Loading ...
Loading ...
Loading ...

4
WARNINGS
• Do not use telescope or nderscope to look at the sun without an
appropriate solar lter. Doing so will cause permanent and irreversible
eye damage.
• Never use an eyepiece lter as a solar lter. Only solar lters will
completely cover the opening of the optical tube and provide proper
eye protection.
• Make sure no screws are loose before using telescope.
• Do not drop or shake your telescope as doing so may damage the
optics, or harm you or the people around you.
CLEANING AND MAINTENANCE
A telescope is carefully aligned during construction, and great care
should be taken to maintain this alignment over the life of the telescope.
Cleaning should be done as little as possible and then only with
mild soap solution and a soft, lint-free cloth. Do not rub elements
when cleaning. Blot optical components gently and allow telescope
to air-dry. Store telescope in its box or in a telescope case when
not in use. Do not use pure alcohol or solvents to clean any parts of
the telescope. Do not remove optical elements from the telescope
as doing so may aect the alignment of optical components when
reassembled. If telescope needs realignment, contact Zhumell or
another professional.
1. Brush telescope optics with camelhair brush or blow o dust with
an ear syringe (can be purchased at any pharmacy). Do not use
a commercial photographic lens cleaner.
2. Remove organic materials (e.g. ngerprints) with short gentle strokes
using soft white tissue paper and a solution of three parts distilled
water and one part isopropyl alcohol. You may also add one drop
of biodegradable dish soap to one pint of the homemade solution.
Do not use lotioned or scented tissues as they could damage the
optics of your telescope.
3. Wipe down the outside of your telescope with a dry cloth to remove
condensation prior to packing up your telescope. Do not wipe any
of the optical surfaces. Instead, allow the optics to dry naturally
in warm indoor air prior to packing up your telescope.
4. Protect your telescope from excessive heat. For example do not
store your telescope in a sealed car on a warm day. Excessive
storage temperatures can damage your telescope.
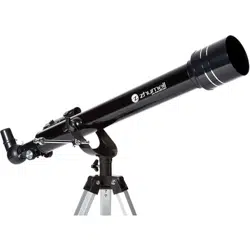
OPTICAL TUBE ASSEMBLY
Type Refractor
Aperture (mm) 60
Focal Length (mm) 700mm
Limiting Magnitude 9.4
Focal Ratio f/11.6
Eyepiece Format 1.25”
Finderscope Red-Dot Finderscope
Mount Type Tripod Base
Unbox and gather the pieces of your telescope.
Extend all three tripod legs to a comfortable working height and
tighten all three clamps securely. Separate the legs until the
cross-section in the middle lays at. Make sure the top of the
tripod is level before moving on.
Hold the telescope tube over the two upright arms of the mount,
letting the silver altitude slow motion rod hang downward. Slide
the altitude slow motion rod on the telescope into the altitude
locking clamp, leaving the locking knob loose.
Lower the telescope tube between the two upright arms of the
mount so that the mounting brackets on the sides of the telescope
tube line up with the holes at the top of each arm. Insert the two
telescope tube mounting knobs into the holes on each arm and
thread them into the mounting bracket on the telescope tube.
Do not over-tighten. Now tighten the silver altitude locking knob
on the side of the mount.
Locate the two screws with nger nuts on top of the OTA near
the lower end. Remove the nger nuts from these screws and
place the nderscope bracket over the threaded screws. Fasten
securely with the nuts.
Remove the plastic battery protector from the nder by pulling
the tab straight out.
Insert the silver tube of the star diagonal into the focuser of the
telescope and secure it in place using the silver set screws on
the focuser.
Choose the lowest-power eyepiece (25mm included) and place
it in the diagonal prism, silver side rst. Secure it in place with
the thumbscrew on the diagonal prism.
You are now ready to begin using your telescope!
1.
2.
3.
4.
5.
6.
7.
SPECIFICATIONS FOR YOUR
ZHUMELL TELESCOPE
TELESCOPE ASSEMBLY
Loading ...
Loading ...
Loading ...