45˚W
60˚W
75˚W
30˚W
15˚W
0˚
15˚E
90˚W
OWNER’S MANUAL
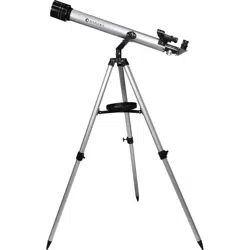
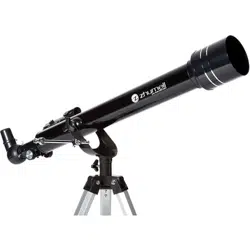
60MM AZ TELESCOPE
ZHUMELL 60x700 TELESCOPE

That’s where our optics products come in. We strive to put high-performance
products in the hands of our customers so that they can experience the world
up close, with their own eyes.
With Zhumell, you get eld-tested, precision-crafted optics at the best possible
value. So even if you’re just starting out as an amateur birder or astronomer,
you don’t have to settle for entry-level products. Zhumell customers enjoy life’s
pursuits, hobbies, and adventures in rich, colorful detail- the kind of detail that
only high-performance optics can produce.
At Zhumell, we design our binoculars, telescopes, and spotting scopes for
discerning, price-conscious users who are uncompromising on quality. If you’re
looking for accessibly priced optics that will bring your world within reach,
you’re looking for Zhumell.
Zhumell customers know that there are plenty of ways to experience
the world. They also understand that, however you choose to explore
it, the best experience is one that fully immerses you in the world’s
most striking details.

3
3. Caring For Your Telescope
• Warnings
• Cleaning and Maintenance
4. Specications
• Parts List
• Telescope Assembly
5. Viewing Through Your Telescope
• Checking and Aligning your Findersope
• Adjustments
Cool Views With Your Telescope
• The Moon
• The Planets
6. Astronomy Formulas
• Magnication
• Focal Ratio
• Limiting Magnitude
• Resolving Power
Astronomy Terminology
7. Telescope Terminology
8. Warranty
ENJOYING YOUR
ZHUMELL TELESCOPE
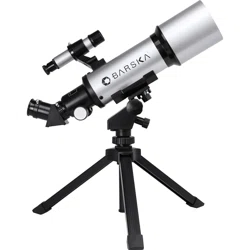
PARTS LIST
• Optical Tube Assembly (OTA)
• Finderscope
• Finderscope Mounting Bracket
• Erect Image Diagonal Prism
• Aluminum Tripod
• Accessory Tray
• 2X Barlow Lens
• 10mm & 25mm Kellner Eyepieces
• Lens Covers
CARING FOR YOUR
ZHUMELL TELESCOPE
Zhumell telescopes are precision astronomical instruments designed
for ease of use and versatility in their application. As with any telescope,
Zhumell telescopes require some technical knowledge of stellar
movement and optical properties. We have provided basic instructions
for telescope use and astronomical viewing in this manual.
Your Zhumell 60x700 Telescope is built with the highest quality optics
and top-notch construction to provide years of reliable functionality,
but will require proper care.
If, after reading this manual, you still have questions about your Zhumell
telescope, please visit http://www.zhumell.com for more helpful tips
and contact information. Our customer service representatives will
be able to address any problems you encounter with your telescope.
Please let us know about your experiences; we would like to hear
your feedback.
Enjoy your Zhumell.

4
WARNINGS
• Do not use telescope or nderscope to look at the sun without an
appropriate solar lter. Doing so will cause permanent and irreversible
eye damage.
• Never use an eyepiece lter as a solar lter. Only solar lters will
completely cover the opening of the optical tube and provide proper
eye protection.
• Make sure no screws are loose before using telescope.
• Do not drop or shake your telescope as doing so may damage the
optics, or harm you or the people around you.
CLEANING AND MAINTENANCE
A telescope is carefully aligned during construction, and great care
should be taken to maintain this alignment over the life of the telescope.
Cleaning should be done as little as possible and then only with
mild soap solution and a soft, lint-free cloth. Do not rub elements
when cleaning. Blot optical components gently and allow telescope
to air-dry. Store telescope in its box or in a telescope case when
not in use. Do not use pure alcohol or solvents to clean any parts of
the telescope. Do not remove optical elements from the telescope
as doing so may aect the alignment of optical components when
reassembled. If telescope needs realignment, contact Zhumell or
another professional.
1. Brush telescope optics with camelhair brush or blow o dust with
an ear syringe (can be purchased at any pharmacy). Do not use
a commercial photographic lens cleaner.
2. Remove organic materials (e.g. ngerprints) with short gentle strokes
using soft white tissue paper and a solution of three parts distilled
water and one part isopropyl alcohol. You may also add one drop
of biodegradable dish soap to one pint of the homemade solution.
Do not use lotioned or scented tissues as they could damage the
optics of your telescope.
3. Wipe down the outside of your telescope with a dry cloth to remove
condensation prior to packing up your telescope. Do not wipe any
of the optical surfaces. Instead, allow the optics to dry naturally
in warm indoor air prior to packing up your telescope.
4. Protect your telescope from excessive heat. For example do not
store your telescope in a sealed car on a warm day. Excessive
storage temperatures can damage your telescope.
OPTICAL TUBE ASSEMBLY
Type Refractor
Aperture (mm) 60
Focal Length (mm) 700mm
Limiting Magnitude 9.4
Focal Ratio f/11.6
Eyepiece Format 1.25”
Finderscope Red-Dot Finderscope
Mount Type Tripod Base
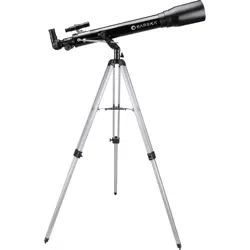
Unbox and gather the pieces of your telescope.
Extend all three tripod legs to a comfortable working height and
tighten all three clamps securely. Separate the legs until the
cross-section in the middle lays at. Make sure the top of the
tripod is level before moving on.
Hold the telescope tube over the two upright arms of the mount,
letting the silver altitude slow motion rod hang downward. Slide
the altitude slow motion rod on the telescope into the altitude
locking clamp, leaving the locking knob loose.
Lower the telescope tube between the two upright arms of the
mount so that the mounting brackets on the sides of the telescope
tube line up with the holes at the top of each arm. Insert the two
telescope tube mounting knobs into the holes on each arm and
thread them into the mounting bracket on the telescope tube.
Do not over-tighten. Now tighten the silver altitude locking knob
on the side of the mount.
Locate the two screws with nger nuts on top of the OTA near
the lower end. Remove the nger nuts from these screws and
place the nderscope bracket over the threaded screws. Fasten
securely with the nuts.
Remove the plastic battery protector from the nder by pulling
the tab straight out.
Insert the silver tube of the star diagonal into the focuser of the
telescope and secure it in place using the silver set screws on
the focuser.
Choose the lowest-power eyepiece (25mm included) and place
it in the diagonal prism, silver side rst. Secure it in place with
the thumbscrew on the diagonal prism.
You are now ready to begin using your telescope!
1.
2.
3.
4.
5.
6.
7.
SPECIFICATIONS FOR YOUR
ZHUMELL TELESCOPE
TELESCOPE ASSEMBLY

4
WARNINGS
• Do not use telescope or nderscope to look at the sun without an
appropriate solar lter. Doing so will cause permanent and irreversible
eye damage.
• Never use an eyepiece lter as a solar lter. Only solar lters will
completely cover the opening of the optical tube and provide proper
eye protection.
• Make sure no screws are loose before using telescope.
• Do not drop or shake your telescope as doing so may damage the
optics, or harm you or the people around you.
CLEANING AND MAINTENANCE
A telescope is carefully aligned during construction, and great care
should be taken to maintain this alignment over the life of the telescope.
Cleaning should be done as little as possible and then only with
mild soap solution and a soft, lint-free cloth. Do not rub elements
when cleaning. Blot optical components gently and allow telescope
to air-dry. Store telescope in its box or in a telescope case when
not in use. Do not use pure alcohol or solvents to clean any parts of
the telescope. Do not remove optical elements from the telescope
as doing so may aect the alignment of optical components when
reassembled. If telescope needs realignment, contact Zhumell or
another professional.
1. Brush telescope optics with camelhair brush or blow o dust with
an ear syringe (can be purchased at any pharmacy). Do not use
a commercial photographic lens cleaner.
2. Remove organic materials (e.g. ngerprints) with short gentle strokes
using soft white tissue paper and a solution of three parts distilled
water and one part isopropyl alcohol. You may also add one drop
of biodegradable dish soap to one pint of the homemade solution.
Do not use lotioned or scented tissues as they could damage the
optics of your telescope.
3. Wipe down the outside of your telescope with a dry cloth to remove
condensation prior to packing up your telescope. Do not wipe any
of the optical surfaces. Instead, allow the optics to dry naturally
in warm indoor air prior to packing up your telescope.
4. Protect your telescope from excessive heat. For example do not
store your telescope in a sealed car on a warm day. Excessive
storage temperatures can damage your telescope.
OPTICAL TUBE ASSEMBLY
Type Refractor
Aperture (mm) 60
Focal Length (mm) 700mm
Limiting Magnitude 9.4
Focal Ratio f/11.6
Eyepiece Format 1.25”
Finderscope Red-Dot Finderscope
Mount Type Tripod Base
Unbox and gather the pieces of your telescope.
Extend all three tripod legs to a comfortable working height and
tighten all three clamps securely. Separate the legs until the
cross-section in the middle lays at. Make sure the top of the
tripod is level before moving on.
Hold the telescope tube over the two upright arms of the mount,
letting the silver altitude slow motion rod hang downward. Slide
the altitude slow motion rod on the telescope into the altitude
locking clamp, leaving the locking knob loose.
Lower the telescope tube between the two upright arms of the
mount so that the mounting brackets on the sides of the telescope
tube line up with the holes at the top of each arm. Insert the two
telescope tube mounting knobs into the holes on each arm and
thread them into the mounting bracket on the telescope tube.
Do not over-tighten. Now tighten the silver altitude locking knob
on the side of the mount.
Locate the two screws with nger nuts on top of the OTA near
the lower end. Remove the nger nuts from these screws and
place the nderscope bracket over the threaded screws. Fasten
securely with the nuts.
Remove the plastic battery protector from the nder by pulling
the tab straight out.
Insert the silver tube of the star diagonal into the focuser of the
telescope and secure it in place using the silver set screws on
the focuser.
Choose the lowest-power eyepiece (25mm included) and place
it in the diagonal prism, silver side rst. Secure it in place with
the thumbscrew on the diagonal prism.
You are now ready to begin using your telescope!
1.
2.
3.
4.
5.
6.
7.
SPECIFICATIONS FOR YOUR
ZHUMELL TELESCOPE
TELESCOPE ASSEMBLY

5
Never look at the sun without using a solar lter. Do not use an
eyepiece solar lter. When using a solar lter, do not remove the
full lenscap, view only through the small opening. Looking at the
sun without proper use of a solar lter can cause permanent eye
damage, included blindness.
Using your nderscope will help you locate celestial bodies much
more quickly as the nderscope is equipped with a wider eld of
view than your telescope. To simplify focusing while viewing, start
with the lowest power magnication and work up to the desired power.
When viewing faint deep-sky objects, images will not show color.
The human eye is not able to distinguish the dierences in color
found in such dim images. The lack of color is due to human anatomy,
not any limitations of telescope construction.
VIEWING THROUGH YOUR
ZHUMELL TELESCOPE
CHECKING AND ALIGNING YOUR FINDERSCOPE
1.
Insert the lowest-power (25mm) eyepiece into the diagonal prism.
Focus the eyepiece to view an easily recognizable, stationary
distant object like a sign or lightpole.
2. Turn on the nderscope by turning the knob on the side of the
unit, but be careful not to move the telescope in any way. Hold
your eye about a foot behind the glass lens of the nderscope
and look through it to nd the red dot. Check to see if the object
viewed through the telescope eyepiece is lined up with the red
dot. If not, your nderscope must be re-aligned.
3. To align your nderscope, use the up & down and left & right
adjustment knobs on the bottom and side of the nder to move
the red dot until it lies over the object you see in your eyepiece.
It may take many tries to get it exactly right, but it will make
nding objects much, much easier when you’re ready to use
your telescope.
Finderscope alignment is the rst step to ne-tuning your telescope
and viewing celestial objects. Follow these steps to properly set up
and align your nderscope.
ADJUSTMENTS
Your telescope can be maneuvered along two axes, altitude and azimuth.
The longitudinal axis (left to right) is commonly referred to in astronomy
as “azimuth”. To adjust the azimuth of your telescope, loosen the
thumbscrew where the telescope attaches to the tripod. Gently
swing your telescope left or right until it faces the object you seek.
Tighten the thumbscrew to hold the telescope in place.
The latitudinal axis (up and down) is commonly referred to in astronomy
as altitude. To adjust the altitude of your telescope, loosen the knob
holding the slow motion control and raise and lower the angle of
the scope until it is pointed near the object you seek. Secure it in
place by tightening the knob holding the slow motion rod. For ne
adjustments, simply turn the handle in the middle of the slow motion
rod to slowly raise and lower the scope.
For best results, only adjust one axis of your telescope position at a time.
As you set out to begin viewing, one of the easiest and most
enjoyable objects to check out is the moon. Finding the moon
and adjusting to view it is a good way to acquaint yourself with
the movements of your telescope.
Practice using the azimuth and altitude adjustments to bring the
moon into the center of your view. Focus your view by turning
the knobs located on the smaller end of the OTA. Once you’ve
located the moon and successfully focused your telescope on it,
experiment with focusing and your dierent eyepieces. This will
help familiarize you with the dierent results you can get from
your telescope.
THE MOON
COOL VIEWS WITH YOUR
ZHUMELL TELESCOPE
THE PLANETS
Once you’ve used your telescope to view the moon, you should
be familiar with the basic telescope movements and adjustments
you need. Next stop: the planets. Not all the planets are visible
from one area at one time, so you’ll need to do a little research
before you begin. There are a number of online resources helpful
for discovering what planets and objects should be visible in your
area on any given night.
To nd a planet, you must rst locate it with the naked eye. Once
you’ve got its general location, point your telescope in that direction
and center the planet in the crosshairs of your nderscope. Once
the planet is lined up in the nderscope, begin to view the planet
through your telescope using the lowest power (longest focal
length) eyepiece. You may need to make slight adjustments to
the telescope aim and you will need to focus the eyepiece to
bring the planet into full view.
For a closer look at the planet, replace the low-powered eyepiece
with a higher-powered one and refocus your telescope.

6
MAGNIFICATION
To determine the magnication of a telescope and eyepiece combinantion,
divide the telescope focal length by the eyepiece focal length.
Magnication (x) = Telescope Focal Length (mm)/
Eyepiece Focal Length (mm)
Ex: 25mm Eyepiece with a 60x700 telescope
Magnication = 700mm/25mm
Magnication = 28X
FOCAL RATIO
To determine the focal ratio of a telescope, divide the focal length of
the telescope by the aperture.
Focal Ratio (f/x)= Telescope Focal Length (mm)/Aperture (mm)
Ex: Focal Ratio of a 60x700 telescope
Focal Ratio (f/x)= 700mm/60mm
Focal Ratio (f/x)= f/11.6
LIMITING MAGNITUDE
To determine the limiting magnitude of a telescope, use the aperture
in the following formula for an approximation.
Limiting Magnitude = 7.5 + 5LOG (Aperture in cm)
Ex: Limiting Magnitude of a 60x700mm telescope.
Limiting Magnitude = 7.5 + 5LOG (6cm)
Limiting Magnitude = 7.5 + (5 x 0.78)
Limiting Magnitude = 11.39
RESOLVING POWER
To determine the resolving power of a telescope under ideal conditions,
divide the aperture into 4.56.
Resolving Power = 4.56/Aperture (in inches)
Ex: Resolving Power of a 60x600mm telescope.
Aperture (in.) = 60mm/25.4 = 2.36 in.
Resolving Power = 4.56/2.36in.
Resolving Power = 1.93
ASTRONOMY FORMULAS FOR YOUR
ZHUMELL TELESCOPE
DECLINATION (DEC.)
The astronomical equivalent of latitude. Declination describes the
angle of a celestial object above or below the celestial equator. The
sky over the Northern hemisphere has a positive declination. The
sky over the Southern hemisphere has a negative declination. For
example, Polaris (the North Star) which lies nearly directly over the
North Pole, has a declination value of 90°.
RIGHT ASCENSION (R.A.)
The astronomical equivalent of longitude. Right Ascension measures
the degree of distance of a star to the east of where the ecliptic
crosses the celestial equator. R.A. is measured in hours, minutes,
and seconds as opposed to degrees. It is dierent than the term
“meridian”, which is used in referring to lines of longitude. Right
Ascension is referred to in “hour circles”. There are 24 hour circles of
right ascension which run from the north to the south celestial poles.
CELESTIAL EQUATOR
The celestial equator is the line of declination which lies directly
above the Earth’s equator. The celestial equator lies halfway between
the north and south celestial poles and serves as the 0° point in
measuring declination.
ECLIPTIC
The ecliptic is the apparent path of the sun through the sky over
the course of the year. Since we view the sun from dierent angles
throughout the year, it appears to move in relation to other stars.
The vernal (spring) and autumnal (fall) equinoxes lie at the points
where the ecliptic intersects the celestial equator. The vernal equinox
is where right ascension is at 0h (hours). The autumnal equinox can
be found at 12h R.A.
ASTRONOMY
TERMINOLOGY
ZENITH
The zenith is the point in the celestial sphere directly above your
head. The zenith varies depending upon your location. In general,
the declination point of your zenith is equal to the latitude at which
you are standing on Earth.
EPHEMERIS
The ephemeris of a planet or the sun or the moon is a table giving
the coordinates of the object at regular intervals of time. The coordinates
will be listed using declination and right ascension. Other information
such as distance and magnitude may be listed in ephemerides
(plural of ephemeris).
ALTITUDE
The altitude of a celestial object is the angular distance of that object
above the horizon.The maximum possible altitude is the altitude of
an object at the zenith, 90°. The altitude of an object on the horizon
is 0°. Altitude is measured from your point of observation and does
not directly correlate to points on the celestial sphere.
AZIMUTH
Azimuth is the angular distance around the horizon measured eastward
in degrees from the North Horizon Point. Thus, the North Horizon
Point lies at an azimuth of 0°, while the East Horizon Point lies at
90°, and the South Horizon Point at 180°. Azimuth is measured
from the point of observation and does not directly correspond to
points on the celestial sphere.
ANGULAR DISTANCE
Angular distance is the size of the angle through which a telescope
tube or binocular aiming at one object must be turned in order to
aim at another object. If you must rotate the equipment from the
zenith to the horizon, the angular distance between the two points
would be 90°.

7
OBJECTIVE
The objective is the front lens of a telescope. The listed measurement
for objective lenses is the lens diameter. A larger objective allows
more light to enter a telescope and provides a brighter image. The
objective diameter is also sometimes referred to as the aperture of
a telescope.
FOCAL LENGTH
The focal length of a telescope is the distance from the point where
light enters a telescope (the objective) to the point where the image
is in focus. In telescopes with the same size objective, a longer focal
length will provide higher magnication and a smaller eld of view.
MAGNIFICATION
The magnication of a telescope is determined by the relationship
between the focal length of the telescope and the focal length of the
eyepiece used. A greater dierence in these focal lengths results in
a greater the magnication of the telescope. Every telescope has
a maximum useful magnication of about 60 times the diameter of
the objective in inches. Magnication beyond the maximum useful
magnication will provide dim, low contrast images.
FOCAL RATIO
The focal ratio of a telescope is a description of the relationship
between the focal length and objective lens size of a telescope.
Visually, a smaller focal ratio (also called f-stop) provides a wider
eld of view. Photographically, the lower the f-stop, the shorter the
exposure time needed to capture an object on lm.
LIMITING MAGNITUDE
The limiting magnitude of a telescope describes the faintest object
you can see with a telescope. The magnitude of a star describes
its brightness. The larger the magnitude of an object, the fainter it
appears to be. The brightest stars have a magnitude of 0 or less.
RESOLVING POWER
The resolving power, or Dawes’ Limit, of a telescope is the ability
to view closely spaced objects through a telescope. The resolving
power of a telescope is measured in seconds of arc. The smaller the
resolving power, the better you will be able to separate binary stars
when viewing through your telescope.
ABERRATION
Aberrations are degradations in image, which can occur due to optical
system design or improper alignment of optical system components.
The most common types of aberration are chromatic aberration,
spherical aberration, coma, astigmatism, and eld curvature.
COLLIMATION
Collimation is the alignment of optical components within an optical
system. Improper collimation will distort an image and may result
in aberrations present in the image. Most reector telescopes have
collimation adjustments which can be made in order to reduce aberrations
and image distortion. Refractor telescopes do not require collimation
nearly as often as reector telescopes.
TELESCOPE
TERMINOLOGY

Zhumell products are designed to provide you with the highest quality and best value
available, which is why we’re proud to oer a world-class warranty on all of our products.
All Zhumell telescopes are covered by a 3-year no-fault warranty.
To obtain warranty service, the damaged equipment must be returned to Zhumell. Our
Customer Care associates will be happy to assist you in completing this return to get your
Zhumell in working order as quickly as possible. There is a $25 surcharge associated with
warranty returns to cover return shipping and handling.
For more information, contact information, and to download the Zhumell Warranty Return
Form, please visit http://www.zhumell.com.
WARRANTY
FCC NOTE: This equipment has been tested and found to comply with the limits for a Class B digital device,
pursuant to part 15 of the FCC Rules. These limits are designed to provide reasonable protection against harmful
interference in a residential installation. This equipment generates, uses, and can radiate radio frequency energy
and, if not installed and used in accordance with the instructions, may cause harmful interference to radio communications.
However, there is no guarantee that interference will not occur in a particular installation. If this equipment does
cause harmful interference to radio or television reception, which can be determined by turning the equipment o
and on, the user is encouraged to try to correct the interference by one or more of the following measures:
• Reorient or relocate the receiving antenna.
• Increase the separation between the equipment and receiver.
• Connect the equipment into an outlet on a circuit dierent from that to which the receiver is connected.
• Consult the dealer or an experienced radio/TV technician for help.
Product design and specications are subject to change without prior notication.
This product is designed and intended for use by those 14 years of age and older.