Loading ...
Loading ...
Loading ...
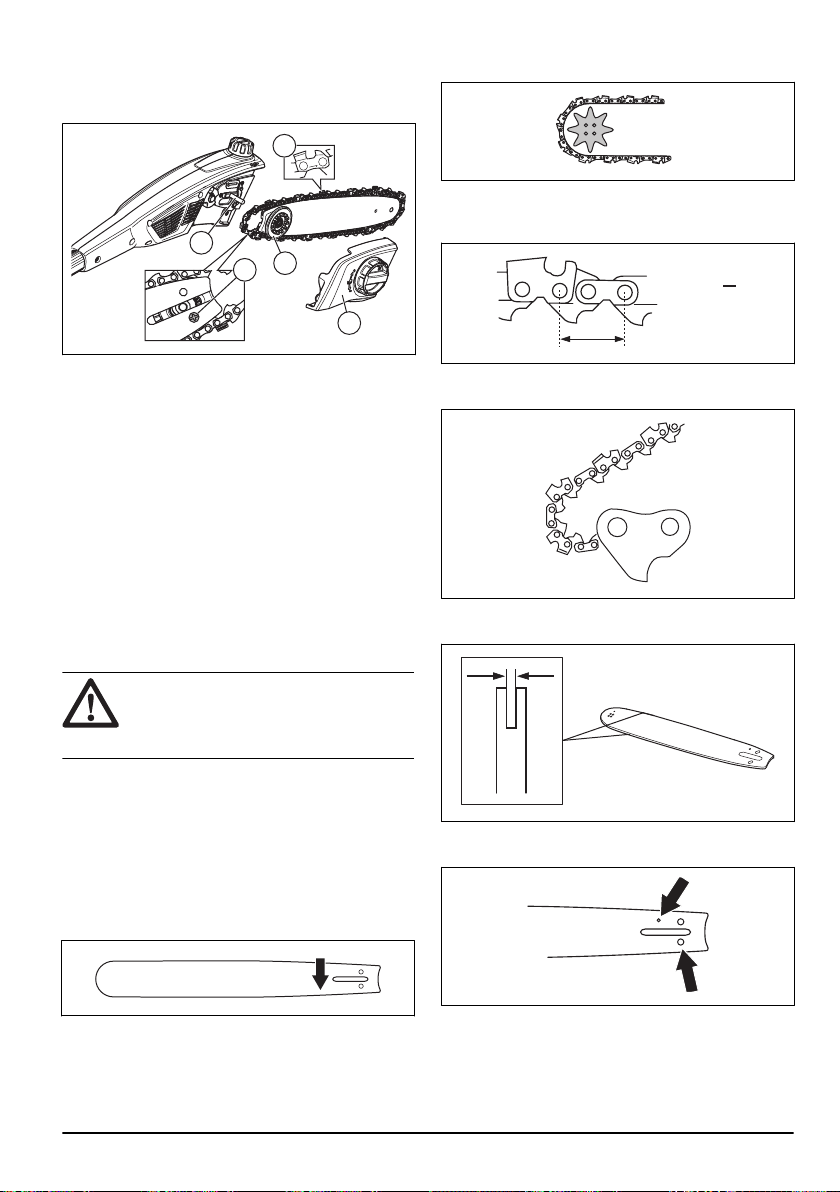
To replace the saw chain
1. Turn the locking knob counterclockwise and remove
the protective cover (A).
A
B
E
D
C
2. Remove the guide bar with the saw chain attached.
3. Remove the saw chain from the guide bar.
4. Put a new saw chain in the groove of the guide bar.
5. Install the guide bar and gear (B) onto the guide bar
pin (E).
6. Install the saw chain around the drive sprocket.
Make sure that the cutting teeth point in the direction
away from the drive sprocket (C).
7. Install the protective cover (A) and turn the locking
knob clockwise.
8. Tighten the saw chain. Refer to
To adjust the tension
of the saw chain on page 19
for instructions.
To sharpen the saw chain
Information about the guide bar and saw chain
WARNING:
Use protective gloves
when you use or do maintenance on the
saw chain. A saw chain that does not move
can also cause injuries.
Replace a worn or damaged guide bar or saw chain with
the guide bar and saw chain combination recommended
by Husqvarna. This is necessary to keep the safety
functions of the product. Refer to
Accessories on page
24
, for a list of replacement bar and chain
combinations that we recommend.
• Guide bar length, in/cm. Information about the guide
bar length can usually be found on the rear end of
the guide bar.
• Number of teeth on bar tip sprocket (T).
• Chain pitch, in. The distance between the drive links
of the saw chain must align with the distance of the
teeth on the bar tip sprocket and drive sprocket.
PITCH =
D
D
2
• Number of drive links. The number of drive links is
decided by the type of guide bar.
• Bar groove width, in/mm. The groove width in guide
bar must be the same as the chain drive links width.
• Chain oil hole and hole for chain tensioner. The
guide bar must align with product.
1636 - 003 - 06.04.2021
17
Loading ...
Loading ...
Loading ...