Loading ...
Loading ...
Loading ...
Maintenance Daily Weekly Monthly
Make sure that the battery is charged. X
Make sure that the battery charger is not
damaged.
X
Examine all cables, couplings and connec-
tions. Make sure that there is no damage or
dirt.
X
Clean the saw chain cover. X
Do a check of the connections between the
battery and the product. Do a check of the
connection between the battery and the bat-
tery charger.
X
Make sure that the saw head is not dam-
aged. Replace the saw head if it is damaged.
An approved Husqvarna dealer must do all servicing on the saw
head.
Examine the wear of the chain drive sprock-
et.
Replace the chain drive sprocket after approximately 100 hours of
operation or more frequently if it is necessary.
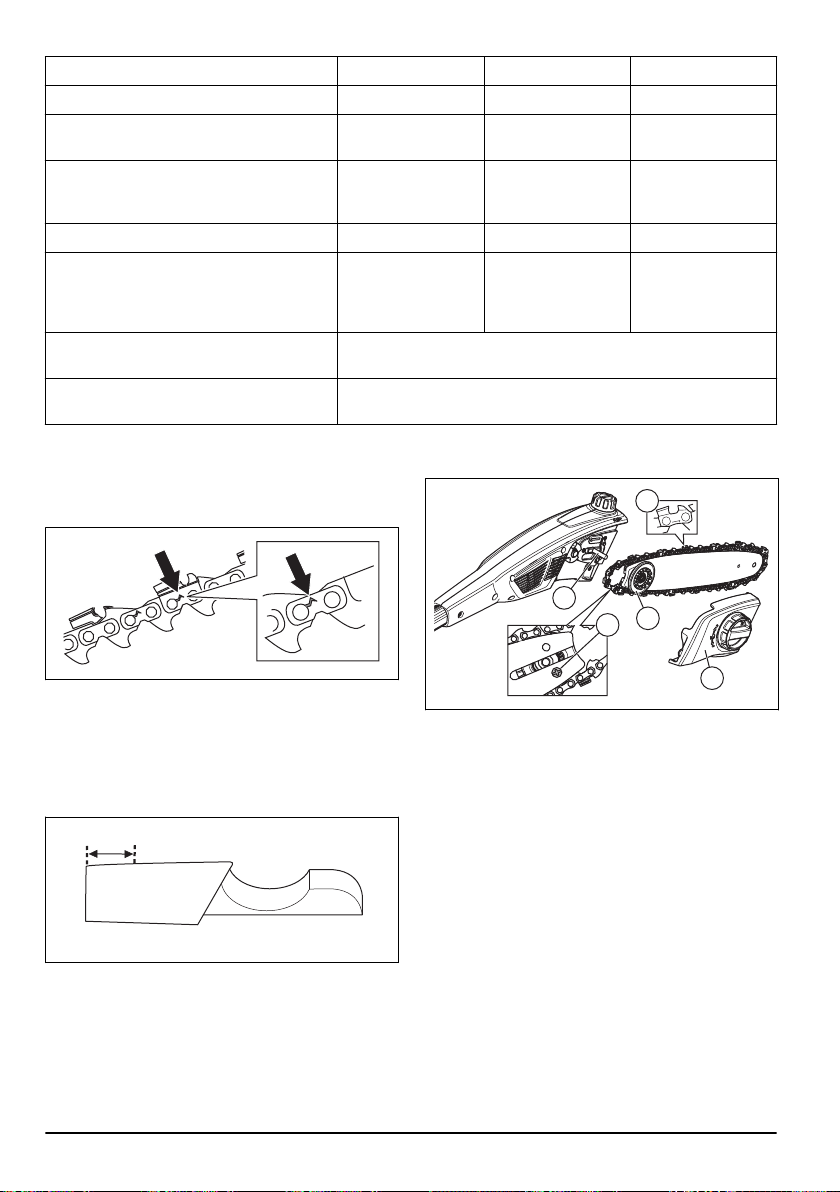
To examine the cutting equipment
1. Make sure that there are no cracks in rivets and links
and that no rivets are loose. Replace if it is
necessary.
2. Make sure that the saw chain is easy to bend.
Replace the saw chain if it is rigid.
3. Compare the saw chain with a new saw chain to
examine if the rivets and links are worn.
4. Replace the saw chain when the longest part of the
cutting tooth is less than 4 mm/0.16 in. Also replace
the saw chain if there are cracks on the cutters.
To replace the guide bar
1. Turn the locking knob counterclockwise and remove
the protective cover (A).
A
B
E
D
C
2. Remove the guide bar with the saw chain attached.
3. Remove the saw chain from the guide bar.
4. Remove the bolt (D) and remove the gear. Keep the
gear near.
5. Install the gear with the bolt (D) into the new guide
bar.
6. Put the saw chain in the groove of the guide bar.
7. Install the guide bar and gear (B) onto the guide bar
pin (E).
8. Install the saw chain around the drive sprocket.
Make sure that the cutting teeth point in the direction
away from the drive sprocket (C).
9. Install the protective cover (A) and turn the locking
knob clockwise.
10. Tighten the saw chain. Refer to
To adjust the tension
of the saw chain on page 19
for instructions.
16
1636 - 003 - 06.04.2021
Loading ...
Loading ...
Loading ...