Loading ...
Loading ...
Loading ...
9
Step 3 – FILLING THE FUEL TANK
WARNING: This generator may emit highly flammable and explosive gasoline vapors, which can cause
severe burns or even death if ignited. A nearby open flame can lead to explosion even if not directly in
contact with gasoline.
Do not operate near open flame.
Do not smoke near generator.
Always operate on a firm, level surface.
Always turn generator off before refueling. Allow generator to cool for at least 2 minutes before
removing fuel cap. Loosen cap slowly to relieve pressure in tank.
Do not overfill fuel tank. Gasoline may expand during operation. Do not fill to the top of the tank.
Allow for expansion.
Always check for spilled fuel before operating. Clean up any spilled fuel before starting.
Empty fuel tank before storing or transporting the generator.
Before transporting, turn fuel valve to off position and disconnect spark plug wire.
1.
Be sure generator is outdoors and in a well ventilated area.
2.
Clean the area around the fuel fill cap and remove the fuel fill cap.
3.
Using the approved red gasoline container with the gasoline and oil mixture, slowly add the fuel to
the tank. DO NOT overfill the fuel tank. Leave space for expansion.
4.
Replace the fuel cap and wipe up any spills.
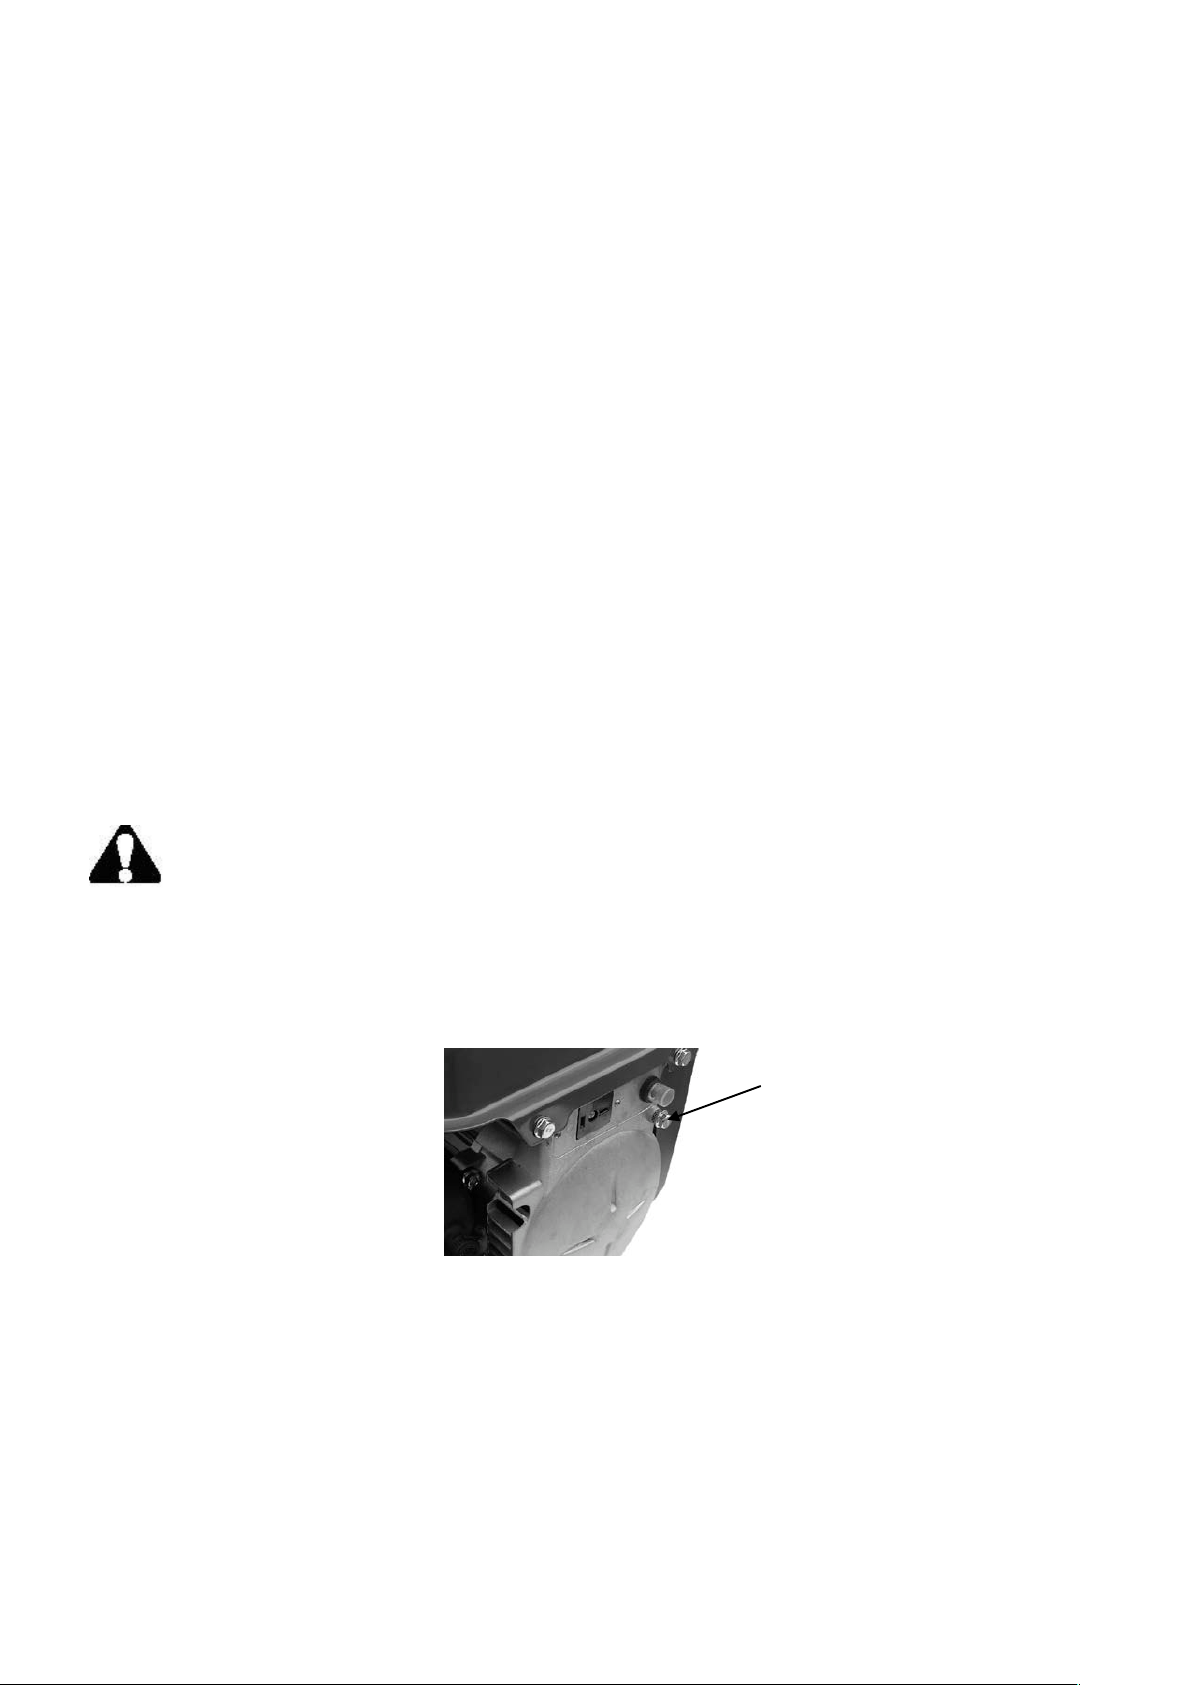
Step 4 - GROUND THE GENERATOR
WARNING: Failure to properly ground the generator can result in electrocution.
Ground the generator by tightening the grounding nut on the front control panel against a
grounding wire. A generally acceptable grounding wire is a No. 12 AWG (American Wire
Gauge) stranded copper wire. This grounding wire should be connected at the other end to a copper,
brass, or steel-grounding rod that is driven into the earth. Wire and grounding rods are not included in
generator contents.
Grounding codes can vary by location. Contact a local electrician to check the area codes.
Grounding Nut
NOTE: After completing the above preparation, the generator is ready to be started.
Loading ...
Loading ...
Loading ...