Loading ...
Loading ...
Loading ...
— 12 —
Installation
STEP 10
Venting
• Depending on the exterior venting chosen (See Page 10), either exit the ducting through the ceiling or wall.
• Alwaysuserigidtypemetal/aluminumducttube(followingthebuildingcodesinyourarea)tomaximizeairow.
• Makesurethatthebackdraftapscanopentoallowformaximumairow.Connecttheducttubetothevent/damper
and securely seal with duct tape so that it is air tight.
STEP 11
Connect to AC
• ConnectACplugintoagroundedACoutlethaving120V,60Hz.Placetheoutletatamaximumdistanceof33-1/2in.
(851 mm) from where the cord exits on the hood.
• SEE IMPORTANT INSTRUCTIONS ON NEXT PAGE.
3-Pronged Plug
Ground Plug
3-Prong Receptacle
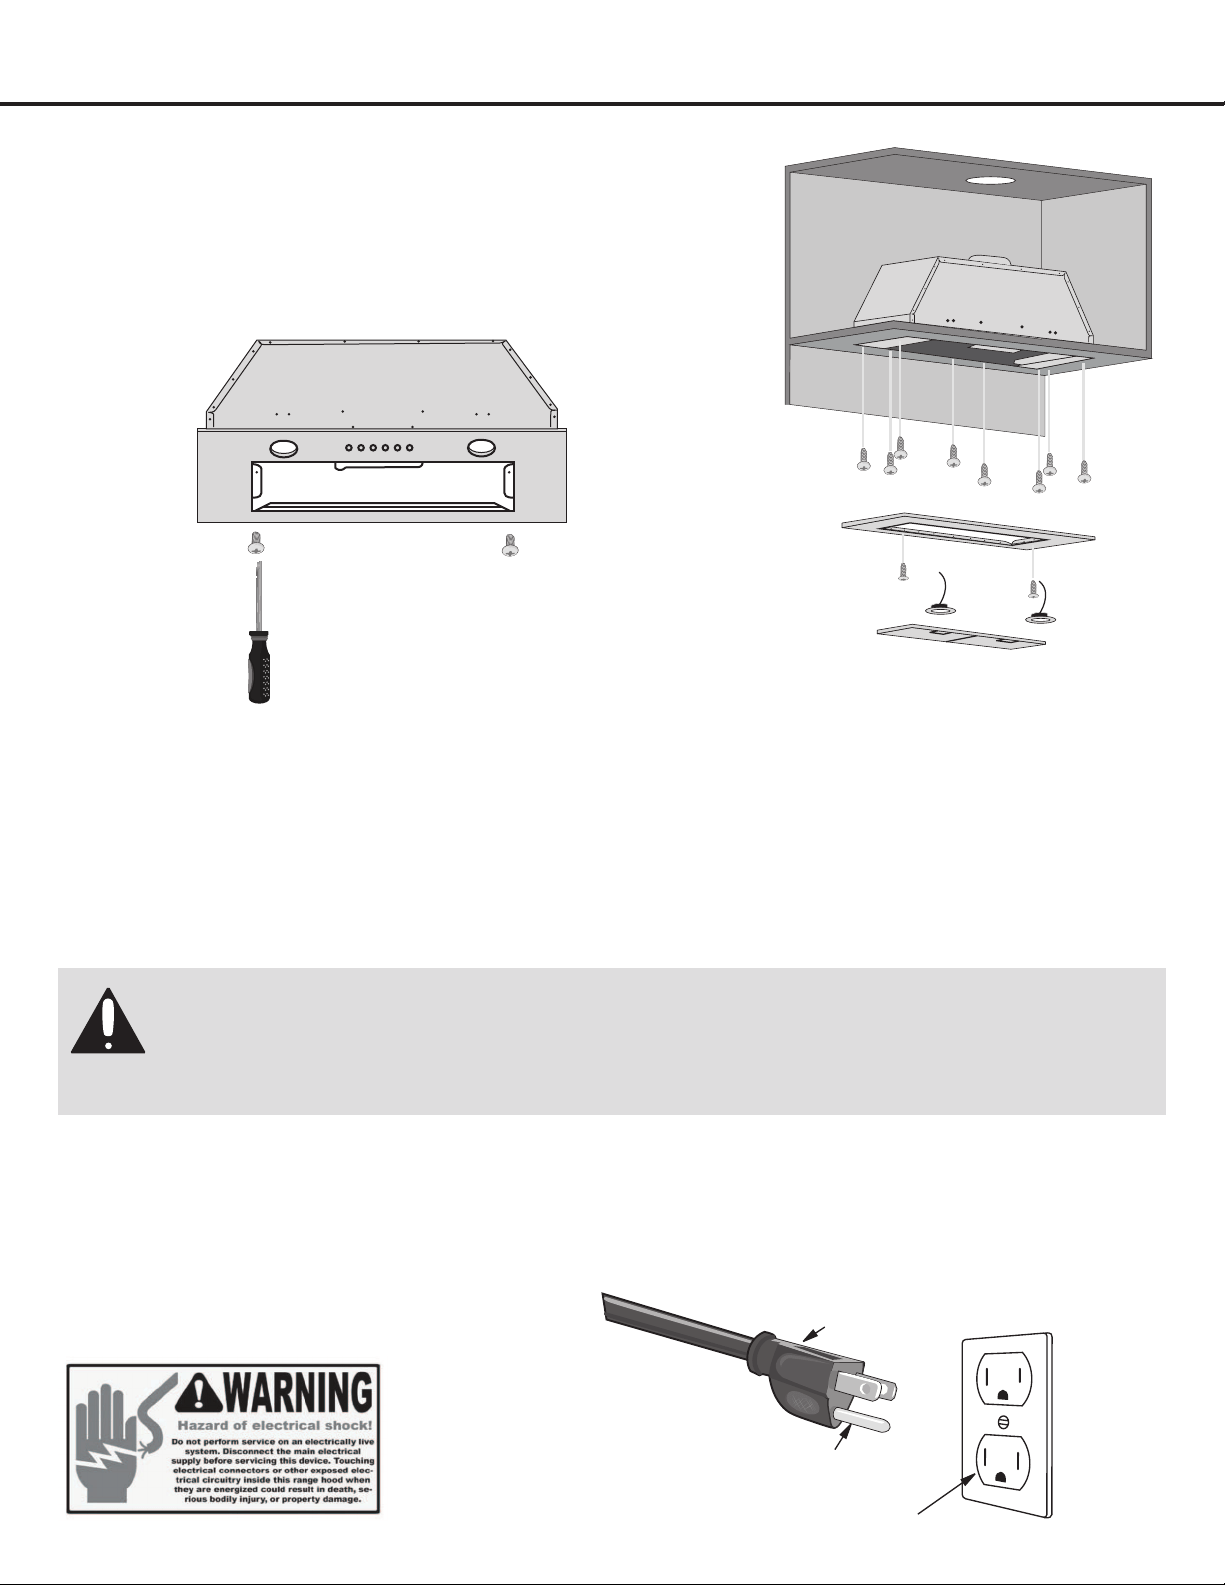
STEP 9
Installing the Hood
• Remove the lters, LED lights and the range hood cover. (See Fig #3)
• Align range hood to the opening in the bottom of the cabinet and screw in
with screws. (See Fig #4)
Fig #4Fig #3
SAFETY WARNING:
Risk of electrical shock. This range hood must be properly grounded. Make sure this is done by a
qualied electrician in accordance with all applicable national and local electrical codes. Before
connecting wires, switch power off at service panel and lock service panel to prevent power from
being switched on accidentally.
Loading ...
Loading ...
Loading ...