Loading ...
Loading ...
Loading ...
10
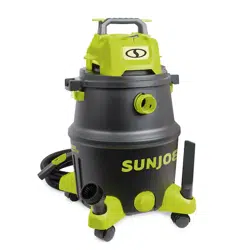
2. To attach the power head, insert the tabs on each side of
the collection tank into the lid lock slots, and push rmly
to make sure the tabs are locked inside of the lid locks.
NOTE: The power head must be attached any time the
unit is being operated.
Maintenance
To order genuine replacement parts or accessories for the
Sun Joe
®
SWD12000 electric wet/dry vacuum, please visit
sunjoe.com or contact the Snow Joe
®
+ Sun Joe
®
customer
service center at 1-866-SNOWJOE (1-866-766-9563).
mWARNING! Disconnect the power cord before
performing any maintenance task.
If the power is still connected, the unit could be accidentally
turned on while you are performing maintenance on it,
which could result in personal injury.
Cleaning The Dust Tank
Clean the equipment routinely after each use:
1. Take the unit outside to clean it to avoid creating a
mess indoors.
2. Remove the power head and empty the dust tank.
Clean the tank with water and allow it to dry completely.
3. The tank must be drained and cleaned every time after
vacuuming. Remove the drain outlet cap by turning it
clockwise and use the Drain outlet to drain the liquid
waste in the tank (Fig. 10).
Cleaning the HEPA lter
mWARNING! To avoid serious personal injury, always
turn the unit o and unplug it before cleaning or servicing.
The HEPA lter included is made of high quality material
designed to stop small dust particles. The lter should be used
for dry pick-up only. If the dust lter is wet, it will clog quickly
and be very dicult to clean. Handle the lter carefully when
removing it for cleaning and replacing. Check the lters for
tears or small holes, a small hole can let dust pass through
and out of the cleaner. Do not use a lter with holes or tears,
replace it immediately.
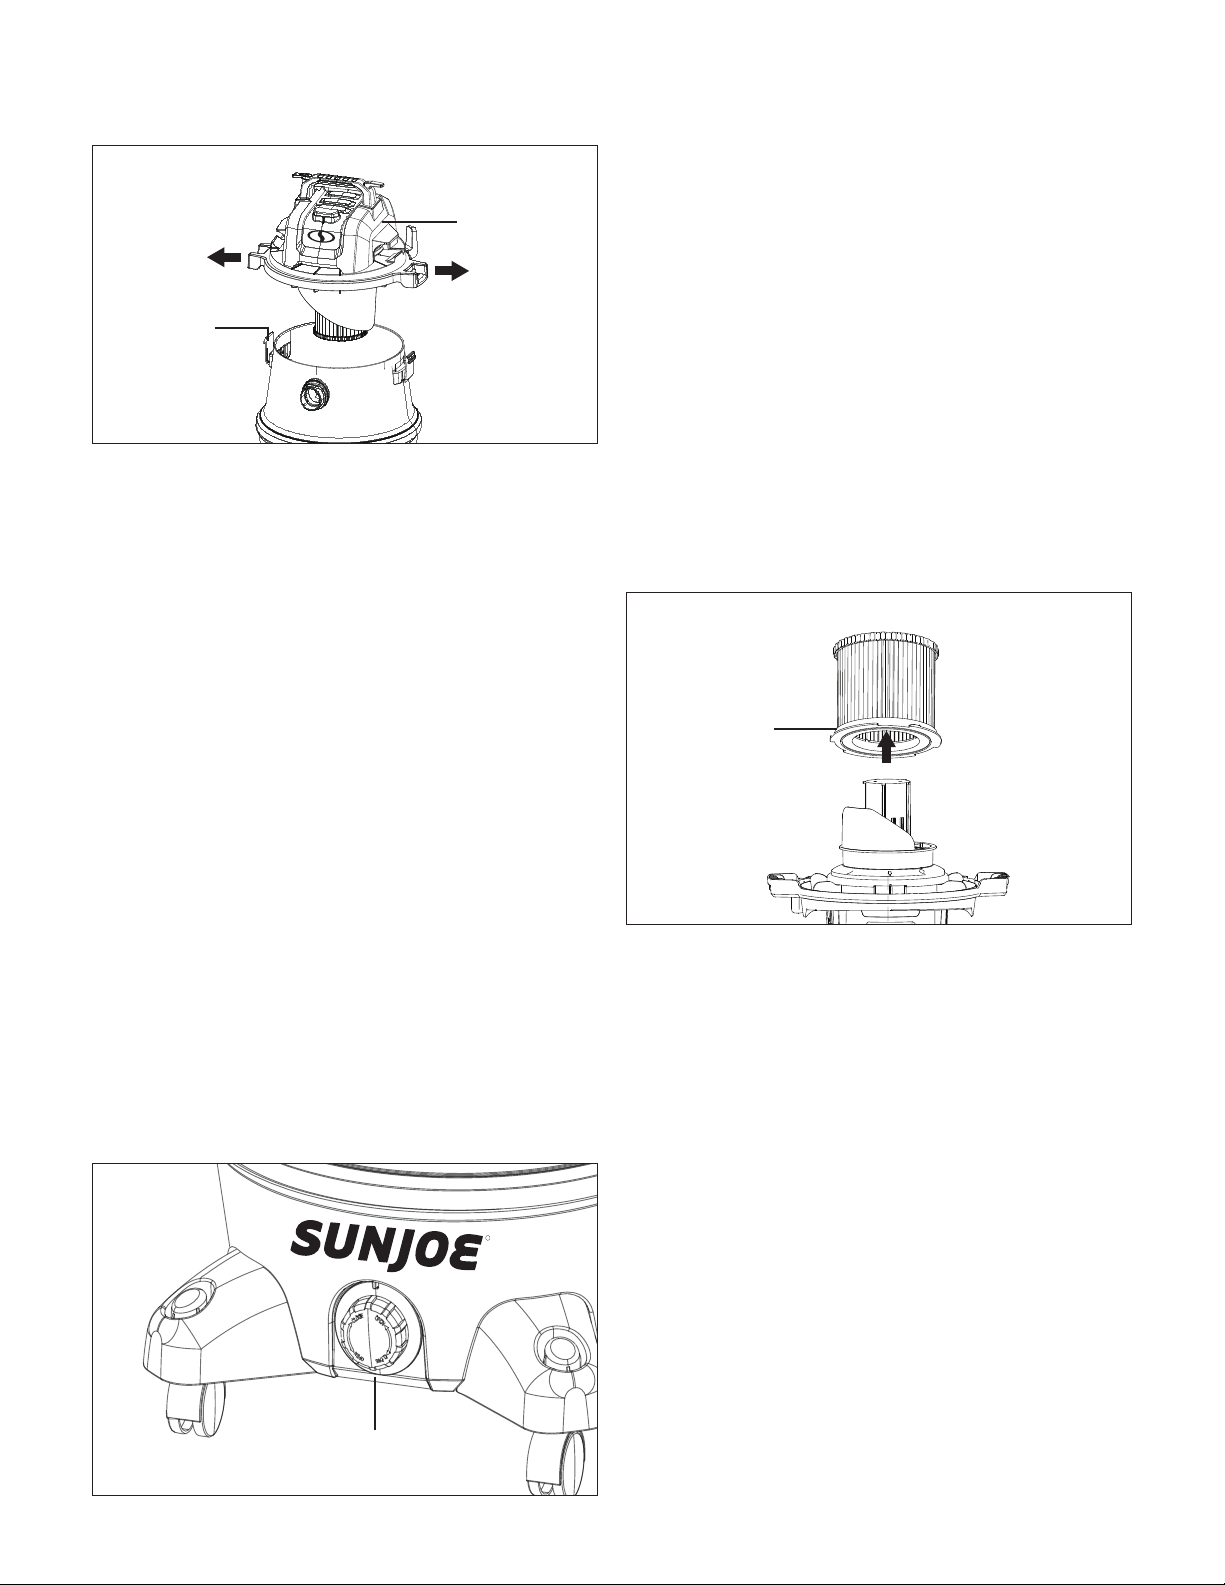
1. Switch o and unplug the unit.
2. Remove the power head from the collection tank.
3. With the removed power head in the upside down
position, carefully remove the HEPA lter from the lter
cage (Fig. 11).
4. Clean the HEPA lter by gently tapping or brushing dirt o.
Cleaning should not be done indoors in living areas.
5. If needed, use a mild soap and water solution to wash the
HEPA lter and rinse with clean water. Allow the wet lter
to air dry for 24 hours before installing onto the lter cage.
mWARNING! The HEPA lter must be installed before dry
vacuuming again.
Cleaning the Foam Filter
mWARNING! The foam lter must be cleaned every time
after wet vacuuming.
1. Switch o and unplug the unit.
2. Remove the power head from the collection tank.
3. With the removed power head in the upside down
position, carefully remove the foam lter from the lter
cage (Fig. 12).
Fig. 9
Lid lock
Power head
R
Fig. 10
Drain outlet cap
Fig. 11
HEPA lter
Loading ...
Loading ...
Loading ...