
Loading ...
Loading ...
Loading ...
Page 5 • JL Audio, Inc., 2022 Continued on Next Page
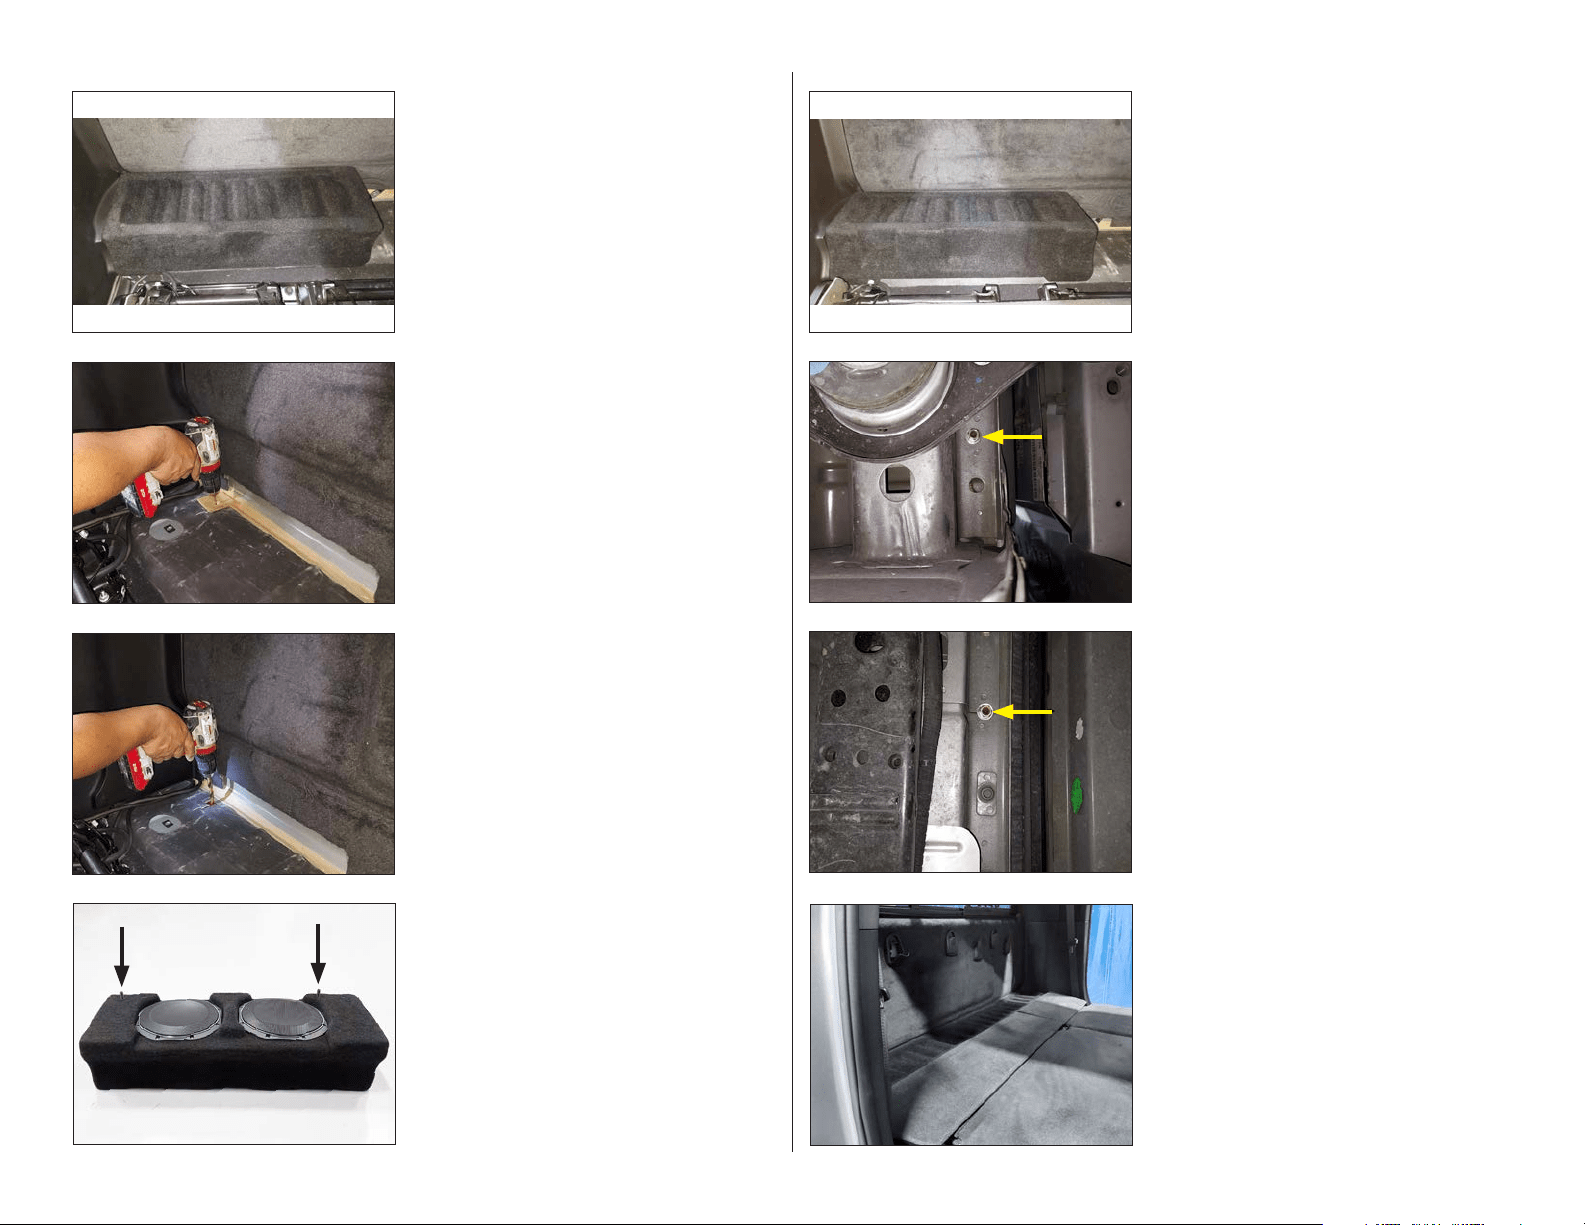
STEP 14
From underneath the vehicle, locate the
second of the two 3/8 - 16 x 2-1/4” Set Screws
passed through the floor of the vehicle in
STEP 12.
Referring to Page 2 as a guide, use
one supplied 3/8” Flat Washer, one
3/8” Split Lock Washer, and one
3/8 - 16 Hex Nut to attach the Stealthbox® to
the vehicle. Fully tighten the 3/8 - 16 Hex Nut.
STEP 13
From underneath the vehicle, locate one of the
two 3/8 - 16 x 2-1/4” Set Screws passed through
the floor of the vehicle in STEP 12.
Referring to Page 2 as a guide, use one
supplied 3/8” Flat Washer, one
3/8” Split Lock Washer, and one
3/8 - 16 Hex Nut to attach the Stealthbox® to
the vehicle. Fully tighten the 3/8 - 16 Hex Nut.
STEP 12
Route speaker cable from the amplifier to
the Stealthbox® and connect to the enclosure’s
terminal cup.
Carefully place the Stealthbox® into the
mounting location, allowing the two protruding
3/8 - 16 x 2-1/4” Set Screws to pass through the
holes drilled in the floor in STEP 10.
STE P 11
Back the two 3/8 - 16 x 2-1/4” Set Screws
installed in STEP 7 out, leaving 1-1/4” length
protruding from the enclosure.
(Passenger side indicated).
STEP 10
Remove the two Wax Squares from the vehicle.
Use a 7/16” drill bit to enlarge the two pilot
holes drilled in STEP 9.
STEP 9
Remove the enclosure and use a 1/8” drill bit
to drill a pilot hole through the center of the
impression on each Wax Square installed in
STEP 6.
STEP 8
Place the enclosure into the vehicle, aligning it
with the rear corner of the cab with the
terminal cup facing the rear wall.
(Passenger side shown).
Firmly press down on the enclosure to allow
the two 3/8 - 16 x 2-1/4” Set Screws installed
and left protruding in STEP 7 to leave an
impression on the two Wax Squares placed in
STEP 6.
SB-D-MGACABG4/10TW1 INSTR_SKU# 011577
STEP 15
Reinstall the factory driver and passenger rear
seat gap cover panels.
Loading ...