
Loading ...
Loading ...
Loading ...
— 12 —
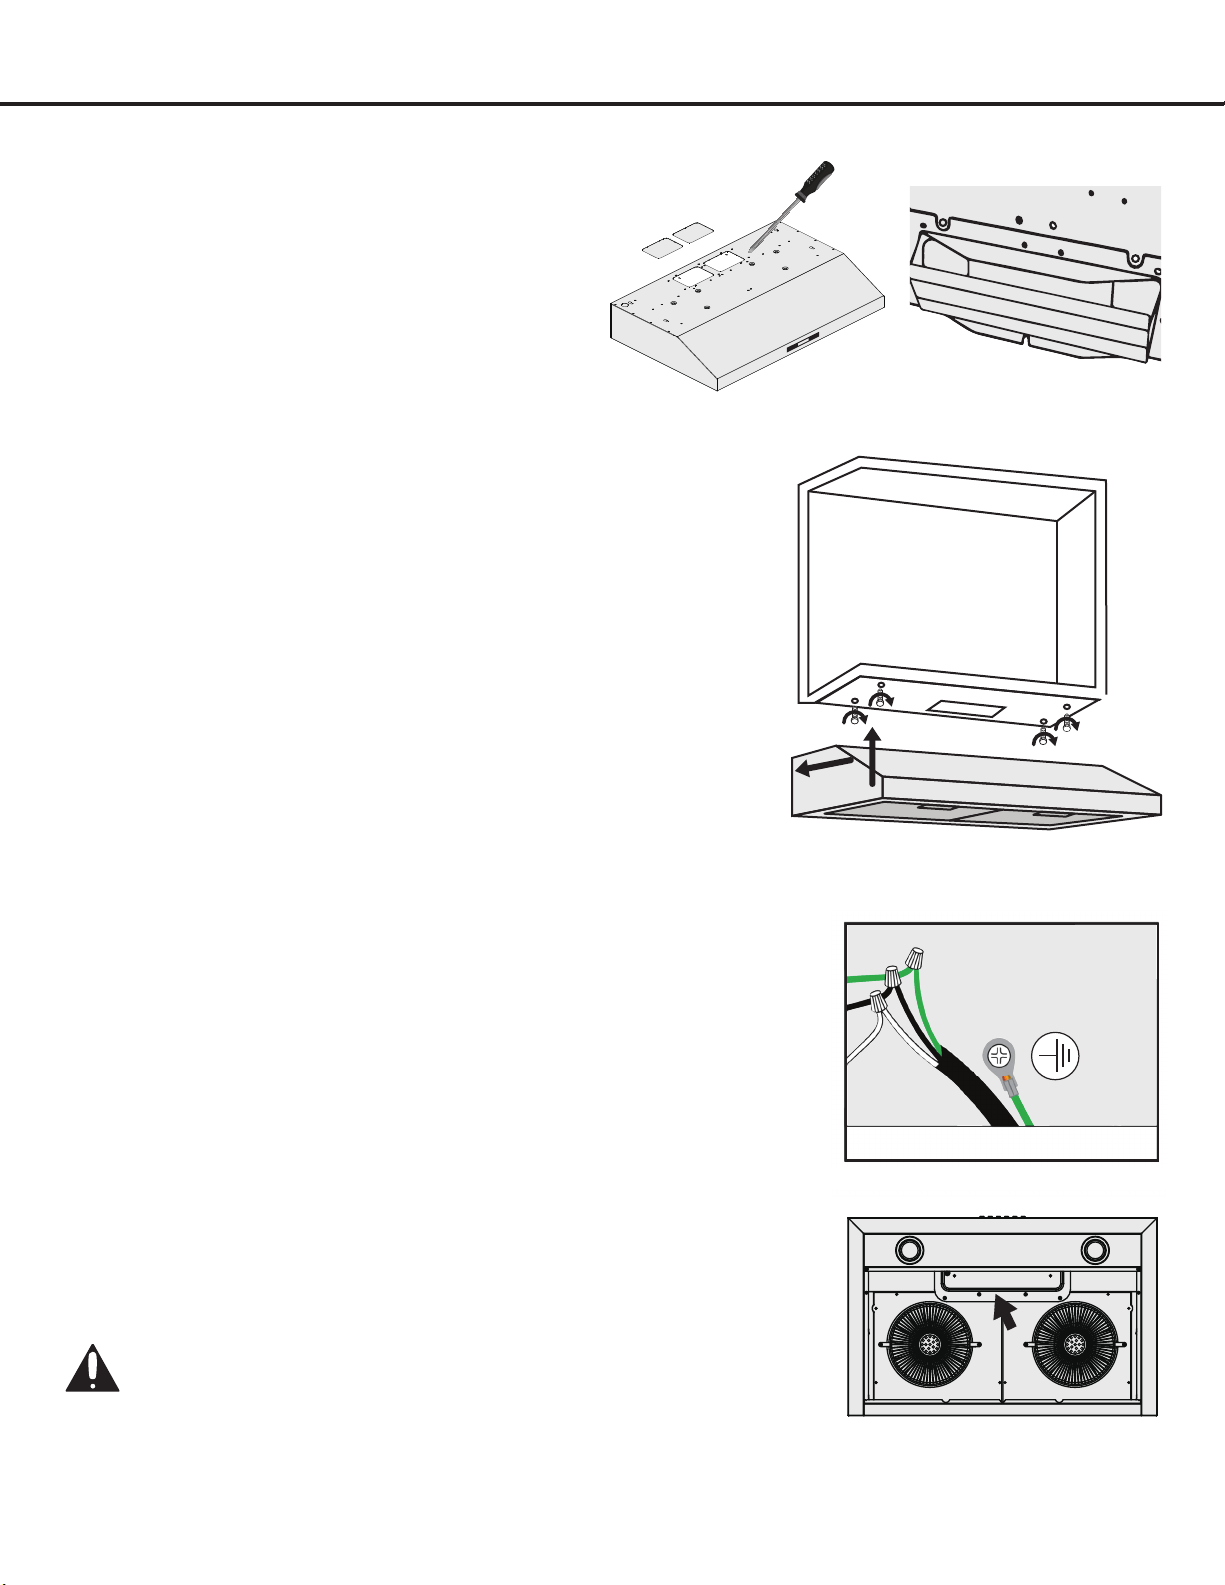
STEP 8
Attaching Vent/Damper
• Depending on the exterior venting option chosen (See
page 10), pop out the steel panel on either the top or
rear of the range hood. (See Fig #2)
• Using the supplied screws, attach the rectangular vent/
damper to the rear of the range hood. (See Fig #3)
Installation
STEP 10
Electrical Connection
• Open the PCB box with a Phillips screwdriver
• Please use the bushing provided on the cut-out opening to protect the
electrical wires.
• Connect cable to range hood wiring. (See Fig #5)
• Connect BLACK to BLACK, WHITE to WHITE and GREEN to GREEN.
• DON’T FORGET TO CONNECT THE GROUND! (green wire)
• Secure all the leads inside the PCB box.
• Secure the PCB box with a screw.
• WARNING: ALL CONNECTORS MUST BE ENCLOSED IN THE PCB BOX.
(See Fig #6)
SAFETY WARNING: Risk of electrical shock. This range hood must
be properly grounded. Make sure this is done by a qualied electrician in
accordance with all applicable national and local electrical codes. Before
connecting wires, switch power off at service panel and lock service panel
to prevent power from being switched on accidentally.
STEP 9
Installing the Hood
• Using measurements provided on Page 7, measure and drill 4 holes into bottom
of cabinet. (See Fig #4)
• Depending on exterior venting chosen (See page 10), use measurements
provided on Page 7 and cut vent hole in cabinet.
• Align range hood to the holes in the bottom of the cabinet and screw in. (See
Fig #4)
Fig #4
Note: Use threaded drywall anchors only when mounting the hood
on sheet rock. Mounting the hood on wall studs or lumbers is highly
recommended.
Fig #2 Fig #3
Fig #5
Fig #6
Loading ...
Loading ...
Loading ...