Loading ...
Loading ...
Loading ...
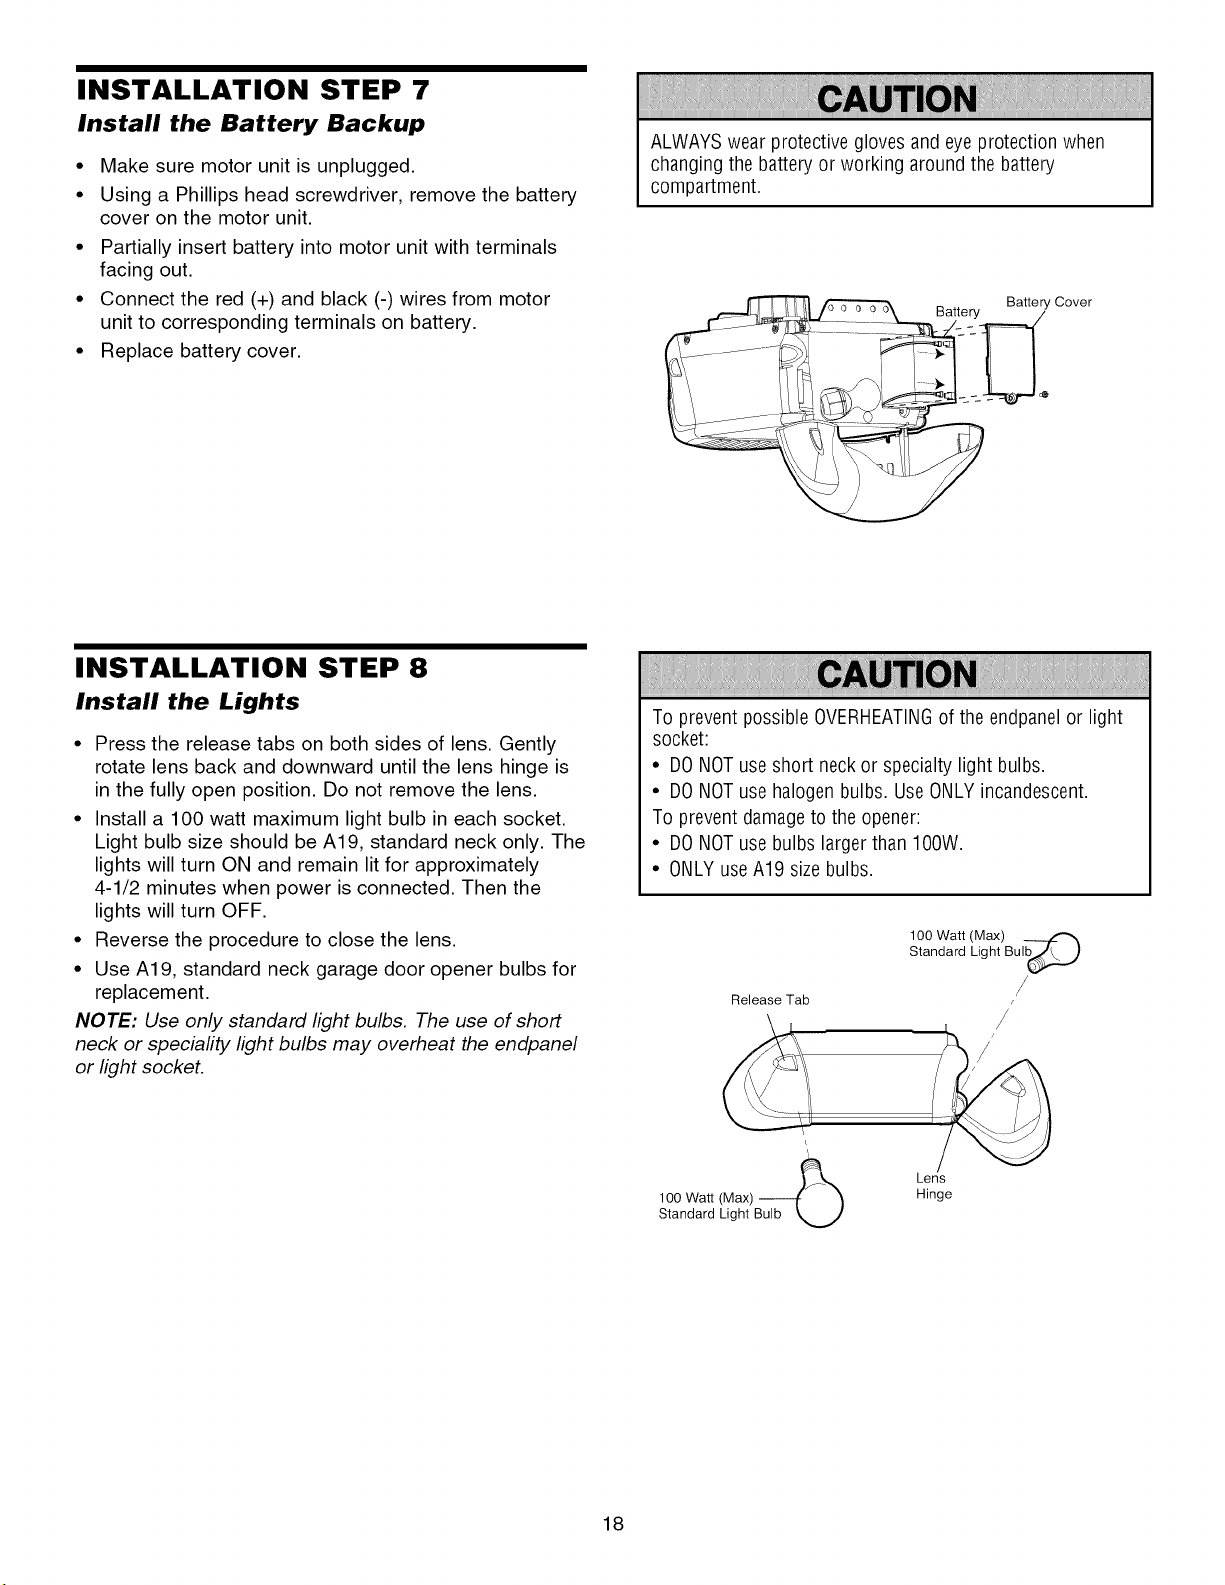
INSTALLATION STEP 7
Install the Battery Backup
• Make sure motor unit is unplugged
• Using a Phillips head screwdriver, remove the battery
cover on the motor unit
• Partially insert battery into motor unit with terminals
facing out
• Connect the red (+) and black (-) wires from motor
unit to corresponding terminals on battery
• Replace battery cover
ALWAYSwear protective gloves and eyeprotection when
changing the battery or working around the battery
compartment
Battery
Battery Cover
INSTALLATION STEP 8
Install the Lights
• Press the release tabs on both sides of lens Gently
rotate lens back and downward until the lens hinge is
in the fully open position Do not remove the lens
• Install a 100 watt maximum light bulb in each socket
Light bulb size should be A19, standard neck only The
lights will turn ON and remain lit for approximately
4-1/2 minutes when power is connected Then the
lights will turn OFF
• Reverse the procedure to close the lens
• Use A19, standard neck garage door opener bulbs for
replacement
NOTE: Use only standard light bulbs. The use of short
neck or speciafity light bulbs may overheat the endpanel
or light socket.
To prevent possible OVERHEATINGof the endpanel or light
socket:
• DONOTuse short neck or specialty light bulbs.
• DONOTuse halogen bulbs. UseONLYincandescent.
To prevent damageto the opener:
• DONOTuse bulbs larger than IOOW.
• ONLYuseA19 size bulbs.
Release Tab
100 Watt (Max) ( _
Standard Light Bulb
100 Watt Light Bul_
(Max)
Standard
/
/
/
H //
Lens
Hinge
18
Loading ...
Loading ...
Loading ...