Loading ...
Loading ...
Loading ...
INSTALLATION
5
INSTALLATION NOTES
1. Make sure the lter is operating under the working pressure and using a pressure control valve when
the system is using a booster pump.
2. To aid in winterization and maintenance it is recommended that a separate gate valve be installed.
3. Minimize the length of pipe and the number of ttings to minimize friction loss to ensure maximum
efciency.
4. Connect all plumbing to the Multi-port Valve taking care that all joints are glued or tightened securely to
prevent leaking.
5. To prevent breakage and damage to the pump and Multi-port Valve, use only pipe sealants specically
formulated for plastics.
6. Ensure solvents are not excessively applied to ttings as this could run into O-Rings and create sealing
problems.
7. DO NOT over tighten ttings or adapters.
MULTI-PORT VALVE INSTALLATION
Top Mount Sand Filters are supplied with a screw down Multi-port Valve. Supplied with the Multi-port
Valve are Flange clamp, screws and O-Ring.
1. Screw the barrel unions onto the threaded ports on the Multi-port Valve.
2. When rotating the Multi-port Valve into position on a Top Mount Filter, leave some leeway for better
alignment of plumbing.
3. Once the Multi-port Valve is in position and the plumbing is aligned, apply the thread tape to the barrel
union thread.
4. Using a roll of Teon tape, wrap the Teon tape around the thread (tail) of the barrel union in a clock
wise direction.
5. Screw the barrel union into the thread of the Multi-port Valve and hand tighten. The barrel union should
be rmly threaded into the Multi-port Valve and there should be no play between the thread.
6. Once you have done this tighten the barrel union with an appropriate tool until it is tight.
7. Repeat steps until all barrel unions are rmly onto the Multi-port Valve.
8. Glue the plumbing to the Barrel unions and allow 24 hours for glue (solvent) to set before starting the
lter.
9. Test the lter and check for leaks around the threads. If leaking occurs disconnect plumbing and repeat
the steps 2 to 6 until the leak has stopped.
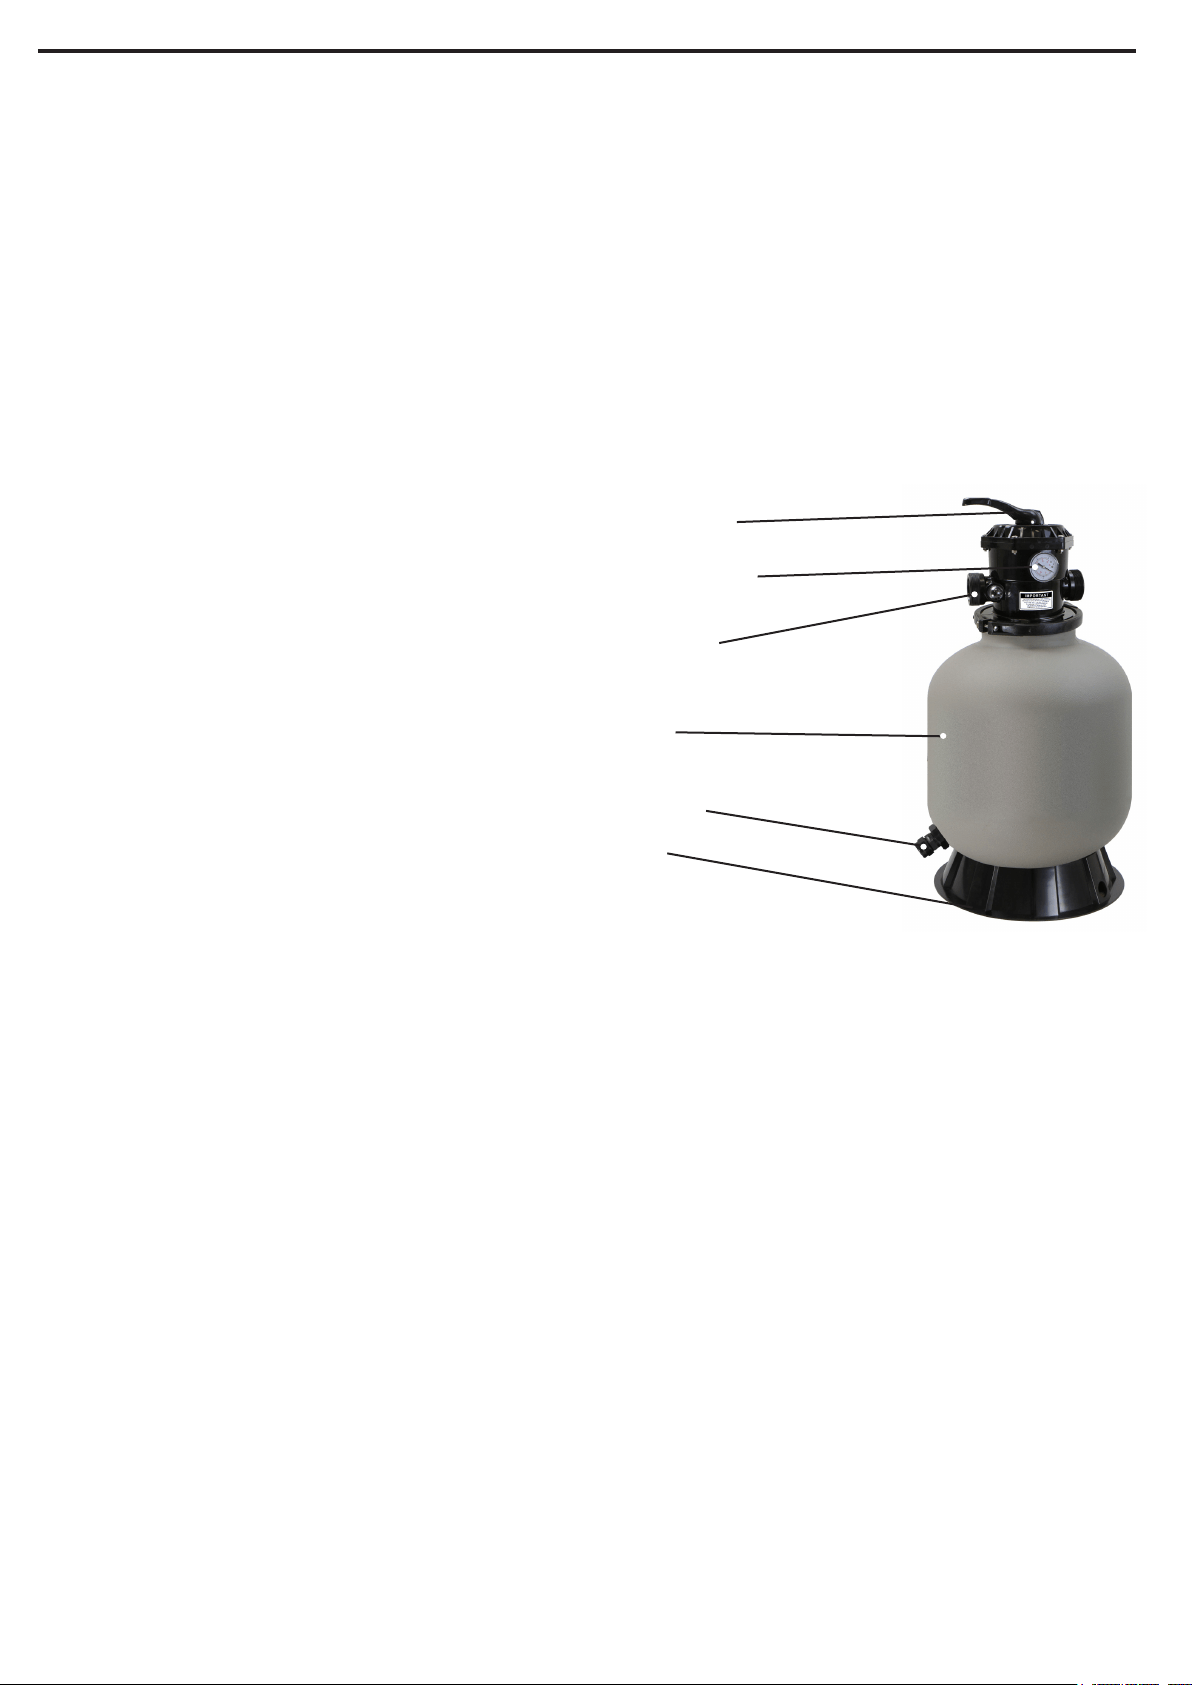
CONTROL VALVE
PRESSURE GAUGE
RETURN TO POOL
FILTER
BASE
DRAIN CAP
Loading ...
Loading ...
Loading ...