Loading ...
Loading ...
Loading ...

4
SAND FILTRATION WORKING PRINCIPLE
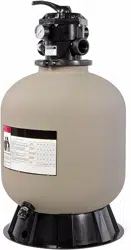
Incoming water from the piping system is automatically directed by the multi-port valve to the top of the
lter bed. As the water is pumped through the lter sand, dirt and debris are trapped by the lter bed, and
ltered out. The lter water is returned from the bottom of the lter tank., through the multi-port and back
through the piping system .
PREPARATION BEFORE INSTALLATION
1. Position the lter as close to the swimming pool / spa as possible.
2. The lter should be placed on a level concrete slab, very rm ground, or equivalent. Ensure that the
ground will not subside to prevent any strain to the attached plumbing.
3. Position the lter so that the piping connections, Multi-Port Valve and winter drain is convenient and
accessible for operation, servicing and winterizing.
4. Ensure that the compliance label is facing the front to allow easy identication in the case of
service difculties.
INSTALLATION
INSTALLATION
WARNING: This product should be installed and serviced only by a qualied professional.
1. Put the lter tank on the base. Turn the lter tank to the right to tighten it. Position the outlet drain plug
so it is facing outside for easy operation.
2. Before lling the lter media into the lter vessel, do a visual check of the laterals. Look for broken or
loose laterals. Replace if necessary. The laterals of side-mount valve sand lter are all installed.
3. Match the Raised Point of the laterals to Folding Umbrella lateral holder, insert the laterals and turn
90º clockwise. Listen for a sound to conrm the lateral is in place.
4. Make sure the air release hose is running along side the body of the lateral holder. One end of the
air release hose MUST be out of the sand. DO NOT bury the air release hose in the sand.
5. To eliminate stress on the laterals, ll the lter vessel with enough water to provide a cushioning
effect when the lter sand is poured in.
6. Use Sand Shield to protect the lter top mount and make sure the central stem pipe has been fully
covered.
7. Carefully pour the exact amount of sand into the lter vessel. DO NOT allow sand to go into the stem
pipe. DO NOT damage the lter top mount or it can cause a leak.
8. Put the O-Ring on the top mount valve and then connect the valve on the lter vessel. The
stem pipe should be straight and aligned with the top mount valve. Tighten the ange clamp on the
valve. NOTE: The ange clamp should be in place and tight or it could cause injuries.
9. To connect the pump to the base, use the screws from the pump hardware pack.
10. Adjust the valve position. The pressure hose connects to the pump output/input valve.
11. The other two connection ends of the valve connect to the swimming pool and the drain outlet hose.
Loading ...
Loading ...
Loading ...
