Loading ...
Loading ...
Loading ...
8
USING THE APPLIANCE
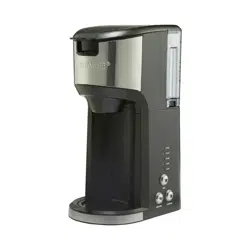
Using the appliance
This appliance can be used for brewing up to 14oz of coee using ground coee
or K-cup capsules, according to the insert used. Use only water and do not use any
other liquids.
NOTE:
- The appliance has a rated power of 1200W. Before plugging it into the wall
outlet, ensure that the electrical circuit is not overloaded with other appliances.
This appliance should always be operated on a separate 120V ~ 60Hz wall
outlet.
- Make sure the appliance is assembled before connecting it to a wall outlet.
t Place the appliance on a clean, flat and heat resistant surface (ill.
a
).
t Lift the release lever (1) to unlock the lid (ill.
b
).
WARNING:
- Do not touch the needle on the underside of the lid (2) or inside the capsule
holder (16), they are sharp.
- Only use suitable ground coffee or capsules. Do not place ground coffee/
capsule directly into the insert holder (14) (ill.
c
). Do not place other than
the recommended ground coffee/capsule into the ground coffee holder (15)/
capsule holder (16).
- Some capsules may not work with this appliance. If the capsule does not
properly fit into the capsule holder (16), or leaks during the brewing cycle, do
not use that type of capsule again.
t When using the ground coffee holder (15), ensure it contains the required
amount of ground coffee. Fill with ground coffee up to the MAX fill line. Do not
overfill it. Do not compress the ground coffee in the ground coffee holder (15).
Do not use ground coffee for Espressos, as it is too fine and can clog the ground
coffee holder. Insert the ground coffee holder (15) in the insert holder (14)
(ill.
d
).
t When using the capsule holder (16), insert a capsule in the capsule holder.
Insert the capsule holder (16) in the insert holder (14) (ill.
d
).
t Close the lid (2) into the
e
).
t Place the drip tray (11) with cup holder (10) in either the upper or lower
mounting slots (12) (ill.
f
). Ensure it is securely in place when using the upper
mounting slots and sits flat when using the lower mounting slots.
by pressing it down
lock position (ill.
Loading ...
Loading ...
Loading ...