Loading ...
Loading ...
Loading ...
8
2
2
1
4
3
7
8
9
11
6
5
10
12
UNPACKING YOUR WET/DRY VACUUM & GENERAL ASSEMBLY
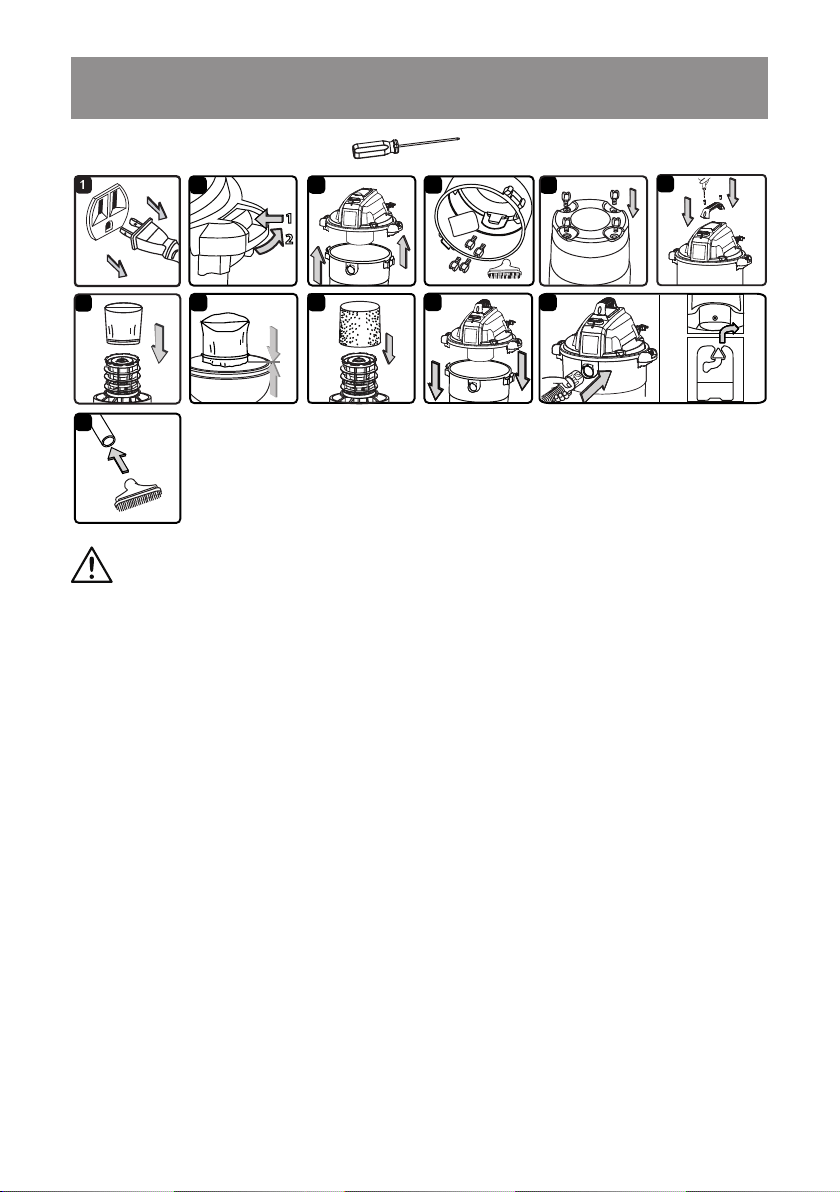
1. Verify that the power cord is disconnected from the outlet (Fig. 1).
2. Undo the latches (Fig. 2).
3. Lift the power head off the collection tank (Fig. 3).
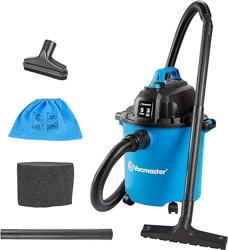
4. Remove the contents from inside the collection tank. Make sure you have all contents as listed
on page 7 (Fig. 4).
5. Turn the collection tank upside down and insert the four casters into the slots on the bottom
of the collection tank. Ensure each caster is aligned straight into the collection tank and apply
pressure until the casters snap into place (Fig. 5).
6. Insert the handle into the slots located on the top of the power head and secure it with the
screws provided. Do not over-tighten the screws (Fig. 6).
7. Your vacuum comes ready for dry vacuum cleaning. If the reusable cloth lter is not installed,
refer to page 14 for installation instructions (Fig. 7 & 8).
8. For wet vacuum cleaning, remove the reusable cloth lter, and install the supplied foam wet
lter. See page 15 for the foam wet lter installation instructions (Fig. 9).
9. Place the power head back on the collection tank, aligning the top section with the latches, and
snap into place (Fig. 10).
10. Insert the locking end of the hose into the vacuum port on the collection tank and turn
clockwise to lock into place (Fig. 11).
11. Choose the desired attachment and insert onto the end of the hose or extension wand
(Fig. 12).
A Philips head screw driver is required.
GENERAL ASSEMBLY INSTRUCTIONS
WARNING:
DO NOT PLUG THE POWER CORD INTO A POWER OUTLET. MAKE
SURE THE PLUG IS DISCONNECTED BEFORE ASSEMBLING THE WET/DRY VACUUM.
TO REDUCE THE RISK OF ELECTRIC SHOCK, DO NOT EXPOSE TO RAIN.
NOISE DIFFUSER
For quiet operation, install the noise diffuser into the blower port by inserting the locking end of the
diffuser into the blower port and turning clockwise to lock into place.
Loading ...
Loading ...
Loading ...