Loading ...
Loading ...
Loading ...

7.2 Raising a Load
1. Position the jack directly beneath the approved
vehicle lifting point.
See the vehicle manufacturer information for the
approved lifting points.
2. Twist the handle shaft (1) clockwise until strong
resistance is felt.
3. Pump the handle shaft down and up until contact is
made with the vehicle and check that the saddle (4) is
positioned correctly.
4. Pump the handle shaft down and up to lift the vehicle.
Use the full stroke range to lift more quickly. The jack
reaches maximum height in less than 7 full pumps.
− 3 tonne - 6 pumps
− 4 tonne - 6.5 pumps
Important: If the jack drops under load, safely lower
the load (see 7.3) and bleed the piston chamber
(see 7.1).
5. Immediately secure the raised vehicle with an
appropriate axle stand, placing it as instructed in the
manufacturer information.
7.3 Lowering a Load
WARNING! Always ensure that there are no persons or
obstacles beneath the vehicle before lowering.
1. Gently pump the handle shaft (4) to raise the vehicle
slightly and allow the axle stand to be removed safely.
2. When the axle stand is clear, carefully twist the pump
handle anticlockwise to gently lower the load.
Do not turn the handle shaft more than a half turn at
a time during lowering.
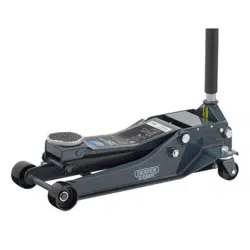
Fig.3Fig.1 Fig.2
7.1 Preparing the Jack
Prepare the jack correctly before each use:
1. Check the jack for bent, broken, cracked or loose parts,
and oil leaks; ensure that the wheels (11) rotate freely
and that the caster bolts (10) are tightly fastened.
WARNING! Do not use the product if defects are
present. If it is suspected that the jack has been
subjected to abnormal loads or has suered any
knocks, withdraw it from service until the product
has been repaired.
2. Assemble the handle shaft:
a. Depress the spring pin on the upper handle shaft
(C) and insert it into the top of the lower handle
shaft (B).
When the pin aligns with the hole on the lower
shaft, the spring will lock it in place.
b. Insert the complete handle shaft into the handle
socket (2) and secure with bolt (D).
Important: The handle shaft should be securely
fastened but able to be twisted without excessive
force. Overtightening may prevent movement of
the handle.
3. Bleed the jack piston:
a. Twist the handle shaft (1) anticlockwise and allow
the lifting arm to drop to its lowest position.
b. Pump the handle shaft down and up at least ten
times using the full stroke range to lubricate the
piston and expel any accumulated air.
c. Twist the handle shaft clockwise until strong
resistance is felt to seal the release valve.
4. Test the jack:
a. Pump the handle shaft down and up to raise the
lifting arm to its highest position.
b. Observe the saddle to check that it does not drop.
5. If the lifting arm begins to drop without intervention:
a. Twist the handle shaft anticlockwise and allow the
lifting arm to drop to its lowest position.
b. Unscrew and remove the pump cover plate (9).
c. Slightlyloosentheoilllerplug,toallowanyairto
escape the chamber.
Escaping air will hiss as it leaves the chamber.
d. Tightentheoilllerplug.
6. Test the jack again by raising the lifting arm and
ensuring that it does not drop without intervention.
Repeat this process if necessary. If the issue is not
resolved after several attempts, contact Draper Tools
for assistance.
The jack is now ready for use.
Twisting the handle shaft anticlockwise opens the
release valve and lowers the lifting arm.
Twisting the handle shaft clockwise closes the
release valve.
Pumping the handle shaft down and up raises the lifting
arm if the release valve is closed.
7. Operating Instructions
EN
7. Operating Instructions
– 10 – – 11 –
Loading ...
Loading ...
Loading ...