Operator's Manual &
Spare Parts List
US9430701 (5-19)
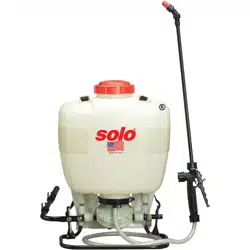
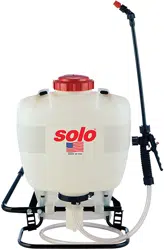
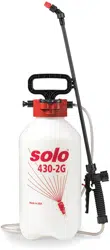
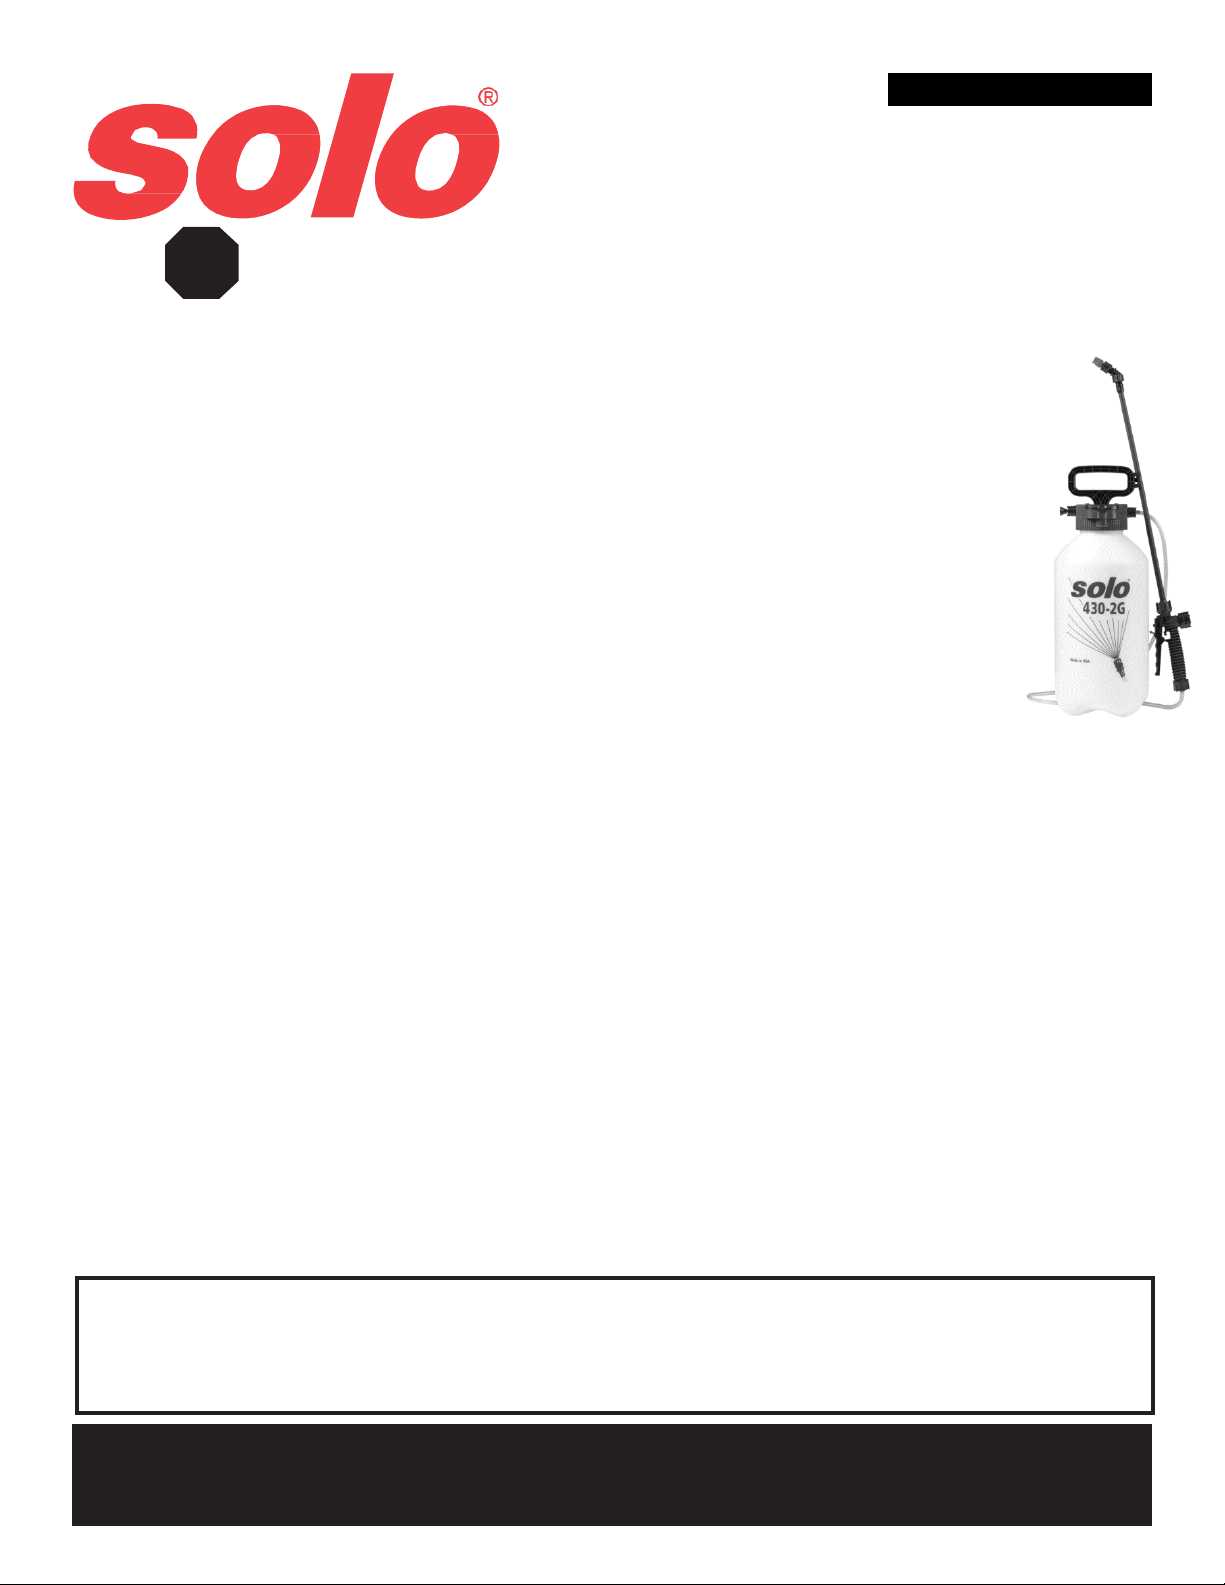
430-1G, 430-2G, 430-3G, 430-1G-HD, 430-2G-HD,
430-3G-HD Compression Sprayers
STOP!
If you are missing parts, instructions or have questions, DO NOT return this unit back to
the store. Call 1-800-765-6462. Solo will send the missing parts/information to you
promptly.
WARRANTY:
Solo model 430-1G, 430-2G, 430-3G, 430-1G-HD, 430-2G-HD, 430-3G-HD, sprayers are covered by Solo's 2-YEAR
LIMITED WARRANTY. This warranty is limited to 1-year for commercial use. Solo manufactured parts which fail due
to defective material or workmanship will be repaired or replaced without charge. See page 3 for full details.
SAFETY PRECAUTIONS:
• Do not fill with, use or spray flammable materials.
• After each use, ALWAYS loosen tank cap and pump assembly prior to storage.
• Never store in direct sunlight.
• Do not use gasoline, acid, caustic or potentially injurious chemicals.
• At the time of manufacture of this sprayer, we are not aware of any approved plant protection chemicals which
would adversely affect this sprayer when applied in their usual concentration.
• Observe the recommendations of the chemical manufacturer.
• Prior to removing any part of the sprayer pull the pressure relief valve to release any pressure in the
tank.
• Wear rubber gloves, safety goggles and appropriate protective clothing.
• After pumping be sure handle is in the locked down position.
WARNING:
Chemicals can be harmful to individuals and the environment if improperly used. In addition, some chemicals are caustic, corrosive,
or poisonous and should be avoided. Read warnings and chemical manufacturer's instructions. Solo high density polyethylene
sprayers are fitted with Viton® seals which are resistant to a wide variety of agricultural and household chemicals; however, care
should be exercised to ensure that sprayer components are clean, functioning properly, and in a good state of repair before and
during use. If in doubt about a particular chemical, check with manufacturer. If you suspect or observe indications that the material
may be unsafe in a Solo sprayer... STOP! Do not use or apply chemical.
ALWAYS WEAR RUBBER GLOVES, SAFETY GOGGLES AND APPROPRIATE PROTECTIVE CLOTHING.
• Read and follow operating instructions.
• Do not fill sprayer over maximum fill mark. Releasing pressure in an overfill condition can cause harmful venting of sprayer con-
tents.
• Relieve pressure only with sprayer upright and while standing on the side of the sprayer opposite the pressure relief valve.
Venting of sprayer contents can occur if liquid is over bottom of relief valve.
• CAUTION: To prevent injury from ejected pump assembly and/or solution, never stand with face or body over the top of the tank
when pumping or loosening pump.
• Do not modify sprayer or pressure relief valve.
• Never spray in the direction of humans, animals or property which might be injured or damaged by spray formula.
• Do not use disinfectants, solvents or impregnating agents unless first tested to ensure they are not harmful to the environment
and sprayer.
• Do not use liquids with a temperature above 120°F (45°C).
• Remember that a sprayer with liquid is a significant amount of weight (8 lbs. per gallon). Use caution when bending, leaning or
walking. Bend only at the knees and support yourself as required to ensure personal safety.
• Do not inflate sprayer without liquid in the tank.
• Do not climb on ladders, trees or other unsteady or potentially unsafe structures.
Visit us on the web at www.us.solo.global
Parts ordering available on-line, or call Solo’s order desk at (757) 245-5531.
Customer Service Commitment From Solo's Service Department
In the event the sprayer you have purchased has missing or damaged parts, please call 1-800-765-6462, 9:00 AM - 5:00
PM EST. In order to assist your service representative, please have the following information available: sprayer model
number, part description and part number. A parts list is included in your operator's manual.
Solo is committed to your satisfaction and is continuing its efforts to earn your future business.

2
Assembly Instructions for Wand
1. Ensure that the O-ring is on the non-threaded end of the wand.
2. Insert the non-threaded end of the wand with O-ring into the open end of the shut-off valve.
3. Tighten the screw cap.
4. Pump handle is fitted with a slide-retainer for easy storage.
Screw Cap
Wand
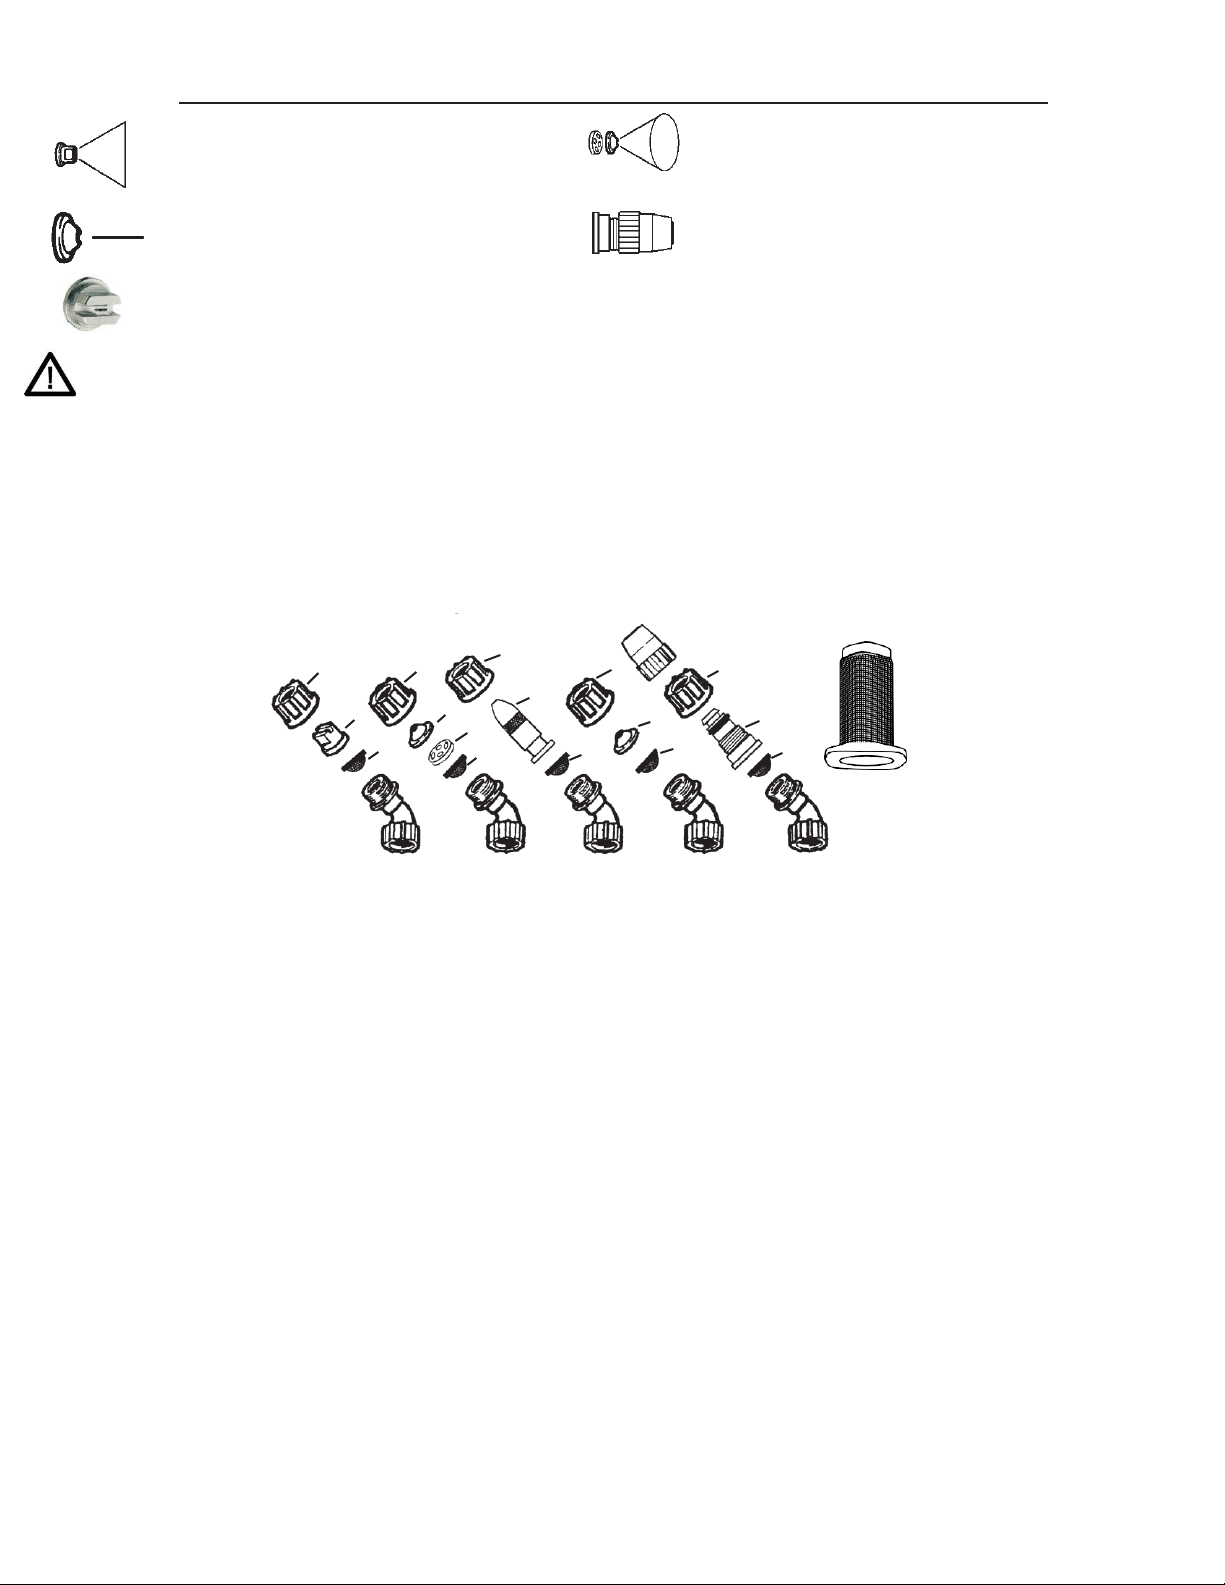
Using the Adjustable Nozzle
To change the spraying pattern, first make sure the retaining nut (2) is screwed tightly to the elbow (5).
If it is not tight, the nozzle cap (1) and nozzle body (3) will rotate inside the retaining nut and the nozzle
will not adjust. For a straight stream pattern, rotate the nozzle cap outward. For a hollow cone pattern,
rotate the nozzle cap inward towards the retaining nut. If it becomes difficult to rotate the nozzle cap,
remove the nozzle cap from the nozzle body and lubricate the O-ring on the nozzle body with non-
water-soluble grease. Solo lubricant #9850-P is available.
Removing Adjustable Nozzle
Unscrew the nozzle cap (1) from the nozzle body (3). This is best accomplished while the retaining nut (2)
is securely fastened to the elbow (5). Next, unscrew the retaining nut (2). Push the nozzle body (3) out of
the retaining nut (2). The filter (4) will come out with the body. To re-install the nozzle, reverse the above
instructions.
Operation:
O-Ring
Shut-Off Valve
Install Wand Here
1. Before using sprayer with chemicals, fill sprayer with fresh water to assure that you have it
properly assembled; pressurize by pumping the black pump handle and then practice spraying.
When thoroughly familiar with sprayer operation, follow normal operating procedures.
2. Turn pump handle counterclockwise to remove pump. Pump and red cap can be removed
separately. Turn red cap counterclockwise to remove for cleaning inside tank.
3. Fill tank with premixed formula up to desired level. Observe recommendations of chemical manufacturer.
4. Tighten red cap and pump assembly for a good seal.
5. Start or stop spraying by squeezing or releasing the lever on the shut-off valve (3). The spray
pressure can be monitored with an optional pressure gauge part #4900622.
6. Prior to every removal of pump, release pressure first by pulling outward on the pressure relief
valve stem.
Cleaning:
• Carefully clean sprayer after every use.
• Pour or spray all remaining chemical out of sprayer.
• Pour a small amount of water for water soluble chemicals, or mineral spirits for oil-based
• chemicals, into the tank.
• Pressurize and spray through system until all liquid is gone.
• Repeat process with a mild detergent/warm water solution (1oz. per gallon of water).
• Repeat process with warm clear water.
• Use an absorbent cloth to dry all internal surfaces.
• After each use, ALWAYS loosen tank cap and pump assembly prior to storage.
• Follow the recommendations of the chemical manufacturer for disposing of waste water and
• chemicals.
• Do not use aggressive or abrasive cleaning agents.
FREQUENTLY ASKED QUESTIONS:
WILL THE PLASTIC MATERIAL LAST?
Only high-grade polyethylene is used. The material is chosen for high molecular weight, high-impact strength, and excellent
resistance to chemicals and stress. Ultraviolet inhibitors are used in the material to reduce deterioration caused by sunlight.
CAN I USE WEED KILLER AND INSECTICIDE IN THE SAME SPRAYER?
In theory you can, if the sprayer is thoroughly cleaned out with a mild detergent/water solution mixed at a ratio of 1 ounce per gallon.
In practice, the use of both types of chemicals in the same unit is not recommended as the risk to plants can be high. Use caution
when handling any type of chemicals and when cleaning your sprayer. Do not mix cleaning agents as toxic reactions can result.
WHAT SPRAY NOZZLE SHOULD I USE?
A flat spray nozzle is supplied for spraying paths, garden beds, and general area spraying. A cone nozzle is also supplied for
spot spraying and for the treatment of bushes and small trees. For spot spraying, simply remove swirl plate from behind nozzle tip.
Save the swirl plate for future use. Available as an option is a reflux filter with a built-in check valve (27 00 316) which opens at 5 psi
and closes at 4 psi. This virtually eliminates the dripping of fluid still contained in the spray wand. A wide selection of nozzles such as
deflector, adjustable, and anti-drift nozzles are available.
CAN I DO SPOT SPRAYING?
The shut-off valve on the Solo sprayer is well suited for spot spraying. It's almost effortless! The shut-off valve handle
incorporates a clip which holds the valve open for area spraying without tiring the operator's hand.
1. Nozzle cap
2. Retaining nut
3. Nozzle body
4. Filter with gasket
5. Elbow
3
OPERATING FEATURES:
Nozzles - Your Solo sprayer is standard with nozzle arrangements to provide a variety of spray patterns.
Item
Application
Part #
Item
Application
Part #
Jet stream
4074755
Flat spray
nozzle
row treatment
4074263
nozzle and
swirl plate=
hollow cone
shrubs and
bushes
4074756
Jet stream
nozzle
Brass flat
spot & longer
range
cleaner
4074755
0065210
Plastic
adjustable
nozzle
Spot, shrubs &
bushes
4900527
spray nozzle
applications
WARNING: Handling the brass parts of this product will expose you to lead, a chemical known by the State of California to
cause cancer and birth defects or other reproductive harm. Wash hands after handling. For more information, go
to www.P65Warnings.ca.gov.
Spray tips should be assembled as follows for desired spray patterns.
SPRAY TIP ASSEMBLY
1. Flat spray nozzle, brass flat on HD 2. Filter
3. Jet cap 4. Swirl plate
5. Nozzle cap 6. Nozzle body
7. Brass adjustable nozzle* 8. Nozzle retaining nut
*Brass adjustable nozzle is NOT a standard item on most Solo sprayers.
*Brass flat nozzle is NOT a standard item on most Solo sprayers.
8
8 8
8
8
7
1
3
3
6
4
No-drip-check valve replaces
# 2 on heavy-duty (HD)
models along with O-rings
0062106 and 0062115.
2 2
2
2
2
Flat Spray Hollow Cone
Spray
Brass
Adjustable
Nozzle
Jet Stream Plastic
Adjustable
Nozzle
In the best interest of continued technological progress, we reserve the right to change design and configuration of any product without prior or
other notice. Therefore, please note that text and illustrations of this manual are not to be considered binding and do not constitute a basis for
legal or other claims.
SOLO LIMITED WARRANTY
Solo Incorporated guarantees the original purchaser of Solo equipment, that any failure of Solo manufactured parts due to defects in material
and workmanship occurring during the applicable warranty period will be repaired or replaced without charge for parts or labor, except for those
items not covered by warranty.
CONSUMER LIMITED WARRANTY: Solo equipment purchased for consumer use is covered by this Limited Warranty for a period of
TWO (2) YEARS.
COMMERCIAL LIMITED WARRANTY: Solo equipment purchased for commercial use is covered by this Limited Warranty for a
period of ONE (1) YEAR.
OPERATOR'S OBLIGATION AND RESPONSIBILITY: Proof of purchase must be provided by the owner in order to obtain
warranty service. Should any failure covered by this Limited Warranty occur, deliver or ship the Solo products or parts to an authorized
Solo service center. Freight, packing and insurance costs, if any, will be borne by the owner. Follow normal maintenance service to include
applicable lubrication, operation and storage of the product as explained in the operator's manual.
ITEMS NOT COVERED BY WARRANTY: Provisions of the Limited Warranty will not apply to the following: Any indirect or
consequential damages that may result from the failure or malfunction of the Solo product. Normal service requirements arising during
the warranty period, such as cleaning, normal wear, lubrication, filter, spray tips, etc. Normal service work over and above the repair or
replacement of defective parts. Any failure that results from an accident, customer abuse, normal wear, neglect or failure to operate the product
in accordance with the instructions provided in the operator's manual or provided with the product. When an alteration or modification has been
performed on a Solo product, Solo is responsible only for products as originally furnished by Solo, provided the alterations or modifications
do not adversely affect the product's operation, performance or durability. Parts or accessories that are incompatible with the product are not
approved by Solo.
Full disclosure of Solo's Limited Warranty is available from your local Solo dealer or from Solo Incorporated, 5100 Chestnut Avenue,
Newport News, Virginia 23605, (757) 245-4228.
4
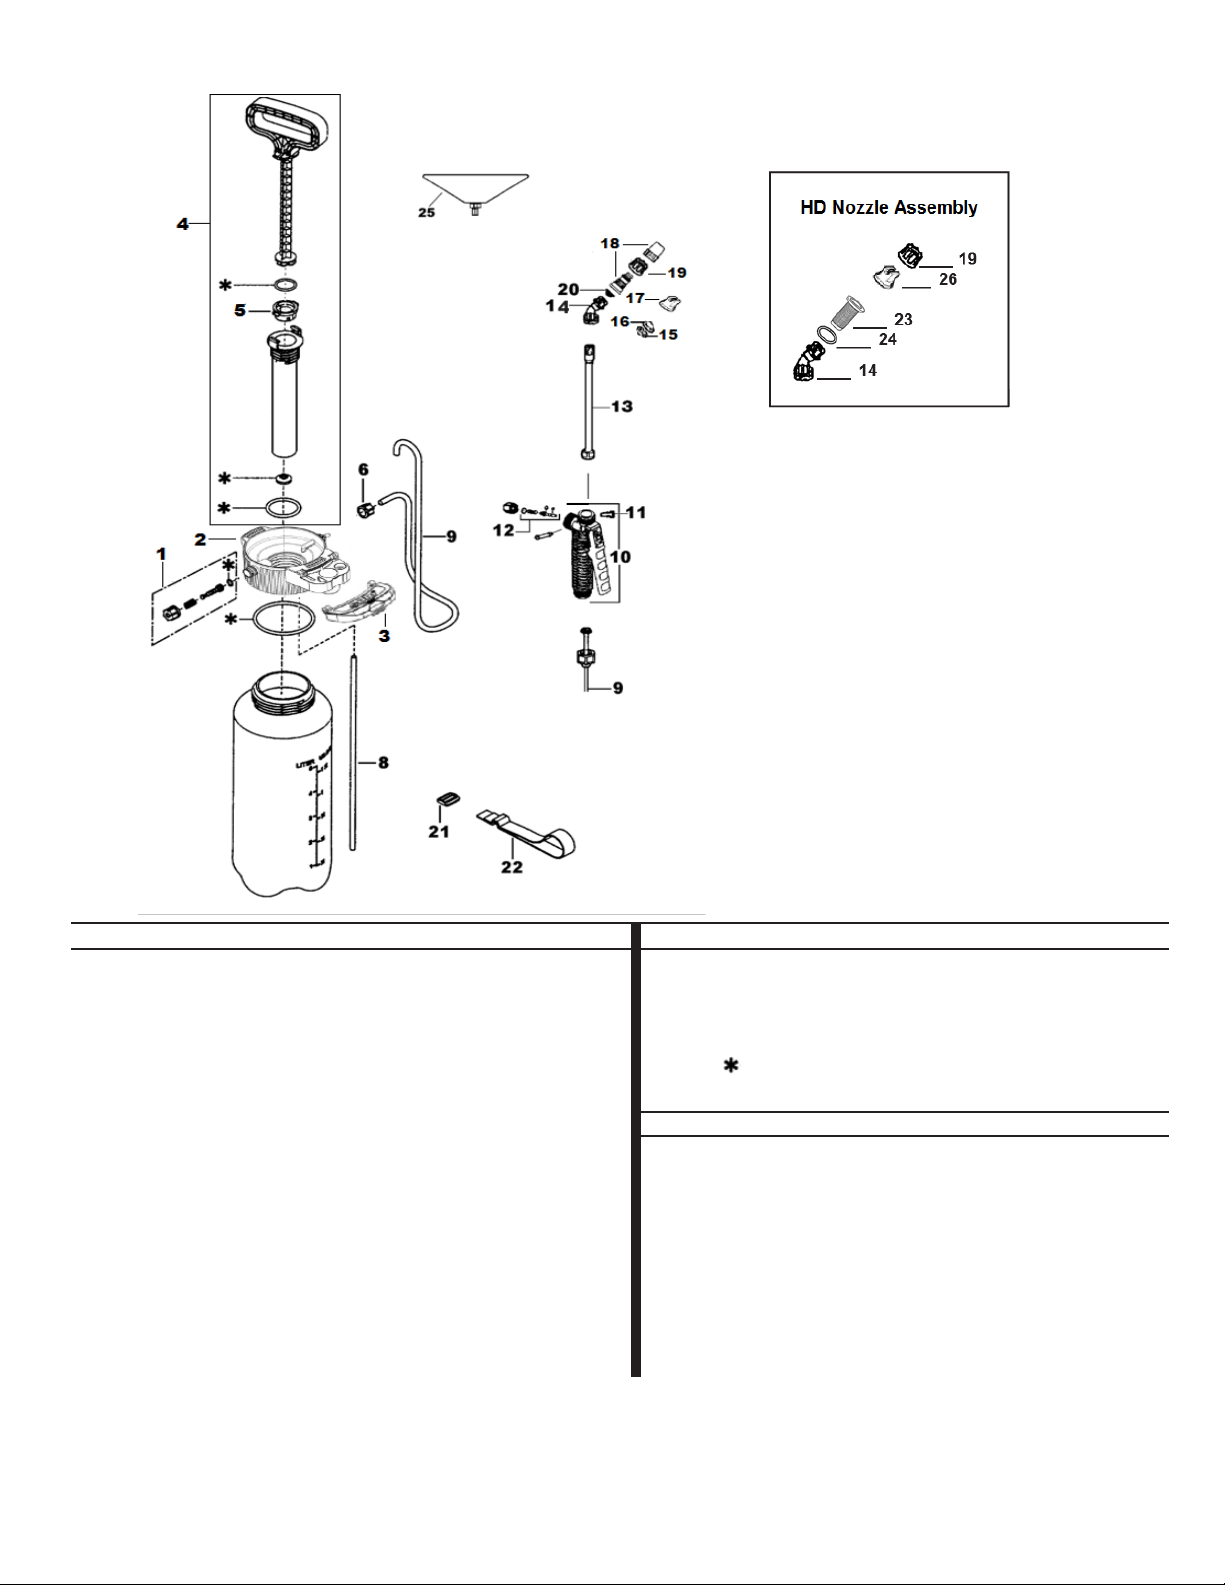
PARTS BREAKDOWN
** Kit not shown in breakdown.
Order parts on-line at us.solo.global or call Solo’s order desk at (757) 245-5531.
For service, contact Solo’s Technical Service Department at (800) 765-6462.
Position No.
Part No.
Description
Position No. Part No. Description
1
4800250
Pressure relief valve
21 4074405 Slide buckle
2
4073852
Tank cap (inc. 1, 3)
22 0094174 Carry strap
2
407383845
Tank cap (Black - HD)
23 2700316 No-drip check valve
val.
3
4073854
Nozzle cover
24 0062115 O-ring
4
4400115
Complete pump
26 0065210 Brass fan nozzle
5
4073839
Pump ring, Half (need 2)
0610403-K Sprayer repair kit
6
4074655
Screw cap
8
0064387
Pickup tube
Accessories
9
4400116
Hose Assy. (inc. 6)
25 4900430 Drift guard
** 0610411-K Shut-off Valve &
Wand repair kit
10
4800170
Shut-off valve
11
4074329
Lock clip
12
0610402-K
Shut-off valve repair kit
13
4900230
Wand
14
4074527
Elbow
15
4074756
Swirl plate
16
4074758
Jet cap
17
4074263
Flat spray nozzle
18
4900527
Plastic adjustable nozzle
19
4074148
Screw cap
20
4074283
Filter