Loading ...
Loading ...
Loading ...
11
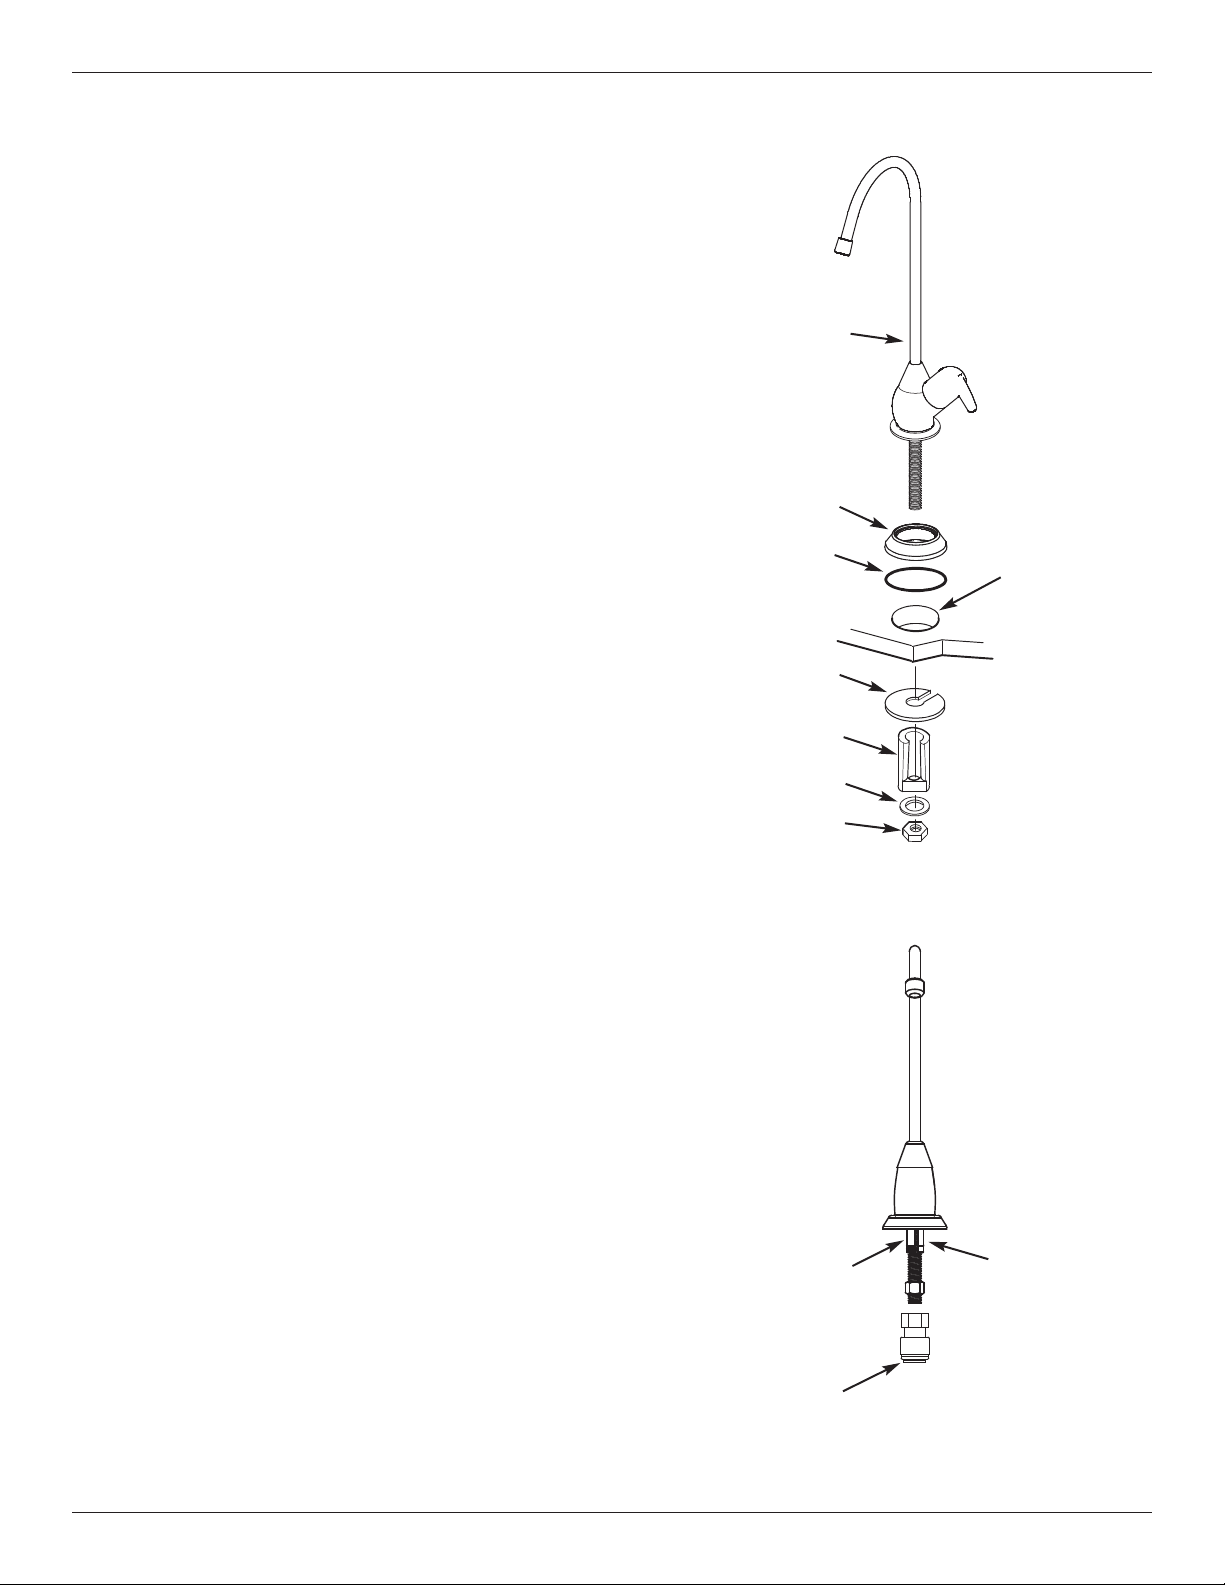
Step D: Install RO Faucet (cont.)
BLACK TUBE
3/8” barb fitting
for the black tube
RED TUBE
1/4” barb fitting
for the red tube
BLUE TUBE
3/8” quick connect
fitting for the
blue tube
Faucet
FIG. 14
FIG. 15
O-ring
Spacer
Hex Nut
Washer
Base
Steel Washer
(large)
1-1/4” dia. Hole
INSTALL REVERSE OSMOSIS FAUCET
1. Locate and organize your RO faucet install parts. Refer
to Fig. 14.
2. Snap the o-ring into the groove on the bottom of the base
and slide the base onto the faucet stud. See Fig. 14.
NOTE: If you routed the red drain tubing directly to a
remote drain point (see page 9), disregard steps 3 & 4.
Move on to step 5.
3. Locate the 3/8" black tubing and push one end onto the
3/8" faucet barb fitting, see Fig. 15.
4. Locate the 1/4" red tubing and push one end onto the
1/4" faucet barb fitting, see Fig. 15.
5. Work tubing and the faucet stud down, into the mounting
hole.
6. On the underside of the sink or countertop, install the
spacer, flat washer, and hex nut. Slide the large steel
washer into place between the countertop and spacer.
Then, tighten the hex nut securely.
7. Thread the quick connect fitting onto the bottom of the
faucet stud.
8. Locate the 3/8" blue tubing and insert one end all the
way into the quick connect fitting on the bottom of the
faucet stud. See Fig. 15.
9. Pull on the tube to be sure it is held firmly in the fitting.
10. Move the RO system into position, under the sink. See
page 5.
NOTE: If you routed the red drain tubing directly to a
remote drain point (see page 9), disregard steps 11-15.
11. Locate the 1/4” red tubing attached to the faucet.
12. Route the loose end of this tube to the red collet fitting
on the Reverse Osmosis filter assembly. See Fig. 21.
13. Cut tube square and to length. See Fig. 16.
14. Insert all the way into the fitting. See Figs. 17 & 18.
15. Pull on the tube to be sure it is held firmly in the fitting.
Loading ...
Loading ...
Loading ...