Loading ...
Loading ...
Loading ...
ninjakitchen.com
ninjakitchen.com
BREWING PODS CONT.
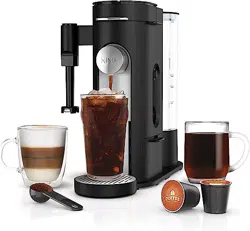
4 Place an empty vessel under the nozzle.
NOTE: Set the
Adjustable Cup Tray to
desired height by pulling
the cup tray up and out
for smaller vessels and
to help prevent coee
splatter. The cup tray
may be removed for
brewing into taller and
wider vessels.
3 Press the coee maker lid down firmly to
pierce the pod and ensure that it is completely
closed. There will be an audible click and some
resistance when closing the handle as the needle
punctures the pod.
5 Press the Style Button and select either Classic,
Rich, Over Ice, or Specialty brew (not available
on all models).
6 Press the Size Button to toggle through and
choose your desired size.
7 Press the Brew Button to start brewing. A
confirmation beep will sound and the progress bar
on the control panel will illuminate to indicate the
status of the brew. When finished, the coee maker
will beep three times.
8 To cancel the brew at any time, press the Brew
Button again or press the Power Button.
NOTE: The brewing cycle will begin then
pause for a short period before resuming. This
is to evenly saturate the coee grounds. The
progress bar is an indication of the total time
remaining until the end of the brew.
NOTE: We recommend disposing of the used
pod after it has cooled down following a brew
to prevent any excess water retention in the
brew basket.
For best results, use the measurements on the Ninja Smart Scoop™ or in the chart to determine
how much ground coee to use for each brew size. The amount of ground coee for each size will
remain the same for any brew type you select. For example, if you select 10 oz. and Classic, you will use
the same amount of coee grounds as if you were to select 10 oz. Rich and 10 oz. Over Ice.
NOTE: Adjust to your preferred taste. More scoops result in stronger coee but slightly lower
volumes, fewer scoops result in weaker coee and slightly higher volumes. Decaf and finer grind
coees drain slower and may cause coee to overflow the filter. If overflow occurs, we recommend
one less scoop. We also recommend one less scoop for decaf. With some brands of coee, the
amount of grounds may need to be reduced to prevent overflow.
MEASURING YOUR COFFEE GROUNDS
COFFEE MEASUREMENT CHART
Serving Size Ninja Smart Scoop Tablespoons
6 oz.
2–3 Scoops 2–3 Tablespoons
8 oz.
10 oz.
12 oz.
14 oz.
3–5 Scoops 3–5 Tablespoons
18 oz.
24 oz. 5–7 Scoops 5–7 Tablespoons
Specialty (4 oz.) 4 Scoops 4 Tablespoons
1 To prepare for brewing using ground coee,
open the coee maker lid and ensure the brew
basket is installed.
2 Place the Permanent Filter in the brew basket;
the Permanent Filter is located in the
Adapter Storage Bin on the right side of the
coee maker.
NOTE: Ensure that the Ninja Pod Adapter is
removed from brew basket before inserting
the Permanent Filter.
NOTE: The adapter storage bin can be used
for both Permanent Filter and Ninja Pod
Adapter.
NOTE: DO NOT use a paper filter in this
coee maker.
BREWING GROUND COFFEE
3 Follow the measurements on the Ninja Smart
Scoop or in the Coee Measurement Chart to
fill the Permanent Filter.
NOTE: DO NOT place ground coee directly
in the brew basket without the Permanent
Filter installed.
6 Press the Style Button and select either
Classic, Rich, Over Ice, or Specialty brew
(not available on all models).
7 Press the Size Button to toggle through sizes.
8 Press the Brew Button to start brewing. A
confirmation beep will sound and the progress
bar on the control panel will illuminate to
indicate the status of the brew. When finished,
the coee maker will beep three times.
9 To cancel the brew at any time, press the Brew
Button again or press the Power Button.
NOTE: The brewing cycle will begin then
pause for a short period before resuming. This
process is used to evenly saturate the coee
grounds. This applies to all brew styles. The
progress bar is an indication of the total time
remaining until the end of the brew.
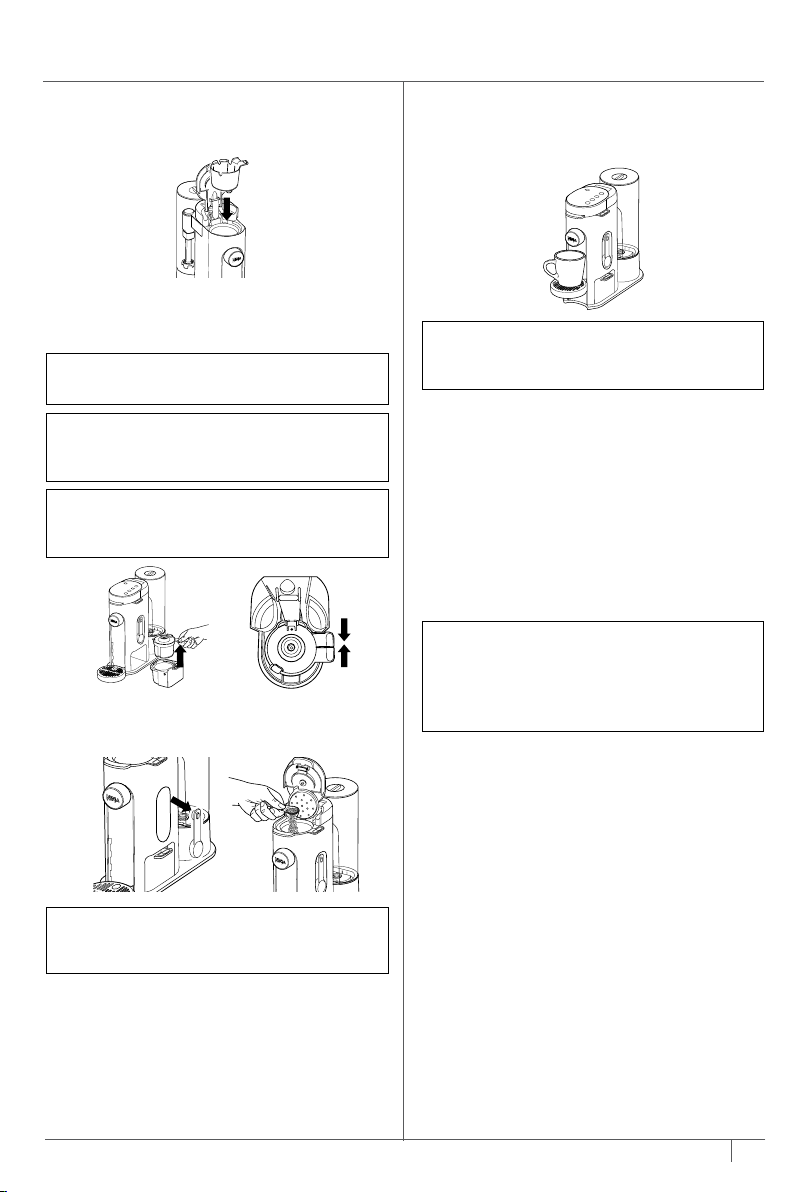
5 Place an empty vessel under the nozzle.
NOTE: Set the Adjustable Cup Tray to desired
height for smaller vessels and to help prevent
coee splatter.
4 Close the Permanent Filter lid and the coee
maker lid.
6 7
Loading ...
Loading ...
Loading ...