Loading ...
Loading ...
Loading ...
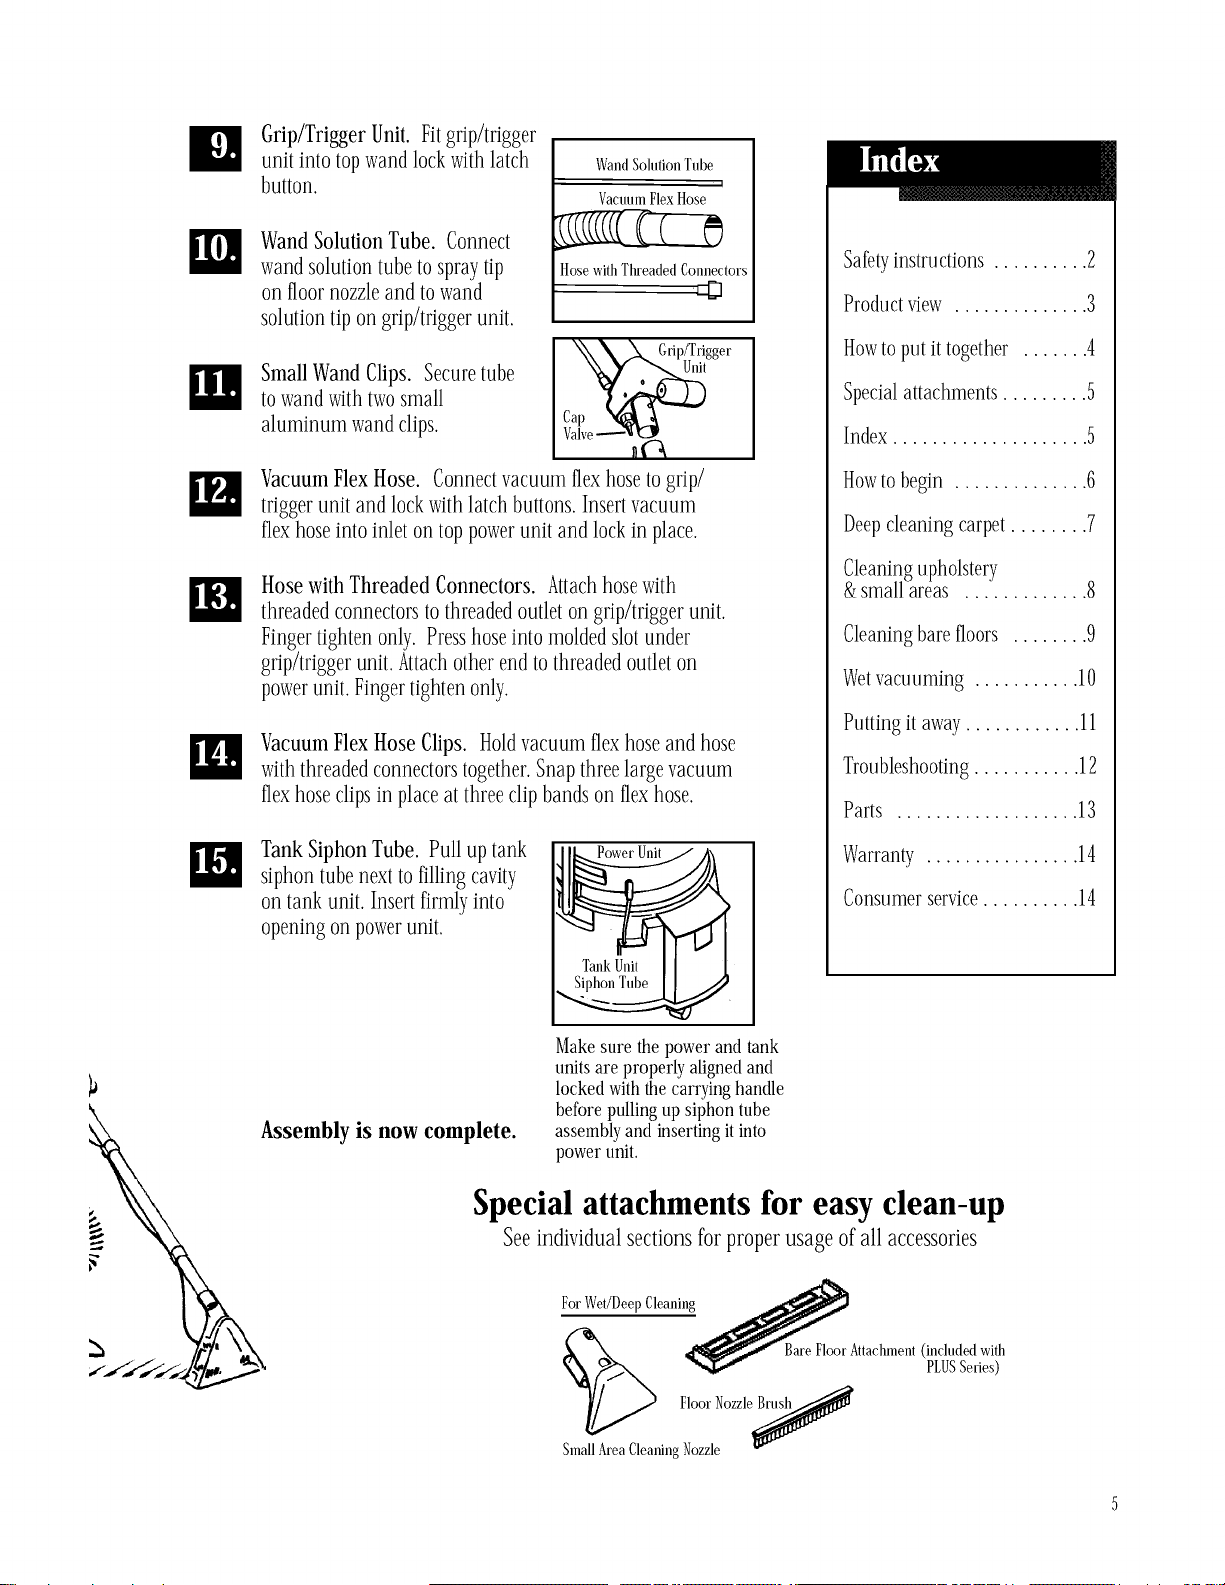
Grip/TriggerUnit. Fitgrip/trigger
unitintotopwandlockwithlatch
button.
Wand Solution Tube
i
Vacnum Flex Hose
WandSolutionTube. Connect
wandsolutiontubetospraytip
onfloornozzleand towand
solutiontipongrip/triggerunit.
SmallWandClips. Securetube
towandwithtwosmall
aluminumwandclips.
Hose with Threaded Connectors
[ XX_, _.. Gtip/Tligger
Cap v_A
Vacuum Flex Hose. Connect vacuum flex hose to grip/
trigger unit and lock with latch buttons. Insert vacuum
flex hose into inlet on top power unit and lock in place.
HosewithThreadedConnectors. Attachhosewith
threadedconnectorstothreadedoutletongrip/triggerunit.
Fingertightenonly.Presshoseintomoldedslotunder
grip/triggerunit.Attachotherendtothreadedoutleton
powerunit.Fingertightenonly.
Vacuum Flex Hose Clips. Hold vacuum flex hose and hose
with threaded connectors together. Snap three large vacuum
flex hose clips in place at three clip bands on flex hose.
Tank Siphon Tube. Pull up tank
siphon tube next to filling cavity
on tank unit. Insert firmly into
opening on power unit.
Power Unit
Safetyinstmctions .......... 2
Productview .............. 3
Howto put ittogether ....... 4
Specialattachments ......... 5
Index .................... 5
Howto begin .............. 6
Deepcleaning carpet........ 7
Cleaningupholstery
&small areas ............. 8
Cleaningbare floors ........ 9
Wetvacuuming ........... 10
Putting it away ............ 11
Troubleshooting........... 12
Parts ................... 13
Warranty ................ 14
Consumerservice.......... 14
F"
Assembly is now complete.
Make sure the power and tank
units are properly aligned and
locked with the carrying handle
before pullingup siphon tube
assemblyand inserting it into
power unit.
Special attachments for easy clean-up
Seeindividualsectionsfor properusage ofallaccessories
For Wet/Deep Cleaning _,-_
..,r Ba_ Fl_r Attachment (included with
PLUSSeries)
SmallArea CleaningFiiiill Ozzle_
Loading ...
Loading ...
Loading ...