Loading ...
Loading ...
Loading ...
ThisUser'sGuidehasbeendesignedtohelpyou
gettheutmostsatisfactionfromyourPowerlifler
DeepCleaner.You'llfindassemblyinstructionsforall
cleaningtasks,safetyprecautions,pre-cleaningtips,
andmaintenanceandtroubleshootinginstructions.
PleasereadthisGuidethoroughlybeforeassembling
yourPowerlifiei:
Payparticularattentiontotheassemblydiagram,
assemblyinstructions,and partnames.Locateand
organizeall partsbeforeassembly.Familiarize
yourselfwiththepartsandwheretheygo.Following
the Guidewillgreatlyenhanceyourabilitytoget
thebestperformancefromyourPowerliflerfor
manyyears.
How to put it together
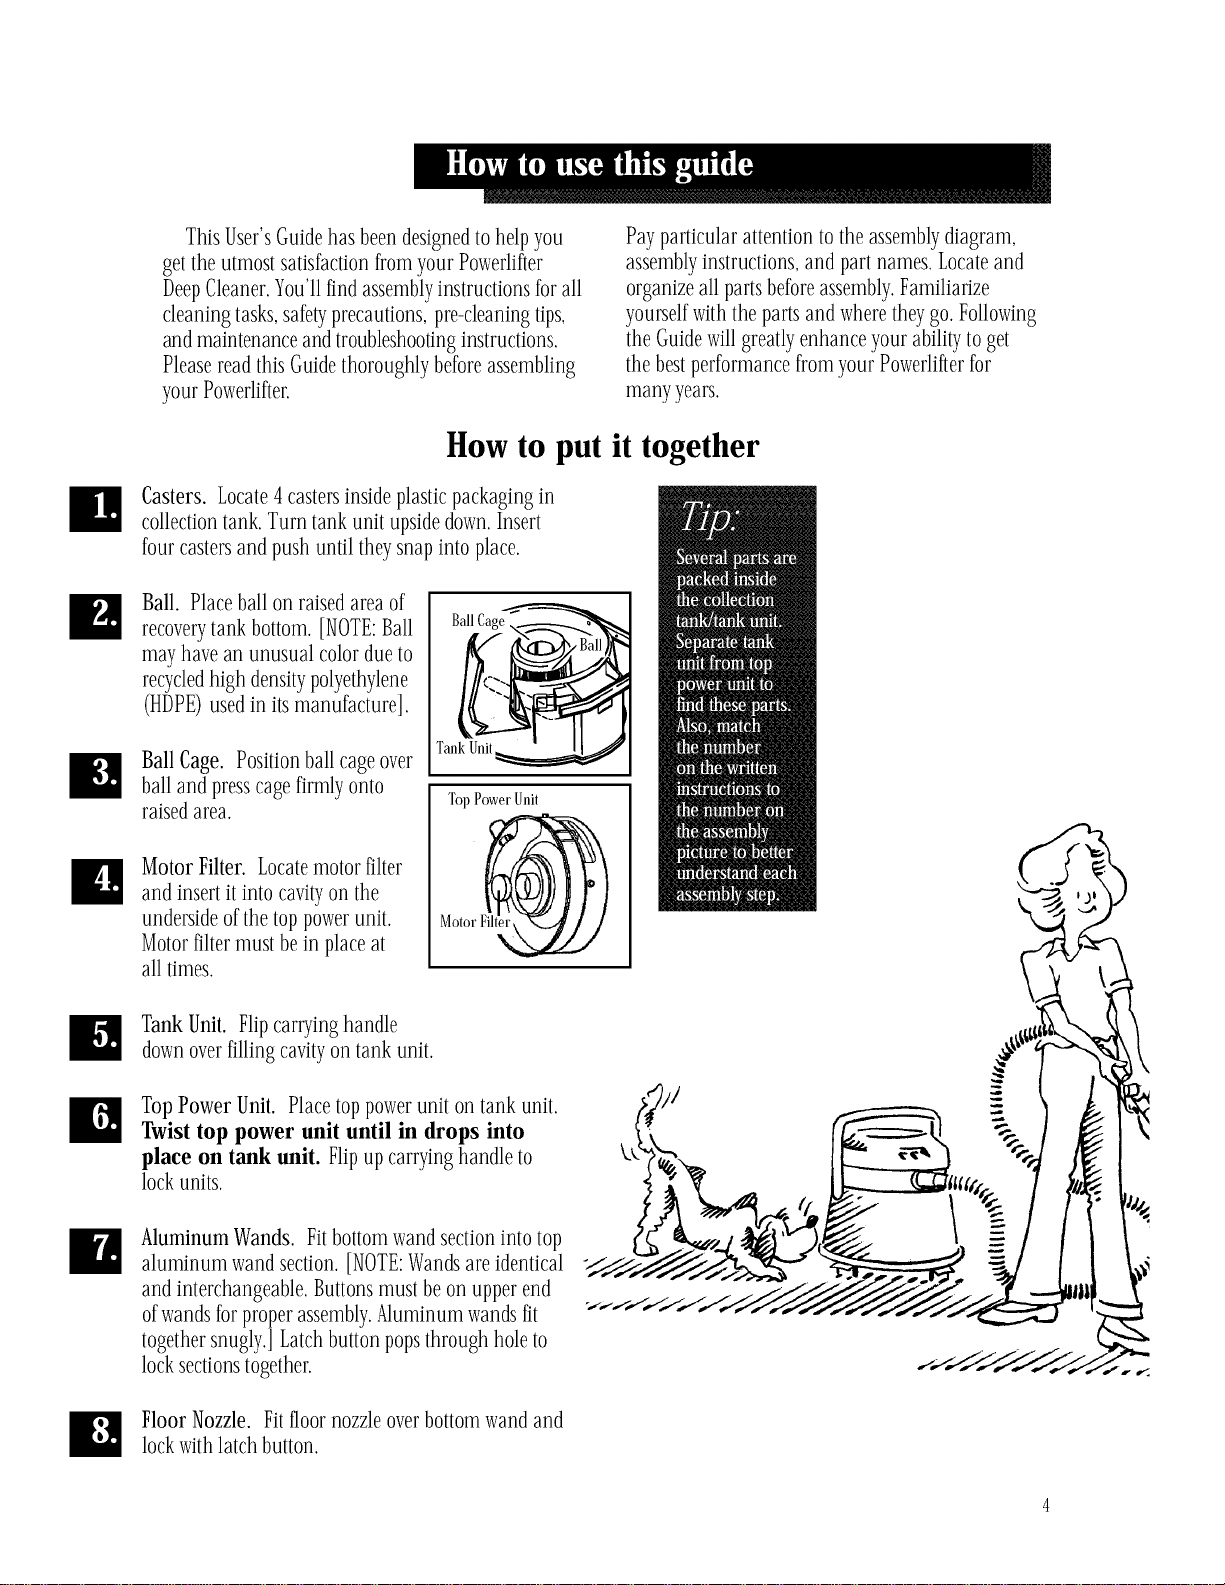
Casters. Locate 4 casters inside plastic packaging in
collection tank. Turn tank unit upside down. Insert
four casters and push until they snap into place.
Ball. Placeballon raisedareaof
recoverytankbottom.[NOTE:Ball
mayhavean unusualcolordueto
recycledhighdensitypolyethylene
(HDPE)usedinitsmanufacture].
Ball Cage. Position ball cage over
ball and press cage firmly onto
raised area.
MotorFilter.Locatemotorfilter
andinsertitinto cavityonthe
undersideofthetoppowerunit.
Motorfiltermustbein placeat
alltimes.
Ball Cage ,,
Tank
Top Power Unit
Motor F@
Tank Unit. Flip carrying handle
down over filling cavity on tank unit.
Top Power Unit. Placetop powerunit on tank unit.
Twist top power unit until in drops into
place on tank unit. Flipup carryinghandle to
lockunits.
Aluminum Wands. Fit bottom wand section into top
aluminum wand section. [NOTE:Wands are identical
and interchangeable. Buttons must be on upper end
ofwands fbr proper assembly. Aluminum wands fit
together snugly.[ Latch button pops through hole to
lock sections together.
Floor Nozzle. Fit floor nozzle over bottom wand and
lock with latch button.
Loading ...
Loading ...
Loading ...