Loading ...
Loading ...
Loading ...
Installing your Appliance
• Select a location for mounting of the heater in accordance with the installation instructions
• The heater must be connected by permanent wiring within the wall cavity from an isolating
switch.
• Ingress Protection (IP): Bathrooms are divided into four zones based on the levels of
perceived risk within each area. The measurements are taken from the fixed plumbing
connection (water source) and each zone has specific requirements regarding the electrical
equipment that can be used within it. Goldair Bathroom heaters are rated IPX0 so must be
installed in Zone 3.
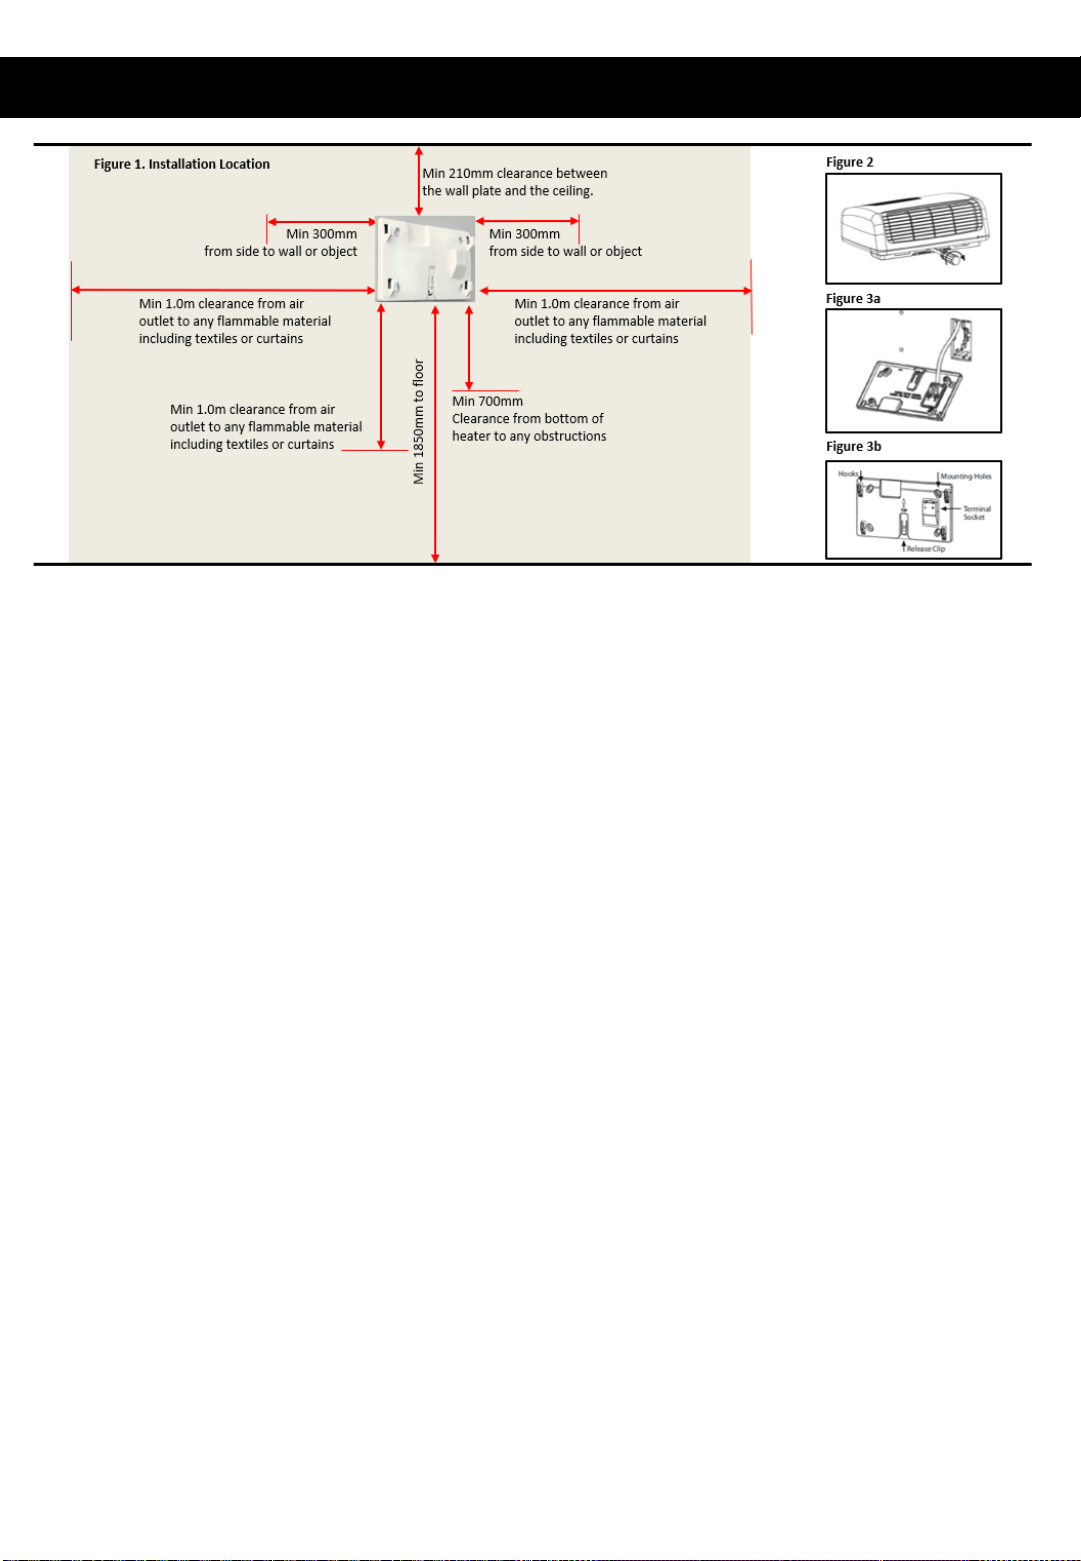
• The Wall Mounting Base should be positioned as shown in Figure 1.
• The wiring within the wall cavity can be terminated into the respective terminals marked L
• and N on the wall mounting base. (See Figure 3a).
• The Wall Mounting Base must be secured with all four screw fixing points.
• Securely fix the Wall Mounting Base to the wall surface with the screws and wall plugs
• supplied. (See Figure3b).
• The Wall Mounting Base can be used with or without a flush box (Cat144) in the wall cavity.
When using a flush box it should be located directly behind the Wall Mounting Base
connector block.
• Fit the heater to the wall mounting base by ensuring the 4 hooks on the wall mounting base
have engaged with the mounting apertures of the heater. Slide the heater down to lock it
into place. The electrical connection is automatically made during this step.
• The heater must be locked in place on the Wall Mounting Base for safe operation.
• To check the heater is fully locked to the mounting base, attempt to gently slide the heater
upwards. It should be securely held in position.
• To remove the heater from the Wall Mounting Base insert a blade screwdriver into the hole
located below the middle of the outlet grille. Rotate the screwdriver until the clip releases.
Then while holding the heater, gently push up with the screwdriver sliding the heater off
the Wall Mounting Base. (See Figure 2.)
• Please refer to your user manual for operating instructions, further information or trouble
shooting before you call the Customer Service number listed within the user manual.
Loading ...
Loading ...
Loading ...