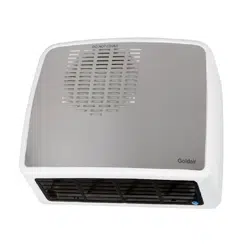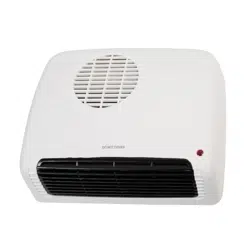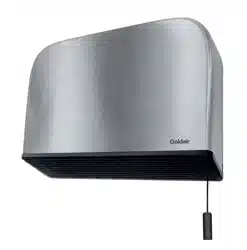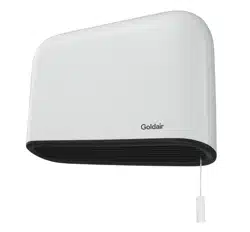
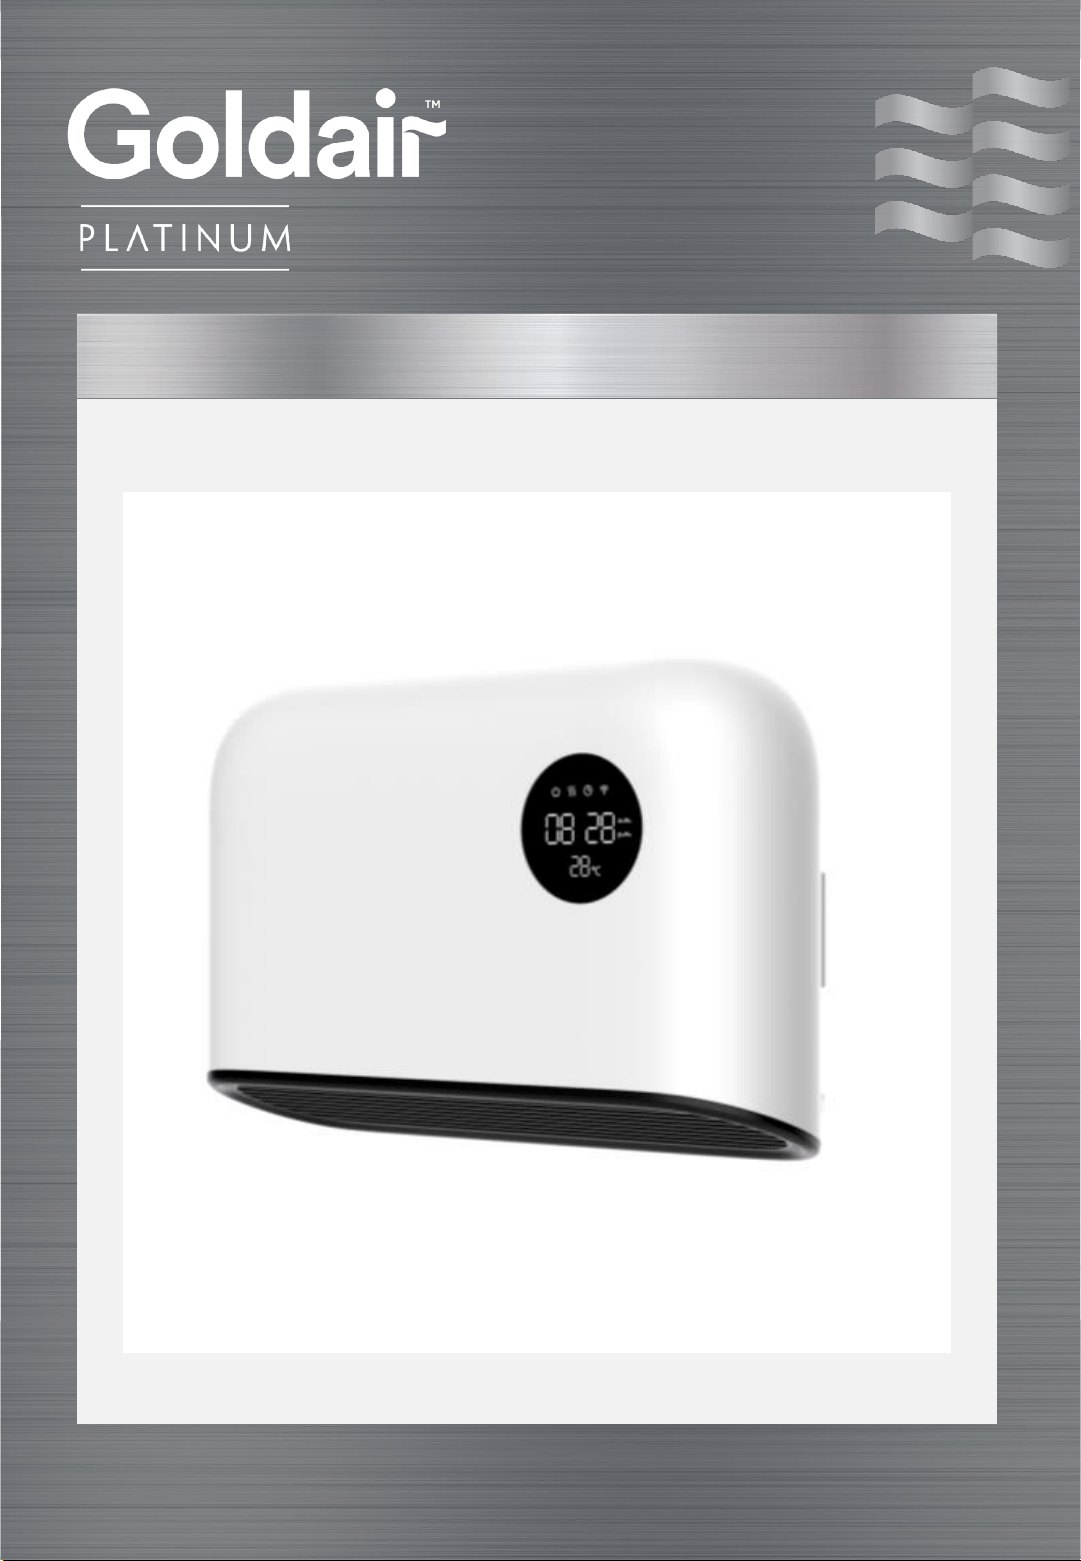
Ceramic Bathroom Heater with WiFi
Operating Instructions
For Model: GBH500

CAUTION: In order to avoid a hazard due to inadvertent resetting of the
thermal safety device, this appliance must not be supplied through an external
switching device, such as a timer, or connected to a circuit that is regularly
switched on and off by the utility.
• This appliance is not intended for use by persons (including children) with
reduced physical, sensory or mental capabilities or lack of experience and
knowledge, unless they are supervised or have been given instruction
concerning the use of the appliance by a person responsible for their safety.
• Children should be supervised to ensure that they do not play with the
appliance.
WARNING: You must not cover this appliance. Covering this appliance presents
fire risk and will activate the safety device; permanently disabling the unit.
WARNING: Do not use this appliance in small rooms when they are occupied by
persons not capable of leaving the room on their own, unless constant
supervision is provided.
WARNING: To reduce the risk of fire, keep textiles, curtains, or any flammable
material a minimum distance of 1 metre from the air outlet.
• Your Goldair Bathroom Fan Heater Wall Mount must be installed with:
• At least 1.85m clearance from the floor.
• At least 210mm clearance from the ceiling.
• At least 300mm clearance on the sides.
• At least 700mm clearance from the bottom of the heater to any
obstructions, such as other appliances, shelves and pictures.
• At least 1.0m clearance from air outlet from any flammable material
including textiles, curtains and soft furnishings.
• The heater must be locked in place on the Wall Mounting Base before use
for safe operation.
• Do not place appliance close to radiant heat source.
General Care and Safety Guide
YOUR SAFETY IS IMPORTANT TO US. PLEASE ENSURE YOU TAKE NOTE OF THE
INSTRUCTIONS AND WARNINGS OUTLINED IN THIS MANUAL.

• Never cover this heater or restrict its airflow with a towel or any other item.
Covering or restricting the airflow of the heater will cause activation of the
thermal safety device. Do not use appliance to dry clothes.
• PLEASE NOTE: The most common cause of overheating is incorrect
installation and/or deposits of dust or fluff in the appliance. Ensure the
heater is installed correctly and/or these deposits are removed regularly
by removing the heater from the quick release wall mount and vacuum
cleaning the air vents and grills.
• This appliance is intended for household use only and not for commercial or
industrial use.
• Use this appliance only as described in this manual. Any other use is not
recommended by the manufacturer and may cause fire, electric shock or
injury.
• Do not use the appliance if it has been dropped or damaged.
• When the appliance has been unpacked, check it for transport damage and
ensure all parts have been delivered. If parts are missing or the appliance has
been damaged, contact the Customer Services Team.
• Do not use if there are visible signs of damage to the appliance.
• Ensure hands are dry before handling the plug or main unit.
• Do not operate this appliance with a damaged cord, plug or after the
appliance malfunctions or has been dropped or damaged in any manner.
Take to a qualified electrical person for examination, electrical service or
repair.
• Do not insert or allow foreign objects to enter any ventilation or exhaust
opening, as this may cause an electric shock, fire or damage to the
appliance.
• Do not immerse in liquid or allow liquid to run into the interior of the
appliance, as this could create an electric shock hazard.
• Do not operate in areas where petrol, paint or other flammable liquids are
used or stored.
• If your appliance does not work, or is not working properly, contact the place
of purchase or the Customer Services Team.
General Care and Safety Guide (continued)
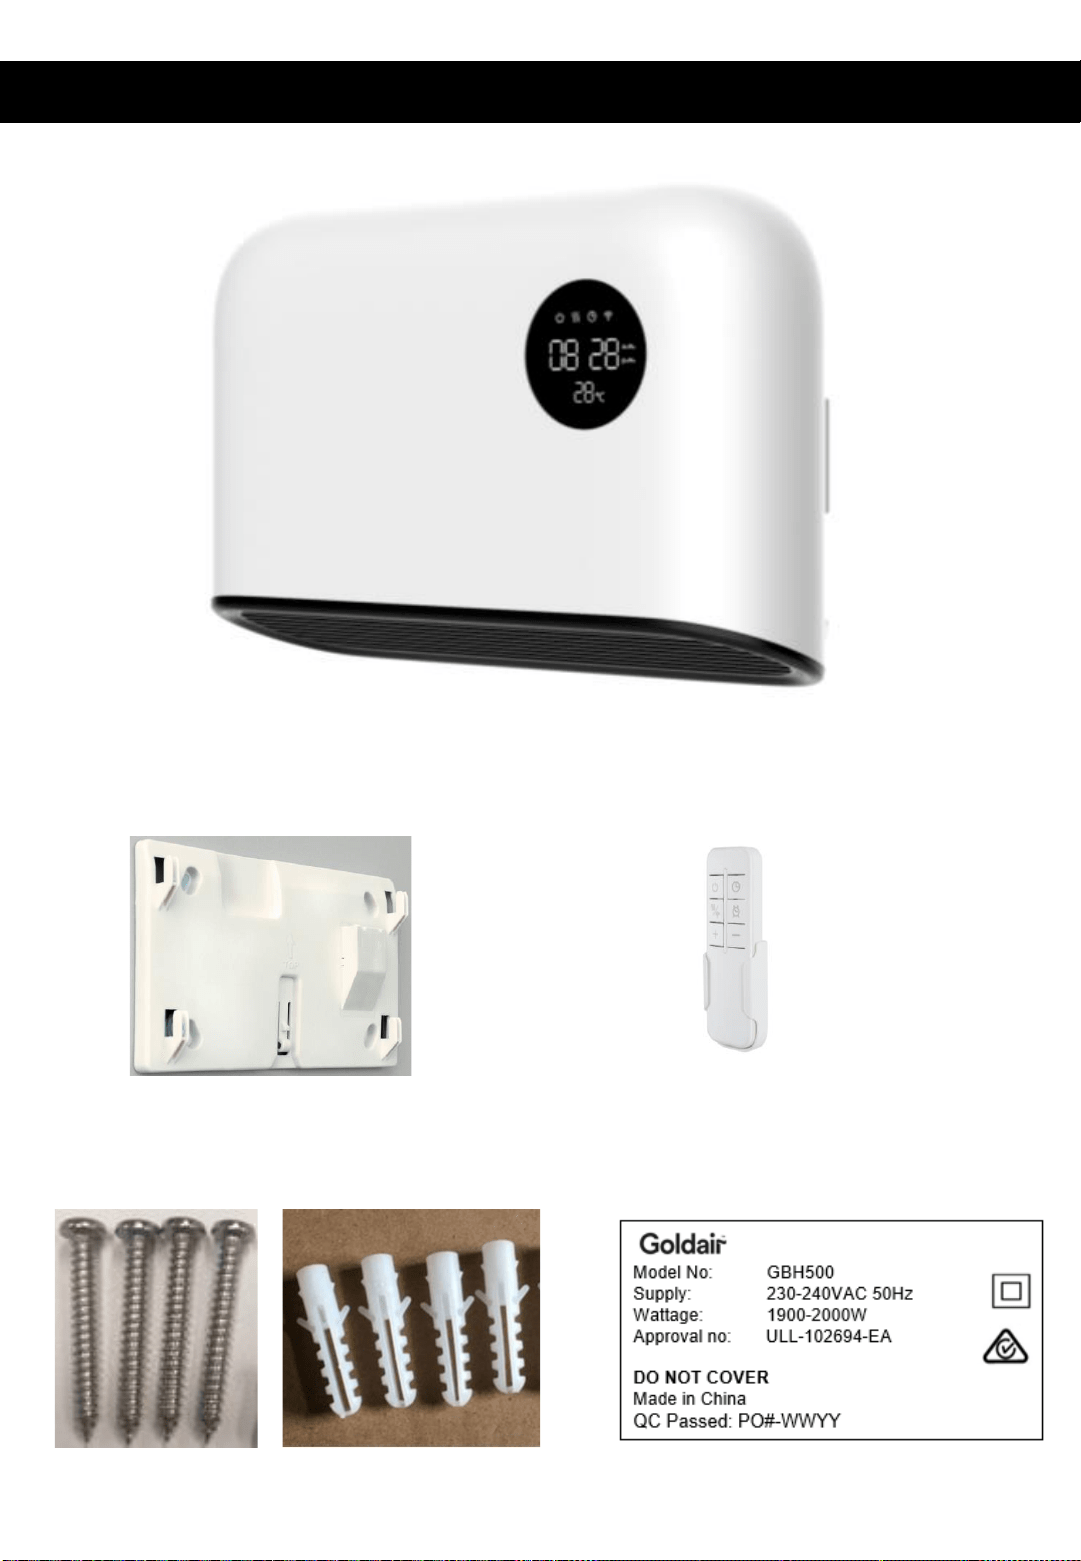
Components
Wall Mounting Plate x 1
Screw Pack:
Screw x 4
Wall Plug x 4
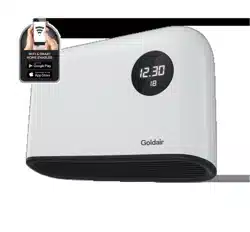
Main Unit x 1 – GBH500
Remote x 1

Instructions
Please read these instructions and User Manual carefully.
Always choose a safe location for the heater, keeping in mind the safety precautions
outlined. Ensure all packaging has been removed from the unit before use. Do not dispose
of packaging until completely satisfied with your purchase.
THE HEATER MUST BE LOCKED IN PLACE ON THE WALL MOUNTING BASE BEFORE IT CAN BE
SAFELY OPERATED.
Bathroom fan heaters are only to be mounted on heat resistant walls that comply with
current AS/NZS specifications & building regulations. Use only the voltage specified on the
rating label of the appliance.
• It is illegal for persons other than those authorised by legislation to work on the fixed
wiring of any electrical installation.
• All installations must be in accordance with the local Electrical Wiring Regulations and
Wiring Rules.
• Means for disconnection must be incorporated in the fixed wiring in accordance with the
wiring rules
CAUTION: Do not mount directly under or above an electrical power socket. It is
recommended to install the heater to the side of any power socket
CAUTION: The appliance is to be installed so that switches and other controls cannot be
touched by a person in the bath or shower.
NOTE: Your Goldair Bathroom Fan Heater Wall Mount must be installed with:
• At least 1.85m clearance from the floor.
• At least 210mm clearance from the ceiling.
• At least 300mm clearance on the sides.
• At least 700mm clearance from the bottom of the heater to any obstructions,
such as other appliances, shelves and pictures.
• At least 1.0m clearance from air outlet from any flammable material including
textiles, curtains and soft furnishings.
CAUTION: Ensure your unit is at least 700mm above any wall mounted object – this
includes window frames and doors – they may only protrude a small amount, but this can
reflect sufficient heat to cause safety devices to activate.
NEVER install unit in a position where an open door can abut up to the front of the unit, as
it will heat up too quickly and activate the safety devices.
See installation instructions on next page.
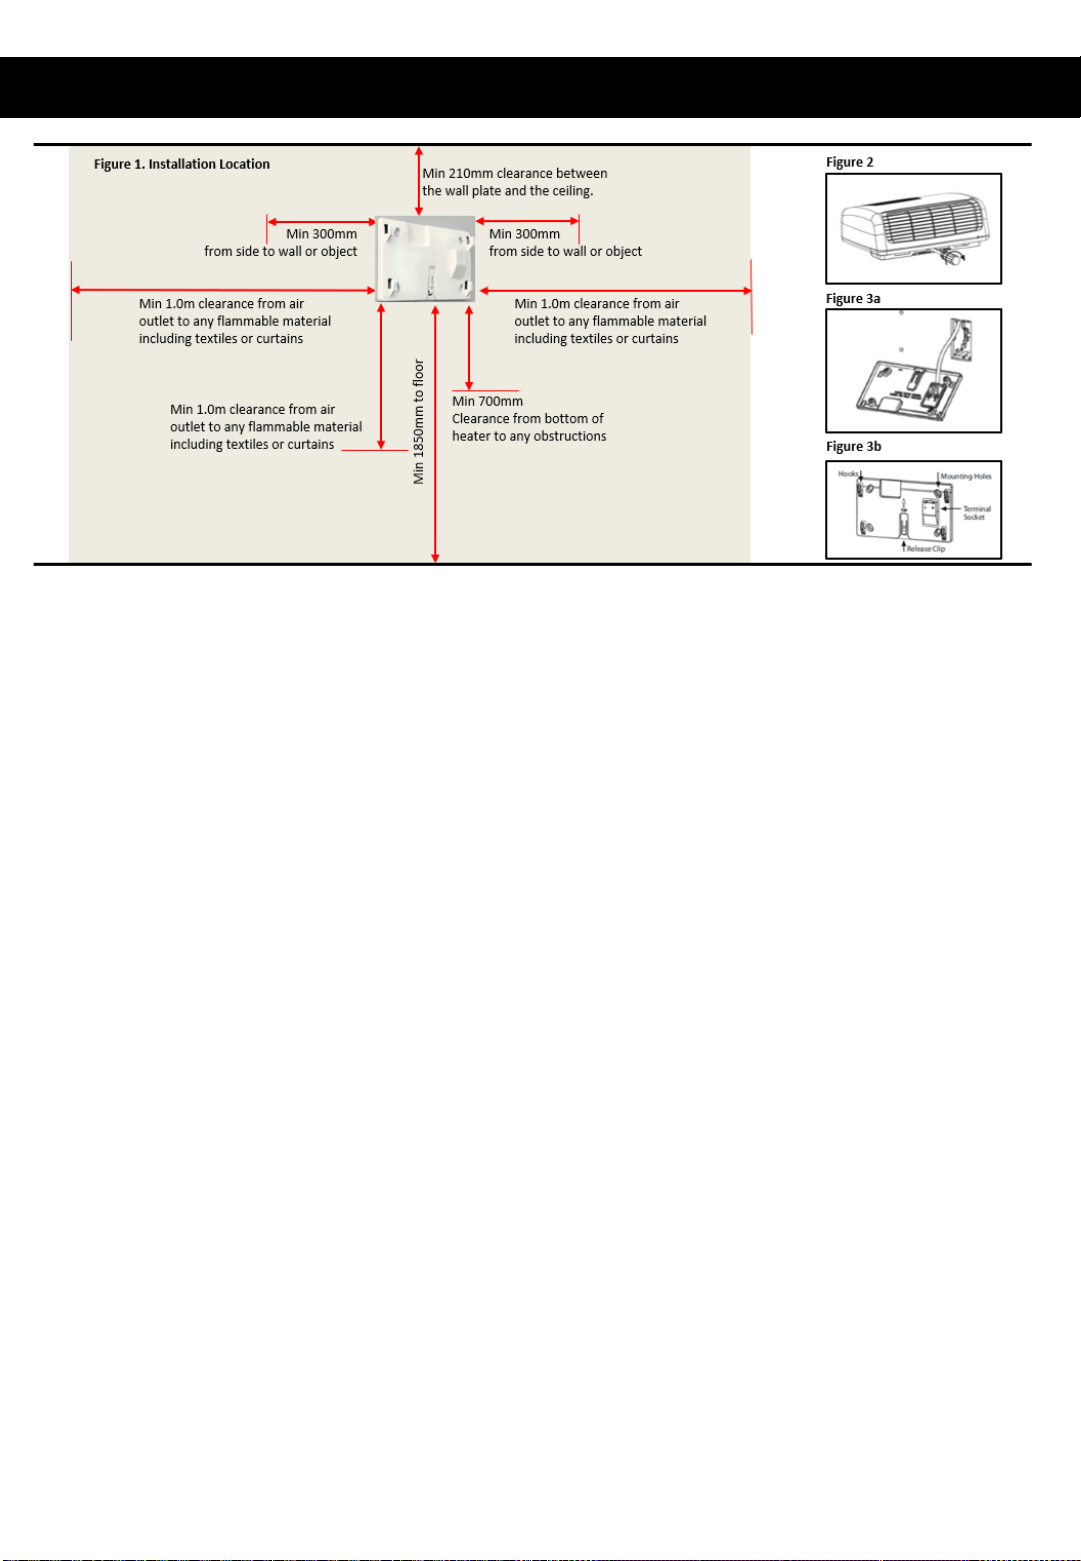
Installing your Appliance
• Select a location for mounting of the heater in accordance with the installation instructions
• The heater must be connected by permanent wiring within the wall cavity from an isolating
switch.
• Ingress Protection (IP): Bathrooms are divided into four zones based on the levels of
perceived risk within each area. The measurements are taken from the fixed plumbing
connection (water source) and each zone has specific requirements regarding the electrical
equipment that can be used within it. Goldair Bathroom heaters are rated IPX0 so must be
installed in Zone 3.
• The Wall Mounting Base should be positioned as shown in Figure 1.
• The wiring within the wall cavity can be terminated into the respective terminals marked L
• and N on the wall mounting base. (See Figure 3a).
• The Wall Mounting Base must be secured with all four screw fixing points.
• Securely fix the Wall Mounting Base to the wall surface with the screws and wall plugs
• supplied. (See Figure3b).
• The Wall Mounting Base can be used with or without a flush box (Cat144) in the wall cavity.
When using a flush box it should be located directly behind the Wall Mounting Base
connector block.
• Fit the heater to the wall mounting base by ensuring the 4 hooks on the wall mounting base
have engaged with the mounting apertures of the heater. Slide the heater down to lock it
into place. The electrical connection is automatically made during this step.
• The heater must be locked in place on the Wall Mounting Base for safe operation.
• To check the heater is fully locked to the mounting base, attempt to gently slide the heater
upwards. It should be securely held in position.
• To remove the heater from the Wall Mounting Base insert a blade screwdriver into the hole
located below the middle of the outlet grille. Rotate the screwdriver until the clip releases.
Then while holding the heater, gently push up with the screwdriver sliding the heater off
the Wall Mounting Base. (See Figure 2.)
• Please refer to your user manual for operating instructions, further information or trouble
shooting before you call the Customer Service number listed within the user manual.

Operating Your Heater
WARNING: In order to avoid overheating or fire, DO NOT COVER the heater.
WARNING: Do not use this heater with a programmer, separate timer, remote-control
system or any other device that switches the heater on automatically, as a fire risk exists if
the heater is covered or positioned incorrectly.
WARNING:Never leave this heater unattended when in use.
NOTE: When the appliance is turned on for the first time, it may release a slight odour or
smoke. This odour or smoke is a normal occurrence caused by the initial heating of the
internal heating elements and should not occur again.
IMPORTANT NOTE:
Goldair bathroom heaters have 3 operating modes:
Heat Control – Hot Air – 2000W
Ensure the heater has power available by turning it on at the isolating switch. Pull the pull-
cord to start the heater. The neon indicator light will illuminate indicating the heater is in
operation. Pull the pull-cord again to turn the heater off.
Automatic Step-down Heat – Warm Air – 1000W
When the room reaches a pre-set temperature, the heater will automatically step-down and
reduce the heat output to save power. If the room cools down, the heater will automatically
step-up and increase the heat output.
Cool Down – Cold Air
The heater will run for 30 seconds when turned off to allow ceramic heating plate to cool
down. It will automatically switch off after this time.
Overheat Protection – Cold Air
The heater will turn itself off in the event of over heating. The most common cause of over
heating is incorrect installation and/or deposits of dust or fluff entering the appliance. Ensure
the heater is installed correctly and/or these deposits are removed regularly by cleaning the
inlet and outlet grills. The heater will automatically re-set when it has cooled down.
If the heater is blowing cold air, power it off and leave it for 1-2
hrs to allow the safety devices to cool down and reset. Then
reactivate your heater and if;
A) it blows warm or hot air, continue to use the heater.
B) it still blows cold air, then the permanent disabling element
safety device has activated. You will need to reach out to CDB
customer services team with imagery of your installation and we
will be in touch with further instructions. Scan the QR-Code to be
directed to our contact us website page.
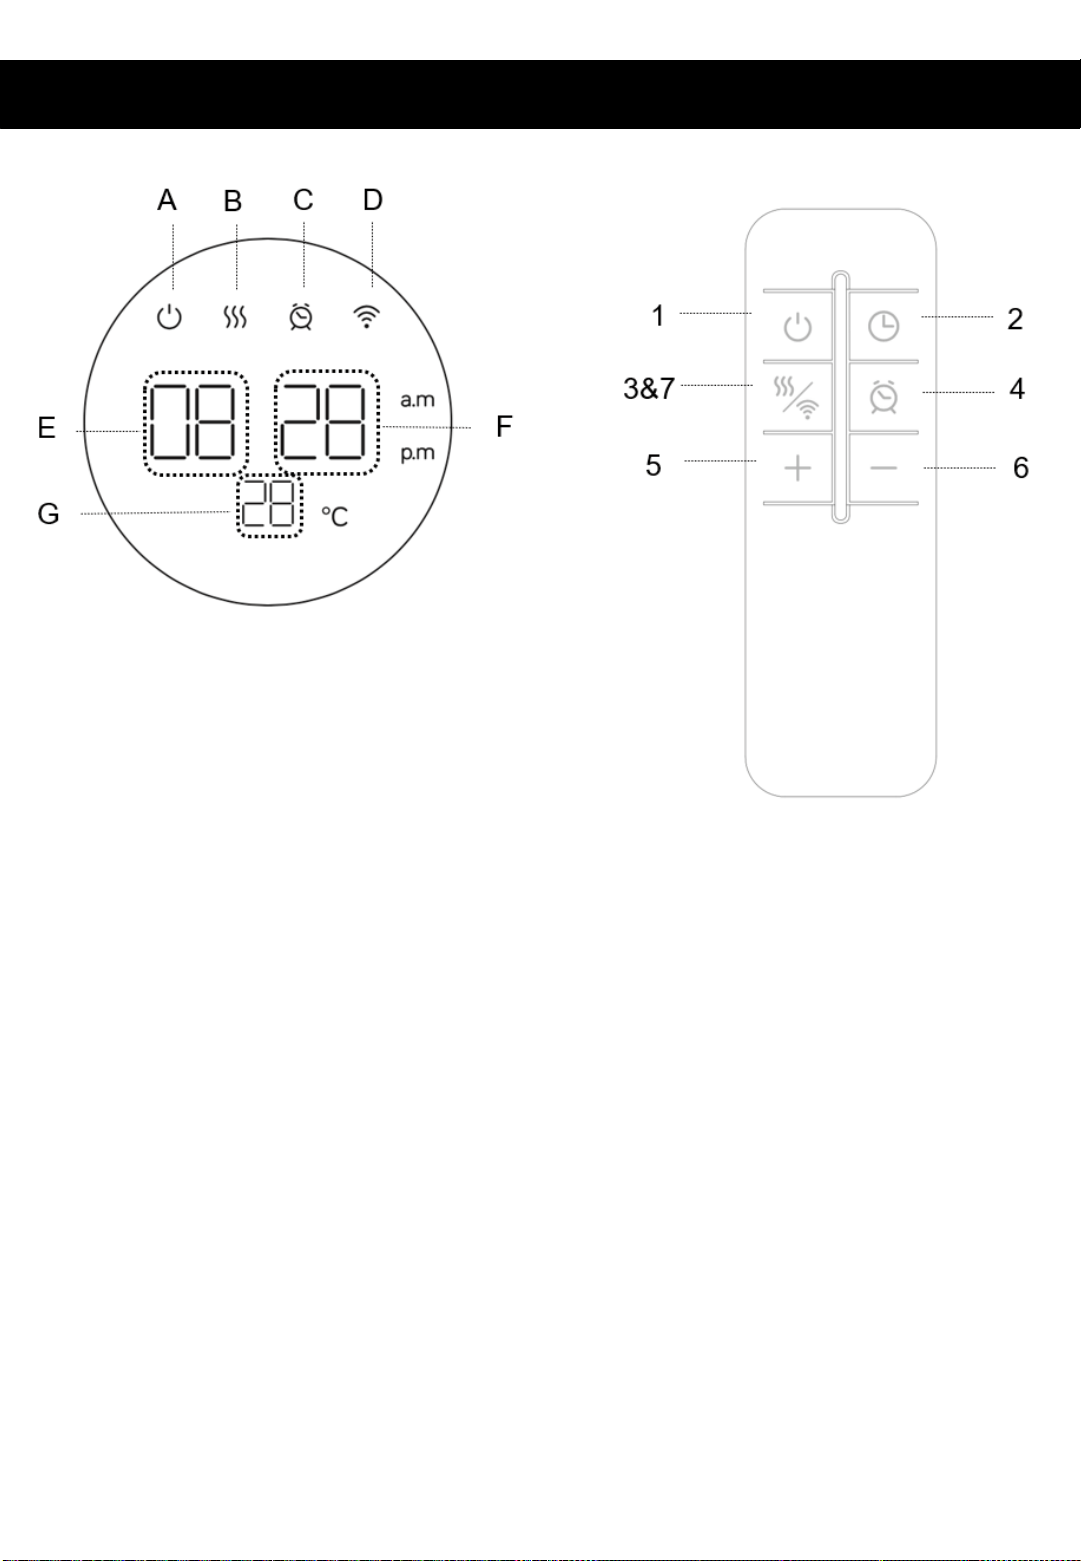
Control Panel and Remote Control
CONTROL PANEL
A. Stand-by indicator
B. Heating indicator (50%)
C. Clock indicator
D. WiFi indicator
E. Hour, timer, power display
F. Minute, timer, display
G. Room temperature display
REMOTE CONTROL
1. Stand-by
2. Clock setting
3. Heating setting
4. Timer off/on
5. Increase
6. Decrease
7. WiFi connection
How to use
The heater will start with a beep sound when power has been supplied. The indicator light
is on, and the heater is in stand-by mode.
Press on remote control to turn on the heater.
To stop the heater working, press to turn off the heater. The heater will continue
operate for 30 seconds in order to cool down the device.
Note: All operations can only be done by remote control.
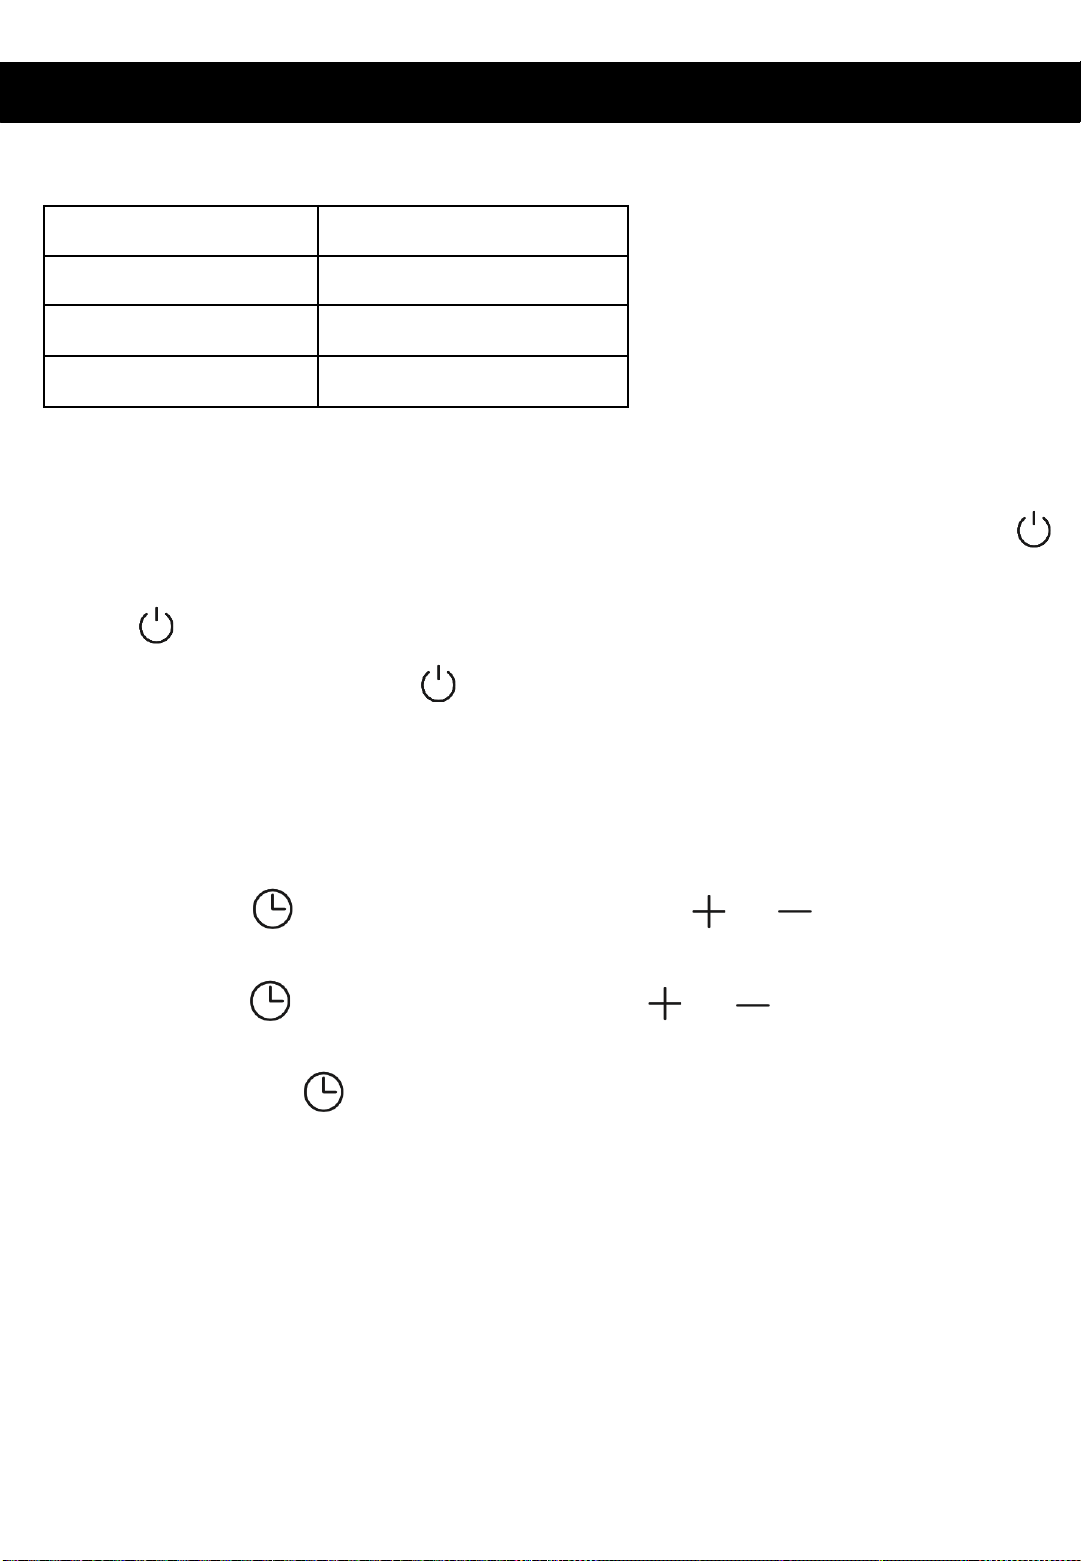
Operating Instructions
Specification
Voltage AC230-240V
Frequency 50Hz
Power 1900-2000W
Battery Model 2 x AAA Battery (Remote)
Clock Setting
Press clock button one time, the area E will blink, press or to set the hours
from 0-23.
Press clock button again, the area F will blink, press or to set the minutes
from 0-59.
Long press clock button to change between am/pm mode and 24H mode.
Note:
Once the clock is set, it will display even when the heater does not work. The default
mode of display is 24H.
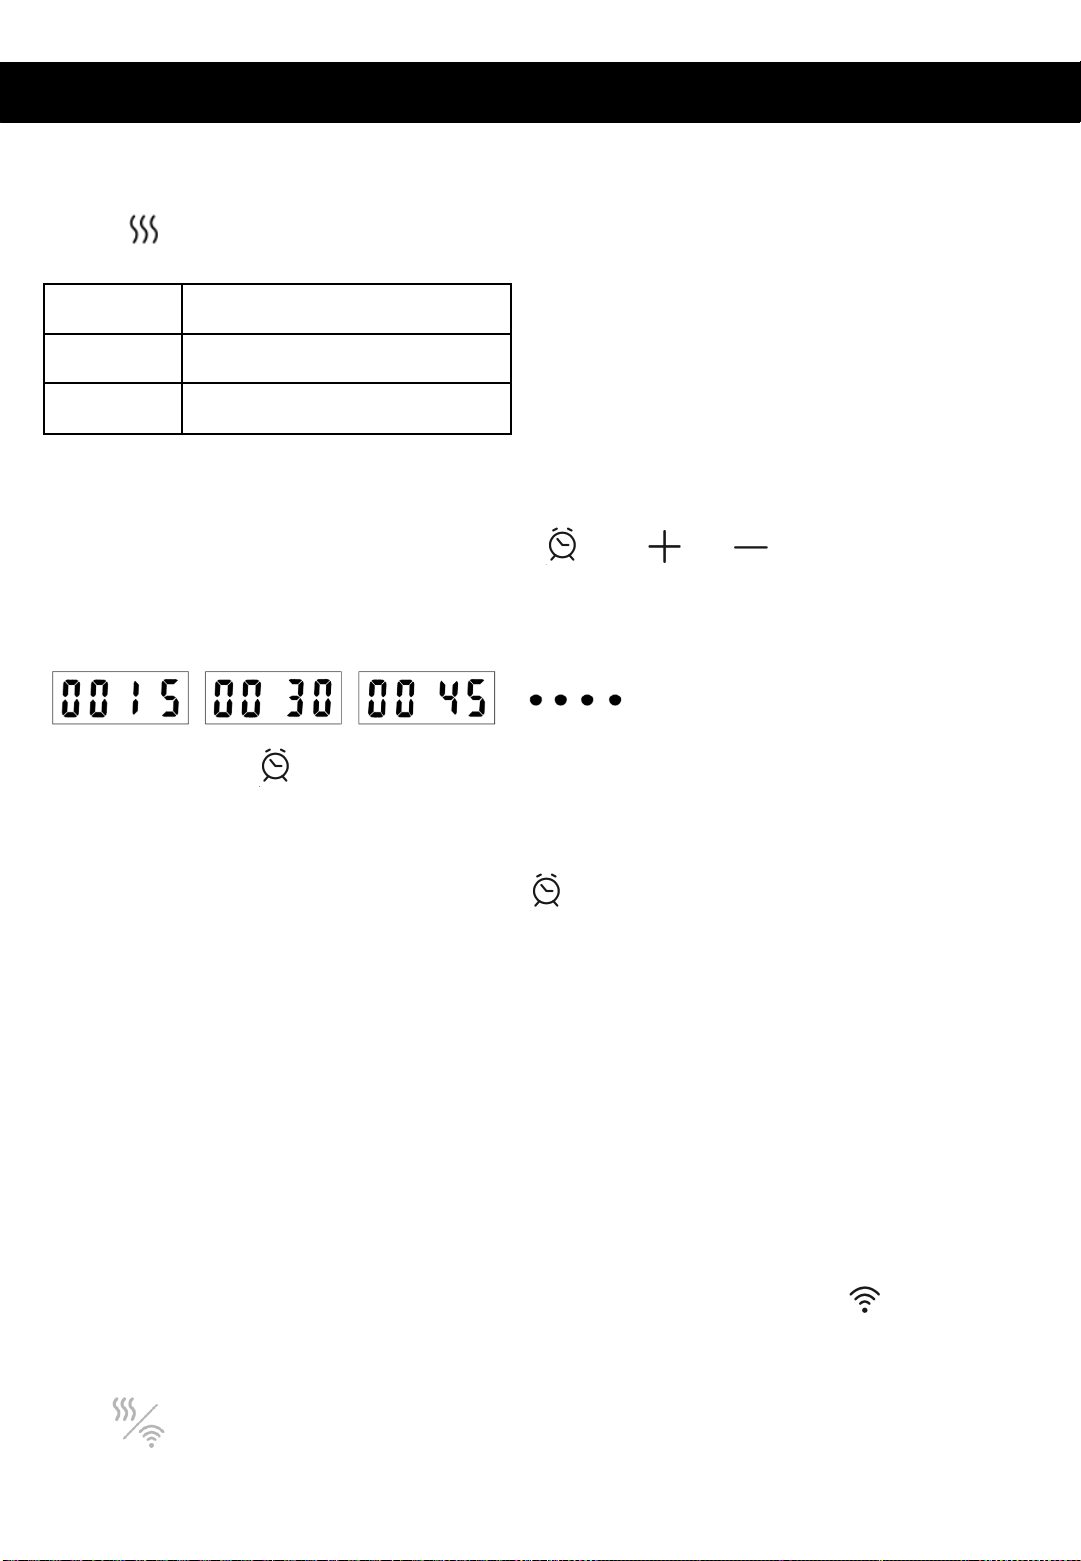
Operating Instructions (continued)
Power Setting
Press to set the power. The Hour area will show H1 and H2.
Mode Power
H1 1000W
H2 1900-2000W
Timer off/on function
To access this function, press the timer button , use or to set the timer from
15 mins, 30 mins, 45 mins, 1 hour……3 hours. The timer will show
Press timer button again to confirm the timer.
When the heater is in standby mode, operate as above to use the timer on function.
When the time is set, press the timer button again to check the rest time.
Set to 0000 to turn timer off.
Ambient Temperature
The display will always show ambient temperature the room temperature area. Please note,
as the thermostat is inside the heater, the temperature may display as higher than the
ambient (room) temperature. For a more accurate reading, you can put another thermostat
within the room.
Wi-Fi Function
The heater will automatically enter the WiFi connection mode, and indicator will blink
quickly. The WiFi device will be in sleep mode if there is no connection within 30 minutes in
order to save energy.
Press for more than 3 seconds to reset the connection.
Open the One Smart Home APP and follow instructions to connect.

WiFi – Downloading and setting up APP
This APP is supported only on 2.4GHz Wi-Fi channels.
The Goldair app and device pairing process require your 2.4ghz connection to
be separated from your 5ghz connection. For instructions on how to do this
please contact your internet provider.
• Tap REGISTER near the bottom of the screen.
• Read and agree to the Privacy Policy.
• Add your email address.
• Tap 'Obtain verification code'
You will then receive an email with a verification
code.
Download Goldair mobile APP
• Open the APP Store or Google Play on your mobile phone.
• Open 'Search' and enter 'Goldair'
• Click 'GET' and begin to download and install.
Once downloaded to your phone open the APP
• Enter the verification code from your email.
• Create a password.
• Then tap confirm.
If you haven't received a verification code via
email, tap the resend button and when the
verification code is received follow above steps.
Your APP is now registered and ready for pairing
to your device.

Pairing APP to Device
Connect with 2.4ghz Wifi Network
On the Home screen,
tap ‘Add Device’ or the
‘+’ icon.
Using the categories on
the left, navigate to your
device and tap on the
image.
Confirm you are connected to
a 2.4ghz network. If your
2.4ghz and 5ghz networks are
dual banded, click ‘Common
router setting method’ on
how to split, or contact your
internet provider.
Your device will now pair with
the app.
Please ensure your device, modem
and phone are as close together as
possible and that your 2.4ghz Wifi
signal is strong.
Once the device has paired, rename
it by tapping the Pen icon
Choose the most suitable room type
and click ‘Done’ in the top right hand
corner.
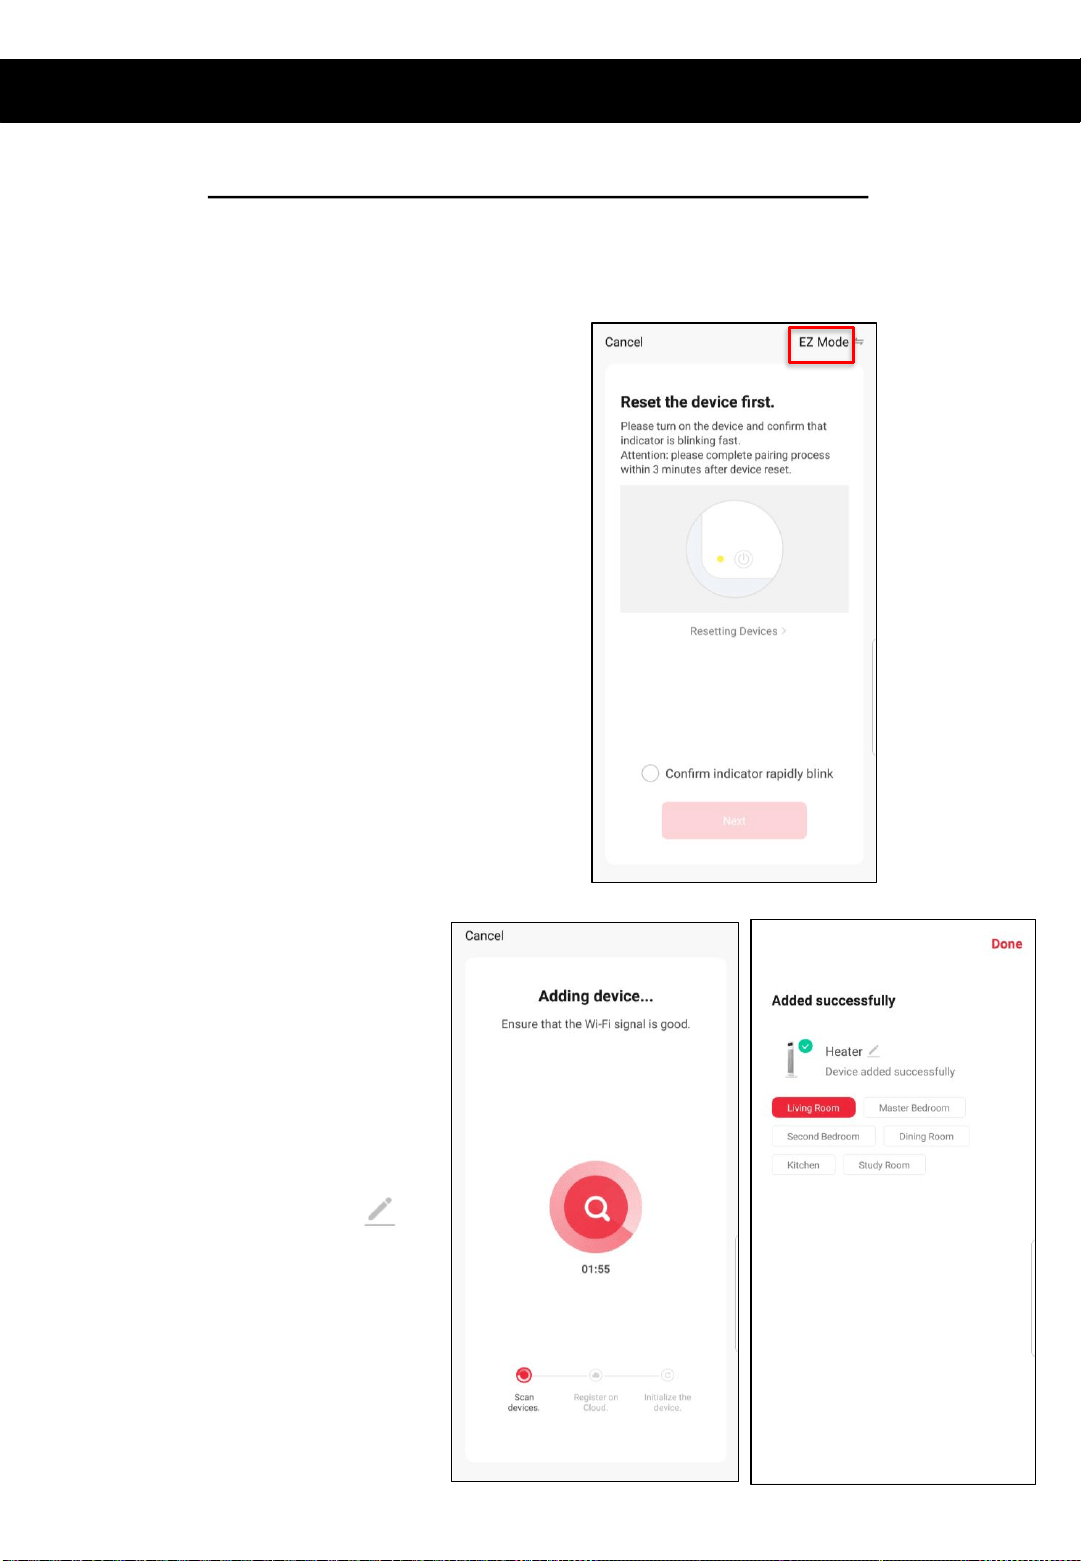
Pairing APP to Device (continued)
Connect with 2.4ghz Wifi Network: EZ Mode
The app will default to EZ Mode in
the top right hand corner.
Ensure your device’s Wifi LED is
flashing rapidly.
If it is not, hold down the ‘WiFi
Connection’ button for 5 seconds or
until the WiFi icon begins to flash.
Click ‘Confirm indicator rapidly blink’
and ‘Next’
See instructions below to finalise your device pairing via EZ mode.
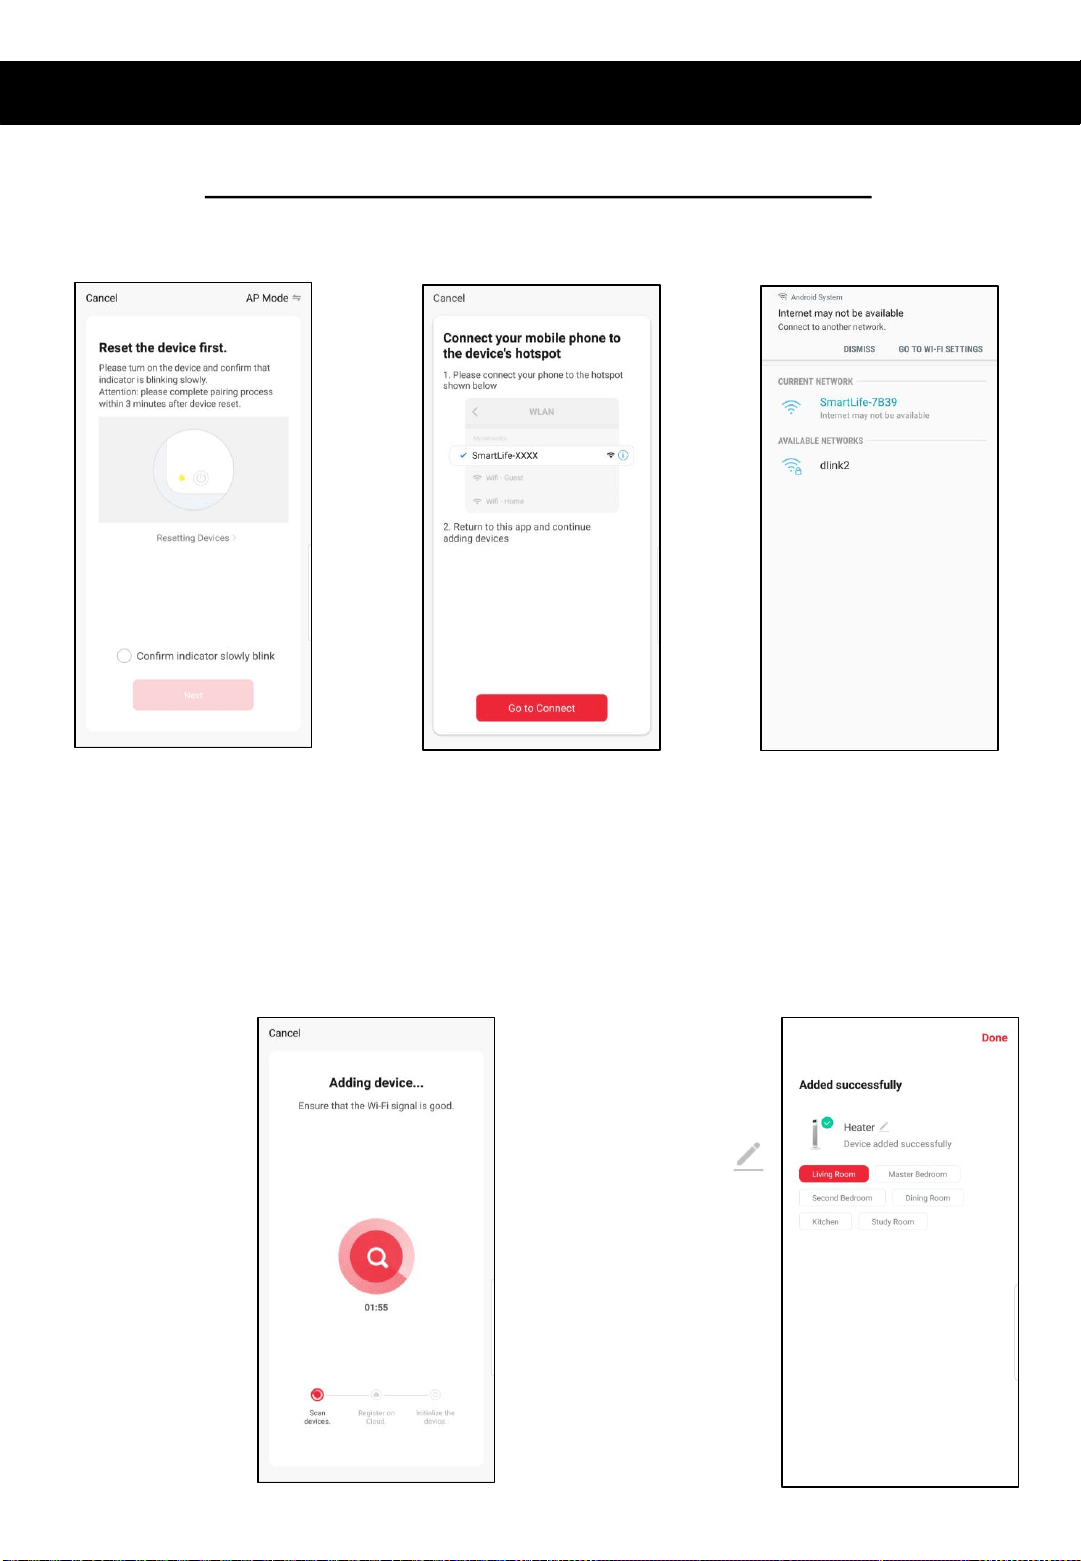
Pairing APP to Device (continued)
Change ‘EZ Mode’ to ‘AP Mode’ by
clicking in the top right-hand corner
Ensure your device’s WiFi LED is
flashing slowly.
If it is not, hold down the ‘WiFi
Connection’ button for 5 seconds or
until the Wifi icon begins to flash.
Click ‘Confirm indicator slowly blink’
and ‘Next’
Click ‘Go Connect’ to
connect to the device’s
Hotspot by selecting the
network highlighted on the
screen in your app, e.g.
‘SmartLife- XXXX’
Select the device’s Hotspot network
and you will be returned to the app.
If not, navigate back to the Goldair
app.
Note- if you get a notification saying
‘Internet may not be available’
press Dismiss.
Your device will now pair
with the app.
Please ensure your device,
modem and phone are as
close together as possible.
Connect with 2.4ghz Wifi Network: AP Mode
See instructions below to finalise your device pairing via AP Mode.
Once the device has paired,
choose to rename it by
tapping the Pen icon
Choose the most suitable
room type and click ‘Done’ in
the top right-hand corner.
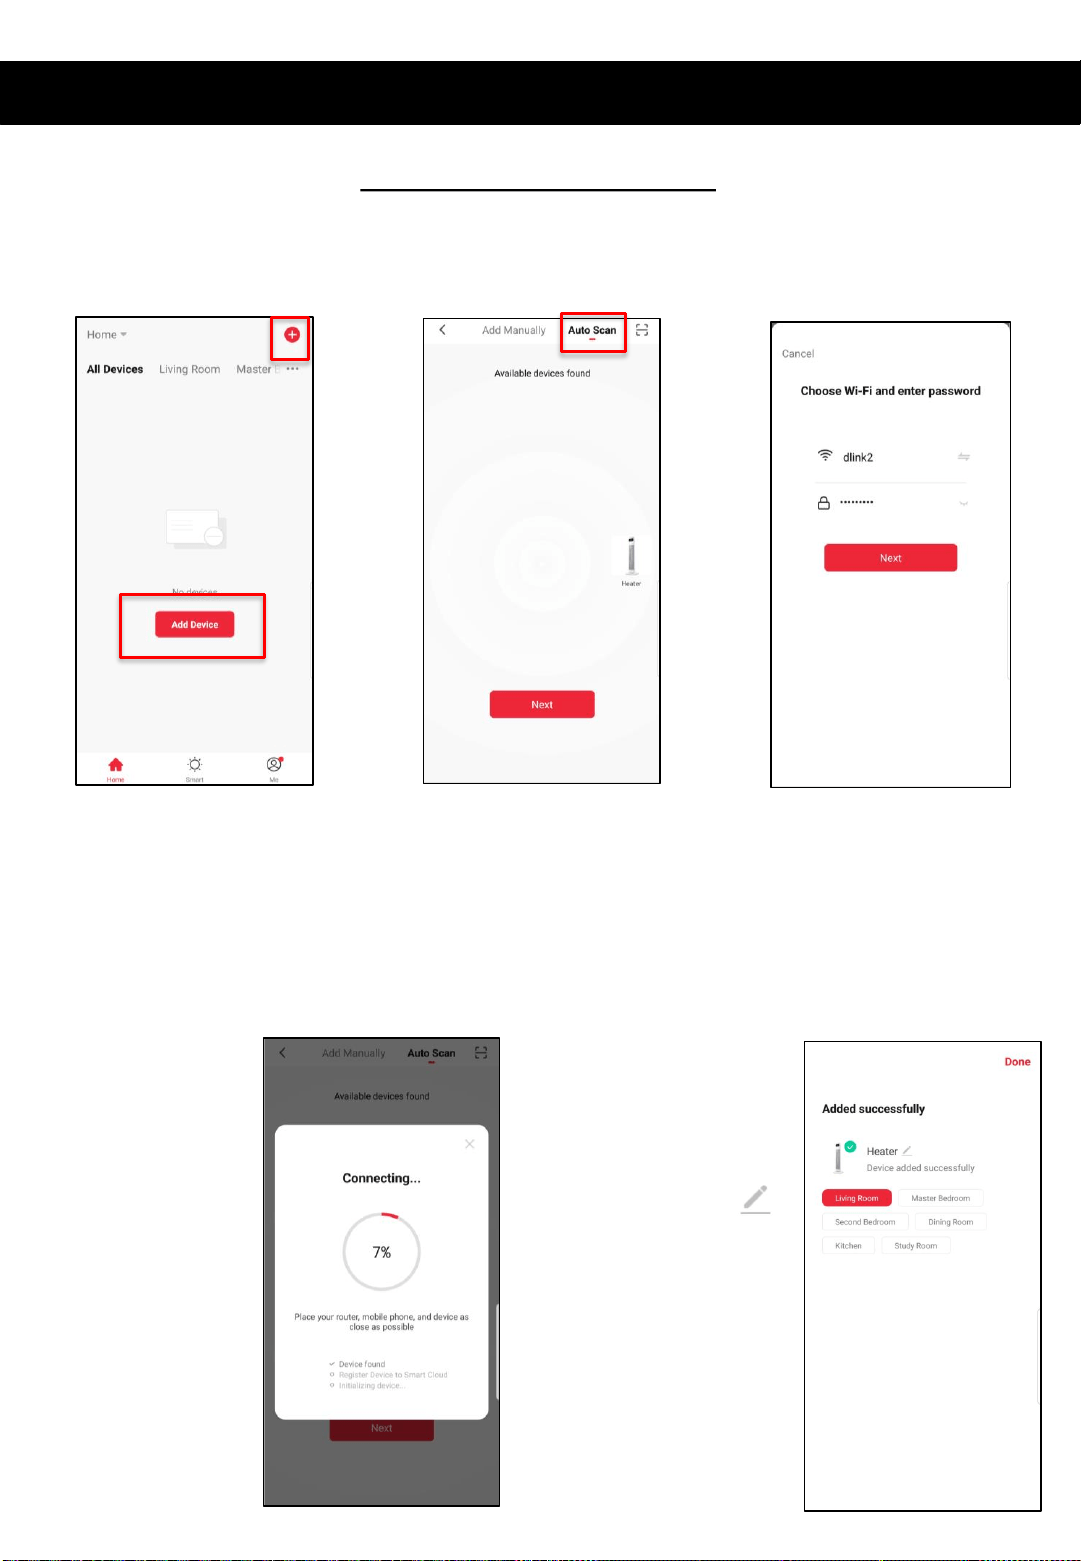
Pairing APP to Device (continued)
Connect with Bluetooth
On the Home screen, tap ‘Add
Device’ or the ‘+’ icon.
Ensure your device’s Wifi LED is
flashing rapidly.
If it is not, hold down the ‘WiFi
Connection’ button for 5 seconds
or until the Wifi icon begins to
flash.
On the top right, click ‘Auto Scan’
The app will now scan for
Bluetooth devices.
When your device appears, click
on the image.
As an alternative way of connecting your device, you can pair via Bluetooth. Please
ensure you have Bluetooth switched on on your mobile phone.
Choose your 2.4ghz Wifi
network and add in the
password. Click ‘Next’
Your device will now pair
with the app.
Please ensure your device,
modem and phone are as
close together as possible.
Once the device has paired,
choose to rename it by
tapping the Pen icon
Choose the most suitable
room type and click ‘Done’ in
the top right hand corner.
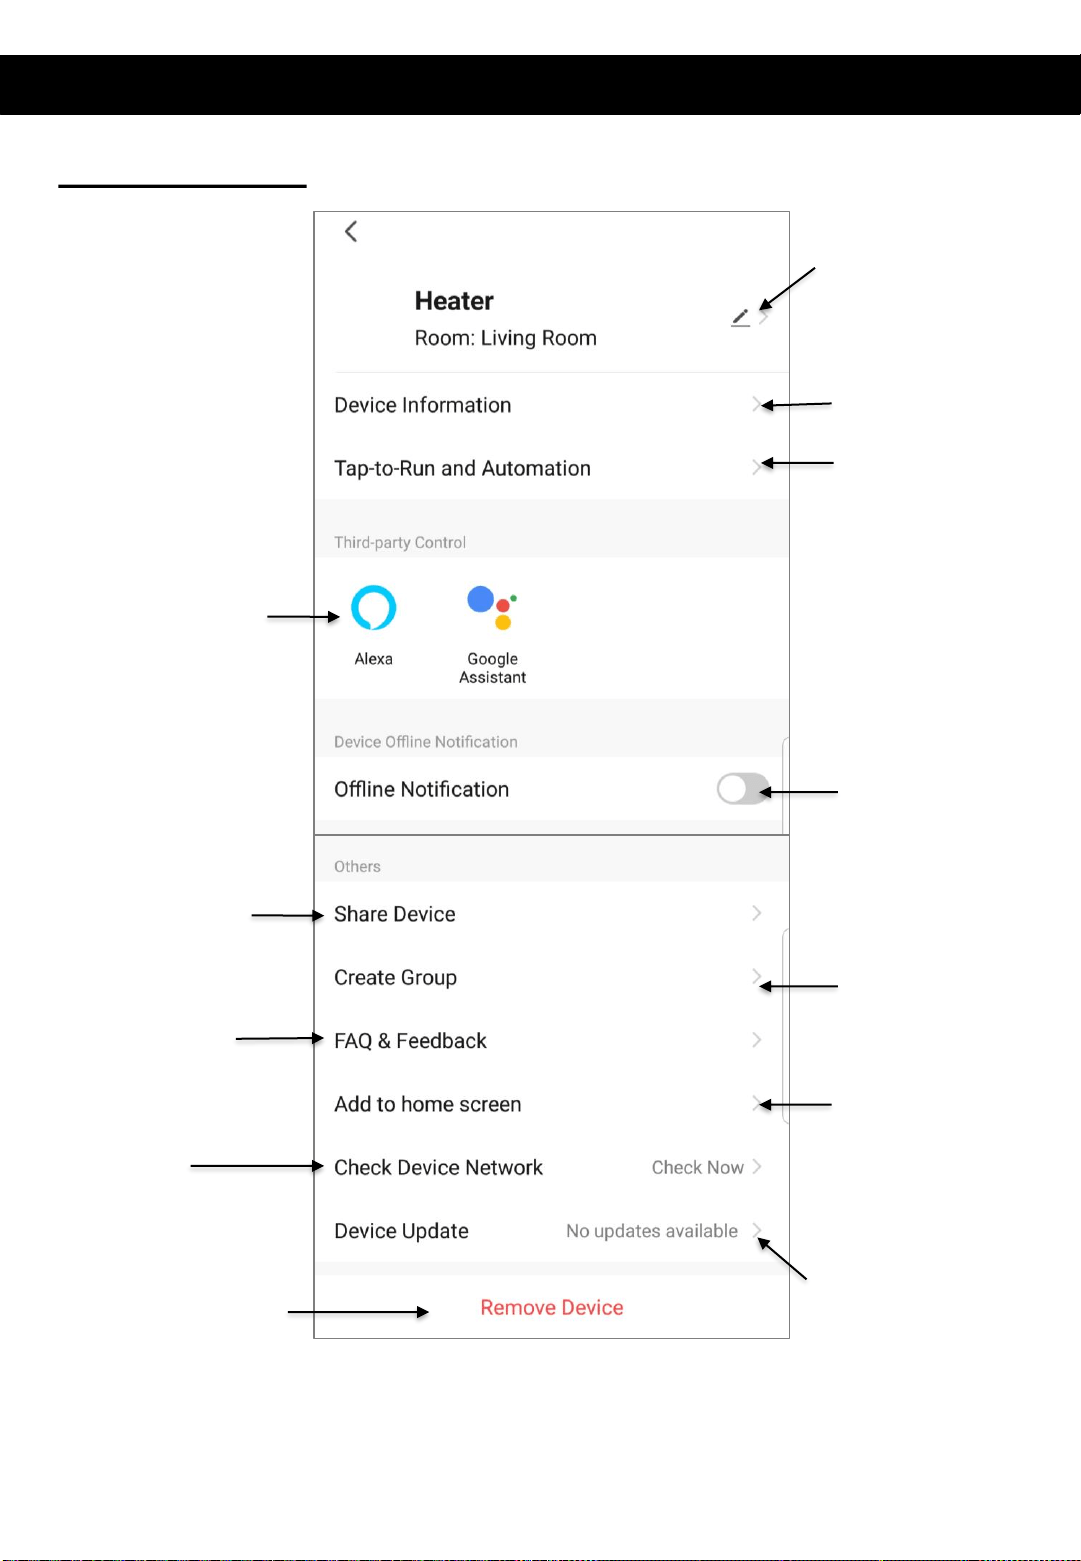
Operating your Device from the APP
View compatible Voice
Control devices &
instructions on setting up.
Change the name,
location & image of
your device
View your device
information
Device settings:
Turn on
notifications for
when device goes
Offline.
Share device with family
(see instructions on next
page)
Read FAQs & submit
feedback
Remove device from app
View your tap-to-
run and smart
scene automations
Create group of
devices (see
instructions on next
page)
Review device
network
Add device shortcut
to home screen
View device updates
& turn on automatic
updates
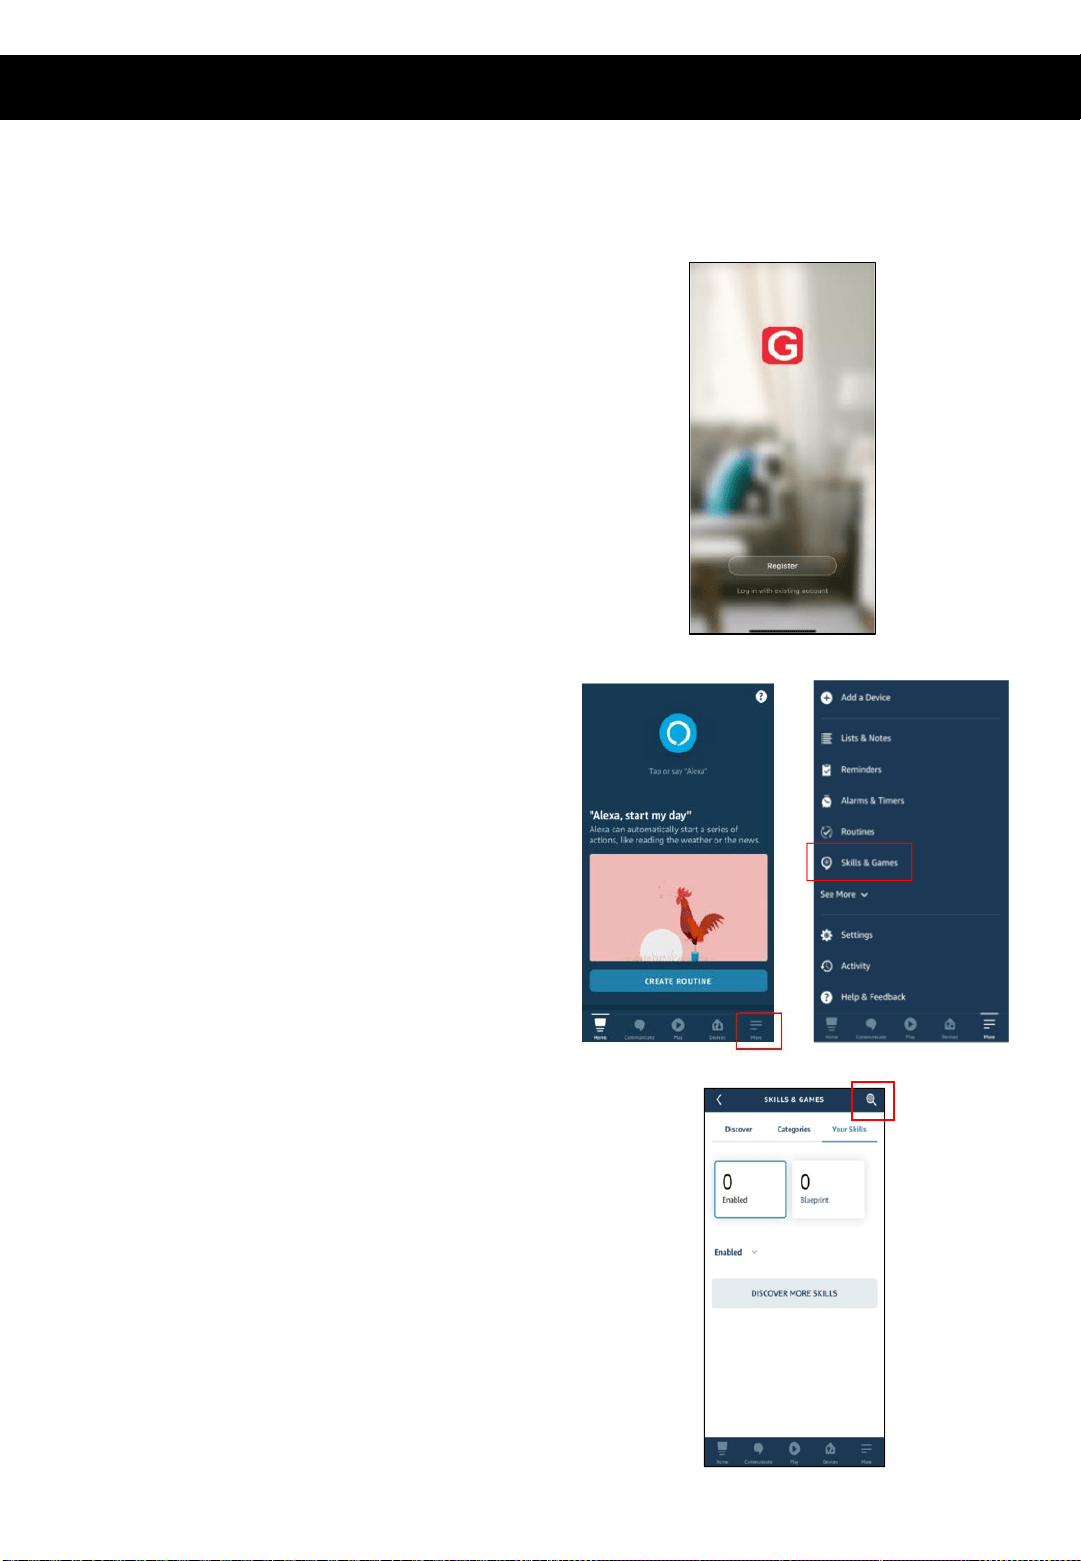
How to connect to your Alexa Devices
• Click on the search icon in the top right-hand
corner
• On the main page of the Alexa app, click
the ‘More’ icon in the bottom right-hand
side of the page. Click on ‘Skills and Games’
• Click on the search icon in the top right-
hand corner
• Download the Goldair App and pair your
device.
Note: change the name of the device to an easily
identifiable name such as ‘Bedroom Fan’ or
‘Living Room Heater’
Note: Ensure you have downloaded and have
configured the Amazon Alexa app. Please see
your Alexa device’s user manual for instructions.
Follow the below instructions to connect your device to Amazon Alexa.
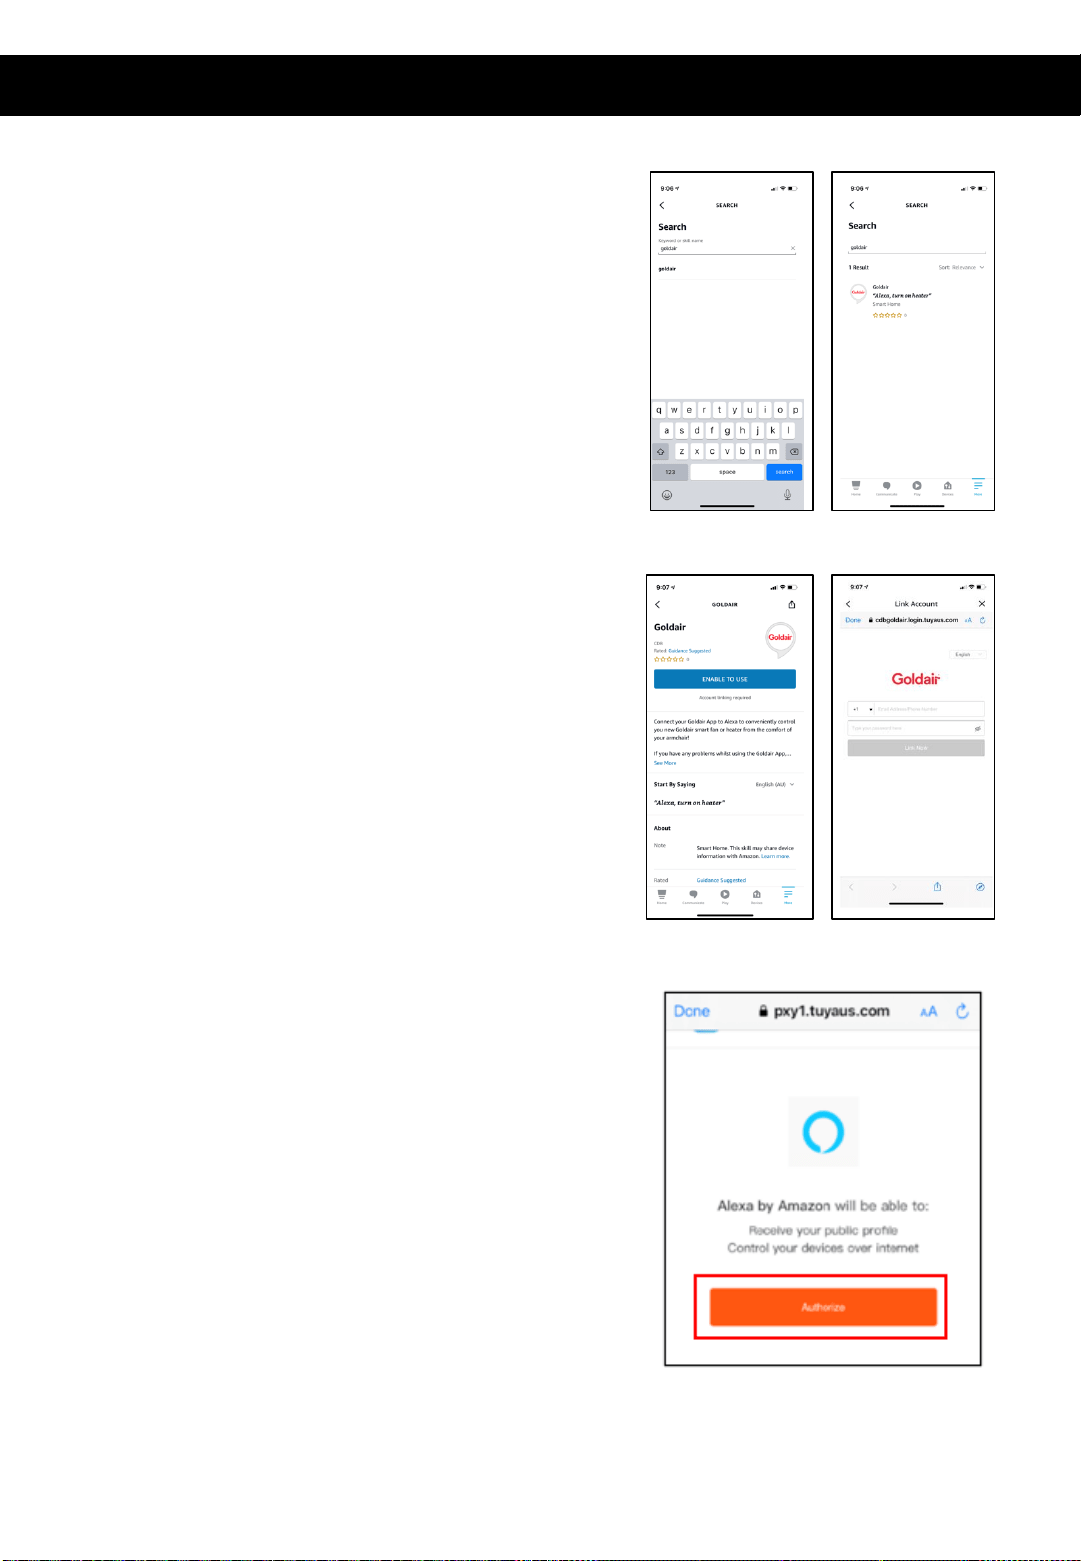
How to connect to your Alexa Devices (continued)
• Type ‘Goldair’ in the search bar and click to proceed.
• Click ‘Enable to use’ and type your phone number/
email address and password and click ‘Link Now’
• Click ‘Authorise’ and go back to the Home screen. Your
devices will now appear, and you can operate using
voice control.

How to connect to your Alexa Devices (continued)
SUGGESTED VOICE COMMANDS
Note: Amazon and Google are in control of voice control functionality and
terminology. Not all functions available via the controller or APP can be controlled
via voice command.
Voice control on your device will allow you to turn ON and OFF and adjust the settings.
Suggested voice commands to work with your Alexa device are:
Turning ON/OFF
Alexa, turn ON <Device Name>
Alexa, turn OFF <Device Name>
Adjust the heat settings
Alexa, set Heat to Low on <Device Name>
Alexa, set Heat to High on <Device Name>
Adjust the Countdown timer settings
Alexa, set countdown timer to cancel in 15 minutes/half an hour/45 minutes/1 hour/1 hour
and 15 minutes/1 and half hour/ 1 hour and 45 minutes /2 hours/2 hours and 15 minutes/2
and half hours/ 2 hours and 45 minutes/3 hours
Query Ambient Temperature
Alexa, what is the current temperature of <Device Name>
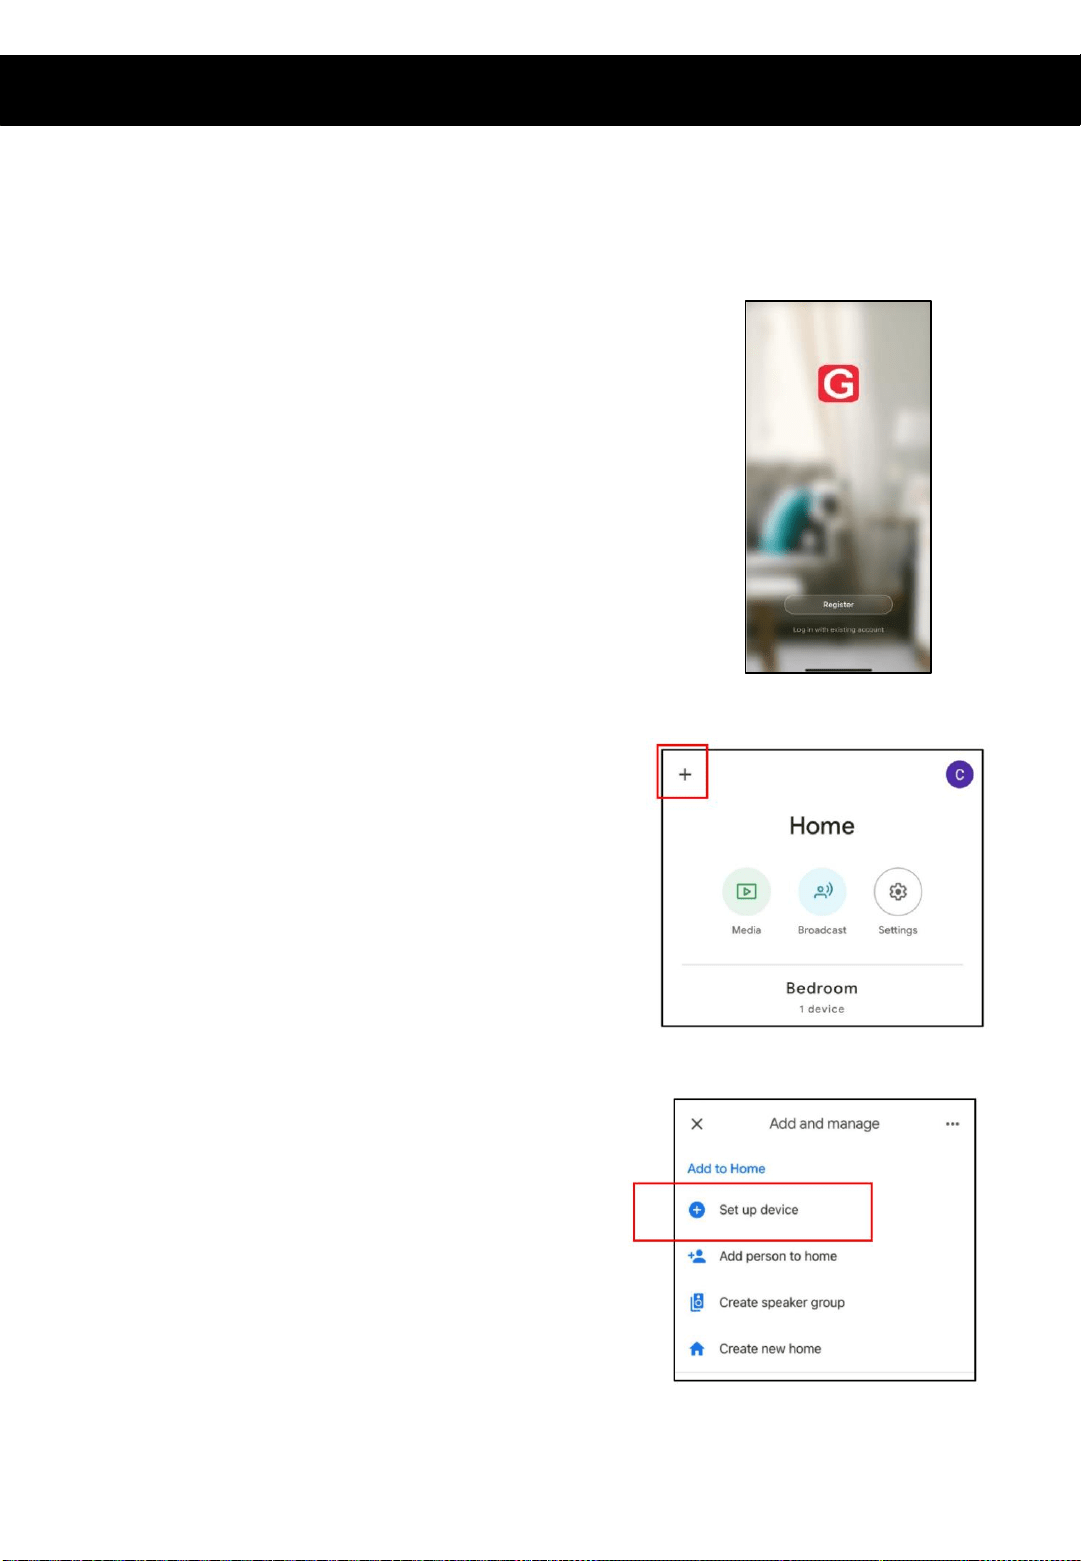
• Download the Goldair App and pair your device.
Note: change the name of the device to an easily
identifiable name such as ‘Bedroom Fan’ or ‘Living Room
Heater’
Note: Ensure you have downloaded and have configured
the Google Home/Assistant apps. Please see your
Google device’s user manual for instructions.
• On the main page of the Google Home app, click the
‘+’ icon in the top left hand side of the page.
• Click ‘Set up device’
Follow the below instructions to connect your device to Google Home.
How to connect to your Google Home devices
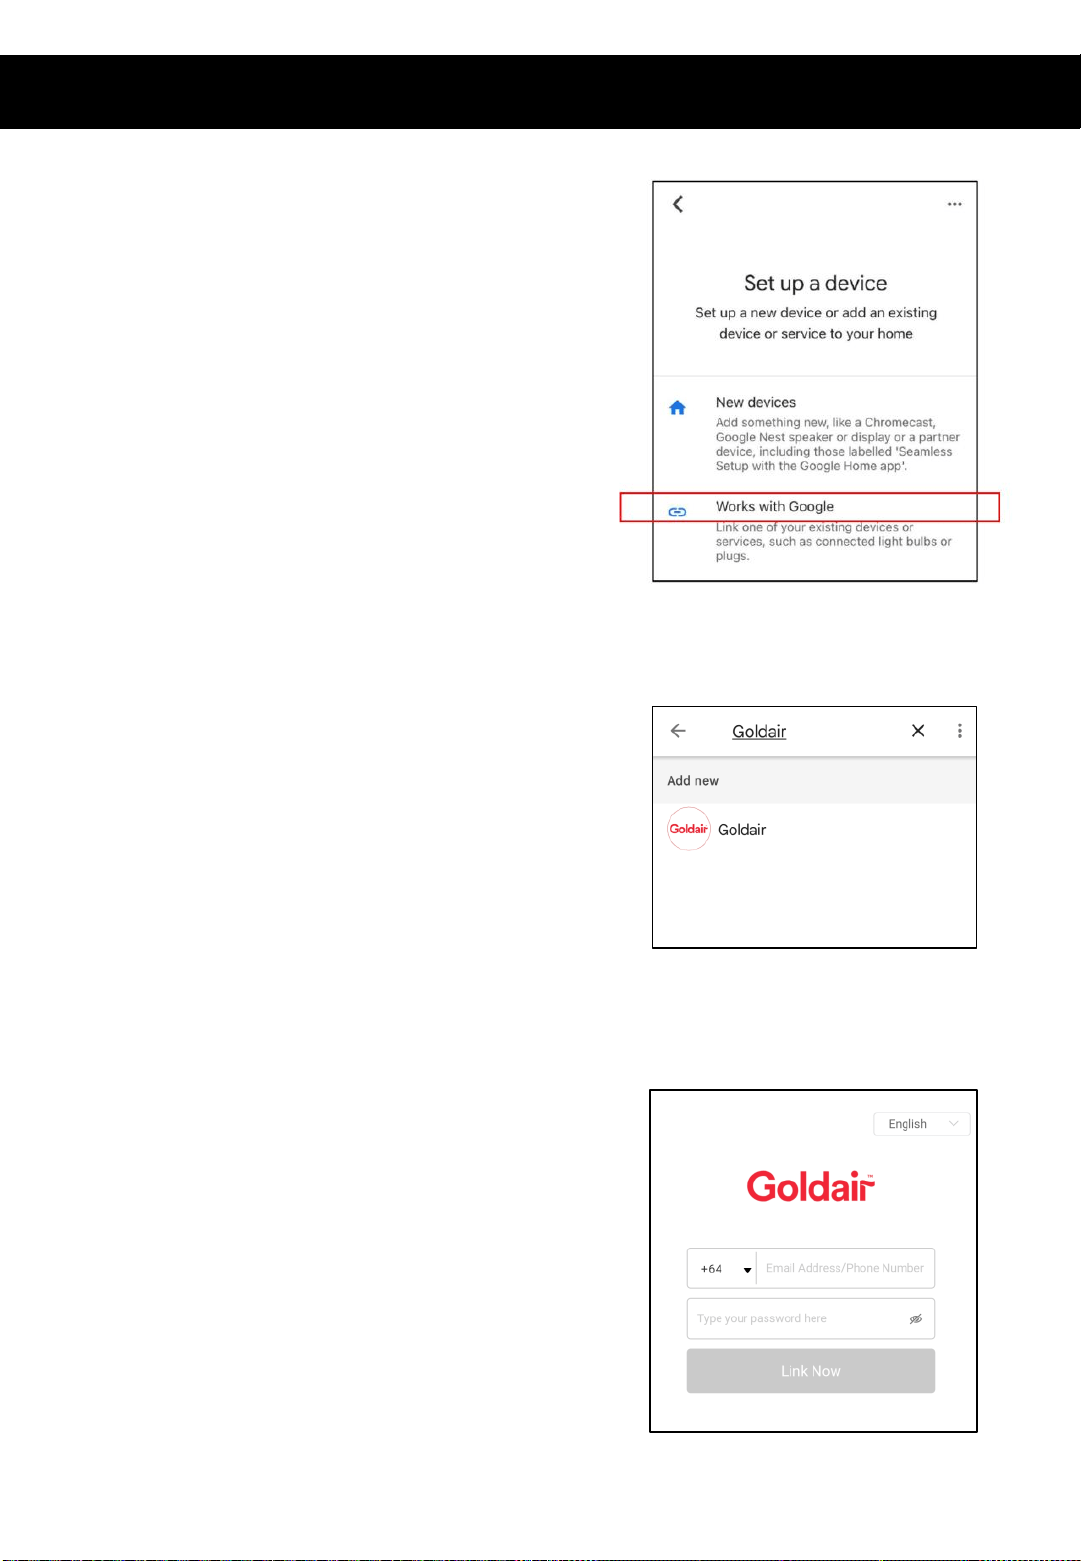
• Click ‘Works with Google’
• Type ‘Goldair’ in the search bar and click to
proceed.
• Type your phone number/ email address and
password and click ‘Link Now’
How to connect to your Google Home devices (continued)
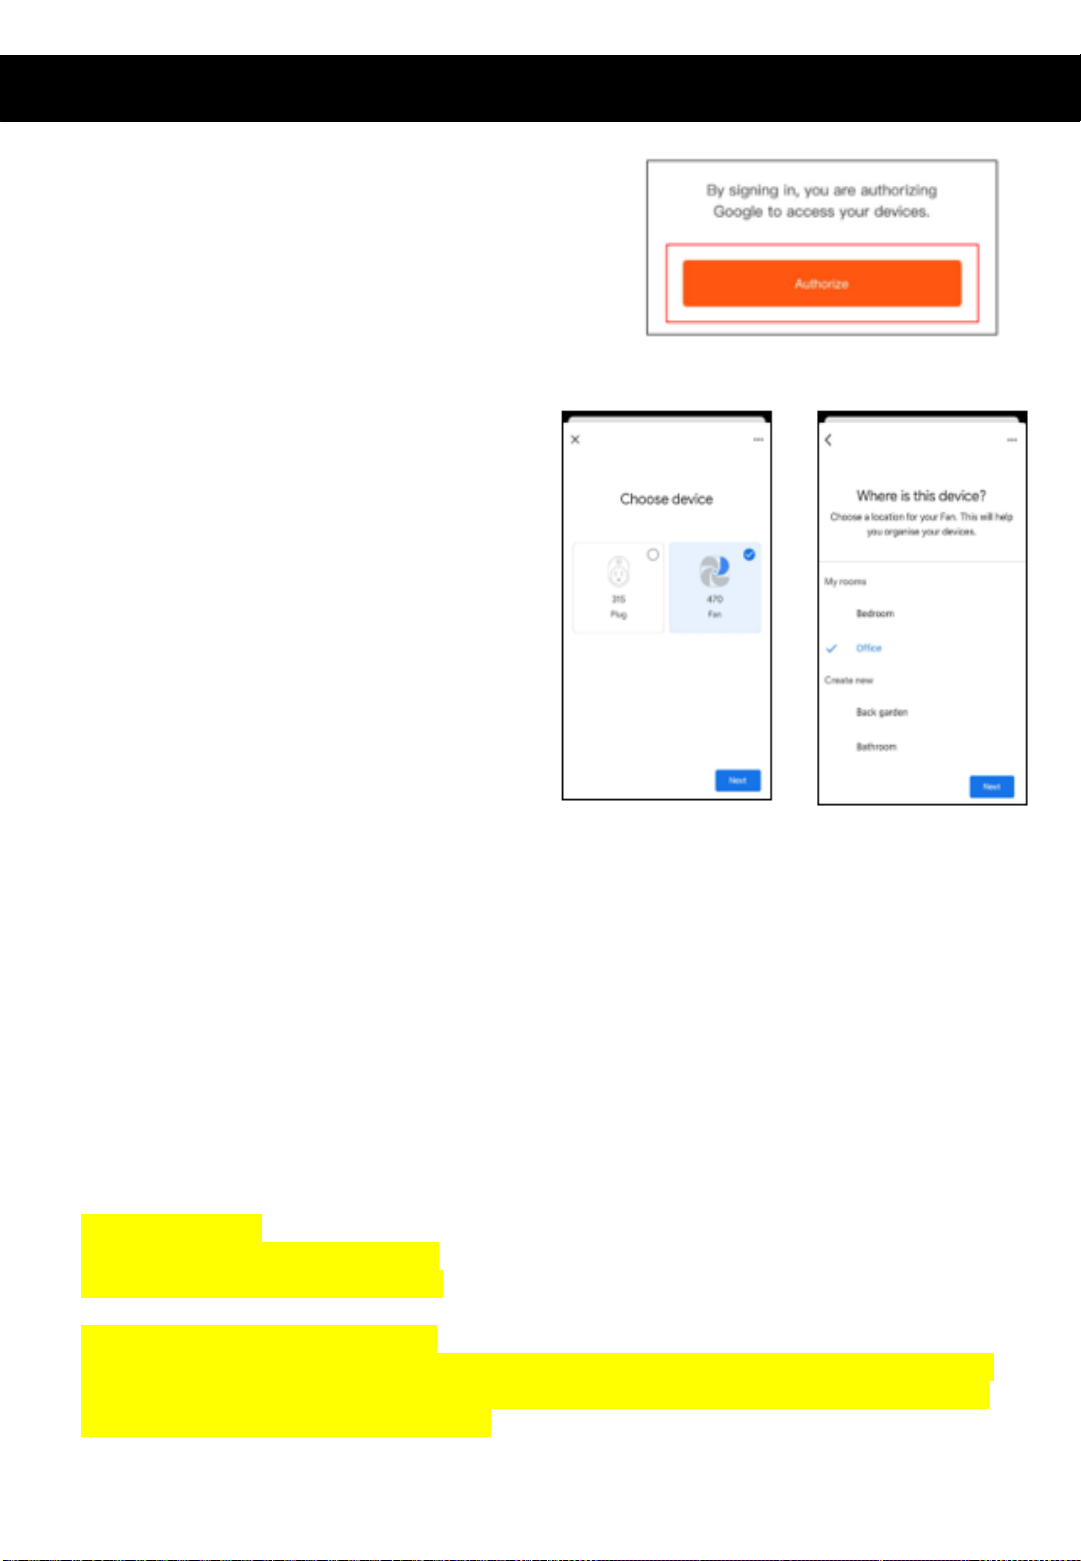
• Click Authorise and all devices from your
Goldair App will appear on screen.
• You have the option to add these to a
particular room in your home
• When you go back to the Home screen,
your devices will now appear, and you
can operate using voice control.
SUGGESTED VOICE COMMANDS
Note: Amazon and Google are in control of voice control functionality and
terminology. Not all functions available via the controller or APP can be controlled via
voice command.
Voice control on your device will allow you to turn ON and OFF and adjust the settings. Suggested
voice commands to work with your Google device are:
Turning ON/OFF
Ok Google, turn ON <Device Name>
Ok Google, turn OFF <Device Name>
Adjust the settings
Ok Google, set <Device Name> to Low
Ok Google, set <Device Name> to High
Adjust the Countdown timer settings
Ok Google, set countdown timer to cancel in 15 minutes/half an hour/45 minutes/1 hour/1 hour
and 15 minutes/1 and half hour/ 1 hour and 45 minutes /2 hours/2 hours and 15 minutes/2 and
half hours/ 2 hours and 45 minutes/3 hours
Query Ambient Temperature
Ok Google, what is the current temperature of <Device Name>
How to connect to your Google Home devices (continued)

Details for pairing this heater to the Goldair App can be found at the below website link.
Either scan the QR code below or enter the website into your browser.
https://www.goldair.co.nz/goldair-app
New Zealand Products
Pairing Mode
To connect to the Goldair app you must ensure that your device is in
pairing mode which is where the WiFi Icon is flashing.
Most products will be in pairing mode after switching the device on but
if it is not:
- Put device on STAND-BY mode (ON at the wall but device is OFF)
- Hold down “POWER” for around 5 seconds or until the WiFi icon
begins to flash.
Quick Connection
- Turn your phone’s Bluetooth ON
- Ensure your device is in Pairing Mode (see instructions above)
- Tap the + on the top right corner to navigate to the main device
screen. Tap ‘Auto Scan’ – your device will appear. Tap the device
and follow the instructions.
- If Quick Connection does not work, follow the manual via the QR
Code above
Pairing APP to Device

Cleaning Your Heater
The heater requires regular cleaning to ensure trouble free operation:
• Before cleaning, remove unit from Mounting Base Plate.
• Use a vacuum cleaner to remove dust and fluff from the inlet and outlet
grills.
• Use a damp cloth to clean the exterior of the heater. Do not use
abrasive cleaning products on this appliance.
• Ensure the heater is dry before turning the power supply back on to the
heater.
Servicing Your Heater
Do not attempt to repair or adjust any electrical or mechanical functions
on this unit. Doing so will void the warranty. Contact a qualified electrical
person to service the heater.
SUPPORT AND TECHNICAL ADVICE
Goldair – New Zealand
Monday – Friday 8am-5pm
Phone +64 (0)9 917 4000
Phone 0800 232 633

Thank you for purchasing this Goldair product. Your product is warranted against faults and manufacture when used in normal
domestic use for a period of two years. In non-domestic use Goldair limits the voluntary warranty to two months.
Goldair undertake to repair or replace this product at no charge if found to be defective due to a manufacturing fault during the
warranty period.
Your Goldair product has been inspected and tested and is guaranteed subject to the following for a period to one year from the date of purchase against
defects in workmanship and materials.
During this period, such defects will be rectified by repair or replacement of the product purchased. Your product contains no user serviceable
components and this warranty becomes invalid if in our opinion the product has been misused, abused, incorrectly installed, tampered with, connected to
an electrical supply not corresponding with the name plate specification, or subjected to power surges. The warranty does not include any labour or other
associated expense that may be involved in removal or installation of the product. Normal wear and tear is expressly excluded.
If your Goldair product fails to operate satisfactorily, please return it to the retailer from whom it was purchased. To obtain a repair or replacement
product under this warranty, you will need to produce satisfactory evidence of date of purchase. The completed warranty and purchase receipt must be
presented with the product. The warranty should be filled out at the time of purchase. It is in your interest to make sure this is done.
If the product is to be replaced (cannot be repaired) then that replacement will be of the same or similar product or accessory excluding packaging,
instruction card etc. Where a replacement product is supplied, this shall be guaranteed for the balance of the original warranty period.
Any model that is no longer available will be replaced by a model of a value and with such features as we consider appropriate in the circumstances.
Goldair Ltd is not responsible for freight forwarding charges, losses or damage in transit.
If service is required after the warranty period has expired, the product should be returned to a qualified electrical technician. Service outside of the
warranty period will be at your cost.
PLEASE KEEP YOUR RECEIPT AS THIS WILL HELP VERIFY YOUR WARRANTY.
The benefits given to you by this warranty are in addition to other rights and remedies available to you under law in relation to the
goods or services to which this warranty relates.
In Australia, our goods come with guarantees that cannot be excluded under the Australian Consumer Law. You are entitled to a
replacement or refund for a major failure and compensation for any other reasonably foreseeable loss or damage. You are also
entitled to have the goods repaired or replaced if the goods fail to be of acceptable quality and the failure does not amount to a
major failure.
In New Zealand this warranty is additional to the conditions and guarantees of the Consumers Guarantee Act (1993).
Two Year Warranty
Goldair Two Year Warranty (IMPORTANT: Please complete and retain this warranty card)
Name
Address
Place Of Purchase Date Of Purchase
Name Of Product Model Number
Attach a copy of the purchase receipt to this warranty card
Due to continual design improvements, the product illustrated in this User Manual may differ slightly from the actual product.
Goldair – New Zealand
CDB Goldair
PO Box 100-707
N.S.M.C
Auckland
Phone +64 (0)9 917 4000
Phone 0800 232 633
www.goldair.co.nz
Goldair – Australia
CDB Goldair Australia Pty
PO Box 574
South Morang
Victoria, 3752
Phone +61 (0)3 9365 5100
Phone 1300 GOLDAIR (1300 465 324)
www.goldair.com.au

New Zealand
PO Box 100707,
North Shore Mail Centre,
Auckland, 0745
www.goldair.co.nz
Australia
PO Box 574,
South Morang,
Victoria, 3752
www.goldair.com.au