Quick Starter Guide Page 1/11
Katadyn Rapidyn Filter Kit
Quick Starter Guide
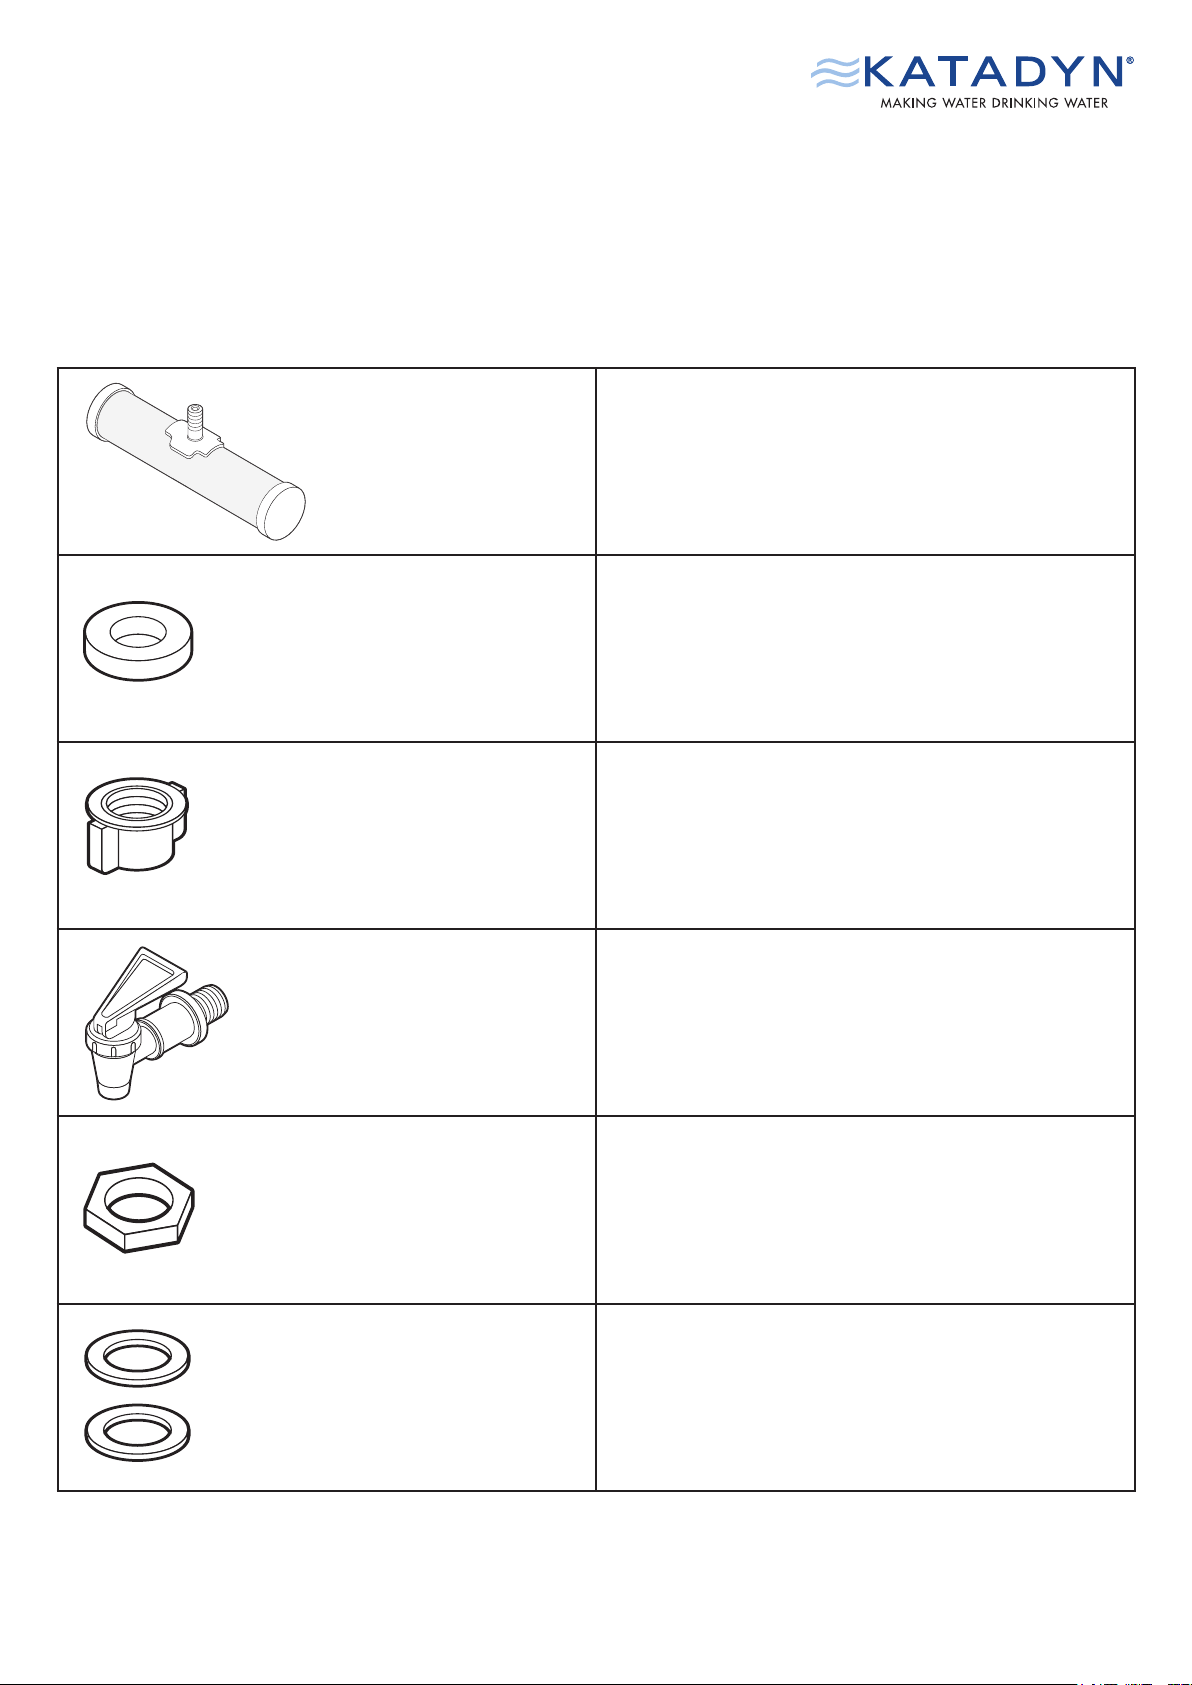
Components
A: Ceramic Filter Element Katadyn Rapidyn
B: Mouth Piece Seal
C: Filter Nut
D: Outlet Tap
E: Tap Nut
F: Tap Seal (2pcs)
Quick Starter Guide Page 2/11
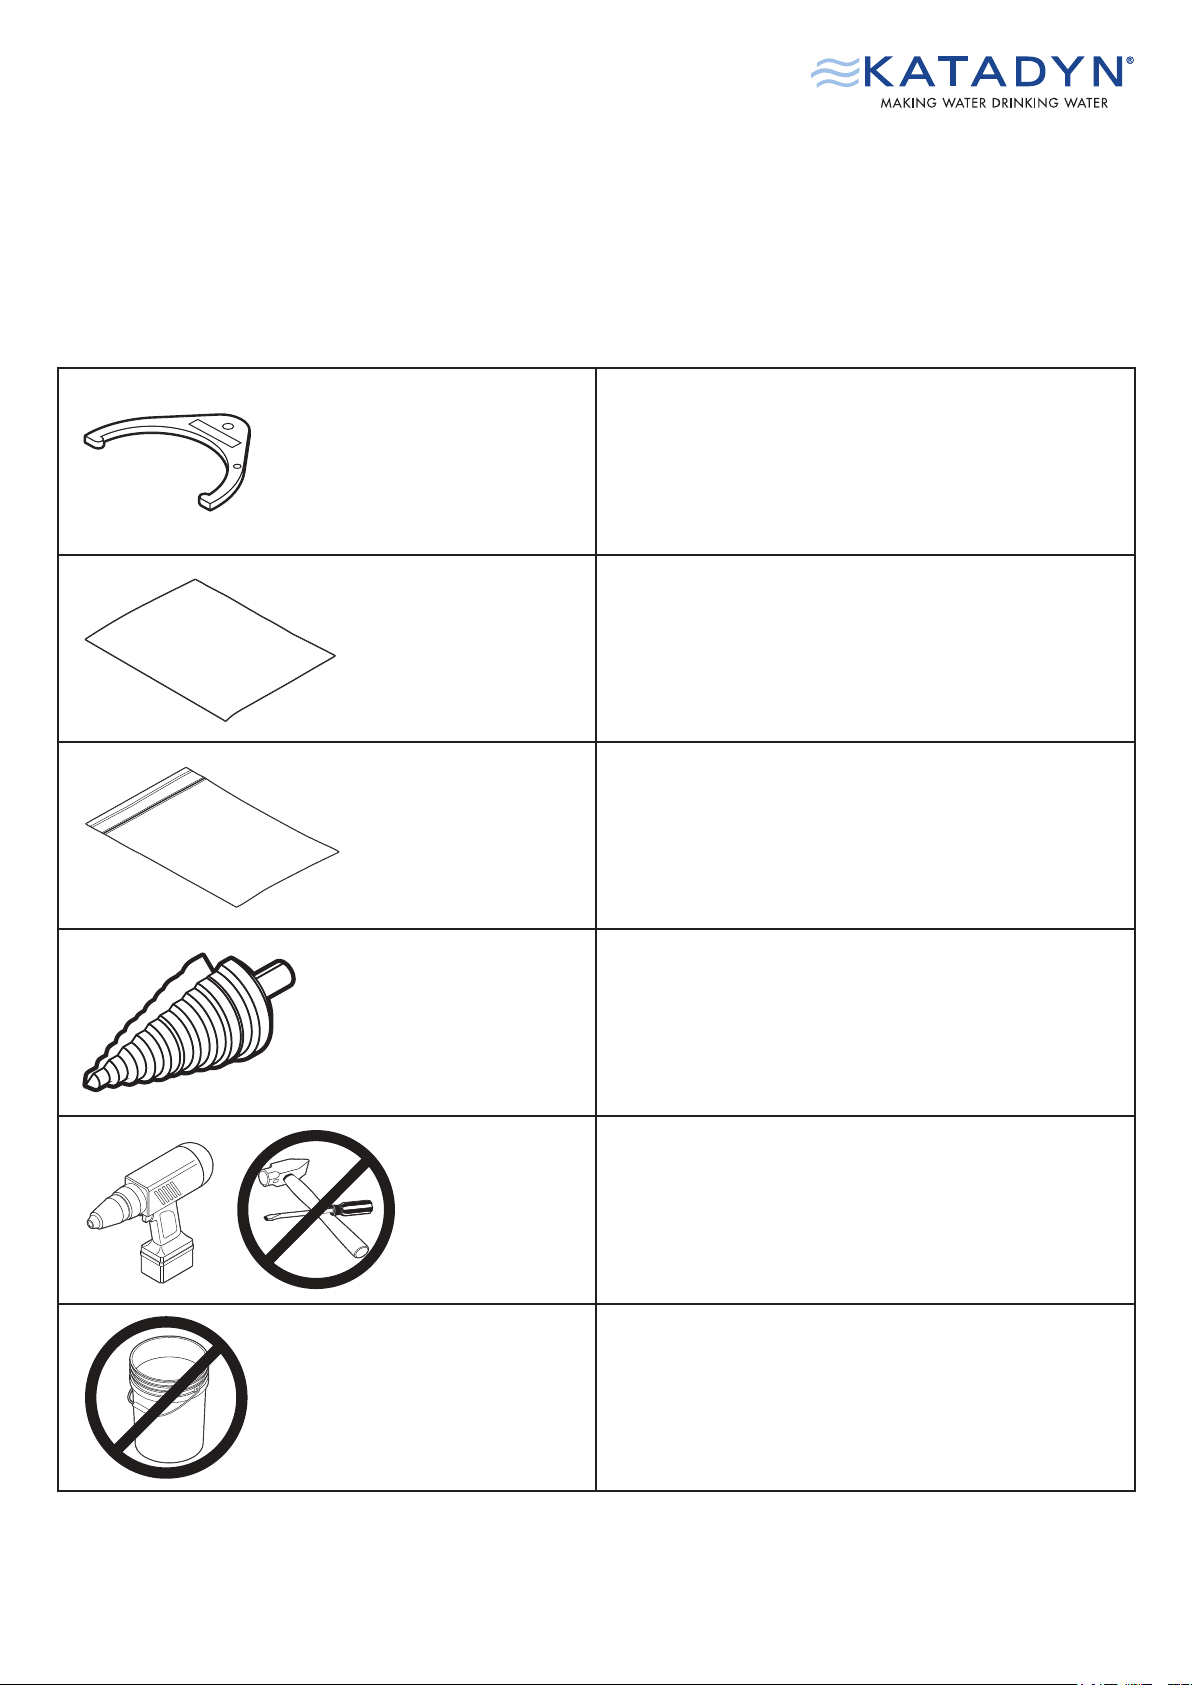
G: End of Life Indicator
H: Abrasive Cleaning Paper
I: Resealable Bag
K: Step Drill (drill bit)
Only a drill is needed no extra tools.
(Drill is not included)
Buckets are not included.
Components (continued)
Quick Starter Guide Page 3/11
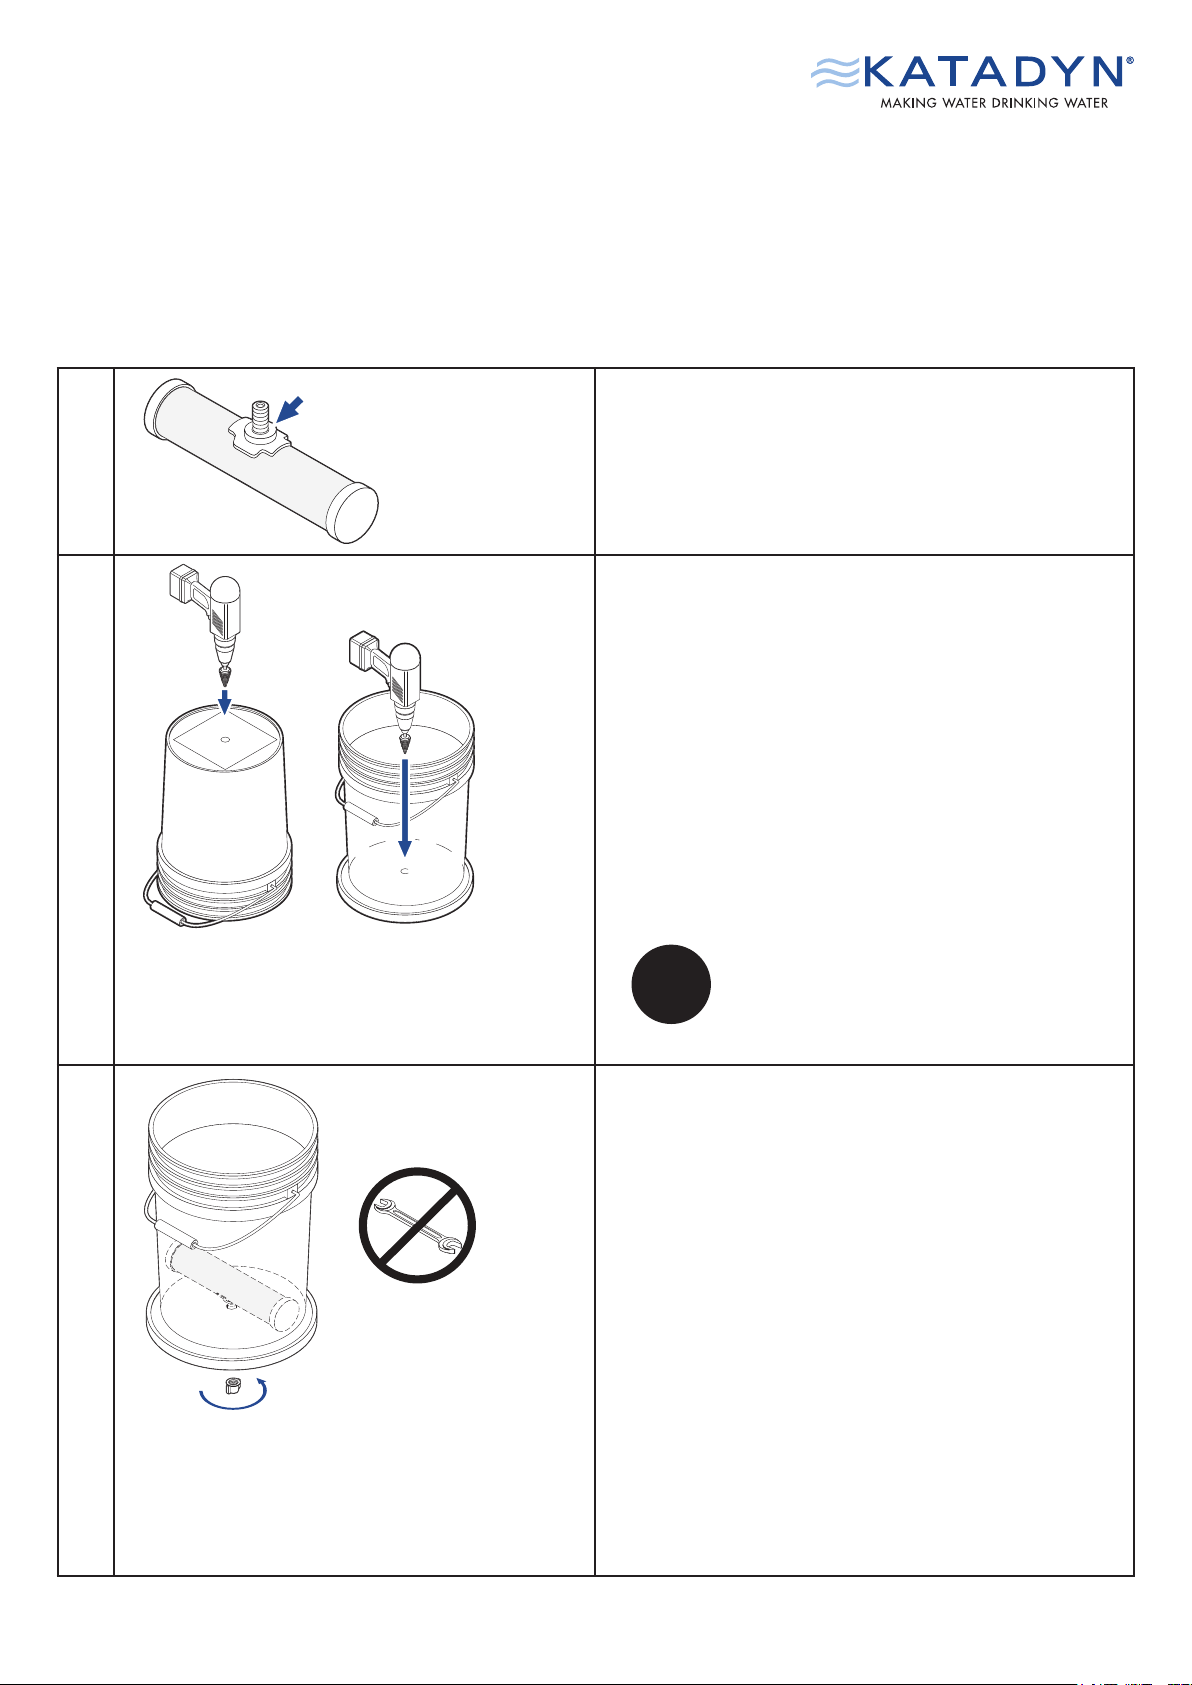
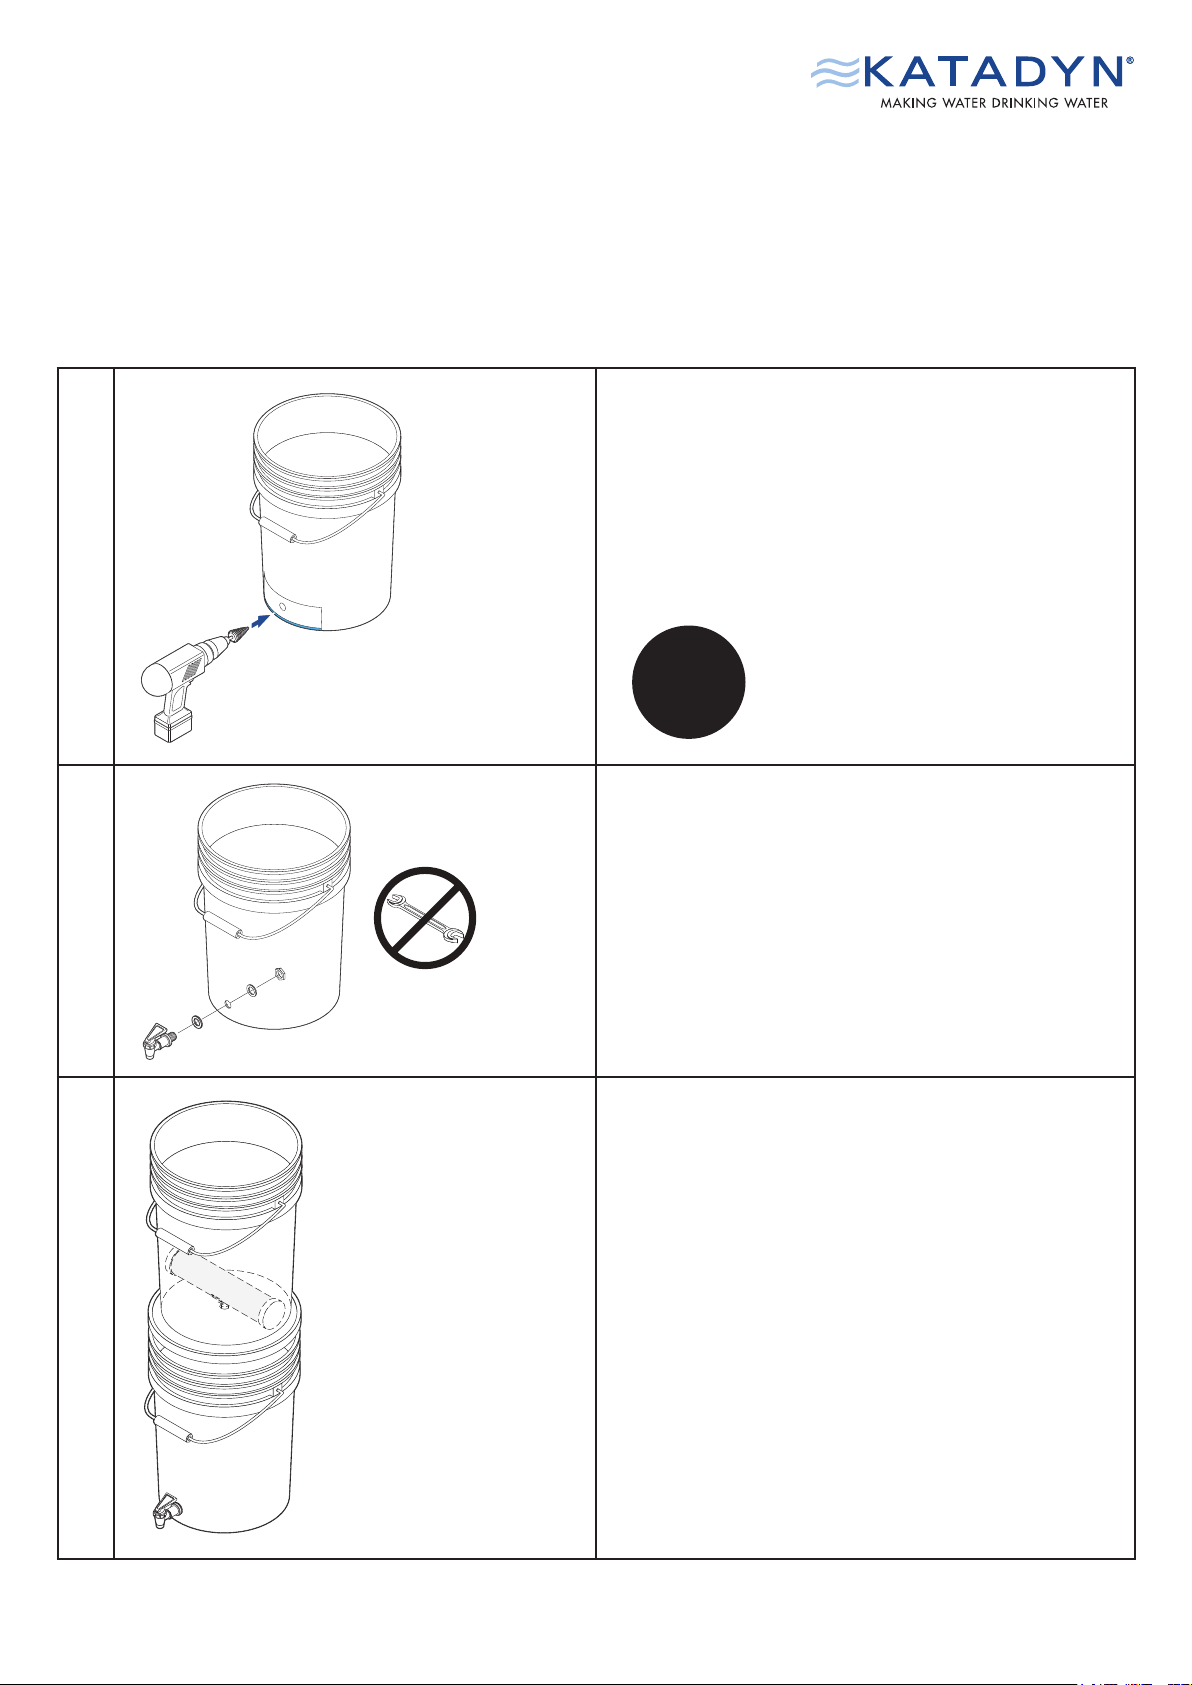
1
Check if mouth piece seal (B) is mounted to the filter
outlet (A).
2
Use the included drill bit to make a hole in your
upper bucket and into the lid of the lower container.
Make sure that the hole is placed in the middle.
1. Place the included template in the middle of
the bucket bottom and drill a hole, diameter
14 mm.
2. Place the upper bucket on the lid of the lower
bucket and mark the position for the hole.
3. Drill a hole in the lid, diameter 14 mm.
3
Push the filter outlet through the bottom of the upper
bucket and the lid of the lower container.
Fix the filter by screwing on the filter nut (C).
Please note: If the filter element is dropped, check
for cracks in the ceramic. If there are any cracks,
clean the filter element with the abrasive cleaning
paper (see section Maintenance). If the cracks are
still visible after cleaning, the filter element is not
safe to use and needs to be disposed of.
Use the included drill bit (K).
Assembling the Filter Kit
Quick Starter Guide Page 4/11
4
Use the included drill bit to make a hole in the
lower bucket for the outlet tap. Make sure that the
hole is placed in the middle.
4. Place the included template with the blue line
level to the bucket bottom and positioned in
the middle. Drill a hole, diameter 20 mm
5
Mount a tap seal (F) on the outlet tap.
Push the outlet tap (D) through the hole of the lower
bucket. Fix the second tap seal (F) from the inside
and fasten the tap by screwing on the tap nut (E).
6
Place the upper bucket onto the lower bucket.
Use the included drill bit (K).
Assembling the Filter Kit (continued)
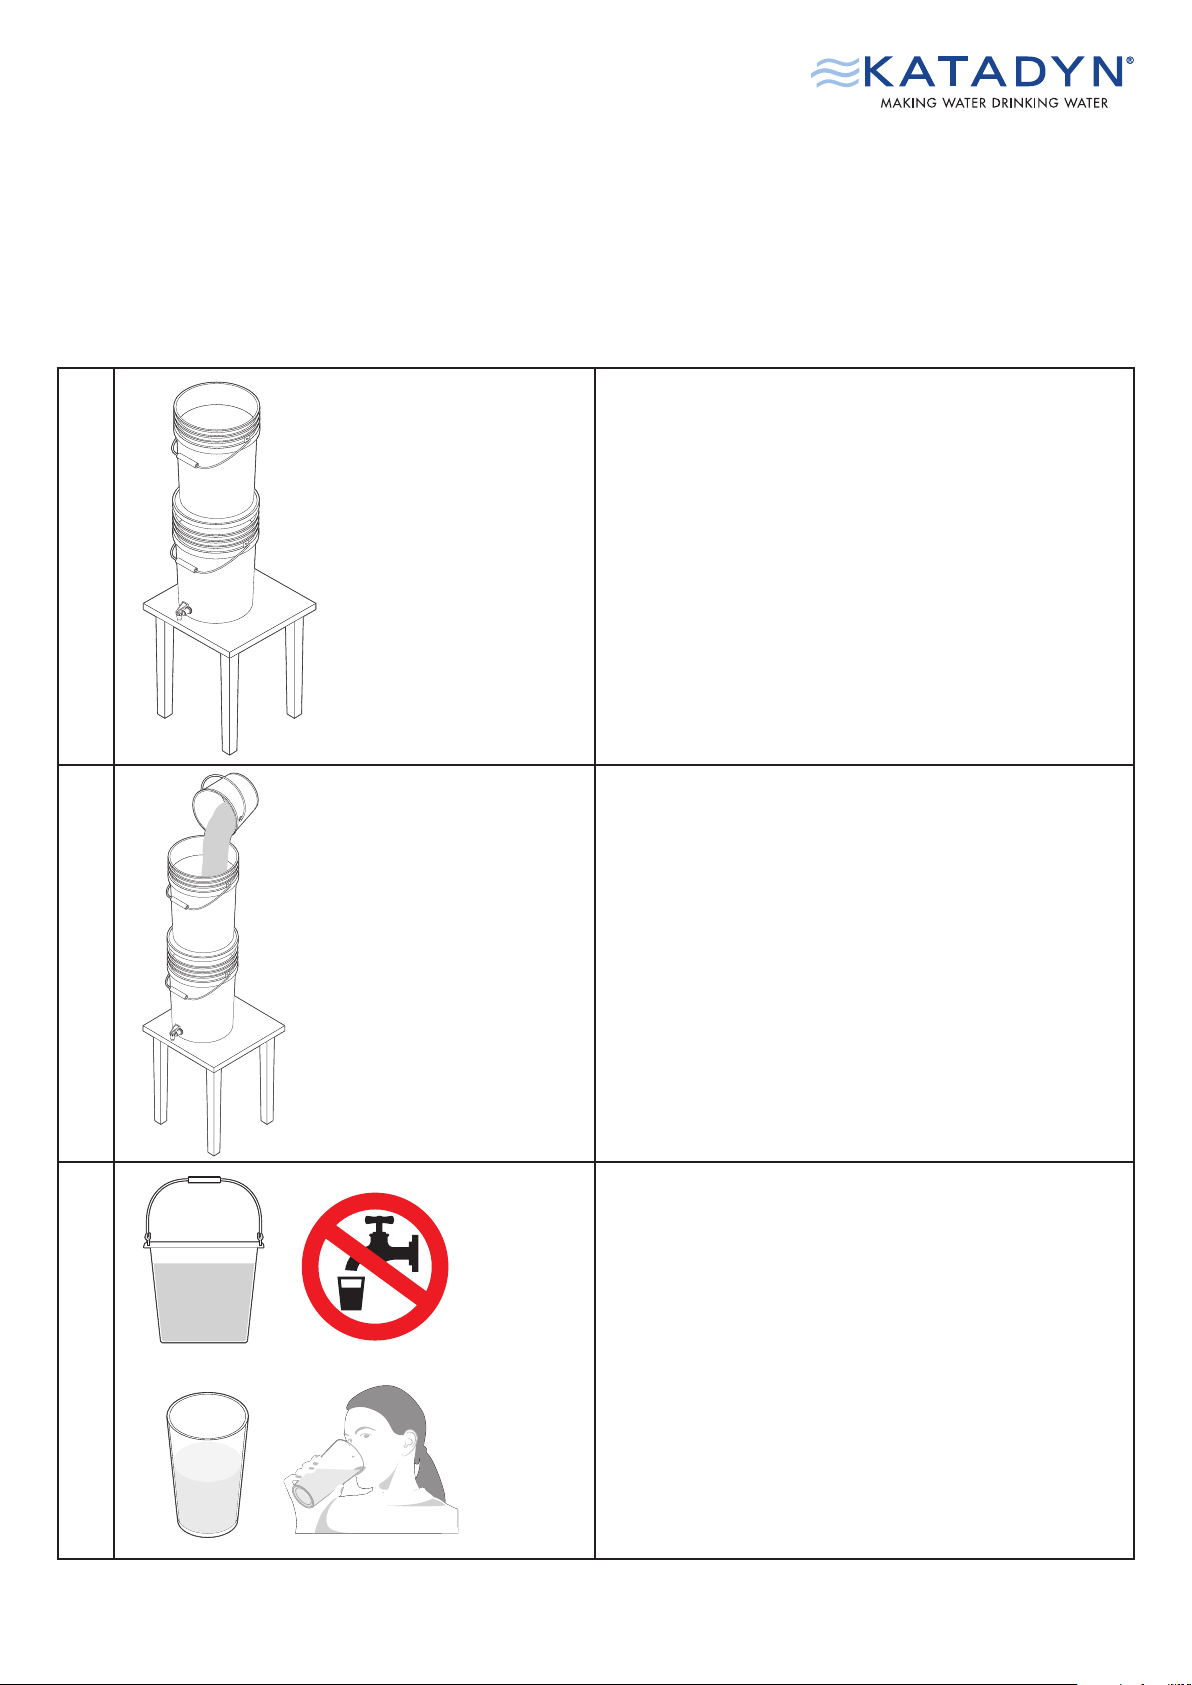
Quick Starter Guide Page 5/11
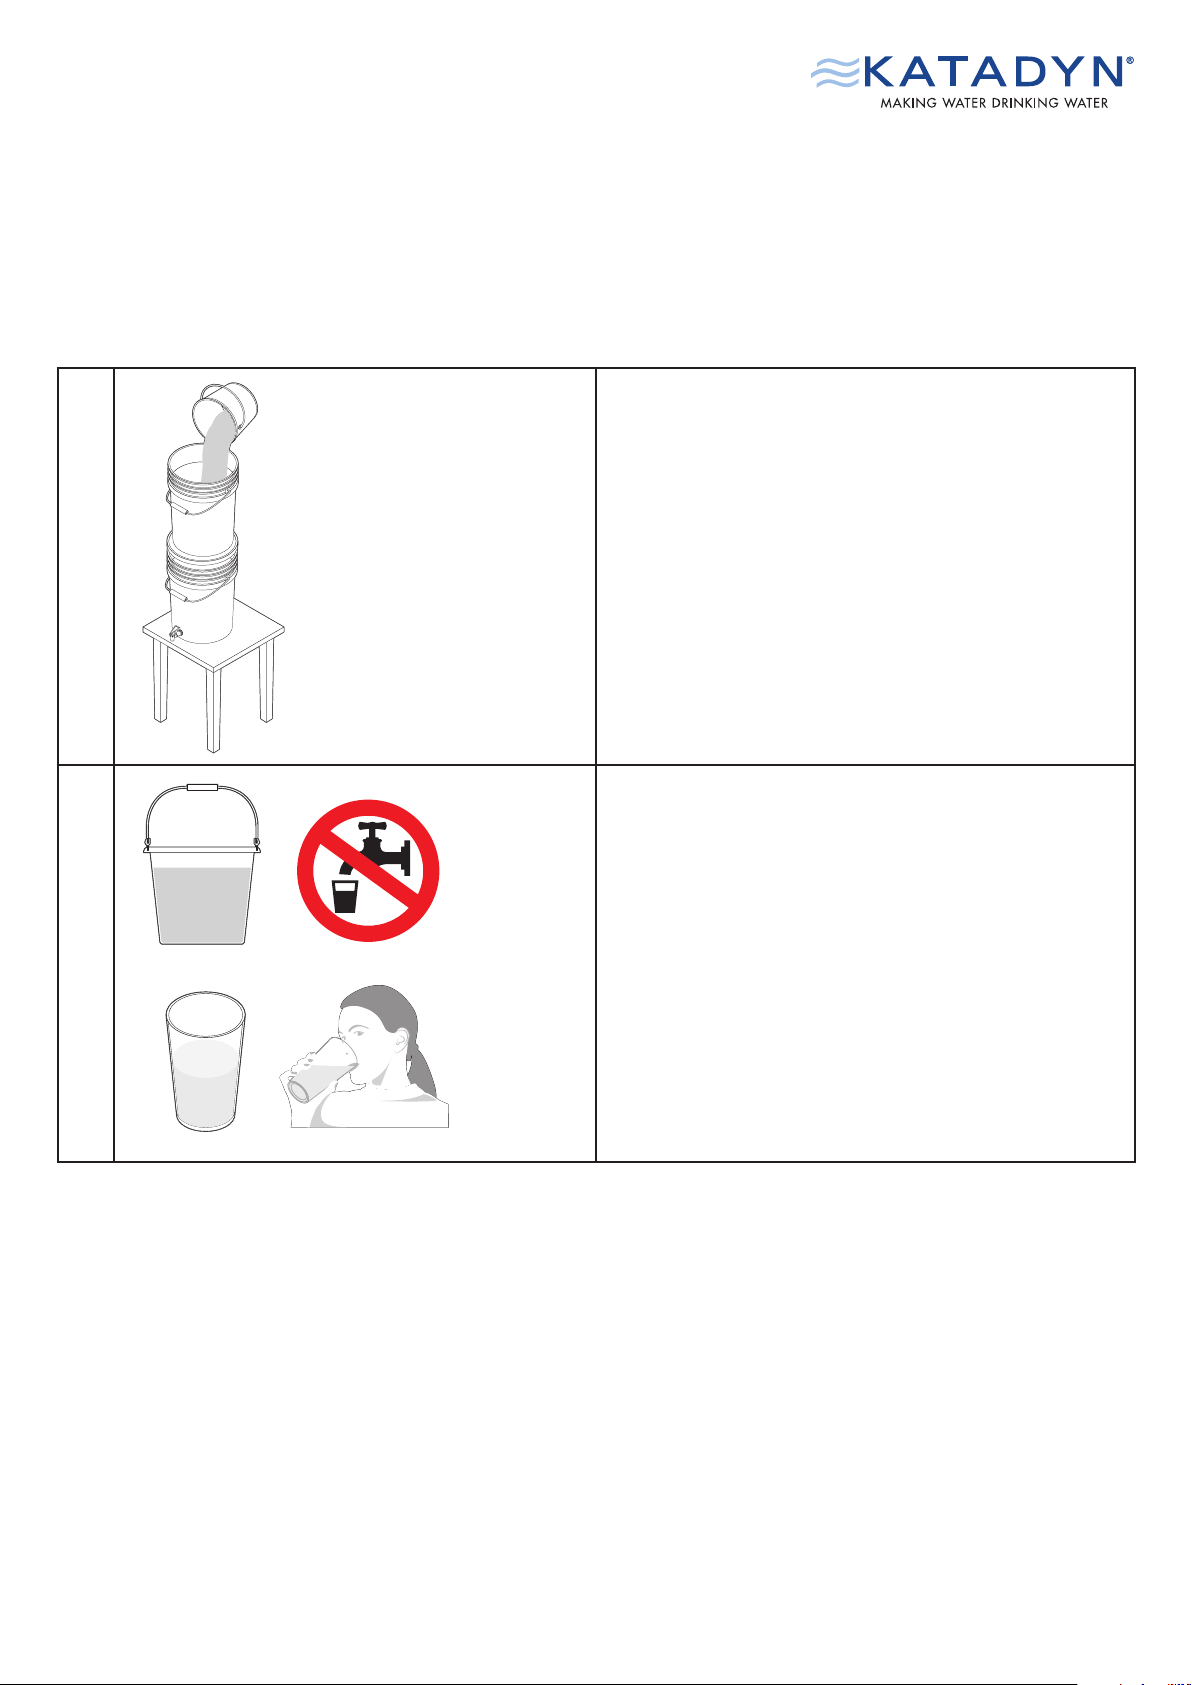
7
Place the entire system on a stable higher surface
(such as a table) to allow high flow rate.
8
Fill water in the upper bucket and wait. It takes
approx. 1 hour to get 3-4 liters.
Wait until the lower bucket is filled.
Please note: Do not use water hotter than 40°C.
9
NO
DRINKING
FIRST 10 L
Please note: The first 10 liters of filtered water must
be thrown away.
After that your Water Filter System is ready for use.
Enjoy.
Assembling the Filter Kit (continued)
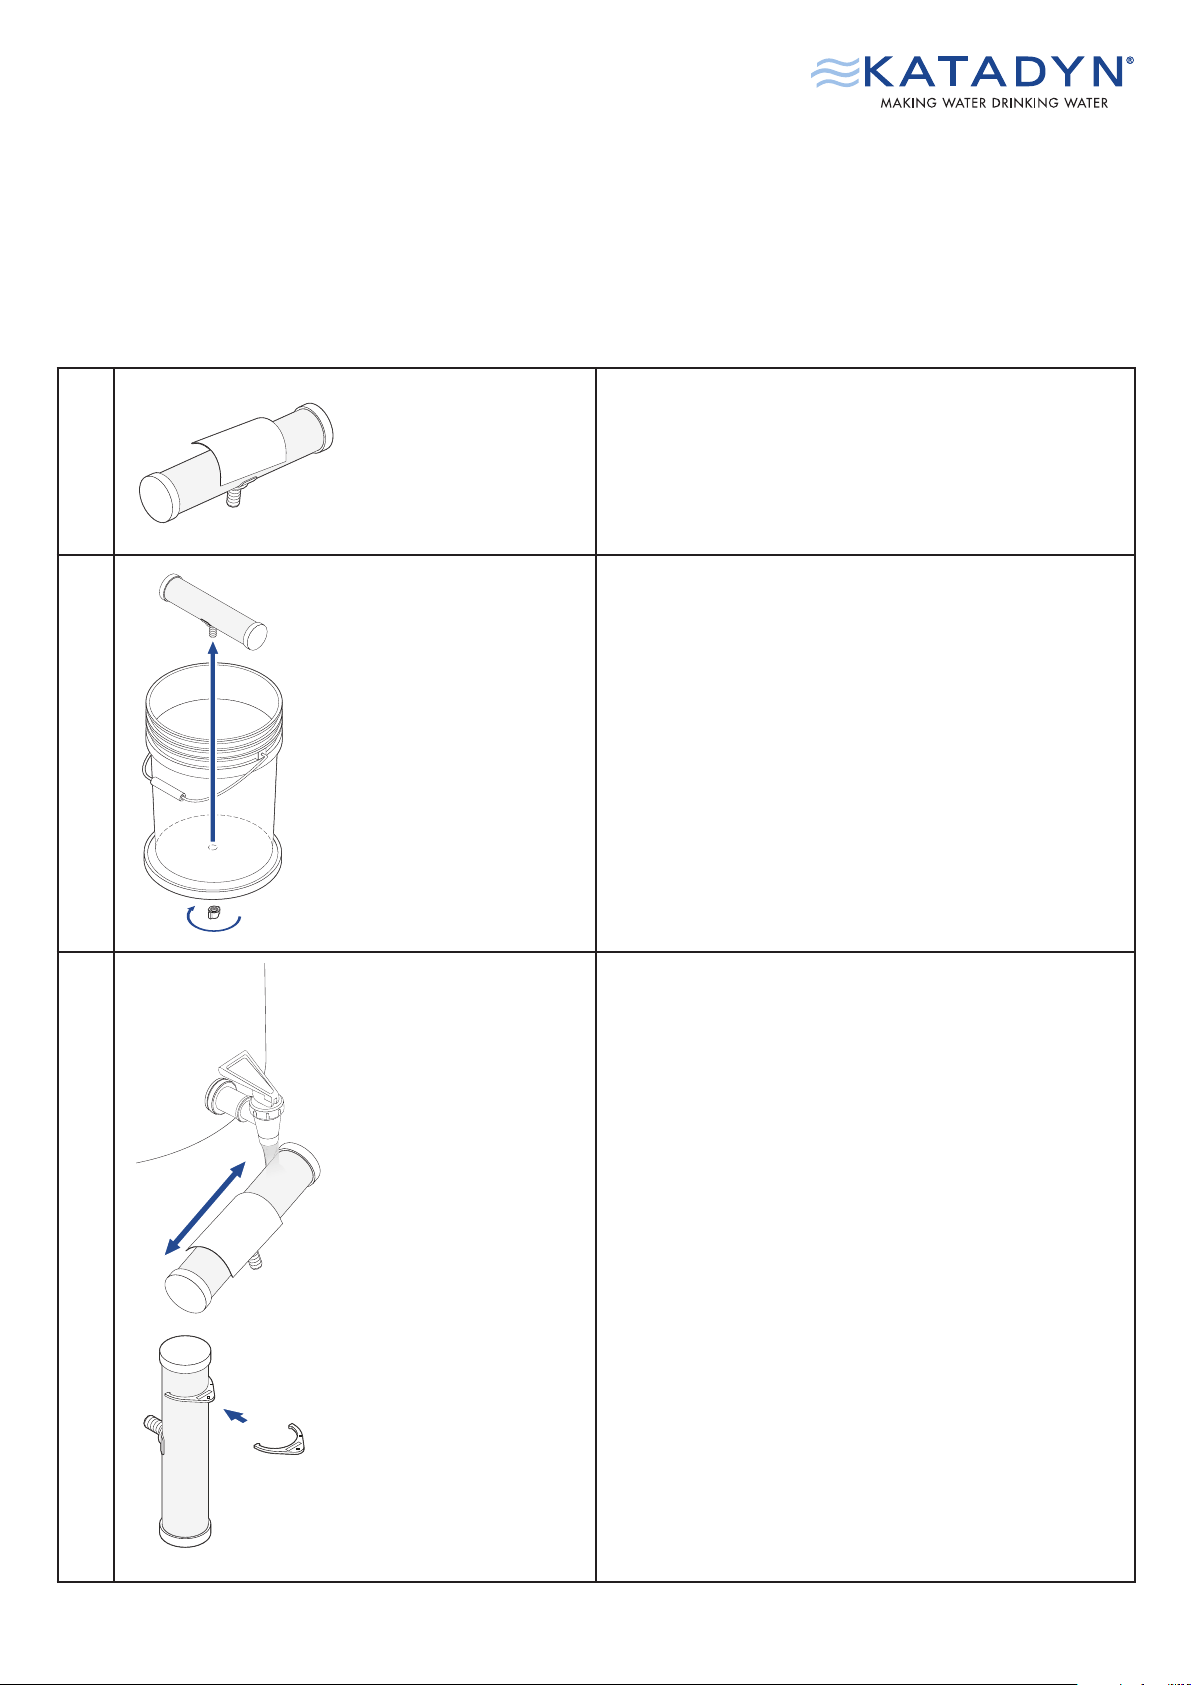
Quick Starter Guide Page 6/11
1
If the flow rate decreases and/or the filter becomes
dirty the filter cartridge needs to be cleaned with
the included abrasive cleaning paper (H).
2
Unscrew the filter nut (C) and remove the filter
element.
3
Wrap the abrasive cleaning paper around the filter
element and clean the surface by scrubbing gently
up and down. Do it under clean running water of
the lower bucket.
Only remove as much as needed of the ceramic
surface otherwise the lifetime of the filter cartridge
will be shorter.
Please note: Do not use any soap or other cleaning
agents.
Check with end of life indicator (G) if the filter
element is still usable.
If the end of life indicator fits around the smallest
part of the filter element, the filter is not longer safe
and the filter element must be replaced.
Maintenance

Quick Starter Guide Page 7/11
4
After cleaning the mount, install the filter according
to step number three in the “Install new Filter
Element” manual on page 8.
Maintenance (continued)
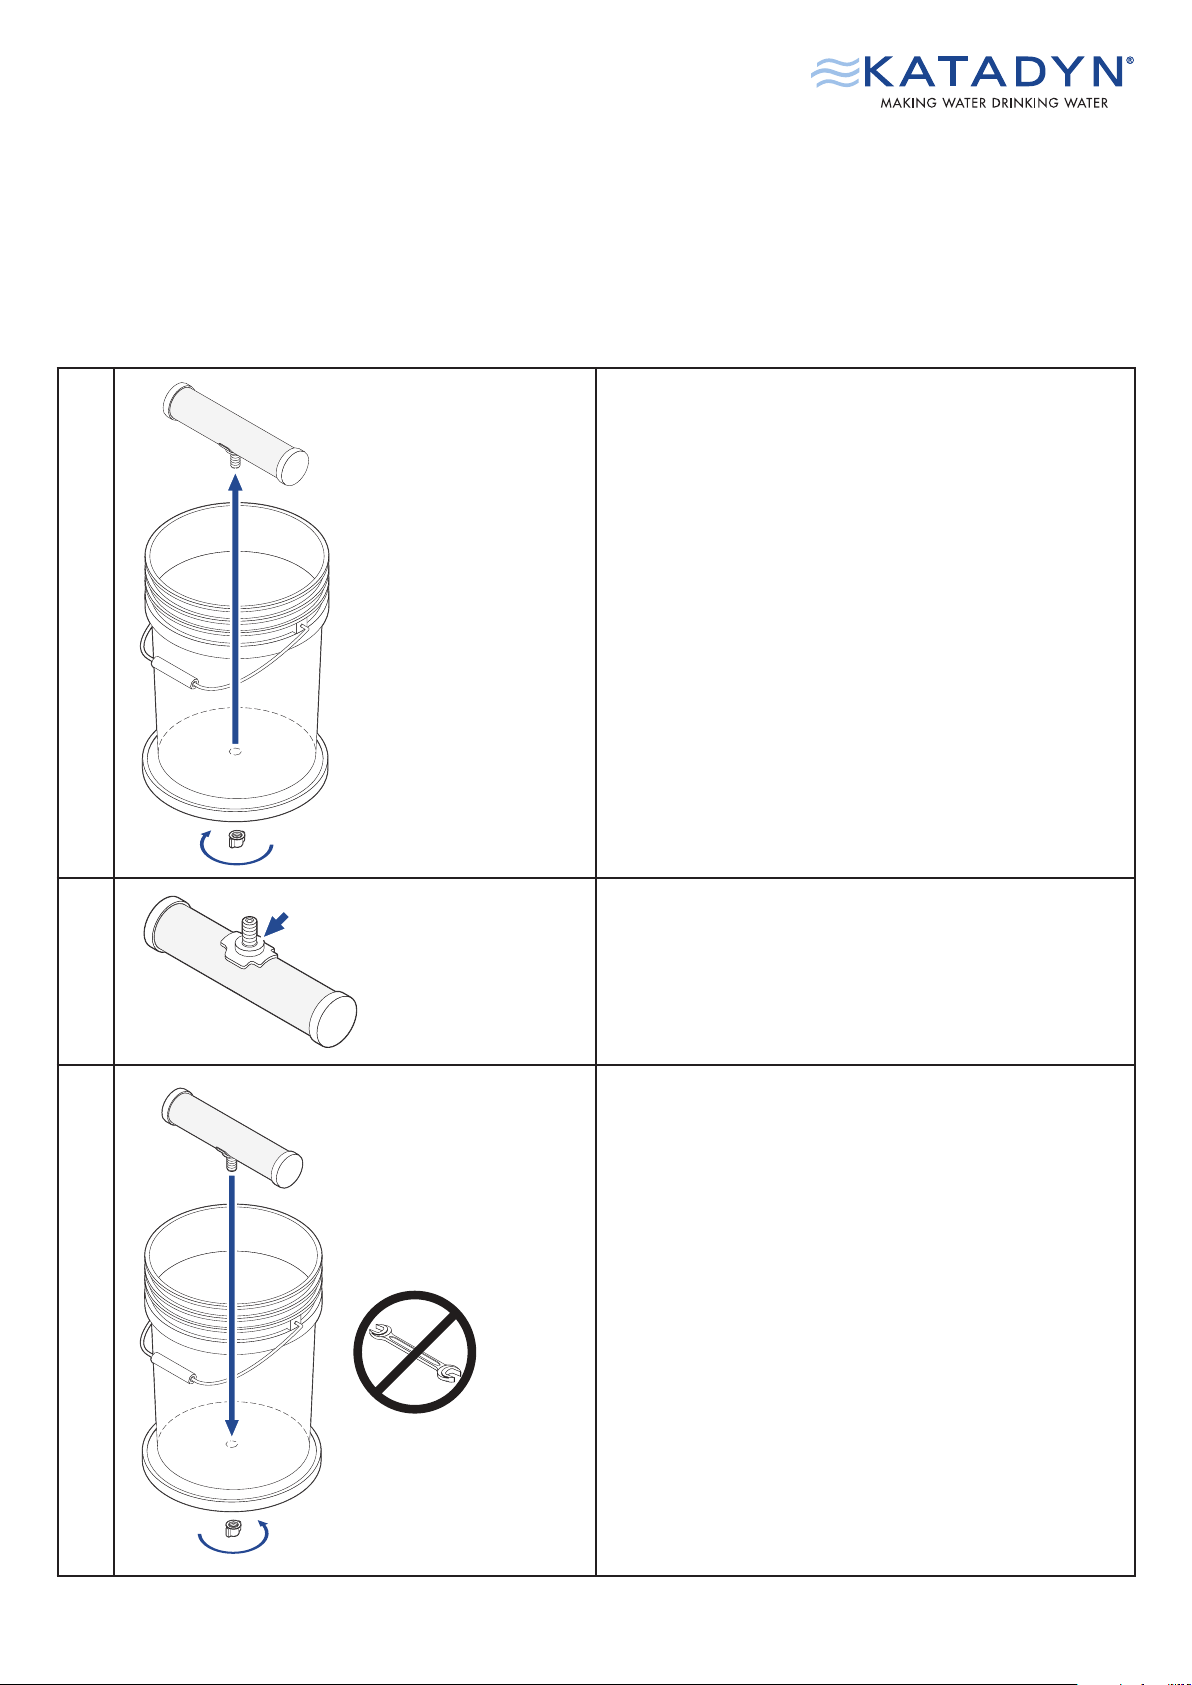
Quick Starter Guide Page 8/11
1
Unscrew the filter nut and remove the filter element.
2
Check if mouth piece seal (B) is mounted to the filter
outlet (A).
3
Push the filter outlet through the bottom of the upper
bucket and the lid of the lower container.
Fix the filter by screwing on the filter nut (C).
Please note: If the filter element is dropped, check
for cracks in the ceramic. If there are any cracks,
clean the filter element with the abrasive cleaning
paper (see section Maintenance). If the cracks are
still visible after cleaning, the filter element is not
safe to use and needs to be disposed of.
Install new Filter Element
Quick Starter Guide Page 9/11
4
Fill water in the upper bucket and wait. It takes
approx. 1 hour to get 3-4 liters.
Wait until the lower bucket is filled.
Please note: Do not use water hotter than 40°C.
5
NO
DRINKING
FIRST 10 L
Please note: The first 10 liters of filtered water must
be thrown away.
After that your Water Filter System is ready for use.
Enjoy.
Install new Filter Element (continued)
Contact:
Katadyn Products Inc. Katadyn North America Inc.
Pfäffikerstrasse 37 4830 Azelia Ave North #300
8310 Kemptthal Minneapolis, MN 55429
Switzerland USA
+41 44 839 21 11 1-800-755-6701
customerser[email protected] [email protected]
Print No. 8020699/0
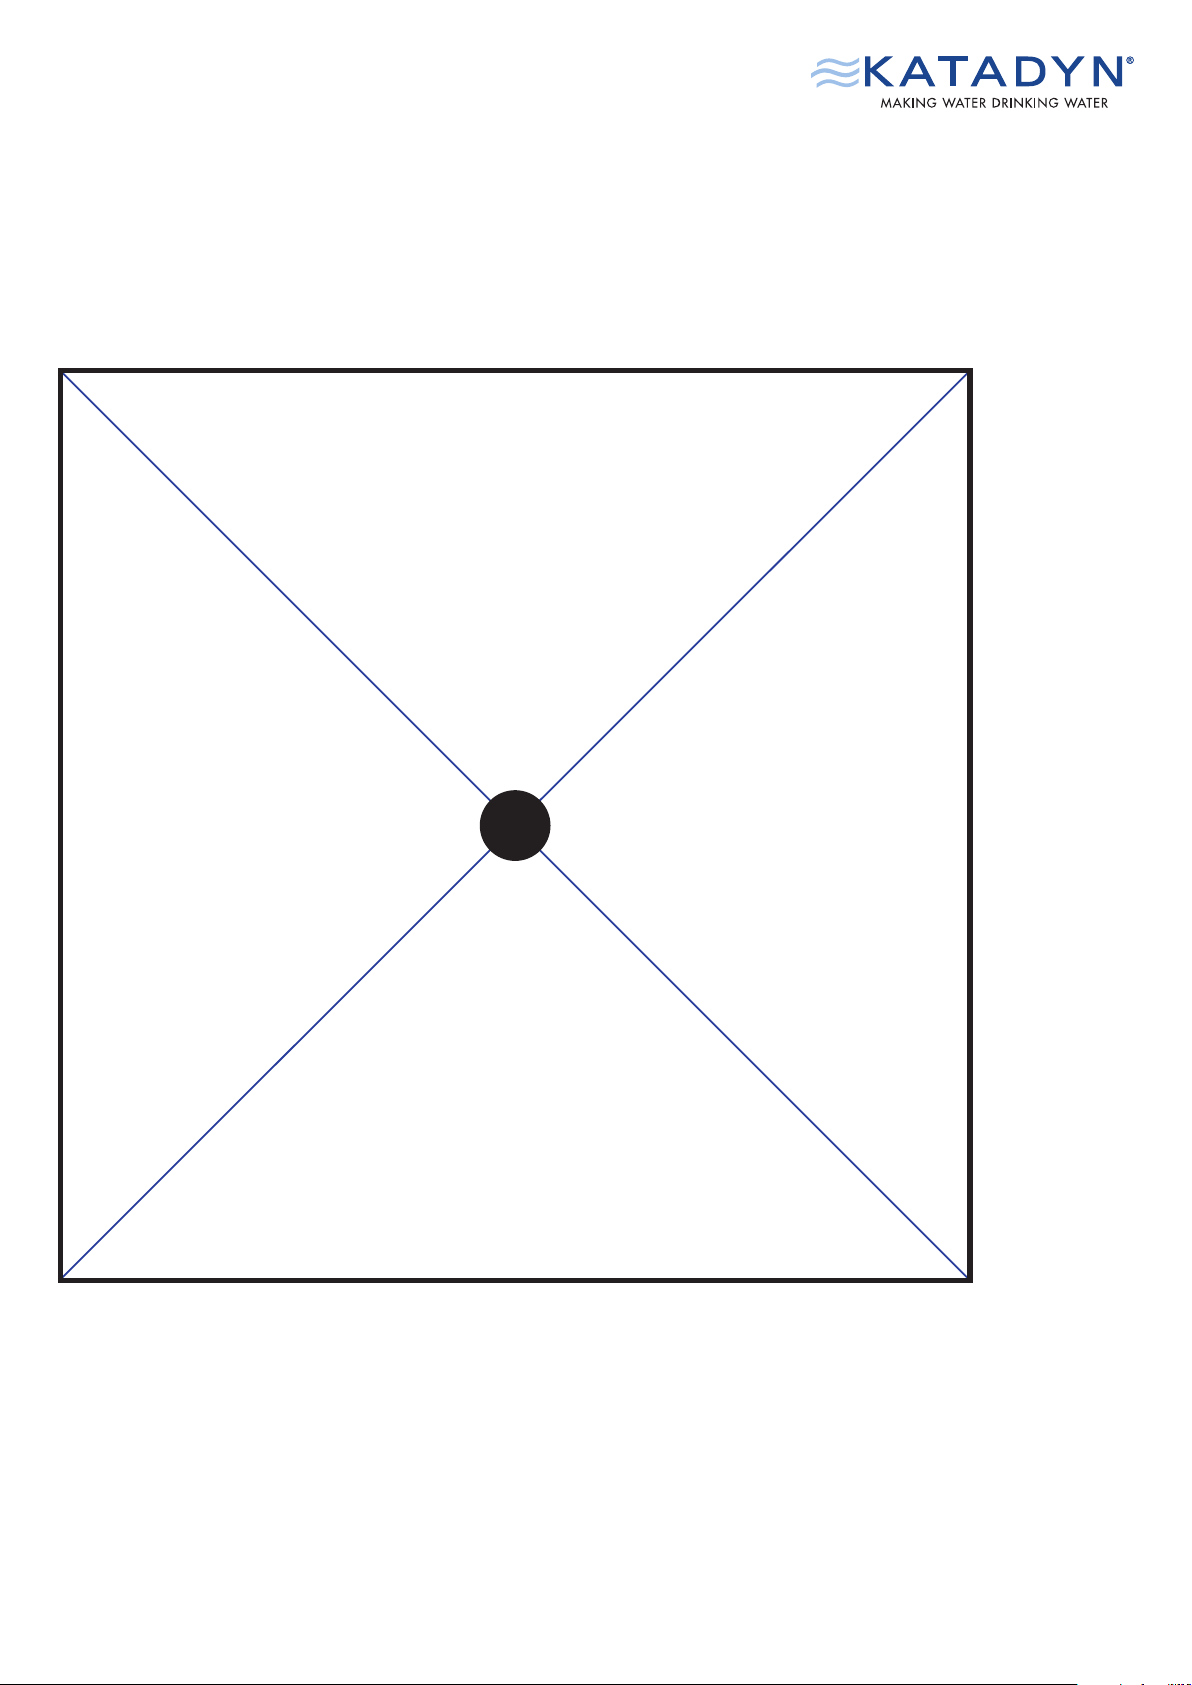
Quick Starter Guide Page 10/11
Template for Filter Element Hole
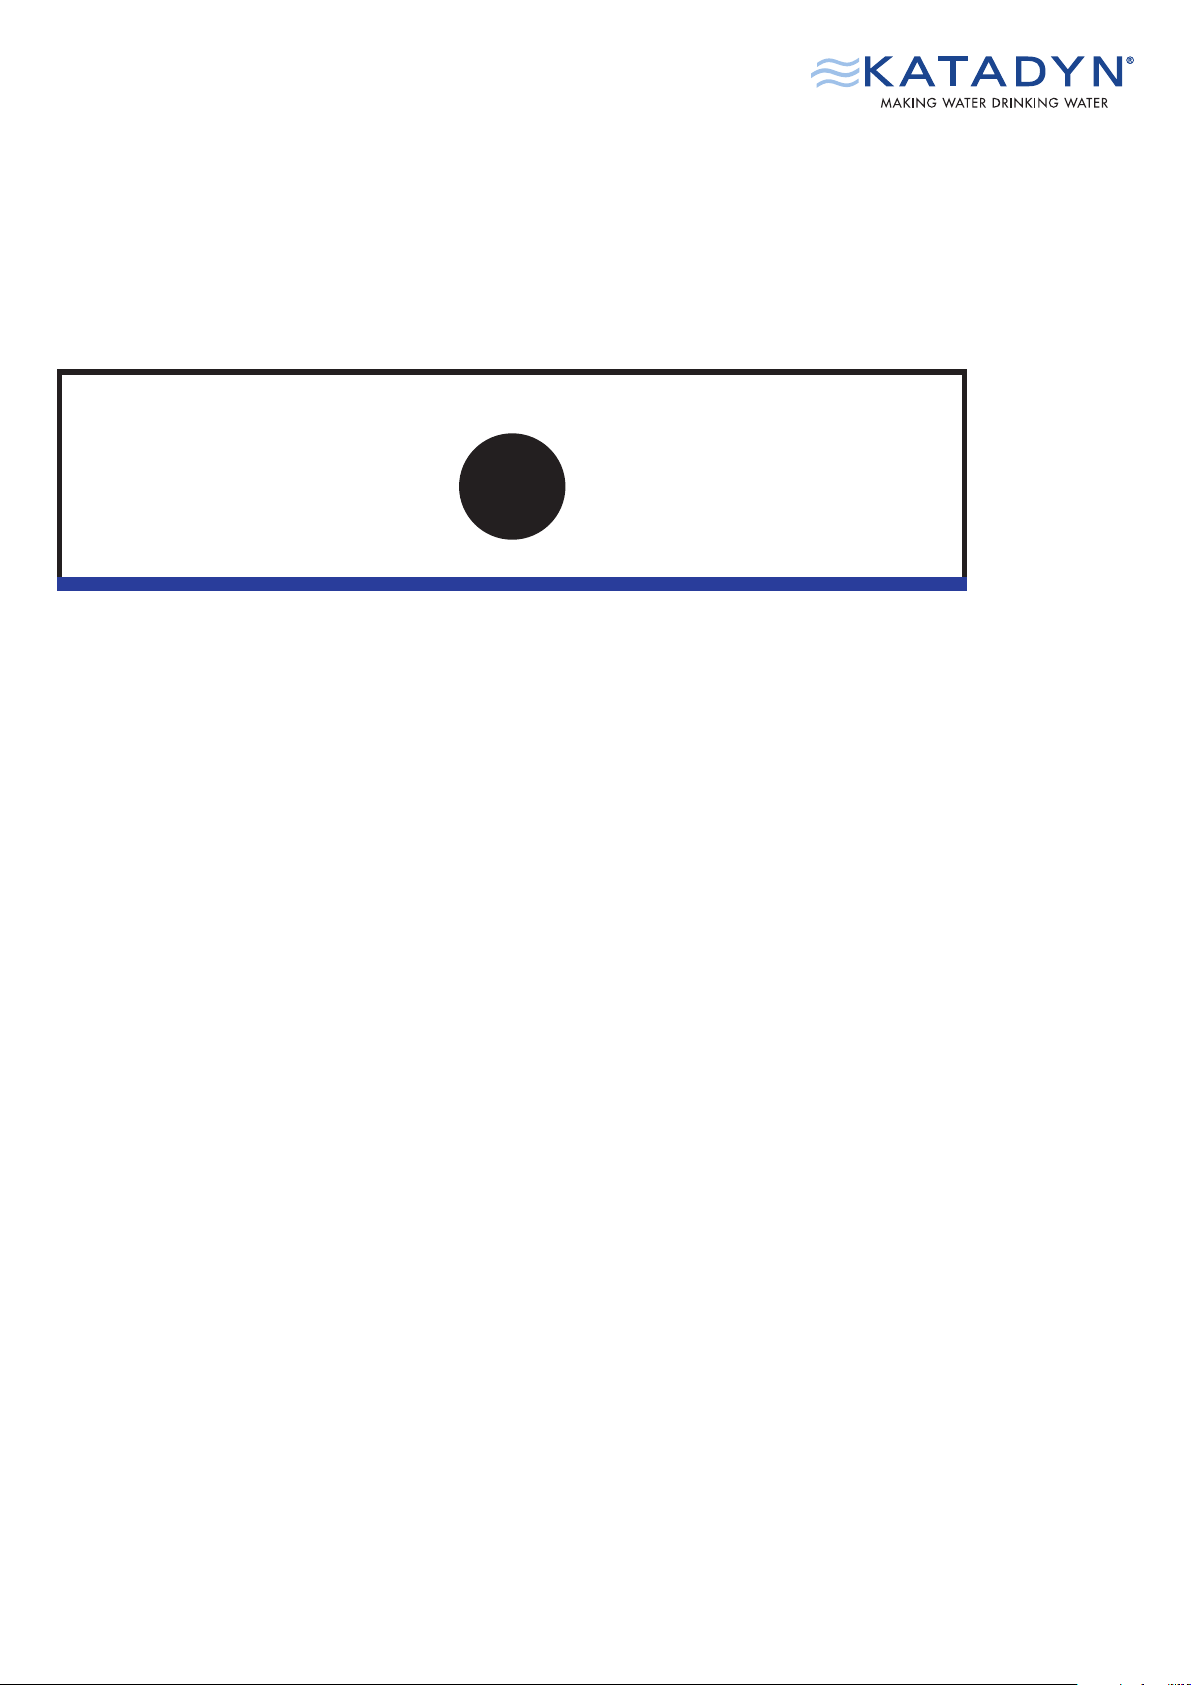
Quick Starter Guide Page 11/11
Template for Outlet Tap Hole