Loading ...
Loading ...
Loading ...
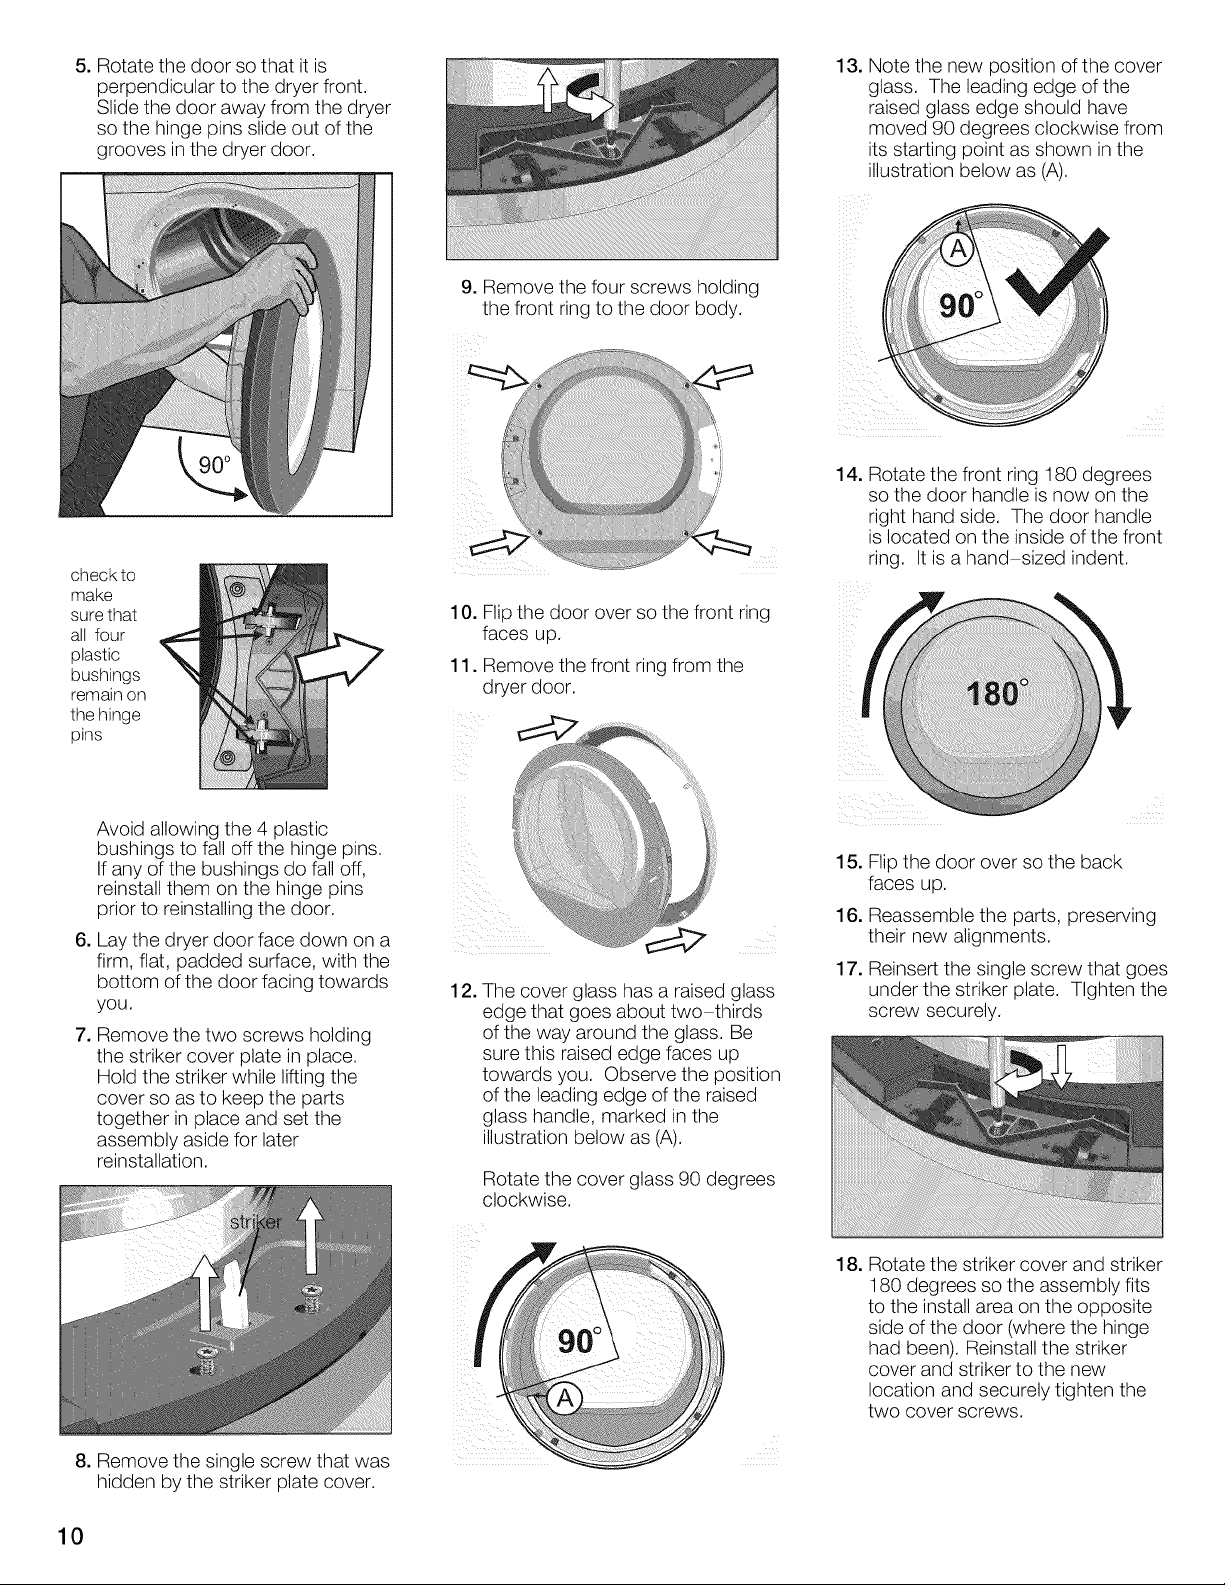
5. Rotate the door so that it is
perpendicular to the dryer front.
Slide the door away from the dryer
so the hinge pins slide out of the
grooves in the dryer door.
check to
make
sure that
all four
plastic
bushings
remain on
the hinge
pins
Avoid allowing the 4 plastic
bushings to fall off the hinge pins.
If any of the bushings do fall off,
reinstall them on the hinge pins
prior to reinstalling the door.
6. Lay the dryer door face down on a
firm, flat, padded surface, with the
bottom of the door facing towards
you.
7. Remove the two screws holding
the striker cover plate in place.
Hold the striker while lifting the
cover so as to keep the parts
together in place and set the
assembly aside for later
reinstallation.
8. Remove the single screw that was
hidden by the striker plate cover.
9. Remove the four screws holding
the front ring to the door body.
10. Flip the door over so the front ring
faces up.
11. Remove the front ring from the
dryer door.
12. The cover glass has a raised glass
edge that goes about two thirds
of the way around the glass. Be
sure this raised edge faces up
towards you. Observe the position
of the leading edge of the raised
glass handle, marked in the
illustration below as (A).
Rotate the cover glass 90 degrees
clockwise.
13. Note the new position of the cover
glass. The leading edge of the
raised glass edge should have
moved 90 degrees clockwise from
its starting point as shown in the
illustration below as (A).
14. Rotate the front ring 180 degrees
so the door handle is now on the
right hand side. The door handle
is located on the inside of the front
ring. It is a hand-sized indent.
15. Flip the door over so the back
faces up.
16. Reassemble the parts, preserving
their new alignments.
17. Reinsert the single screw that goes
under the striker plate. Tighten the
screw securely.
18. Rotate the striker cover and striker
180 degrees so the assembly fits
to the install area on the opposite
side of the door (where the hinge
had been). Reinstall the striker
cover and striker to the new
location and securely tighten the
two cover screws.
10
Loading ...
Loading ...
Loading ...