1
.)+4>
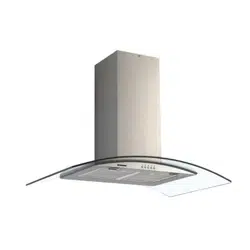
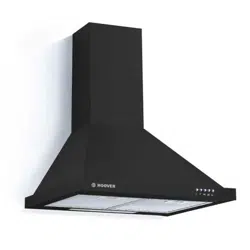
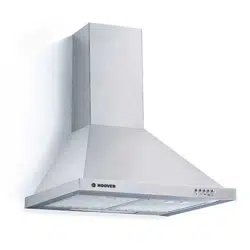
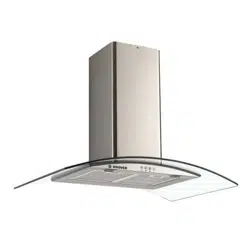
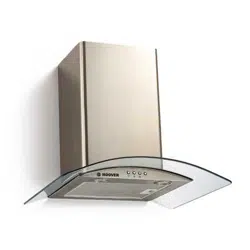
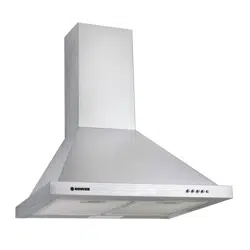
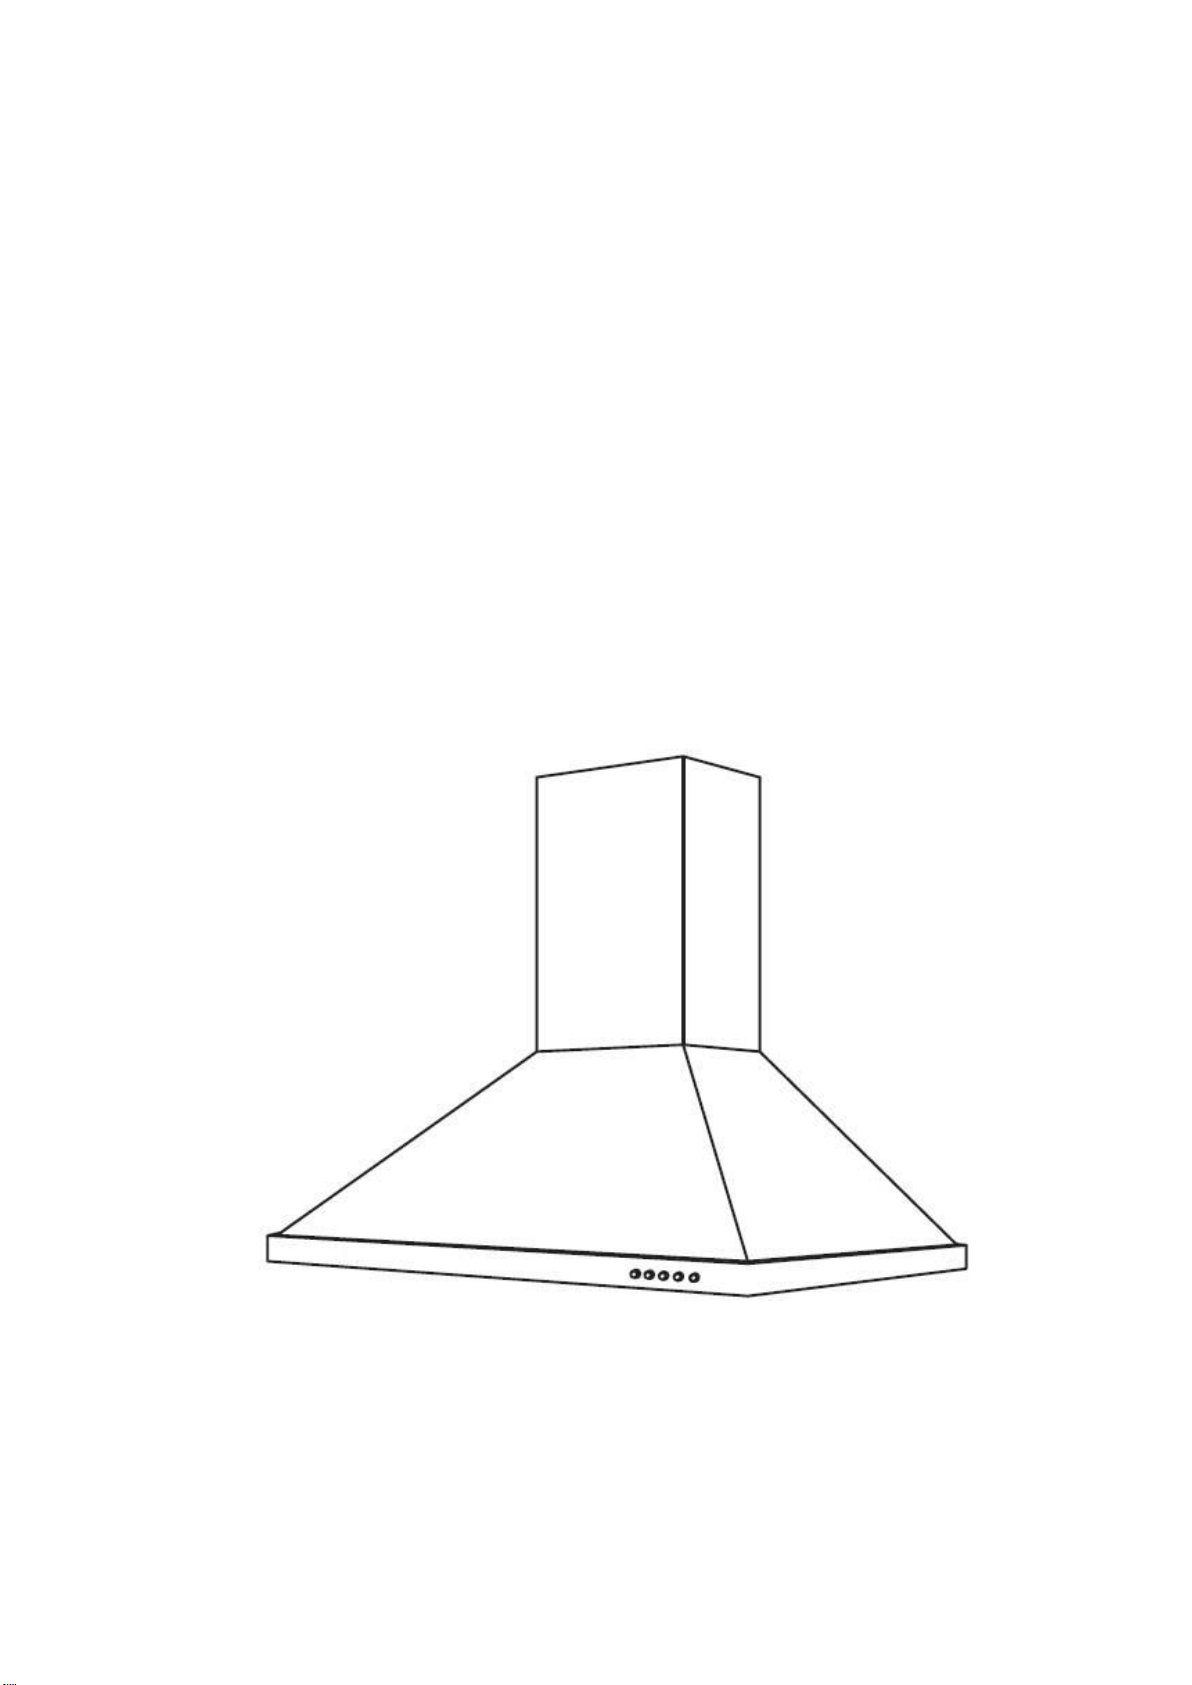
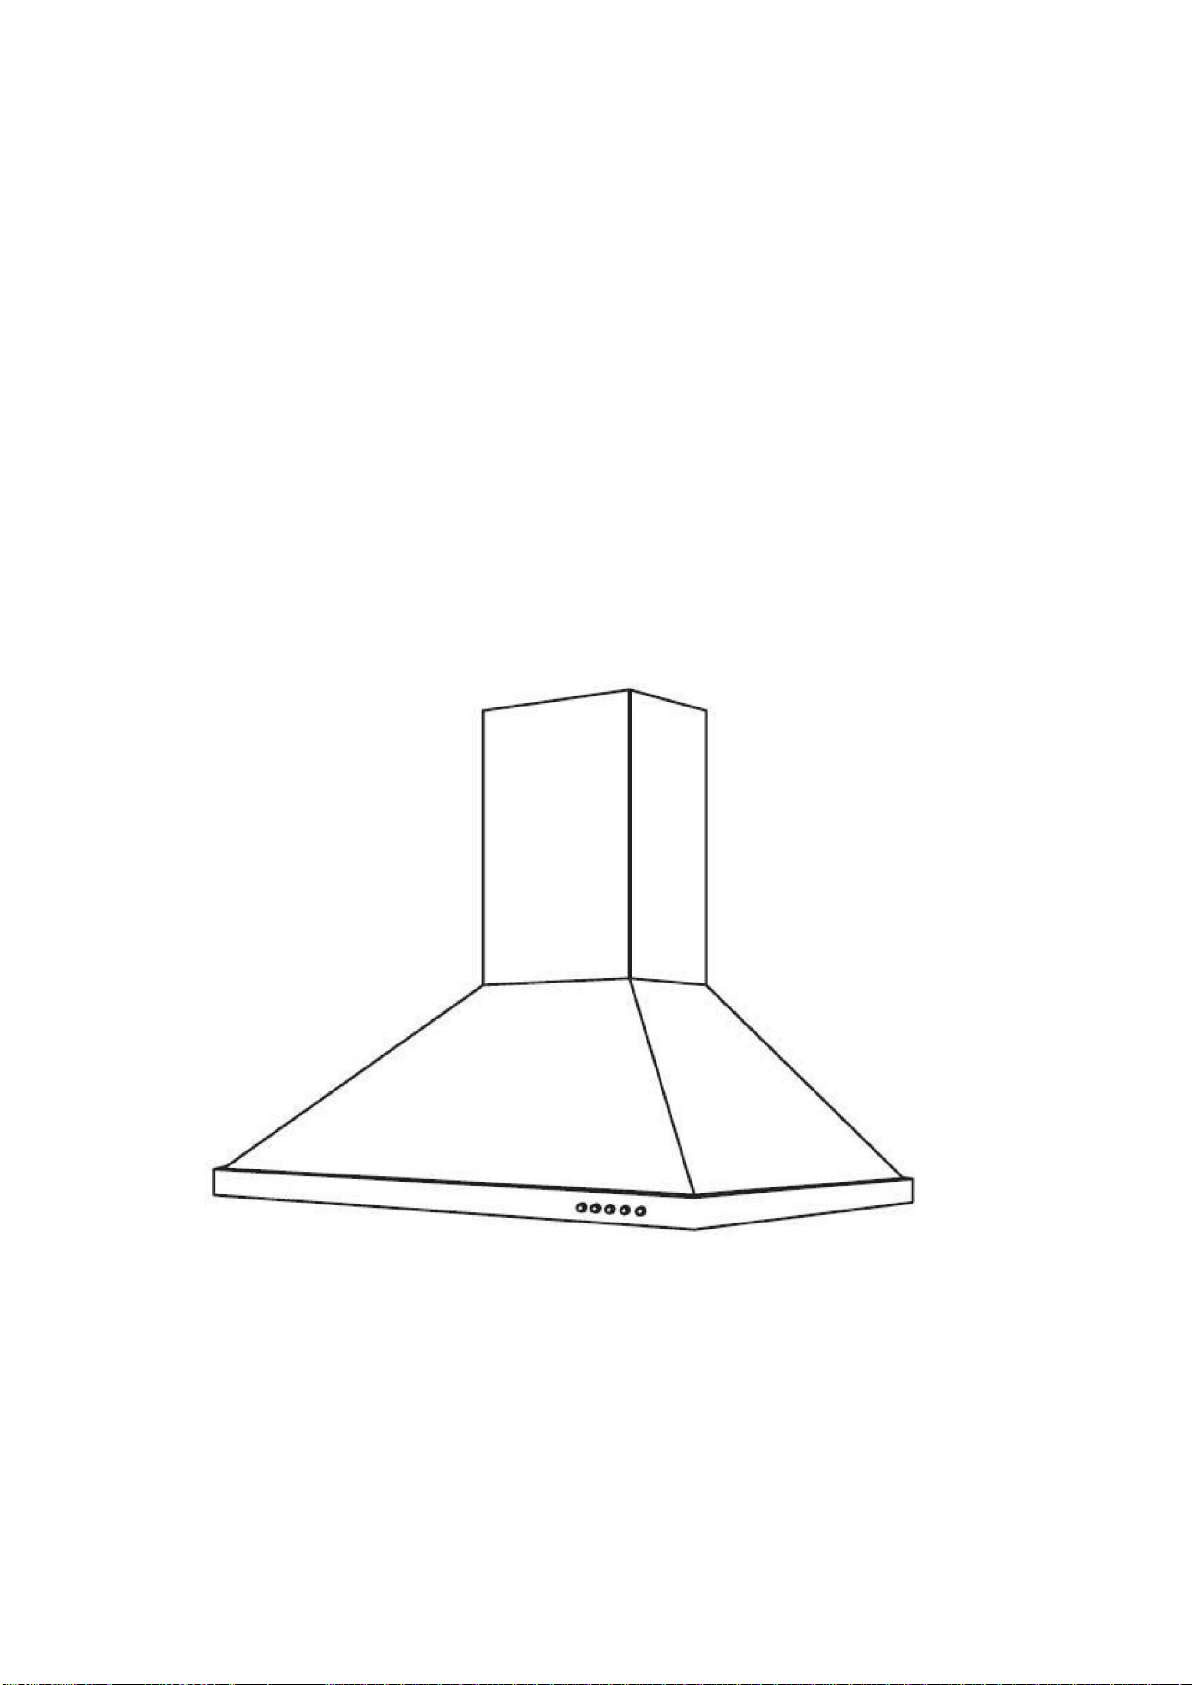
Cooker Hood
Instruction Manual

2
Content
1…………………………………..………………………………Safety instructions
2…………………………………..………………………………Installation
3…………………………………..………………………………Start using your cooker hood
4…………………………………..………………………………Troubleshooting
5…………………………………..………………………………Maintenance and cleaning
6…………………………………..………………………………Environment protection
3
SAFETY INSTRUCTIONS
This manual explains the proper installation and use of your cooker hood,
please read it carefully before using even if you are familiar with the product.
The manual should be kept in a safe place for future reference.
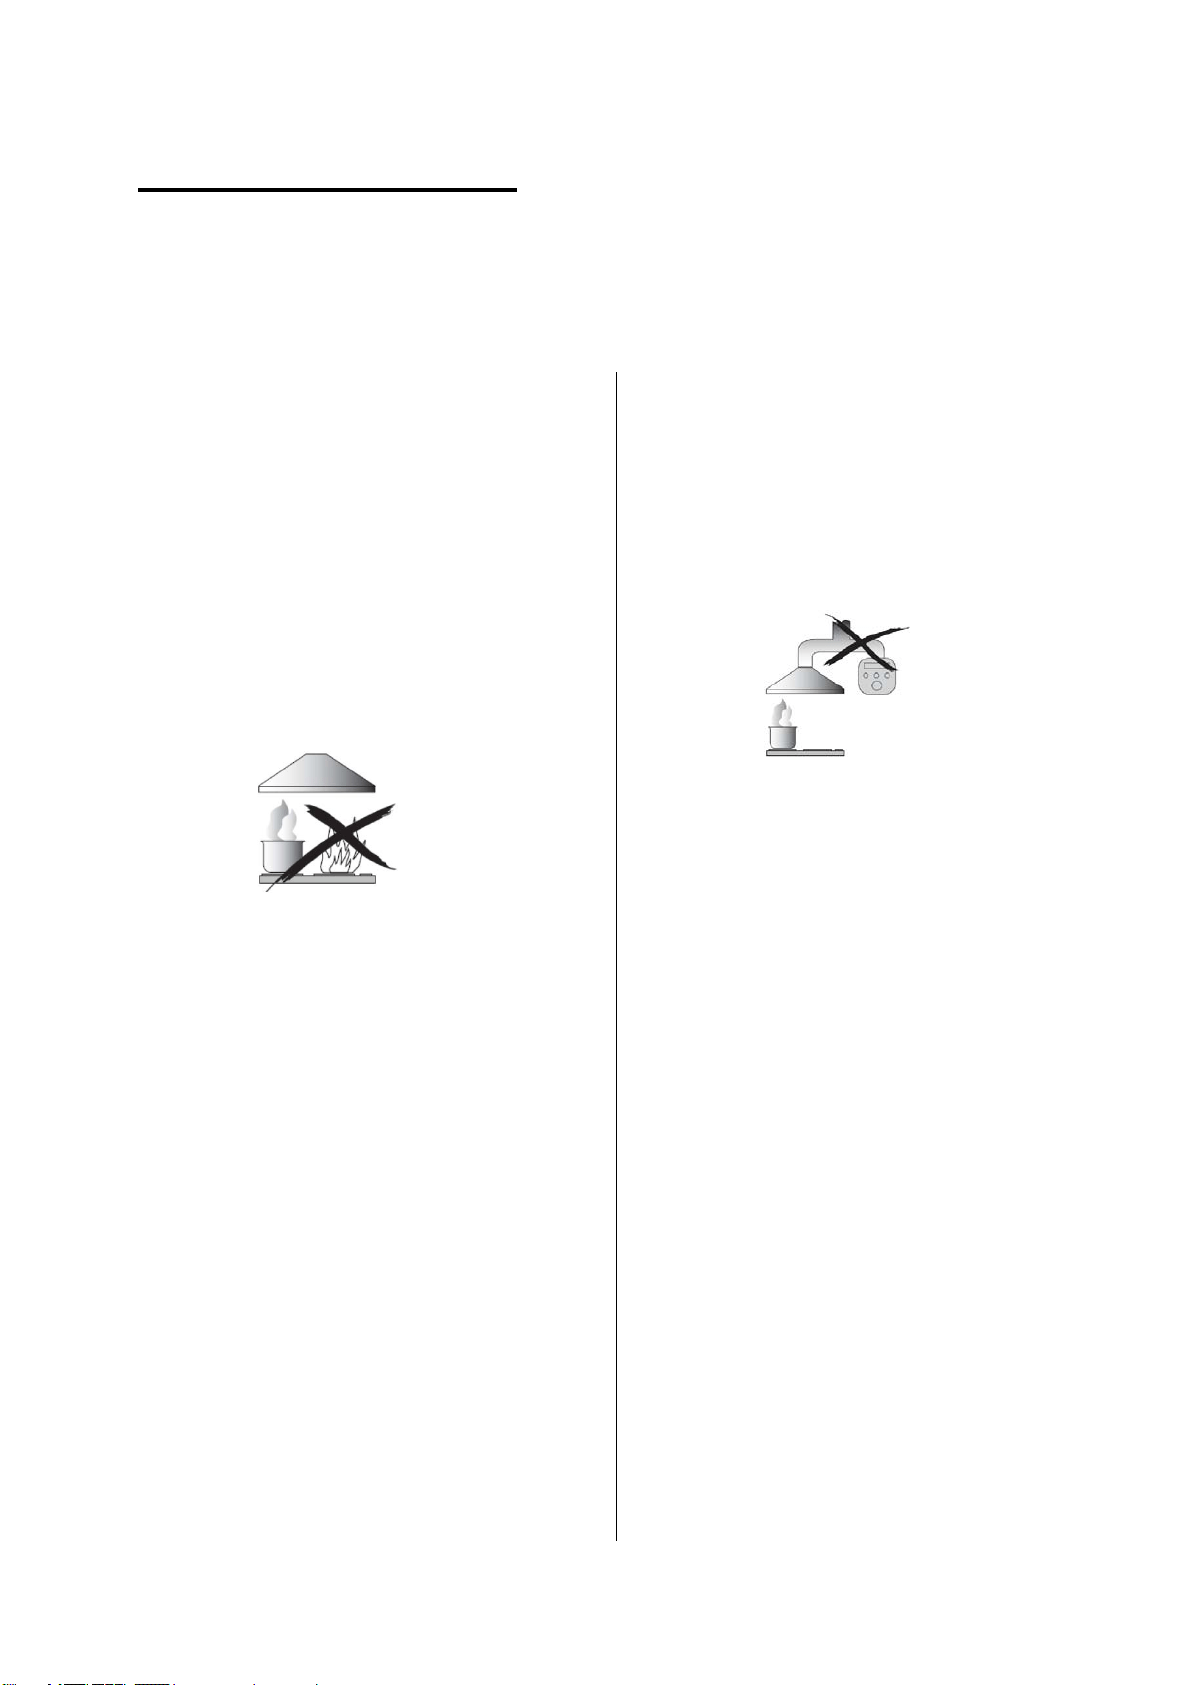
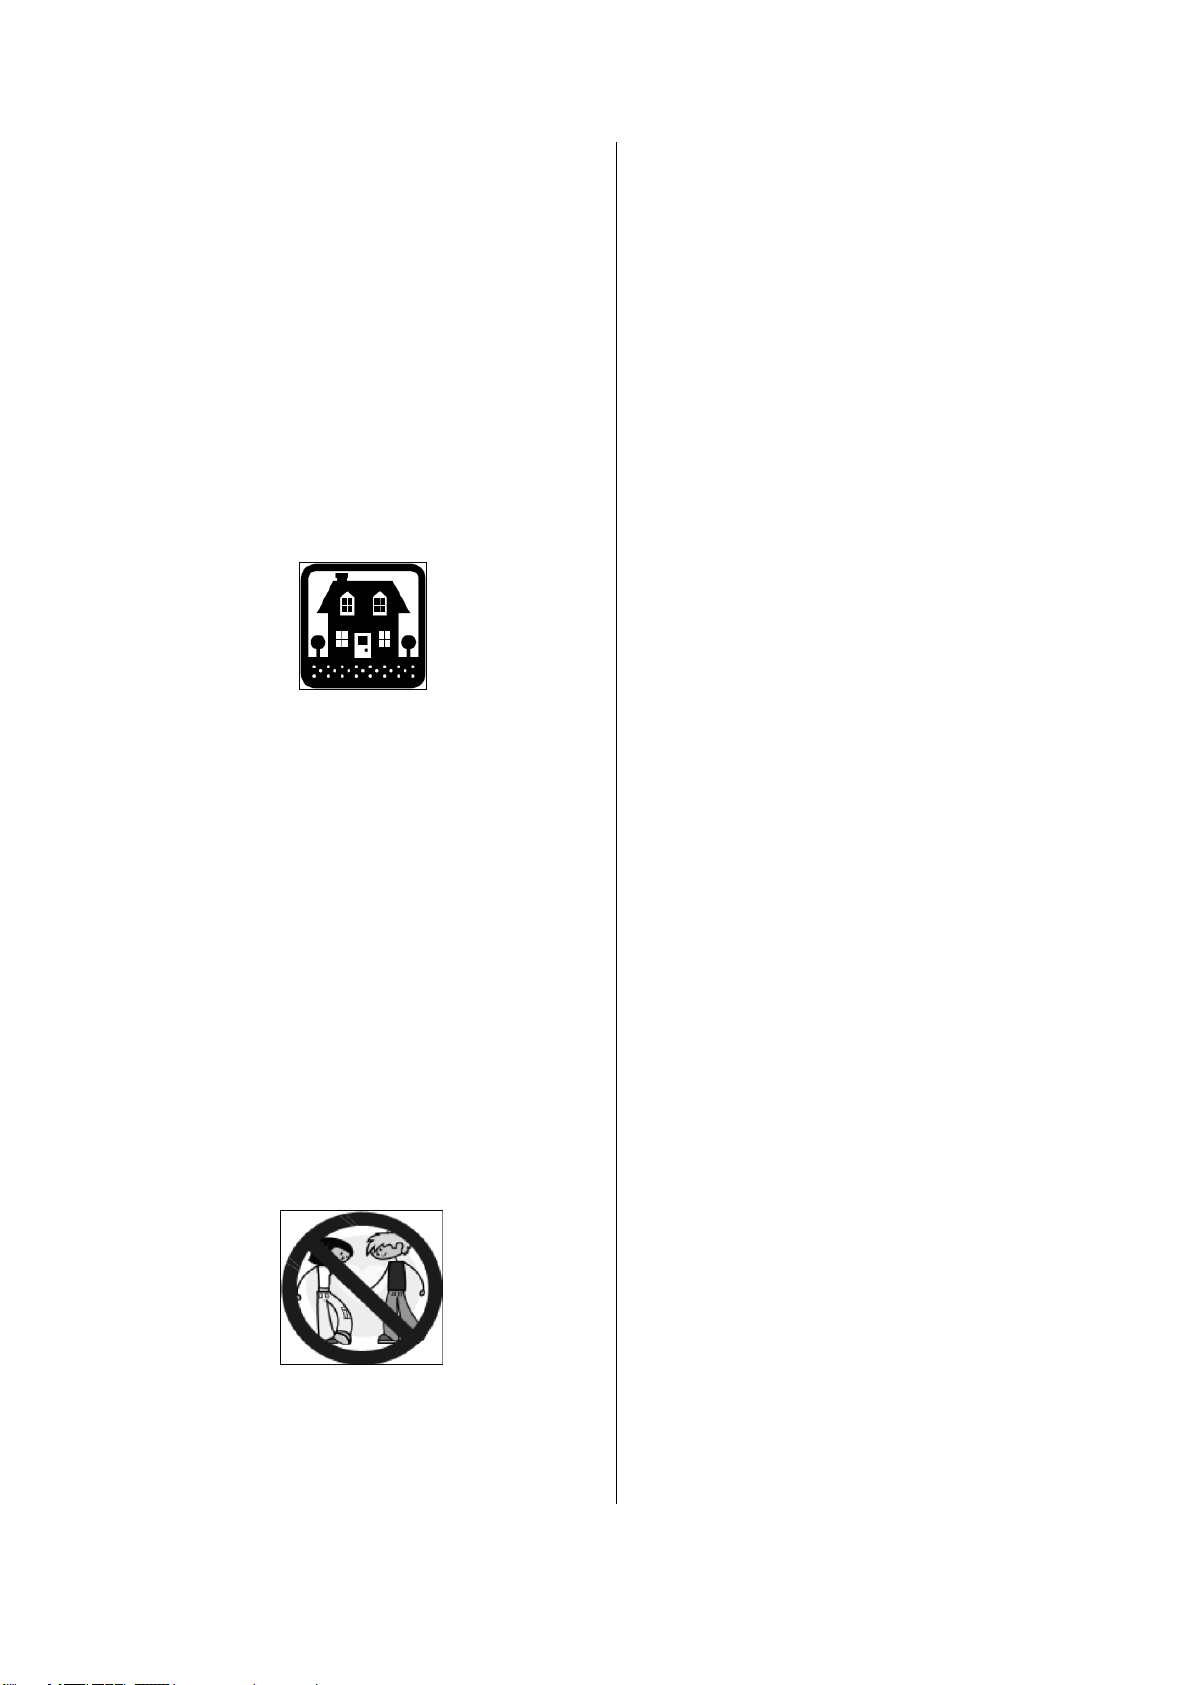
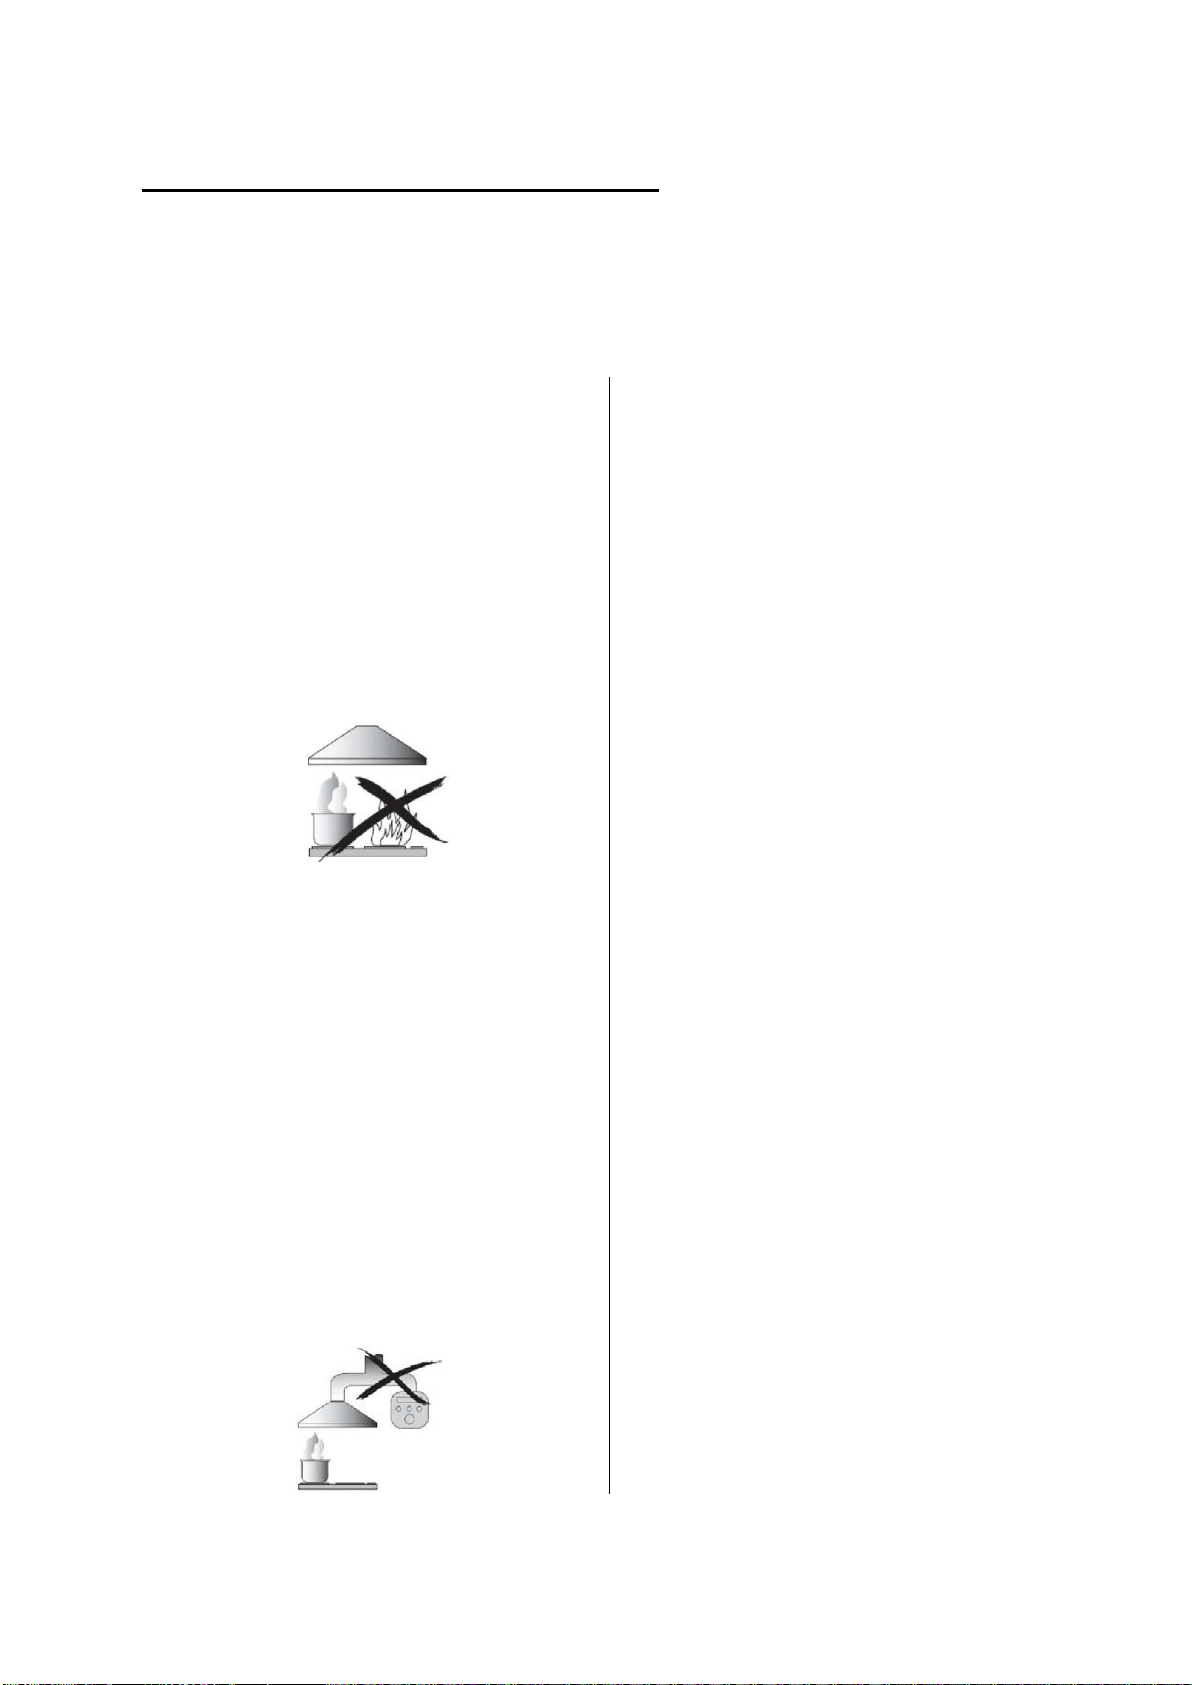
Never to do:
● Do not try to use the cooker hood
without the grease filters or if the filters
are excessively greasy!
●
Do not install above a cooker with a
high level grill.
●Do not leave frying pans unattended
during use because overheated fats or
oils might catch fire.
●
Never leave naked flames under the
cooker hood.
●
If the cooker hood is damaged, do not
attempt to use.
●
Do not flambé under the cooker hood.
●
CAUTION: Accessible parts may
become hot when used with cooking
appliances.
●The minimum distance between the
supporting surface for the cooking
vessels on the hob and the lowest part
of the cooker hood. (When the cooker
hood is located above a gas appliance,
this distance shall be at least 65 cm)
●
The air must not be discharged into a
flue that is used for exhausting fumes
from appliances burning gas or other
fuels. Range hoods and other cooking
fume extractors may adversely affect
the safe operation of appliances
burning gas or other fuels (including
those in other rooms) due to back flow
of combustion gases. These gases
can potentially result in carbon
monoxide poisoning. After installation
of a range hood or other cooking fume
extractor, the operation of open flued
gas appliances should be tested by a
competent person to ensure that back
flow of combustion gases does not
occur.
Always to do:
● Important! Always switch off the
electricity supply at the mains during
installation and maintenance such as
light bulb replacement.
●
The cooker hood must be installed in
accordance with the installation
instructions and all measurements
followed.
●
All installation work must be carried
out by a competent person or qualified
electrician.
●
Please dispose of the packing material
carefully. Children are vulnerable to it.
● Pay attention to the sharp edges
inside the cooker hood especially
during installation and cleaning.
●
Make sure the ducting has no bends
sharper than 90 degrees as this will
reduce the efficiency of the cooker
hood.
●Warning: Failure to install the screws
or fixing device in accordance with
these instructions may result in
electrical hazards
4
●Warning: Before obtaining access to
terminals, all supply circuits must be
disconnected.
Always to do:
●Always put lids on pots and pans
when cooking on a gas cooker.
●
When in extraction mode, air in the
room is being removed by the cooker
hood. Please make sure that proper
ventilation measures are being
observed. The cooker hood removes
odours from room but not steam.
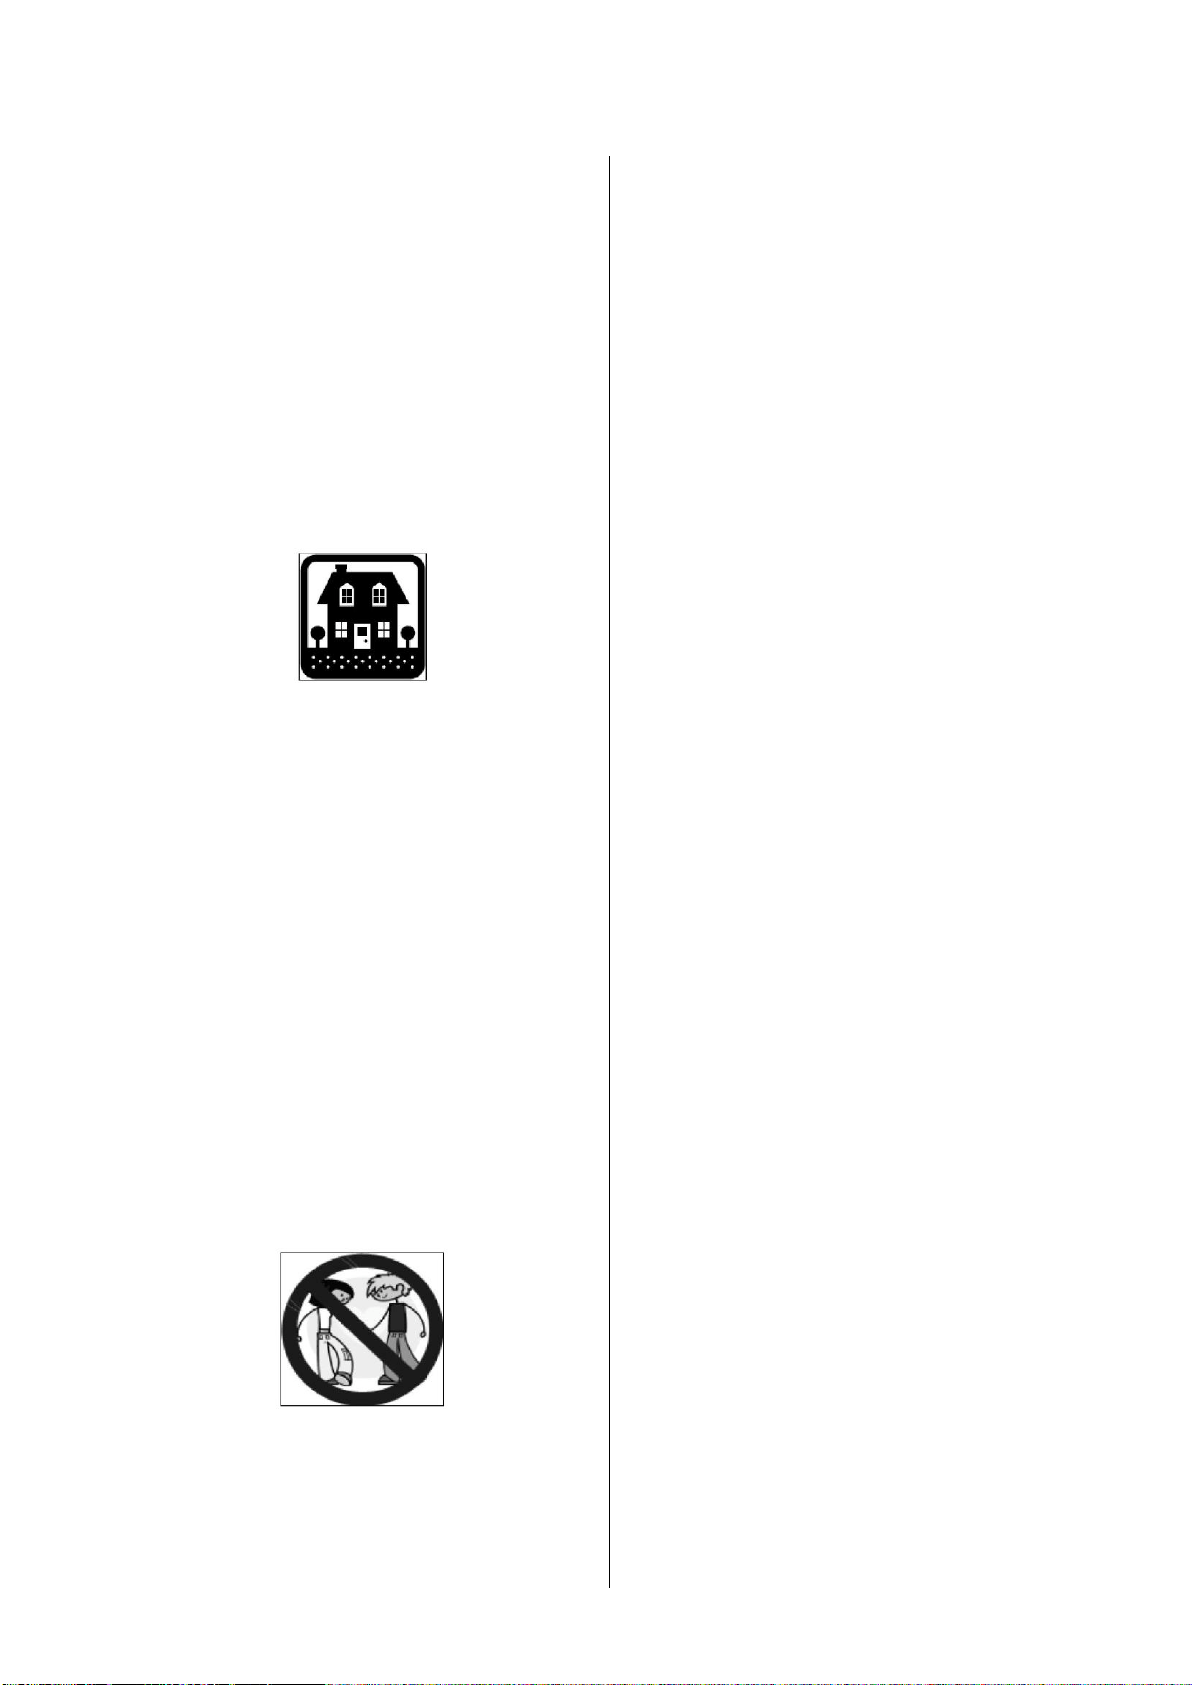
●Cooker hood is for domestic use only.
●
If the supply cord is damaged, it must
be replaced by the manufacturer, its
service agent or similarly qualified
persons in order to avoid a hazard.
●This appliance can be used by
children aged from 8 years and above
and persons with reduced physical,
sensory or mental capabilities or lack
of experience and knowledge if they
have been given supervision or
instruction concerning use of the
appliance in a safe way and
understand the hazards involved.
Children shall not play with the
appliance. Cleaning and user
maintenance shall not be made by
children without supervision.
●Warning: Before obtaining access to
terminals, all supply circuits must be
disconnected.
Always to do:
●
Caution: The appliance and its
accessible parts can become hot
during operation. Be careful to avoid
touching the heating elements.
Children younger than 8 years old
should stay away unless they are
under permanent supervision.
●
There shall be adequate ventilation of
the room when the cooker hood is
used at the same time as appliances
burning gas or other fuels.
●There is a fire risk if cleaning is not
carried out in accordance with the
instructions
●Regulations concerning the discharge
of air have to be fulfilled.
●
Clean your appliance periodically by
following the method given in the
chapter MAINTENANCE.
●
For safety reason, please use only the
same size of fixing or mounting screw
which are recommended in this
instruction manual.
●Regarding the details about the
method and frequency of cleaning,
please refer to maintenance and
cleaning section in the instruction
manual.
●
Cleaning and user maintenance shall
not be made by children without
supervision.
●
When the cooker hood and
appliances supplied with energy other
than electricity are simultaneously in
operation, the negative pressure in the
room must not exceed 4 Pa (4 x 10⁻⁵
bar).
●WARNING: Danger of fire: do not
store items on the cooking surfaces.
●
A steam cleaner is not to be used.
●
NEVER try to extinguish a fire with
water, but switch off the appliance and
then cover flame e.g. with a lid or a
fire blanket.

5
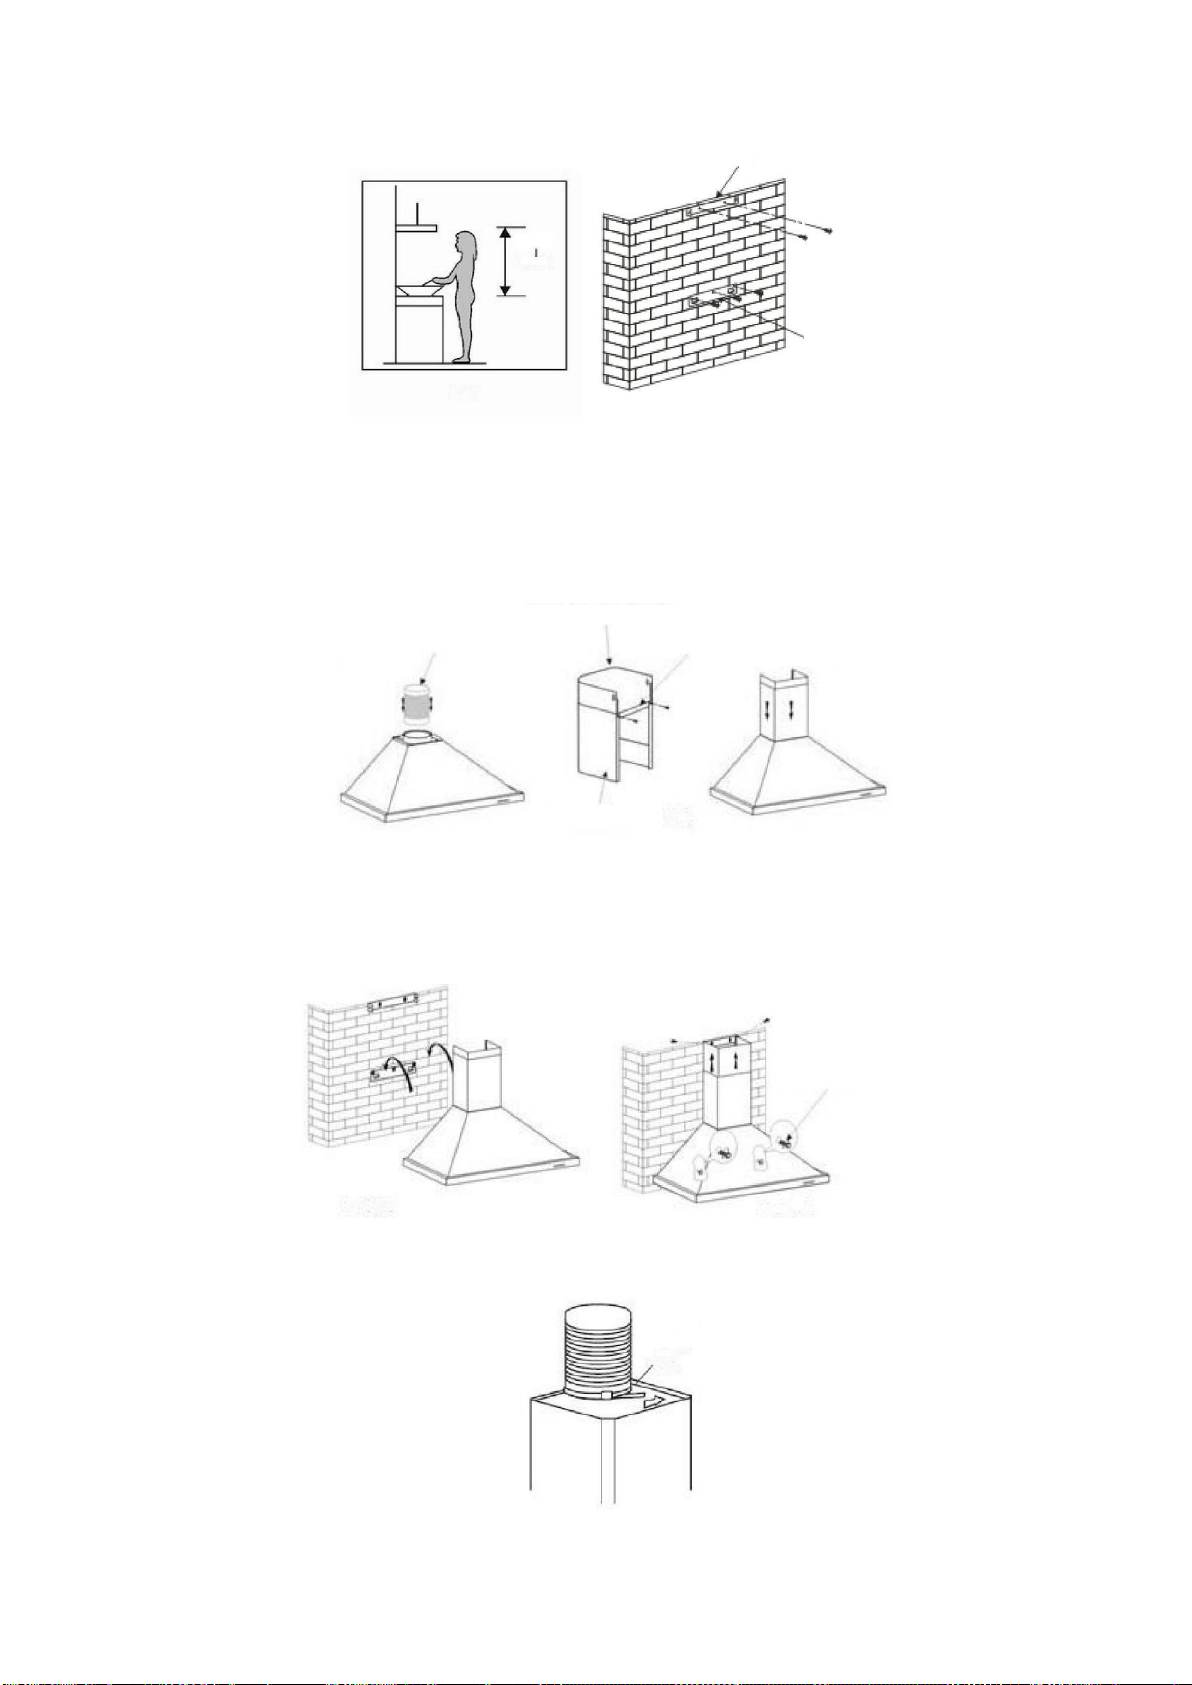
INSTALLATION (VENT OUTSIDE)
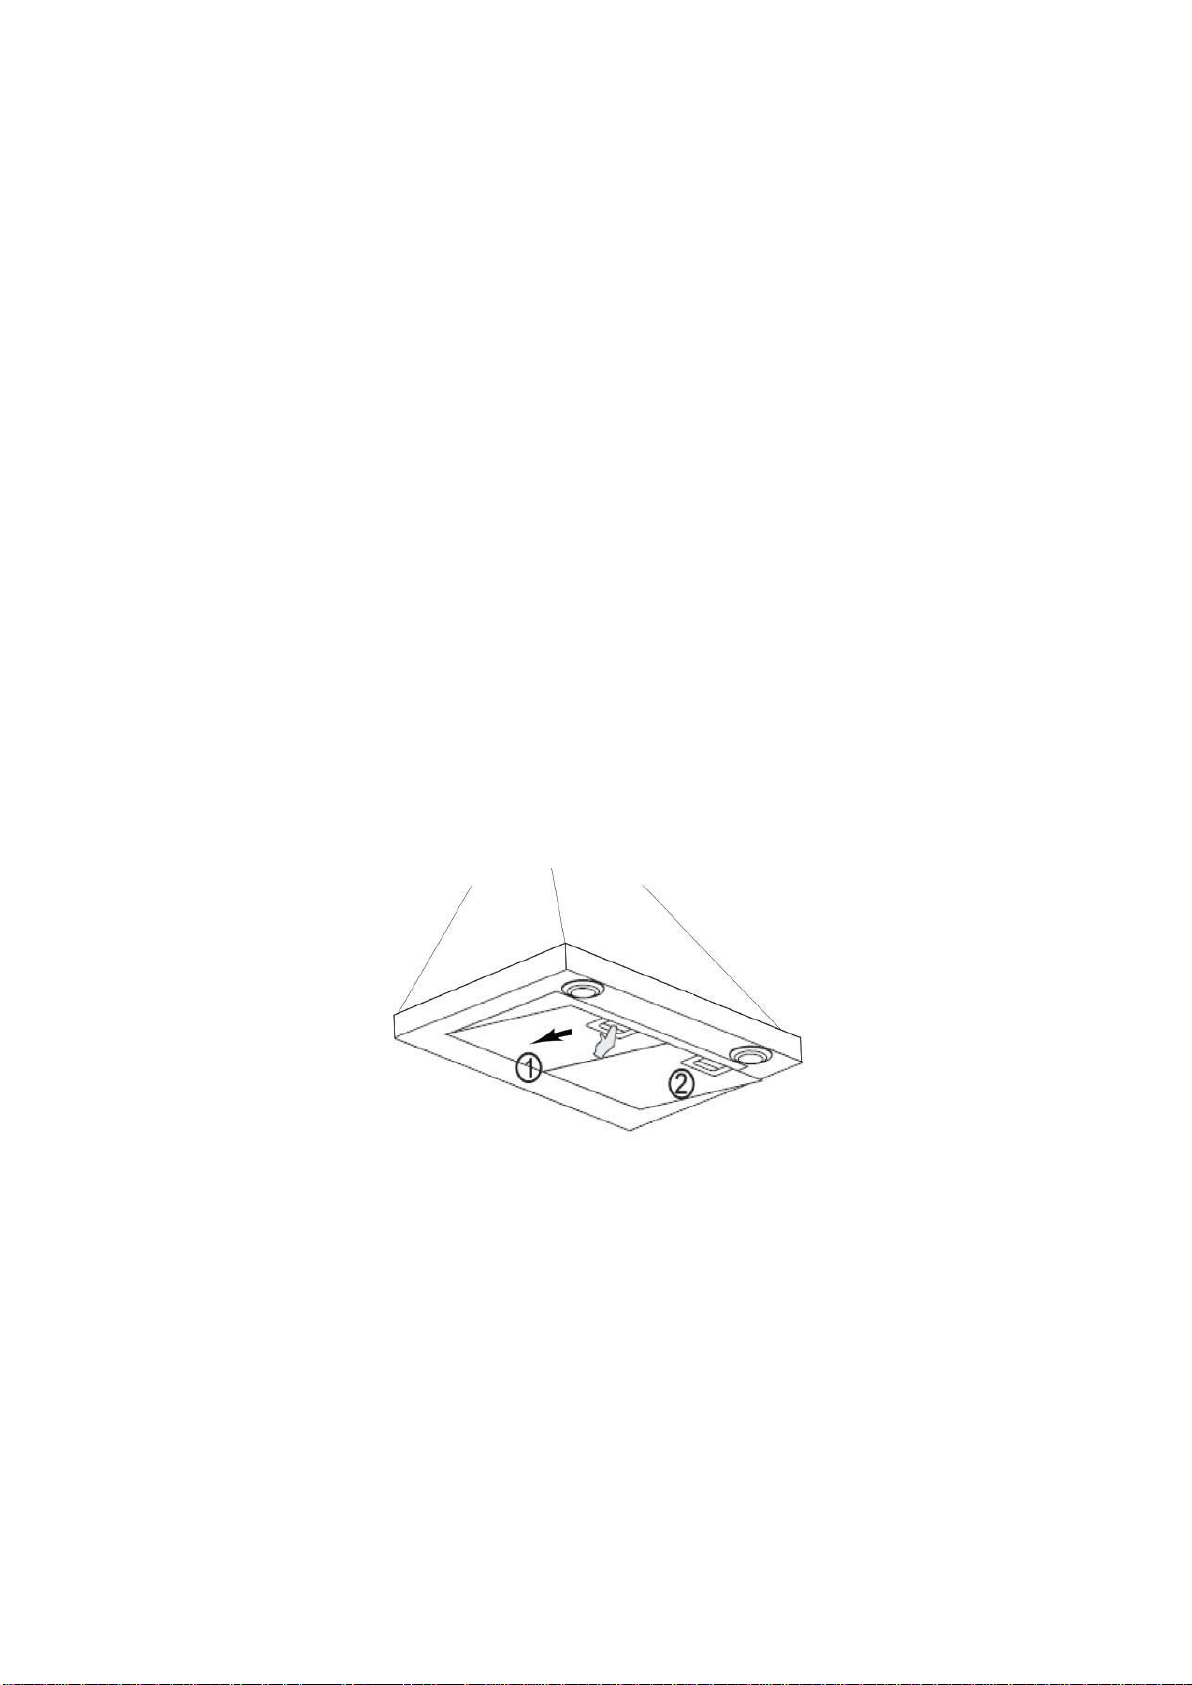
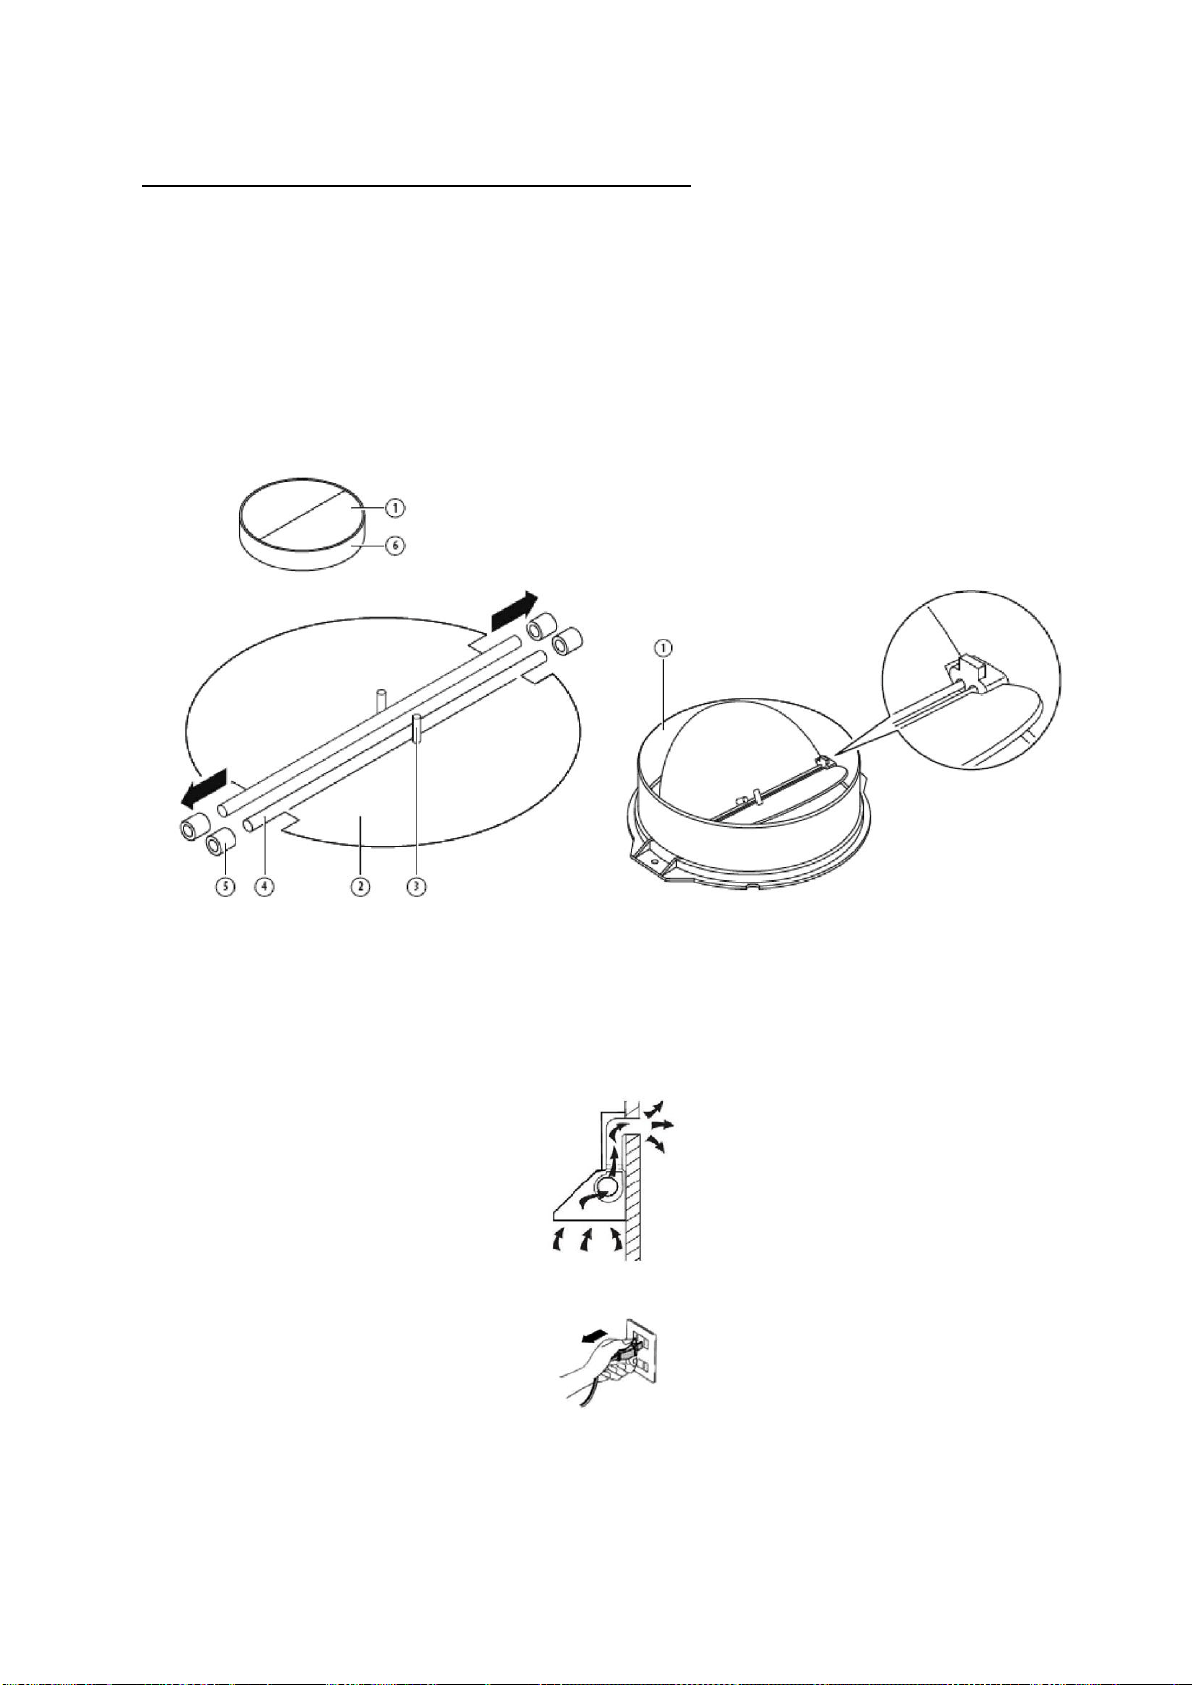
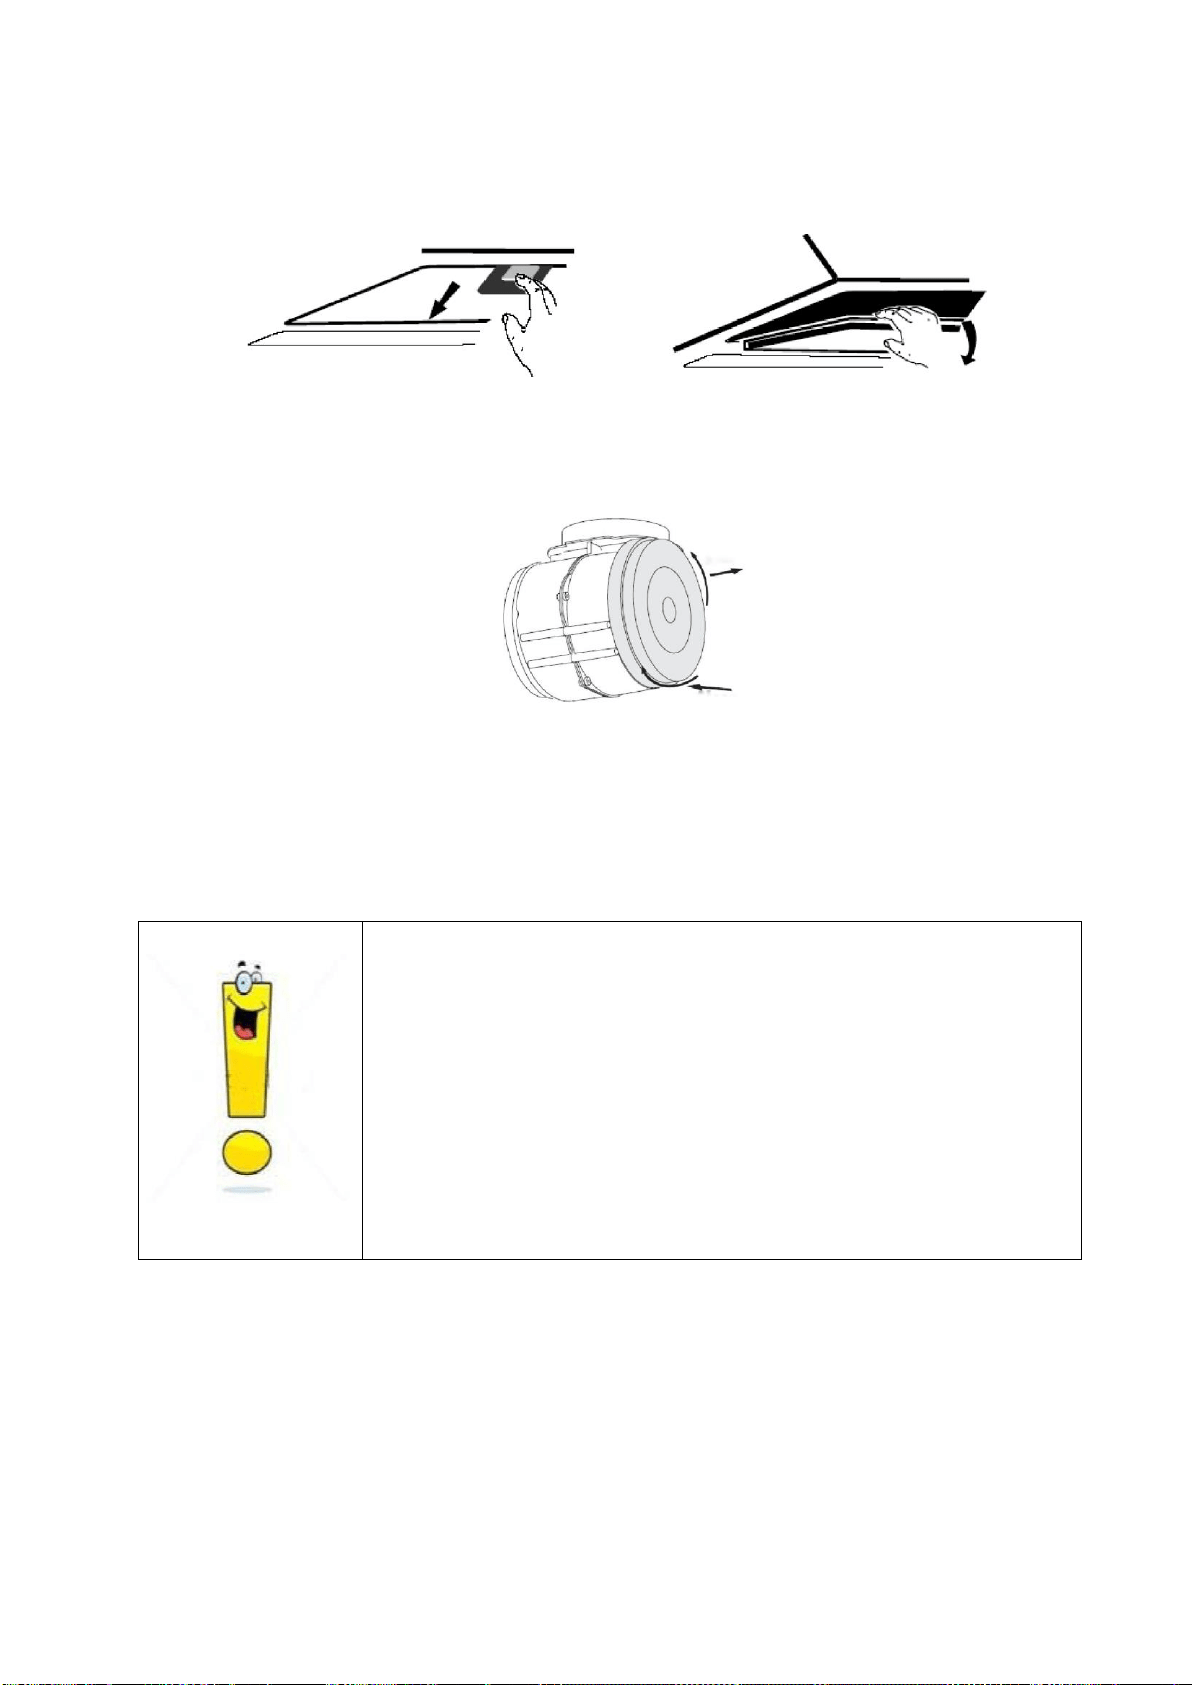
MOUNTING OF THE V-FLAP
If the cooker hood does not have an assembled V-flap 1, you should mount the half-
parts to its body.The images only show an example of how to mount the V-
flap,because the outlet may vary according to different models and configurations.
To mount the V-flap 1 you should:
• Mount two half-parts 2 into the body 6
• the pin 3 should be top oriented;
• the axis 4 should be inserted into the holes 5 on the body;
• repeat all the operations for the 2nd half-part
INSTALLATION
If you have an outlet to the outside, your cooker hood can be connected as below
picture by means of an extraction duct (enamel, aluminum, flexible pipe or non-
flammable material with an interior diameter of 150mm)
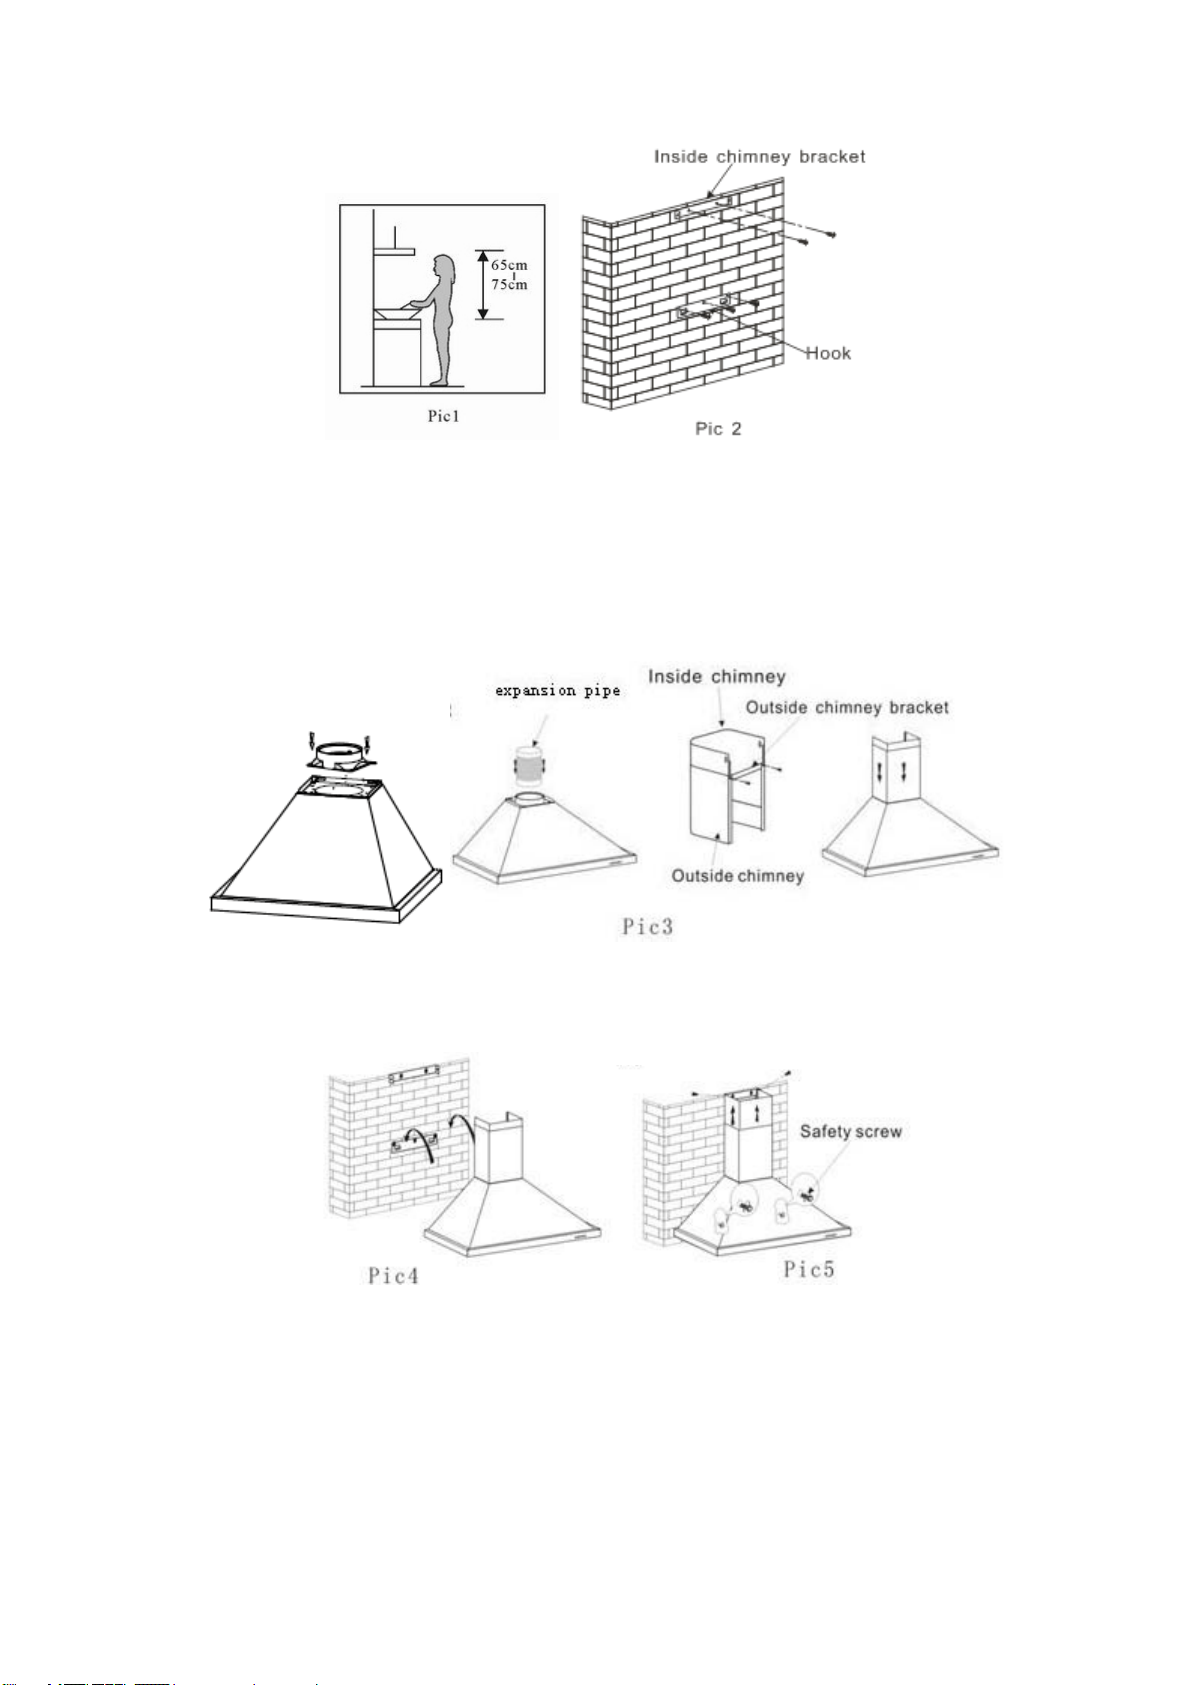
1. Before installation, turn the unit off .
2. The cooker hood should be placed at a distance of 65~75cm above the cooking
surface for best effect.
6
3. Install the hook on a suitable place once the installation height is fixed, and keep it
in line. The fixed position of the inside chimney bracket is the place of chimney. See
pic 2.
4. Install the outlet on the cooker hood with 4pcs screws.Fix the outside chimney
bracket on the outside chimney, and be sure that the inside chimney can be adjusted
the height in it freely as well as fixing the expansion pipe. Afterwards,fix the outlet with
screws and put the expansion pipe with the cable tie on the outlet.Then install the
chimneys on the cooker hood. See Pic 3.
5. Put the cooker hood on the hook. See Pic 4.
6. Adjust the height of the inside chimney to the position of the inside chimney bracket
and fix on it by screw, after adjusting the position, fix the body with safety screw. See
Pic 5. Note:the expansion pipe is not included in the product.
Note: The two safety vents are positioned on the back housing, with diameter of 6mm.
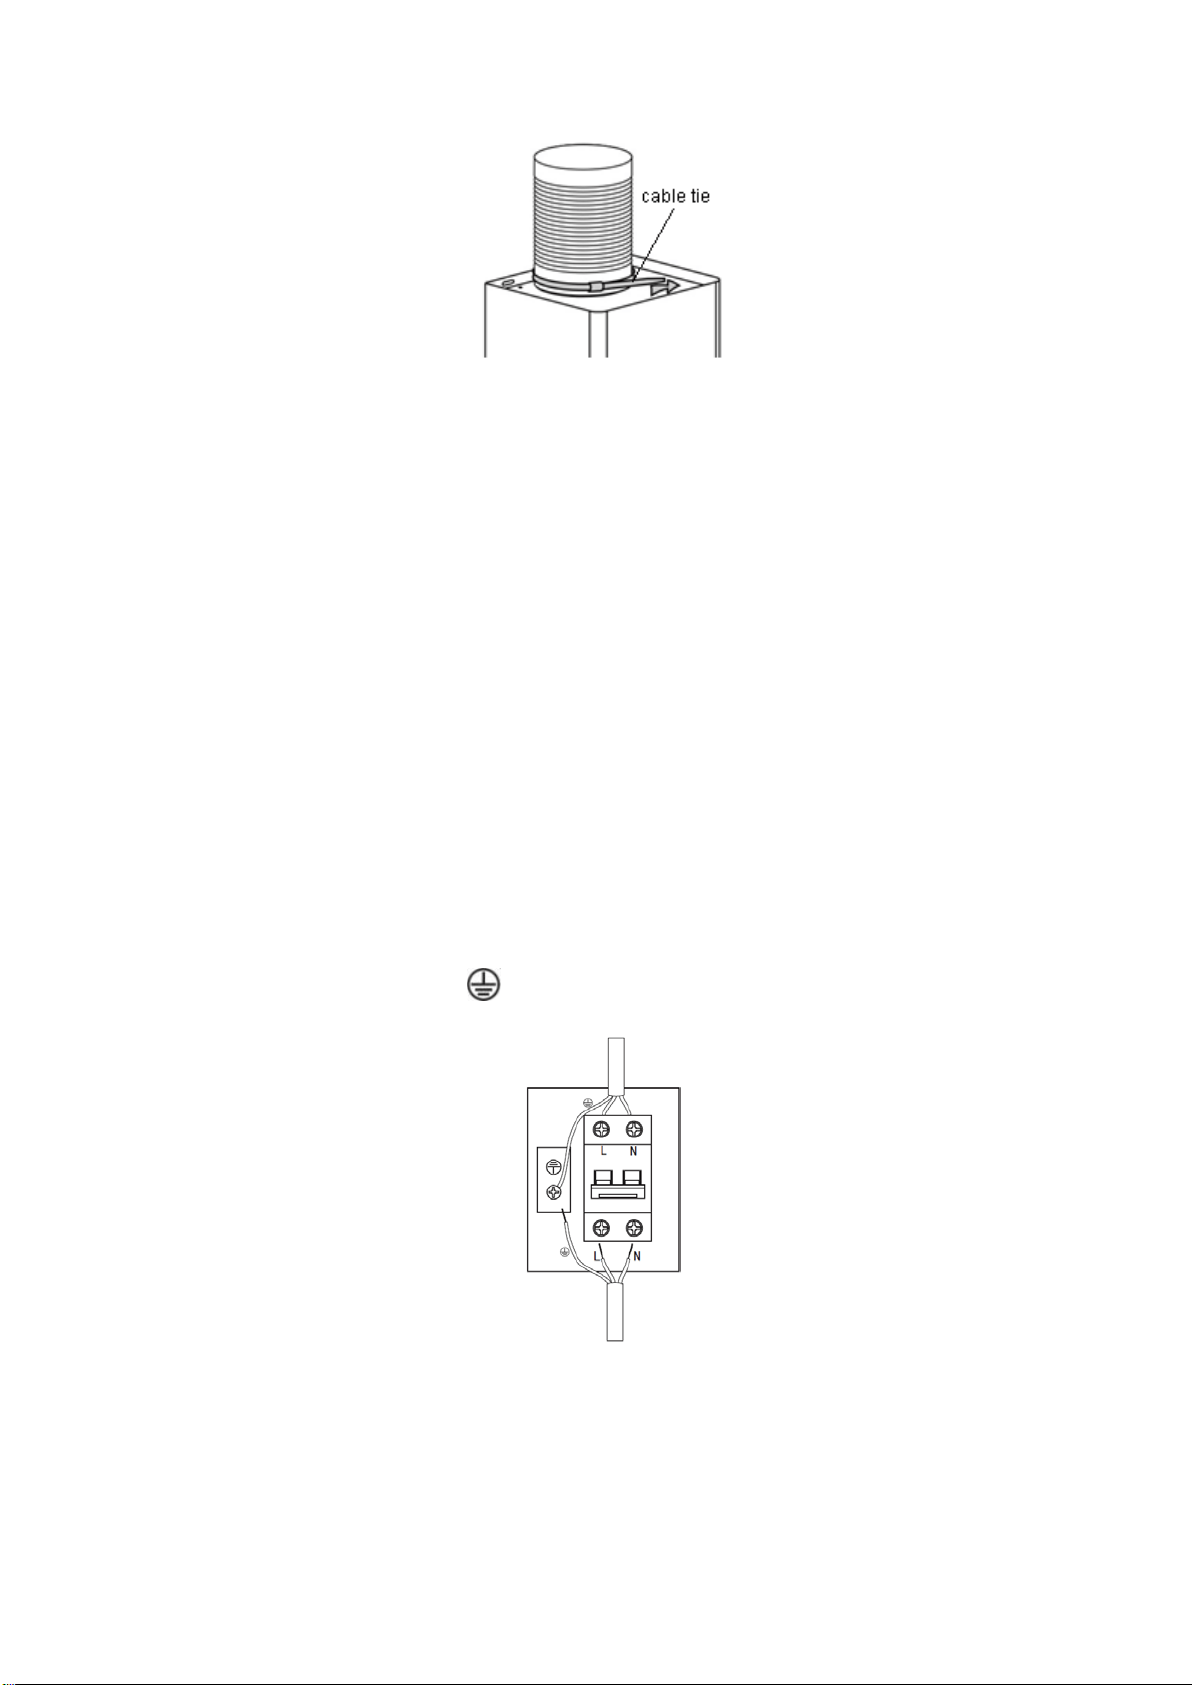
Lay the expansion pipe to the wall outlet. Fix the expansion pipe with a cable tie.
7
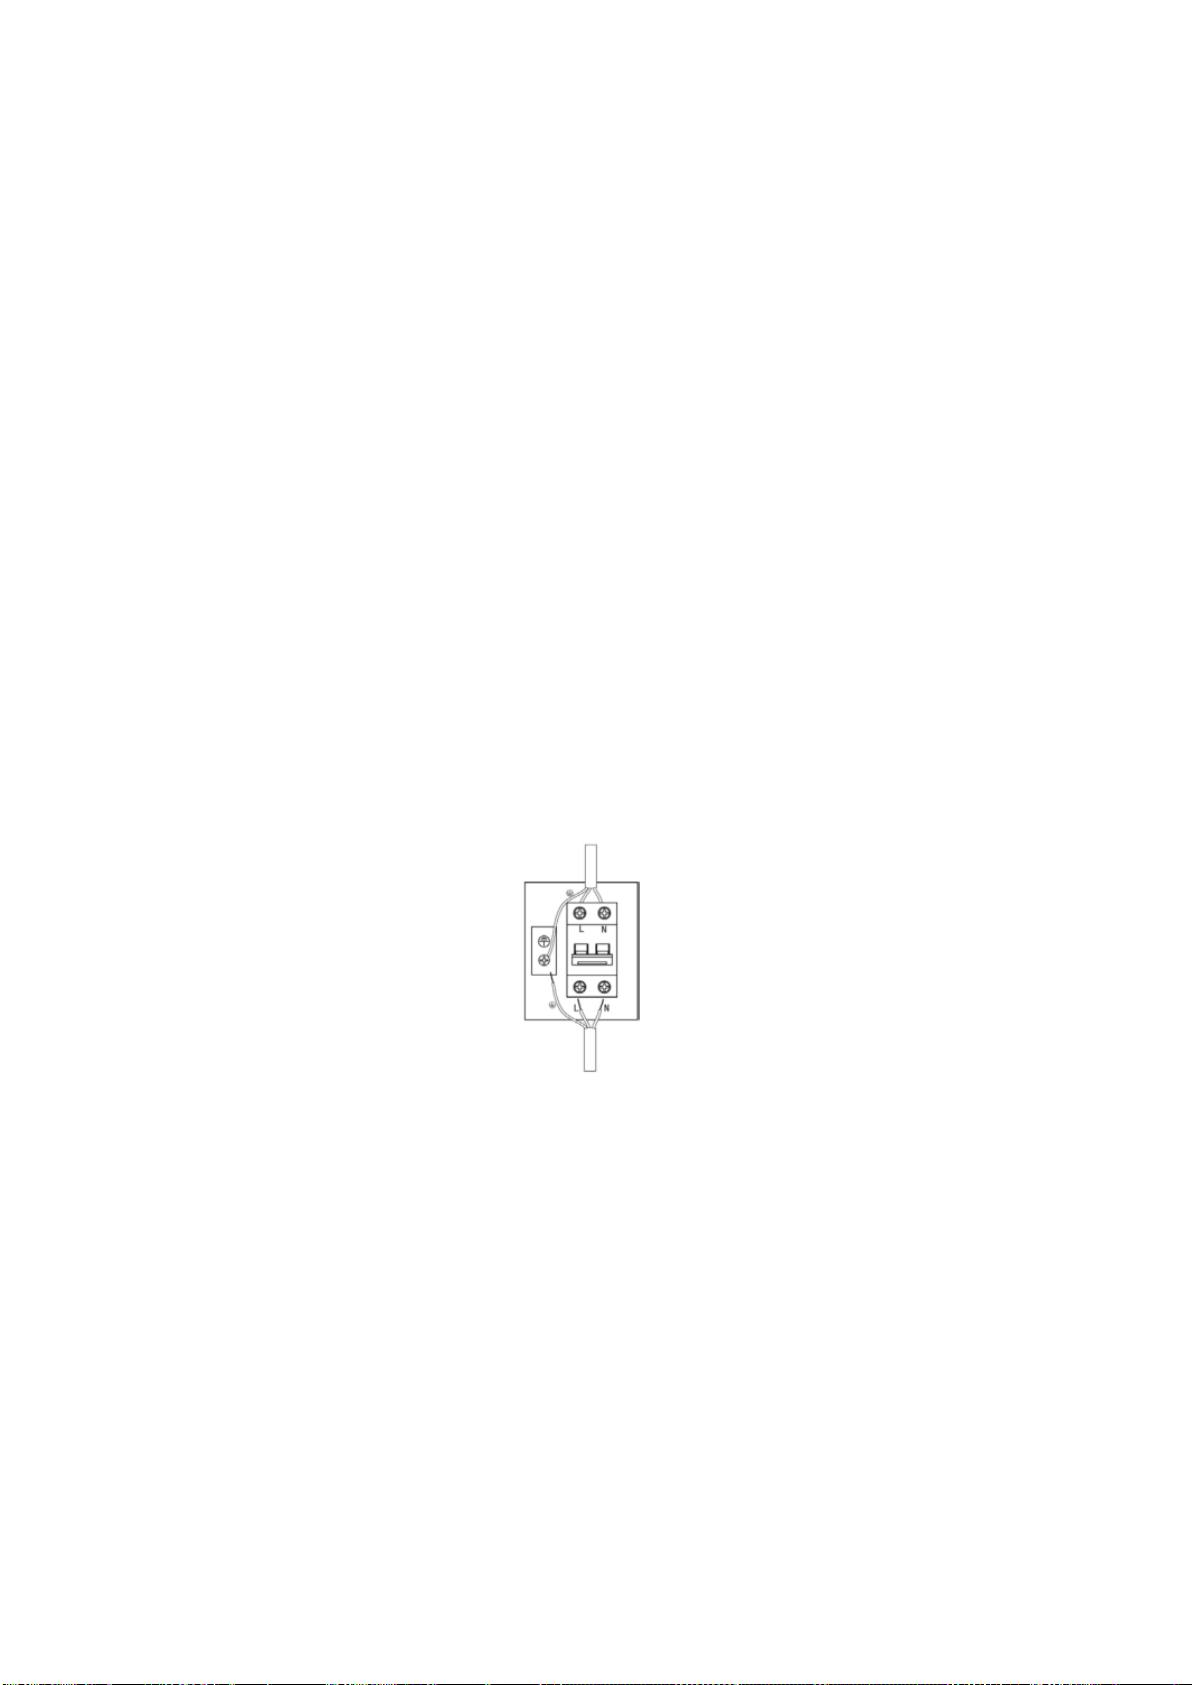
Electrical Installation
All installation must be carried out by a competent person or qualified electrician.
Before connecting the mains supply ensure that the mains voltage corresponds to the
voltage on the rating plate.
Direct Connection
The appliance must be connected directly to the mains using an omnipolar circuit
breaker with a
minimum opening of 3mm between the contacts.
The installer must ensure that the correct electrical connection has been made and
that it complies with the wiring diagram.
The cable must not be bent or compressed.
Regularly check the power plug and power cord for damage. If the supply cord is
damaged, it must be replaced by a special cord or assembly available from the
manufacturer or its service agent.
WARNING: This is a Class I appliance and MUST be earthed
This appliance is supplied with a 3 core mains cable coloured as follows:
Brown = L or Live
Blue = N or Neutral
Green and Yellow = E or Earth
HINTS FOR EXHAUST DUCT INSTALLATION
The following rules must be strictly followed to obtain optimal air extraction:
• Keep expansion pipe short and straight.
• Do not reduce the size or restrict expansion pipe.
• When using expansion pipe always install the pipe pulled taut to minimize pressure
loss.
8
• Failure to observe these basic instructions will reduce the performance and increase
noise levels of the cooker hood.
• Any installation work must be carried out by a qualified electrician or competent
person.
•Do not connect the ducting system of the hood to any existing ventilation system
which is being used for any other appliance ,such as warmer tube, gas tube , hot wind
tube.
•The angle of the bend of the expansion pipe should not be less than 120º; you must
direct the pipe horizontally, or, alternatively, the pipe should go up from the initial point
and should be led to an outer wall.
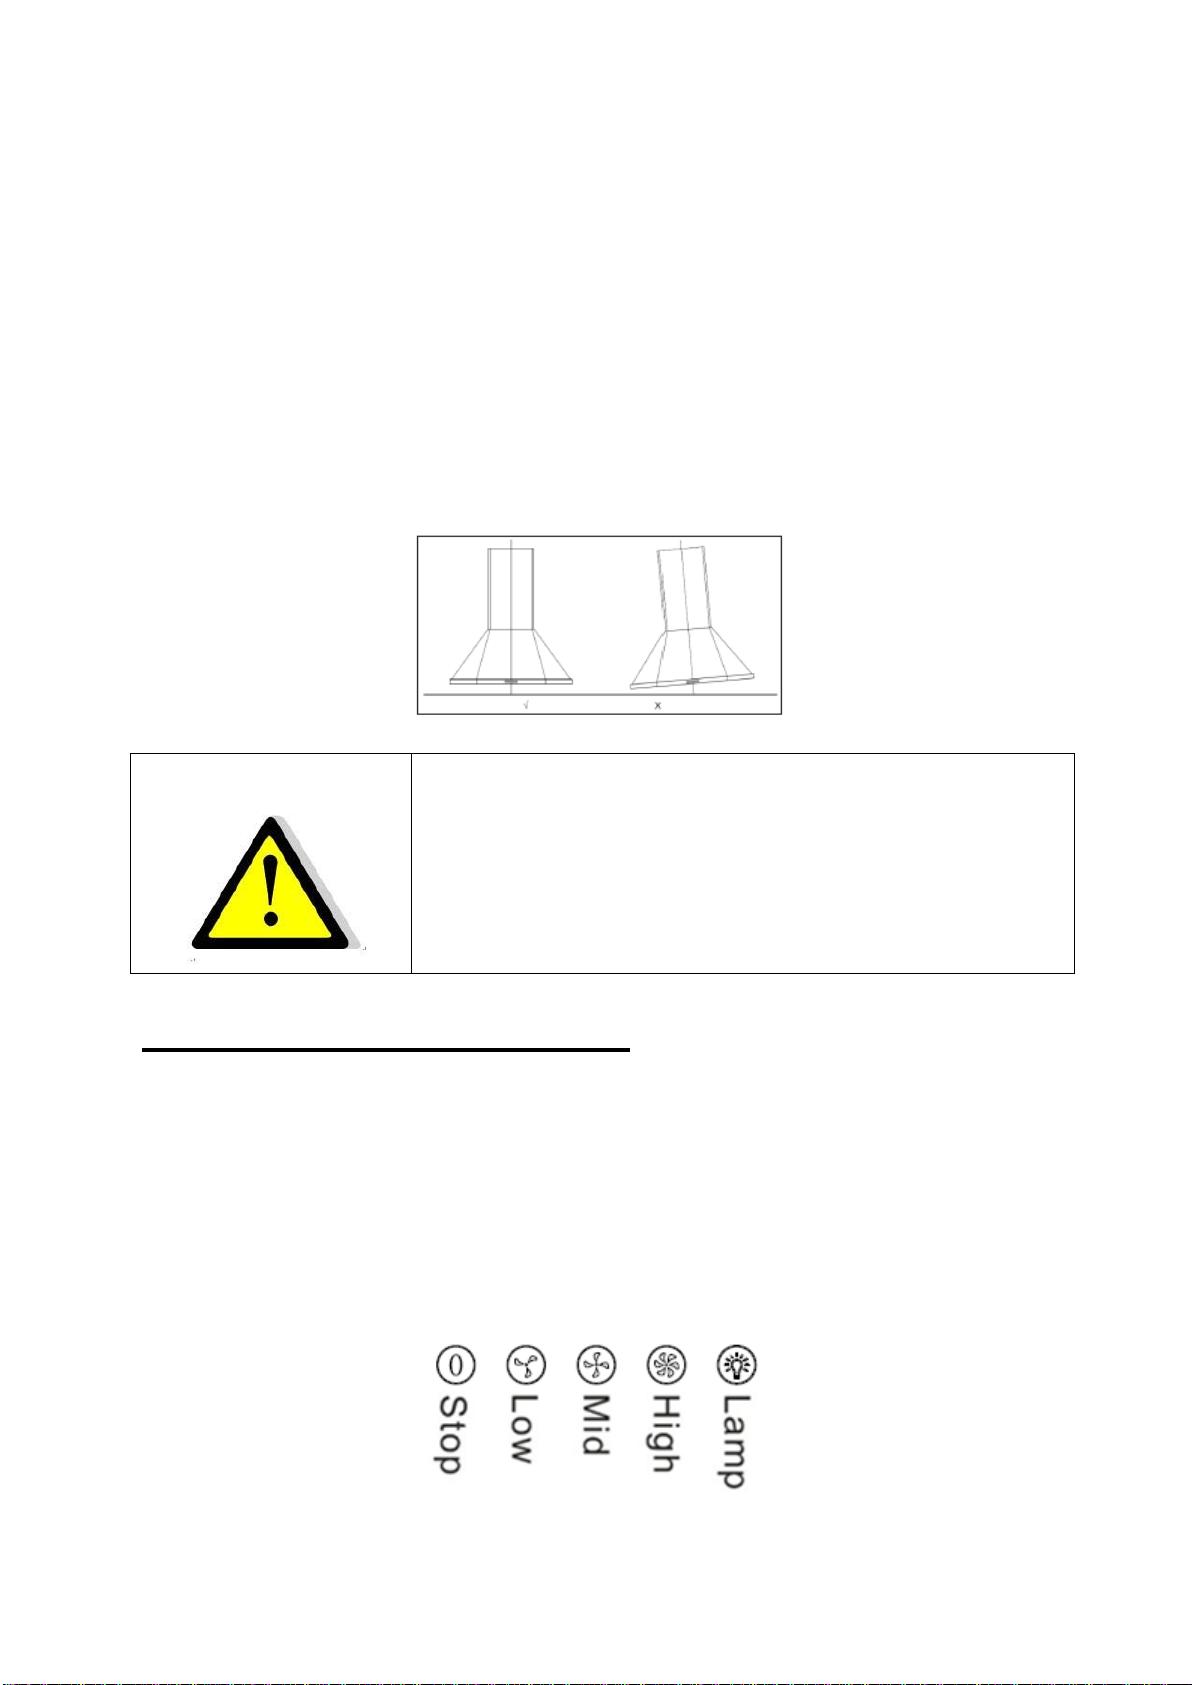
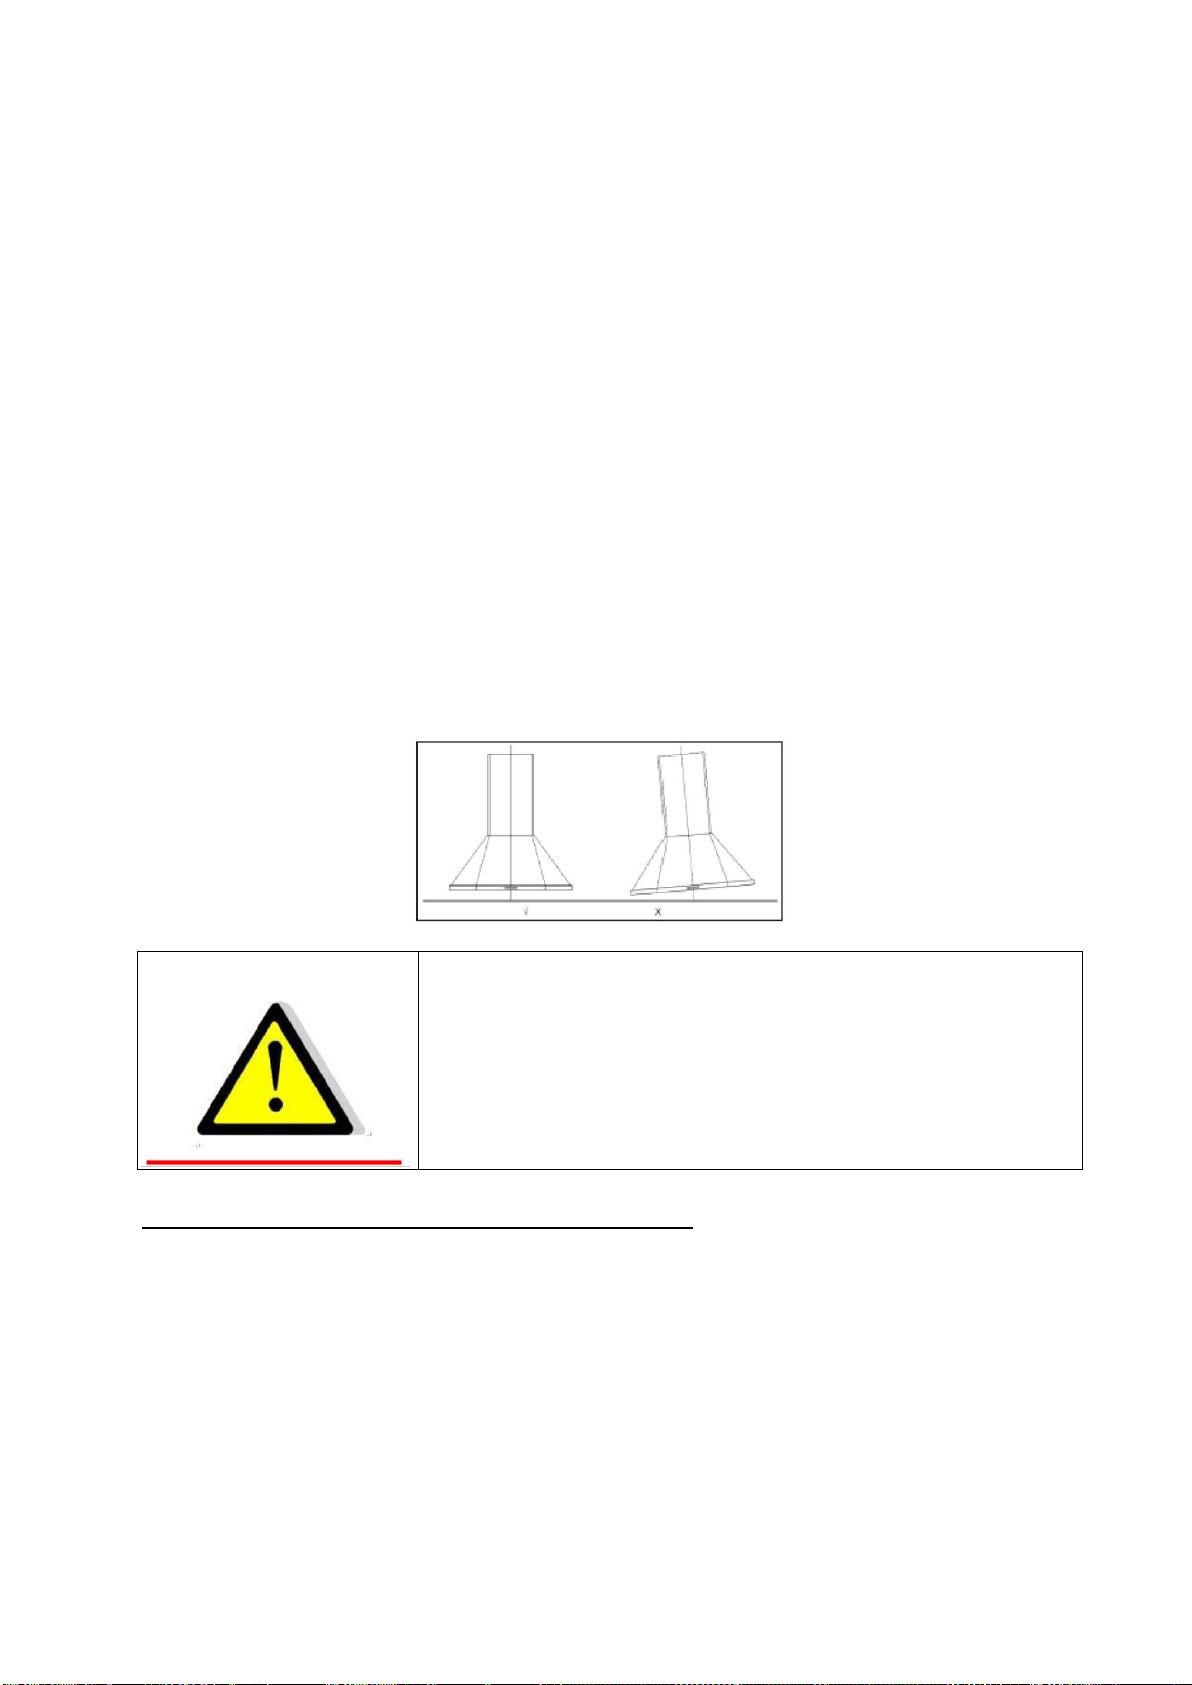
•After the installation ,make sure that the cooker hood is level to avoid grease
collection at on end.
•Ensure the expansion pipe selected for installation complies with relevant standards
and is fire retardant.
WARNING:
For safety reason, please use only the same
size of f ixing or m ounting sc rew which ar e
recommended in this instruction manual.
Failure t o i nstall t
he scr ews or fixing devi ce i n
accordance with these instructions may result in
electrical hazards.
Start Using Your Cooker Hood
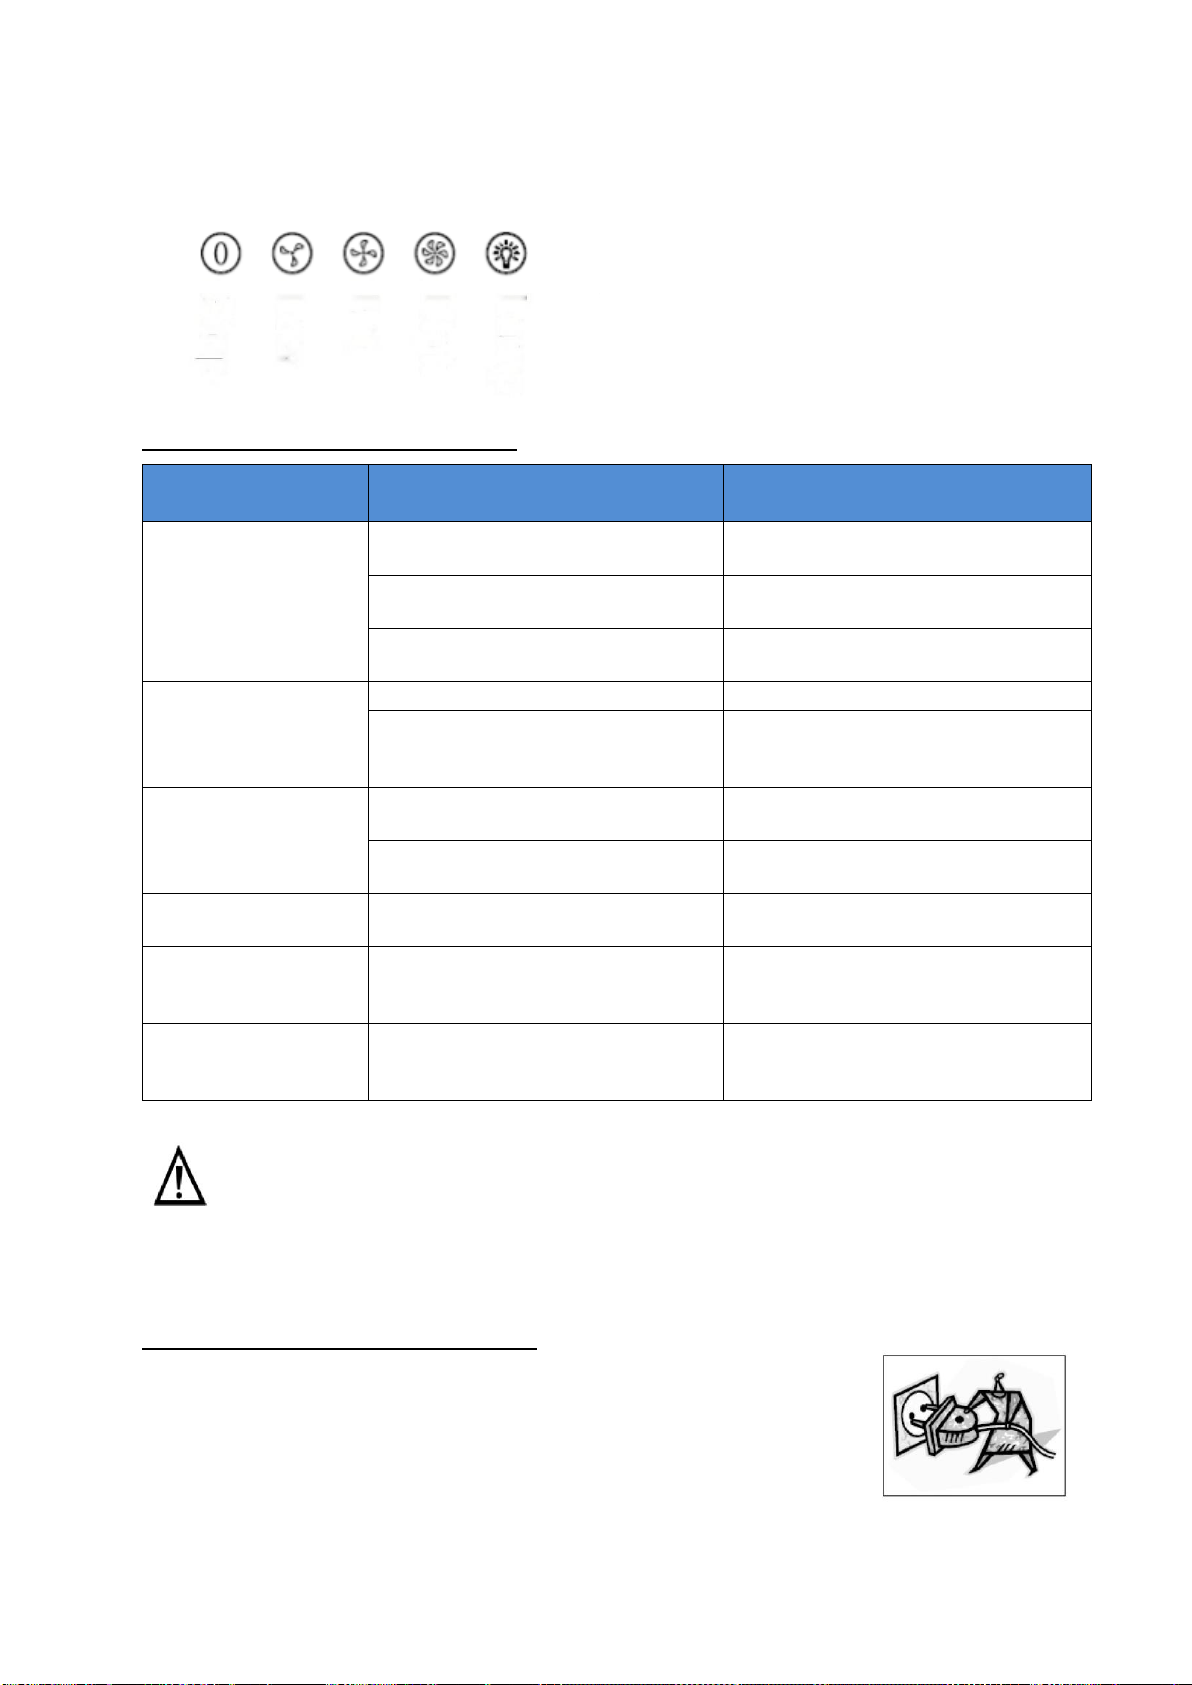
Push button
1) Push the stop button, and the motor will stop.
2) Push the low button, and the motor will run at low speed.
3) Push the middle button, and the motor will run at mid speed.
4) Push the high button, and the motor will run at high speed.
5) Push the light button and the two lights will illuminate. Push it again and the light
will turn off.
9
TROUBLESHOOTING
Fault Possible Cause Solution
Light on, but motor
does not work
Fan switch turned off Select a fan switch position.
Fan switch failed Contact service center.
Motor failed Contact service center.
Light does not
work, motor does
not work
House fuses blown Reset/Replace fuses.
Power cord loose or
disconnected
Refit cord to power outlet.
Switch power outlet on.
Oil leakage
One way valve and the outlet
are not tightly sealed
Take down the one way valve
and seal with sealant.
Leakage from the connection of
chimney and cover
Take chimney down and seal.
Lights not working Broken/Faulty globes
Replace globes as per this
instruction.
Insufficient suction
The distance between the
cooker hood and the gas top is
too far
Refit the cooker hood to the
correct distance.
The Cooker hood
inclines
The fixing screw not tight
enough
Tighten the hanging screw and
make it horizontal.
NOTE:
Any electrical repairs to this appliance must conform to your local, state and
federal laws.Please contact the service centre if in any doubt before
undertaking any of the above.Always disconnect the unit from the power source when
opening the unit.
MAINTENANCE AND CLEANING
Caution:
• Before maintenance or cleaning is carried out, the cooker hood should be
disconnected from the main power supply. Ensure that the cooker hood is switched
off at the wall socket.
•
External surfaces are susceptible to scratches and abrasions, so please follow the
cleaning instructions to ensure the best possible result is achieved without damage.
GENERAL
Cleaning and maintenance should be carried out with the appliance cold especially
when cleaning.Avoid leaving alkaline or acid substances (lemon juice, vinegar etc.) on
the surfaces.
10
STAINLESS STEEL
The stainless steel must be cleaned regularly (e.g.weekly) to ensure a long life
expectancy.Dry with a clean soft cloth. A specialized stainless steel cleaning fluid may
be used.
NOTE:
Ensure that wiping is done along with the grain of the stainless steel to prevent any
unsightly crisscross scratching patterns from appearing.
CONTROL PANEL SURFACE
The inlay control panel can be cleaned using warm soapy water. Ensure the cloth is
clean and well wrung before cleaning. Use a dry soft cloth to remove any excess
moisture left after cleaning.
Important
Using neutral detergents and avoid using harsh cleaning chemicals, strong household
detergents or products containing abrasives,as this will affect the appliance of the
appearance and potentially remove any printing of artwork on the control panel and
will void manufactures warrantee.
GREASE MESH FILTERS
The mesh filters can be cleaned by hand. Soak them for about 3 minutes in water with
a mild detergent and then brush it gently with a soft brush. Do not apply too much
pressureso as to avoid any damage to it . (Leave to dry naturally out of direct sun light)
Filters should be washed separately to crockery and kitchen utensils. It is advisable
not to use rinse aid.
INSTALLING GREASE MESH FILTERS
• To install filters for the following four steps:
- Angle the filter into slots at the back of the hood.
- Push the button on handle of the filter.
- Release the handle once the filter fits into a resting position.
- Repeat to install all filters
CARBON FILTER-not supplied
Activated carbon filter can be used to trap odors. Normally the activated carbon filter
should be changed at three or six months according to your cooking habit. The
installation procedure of activated carbon filter is as below.
11
1. Before installing or replacing the carbon filters, disconnect the mains power to the
unit.
2. Press the filter lock and remove the mesh filter.
3. Turn the carbon filter on both sides of the motor anti-clockwise. Replace the
carbon filters with the new carbon filters.
4. Place the mesh filter.
5. Connect the power supply to the wall socket.
NOTE:
• Make sure the filter is securely locked. Otherwise, it would loosen and cause
danger.
• When activated carbon filter attached, the suction power will be lowered.
BULB REPLACEMENT
Important :
The bulb must be replaced by the manufacturer, its
service agent or similarly qualified persons.
Always switch of f t he el ectricity su pply bef ore
carrying out any operations on the appliance
. When
handling bulb, make sure it is completely cool down
before any direct contact to hands.
When handling globes hold with a cloth or gloves to
ensur
e perspiration does not come in contact with
the globe as this can reduce the life of the globe.
Note:
Before r eplacing l ight t hat t he co oker hood ca n be i solated f rom t he supply
mains by means of a plug or an all-pole switch.
Protect against danger when changing lights, such as wearing gloves.
Changing the lights:
Remove the grease filter.
Way 1. Use a tool or the hand to press the spring splinterof both sides of LED light
to the inside, until the light is pressed out, see pic 1.Then slightly pull the light
connecting wire out, and dismantle the terminal of the light connecting wire. See
pic 2.
Way 2.Use straight screwdriver to prize up the LED light bottom edge, see pic 3,
then slightly pull out the LED light and light connecting wire. See pic 2.
Apply the reverse procedure to install the light back.
• ILCOS D code for this lamp is: DBS-2/65-H-120/33
LED modules –rectangle lamp
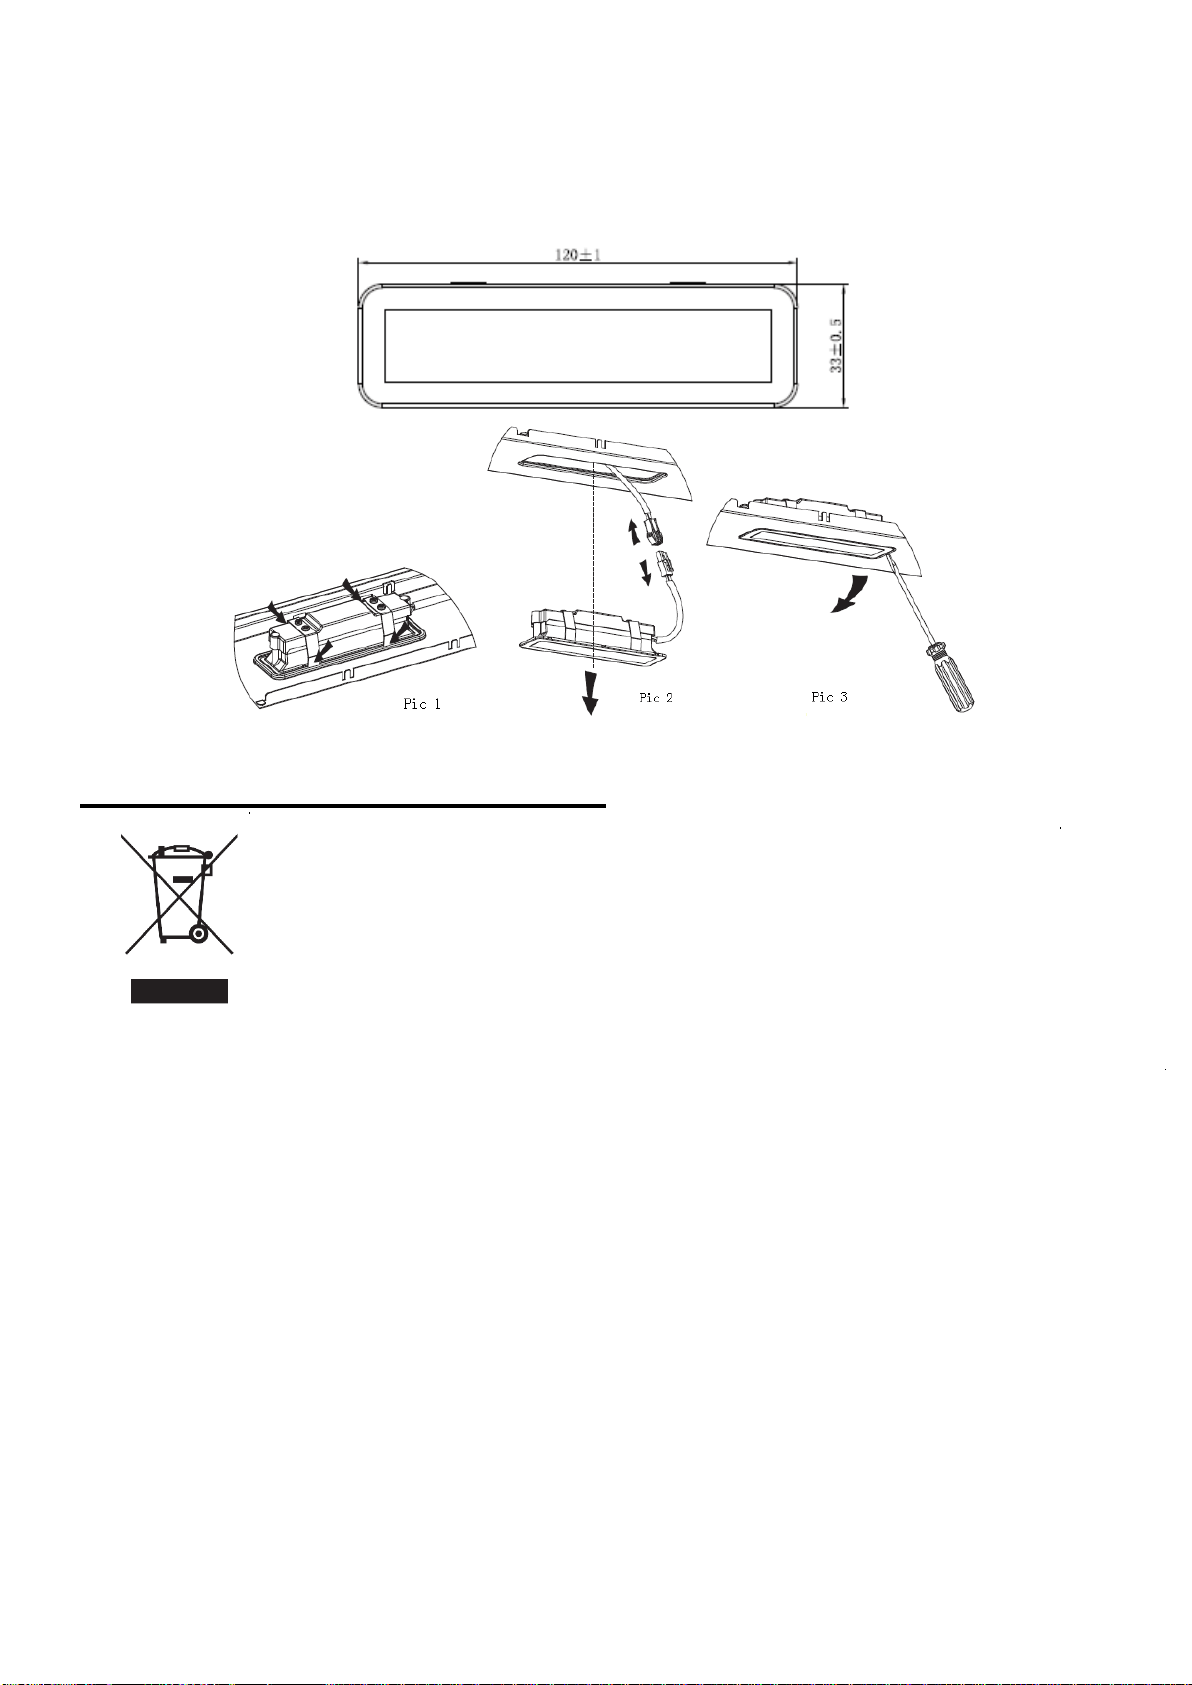
12
– Max wattage: 1×2 W
– Voltage range: AC110-240V
– Dimensions:
ENVIRONMENTAL PROTECTION:
NOTE:
The following shows how to reduce total environmental impact (e.g. energy use) of the
cooking process).
(1) Install the cooker hood in a proper place where there is efficient ventilation.
(2) Clean the cooker hood regularly so as not to block the airway.
(3) Remember to switch off the cooker hood light after cooking.
(4) Remember to switch off the cooker hood after cooking.
INFORMATION FOR DISMANTLING
Do not dismantle the appliance in a way which is not shown in the user manual. The
appliance could not be dismantled by user. At the end of life, the appliance should
not be disposed of with household waste. Check with you Local Authority or retainer
for recycling advice.
This appliance is labelled in accordance with European Directive 2012/19/EU on Waste Electrical
and Electronic Equipment Regulations 2013 regarding electric and electronic appliances (WEEE).
The WEEE contain both polluting substances (that can have a negative effect on the environment)
and base elements (that can be reused). It is important that the WEEE undergo specific treatments
to correctly remove and dispose of the pollutants and recover all the materials. Individuals can
play an important role in ensuring that the WEEE do not become an environmental problem; it is
essential to follow a few basic rules:
- the WEEE should not be treated as domestic waste;
- the WEEE should be taken to dedicated collection areas managed by the town council or a registered
company.
ln many countries, domestic collections may be available for large WEEEs. When you buy a new appliance, the
old one can be returned to the vendor who must accept it free of charge as a one-off, as long as the appliance
is of an equivalent type and has the same functions as the purchased appliance.
Campana extractora
Manual de instrucciones
13

Índice
14
15 .........................................................................Instrucciones de seguridad
17 .........................................................................Instalación
20 .........................................................................Empezar a usar la campana extractora
21 .........................................................................Solución de problemas
21 .........................................................................Mantenimiento y limpieza
25 .........................................................................Protección del medio ambiente
INSTRUCCIONES DE SEGURIDAD
Este manual explica la instalación y el uso adecuados de su campana extractora. Léalo
atentamente antes de usarla, incluso si está familiarizado con el producto. El manual
debe guardarse en un lugar seguro para futuras consultas.
Estas instrucciones también estarán disponibles en un formato alternativo, p.ej. en un
sitio web o a petición del usuario en un formato como un DVD.
Lo que nunca debe hacer:
⚫ ¡No use la campana extractora sin los
filtros de grasa o si los filtros están
excesivamente grasientos!
⚫ No la instale encima de una cocina
con una parrilla de alto nivel.
⚫ No deje las sartenes desatendidas
durante el uso porque las grasas o
aceites sobrecalentados pueden
prenderse en llamas.
⚫ Nunca deje llamas abiertas debajo de
la campana extractora.
⚫ No intente usar la campana extractora
si está dañada.
⚫ No flambee debajo de la campana
extractora.
⚫ PRECAUCIÓN: Las partes accesibles
pueden calentarse cuando se usan
con aparatos de cocina.
⚫ La distancia mínima entre la superficie
de soporte para los utensilios de
cocción en el fogón y la parte más
baja de la campana extractora.
(Cuando la campana se encuentra
encima de una cocina de gas, esta
distancia debe ser de al menos 65 cm).
⚫ El aire no debe extraerse en
conductos usados para expulsar
humos de aparatos que queman gas u
otros combustibles.
Lo que siempre debe hacer:
⚫ ¡Importante! Apague siempre el
suministro de la red eléctrica durante
la instalación y las actividades de
mantenimiento, como cambiar una
bombilla.
⚫ La campana extractora debe
instalarse de acuerdo con las
instrucciones de instalación y todas
las medidas seguidas.
⚫ Todos los trabajos de instalación deben
ser realizados por una persona
competente o un electricista cualificado.
⚫ Deseche el material de embalaje
cuidadosamente. Los niños son
vulnerables a este.
⚫ Preste atención a los bordes afilados
dentro de la campana extractora,
especialmente durante la instalación
y la limpieza.
⚫ Cuando la campana extractora se
encuentra encima de una cocina de
gas, la distancia mínima entre la
superficie de soporte para los utensilios
de cocción en el fogón y la parte más
baja de la campana debe ser:
Cocinas de gas: 75 cm
Cocinas eléctricas: 65 cm
Cocinas de carbón o aceite: 75 cm
⚫ Asegúrese de que los conductos no
tengan dobleces superiores a
90 grados, ya que esto reducirá la
eficiencia de la campana extractora.
⚫ Advertencia: Si los tornillos o el
dispositivo de fijación no se instalan
de acuerdo con estas instrucciones,
pueden producirse riesgos eléctricos.
⚫ Advertencia: Antes de obtener acceso
a los terminales, todos los circuitos de
suministro deben estar
desconectados.
15
Lo que siempre debe hacer:
⚫ Coloque siempre tapas en ollas y
sartenes cuando cocine en una cocina
de gas.
⚫ Cuando se encuentre en el modo de
extracción, la campana extractora
estará extrayendo el aire de la
habitación. Asegúrese de que se
estén observando las medidas de
ventilación adecuadas. La campana
extractora elimina los olores de la
habitación, pero no el vapor.
⚫ La campana extractora es solo para
uso doméstico.
⚫ Si el cable de alimentación está
dañado, debe ser sustituido por el
fabricante, por su servicio técnico o
por cualquier profesional cualificado
similar para evitar riesgos.
⚫ Este electrodoméstico puede ser
utilizado por niños a partir de 8 años y
por personas con capacidades físicas,
sensoriales o mentales reducidas,
o sin experiencia o conocimientos
previos, siempre y cuando hayan
recibido la supervisión y las
instrucciones necesarias para utilizar
el electrodoméstico de forma segura y
comprendan los riesgos que implica.
Los niños no deben jugar con este
electrodoméstico. Las operaciones de
limpieza y mantenimiento no deben
ser realizadas por niños sin
supervisión.
⚫ Advertencia: Antes de obtener acceso
a los terminales, todos los circuitos de
suministro deben estar
desconectados.
Lo que siempre debe hacer:
⚫ Precaución: El electrodoméstico y sus
accesorios se pueden calentar
durante el uso. Trate de evitar tocar
los elementos de calentamiento. Los
niños menores de 8 años deben
mantenerse alejados a menos que
estén bajo supervisión permanente.
⚫ La habitación debe estar
adecuadamente ventilada cuando la
campana extractora se usa al mismo
tiempo que electrodomésticos que
quemen gas u otros combustibles.
⚫ Existe un riesgo de incendio si la
limpieza no se lleva a cabo de
acuerdo con las instrucciones.
⚫ Deben cumplirse las normativas
relativas a la extracción de aire.
⚫ Limpie su electrodoméstico
periódicamente siguiendo el método
indicado en el capítulo
MANTENIMIENTO.
⚫ Por razones de seguridad, use solo
tornillos de fijación o montaje del
tamaño recomendado en este manual
de instrucciones.
⚫ En cuanto a los detalles sobre el
método y la frecuencia de limpieza,
consulte la sección de mantenimiento
y limpieza en el manual de
instrucciones.
⚫ Las operaciones de limpieza
y mantenimiento no deben ser
realizadas por niños sin supervisión.
⚫ Cuando la campana extractora y los
electrodomésticos que funcionan con
energía que no sea electricidad están
funcionando simultáneamente, la
presión negativa en la habitación no
debe superar los 4 Pa (4 x 10⁻⁵ bar).
⚫ ADVERTENCIA: Peligro de incendio:
no almacene artículos sobre las
superficies de cocción.
⚫ No se debe utilizar un limpiador a
vapor.
⚫ NUNCA intente apagar un incendio
con agua; debe apagar el electro-
doméstico y cubrir posteriormente la
llama, p. ej., con una tapa o una
manta contra incendios.
16
INSTALACIÓN (VENTILACIÓN EXTERIOR)
MONTAJE DE LA TAPA EN V
Si la campana extractora no dispone de una tapa en V 1 montada, debe montar las
mitades en su cuerpo. Las imágenes solo muestran un ejemplo de cómo montar la tapa
en V, la salida puede ser diferente según los diferentes modelos y configuraciones.
Para montar la tapa en V, debe:
Montar las dos mitades 2 en el cuerpo 6.
Un pasador 3 debería estar orientado hacia arriba.
El eje 4 debería introducirse en los orificios 5 en el cuerpo.
Repita todas las operaciones para la 2ª mitad.
INSTALACIÓN
Si tiene una salida hacia el exterior, su campana extractora puede conectarse por
medio de un conducto de extracción (esmalte, aluminio, tubo flexible o material
inflamable con un diámetro interior de 150 mm).
1. Antes de la instalación, apague la unidad y desenchúfela de la toma de corriente.
2. La campana extractora debe colocarse a una distancia de 65~75cm por encima de
la superficie de cocción para obtener el mejor efecto.
17
3. Instale el gancho en un lugar adecuado una vez fijada la altura de instalación y
manténgalo alineado. La posición fijada del soporte de la chimenea interior es el lugar
de la chimenea. Vea la figura 2.
4. Fije el soporte de la chimenea exterior en la chimenea exterior, y asegúrese de que
la chimenea interior se puede ajustar a la altura libremente, así como la fijación del tubo
de expansión. A continuación, instale el tubo de expansión y la chimenea en la
campana extractora. Vea la figura 3.
5. Coloque la campana extractora en el gancho. Vea la figura 4.
6. Ajuste la altura de la chimenea interior a la posición del soporte de la chimenea
interior y fíjelo con un tornillo; después de ajustar la posición, fije el cuerpo con un
tornillo de seguridad. Vea la figura 5.
con un diámetro de 6 mm. Coloque el tubo de expansión en la salida de la pared. Fije el
tubo de expansión con la brida para cables en la salida de pared.
65 cm
75 cm
Soporte de la chimenea interior
Gancho
Fig 1
Fig 2
Tubo de expansión
Chimenea interior
Soporte de la chimenea exterior
Chimenea exterior
Fig 3
Fig 4
Fig 5
brida para
cables
tornillo de seguridad
18
Nota: Las dos rejillas de ventilación de seguridad están situadas en la carcasa trasera,
Instalación electrica
Toda la instalación debe ser realizada por una persona competente
o un electricista calificado.
Antes de conectar la alimentación de red, asegúrese de que la tensión de red
corresponda a la tensión en la placa de características.
Conexión directa
El aparato debe conectarse directamente a la red eléctrica mediante un circuito
omnipolar interruptor con un Apertura mínima de 3 mm entre los contactos.
El instalador debe asegurarse de que se ha realizado la conexión eléctrica correcta
y que cumpla con el diagrama de cableado.
El cable no debe doblarse ni comprimirse.
Compruebe regularmente el enchufe y el cable de alimentación para ver si están
dañados.
Si el cable de alimentación está dañado, debe ser reemplazado por un cable o
conjunto especial disponible en el fabricante o su agente de servicio.
ADVERTENCIA: Este es un aparato Clase I y DEBE estar conectado a tierra
Este aparato se suministra con un cable de alimentación de 3 núcleos coloreados
de la siguiente manera:
Marrón = L o Vivo
Azul = N o Neutro
Verde y Amarillo = E o Tierra
19
CONSEJOS PARA LA INSTALACIÓN DEL CONDUCTO DE ESCAPE
Las siguientes reglas deben ser estrictamente seguidas para obtener una óptima
extracción de aire:
Mantenga el tubo de expansión corto y recto.
No reduzca el tamaño ni restrinja el tubo de expansión.
Cuando utilice el tubo de expansión, instale siempre el tubo tenso para minimizar la
pérdida de presión.
La inobservancia de estas instrucciones básicas reducirá el rendimiento y aumentará
los niveles de ruido de la campana extractora.
Cualquier trabajo de instalación debe ser realizado por un electricista cualificado o
una persona competente.
No conecte el sistema de conductos de la campana a ningún sistema de ventilación
existente que se esté utilizando para cualquier otro aparato, como por ejemplo un tubo
calentador, un tubo de gas o un tubo de viento caliente.
El ángulo de curvatura del tubo de expansión no debe ser inferior a 120º; se debe
dirigir la tubería horizontalmente o, alternativamente, la tubería debe subir desde el
punto inicial y debe ser conducida a una pared exterior.
Después de la instalación, asegúrese de que la campana extractora esté nivelada
para evitar que se acumule grasa en los extremos.
Asegúrese de que el tubo de expansión seleccionado para la instalación cumple con
las normas pertinentes y es retardante del fuego.
ADVERTENCIA:
➢ Por razones de seguridad, use solo tornillos de
fijación o montaje del tamaño recomendado en
este manual de instrucciones.
➢ Si los tornillos o el dispositivo de fijación no se
instalan de acuerdo con estas instrucciones,
pueden producirse riesgos eléctricos.
Empezar a usar la campana extractora
Botón
1) Si pulsa el botón «detener», el motor se detendrá.
2) Si pulsa el botón «baja», el motor funcionará a baja velocidad.
3) Si pulsa el botón «media», el motor funcionará a media velocidad.
4) Si pulsa el botón «alta», el motor funcionará a alta velocidad.
5) Si pulsa el botón «luz», las dos luces se encenderán. Púlselo otra vez y la luz se
apagará.
20
SOLUCIÓN DE PROBLEMAS
Fallo
Causa posible
Solución
La luz está encendida,
pero el motor no
funciona
Interruptor del ventilador apagado
Seleccione una posición para el
interruptor del ventilador.
Fallo del interruptor del ventilador
Póngase en contacto con el centro
de asistencia técnica.
Fallo del motor
Póngase en contacto con el centro
de asistencia técnica.
La luz no funciona, el
motor no funciona
Han saltado los fusibles de la casa
Restablezca/Reemplace los fusibles.
Cable de alimentación suelto o
desconectado
Vuelva a ajustar el cable a la toma
de corriente. Encienda la toma de
corriente.
Fuga de aceite
La válvula de una vía y la salida no
están herméticamente selladas
Desmonte la válvula de una vía
y selle con un sellador.
Fuga en la conexión del tubo de
salida y la cubierta
Desmonte el tubo de salida y séllelo.
Las luces no
funcionan
Globos rotos/defectuosos
Sustituya los globos siguiendo estas
instrucciones.
Succión insuficiente
La distancia entre la campana
extractora y el gas está demasiado
lejos
Vuelva a colocar la campana
extractora a la distancia correcta.
La campana
extractora se inclina
El tornillo de fijación no está lo
suficientemente ajustado
Apriete el tornillo de suspensión
y coloque la campana en posición
horizontal.
NOTA:
Cualquier reparación eléctrica de este electrodoméstico debe cumplir con las
leyes locales, estatales y federales. Póngase en contacto con el centro de
asistencia técnica si tiene alguna duda antes de
realizar cualquiera de los pasos anteriores. Desconecte siempre la unidad de la fuente
de alimentación cuando abra la unidad.
MANTENIMIENTO Y LIMPIEZA
Precaución:
• Antes de llevar a cabo el mantenimiento o la limpieza, la
campana extractora debe estar desconectada de la fuente de
alimentación principal. Asegúrese de que la campana extractora
esté desconectada de la toma de pared y que se haya retirado
el enchufe.
Dete
ner
Baja
Med
ia
Alta
Luz
21

Las superficies externas son susceptibles a rasguños y abrasiones, por lo tanto, siga
las instrucciones de limpieza para garantizar que se obtenga el mejor resultado
posible sin daños.
GENERAL
La limpieza y el mantenimiento se deben llevar a cabo con el aparato frío, especialmente
durante la limpieza. Evite dejar sustancias alcalinas o ácidas (jugo de limón, vinagre, etc.)
en las superficies.
ACERO INOXIDABLE
El acero inoxidable debe limpiarse de forma regular (por ejemplo, semanalmente) para
garantizar una larga vida útil. Séquelo con un paño suave y limpio. Se puede usar un
detergente específico para acero inoxidable.
NOTA:
Asegúrese de que la limpieza se realice siguiendo la trama del acero inoxidable para
evitar que aparezcan los antiestéticos patrones de rayado cruzado.
SUPERFICIE DEL PANEL DE CONTROL
El panel de control incrustado se puede limpiar con agua tibia con jabón. Asegúrese de
que el paño esté limpio y bien escurrido antes de limpiarlo. Use un paño suave y seco
para eliminar el exceso de humedad que queda después de la limpieza.
Importante
Use detergentes neutros y evite el uso de productos químicos de limpieza agresivos,
detergentes domésticos fuertes o productos que contengan abrasivos, ya que esto
afectará a la apariencia del electrodoméstico y posiblemente eliminará cualquier
impresión estética en el panel de control y anulará la garantía del fabricante.
FILTROS DE MALLA PARA LA GRASA
Los filtros de malla se pueden limpiar a mano. Empápelos durante aproximadamente
3 minutos en agua con un detergente antigrasa y luego cepíllelos suavemente con un
cepillo suave. No aplique demasiada presión, evite dañarlos. (Deje que se sequen de
forma natural pero alejados de la luz directa del sol)
Los filtros deben lavarse separados de la vajilla y los utensilios de cocina. Se aconseja
no utilizar agente enjuagante.
INSTALACIÓN DE LOS FILTROS DE MALLA PARA LA GRASA
Para instalar los filtros, siga los siguientes cuatro pasos:
- Posicione el filtro en las ranuras de la parte posterior de la campana.
- Presione el botón del agarre del filtro.
- Suelte el agarre una vez que el filtro se ajuste en una posición de descanso.
- Repita este proceso para instalar todos los filtros.
FILTRO DE CARBÓN - no incluido
El filtro de carbón activado se puede usar para atrapar los olores. Normalmente, el filtro
de carbón activado debe cambiarse a los tres o seis meses, según sus hábitos de
cocina. El procedimiento de instalación del filtro de carbón activado es el siguiente.
22
1. Antes de instalar o reemplazar los filtros de carbón, desconecte la alimentación
de la unidad.
2. Presione el bloqueo del filtro y retire el filtro de malla.
3. Gire el filtro de carbón de ambos lados del motor en sentido contrario a las
agujas del reloj. Sustituya los filtros de carbón por unos nuevos.
4. Coloque el filtro de malla.
5. Conecte la fuente de alimentación a la toma de corriente.
NOTA:
Asegúrese de que el filtro esté bloqueado de forma segura. De lo contrario, se
aflojaría y causaría daños.
Cuando el filtro de carbón activado esté conectado, la potencia de succión
disminuirá.
Importante:
La bombilla debe cambiarla el fabricante, su agente de
servicio o personas con una cualificación similar.
Apague siempre el suministro de electricidad antes de
realizar cualquier operación en el aparato. Cuando
manipule la bombilla, asegúrese de que esté
completamente fría antes de cualquier contacto directo
con las manos.
Cuando manipule los globos, sosténgalos con un paño
o guantes para asegurar que la transpiración no entre
en contacto con el globo, ya que esto puede reducir la
vida útil del globo.
ILUMINACIÓN LED
Utilice el destornillador para aflojar el tornillo autorroscante ST4*8MM (2 un.) del panel
de iluminación, saque el accesorio de iluminación. Abra la caja de terminales que se
conectó con el cable, desconecte el conector del cable y cambie la lámpara.
El código ILCOS D para esta lámpara es: DBS-2.5/65-H-120/33
– Módulos LED - lámpara rectangular
– Medidas:
Abrir
Cerrar
23
SUSTITUCIÓN DE LA BOMBILLA

NOTA:
Antes de reemplazar la luz, que la campana extractora se pueda aislar del suministro red
mediante un enchufe o un interruptor omnipolar.
Protéjase contra peligros al cambiar las luces, como usar guantes.
Retire el filtro de grasa.
Forma 1. Use una herramienta o la mano para presionar la astilla de resorte de ambos
lados de la luz LED hacia el interior, hasta que la luz se presione hacia afuera,
vea la imagen 1.
Luego tire ligeramente de la luz cable de conexión y desmonte el terminal del cable de
conexión de la luz. Ver foto 2
Forma 2. Use un destornillador recto para levantar el borde inferior de la luz LED,
vea la imagen 3.
Luego tire ligeramente de la luz LED y el cable de conexión de la luz. Ver foto 2.
Aplique el procedimiento inverso para instalar la parte posterior de la luz
SOSTITUCIÓN DE LA BOMBILLA
El código ILCOS D para esta lámpara es: DBS-2.5/65-H-120/33
– Módulos LED - lámpara rectangular
– Potencia máxima: 1*2 W
– Rango de voltaje: 110-240 V CA
– Medidas:
24
NOTA:
A continuación se muestra cómo reducir el impacto ambiental total (por ejemplo,
mediante el uso de energía) del proceso de cocción.
(1) Instale la campana extractora en un lugar apropiado donde haya una ventilación
eficiente.
(2) Limpie la campana extractora regularmente para no bloquear las vías de salida
del aire.
(3) Recuerde apagar la luz de la campana extractora después de cocinar.
(4) Recuerde apagar la campana extractora después de cocinar.
INFORMACIÓN PARA EL DESMONTAJE
No desmonte el aparato de manera diferente a la mostrada en el manual de
instrucciones. El aparato no puedo ser desmontado por el usuario. Al final de su vida
útil, el electrodoméstico no se debe tirar con la basura doméstica. Consulte con su
recolector de desechos o autoridad local para obtener consejos de reciclaje.
25
PROTECCIÓN DEL MEDIO AMBIENTE:
Este electrodoméstico está certificado conforme a la Directiva Europea 2012/19/UE
sobre residuos de aparatos eléctricos y electrónicos (RAEE) y regulaciones de 2013.
Los dispositivos RAEE contienen sustancias contaminantes (que pueden tener
consecuencias negativas para el medio ambiente) y componentes básicos (que
pueden reutilizarse).
Es importante que dichos dispositivos estén sujetos a tratamientos específicos para
eliminar y desechar correctamente todos los contaminantes y recuperar todos los
materiales.
Cada individuo puede desempeñar un papel importantea la hora de garantizar que los
dispositivos RAEE no se conviertan en un problema medioambiental; pare ello, es
fundamental seguir algunas reglas básicas:
- los dispositivos RAEE no deben tratarse como residuos domésticos;
- los dispositivos RAEE deben llevarse a los puntos de recogida específicos gestionados
por el ayuntamiento o por una empresa registrada.
En muchos países, puede haber disponible un servicio de recogida a domicilio de los
RAEE de gran tamaño. Cuando se compra un nuevo aparato, el viejo puede entregarse
al vendedor, que debe adquirirlo gratuitamente siempre que el aparato sea de tipo
equivalente y tenga las mismas funciones que el que se ha adquirido