Loading ...
Loading ...
Loading ...
6
2
INSTALLING THE FINDERSCOPE
To install the finderscope:
1. Locate the finderscope (it will be mounted inside the finderscope bracket) –
see Figures 1-1 and 1-2.
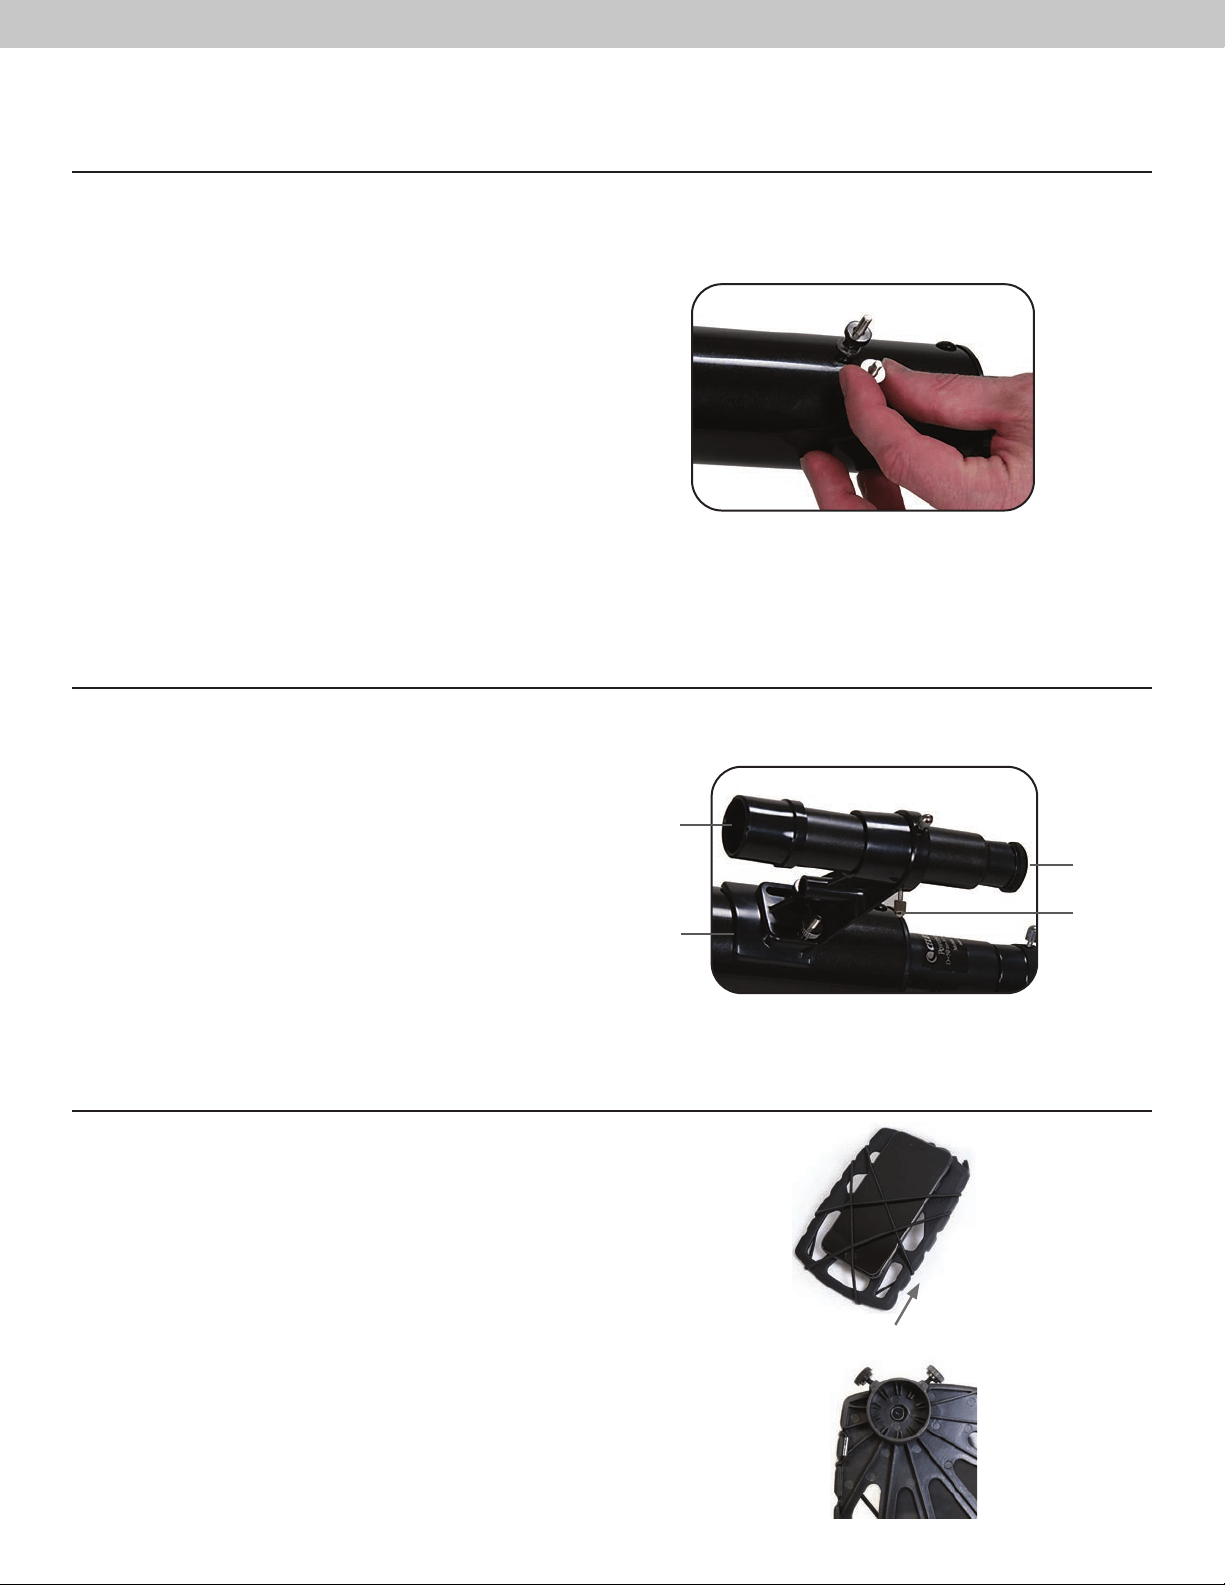
2. Remove the knurled nuts on the threaded posts on the optical tube –
see Figure 2-17.
3. Mount the finderscope bracket by placing it over the posts protruding from
the optical tube and then holding it in place thread on the knurled nuts and
tightening them down.
4. Note that the finderscope should be oriented so that the larger diameter lens
is facing toward the front of the optical tube.
5. Remove the lens caps from both ends of the finderscope.
1
Figure 2-17
ALIGNING THE FINDERSCOPE
Use the following steps to align the finderscope:
1. Locate a distant daytime object and center it in a low power (20mm)
eyepiece in the main telescope.
2. Look through the finderscope (the eyepiece end of the finderscope) and
take notice of the position of the same object.
3. Without moving the main telescope, turn the adjustment thumb screws
located around the finderscope bracket until the crosshairs of the
finderscope are centered on the object chosen with the main telescope.
Eyepiece
Objective
Lens
Adjustment
Screws
Finderscope
Bracket
Figure 2-18
USING THE BASIC SMARTPHONE ADAPTER
1. Lift the bungee straps and slide your smartphone between the straps and the
adapter so that the camera is looking through the camera opening. The straps
should give plenty of tension to hold the device against the adapter and the
black rubberized surface will give enough friction to prevent the phone from
sliding around.
HINT: Depending on the design of your smartphone, the camera may be in
the middle of the device or in one corner. You may want to change
the angle of the bungee straps to better secure the phone. There
are six different anchor points to choose from around the edge of
the adapter. Simply reposition them to different anchor points to
achieve the best results.
2. Turn the adapter over and make sure your camera lens is centered in the
opening in the lens cap. The better you have this centered, the easier it will
be to take images through the telescope.
Loading ...