Loading ...
Loading ...
Loading ...
3
1 Objective Lens
2 Telescope Optical Tube
3 Finderscope
4 Eyepiece
5 Diagonal
6 Focus Knob
7 Altitude Slow Motion Rod Assembly
8 Accessory Tray
9 Tripod
10 Alt-Az Mount
11 Altitude Locking Knob
12 Azimuth Lock
13 Smartphone Adapter
ASSEMBLY
This section covers the assembly instructions for your PowerSeeker telescope. Your
telescope should be set up indoors the first time so that it is easy to identify the
various parts and familiarize yourself with the correct assembly procedure before
attempting it outdoor.
Your PowerSeeker 60AZ telescope comes in one box. The pieces in the box are the
optical tube, altazimuth mount, 20mm eyepiece, 4mm eyepiece, 3x Barlow lens, erect
image diagonal, and a universal smartphone adapter.
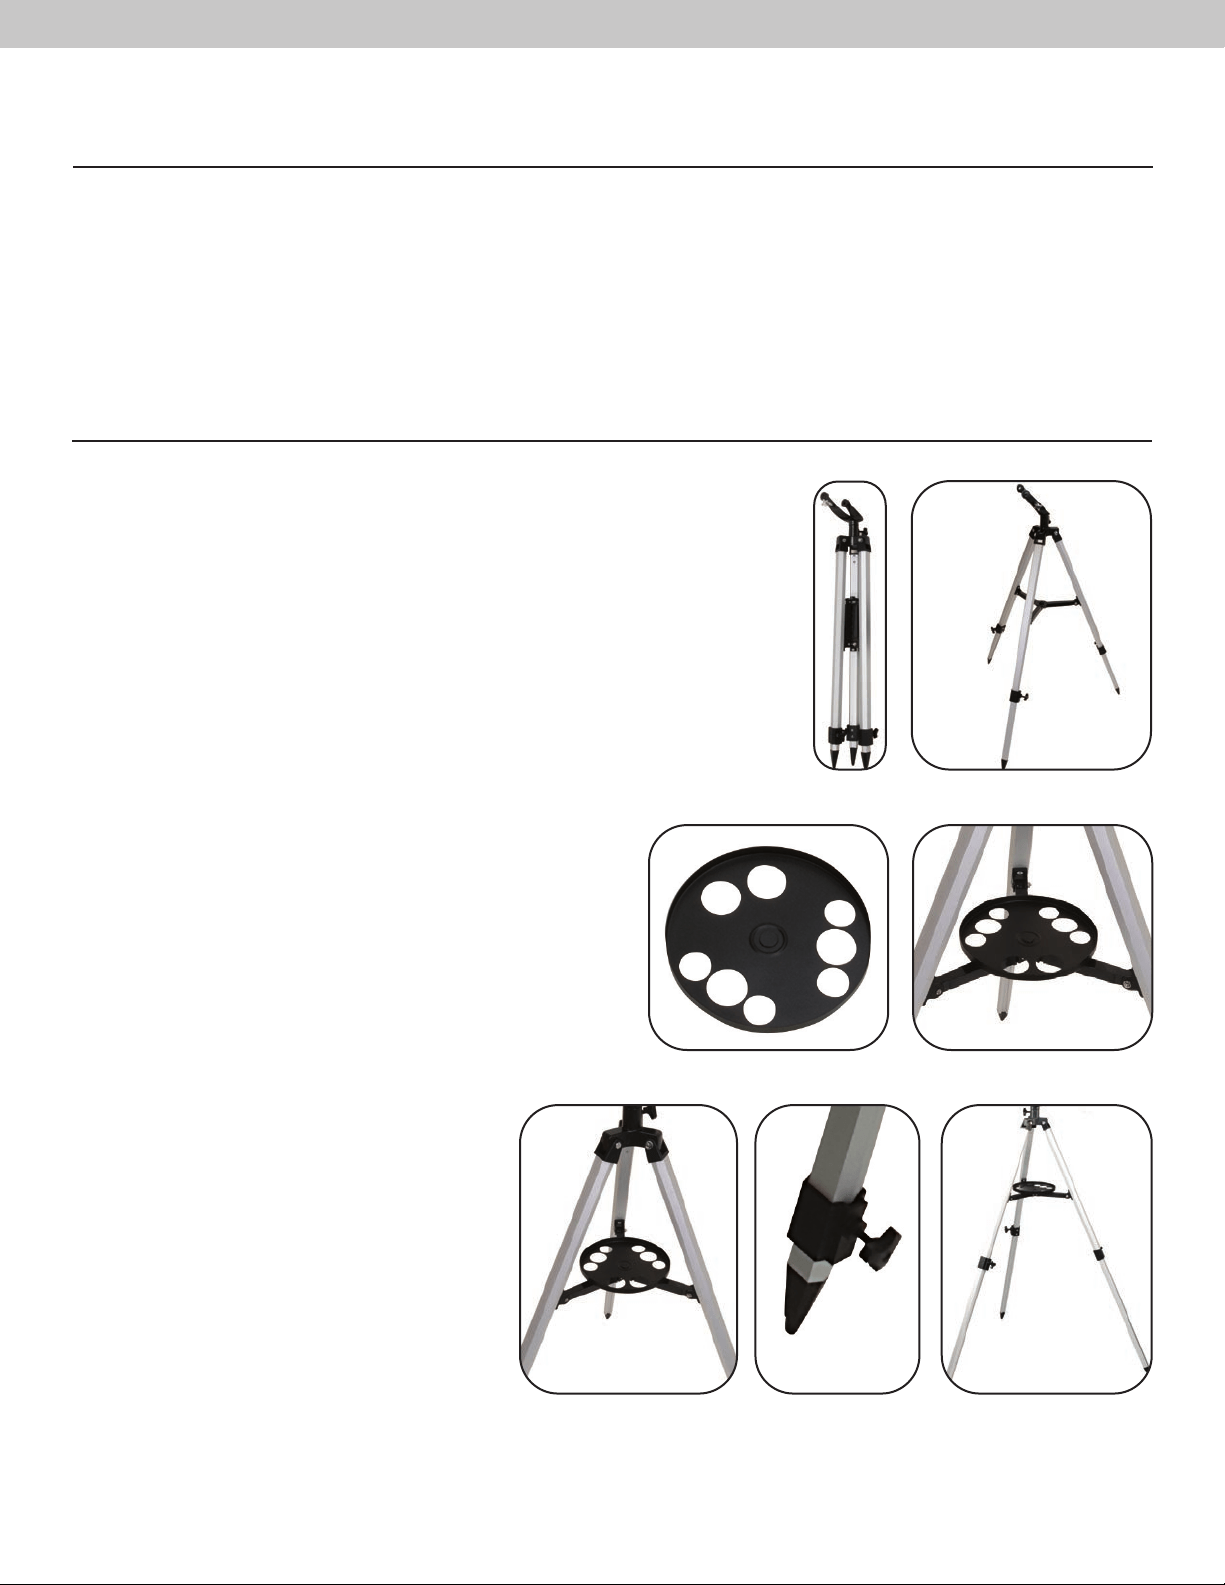
SETTING UP THE TRIPOD
1. Remove the tripod from the box (Figure 2-1). The tripod
comes preassembled so that the set up is very easy.
2. Stand the tripod upright and pull the tripod legs apart
until each leg is fully extended and then push down
slightly on the tripod leg brace (Figure 2-2). The very top
of the tripod is called the tripod head.
3. Next, we will install the tripod accessory tray (Figure 2-3)
onto the tripod leg brace (center of Figure 2-2).
4. On the bottom of the tripod tray is a screw attached to
the center. The screw attaches into a threaded hole in
the center of the tripod leg brace by turning it clockwise.
NOTE: Pull up slightly on the tripod leg brace to
make it easy to attach.
Continue turning the tray until hand tight – don’t over
tighten the tray.
5. The tripod is now completely assembled (Figure 2-4).
6. You can extend the tripod legs to the height you desire.
At the lowest level, the height is about 27” (69 cm) and
extends to about 47” (119 cm). You unlock the tripod leg
lock knobs at the bottom of each leg (Figure 2-5) by
turning them counterclockwise and pull the legs out to
the height you want and then lock the knobs securely.
A fully extended tripod looks similar to the image in
Figure 2-6.
7. The tripod will be the most rigid and stable at the
lower heights.
Figure 2-4
Figure 2-2
Figure 2-3
Figure 2-5 Figure 2-6
Figure 2-3a
Figure 2-1
Loading ...
Loading ...
Loading ...