Loading ...
Loading ...
Loading ...

ENGLISH | 5
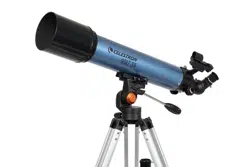
Now that you have observed with your telescope, the next step is taking a picture of what you are seeing. The 90AZ SR Telescope
includes a Smartphone adapter. To use this feature refer to the included smartphone adapter QSG (shown below).
IMAGING WITH YOUR SMARTPHONE AND INCLUDED SMARTPHONE ADAPTER
Camera Controls
The standard camera apps that come preinstalled with your smartphone offer very rudimentary controls and are designed to automatically
adjust focus and exposure. This is not a problem for everyday photography such as landscapes or portraits, but can be a problem for
imaging a planet or the Moon where you have a very bright object against a very black sky. The phone’s camera tries to compensate for
the imbalance of lighting by brightening up the dark areas, but this causes the bright areas to overexpose and blow-out the details. If your
camera app settings do not allow you to manually select the focus point or have an option to disable the autofocus or auto-exposure, you
may want to consider using a different camera app. You can fi nd lots of aftermarket apps for iOS and Android that offer a greater amount
of control for your camera. Many of these are free.
Vibration
To help eliminate any vibration induced when you touch the camera to snap the image, try using a shutter delay. Some apps offer a 2, 5, or
10 second delay before snapping the image. This will give the vibrations a chance to dissipate before actually taking the images.
Subjects to Shoot
Using this method, you should be able to take images of daytime terrestrial objects and nighttime astronomical images of the Moon and
bright planets (Venus, Mars, Jupiter and Saturn). Unfortunately, smartphone camera sensors are not designed to work well in very low light,
so it will not be possible to capture faint astronomical objects such as galaxies or nebulae in this manner.
Magnifi cation
When looking at the Moon or planets with a stationary telescope, you will notice that the object appears to drift across the fi eld of view.
This is actually caused by the Earth’s rotation. If you were looking visually through your 20 mm eyepiece, a planet would take approximately
3.0 minutes to drift across the entire eyepiece’s fi eld of view. If you are using the 10 mm eyepiece, it would only take 1.5 minutes. The
smartphone does not use the entire eyepiece’s fi eld of view and only uses the center of it, making the motion appear even faster. When
centering an astronomical object in the phone’s fi eld of view, try leading the target. Try to point the scope ahead of the planet so that it is
just entering the fi eld of view. This will maximize the amount of time it takes to drift across the entire fi eld, allowing you more time to take
images before needing to re-aim the telescope. The 10 mm will have a narrower fi eld of view and will need to be adjusted more often as a
result. Working with the 20 mm eyepiece will be easier at the start. Once you are comfortable with it, try stepping up to the 10 mm eyepiece.
IMAGING TIPS AND TRICKS
1. Before attaching the adapter, look through your optic (telescope, spotting scope, binocular, etc.)
and make sure that the view is in sharp focus.
2. Open the eyepiece clamp (B) by loosening the eyepiece clamp knob (A) at the top of the
eyepiece clamp.
3. Place the eyepiece clamp over the eyepiece of your optic. Tighten the eyepiece
clamp knob to secure the eyepiece clamp tightly against the eyepiece.
NOTE: Make sure to mount the clamp on a section of the eyepiece barrel that does not rotate freely, such as an eye
relief adjuster.
4. Loosen the holder clamp knob (D) until the holder clamp (C) is open wide enough to
accommodate the width of your phone. Once the phone is in place, tighten the holder clamp
knob until the phone is secured.
NOTE: This adapter can be used with most phone cases, but the case surface MUST be flat so it will fit in the holder
correctly. Any grips, stands, rings, or raised surfaces on the case will impede the placement of the phone. All
folio-style phone cases must be removed.
5. Launch the camera app on your phone. Loosen the holder alignment knob (E) and adjust
the positioning of your phone camera so that it lines up with the eyepiece of your optic.
6. Once the camera is over the eyepiece and your camera is capturing the view through the eye-
piece, carefully tighten the holder alignment knob to secure your phone in position.
7. If needed, adjust the focus on your optic again for the sharpest possible view.
8. You are now ready to take images and videos using your smartphone camera!
USING YOUR SMARTPHONE ADAPTER
Model #81035
(A)
(B)
(C)
(D)
(E)
ENGLISH
FRONT BACK
© 2019 Celestron • All rights reserved
2835 Columbia Street • Torrance, CA 90503 USA
celestron.com/pages/technical-support
10-19
CONGRATULATIONS! YOU HAVE NOW OBSERVED YOUR FIRST CELESTIAL OBJECT!
To get a closer view of the Moon, replace the 20 mm eyepiece with the 10 mm eyepiece. It will give you more magnifi cation, making the
Moon appear much larger. You may need to adjust the focus knobs when you change eyepieces to ensure you are getting the sharpest image.
You can view many other celestial objects, such as planets, star clusters and nebulae using this same basic technique.
Loading ...