Loading ...
Loading ...
Loading ...
en Operating the appliance
18
1Operating the appliance
Oper at i ng the appl i ance
You have already learnt about the controls and how
they work. Now we will explain how to set your
appliance. You will learn about what happens when you
switch the appliance on and off, and how to select the
operating mode.
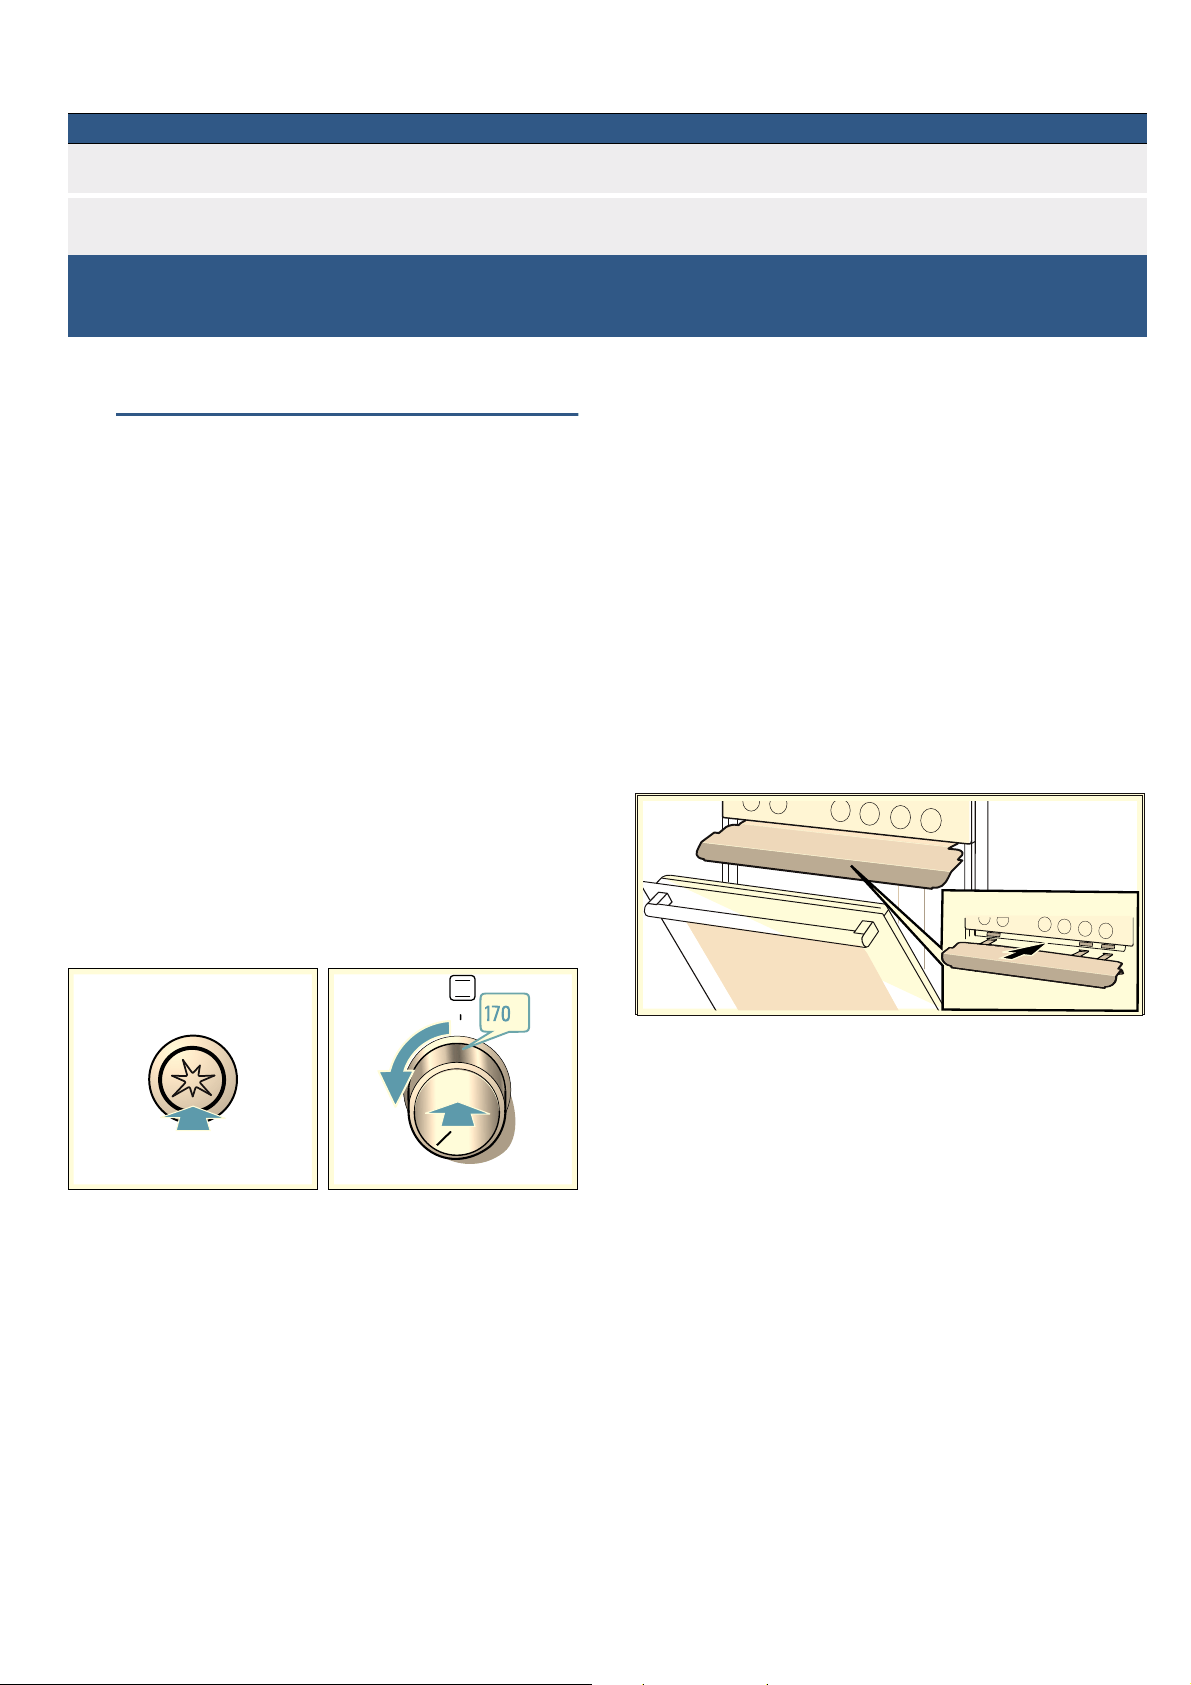
Setting the oven's lower gas burner
When the lower gas burner is lit, you can start to bake
on a baking tray when the oven door is closed.
Example in diagram: Baking at 170 °C.
1. Open the top cover. The top cover must remain
open for as long as the cooker is in operation.
2. Turn on the main gas supply to the appliance. Insert
the plug into the socket. Open the oven door.
3. Push in the function selector for the lower gas burner
and turn it anti-clockwise to 170 °C.
4. Keep the function selector for the lower gas burner
pressed in and press the ignition button 8 at the
same time.
5. The gas that escapes from the lower gas burner is
ignited using the ignition button. Keep the function
selector for the lower gas burner pushed in for 10
seconds so that the safety pilot starts up.
The flame failure device is activated. If the gas flame
goes out, the gas supply is automatically shut off by
the flame failure device.
6. Check through the hole in the oven's bottom panel
that the flame is burning. If the flame is not burning,
repeat the process from step 3.
7. Close the oven door carefully.
8. Preheat the empty oven for 15 minutes and then
start the baking.
9. Once the food is cooked, switch off the function
selector for the lower gas burner.
You can change the temperature at any time.
:Warning – Caution!
The hotplate control should not be actuated for longer
than 15 seconds. If the burner does not ignite within 15
seconds, wait at least 1 minute before repeating the
procedure.
Setting the gas grill
1. Open the top cover. The top cover must remain
open for as long as the cooker is in operation.
2. Turn on the main gas supply to the appliance. Insert
the plug into the socket.
3. Insert the protecting plate into the groove below the
control panel.
Insert the protecting plate with the longer edge at the
front and the curvature at the bottom.
Secure the protecting plate in the groove below the
control panel using the retainers.
Ensure that the protecting plate is engaged in the
retainers. If the protecting plate cannot be removed,
it is properly engaged. You can now safely use the
protecting plate. If it can be removed, insert it into
the groove at a slightly higher angle and make sure
that it engages in the retainers.
4. Close the oven door so that it is as close as possible
to the protecting place.
5. Push in the function selector and turn it clockwise to
the grill setting ( .
Boiling* Rice, vegetables, meat
dishes (with sauces)
Standard-output burner Large flame
Frying Pancakes, potatoes,
schnitzel, fish fingers
High-output burner**
Wok burner**
Between large and small flame
Example Food Hotplate Cooking mode
* If you are using a saucepan with a lid, turn the flame down as soon as the food starts to boil.
** Optional. Available for some appliances. Depending on the appliance model. (For frying on the wok burner,
we recommend that you use a wok.)
&
Loading ...
Loading ...
Loading ...