
imageCLASS
LBP122dw
User
's Guide
USRMA-7913-00 2022-12 en Copyright CANON INC. 2022

Contents
About the Machine .......................................................................................................................................
2
Supported Functions ................................................................................................................................................. 3
System Manager ID and PIN ...................................................................................................................................... 4
Measures to Prevent Unauthorized Access ................................................................................................................. 5
Names of Parts and Their Functions ........................................................................................................................... 7
Front Side ............................................................................................................................................................ 8
Rear Side ............................................................................................................................................................. 9
Operation Panel ................................................................................................................................................. 10
Paper Drawer ..................................................................................................................................................... 12
Usable Paper ........................................................................................................................................................... 13
Precautions When Handling Paper ........................................................................................................................ 16
Specications .......................................................................................................................................................... 17
Basic Specications ............................................................................................................................................. 18
Print Specications ............................................................................................................................................. 20
Network Specications ........................................................................................................................................ 21
Security and Management Function Specications .................................................................................................. 22
Supported Environment ...................................................................................................................................... 25
Recommended Functions ........................................................................................................................................ 26
Cost Savings ...................................................................................................................................................... 27
Making Operations More Ecient ......................................................................................................................... 28
Setting Up .......................................................................................................................................................... 30
Conguring the Default Settings (Setup Guide) ........................................................................................................ 31
Setting Up the Network ........................................................................................................................................... 34
Selecting Wired or Wireless LAN ........................................................................................................................... 36
Connecting to a Wired LAN .................................................................................................................................. 37
Connecting to a Wireless LAN ............................................................................................................................... 38
Connecting to a Wireless LAN by Using the Router Button (Push Button Mode) .................................................... 41
Connecting to a Wireless LAN by Entering a PIN Code (WPS PIN Code Mode) ....................................................... 43
Connecting to a Wireless LAN by Searching for a Router (Access Point Setup Method) ........................................... 45
Connecting to a Wireless LAN by Setting the Details (Manual Setup Method) ........................................................ 47
Setting IPv4 Addresses ........................................................................................................................................ 50
Setting IPv6 Addresses ........................................................................................................................................ 52
Conguring Your Machine for Your Network Environment ....................................................................................... 54
Manually Conguring the Ethernet Settings ..................................................................................................... 55
Conguring DNS .......................................................................................................................................... 56
Conguring SMB .......................................................................................................................................... 59
Conguring WINS ......................................................................................................................................... 60
Conguring SNMP ........................................................................................................................................ 61
Conguring SNTP ......................................................................................................................................... 64
Checking the Network Status and Settings ............................................................................................................. 66
Installing Software and Drivers to the Computer ...................................................................................................... 69
I

Basic Operations .......................................................................................................................................... 71
Turning ON and OFF the Machine ............................................................................................................................ 72
Turning ON the Machine ...................................................................................................................................... 73
Turning OFF the Machine ..................................................................................................................................... 74
Restarting the Machine ....................................................................................................................................... 75
Reducing Power Consumption (Sleep Mode) ............................................................................................................. 76
Using the Operation Panel ....................................................................................................................................... 78
Screens Displayed on the Operation Panel ............................................................................................................. 79
[Home] Screen ............................................................................................................................................. 81
[Status Monitor] Screen ................................................................................................................................. 82
How to Operate the Operation Panel ..................................................................................................................... 84
Entering Characters ............................................................................................................................................ 85
Logging In to the Machine ....................................................................................................................................... 86
Loading Paper ......................................................................................................................................................... 87
Loading Paper in the Paper Drawer ....................................................................................................................... 88
Preparations and Orientation for Loading Envelopes .............................................................................................. 90
Orientation for Loading Paper with a Logo ............................................................................................................. 92
Specifying the Paper Size and Type ....................................................................................................................... 94
Setting the Paper Size and Type for the Paper Drawer ....................................................................................... 95
Registering Non-standard Size Paper (Custom Paper) ....................................................................................... 97
Hiding Unused Paper Sizes ............................................................................................................................ 99
Printing .............................................................................................................................................................. 101
Printing Preparations ............................................................................................................................................ 102
Preparing to Print from a Computer .................................................................................................................... 103
Conguring a Printer Port (Windows) ............................................................................................................ 104
Setting Up a Print Server ................................................................................................................................... 107
Preparations for Using Universal Print ................................................................................................................. 110
Registering the Machine to Cloud Service ...................................................................................................... 111
Registering the Machine to the Computer ..................................................................................................... 114
Printing from a Computer ..................................................................................................................................... 115
Registering Non-standard Size Paper to the Computer (Custom Size) ...................................................................... 118
Printing with Universal Print .............................................................................................................................. 120
Canceling Printing ................................................................................................................................................ 121
Viewing the Print Job Status and Log ..................................................................................................................... 123
Linking with Mobile Devices ............................................................................................................ 125
Preparations for Linking with Mobile Devices ......................................................................................................... 126
Preparations for Direct Connection ..................................................................................................................... 127
Preparations for Using AirPrint ........................................................................................................................... 129
Connecting a Mobile Device to the Machine ........................................................................................................... 132
Connecting a Mobile Device via Wireless LAN Router (LAN Connection) ................................................................... 133
Connecting a Mobile Device Directly to the Machine (Direct Connection) ................................................................. 134
II

Using a Dedicated Application to Print (Canon PRINT Business) ..............................................................................
136
Using AirPrint Application to Print Data ................................................................................................................. 137
Printing from an Android Device ............................................................................................................................ 140
Printing from Chromebook or Other Device with Chrome OS .................................................................................. 141
Security .............................................................................................................................................................. 143
Setting the Department ID and PIN for the Administrator ...................................................................................... 144
Protecting the Network ........................................................................................................................................ 146
Setting the Firewall ........................................................................................................................................... 147
Changing the Port Number ................................................................................................................................ 150
Using a Proxy ................................................................................................................................................... 151
Using TLS ........................................................................................................................................................ 153
Using IEEE 802.1X ............................................................................................................................................. 155
Managing and Verifying a Key and Certicate ...................................................................................................... 157
Generating a Key and Certicate .................................................................................................................. 158
Generating a Key and Certicate Signing Request (CSR) and Obtaining and Registering a Certicate .................... 160
Registering a Key and Certicate or CA Certicate Obtained from an Issuing Authority ....................................... 163
Verifying a Received Certicate with OCSP ..................................................................................................... 165
Preventing Leaking Information ............................................................................................................................ 166
Preventing Unauthorized Use ................................................................................................................................ 167
Restricting Use of Remote UI ............................................................................................................................. 168
Restricting Use from a Mobile Device .................................................................................................................. 170
Preventing Connection to Computer via USB Port ................................................................................................. 171
Conguring LPD, RAW, or WSD ........................................................................................................................... 172
Disabling HTTP Communication ......................................................................................................................... 174
Managing the Machine ........................................................................................................................ 176
Setting the Date and Time ..................................................................................................................................... 177
Managing the Machine from a Computer (Remote UI) ............................................................................................ 178
Starting Remote UI ........................................................................................................................................... 179
Portal Page of Remote UI .................................................................................................................................. 181
Checking Usage and Logs with Remote UI ........................................................................................................... 183
Monitoring the Usage ........................................................................................................................................... 185
Printing and Viewing Reports and Lists ................................................................................................................ 186
Changing the Report and List Print Settings ................................................................................................... 188
Updating the Firmware ......................................................................................................................................... 189
Initializing the Settings and Data .......................................................................................................................... 192
Checking the Number of Printed Pages (Check Counter) ........................................................................................ 194
Settings Menu Items .............................................................................................................................. 196
[Preferences] ........................................................................................................................................................ 197
[Display Settings] .............................................................................................................................................. 198
[Timer/Energy Settings] ..................................................................................................................................... 201
[Network] ........................................................................................................................................................ 203
III

[Wireless LAN Settings] ...............................................................................................................................
208
[TCP/IP Settings] ......................................................................................................................................... 210
[External Interface] ........................................................................................................................................... 216
[Accessibility] ................................................................................................................................................... 217
[Adjustment/Maintenance] ................................................................................................................................... 219
[Adjust Image Quality] ...................................................................................................................................... 220
[Special Processing] .................................................................................................................................... 221
[Maintenance] .................................................................................................................................................. 225
[Function Settings] ................................................................................................................................................ 226
[Common] ....................................................................................................................................................... 227
[Paper Feed Settings] .................................................................................................................................. 228
[Print Settings] ........................................................................................................................................... 229
[Printer] .......................................................................................................................................................... 230
[Printer Settings] ........................................................................................................................................ 231
[Management Settings] ......................................................................................................................................... 238
[User Management] .......................................................................................................................................... 240
[Device Management] ....................................................................................................................................... 241
[Remote UI Settings/Update Firmware] ............................................................................................................... 243
[Remote UI Settings] ................................................................................................................................... 244
[Data Management] .......................................................................................................................................... 245
[Security Settings] ............................................................................................................................................. 246
[Authentication/Password Settings] .............................................................................................................. 247
[Toner Delivery Settings] ....................................................................................................................................... 248
Maintenance ................................................................................................................................................. 250
Cleaning the Machine ........................................................................................................................................... 252
Cleaning the Surface of the Machine ................................................................................................................... 253
Cleaning the Fixing Assembly ............................................................................................................................. 254
Cleaning the Drum ........................................................................................................................................... 255
Replacing Consumables ......................................................................................................................................... 256
Replacing the Toner Cartridge ............................................................................................................................ 257
Checking the Remaining Amount of Consumables ................................................................................................ 262
List of Consumables .......................................................................................................................................... 263
Adjusting the Print Density ................................................................................................................................... 265
Moving the Machine ............................................................................................................................................. 266
Troubleshooting ......................................................................................................................................... 270
Paper Jams ........................................................................................................................................................... 271
Paper Jams in the Paper Drawer, Output Tray, and Rear Side ................................................................................. 272
Paper Jams That Occur Repeatedly ..................................................................................................................... 276
Problems with Printing Results .............................................................................................................................. 278
Toner Smudges and Splatters Appear ................................................................................................................. 280
Streaks Appear ................................................................................................................................................. 281
Printing Is Uneven ............................................................................................................................................ 283
Smudge Marks Appear on the Edge of Printouts ................................................................................................... 285
IV

Text or Images Are Blurry ..................................................................................................................................
286
Printouts Have Ghost Images ............................................................................................................................. 287
Printouts Are Faded .......................................................................................................................................... 289
The Edge of the Page Is Not Printed .................................................................................................................... 291
The Background Is Generally Dark ...................................................................................................................... 292
White Spots Appear .......................................................................................................................................... 293
Smudge Marks Appear on the Back Side of Printouts ............................................................................................ 295
Printouts Are Skewed ........................................................................................................................................ 296
The Printed Barcode Cannot be Scanned ............................................................................................................. 297
Paper and Paper Feeding Problems ........................................................................................................................ 298
Paper Creases .................................................................................................................................................. 299
Paper Curls ...................................................................................................................................................... 300
Paper Is Not Fed or Two or More Sheets Are Fed Together ..................................................................................... 301
Printed Paper Sticks Together ............................................................................................................................ 302
Setting Up ............................................................................................................................................................ 303
The Machine Connected via WSD Port Is Not Displayed During Driver Installation .................................................... 304
Cannot Connect to Wireless LAN ......................................................................................................................... 305
Network ............................................................................................................................................................... 306
Cannot Switch to Wireless LAN ........................................................................................................................... 307
Cannot Find the Print Server to Connect to .......................................................................................................... 308
Cannot Connect to a Shared Printer .................................................................................................................... 309
Cannot Find the IP Address of the Machine .......................................................................................................... 310
AirPrint Does Not Work ..................................................................................................................................... 311
Printing ................................................................................................................................................................ 312
Cannot Print .................................................................................................................................................... 313
Cannot Print (Wireless LAN) ......................................................................................................................... 314
Cannot Print (Wired LAN) ............................................................................................................................. 316
Cannot Print (USB Connection) ..................................................................................................................... 317
Cannot Print (via Print Server) ...................................................................................................................... 318
Printing Is Slow ................................................................................................................................................ 319
Management Functions and Environment Settings ................................................................................................ 320
Cannot Access Remote UI .................................................................................................................................. 321
Changing the Time Until Sleep Mode .................................................................................................................. 322
Lost Department ID or PIN for the Administrator .................................................................................................. 323
Checking the Items That Can Be Congured on the Machine and Their Settings ....................................................... 324
A Message Appears ............................................................................................................................................... 325
An Error Code Is Displayed ..................................................................................................................................... 336
If the Problem Persists .......................................................................................................................................... 339
Appendix ........................................................................................................................................................... 341
Manuals of the Machine ........................................................................................................................................ 342
Using the User's Guide .......................................................................................................................................... 343
Manual Display Settings ........................................................................................................................................ 346
Operation Examples When Using a Computer ........................................................................................................ 347
V

Environmental Information, Regulations, and Standards
........................................................................................ 357
Notice .................................................................................................................................................................. 358
Trademarks and Copyrights ................................................................................................................................... 359
Third-party Software ............................................................................................................................................. 361
VI

About the Machine
About the Machine ............................................................................................................................................
2
Supported Functions ............................................................................................................................................. 3
System Manager ID and PIN ................................................................................................................................. 4
Measures to Prevent Unauthorized Access .......................................................................................................... 5
Names of Parts and Their Functions .................................................................................................................... 7
Front Side ......................................................................................................................................................... 8
Rear Side .......................................................................................................................................................... 9
Operation Panel .............................................................................................................................................. 10
Paper Drawer ................................................................................................................................................. 12
Usable Paper ........................................................................................................................................................ 13
Precautions When Handling Paper ................................................................................................................. 16
Specications ....................................................................................................................................................... 17
Basic Specications ......................................................................................................................................... 18
Print Specications ......................................................................................................................................... 20
Network Specications ................................................................................................................................... 21
Security and Management Function Specications ......................................................................................... 22
Supported Environment ................................................................................................................................. 25
Recommended Functions .................................................................................................................................... 26
Cost Savings ................................................................................................................................................... 27
Making Operations More Ecient .................................................................................................................. 28
About the Machine
1

About the Machine
94RC-000
Befor
e using the machine, check the basic information of the machine such as the supported functions, names of each
part, and specications of the functions. Also consider the management system of the machine and measures against
security risks.
Basic Information
The supported functions vary depending on the model. Check the list for details.
Supported Functions(P. 3)
Check the names of parts, usable paper, and specications of functions, as needed.
Names of Parts and Their Functions(P. 7)
Usable Paper(P. 13)
Specications(P
. 17)
Information Required for Management Functions
When using the management functions, use the System Manager ID and PIN to log in.
The preset System Manager ID and PIN vary depending on the model.
System Manager ID and PIN(P. 4)
When using the machine in a network envir
onment, check the examples of measures to prevent
unauthorized access, and consider implementing these.
Measures to Prevent Unauthorized Access(P. 5)
Useful Tips
Intr
oduces recommended functions useful for digitizing documents, reducing costs, and making operations
more ecient.
Recommended Functions(P. 26)
About the Machine
2
Supported Functions
94RC-001
User
's Guide (this manual) describes all functions of the model series including the machine.
Some of the functions listed in User's Guide may not be available depending on your model. Use the table below to
see which functions are supported by your model.
Supported Functions(P. 3)
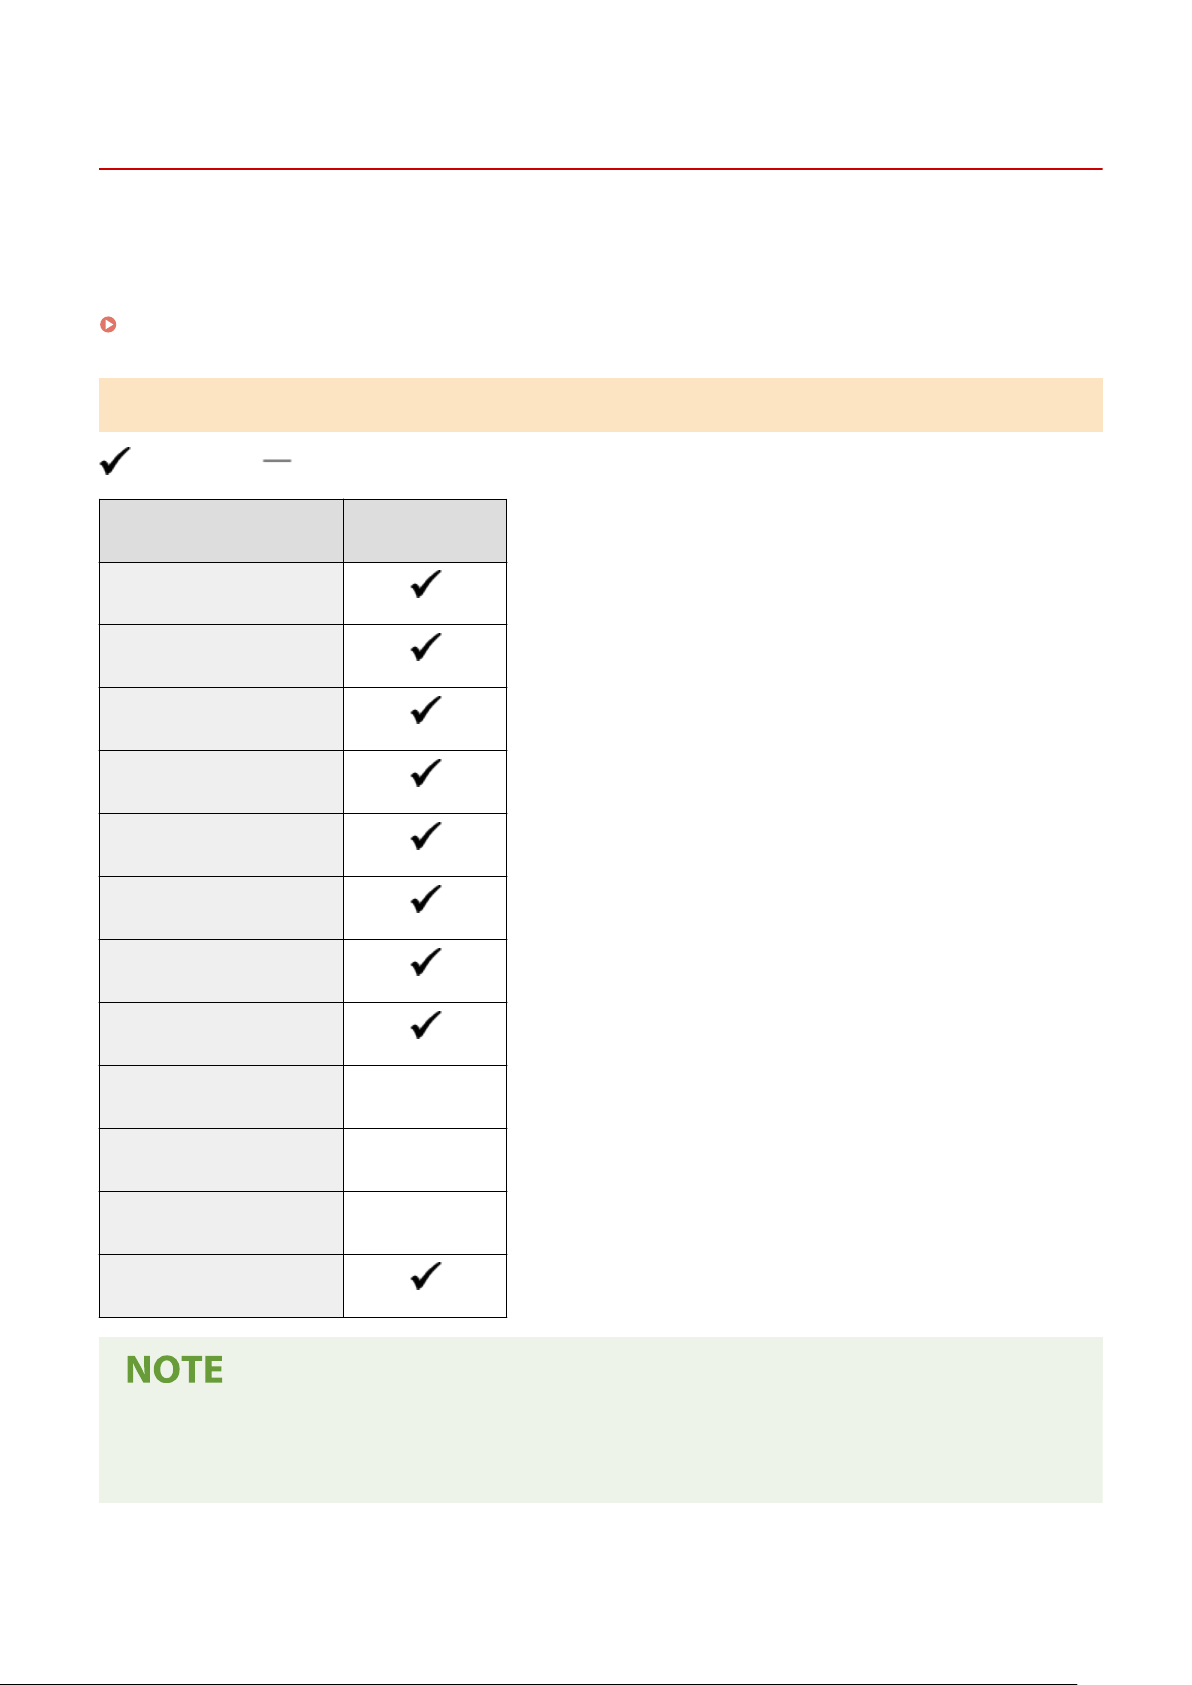
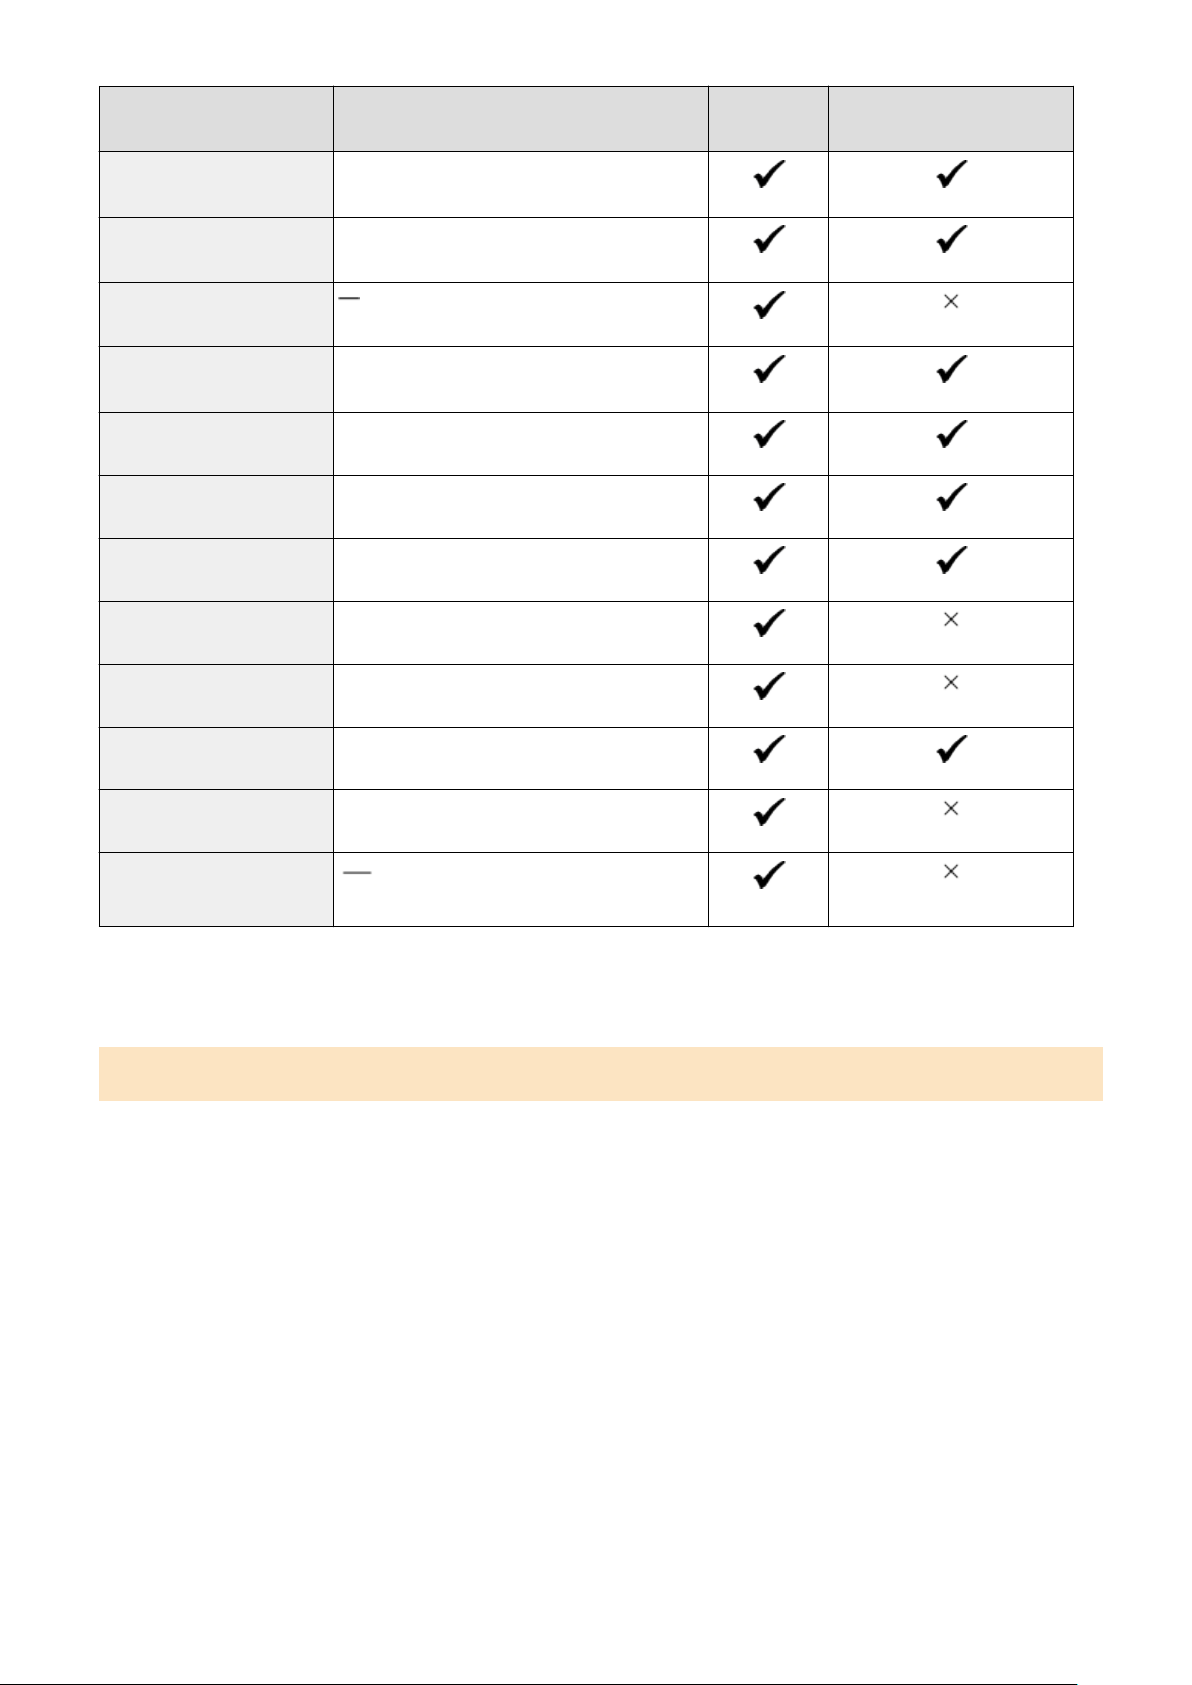
Supported Functions
: Supported : Not supported
Function LBP122dw
Print
2-sided Printing
Wired LAN connection
Wireless LAN connection
USB connection
Remote UI
Keys and certicates
Linking with mobile devices
Display
Black and white LCD
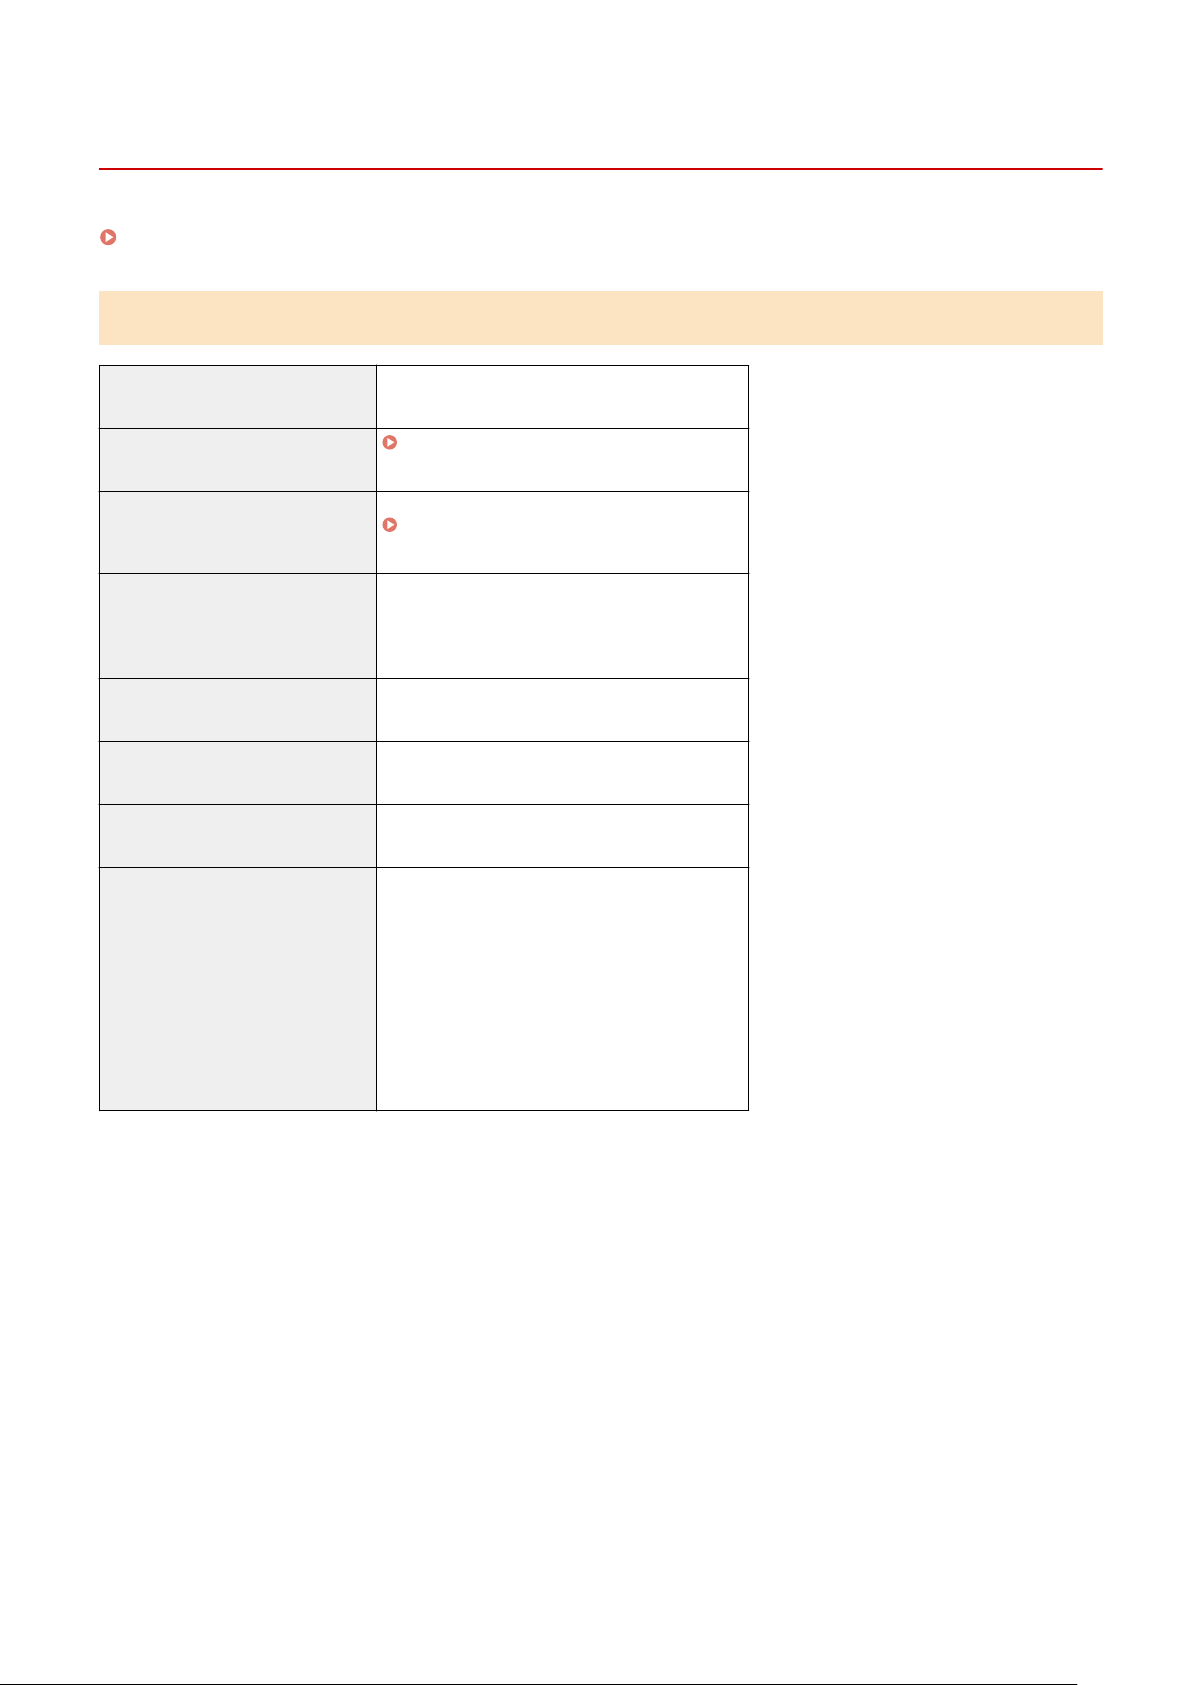
Default System Manager ID
Not specied
Default System Manager PIN
Not specied
Toner Replenishment Service
● For details about the types of available drivers, see the Canon website for your country or r
egion, or see the
supplied User Software CD-ROM/DVD-ROM.
https://global.canon/en/support/
About the Machine
3

System Manager ID and PIN
94RC-005
The machine has a System Manager Mode for vie
wing and changing important settings.
When System Manager ID and System Manager PIN are set, only those users who know this information are able to
log into System Manager Mode.
By default, the System Manager ID and System Manager PIN are not set.
System Manager Mode is disabled, allowing anyone to see and change important settings. Set the System Manager ID
and System Manager PIN to protect the information, and allow only certain administrators of this information.
For details about how to change and set the System Manager ID and System Manager PIN, see the following:
Setting the Department ID and PIN for the Administrator(P. 144)
About the Machine
4

Measures to Prevent Unauthorized Access
94RC-006
Be sur
e to read this section before using the machine in a network environment.
Printers and multifunction machines can provide various useful functions when connected to a network. However,
because this also creates risks of unauthorized access and eavesdropping over the network, measures against security
risks are essential.
This section provides examples of measures against unauthorized access that you can implement during setup when
using the machine in a network environment.
Using a Private IP Address(P. 5)
Using a PIN to Protect Information(P. 5)
Precautions When Using Remote UI(P. 6)
● Ther
e are additional measures against security risks you can implement on the machine, such as restricting
communication with a rewall and using TLS encrypted communication to prevent eavesdropping and
tampering. Take the necessary measures according to your usage environment.
Security(P. 143)
Using a Private IP Address
Ther
e are two types of IP addresses: a global IP address, which is used for connecting to the Internet, and a private IP
address, which is used in a local area network such as a company LAN.
If a global IP address is assigned to the machine, the machine can be accessed by users on the Internet. Thus, the risk
of information leakage due to unauthorized access from external network increases.
On the other hand, if a private IP address is assigned to the machine, access to the machine is restricted to only users
on your local area network. Therefore, it reduces the risk of unauthorized access compared to an assigned global IP
address.
Basically, assign a private IP address to the machine.
A private IP address is used in one of the following ranges.
Ranges for Private IP Addresses
● From 10.0.0.0 to 10.255.255.255
● From 172.16.0.0 to 172.31.255.255
● From 192.168.0.0 to 192.168.255.255
For details about how to assign and conrm the IP address, see the following:
Setting IPv4 Addresses(P. 50)
Setting IPv6 Addresses(P. 52)
If you want to assign a global IP addr
ess to the machine, you can create an environment to prevent outside access,
such as by using a rewall, to reduce the risk of unauthorized access. Contact your network administrator about how
to implement network security.
Using a PIN to Protect Information
By setting up a PIN to pr
otect the information stored in the machine, you can reduce the risk of information leakage or
unauthorized use if a malicious third party attempts to gain unauthorized access.
You can set a PIN to the functions indicated below. Only users who know the PIN can use these functions and access
the information on the machine.
Remote UI
About the Machine
5

You can require the user to enter the Remote UI Access PIN when using Remote UI.
Setting the PIN to Use for Remote UI(P. 168)
System Manager ID
Y
ou can require the user to enter the System Manager ID and System Manager PIN, when changing any
important settings.
Setting the Department ID and PIN for the Administrator(P. 144)
Precautions When Using Remote UI
● Do not access other websites when using Remote UI.
● After using Remote UI, be sure to log out and close your browser.
About the Machine
6

Names of Parts and Their Functions
94RC-007
Fr
ont Side
Check these parts on the front when operating the machine.
Front Side(P. 8)
● Use the oper
ation panel to operate the machine and congure the settings.
Operation Panel(P. 10)
● Load printing paper into the paper dr
awer.
Paper Drawer(P. 12)
Rear Side
Check the r
ear parts when installing and connecting the machine and when clearing paper jams.
Rear Side(P. 9)
About the Machine
7
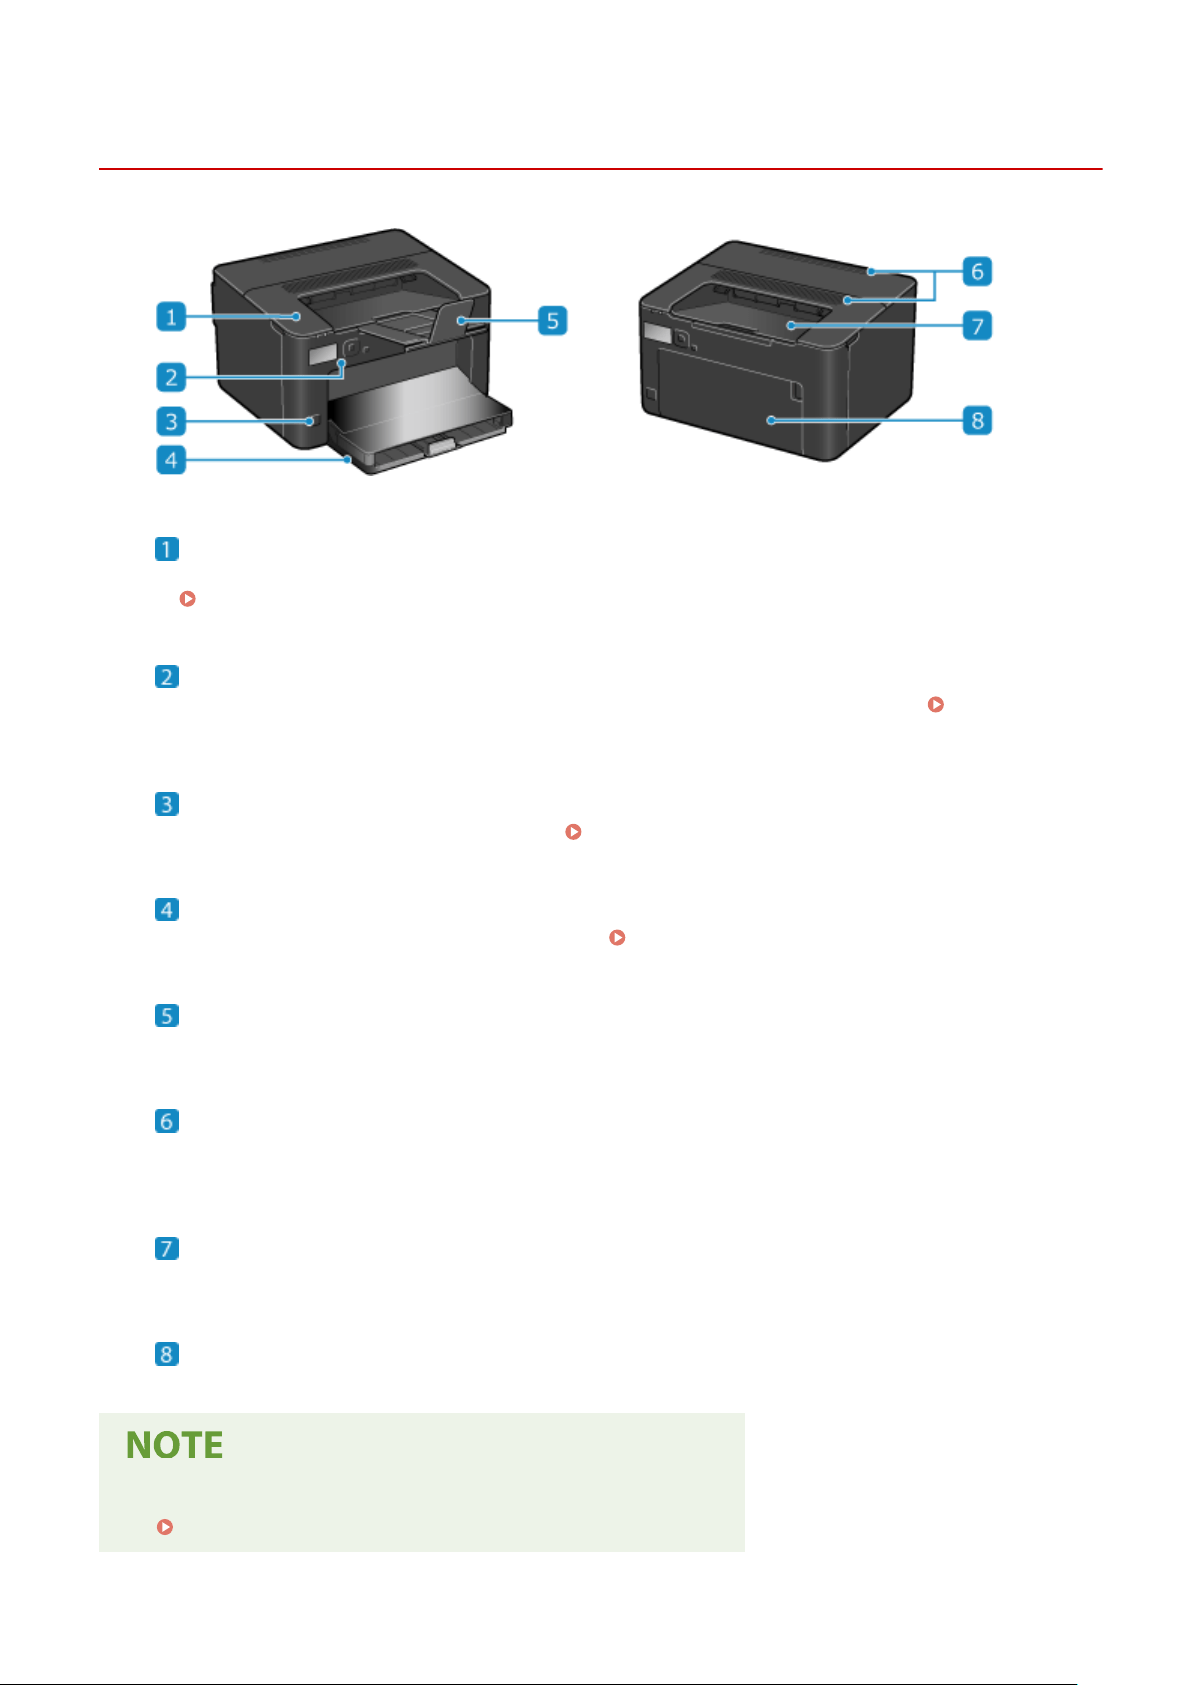
Front Side
94RC-008
Toner cover
Open the toner co
ver when replacing the toner cartridge.
Replacing the Toner Cartridge(P. 257)
Operation panel
Use the display and k
eys to operate the machine and conrm the operations and status.
Operation
Panel
(P. 10)
Power switch
Turns the power of the machine ON and OFF. Turning ON and OFF the Machine(P. 72)
Paper drawer
Load paper you usually use into the paper dr
awer.
Paper Drawer(P. 12)
Paper stopper
Open the paper stopper to pr
event paper from falling out of the output tray.
Ventilation slots
Air inside the machine is released through the ventilation slots to cool down the inside of the machine.
Do not place objects next to the ventilation slots, as this can prevent ventilation.
Output tray
Printed paper is ejected to the output tr
ay.
Front cover
Open the fr
ont cover when loading paper into the paper drawer.
● T
o ensure ecient use of the machine, regularly clean the surface.
Cleaning the Surface of the Machine(P. 253)
About the Machine
8
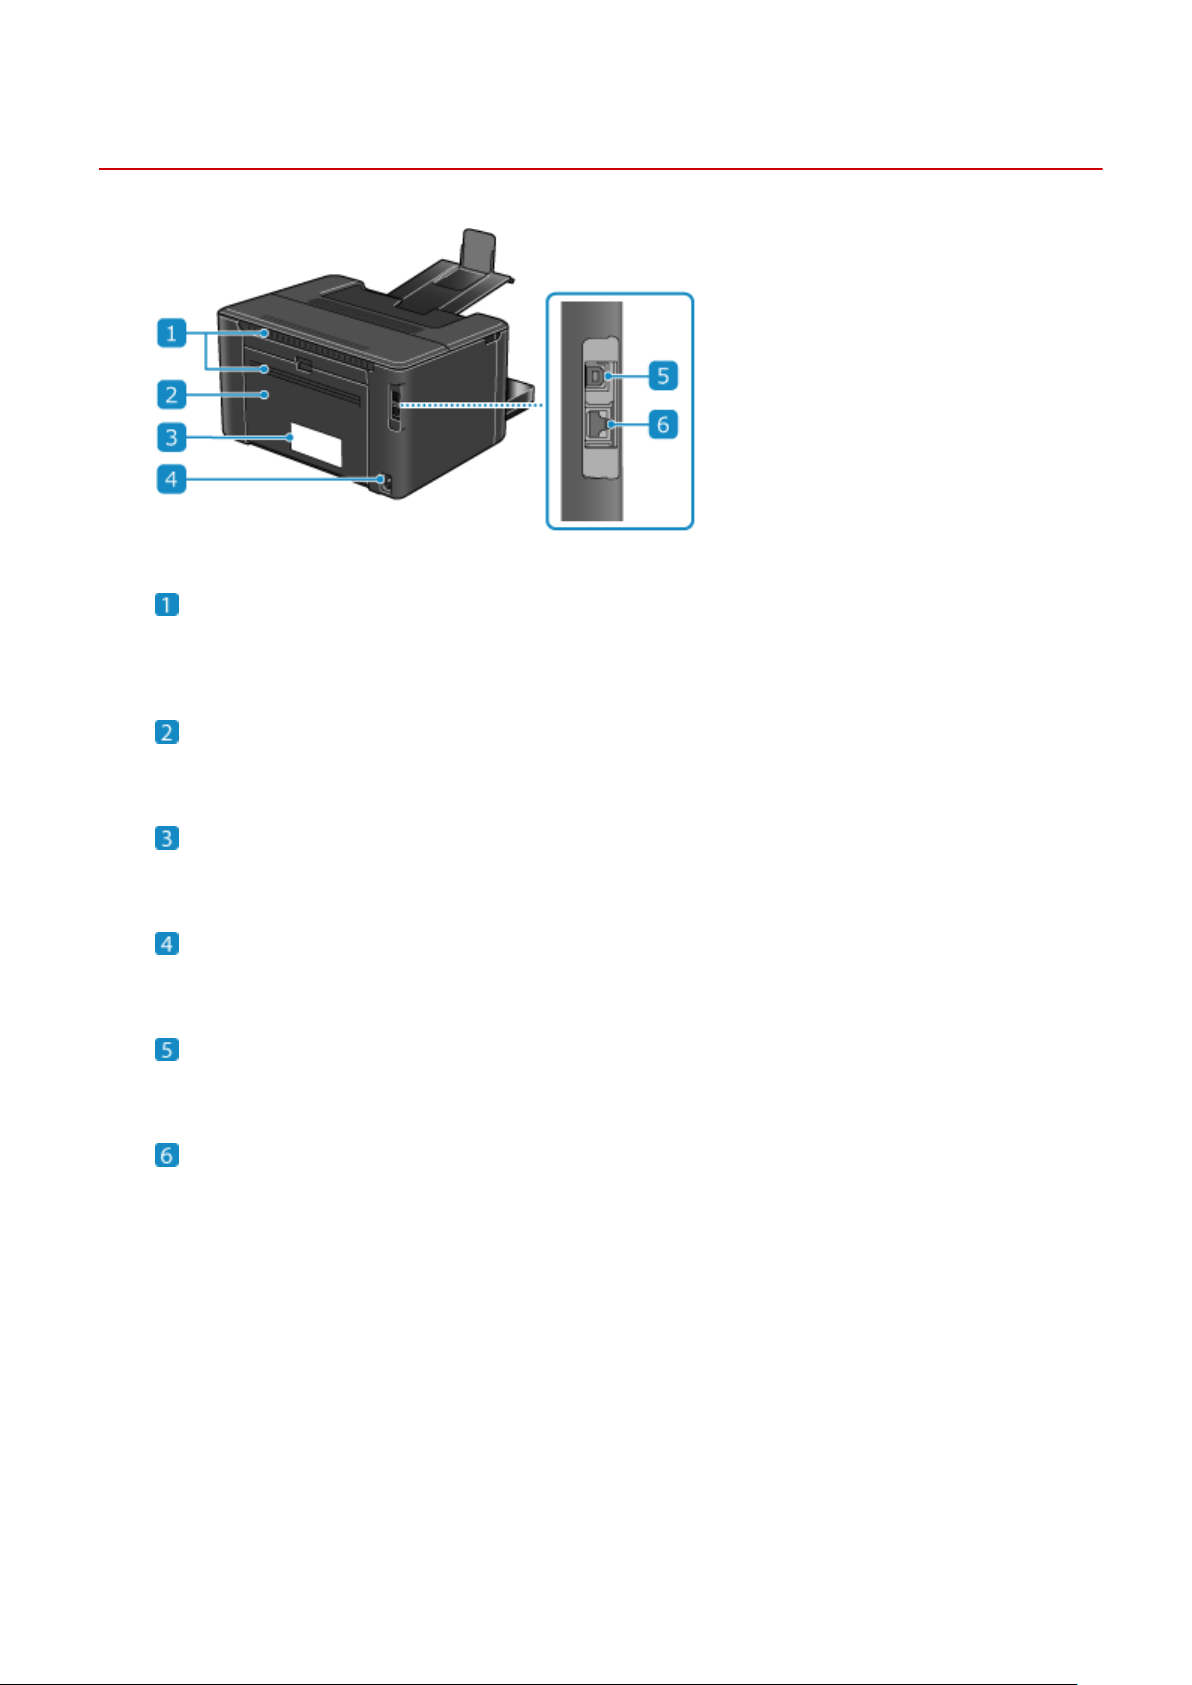
Rear Side
94RC-009
Ventilation slots
Air inside the machine is r
eleased through the ventilation slots to cool down the inside of the machine.
Do not place objects next to the ventilation slots, as this can prevent ventilation.
Rear cover
Open the r
ear cover when a paper jam occurs inside the machine.
Rating label
This label sho
ws the serial number, which is needed when making inquiries about the machine.
Power socket
Connect the po
wer cord to the power socket.
USB port (for computer connection)
Y
ou can connect a computer to the USB port using a commercial USB cable.
LAN port
You can connect the machine to a wired LAN using a commercial Ethernet cable connected to the LAN port.
About the Machine
9
Operation Panel
94RC-00C
Use the oper
ation panel to operate the machine and congure the settings.
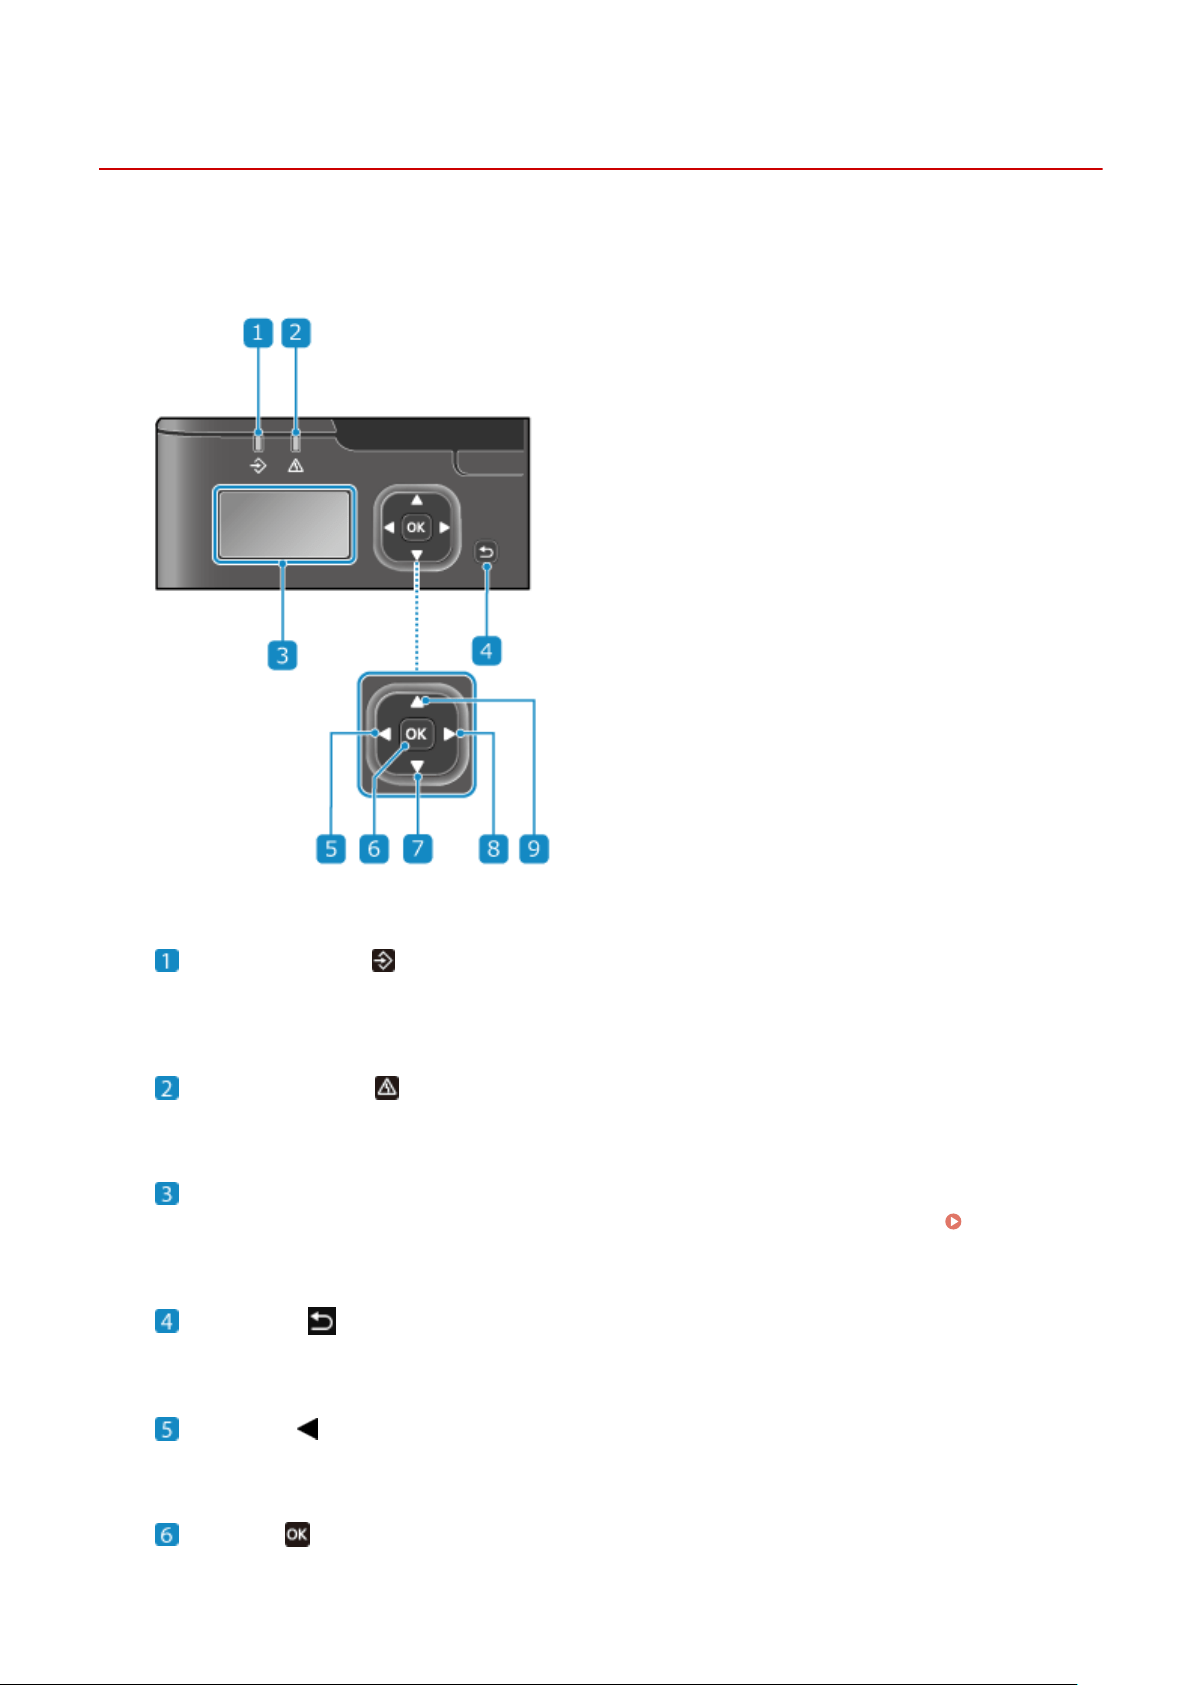
Data indicator ( )
Blinks when an oper
ation is being performed, such as during printing, and lights up when data is waiting to
be processed.
Error indicator ( )
Blinks or lights up when a paper jam or other err
or occurs.
Display
Displays the screens for operating the functions, usage, messages, and other information. Using the
Oper
ation Panel(P. 78)
Back key ( )
Returns you to the pr
evious screen.
Left key ( )
Returns to the pr
evious screen. Press when entering text to move the cursor to the left.
OK key ( )
Conrms the settings and selected details.
About the Machine
10

Down key ( )
Selects the item belo
w and decreases the value on a slider.
Right key ( )
Mo
ves to the next screen. Press when entering text to move the cursor to the right.
Up key ( )
Selects the item abo
ve and increases the value on a slider.
About the Machine
11
Paper Drawer
94RC-00F
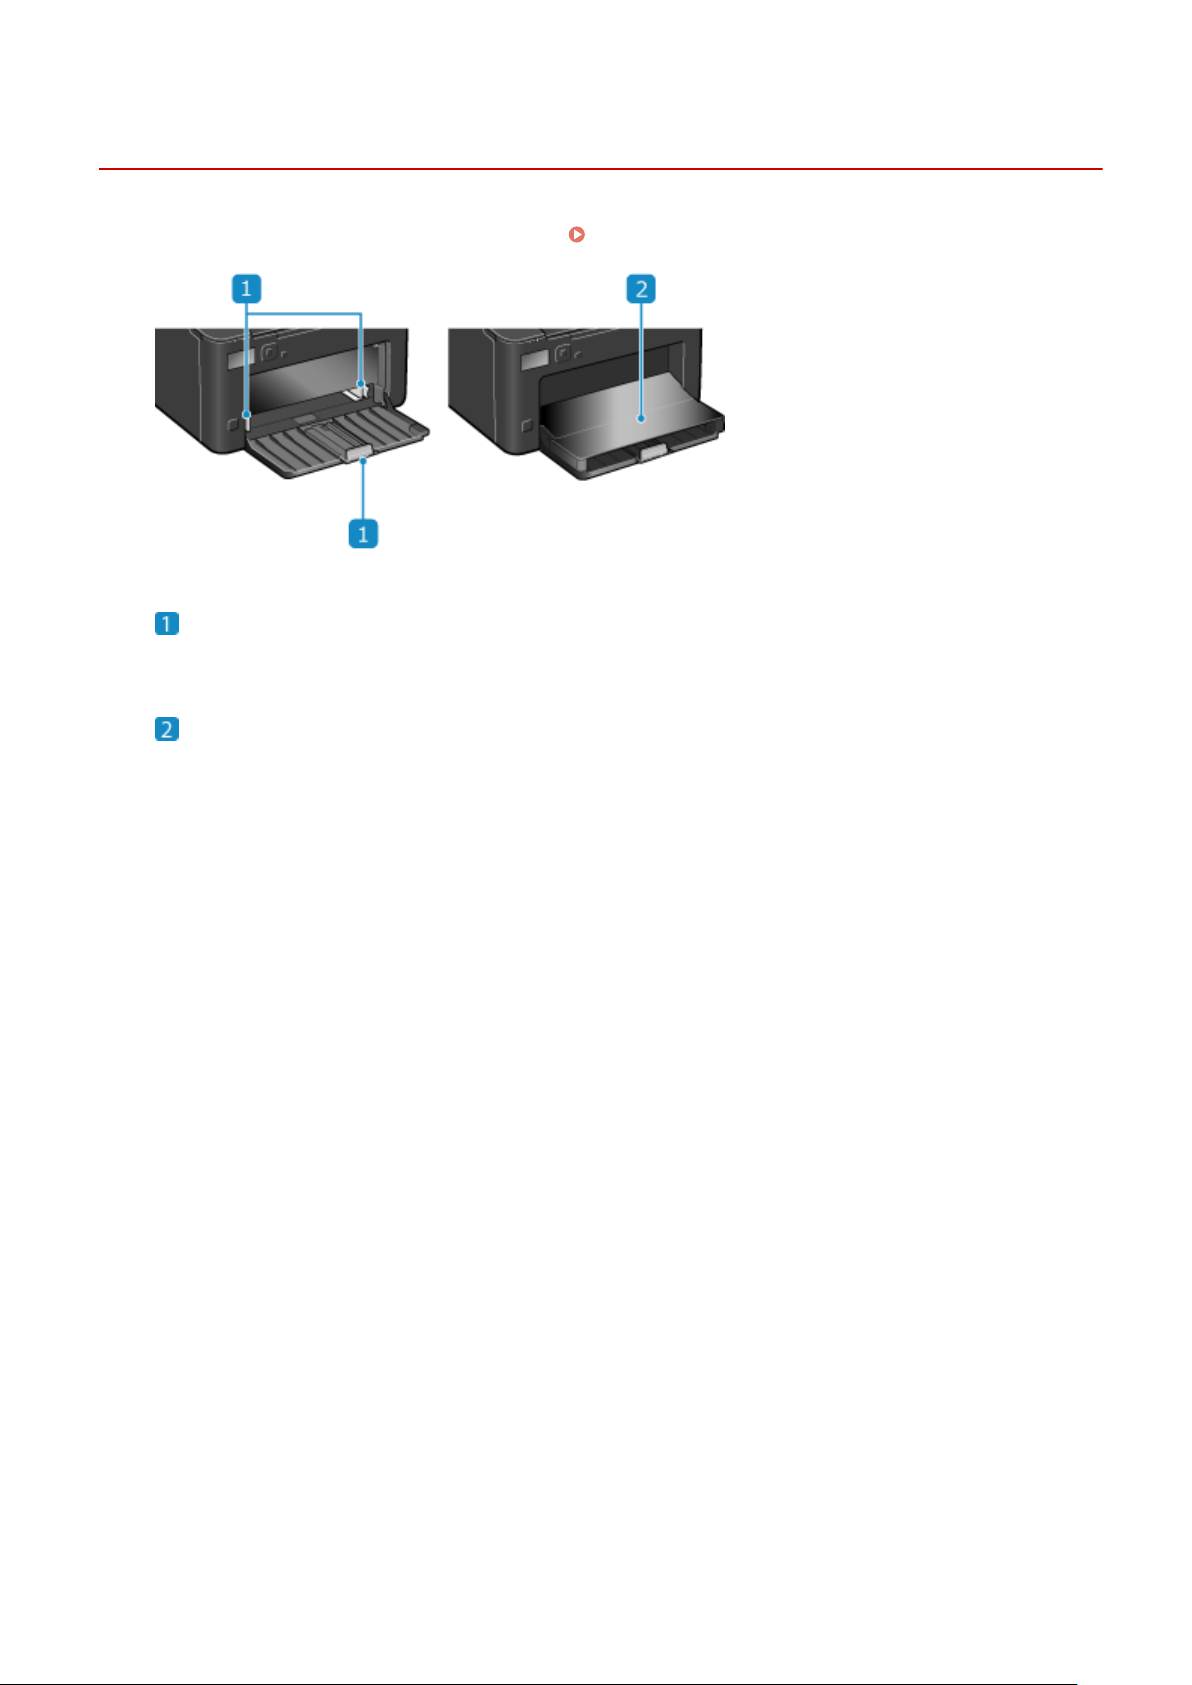
Load paper that you usually use into the paper dr
awer.
Loading Paper in the Paper Drawer(P. 88)
Paper guides
Align the paper guides against the edges of the paper to pr
operly place the paper.
Paper cover
Open the paper co
ver when loading paper into the paper drawer.
About the Machine
12
Usable Paper
94RC-00H
The sizes and types of paper that can be used on the machine ar
e shown below.
Usable Paper Sizes(P. 13)
Usable Paper Types(P. 14)
Unusable Paper(P. 15)
● Pr
ecautions must be taken when handling and storing paper.
Precautions When Handling Paper(P. 16)
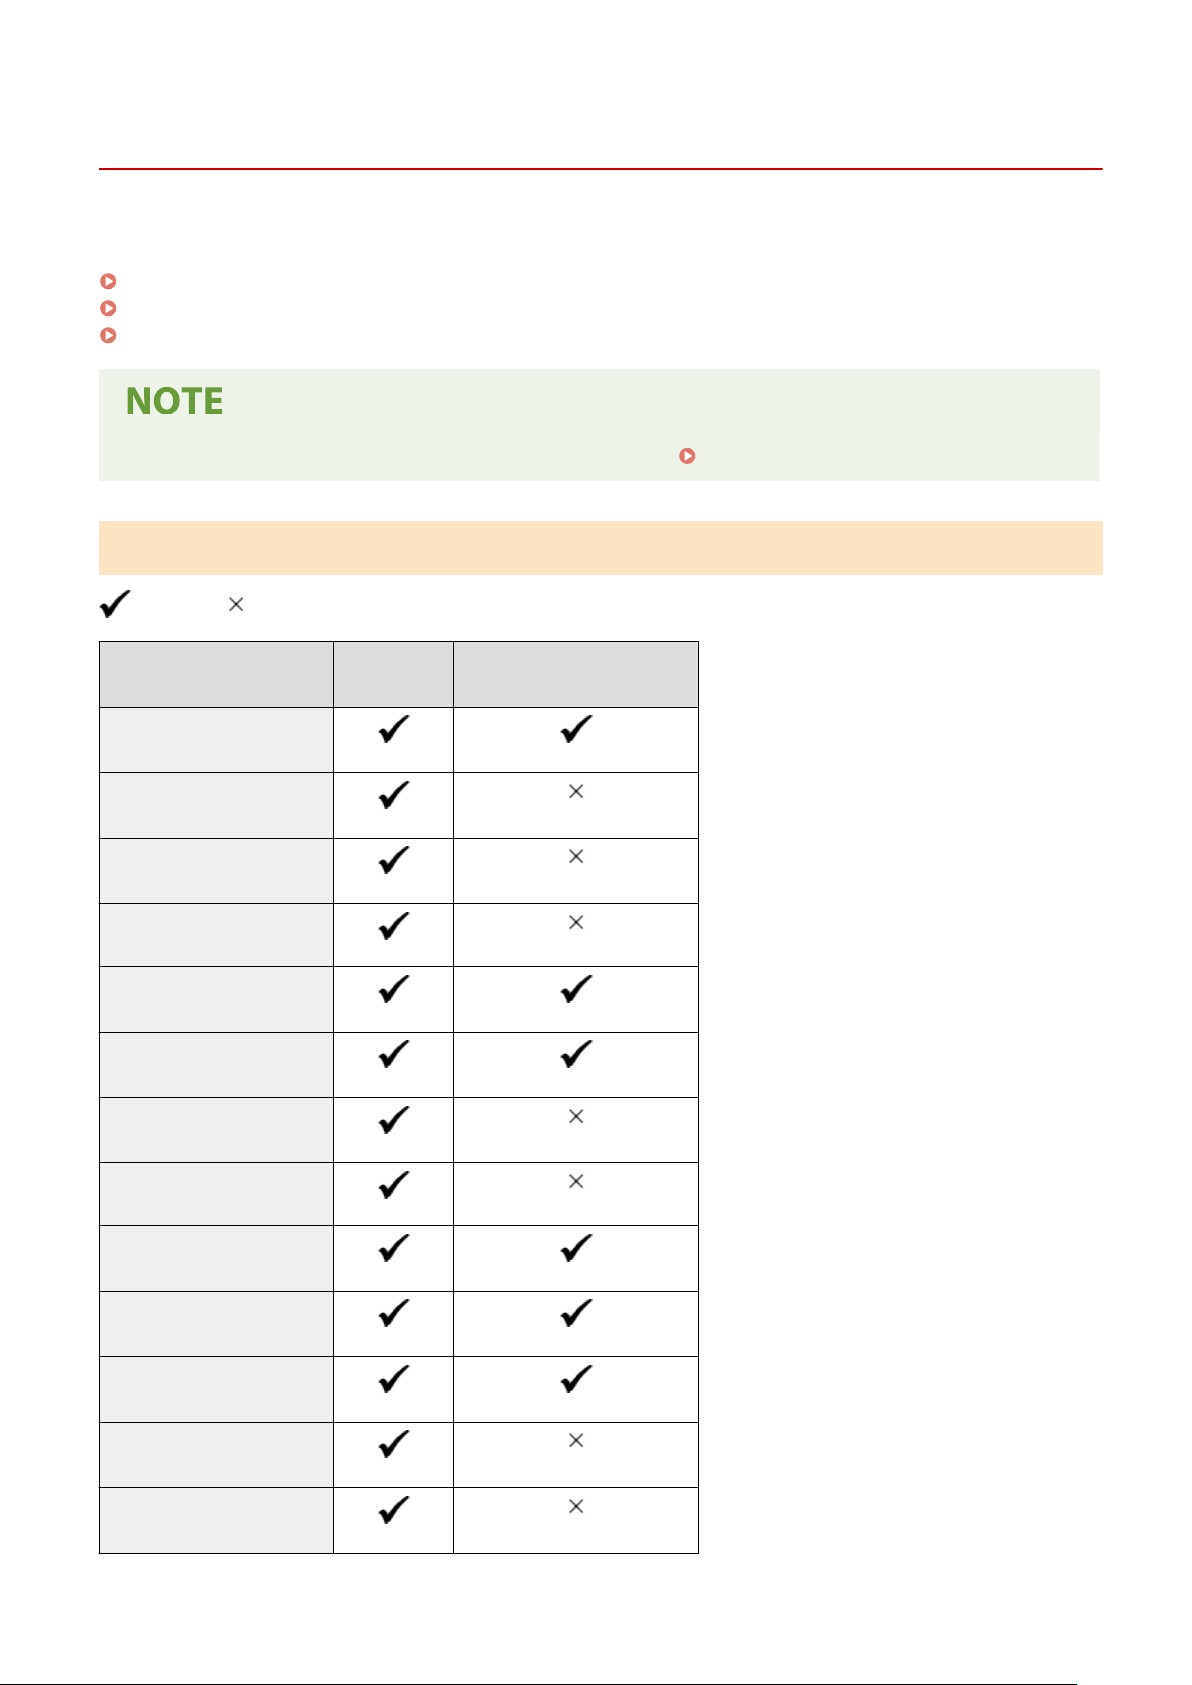
Usable Paper Sizes
: Usable : Not usable
Paper Size Paper Drawer
Automatic 2-sided Printing
*1
A4
*1*2
B5
*1
A5
*1*3
A6
Legal (LGL)
*1
Letter (LTR)
*1*2
Statement (STMT)
*1
Executive (EXEC)
Ocio
*1
Ocio (Br
azil)
*1
Ocio (Me
xico)
*1
Letter (Government)
*1
Legal (Government)
*1
About the Machine
13
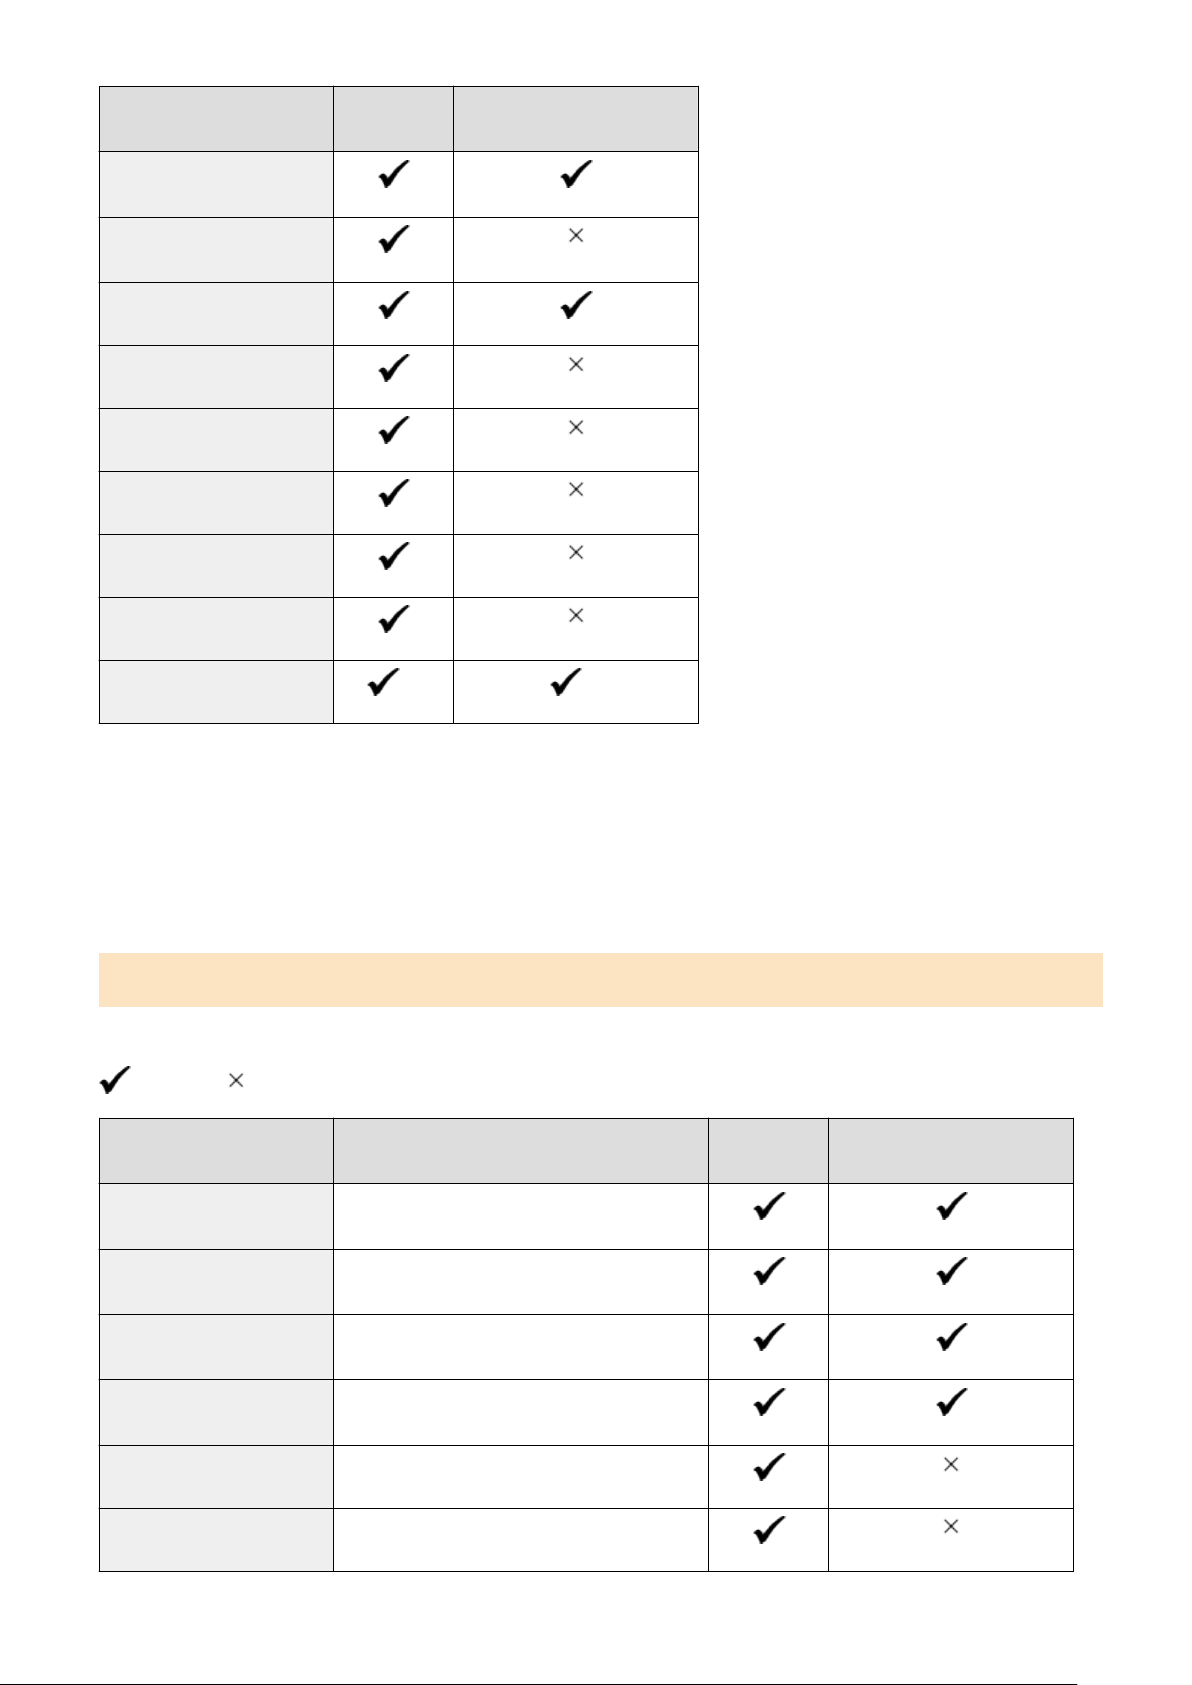
Paper Size Paper Drawer
Automatic 2-sided Printing
*1
Foolscap/Folio
*1
Foolscap (Australia)
*1
Legal (India)
3x5inch
Envelope No.10 (COM10)
Envelope Monarch
Envelope C5
Envelope DL
Custom Paper Size
*4
*5
*1
Automatically prints on both sides without having to r
eload the paper.
*2
Enables printing of reports and lists.
*3
Enables loading of paper in the portrait or landscape orientation.
*4
You can use a custom size from 3" x 5" (76.0 mm x 127.0 mm) to 8 1/2" x 14" (216.0 mm x 356.0 mm).
*5
You can use a custom size from 8 1/4" x 11" (210.0 mm x 279.0 mm) to 8 1/2" x 14" (216.0 mm x 356.0 mm).
Usable Paper Types
Y
ou can use non-chlorine paper.
: Usable : Not usable
Paper Type Paper Weight Paper Drawer
Automatic 2-sided Printing
*1
Thin 1
*1
16 lb Bond (60 g/m²)
Plain 1
*1*2
17 lb Bond to 18 lb Bond (61 g/m² to 70 g/m²)
Plain 2
*1*2
18 lb Bond to 23 lb Bond (71 g/m² to 89 g/m²)
Plain 3
*1*2
23 lb Bond to 27 lb Bond (90 g/m² to 105 g/m²)
Heavy 1 28 lb Bond to 31 lb Bond (106 g/m² to 120 g/m²)
Heavy 2 32 lb Bond to 60 lb Cover (121 g/m² to 163 g/m²)
About the Machine
14
Paper Type Paper Weight Paper Drawer
Automatic 2-sided Printing
*1
Recycled 1
*1*2
17 lb Bond to 18 lb Bond (61 g/m² to 70 g/m²)
Recycled 2
*1*2
18 lb Bond to 23 lb Bond (71 g/m² to 89 g/m²)
Labels
Color
*1*2
17 lb Bond to 18 lb Bond (61 g/m² to 70 g/m²)
Letterhead 1 17 lb Bond to 18 lb Bond (61 g/m² to 70 g/m²)
Letterhead 2 18 lb Bond to 23 lb Bond (71 g/m² to 89 g/m²)
Letterhead 3 23 lb Bond to 27 lb Bond (90 g/m² to 105 g/m²)
Letterhead 4 28 lb Bond to 31 lb Bond (106 g/m² to 120 g/m²)
Letterhead 5 32 lb Bond to 60 lb Bond (121 g/m² to 163 g/m²)
Bond 1 17 lb Bond to 27 lb Bond (60 g/m² to 104 g/m²)
Bond 2 27 lb Bond to 60 lb Bond (105 g/m² to 163 g/m²)
Envelope
*1
Automatically prints on both sides without having to r
eload the paper.
*2
Enables printing of reports and lists.
Unusable Paper
Before printing, check whether the paper to use is suitable. Do not use the following types of paper, as they can
cause paper jams or printing err
ors:
● Wrinkled, creased, curled, torn, or damp paper
*1
● Thin straw paper, very thin paper, coarse paper, glossy paper
● Paper with glue or other adhesive sticking out or label paper whose back side can be easily peeled off
● Paper printed by a thermal transfer printer, back side of paper printed by a thermal transfer printer
*1
Printing on damp paper may cause steam to be emitted fr
om the output area or water droplets to adhere to the
output part, but this does not indicate a malfunction. This is because the water contained in the paper evaporates due to
the heat generated when the toner xes to the paper. This is more likely to occur when the room temperature is low.
About the Machine
15

Precautions When Handling Paper
94RC-00J
T
o prevent paper jams and other errors and ensure beautiful printing, you must take precautions when handling and
storing paper.
To maintain the quality of printed paper, pay attention when storing and gluing paper.
◼ Handling and Storing Paper
Acclimating the Paper to the Usage Environment
Before using the paper in the machine, be sure to fully acclimate the paper to the environment where the
machine is located. Immediately using paper stored in a location with a different temperature or humidity
can cause paper jams or printing errors.
Storing Paper Before Use
● It is recommended that you use paper as soon as possible after opening the package. Any remaining
paper should be wrapped in the original package and stored on a at surface.
● To protect the paper from moisture or dryness, keep the paper wrapped in its package until use.
● Do not store the paper so that it curls or folds.
● Do not store the paper vertically, and do not stack too much paper.
● Do not store the paper in direct sunlight, or in a place with high humidity, dryness, or a drastically different
temperature or humidity compared to the usage environment.
◼ Storing and Gluing Printed Paper
Storing Paper
● Store the paper on a at surface.
● Do not store the paper together with items made of polyvinyl chloride (PVC) such as a clear folder. The
toner may melt, causing the paper to stick to the PVC material.
● Do not store the paper folded or creased. Toner may peel off.
● Do not store the paper in a place with high temperature.
● When storing the paper for a long period of time (two years or longer), store in a binder or similar item.
● Storing the paper for a long period of time can cause a discoloration of the paper, resulting in a
discoloration of printed images.
Precautions When Gluing Printed Paper
● Always use insoluble adhesives.
● Before applying adhesive, perform a test using an unneeded printout.
● Allow glued paper to fully dry before stacking.
About the Machine
16

Specications
94RC-00K
Specications ar
e subject to change for product improvement, and the contents may be updated depending on
products released in the future. For details about product information, see the Canon website.
https://global.canon/
Specications of Main Unit
Basic Specications(P
. 18)
Specications of Functions
Print Specications(P
. 20)
Network Specications(P
. 21)
Security and Management Function Specications(P
. 22)
Operating Environment and Supported Software and Servers
Supported Environment(P. 25)
About the Machine
17
Basic Specications
94RC-00L
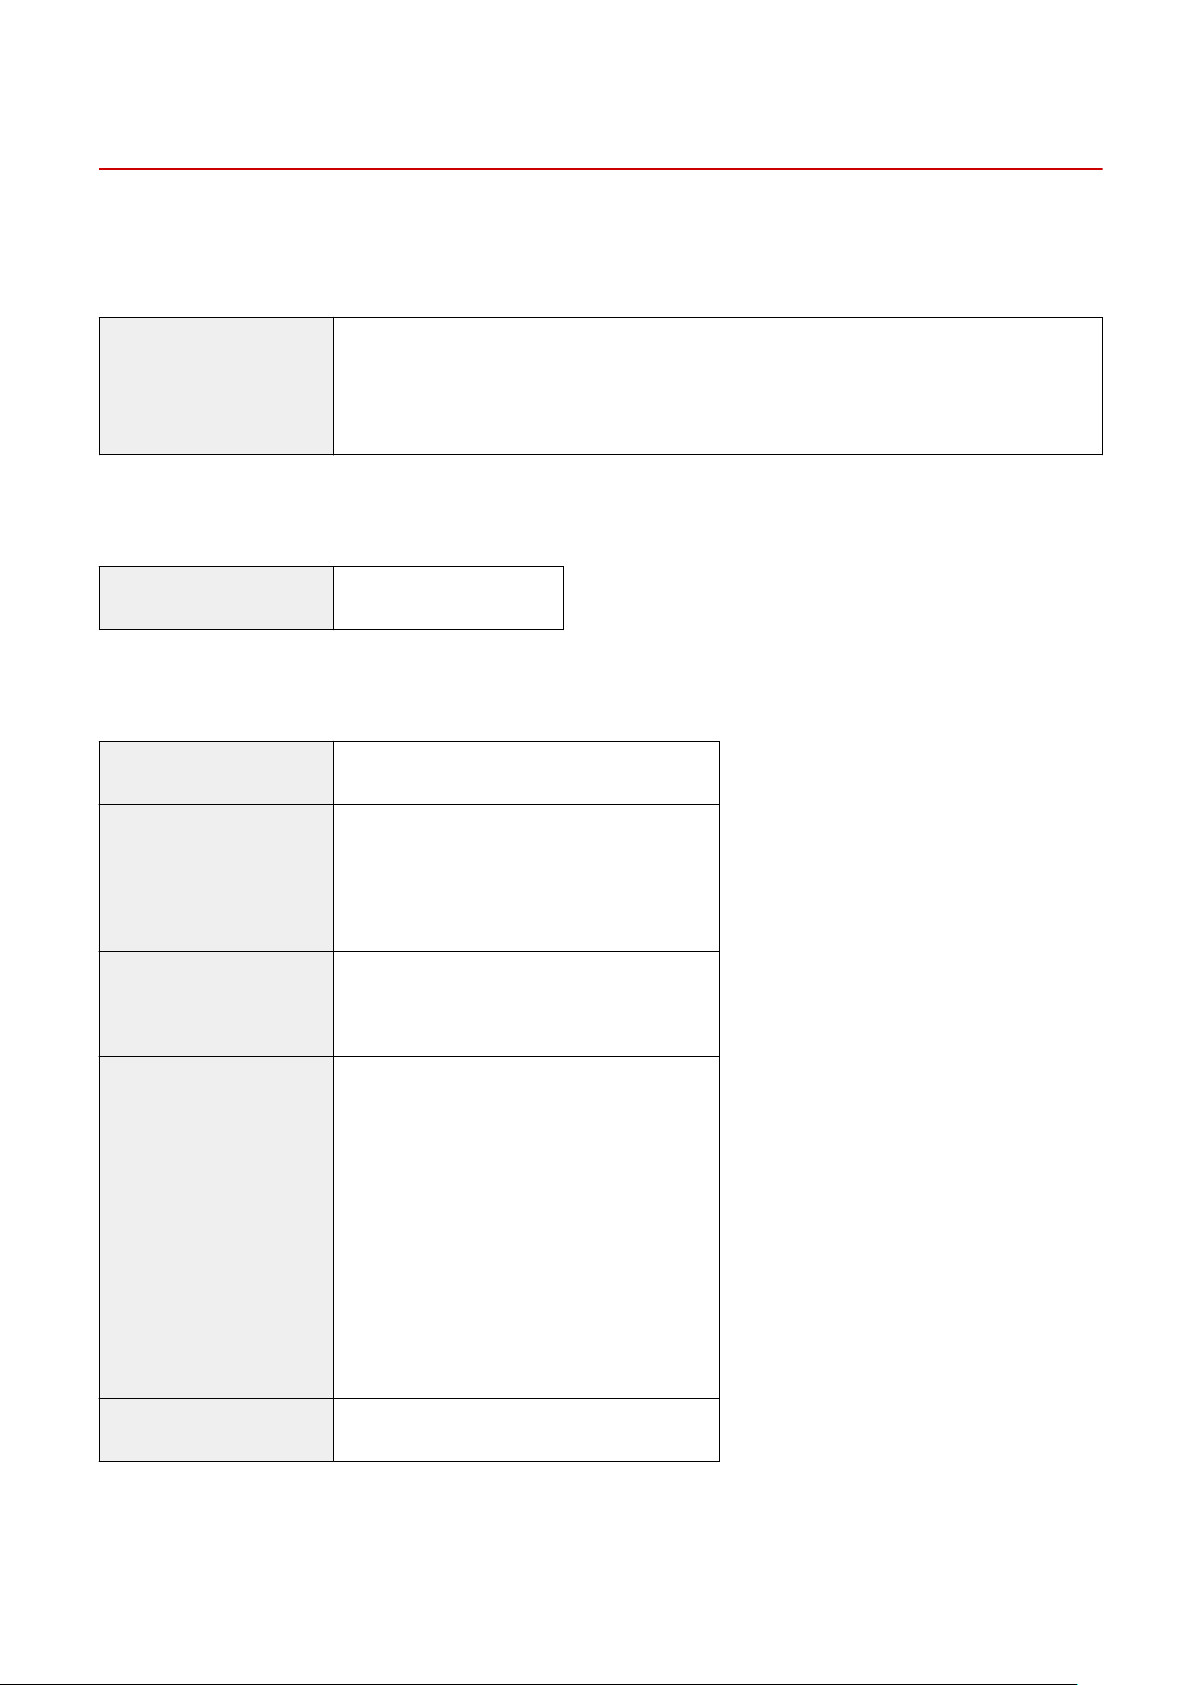
Type Desktop
Color Supported Black and White
Print Resolution 600 dpi x 400 dpi
600 dpi x 600 dpi (at 2/3 speed)
Number of Tones 256
Paper Size Maximum: 8 1/2" x 14" (216.0 mm x 356.0 mm)
Minimum (paper dr
awer): 3" x 5" (76.0 mm x 127.0 mm)
Paper Type and Weight
Usable Paper(P. 13)
Warm-up time
*1
After powering ON
7.5 seconds or less
After r
ecovering from sleep mode
3.2 seconds or less
First Print Time
(Letter)
Approx. 7.0 seconds
Continuous Print Speed
*2
(Letter)
30 sheets/minute
Paper Feeding System and Paper Capacity
*3
Paper Drawer x 1
150 sheets (16 lb Bond (60 g/m²), 21 lb Bond (80 g/m²))
Output System and Output Capacity
*3
Output Tray
100 sheets (20 lb Bond (75 g/m²))
Power supply AC 110 V - 127 V, 60 Hz, 4.7 A
Power Consumption
*1
Maximum Power Consumption
1,230 W or less
During Sleep Mode
Appr
ox. average of 1.0 W (USB, wired LAN, or wireless LAN connection)
With Power Turned OFF
0.3 W or less
Dimensions 14" x 11 1/8" x 8 3/8" (356 mm x 283 mm x 213 mm)
About the Machine
18

(W x D x H)
Weight
(Not including toner cartridges)
Approx. 12.3 lb (5.6 kg)
Maximum Occupancy Space 14" x 23 1/2" x 18" (356 mm x 598 mm x 458 mm)
* Pr
ovide a space of at least 4" (100 mm) around the machine.
Memory Capacity RAM: 256 MB
Usage Environment Temperature: 50 °F to 86 °F (10 °C to 30 °C)
Humidity: 20% to 80% RH (no condensation)
*1
May vary depending the usage envir
onment and usage conditions.
*2
Print speed is measured based on internal testing using Letter size paper printed with 100% print ratio to original on
one-sided paper. Internal testing involved continuously printing the same one page of content on plain paper. Print
speed may vary depending on paper type, paper size or paper feeding direction.
The device may automatically pause or slow down in order to adjust printer condition such as controlling temperature of
a certain unit or limiting impact to image quality during continuous printing.
*3
May vary depending on the installation environment and paper to be used.
About the Machine
19
Print Specications
94RC-00R
UFR II Printer Function(P. 20)
UFR II Printer Function
Type Internal
Print Size Usable Paper(P. 13)
Continuous Print Speed Same as "Continuous Print Speed" for main unit
Basic Specications(P
. 18)
Resolution Data Processing
600 dpi x 600 dpi
Page Description Language (PDL) UFR II
Protocol Supported TCP/IP: LPD, Port9100, IPP, IPPS, WSD
Resident Fonts None
Interface USB
USB 2.0 Hi-Speed
Wir
ed LAN
10Base-T, 100Base-TX (IEEE 802.3 compliant)
Wireless LAN
IEEE 802.11b, IEEE 802.11g, IEEE 802.11n
About the Machine
20
Network Specications
94RC-00S
◼ Common
Protocol Supported TCP/IP
Fr
ame type: Ethernet II
Print applications: LPD, Raw, IPP, IPPS, WSD, Mopria, AirPrint, Windows10 Mobile Print,
Windows11 Mobile Print
◼ Wir
ed LAN
Interface 10BASE-T, 100BASE-TX (RJ-45)
◼ Wir
eless LAN
Standard IEEE 802.11b, IEEE 802.11g, IEEE 802.11n
Transmission Method IEEE 802.11b (Modulation system: DS-SS)
IEEE 802.11g (Modulation system: OFDM method)
IEEE 802.11n (Modulation system: OFDM method)
Communication Mode Infrastructure Mode
Access Point Mode
Security
(Encryption Method)
Infrastructure Mode
128 (104) / 64 (40) bit WEP
WP
A-PSK (TKIP / AES-CCMP)
WPA2-PSK (TKIP / AES-CCMP)
WPA-EAP (AES-CCMP)
WPA2-EAP (AES-CCMP)
Access Point Mode
WPA2-PSK (AES-CCMP)
Setup Method WPS (Wi-Fi Protected Setup), Manual setup
About the Machine
21
Security and Management Function Specications
94RC-00U
Firewall(P. 22)
Keys and Certicates(P
. 22)
Denition of "
Weak Encryption"(P. 23)
TLS(P. 23)
Firewall
● Up to 16 IP addresses (or ranges of IP addresses) can be specied for both IPv4 and IPv6.
● Up to 32 MAC addresses can be specied.
Keys and Certicates
The following keys and certicates are supported:
◼ Self-generated Key and Self-signed Certicate or CSR
Public key algorithm (and key length) RSA (512 bits, 1024 bits, 2048 bits, 4096 bits)
ECDSA (P256, P384, P521)
Certicate signatur
e algorithm
RSA: SHA-256, SHA-384
*1
, SHA-512
*1
ECDSA: SHA-256, SHA-384, SHA-512
*1
SHA384-RSA and SHA512-RSA ar
e available only when the RSA key length is 1024 bits or more.
◼ Key and Certicate or CA Certicate for Installation
Format Key
PK
CS#12
*1
CA certicate
X.509 DER format/PEM format
File extension Key
".p12" or ".pfx"
CA certicate
".cer
" or ".pem"
Public key algorithm (and key length) RSA (512 bits, 1024 bits, 2048 bits, 4096 bits)
ECDSA (P256, P384, P521)
About the Machine
22

Certicate signatur
e algorithm
RSA: SHA-256, SHA-384
*2
, SHA-512
*2
ECDSA: SHA-256, SHA-384, SHA-512
*1
Requir
ements for the certicate contained in a key are pursuant to CA certicates.
*2
SHA384-RSA and SHA512-RSA are available only when the RSA key length is 1024 bits or more.
● The machine does not support use of a certicate r
evocation list (CRL).
Denition of "
Weak Encryption"
When [Prohibit Use of Weak Encrypt.] in [Encryption Settings] is set to [On], the use of the following algorithms is
prohibited.
[Encryption Settings](P. 246)
Hash MD4, MD5, SHA-1
HMAC HMAC-MD5
Common key encryption RC2, RC4, DES
Public key encryption RSA encryption (512 bits/1024 bits)
RSA signatur
e (512 bits/1024 bits)
DSA (512 bits/1024 bits)
DH (512 bits/1024 bits)
● Even when [Pr
ohibit Key/Cert. with Weak Encryption] in [Encryption Settings] is set to [On], the hash
algorithm SHA-1, which is used for signing a root certicate, can be used.
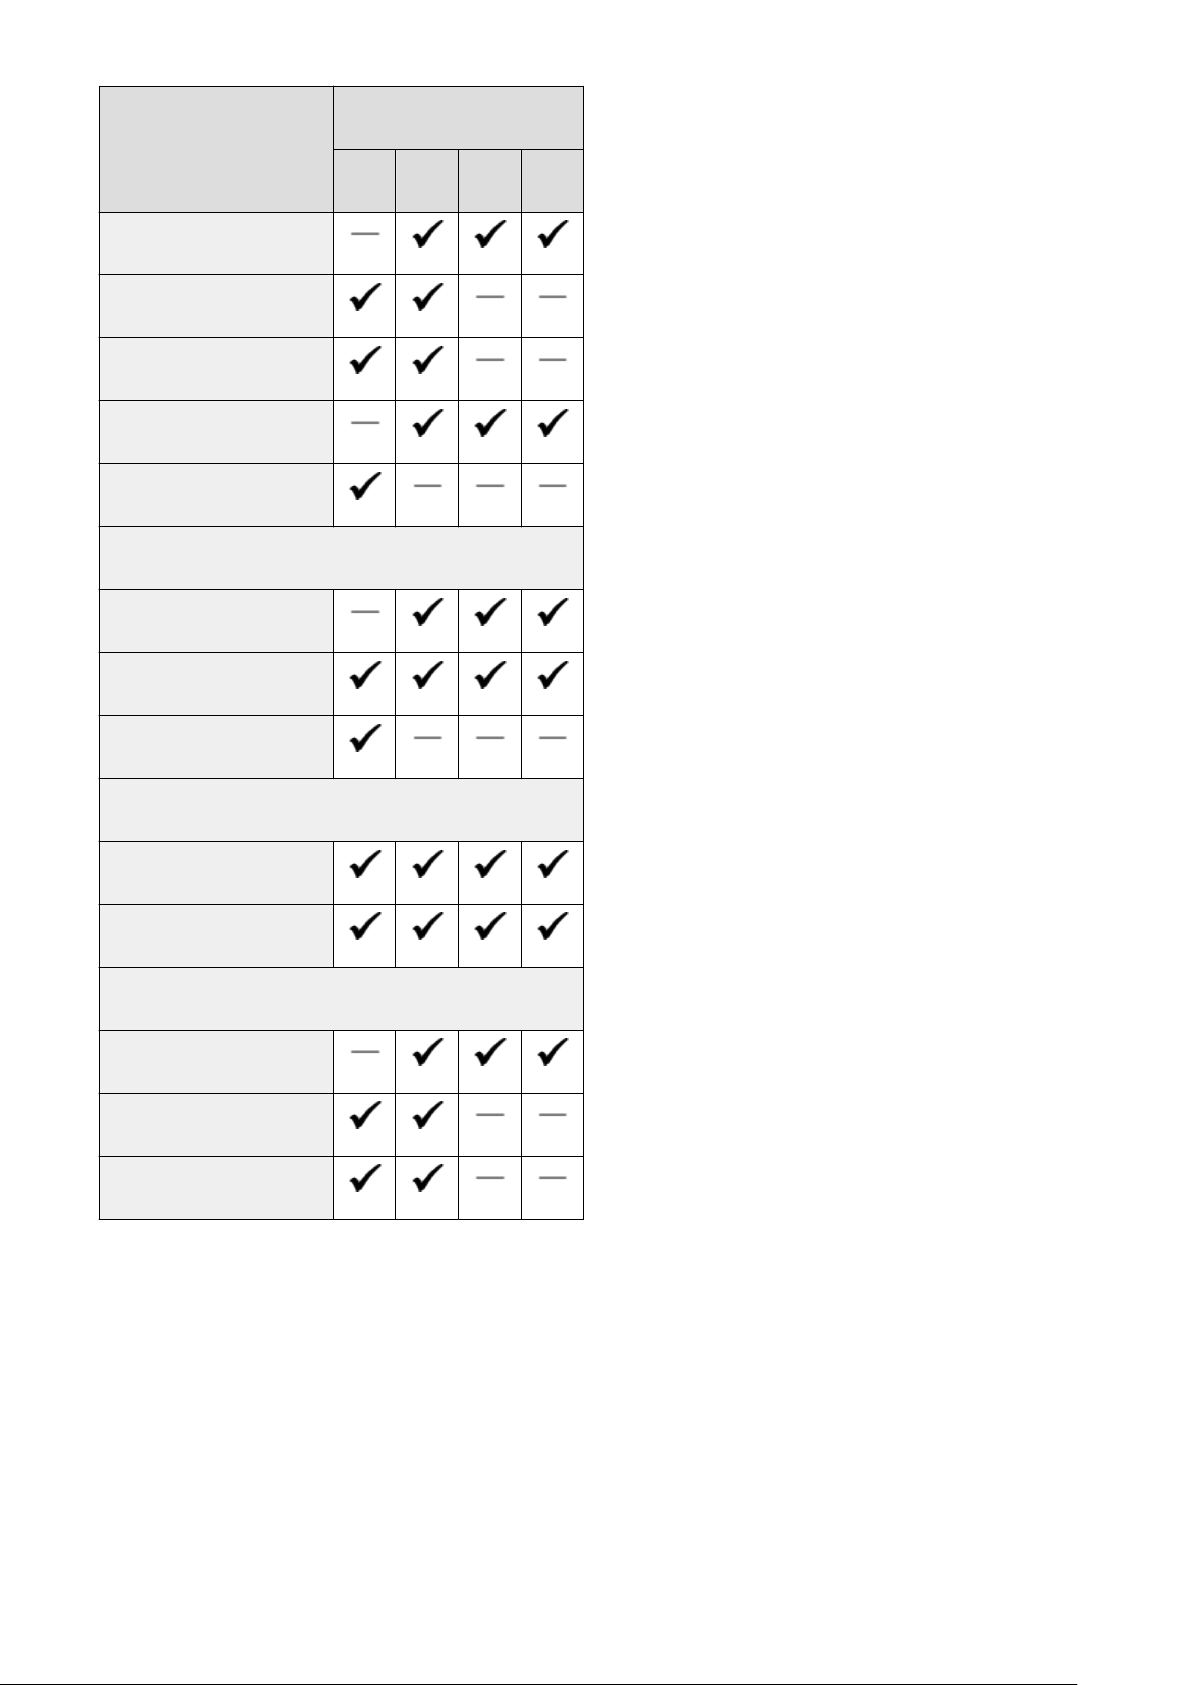
TLS
The follo
wing combinations of the TLS version and algorithm are usable:
: Usable : Not usable
Algorithm TLS Version
TLS 1.3 TLS 1.2 TLS 1.1 TLS 1.0
Encryption Algorithm
AES-CBC (256bit)
About the Machine
23
Algorithm TLS Version
TLS 1.3 TLS 1.2 TLS 1.1 TLS 1.0
AES-CBC (128bit)
AES-GCM (256bit)
AES-GCM (128bit)
3DES-CBC
CHACHA20-POLY1305
Key Exchange Algorithm
RSA
ECDHE
X25519
Signature Algorithm
RSA
ECDSA
HMAC Algorithm
SHA1
SHA256
SHA384
About the Machine
24

Supported Environment
94RC-00W
Operating Environment(P. 25)
Operating Environment
AirPrint Operating Environment Using AirPrint Application to Print Data(P. 137)
Remote UI Operating Environment
*1
Windows
Internet Explor
er 11
Microsoft Edge
Google Chrome
macOS
Safari 11
Google Chrome
Android
Google Chrome
UC Browser
iOS
Safari 11
UC Browser
*1
Y
ou must set your Web browser to enable cookies and use JavaScript.
About the Machine
25
Recommended Functions
94RC-00X
This section intr
oduces recommended functions that can be useful for your purpose and help you solve problems,
such as to save paper and power, and improve operations.
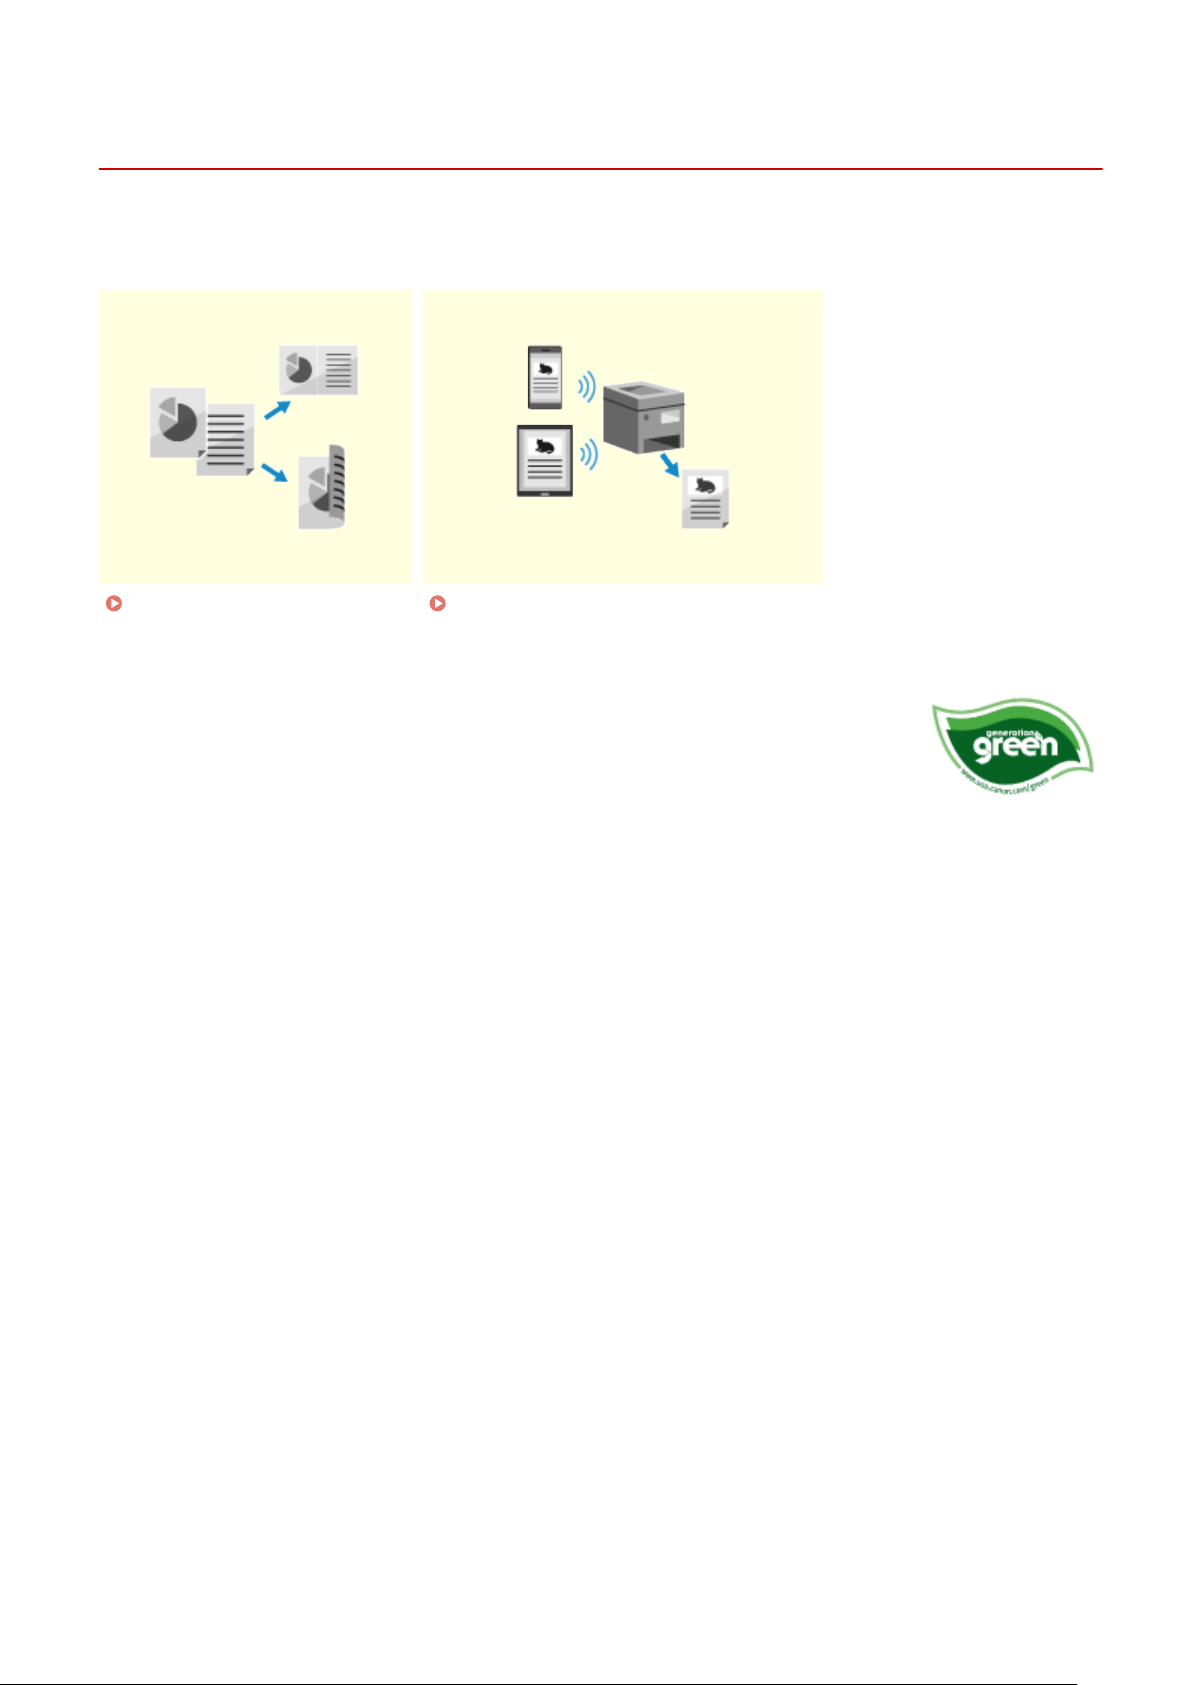
Cost Savings(P. 27) Making Operations More Ecient(P
. 28)
Canon strives to be environmentally and energy conscious in all aspects of its operations.
Click her
e to learn about the ways in which Canon is helping to protect the environment.
About the Machine
26

Cost Savings
94RC-00Y
This machine can help you save costs on paper and po
wer.
Saving Paper
Saving Paper When Printing
Y
ou can print on both sides of the paper, and print multiple pages on one
sheet of paper.
Printing from a Computer(P. 115)
Saving Energy
You can congur
e the machine to enter sleep mode when not in use to save energy. The power of the machine
does not turn OFF, so it can quickly resume operations.
Reducing Power Consumption (Sleep Mode)(P. 76)
About the Machine
27
Making Operations More Ecient
94RC-010
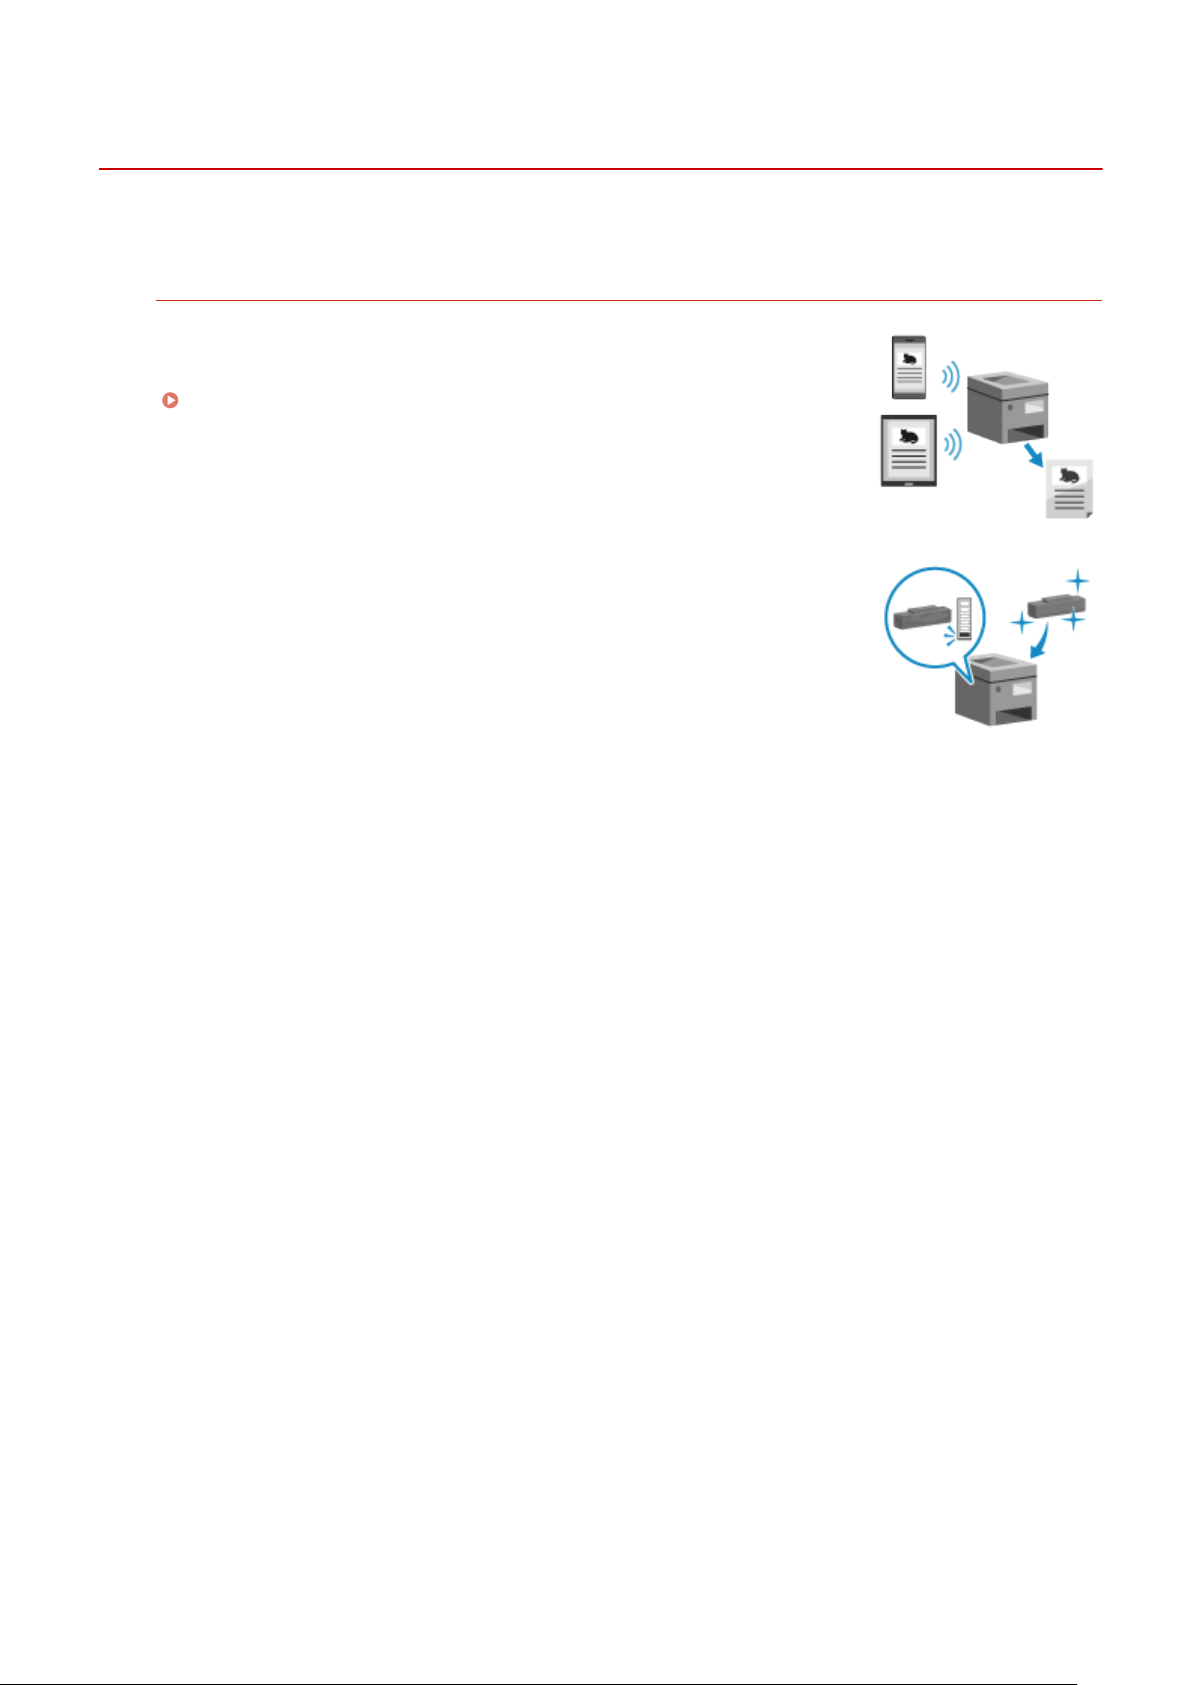
Y
ou can print data even in an environment where a computer cannot be used.
Printing Data Without Using a Computer
You can print data from a mobile device connected to the machine while using an
application. The machine supports dir
ect connection for easy connection setup
without having to use a wireless LAN router.
Linking with Mobile Devices(P. 125)
Through the toner replenishment service, new toner cartridges are
automatically deliver
ed to you before your existing toner cartridges are used
up.
* Use of the toner replenishment service requires prior registration with
select retailers. This service is only available in certain countries.
About the Machine
28

Setting Up
Setting Up .............................................................................................................................................................
30
Conguring the Default Settings (Setup Guide) ................................................................................................ 31
Setting Up the Network ...................................................................................................................................... 34
Selecting Wired or Wireless LAN ..................................................................................................................... 36
Connecting to a Wired LAN ............................................................................................................................. 37
Connecting to a Wireless LAN ......................................................................................................................... 38
Connecting to a Wireless LAN by Using the Router Button (Push Button Mode) ...................................... 41
Connecting to a Wireless LAN by Entering a PIN Code (WPS PIN Code Mode) ......................................... 43
Connecting to a Wireless LAN by Searching for a Router (Access Point Setup Method) ............................ 45
Connecting to a Wireless LAN by Setting the Details (Manual Setup Method) .......................................... 47
Setting IPv4 Addresses ................................................................................................................................... 50
Setting IPv6 Addresses ................................................................................................................................... 52
Conguring Your Machine for Your Network Environment ............................................................................. 54
Manually Conguring the Ethernet Settings ............................................................................................ 55
Conguring DNS ...................................................................................................................................... 56
Conguring SMB ...................................................................................................................................... 59
Conguring WINS .................................................................................................................................... 60
Conguring SNMP ................................................................................................................................... 61
Conguring SNTP .................................................................................................................................... 64
Checking the Network Status and Settings ..................................................................................................... 66
Installing Software and Drivers to the Computer ............................................................................................. 69
Setting Up
29

Setting Up
94RC-011
After installing the machine, congur
e the required settings to enable use of the functions by performing the following
steps.
Steps 1 and 2 are the machine settings.
Step 3 is the setting for using the machine from a computer. Congure this setting for each computer using the
machine.
Step 1
When you turn ON the machine for the rst time, the screen (Setup Guide) for setting the
items required for using the machine is displayed. Congure the settings by following the
instructions on the screen.
Conguring the Default Settings (Setup Guide)(P. 31)
Step 2
Congure the network settings not included in the Setup Guide.
If you did not connect to the network using the Setup Guide, do that during this step.
Setting Up the Network(P. 34)
Step 3
Install the software required to use the machine and printer driver on your computer.
Installing Software and Drivers to the Computer(P. 69)
◼ See Also
Implementing Measur
es to Prevent Unauthorized Access
It is important to provide measures against security risks when using the machine in a network environment.
Check examples of measures that you can take with the machine.
Measures to Prevent Unauthorized Access(P. 5)
Checking Available Functions
The functions available on the machine vary depending on the model. Check the functions that ar
e available
on your model.
Supported Functions(P. 3)
Conguring the Settings Requir
ed to Use the Functions of the Machine
Additional settings may be required depending on your model. For details about the settings required for
each function, see the following:
Printing Preparations(P. 102)
Preparations for Linking with Mobile Devices(P. 126)
Setting Up
30
Conguring the Default Settings (Setup Guide)
94RC-0C0
When you turn ON the machine for the rst time, the scr
een (Setup Guide) for setting the items required for using the
machine is displayed. Congure the settings using the procedure below by following the instructions on the screen.
Step 1: Setting the Display Language and Country or Region(P. 31)
Step 2: Setting the Date and Time(P. 31)
Step 3: Setting Remote UI(P. 32)
Step 4: Connecting to a Wireless LAN(P. 32)
Step 5: Conguring Settings for T
oner Replenishment Service(P. 33)
● These settings can only be congur
ed one time using the Setup Guide when starting the machine for the
rst time. To change the settings congured with the Setup Guide at a later time, set the items in Steps 2 to
4 individually. For the details of each setting, see the following.
Setting the Date and Time(P. 177)
Setting the Department ID and PIN for the Administrator(P. 144)
Setting the PIN to Use for Remote UI(P. 168)
Connecting to a Wireless LAN(P. 38)
Step 1: Setting the Display Language and Country or Region
Set the language displayed on the oper
ation panel screen and reports to be printed. Next, set the country or region
where the machine is used.
1
On the [Language] screen, select the display lamguage and press
.
2
Select [Yes], and then press
.
➠ The display language is set, and the [Select Country/Region] scr
een is displayed.
Depending on the country or region, the [Select Country/Region] screen is not displayed and the [Time
Zone] screen is displayed. When the [Time Zone] screen is displayed, proceed to "Step 2: Setting the Date
and Time."
Step 2: Setting the Date and Time(P. 31)
3
On the [Select Country/Region] screen, select the country or region, and press .
➠ The country or region is set, and the [Time Zone] screen is displayed.
Step 2: Setting the Date and Time
The date and time ar
e used as the reference for the functions using date and time information, and therefore, they
need to be set accurately.
1
On the [Time Zone] screen, select your time zone and press
.
Set the time zone (UTC
*1
) and Daylight Saving Time accor
ding to the region where this machine is installed.
Setting Up
31

*1 The UTC (Coordinated Universal Time) is a coordinated universal time that is standard for all parts of the
world. Internet-based communication r
elies on the UTC being set correctly.
2
On the [Current Time Set.] screen, enter the date and time, and press
.
➠ The time and date ar
e set, and the Remote UI conrmation screen is displayed.
Step 3: Setting Remote UI
With Remote UI, you can use a W
eb browser on a computer to check the operation status of the machine, change the
settings, and perform other operations.
Set the Remote UI Access PIN for using Remote UI to prevent unauthorized access to the machine.
1
On the Remote UI conrmation scr
een, select [<Yes>] and press .
To set the Remote UI Access PIN at a later time, select [No] and proceed to "Step 4: Connecting to a Wireless
LAN." Setting the PIN to Use for Remote UI(P. 168)
2
Conrm the message press conrm the message select [Yes] press .
➠ The [Remote UI Access PIN] scr
een is displayed.
Restrict the use of Remote UI to only those users who know the Remote UI Access PIN.
3
Enter the Remote UI Access PIN
select [<Apply>] press .
Specify any number. You cannot set a PIN consisting of all zeros, such as "00" or "0000000."
4
Enter the PIN again
select [<Apply>] press .
➠ After the message [Settings applied.] appears, the scr
een for conrming the wireless LAN connection is
displayed.
Step 4: Connecting to a Wireless LAN
Connect to the network using wir
eless local area network (LAN).
1
On the screen for conrming the wir
eless LAN connection, select [Yes] and press
.
● If the machine is not connected to a wireless LAN, select [No] and press and proceed to "Step 3:
Conguring Settings for Toner Replenishment Service." Step 5: Conguring Settings for T
oner
Replenishment Service(P. 33)
● When connecting to a wired LAN, congure the wired LAN connection settings after exiting the Setup Guide.
Selecting Wired or Wireless LAN(P. 36)
2
Select the Wireless LAN connection type, and connect to the Wireless LAN.
➠ When the connection to the wir
eless LAN is completed, the Toner Replenishment Service confirmation
screen is displayed.
Setting Up
32

Depending on your wireless LAN router, the connection type and security standards may vary. Check for a
connection type and security standar
d that are supported by both the wireless LAN router and the machine,
and then establish a connection according to the connection type. For the standards and procedure, see the
following:
Connecting to a Wireless LAN(P. 38)
Step 5: Conguring Settings for Toner Replenishment Service
You can congure settings for toner replenishment service. Through toner replenishment service, new toner
cartridges are automatically delivered to you before your existing toner cartridges are used up.
* Use of the toner replenishment service requires prior registration with select retailers. This service is only available in
certain countries.
* This service can be set up through [Toner Delivery Settings] displayed on the [Home] screen. [Home]
Scr
een(P. 81)
1
Select [Yes], and then press
.
2
Press .
3
On the conrm scr
een of toner replenishment service, select [Accept], and then press
.
4
Press .
5
Press
.
➠ The settings congur
ed in the Setup Guide are applied.
When you exit the Setup Guide, the [Home] screen is displayed.
[Home] Screen(P. 81)
● If connecting to the server fails, try conguring the settings again thr
ough [Connect to Server/Verify
Connection with Server] in [Toner Delivery Settings].
[Home] Screen(P. 81)
Setting Up
33

Setting Up the Network
94RC-013
T
o operate the machine from a computer or to connect to a server, you must connect the machine to a network.
Use the procedure below to connect the machine to a network and congure the settings of the machine according to
the network environment.
Administrator privileges are required to set up the network.
● Connecting the machine to a network without pr
oper security measures may leak information from the
machine to third parties.
Protecting the Network(P. 146)
◼ Pr
eparing to Set Up the Network
● Provide an Ethernet cable and router according to the usage environment of the machine.
● Check the information of the network environment used by the machine and the required network settings. For
details, contact the network administrator.
● Check that the computer and router to be used in the network are properly connected, and complete the network
settings. For details on the connection method, see the manuals of the devices or contact the manufacturer.
◼ Network Settings Procedure
Step 1
Select whether to use wired or wireless LAN and connect to the network.
T
o connect to a Wired LAN
Selecting Wired or Wireless LAN(P. 36)
Connecting to a Wired LAN(P. 37)
T
o connect to a Wireless LAN
Selecting Wired or Wireless LAN(P. 36)
Connecting to a Wireless LAN(P. 38)
Step 2
Set the IP address.
● By default, when the machine connects to a wir
ed or wireless LAN, an IP address is obtained
automatically and set to the machine.
● To use a specific IP address, set this manually.
Setting IPv4 Addresses(P. 50)
Setting IPv6 Addresses(P. 52)
* When setting an IP addr
ess manually, you cannot use the operation panel to congure
some IPv6 address settings. It is recommended to use the operation panel to set the IPv4
address, and then use Remote UI to set the IPv6 address.
Step 3
Congure the settings of the machine accor
ding to the network environment, as needed.
Setting Up
34

Conguring Y
our Machine for Your Network Environment(P. 54)
* You cannot use the operation panel to congure some of the settings. It is recommended
that you congure the settings using Remote UI in Step 3
◼ Checks after Conguring the Network Settings
Check that the machine is pr
operly connected to the network.
Check the IP address and MAC address of the machine and other information, as needed.
Checking the Network Status and Settings(P. 66)
Setting Up
35

Selecting Wired or Wireless LAN
94RC-014
Set whether to connect the machine to the network using a wir
ed or wireless LAN.
If you want to switch from wired LAN to wireless LAN, you can make the setting during the procedure for connecting
to wireless LAN.
Connecting to a Wireless LAN(P. 38)
* Y
ou cannot connect to a wired LAN and wireless LAN at the same time.
Use the operation panel to congure the settings. You cannot congure the settings using Remote UI from a
computer.
Administrator privileges are required.
1
On the operation panel, select [Menu] in the [Home] screen and press
. [Home]
Scr
een(P. 81)
2
Press [Preferences]
[Network] [Select Wired/Wireless LAN] .
If the login screen appears, enter the System Manager ID and PIN, and then press . System Manager
ID and PIN(P
. 4)
3
Select [Wired LAN] or [Wireless LAN] and press
.
➠ The message [Settings applied.] appears.
Ne
xt, connect to the wired or wireless LAN.
Connecting to a Wired LAN(P. 37)
Connecting to a Wireless LAN(P. 38)
When Switching between Wired and Wireless LAN
● Any installed drivers must be uninstalled and then r
einstalled.
For details about uninstalling and installing drivers, see the driver manual at the online manual site.
https://oip.manual.canon/
Setting Up
36
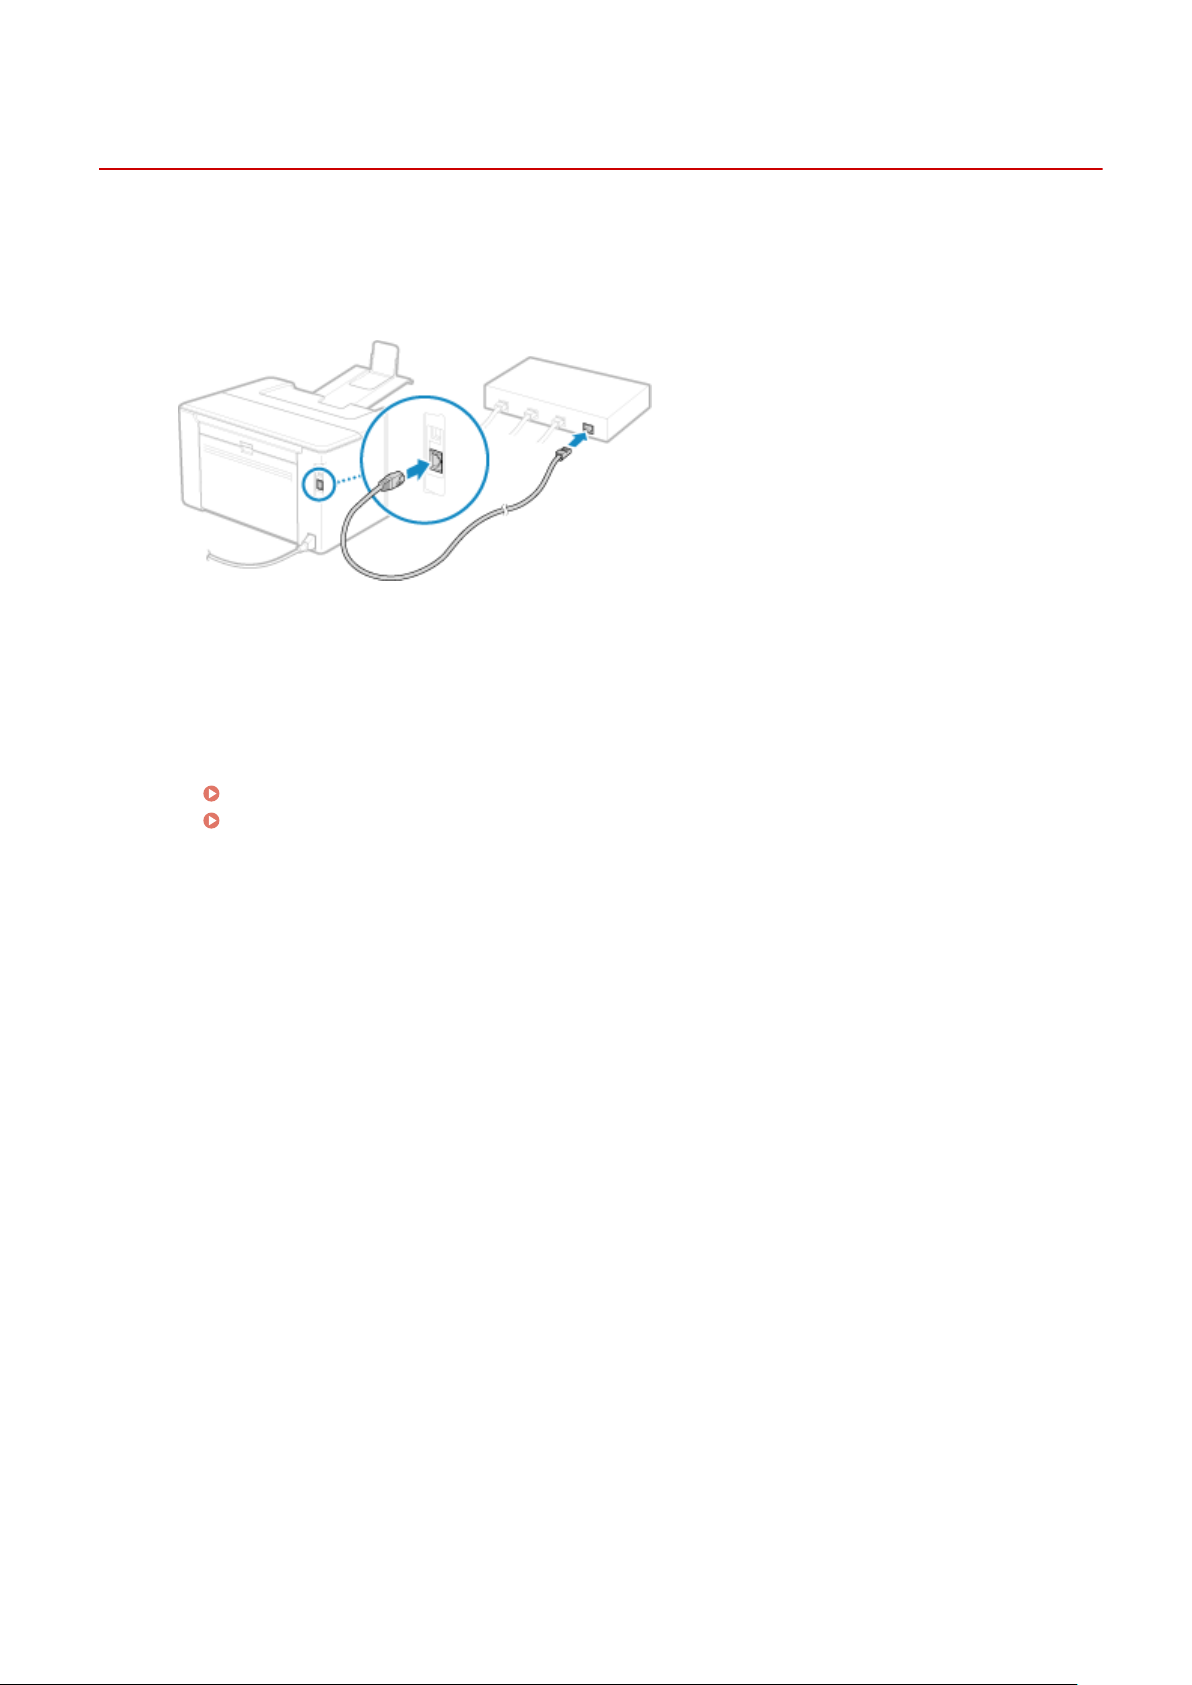
Connecting to a Wired LAN
94RC-015
Connect a computer to the machine via a r
outer. Use an Ethernet cable to connect the machine to the router.
1
Connect an Ethernet cable to the machine and router.
Insert the connector all the way into the port until it clicks in place.
2
Wait a few minutes.
➠ By default, the IP addr
ess is set automatically.
To use a specic IP address, set this manually.
Setting IPv4 Addresses(P. 50)
Setting IPv6 Addresses(P. 52)
Setting Up
37

Connecting to a Wireless LAN
94RC-016
Connect a computer to the machine via a wir
eless LAN router (access point).
Depending on your wireless LAN router, the connection type and security standards may vary. Check for a connection
type and security standard that are supported by both the wireless LAN router and the machine, and then establish a
connection according to the connection type.
Depending on the connection type, you must enter the security information of the wireless LAN router.
Checking the Connection Types and Security Standards Supported by the Machine(P. 38)
Wireless LAN Router Information Required for Connection(P. 39)
Connect with a Secure Network Environment
● The r
adio waves used for wireless communication can reach beyond walls and other obstructions within a
certain range. Therefore, connecting the machine to a network without proper security measures may leak
personal data and other information to third parties. Connect the machine to a wireless LAN at your own
discretion and responsibility.
Protecting the Network(P. 146)
Reducing Power Consumption
● When Po
wer Save Mode is enabled, the machine regularly enters the power save state according to the
signal transmitted by the wireless LAN router.
[Power Save Mode](P. 209)
Checking the Connection Types and Security Standards Supported by the
Machine
◼ Connection T
ype
Connect using a type that is supported by your wireless LAN router. To specify the authentication, encryption, or other
security method in detail, use the manual setup method to connect.
The following connection types are supported by the machine:
Push Button Mode (WPS)
If the wireless LAN router has the above symbol on the package or the button of the device, you can easily
connect b
y pressing the button.
Connecting to a Wireless LAN by Using the Router Button (Push Button Mode)(P. 41)
WPS PIN Code Mode
If you are using a WPS router that does not support the push button mode, enter the PIN code to connect.
Connecting to a Wireless LAN by Entering a PIN Code (WPS PIN Code Mode)(P. 43)
* If the wir
eless LAN router is set up to use WEP authentication, you may not be able to connect with WPS. In
this case, use the manual setup method to connect.
Setting Up
38

Access Point Setup Method
Search for the wireless LAN router from the machine, and enter the network key manually to connect.
Connecting to a Wireless LAN by Searching for a Router (Access Point Setup Method)(P. 45)
When you connect with the access point setup method, the following authentication and encryption methods
ar
e set:
● WEP authentication method: Open System
● Encryption for WPA/WPA2: AES-CCMP or TKIP is set automatically according to the selected wireless LAN
router.
To specify a different authentication or encryption method, use the manual setup method to connect.
Manual Setup Method
In addition to the SSID and network key, manually enter all the wireless LAN settings such as the authentication
and encryption methods to connect.
Connecting to a Wireless LAN by Setting the Details (Manual Setup Method)(P. 47)
◼ Security Standar
ds
The wireless LAN of the machine supports the security standards below. For details on whether your wireless LAN
router supports these standards, see the manual of the wireless LAN router or contact the manufacturer.
● WEP
● WPA-PSK
● WPA2-PSK
● WPA-EAP
● WPA2-EAP
Wireless LAN Router Information Required for Connection
When connecting with the access point setup method or the manual setup method, you must set the information
below.
This information is listed on the main unit of the wireless LAN router. For details, see the manual of the wireless LAN
router or contact the manufacturer.
SSID
This is the name used to identify the wireless LAN router. This may be listed as the access point name or
network name.
Network Key
This is the keyword used for data encryption or the password used for network authentication. This may be
listed as the encryption key, WEP key, WPA/WPA2 passphrase, or pre-shared key (PSK).
Security Standards
These are required when connecting with the manual setup method. Check the following information:
Security Standards
● WEP
● WPA-PSK
● WPA2-PSK
● WPA-EAP
● WPA2-EAP
WEP Authentication Method
● Open System
Setting Up
39

● Shar
ed Key
Encryption for WPA/WPA2
● TKIP
● AES-CCMP
● IEEE 802.1X Authentication
Setting Up
40

Connecting to a Wireless LAN by Using the Router
Button (Push Button Mode)
94RC-017
If your wir
eless LAN router supports WPS push button mode, you can easily set up a connection simply by using the
operation panel of the machine and the button on the wireless LAN router.
Administrator privileges are required to connect to a wireless LAN.
1
On the operation panel, select [Menu] in the [Home] screen and press
. [Home]
Scr
een(P. 81)
2
Press [Preferences
[Network] [Wireless LAN Settings] .
➠ The [Select Network] screen is displayed.
● If the login screen appears, enter the System Manager ID and PIN, and then press . System Manager
ID and PIN(P
. 4)
● If the message [Enable the wireless LAN?] appears, select [Yes] and press
.
● If the message [Cannot nd the access point.] appears, pr
ess
.
3
Select [Other Connections] and press .
4
Select [WPS Push Button Mode] and press .
➠ The machine starts sear
ching for an access point.
5
After the search for an access point starts, press the button on the wireless LAN
r
outer within two minutes.
Press the button within two minutes. (Depending on the wireless LAN router, you may have to press and hold
the button.)
* For details on ho
w to operate the button, see the manual of your wireless LAN router.
6
When [Connected.] appears on the operation panel, press
.
➠ When the machine is connected to the wir
eless LAN, [
] appears on the [Home] screen.
7
Wait a few minutes.
➠ By default, an IP addr
ess is set automatically.
To use a specific IP address, set this manually.
Setting IPv4 Addresses(P. 50)
Setting IPv6 Addresses(P. 52)
Setting Up
41

If an Error Message Appears during Operation and a Connection Cannot Be Established
● Pr
ess
, and repeat the procedure starting from Step 3.
Setting Up
42
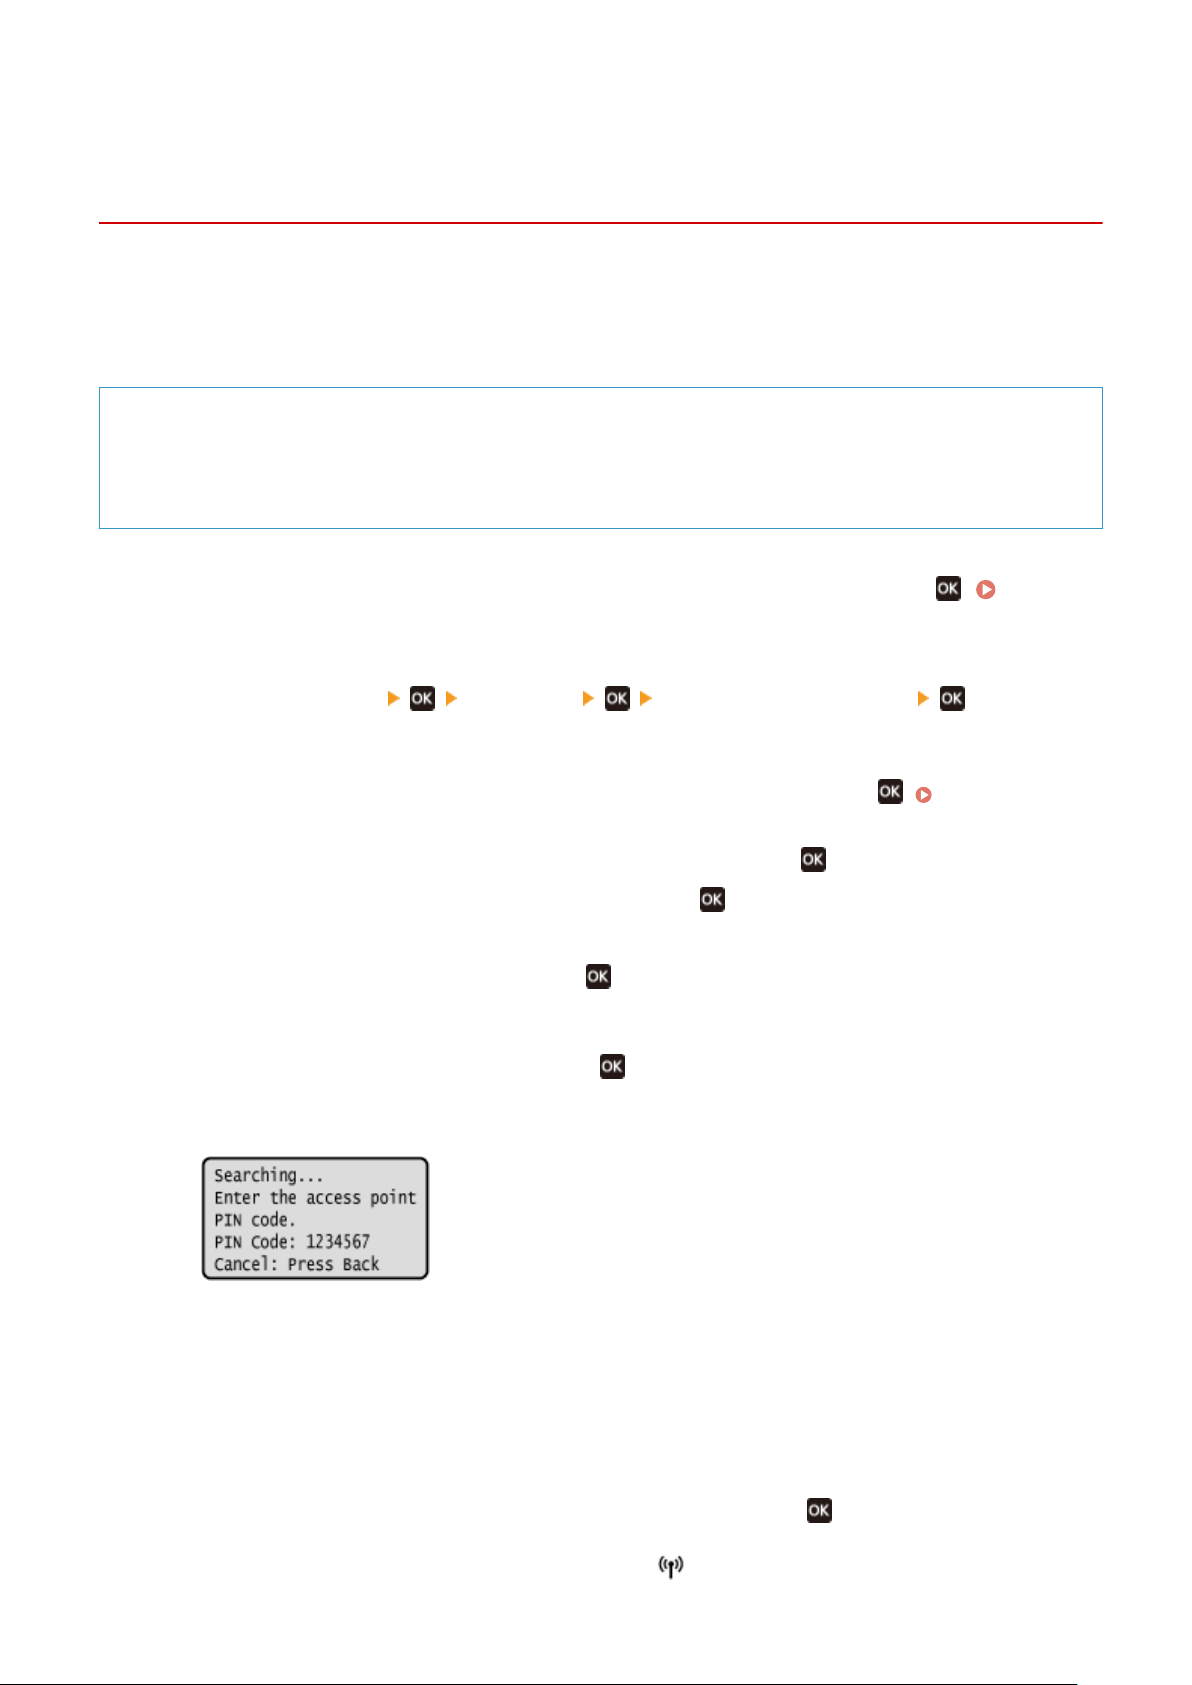
Connecting to a Wireless LAN by Entering a PIN Code
(WPS PIN Code Mode)
94RC-018
When the wir
eless LAN router supports WPS PIN code mode, you can establish a connection by registering a PIN code
generated on the machine to the wireless LAN router. Use a computer to register the PIN code.
Administrator privileges are required to connect to a wireless LAN.
Required Preparations
● Access the wir
eless LAN router from a computer, and enable registration of a WPS PIN code.
* For details on how to register a WPS PIN code, see the manual of your wireless LAN router.
1
On the operation panel, select [Menu] in the [Home] screen and press . [Home]
Screen(P. 81)
2
Press [Preferences [Network] [Wireless LAN Settings] .
➠ The [Select Network] scr
een is displayed.
● If the login screen appears, enter the System Manager ID and PIN, and then press
. System Manager
ID and PIN(P. 4)
● If the message [Enable the wireless LAN?] appears, select [Yes] and press .
● If the message [Cannot nd the access point.] appears, press .
3
Select [Other Connections] and press .
4
Select [WPS PIN Code Mode] and press
.
➠ A PIN code is gener
ated.
Once this screen is displayed, you must register the WPS PIN code to the wireless LAN router within 10
minutes.
5
Access the wireless LAN router from a computer, and register the WPS PIN code to
the r
outer.
6
When [Connected.] appears on the operation panel, press .
➠ When the machine is connected to the wir
eless LAN, [
] appears on the [Home] screen.
Setting Up
43

7
Wait a few minutes.
➠ W
ait a few minutes. By default, an IP address is set automatically.
To use a specific IP address, set this manually.
Setting IPv4 Addresses(P. 50)
Setting IPv6 Addresses(P. 52)
If an Error Message Appears during Operation and a Connection Cannot Be Established
● Pr
ess
, and repeat the procedure starting from Step 3.
Setting Up
44
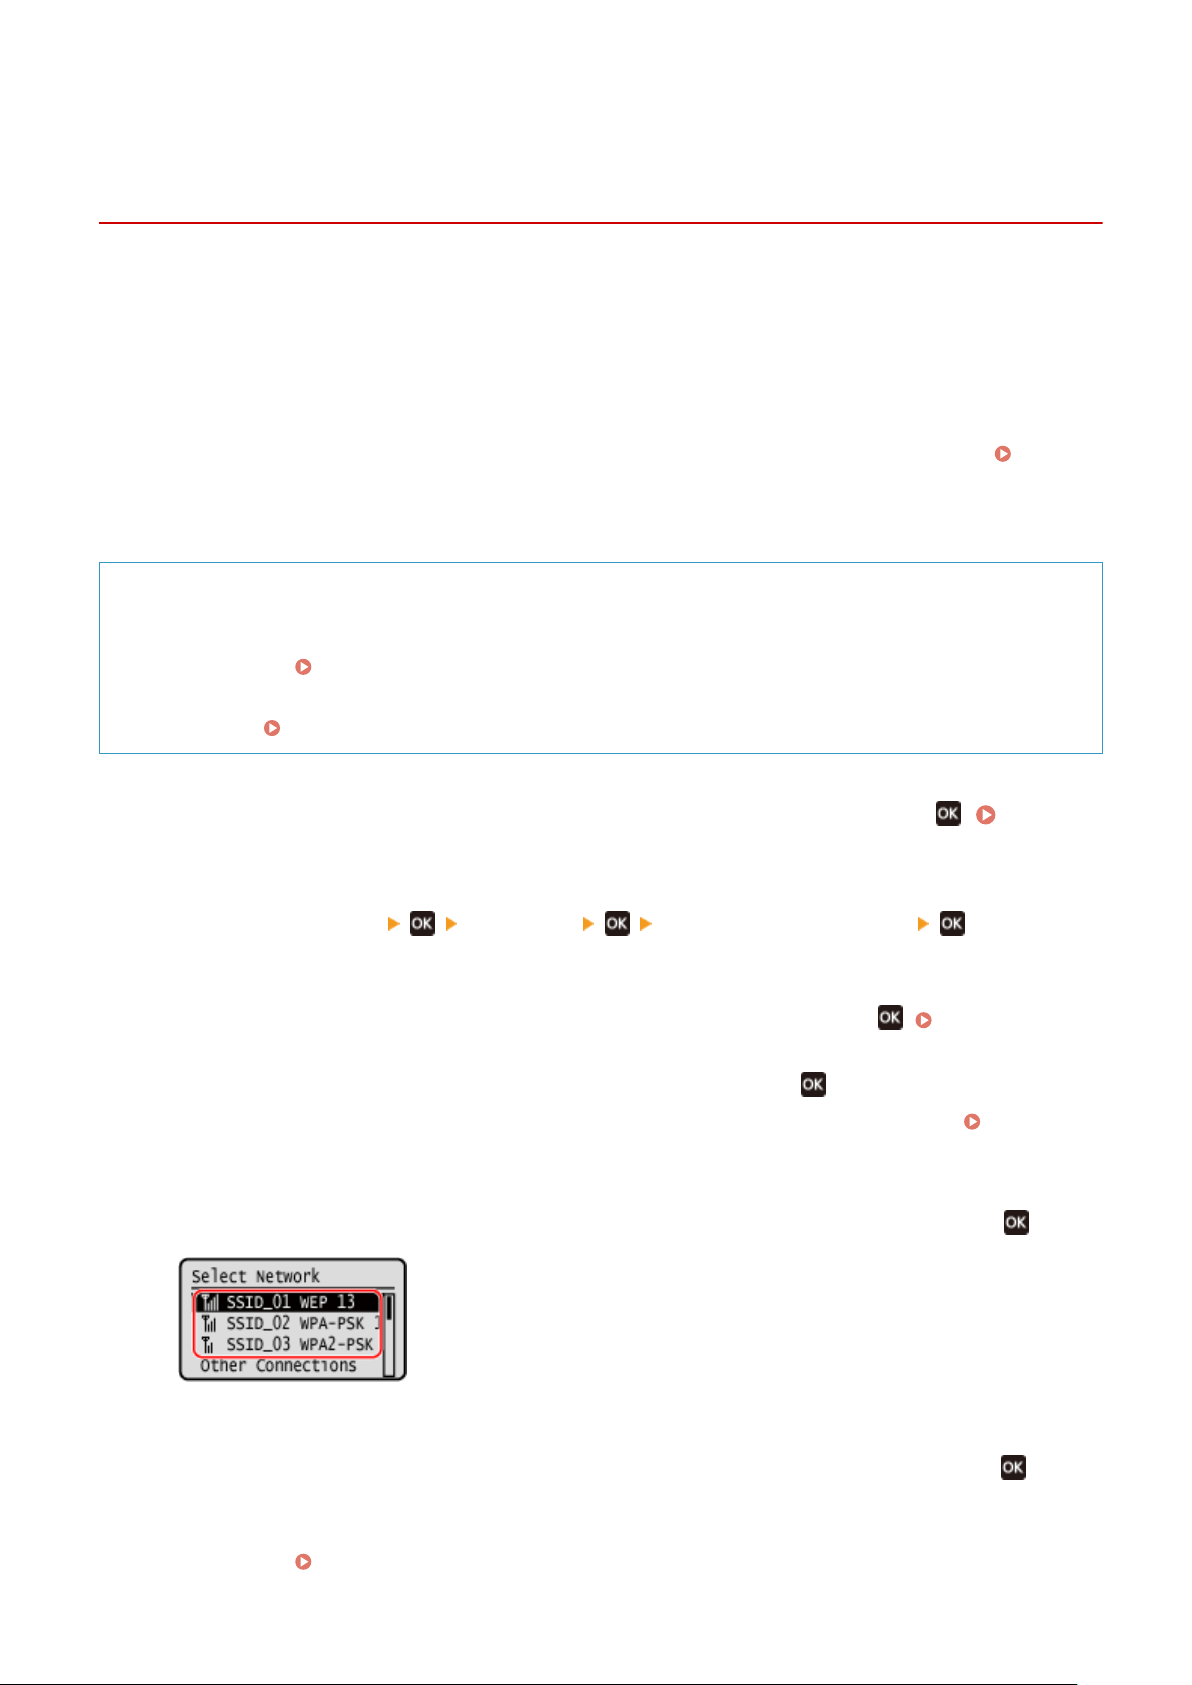
Connecting to a Wireless LAN by Searching for a Router
(Access Point Setup Method)
94RC-019
Search for a wireless LAN router (access point) to which to connect, and enter the network key.
When you connect with the access point setup method, the follo
wing authentication and encryption methods are
set:
● WEP authentication method: Open System
● Encryption for WPA/WPA2: AES-CCMP or TKIP is set automatically according to the selected wireless LAN router.
To specify a different authentication or encryption method, use the manual setup method to connect.
Connecting to a Wireless LAN by Setting the Details (Manual Setup Method)(P. 47)
Administrator privileges are required to connect to a wireless LAN.
Required Preparations
● Pr
epare the information of the wireless LAN router (SSID or network key) to which you want to connect, and
keep it close by.
Wireless LAN Router Information Required for Connection(P. 39)
● When connecting to a wir
eless LAN router supporting WPA-EAP or WPA2-EAP for the security standard, set
IEEE 802.1X.
Using IEEE 802.1X(P. 155)
1
On the operation panel, select [Menu] in the [Home] screen and press . [Home]
Screen(P. 81)
2
Press [Preferences [Network] [Wireless LAN Settings] .
➠ The [Select Network] scr
een is displayed.
● If the login screen appears, enter the System Manager ID and PIN, and then press
. System Manager
ID and PIN(P. 4)
● If the message [Enable the wireless LAN?] appears, select [Yes] and press .
● If the message [Cannot nd the access point.] appears, check that the router is discoverable. Cannot
Connect to Wir
eless LAN(P. 305)
3
Select the SSID of the wireless LAN to which you want to connect, and press
.
➠ The Network Ke
y input screen is displayed.
When selecting the SSID of the wireless LAN router supporting WPA-EAP or WPA2-EAP for the security
standard, the message [IEEE 802.1X Settings values will be applied to connect.] appears. Press
, and
pr
oceed to Step 4.
If you cannot find the wireless LAN router to which you want to connect, check that the router is
discoverable.
Cannot Connect to Wireless LAN(P. 305)
Setting Up
45

4
Enter the network key, and press [<Apply>]
.
5
Press [Yes] .
6
When [Connected.] is displayed on the operation panel, press .
➠ When the machine is connected to the wir
eless LAN, [
] appears on the [Home] screen.
7
Wait a few minutes.
➠ By default, an IP addr
ess is set automatically.
To use a specific IP address, set this manually.
Setting IPv4 Addresses(P. 50)
Setting IPv6 Addresses(P. 52)
If an Error Message Appears during Operation and a Connection Cannot Be Established
● Pr
ess
, check the information (SSID or network key) of the wireless LAN router to which you want to
connect, and r
epeat the procedure starting from Step 3.
Setting Up
46
Connecting to a Wireless LAN by Setting the Details
(Manual Setup Method)
94RC-01A
Y
ou can connect to a wireless LAN router by manually entering all information of the router such as the SSID, network
key, and security settings.
Administrator privileges are required to connect to a wireless LAN.
Required Preparations
● Pr
epare the information of the wireless LAN router to which you want to connect, and keep it close by.
Wireless LAN Router Information Required for Connection(P. 39)
● When connecting to a wir
eless LAN router supporting WPA-EAP or WPA2-EAP for the security standard, set
IEEE 802.1X.
Using IEEE 802.1X(P. 155)
1
On the operation panel, select [Menu] in the [Home] screenand press . [Home]
Screen(P. 81)
2
Press [Preferences [Network] [Wireless LAN Settings] .
➠ The [Select Network] scr
een is displayed.
● If the login screen appears, enter the System Manager ID and PIN, and then press
. System Manager
ID and PIN(P
. 4)
● If the message [Enable the wireless LAN?] appears, select [Yes] and press
.
● If the message [Cannot nd the access point.] appears, select [Close] and pr
ess
.
3
Select [Other Connections] and press .
4
Select [Manually Enter Network Name] and press
.
➠ The SSID input scr
een is displayed.
5
Enter the SSID, select [<Apply>], and press
.
➠ The [Security Settings] scr
een is displayed.
6
Select the security standard, and set the authentication and encryption.
When using WEP
1
Select [WEP] and press
.
➠ The [802.11 Authentication] scr
een is displayed.
Setting Up
47
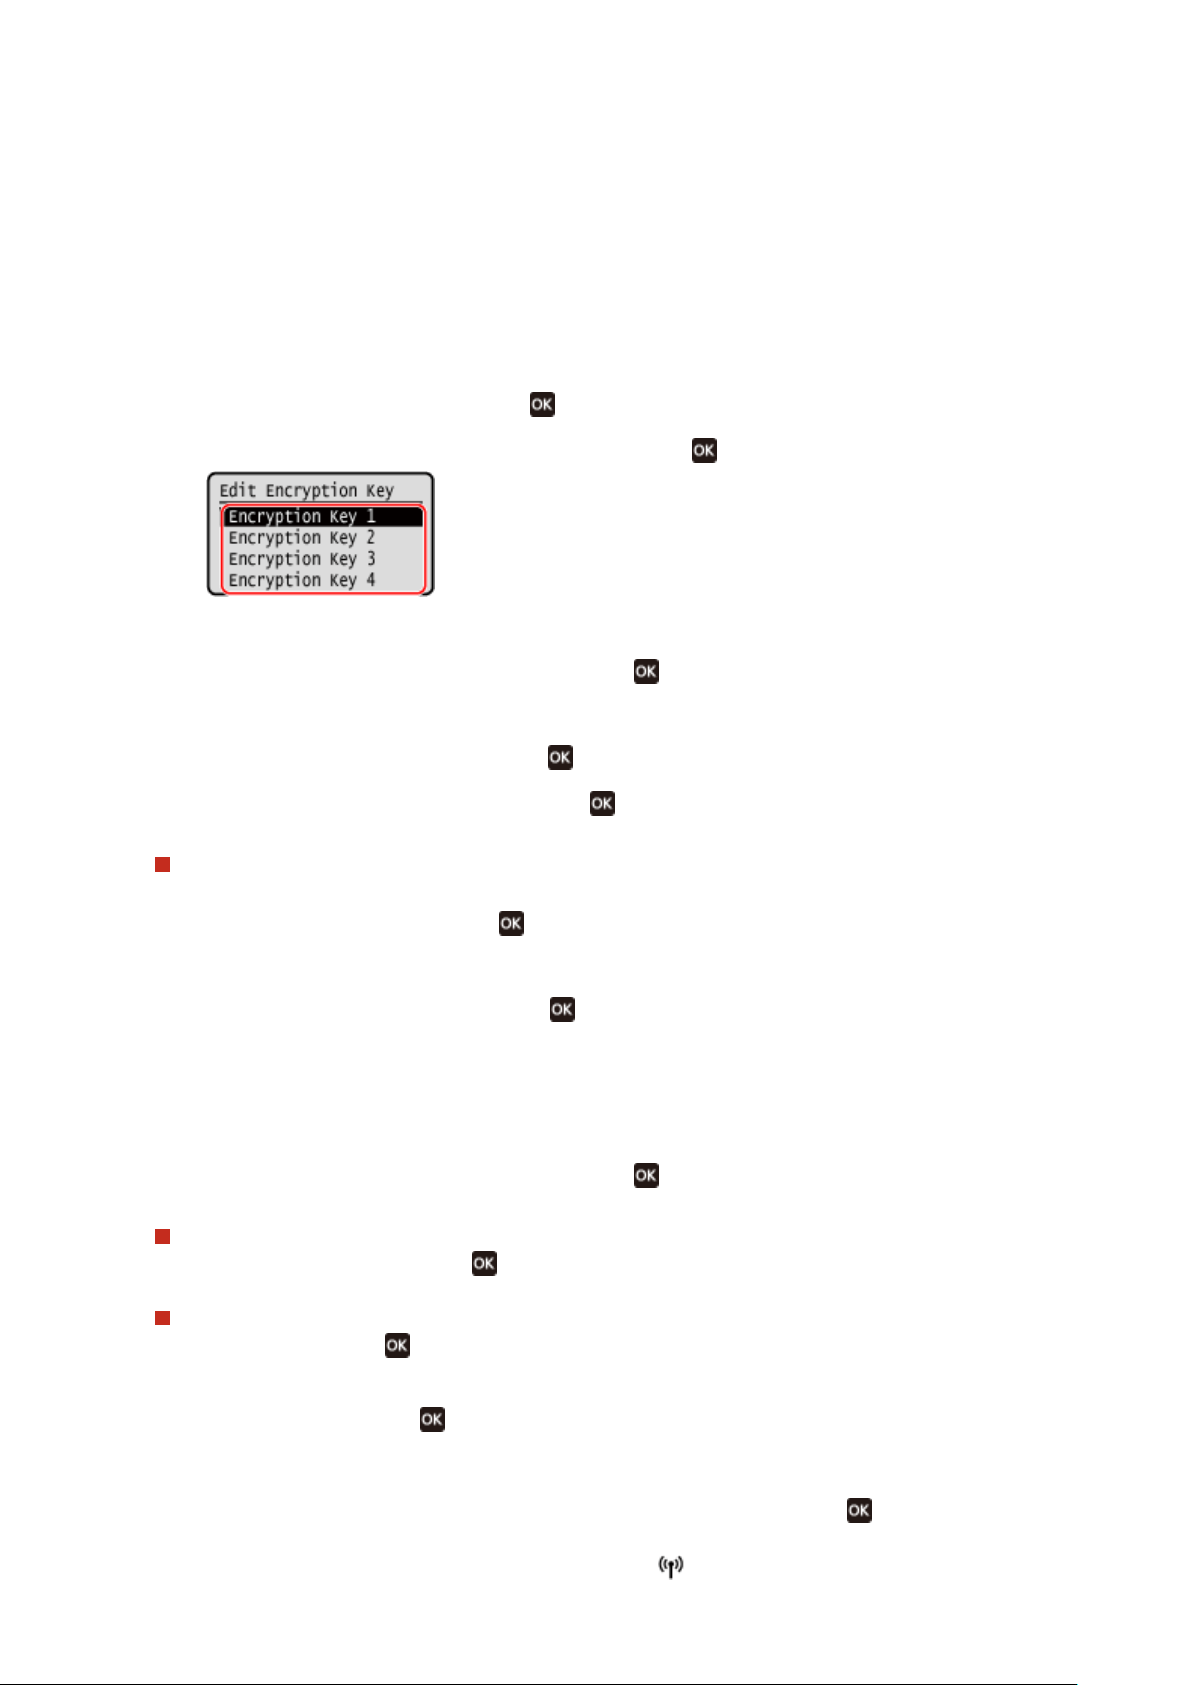
2
Select the authentication method.
[Open System]
Uses open authentication.
* When you select this authentication method, an authentication err
or occurs when connected to a
wireless LAN router that uses a shared key. The machine setting changes to [Shared Key] at this time, and
an attempt to reconnect to the router is made.
[Shared Key]
Uses an encryption key for the password.
3
Select [Edit Encryption Key] and press
.
4
Select an encryption key that is not registered, and press .
➠ The encryption k
ey input screen is displayed.
5
Enter the network key, select [<Apply>], and press
.
➠ The encryption key is registered to the [Encryption Key] screen.
6
Select [Select Encryption Key] and press
.
7
Select a registered encryption key, and press .
When Using WPA-PSK or WPA2-PSK
1
Select [WPA/WPA2-PSK] and press
.
➠ The [WPA/WPA2 Encryption] screen is displayed.
2
Select the encryption method and press
.
➠ The encryption key input screen is displayed.
When you select [Auto], AES-CCMP or TKIP is set automatically according to the wireless LAN router to
which you want to connect.
3
Enter the network key, select [<Apply>], and press .
When Using WPA-EAP or WPA2-EAP
Select [WP
A/WPA2-EAP] and press
.
When Not Using a Security Standard
Select [None] and pr
ess
.
7
Select [Yes] and press .
8
When [Connected.] is displayed on the operation panel, press
.
➠ When the machine is connected to the wir
eless LAN, [
] appears on the [Home] screen.
Setting Up
48

9
Wait a few minutes.
➠ By default, an IP addr
ess is set automatically.
To use a specic IP address, set this manually.
Setting IPv4 Addresses(P. 50)
Setting IPv6 Addresses(P. 52)
If an Error Message Appears during Operation and a Connection Cannot Be Established
● Pr
ess
, check the information of the wireless LAN router to which you want to connect, and repeat the
pr
ocedure starting from Step 3.
Setting Up
49
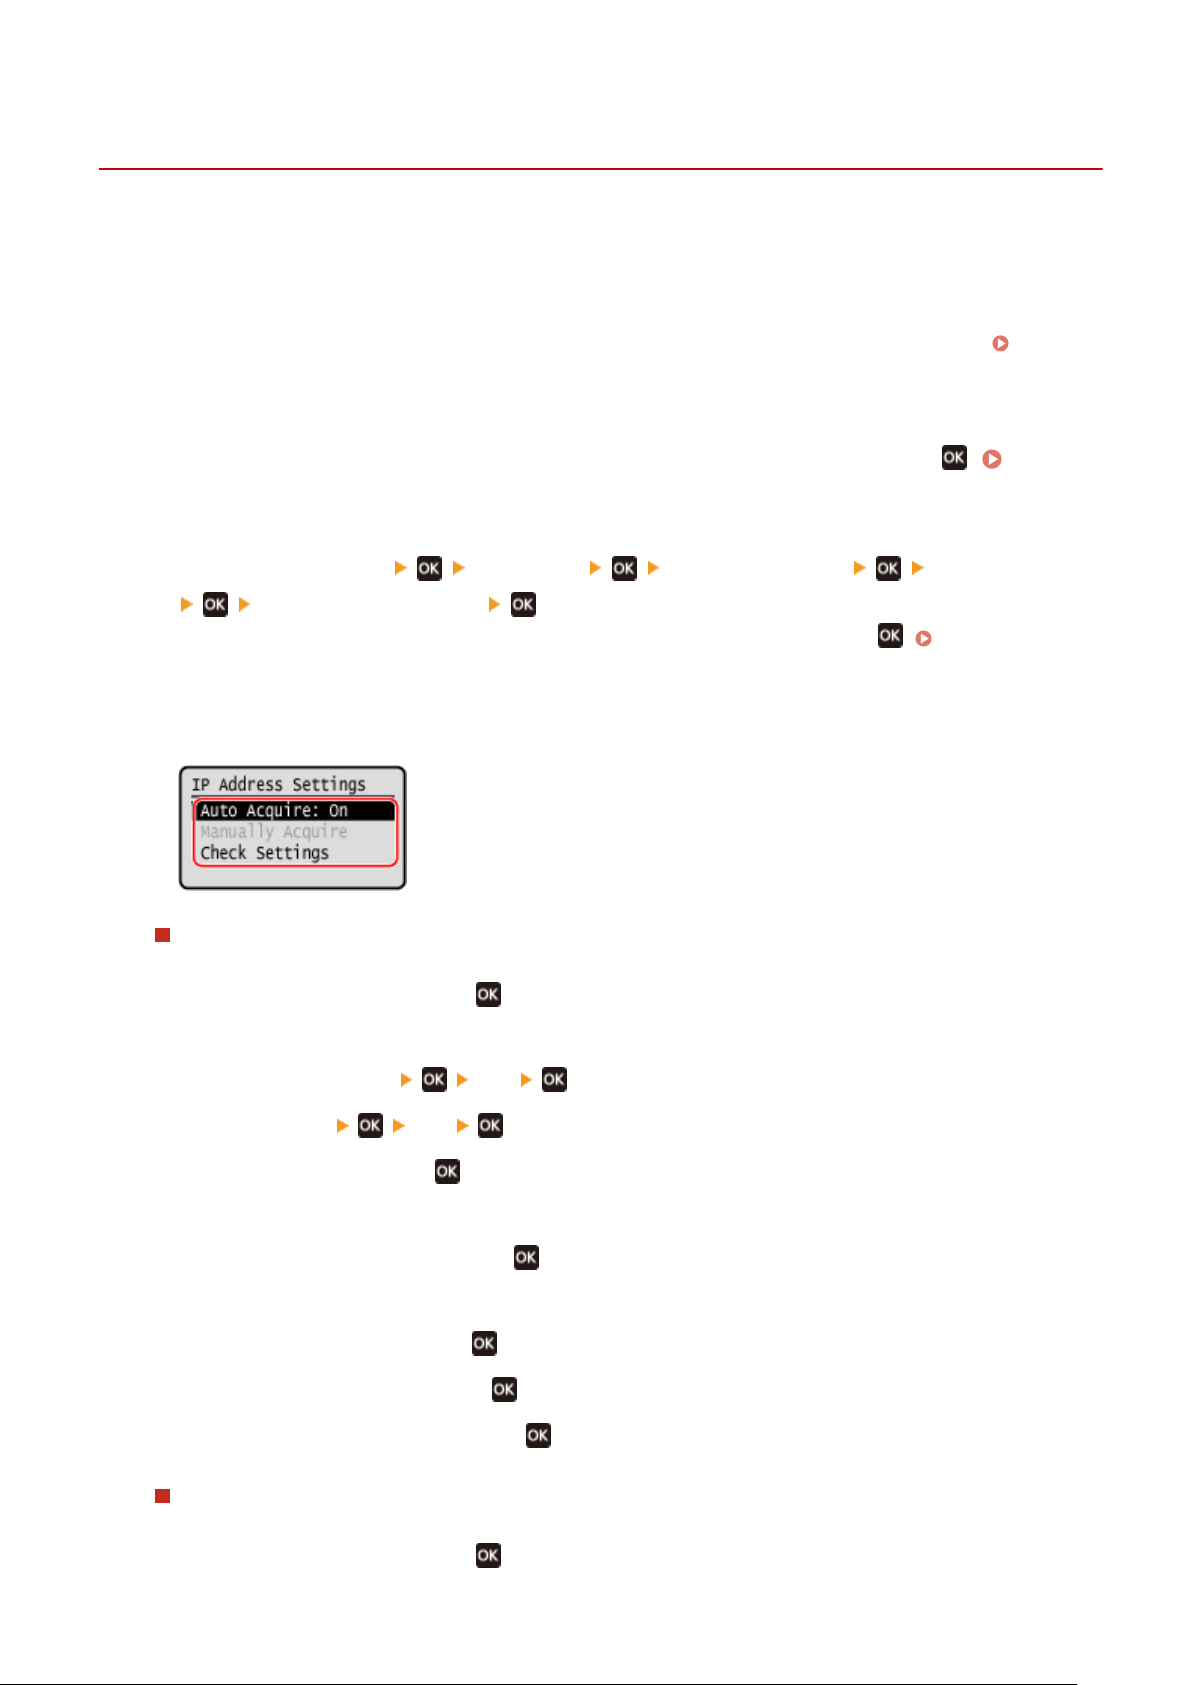
Setting IPv4 Addresses
94RC-01C
The machine
's IPv4 address can either be assigned automatically using DHCP or entered manually.
By default, the IPv4 address is set automatically when connected to a wired or wireless LAN, but you can set it or
change it manually according to your usage environment and purpose.
This section describes how to congure the settings using the operation panel.
You can also set the IPv4 address using Remote UI from a computer after it has been set on the machine.
Managing
the Machine fr
om a Computer (Remote UI)(P. 178)
Administrator privileges are required. The machine must be restarted to apply the settings.
1
On the operation panel, select [Menu] in the [Home] screen, and press
. [Home]
Scr
een(P. 81)
2
Press [Preferences]
[Network] [TCP/IP Settings] [IPv4 Settings]
[IP Address Settings] .
If the login screen appears, enter the System Manager ID and PIN, and then press . System Manager
ID and PIN(P
. 4)
3
Set the IP address.
When Manually Setting the IP Address
1
Select [Auto Acquire] and press
.
➠ The [Auto Acquir
e] screen is displayed.
2
Press [Select Protocol]
[Off] .
3
Press [Auto IP] [Off] .
4
Select [<Apply>] and press .
➠ The [IP Addr
ess Settings] screen is displayed.
5
Select [Manually Acquire] and press
.
➠ The IP addr
ess input screen is displayed.
6
Enter the IP address and press
.
7
Enter the subnet mask and press .
8
Enter the gateway address and press .
When Assigning an IP Address Automatically
1
Select [Auto Acquire] and press
.
Setting Up
50
➠ The [Auto Acquir
e] screen is displayed.
2
Congure the Auto Acquir
e setting, as needed.
[Select Protocol]
Normally, set to [DHCP]. However, when [DHCP] is set in an environment where DHCP cannot be used,
the machine will continue to conrm Auto Acquire in the network, creating unnecessary communication.
When not using DHCP, set this to [Off].
[Auto IP]
Normally, set to [On]. Although priority is given to the IP address allocated with DHCP, if there is no
response from DHCP, Auto IP will be used.
3
Select [<Apply>] and press
.
4
Restart the machine.
Restarting the Machine(P. 75)
➠ The settings ar
e applied.
Perform a connection test to check whether the IPv4 address is correctly congured.
Checking the
Network Status and Settings(P
. 66)
Checking the Currently Set IP Address
● On the scr
een in Step 3, select [Check Settings] and press
to check the current IP address setting. If the
IP addr
ess is displayed as "0.0.0.0," it is not correctly congured.
If the IP Address Is Changed after Installing the Printer Driver
● In Windows, you must add a new port.
Conguring a Printer Port (Windo
ws)(P. 104)
If you do not know which port is being used, see the following:
Viewing the Printer Port(P. 354)
● In macOS, you must r
e-register the machine on the Mac. For details about registering the machine, see the
manual of the driver at the online manual site.
https://oip.manual.canon/
* If you are using DHCP to automatically obtain the IP address of the machine, the IP address may be changed
automatically.
Setting Up
51

Setting IPv6 Addresses
94RC-01E
In an IPv6 environment, you can set the following IPv6 addresses and use them at the same time.
● Link-Local Addr
ess
An address that can only be used within the same link. It cannot be used to communicate with devices beyond
a router.
A link-local address is automatically set when usage of IPv6 addresses is enabled.
● Stateless Address
An address that is generated automatically using the network prex provided by the router and the MAC
address of the machine.
This address is discarded when the machine is restarted or turned ON.
● Manual Address
An address that is entered manually by specifying the IP address, prex length, and default router address.
● Stateful Address
An address obtained from a DHCP server using DHCPv6.
This section describes how to congure the settings using Remote UI from a computer.
On the operation panel, select [Menu] in the [Home] screen, and then select [Preferences] to congure the settings.
You cannot use the operation panel to congure some of the settings.
[IPv6 Settings](P. 212)
Administr
ator privileges are required. The machine must be restarted to apply the settings.
Required Preparations
● Set an IPv4 addr
ess to the machine.
Setting IPv4 Addresses(P. 50)
1
Log in to Remote UI in System Manager Mode. Starting Remote UI(P. 179)
2
On the Portal page of Remote UI, click [Settings/Registration]. Portal Page of
Remote UI(P
. 181)
3
Click [Network Settings]
[IPv6 Settings] [Edit].
➠ The [Edit IPv6 Settings] scr
een is displayed.
4
In [IP Address Settings], select the [Use IPv6] checkbox.
5
Set the IPv6 address to use.
When Using a Stateless Address
Select the [Use Stateless Addr
ess] checkbox.
When Using a Manual Address
Select the [Use Manual Addr
ess] checkbox, and enter the IP address, prex length, and default router
address.
* You cannot enter a multicast address (address starting with "ff").
Setting Up
52

When Using a Stateful Address
Select the [Use DHCPv6] checkbo
x.
6
Click [OK].
7
Restart the machine.
Restarting the Machine(P. 75)
➠ The settings ar
e applied.
Perform a connection test to check whether the IPv6 address is correctly congured.
Checking the
Network Status and Settings(P
. 66)
If the IP Address Is Changed after Installing the Printer Driver
● Y
ou must add a new port.
Adding a Port(P. 104)
Setting Up
53

Conguring Y
our Machine for Your Network
Environment
94RC-01F
The size and congur
ation of a network vary depending on the purpose and usage. The machine is equipped with a
variety of technologies to support many environments.
Congure the settings of the machine according to your network environment, as needed.
Manually Conguring the Ethernet Settings(P
. 55)
Conguring DNS(P
. 56)
Conguring WINS
(P. 60)
Conguring SNMP
(P. 61)
Conguring SNTP
(P. 64)
◼ See Also
To reduce the threat of unauthorized access and eavesdropping, it is recommended to congure the security settings
according to your network environment.
Protecting the Network(P. 146)
Using the Machine in a Network with IEEE 802.1X Authentication
● When connecting the machine to a network that uses IEEE 802.1X authentication, you must congur
e the
settings on the machine such as the authentication method managed by the authentication server.
Using
IEEE 802.1X
(P. 155)
Setting Up
54

Manually Conguring the Ethernet Settings
94RC-01H
By default, when the machine connects to a wir
ed LAN, the Ethernet communication mode and Ethernet type are
detected automatically, and these can be used without changes. Depending on the usage environment, you may have
to change the Ethernet settings to suit the settings of peripheral devices.
This section describes how to congure the settings using Remote UI from a computer.
On the operation panel, select [Menu] in the [Home] screen, and then select [Preferences] to congure the settings.
[Ethernet Driver Settings](P. 205)
Administr
ator privileges are required. The machine must be restarted to apply the settings.
1
Log in to Remote UI in System Manager Mode.
Starting Remote UI(P. 179)
2
On the Portal page of Remote UI, click [Settings/Registration]. Portal Page of
Remote UI(P. 181)
3
Click [Network Settings] [Ethernet Driver Settings] [Edit].
➠ The [Edit Ethernet Driver Settings] scr
een is displayed.
4
Clear the [Auto Detect] checkbox.
5
Select the communication mode.
Normally, select [Full Duplex]. When the network router is set to half duplex communication, select [Half
Duple
x].
6
Select the Ethernet type, and click [OK].
7
Restart the machine.
Restarting the Machine(P. 75)
➠ The settings are applied.
Setting Up
55

Conguring DNS
94RC-01J
When using the machine in an envir
onment with Domain Name System (DNS), congure the DNS server information
and DHCP option settings.
In an environment without DNS, you can congure multicast DNS (mDNS) to use the DNS function. mDNS is used by
Bonjour and other software.
This section describes how to congure the settings using Remote UI from a computer.
On the operation panel, select [Menu] in the [Home] screen, and then select [Preferences] to congure the settings.
You cannot use the operation panel to congure some of the settings.
[TCP/IP Settings](P. 210)
Administr
ator privileges are required. Depending on the item to be congured, you may have to restart the machine.
Required Preparations
● When conguring DNS for IPv6, congur
e the setting to use an IPv6 address.
Setting IPv6
Addr
esses(P. 52)
1
Log in to Remote UI in System Manager Mode. Starting Remote UI(P. 179)
2
On the Portal page of Remote UI, click [Settings/Registration]. Portal Page of
Remote UI(P
. 181)
3
Click [Network Settings]
[IPv4 Settings] or [IPv6 Settings] [Edit].
➠ The [Edit IPv4 Settings] scr
een or [Edit IPv6 Settings] screen is displayed.
4
In [DHCP Option Settings], congur
e the DHCP option settings.
If you are not conguring the DHCP option settings, pr
oceed to Step 5.
Select the checkboxes of the items to enable.
[Acquir
e Host Name] (IPv4 only)
Obtains a host name (Option 12) from the DHCP server.
[DNS Dynamic Update] (IPv4 only)
The DHCP server automatically updates the information (Option 81) corresponding to the host name in place of
the machine.
[Acquire DNS Server Address]
Obtains a DNS server address (Option 6 for IPv4, Option 23 for IPv6) from the DHCP server.
[Acquire Domain Name]
Obtains a domain name (Option 15 for IPv4, Option 24 for IPv6) from the DHCP server.
[Acquire WINS Server Address] (IPv4 only)
Obtains a WINS server address (Option 44) from the DHCP server.
5
In [DNS Settings], set the DNS server information.
Setting Up
56

● For details about the setting information, contact your pr
ovider or network administrator. You can also refer
to the computer settings.
Viewing the Network Connection Information of the Computer(P. 352)
● If you ar
e not conguring the DNS server information, proceed to Step 6.
[Primary DNS Server Address]
Enter the IP addr
ess of the DNS server.
* For IPv6, you cannot enter a multicast address (address starting with "ff").
[Secondary DNS Server Address]
When using a secondary DNS server, enter the IP address of that server.
* For IPv6, you cannot enter a multicast address (address starting with "ff").
[Use Same Host Name/Domain Name as IPv4] (IPv6 only)
Select the checkbox to use the same host and domain names as in IPv4.
To set the IPv6 host name and domain name individually, clear this checkbox, and enter [Host Name] and
[Domain Name].
[Host Name]
Enter the host name to register in the DNS server using single-byte alphanumeric characters.
[Domain Name]
Enter the domain name to which the machine belongs using single-byte alphanumeric characters.
Input example:
example.com
[DNS Dynamic Update]
Select the checkbox to automatically update the DNS records when the corresponding information of the host
name and IP address is changed in a DHCP environment, for example.
To Specify the Type of Address to Register to the DNS Server (IPv6 only)
Depending on the type of address you want to register, select the [Register Manual Address], [Register
Stateful Address], or [Register Stateless Address] checkbox.
To Specify the Interval between Updates
In [DNS Dynamic Update Interval], enter the interval at which to automatically update this information.
6
In [mDNS Settings], congure the mDNS settings.
If you are not conguring the mDNS settings, pr
oceed to Step 7.
For IPv4
T
o use mDNS, select the [Use mDNS] checkbox, and enter the mDNS name.
For IPv6
To use mDNS, select the [Use mDNS] checkbox, and select whether to use the same mDNS name as IPv4.
● To use the mDNS name set with IPv4 also with IPv6, select the [Use Same mDNS Name as IPv4]
checkbox.
● To congure the mDNS name of IPv6 individually, clear the [Use Same mDNS Name as IPv4]
checkbox, and enter the mDNS name.
7
Click [OK].
8
Restart the machine.
Restarting the Machine(P. 75)
Setting Up
57

➠ The settings ar
e applied.
Setting Up
58

Conguring SMB
94RC-01K
The Server Message Block (SMB) communication pr
otocol is used to enable the machine as a shared printer on the
network. Depending on the network environment, you may have to set the computer name and workgroup name of
the machine
Setting the Computer Name and Workgroup Name
Set the computer name used to identify the machine in a network and the workgroup name to identify the group that
the machine belongs to.
Congure these settings using Remote UI from a computer. You cannot use the operation panel to congure the
settings.
Administrator privileges are required. The machine must be restarted to apply the settings.
1
Log in to Remote UI in System Manager Mode.
Starting Remote UI(P. 179)
2
On the Portal page of Remote UI, click [Settings/Registration]. Portal Page of
Remote UI(P. 181)
3
Click [Network Settings] [Computer Name/Workgroup Name Settings] [Edit].
➠ The [Edit Computer Name/W
orkgroup Name Settings] screen is displayed.
4
Enter the computer name and workgroup name of the machine, and click [OK].
Enter using single-byte alphanumeric characters.
In an Environment with WINS
● Select the [Use NetBIOS] checkbo
x.
● You cannot register names that start with an asterisk (*) to the WINS server.
5
Restart the machine.
Restarting the Machine(P. 75)
➠ The settings ar
e applied.
Setting Up
59

Conguring WINS
94RC-01L
When using the machine in a network envir
onment that uses both NetBIOS and TCP/IP, congure Windows Internet
Name Service (WINS) to convert the NetBIOS name to an IP address.
To enable WINS, specify the WINS server. WINS cannot be used in an IPv6 environment.
This section describes how to congure the settings using Remote UI from a computer.
On the operation panel, select [Menu] in the [Home] screen, and then select [Preferences] to congure the settings.
[WINS Settings](P. 213)
Administr
ator privileges are required. The machine must be restarted to apply the settings.
Required Preparations
● Set the computer name and workgr
oup name.
Setting the Computer Name and Workgroup
Name(P
. 59)
● Prepare the IPv4 address of the WINS server and keep it close by.
1
Log in to Remote UI in System Manager Mode. Starting Remote UI(P. 179)
2
On the Portal page of Remote UI, click [Settings/Registration]. Portal Page of
Remote UI(P
. 181)
3
Click [Network Settings]
[WINS Settings] [Edit].
➠ The [Edit WINS Settings] scr
een is displayed.
4
Select the [WINS Resolution] checkbox.
5
Enter the IPv4 address of the WINS server, and click [OK].
If the IP address of the WINS server is obtained from a DHCP server, the obtained IP address has priority.
Conguring DNS(P
. 56)
6
Restart the machine.
Restarting the Machine(P. 75)
➠ The settings are applied.
Setting Up
60

Conguring SNMP
94RC-01R
Simple Network Management Pr
otocol (SNMP) is a protocol for monitoring and controlling communication devices in a
network by accessing a Management Information Base (MIB). Congure these settings according to the purpose of
use and environment of the machine.
The machine supports SNMPv1 and SNMPv3. You can also use both at the same time. Trap notication is not
supported.
When SNMP management software is installed on the network, you can use the software to congure, monitor, and
control the machine remotely from a computer. For more information, see the manual of the software you are using.
SNMPv1
SNMPv1 denes the scope of communication using information called a "community name." As the
community name is sent to the network in plain text, the security of the network is vulnerable. To ensure
network security, disable SNMPv1 and use SNMPv3. When SNMPv1 is disabled, you will not be able to use
some functions such as obtaining information from the machine using the printer driver.
SNMPv3
SNMPv3 communicates using user information for SNMPv3. This protocol enables you to congure the
authentication and encryption in the user information to monitor and control communication devices on the
network with a solid security system.
This section describes how to congure the settings using Remote UI from a computer.
On the operation panel, select [Menu] in the [Home] screen, and then select [Preferences] to congure the settings.
However, the operation panel can only be used to enable or disable SNMPv1 and SNMPv3.
[SNMP Settings](P. 204)
Administr
ator privileges are required. The machine must be restarted to apply the settings.
Required Preparations
● T
o congure SNMPv3, you must enable TLS. Using TLS(P. 153)
1
Log in to Remote UI in System Manager Mode.
Starting Remote UI(P. 179)
2
On the Portal page of Remote UI, click [Settings/Registration]. Portal Page of
Remote UI(P. 181)
3
Click [Network Settings] [SNMP Settings] [Edit].
➠ The [Edit SNMP Settings] scr
een is displayed.
4
In [SNMPv1 Settings], set SNMPv1.
To Enable SNMPv1
1
Select the [Use SNMPv1] checkbox.
2
Congure the community
.
● You can set MIB Access Permission (permission to read/write to MIB objects) for each community.
● When using both SNMPv1 and SNMPv3, it is recommended to set MIB Access Permission to [Read
Only]. When setting SNMPv1 to [Read/Write] (full-access permission), you can perform nearly all
operations, and therefore, you are not able to use the solid security features of SNMPv3.
Setting Up
61

To Congur
e the Community Name
Select the [Use Community Name 1] or [Use Community Name 2] checkbox, and congure the
community name and MIB Access Permission.
Enter the community name using single-byte alphanumeric characters.
To Congure a Dedicated Community
Dedicated Community is a preset community for Canon Device Management software.
To use Dedicated Community, select the [Use Dedicated Community] checkbox, and congure MIB Access
Permission.
* For details, see the manual of the software you are using.
To Disable SNMPv1
Clear the [Use SNMPv1] checkbo
x.
5
In [SNMPv3 Settings], congur
e SNMPv3.
To Enable SNMPv3
1
Select the [Use SNMPv3] checkbox.
2
In [User Settings 1], [User Settings 2], or [User Settings 3], select the [Enable User] checkbox.
3
Congure the user.
[User Name]
Enter the user name using single-b
yte alphanumeric characters.
[MIB Access Permission]
Set the read/write permission to MIB objects for each specied user.
To allow both read and write, select [Read/Write].
[Security Settings]
Select whether to enable or disable authentication and encryption.
[Authentication Algorithm]
When [Authentication On/Encryption On] or [Authentication On/Encryption Off] is selected in [Security
Settings], select the authentication algorithm according to the usage environment.
To set a password, select the [Set/Change Password] checkbox, and enter the same password in both
[Authentication Password] and [Conrm] using single-byte alphanumeric characters.
[Encryption Algorithm]
When [Authentication On/Encryption On] is selected in [Security Settings], select the encryption algorithm
according to the usage environment.
To set a password, select the [Set/Change Password] checkbox, and enter the same password in both
[Encryption Password] and [Conrm] using single-byte alphanumeric characters.
To Disable SNMPv3
Clear the [Use SNMPv3] checkbo
x.
Setting Up
62

6
In [Printer Management Information Acquisition Settings], select whether to obtain
the printer management information.
To regularly obtain printer management information from the machine, such as protocols and ports, select
the [Acquir
e Printer Management Information from Host] checkbox.
7
Click [OK].
8
Restart the machine.
Restarting the Machine(P. 75)
➠ The settings ar
e applied.
Changing the Port Number
● T
o change the port number of the SNMP server, see the following:
Changing the Port Number(P. 150)
Setting Up
63

Conguring SNTP
94RC-01S
T
o obtain time information from the time server on the network, congure Simple Network Time Protocol (SNTP).
When SNTP is congured, the time server is checked at specied intervals to adjust the time and maintain the correct
time on the machine.
The machine supports both an NTP server (NTPv3) and SNTP server (SNTPv3 and v4).
Congure these settings using Remote UI from a computer. You cannot use the operation panel to congure the
settings.
Administrator privileges are required. The machine must be restarted to apply the settings.
Required Preparations
● The time is adjusted based on the UT
C (Coordinated Universal Time), so specify the time zone setting.
Setting the Date and Time(P. 177)
● Pr
epare the IP address of the NTP or SNTP server and keep it close by.
1
Log in to Remote UI in System Manager Mode. Starting Remote UI(P. 179)
2
On the Portal page of Remote UI, click [Settings/Registration]. Portal Page of
Remote UI(P
. 181)
3
Click [Network Settings]
[SNTP Settings] [Edit].
➠ The [Edit SNTP Settings] scr
een is displayed.
4
Select the [Use SNTP] checkbox.
5
In [NTP Server Name], enter the IP address of the NTP/SNTP server.
When using a DNS server, you can enter the host name or FQDN instead of the IP address.
Input e
xample:
ntp.example.com
6
In [Polling Interval], enter the interval at which to check the server and adjust the
time.
7
Click [OK].
8
Restart the machine.
Restarting the Machine(P. 75)
➠ The settings ar
e applied.
Setting Up
64
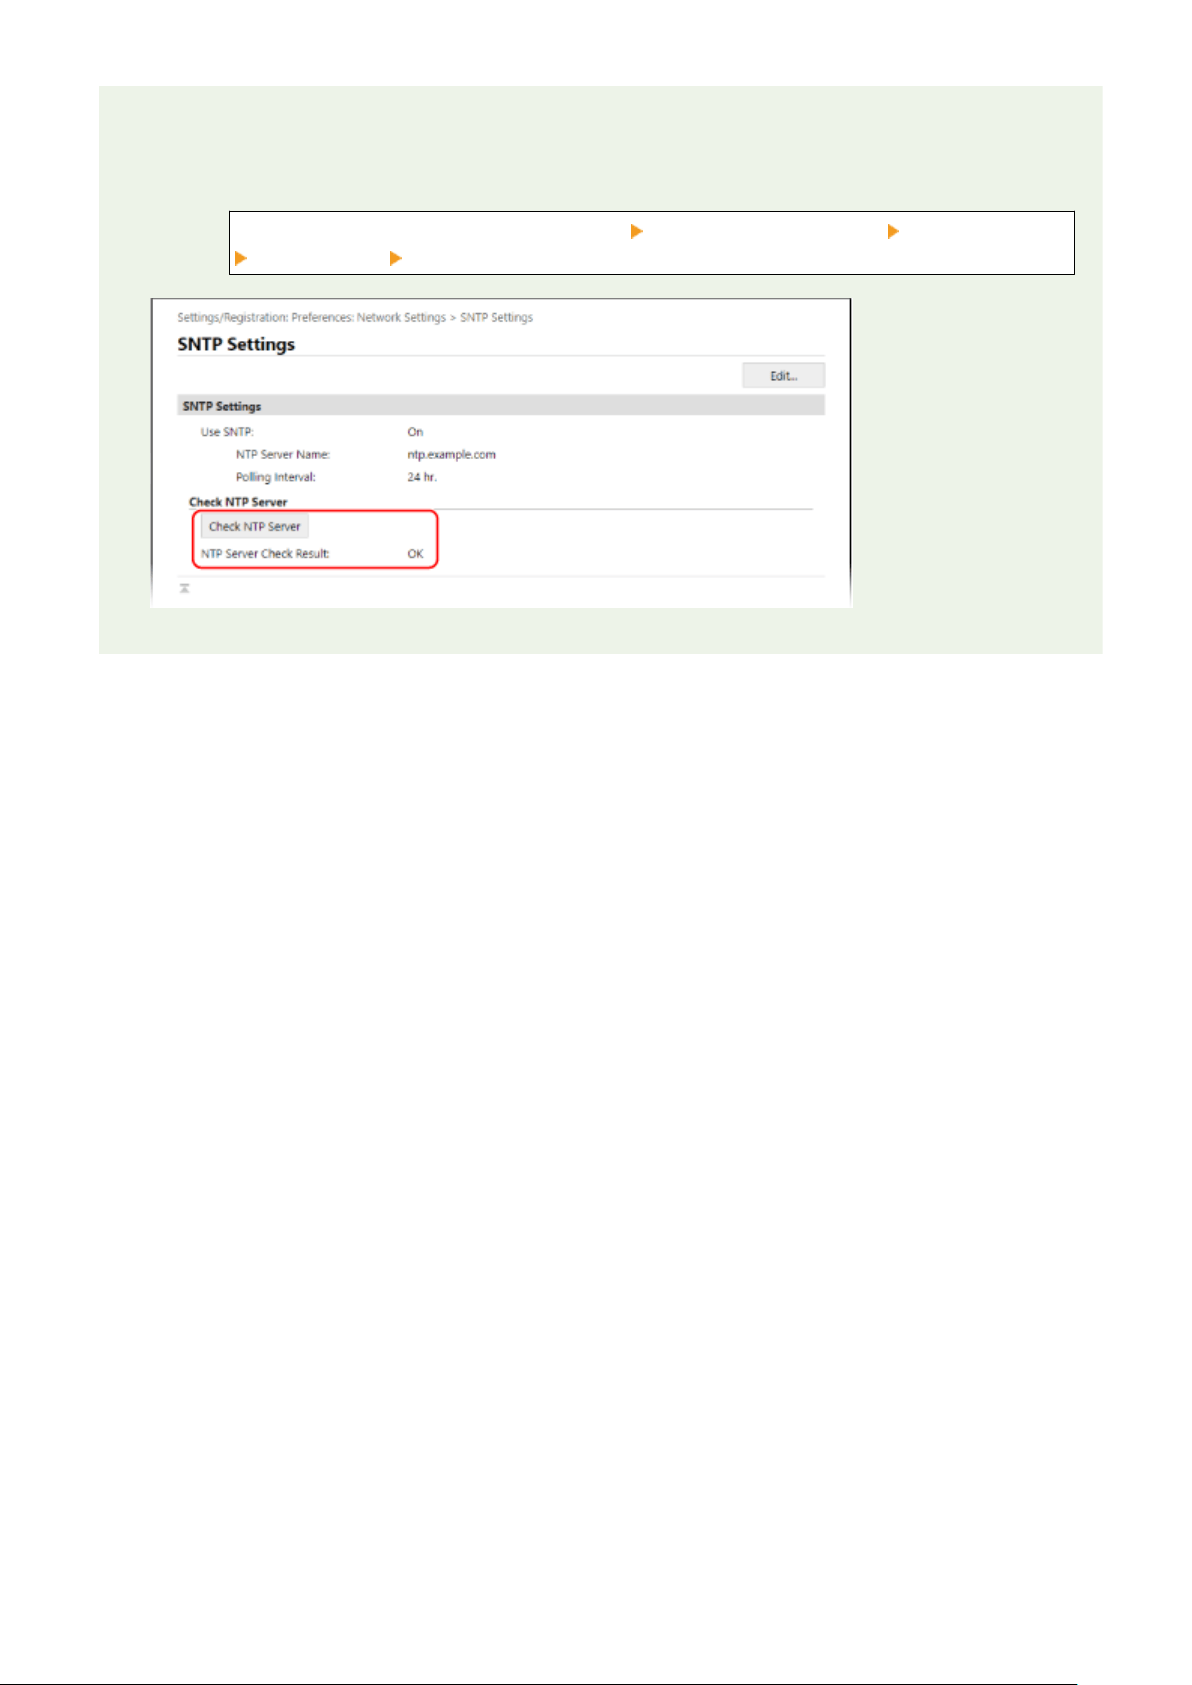
Testing Communication with the NTP or SNTP Server
● T
est communication using the following procedure: If the machine is correctly communicating with the
server, [OK] appears in [NTP Server Check Result].
Log in to Remote UI in System Manager Mode click [Settings/Registration] [Network Settings]
[SNTP Settings] [Check NTP Server].
* This tests the communication status and does not adjust the time.
Setting Up
65

Checking the Network Status and Settings
94RC-01W
Y
ou can perform a connection test with devices in the network to check whether the machine is correctly connected to
the network.
The IP address of the machine and the MAC address information are needed to use Remote UI and congure the
rewall settings. Check these current settings.
Checking Whether the Machine Can Connect to Network Devices(P. 66)
Viewing the IP address set to the machine(P. 67)
Viewing the MAC Address of the Wired LAN(P. 67)
Viewing the MAC Address and Connection Information of the Wireless LAN(P. 68)
● If the IP addr
ess is displayed as "0.0.0.0," it is not correctly congured. Set the IP address again.
Setting IPv4 Addresses(P. 50)
Setting IPv6 Addresses(P. 52)
● Connecting the machine to a switching hub, for e
xample, may prevent connection to the network even when
the IP address is correctly congured. In this case, set a wait time until machine starts communicating and
try connecting again.
[Waiting Time for Connection at Startup](P. 205)
● Y
ou can print the System Manager Data List to view the network settings.
Printing and Viewing Reports
and Lists(P
. 186)
Checking Whether the Machine Can Connect to Network Devices
In the W
eb browser of the computer connected to the network, enter the IPv4 or IPv6 address of the machine. If the
Remote UI login screen is displayed, the machine is properly connected to the network.
Starting Remote UI(P. 179)
When using an IPv4 addr
ess, you can use the following procedure to send a ping command from the operation panel
to check whether the machine can connect to a network device.
Required Preparations
● Pr
epare the IPv4 address of a device in the network to which you want to connect and keep it close by.
1
On the operation panel, select [Menu] in the [Home] screen, and press . [Home]
Scr
een(P. 81)
2
Press [Preferences]
[Network] [TCP/IP Settings] [IPv4
Settings]
[PING Command] .
If the login screen appears, enter the System Manager ID and PIN, and then press . System Manager
ID and PIN(P
. 4)
3
Enter the IPv4 address of a network device, and press
.
➠ If the machine is corr
ectly connected to the network, [Received response from host.] appears.
Setting Up
66
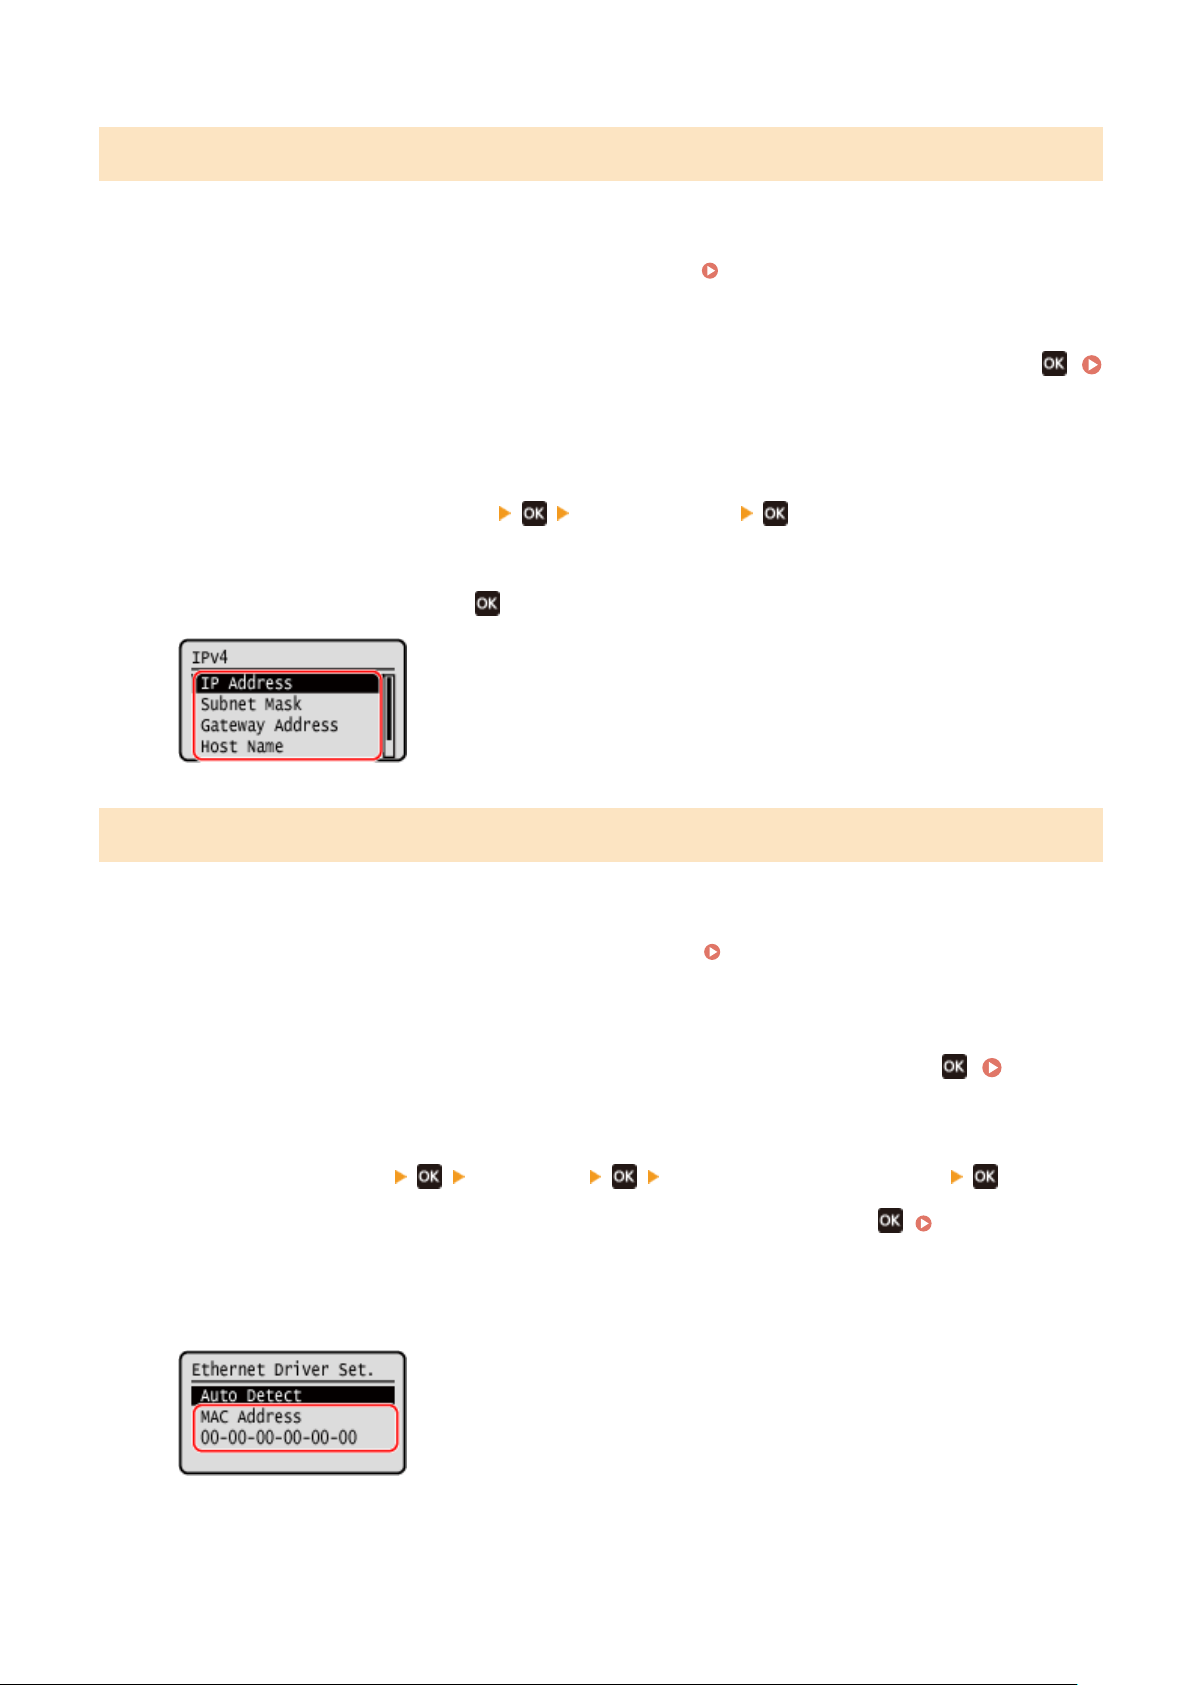
Viewing the IP address set to the machine
You can view the setting of IP address set to the machine such as the IPv4 address and the IPv6 address.
This section describes how to view the IP address using the operation panel.
You can also check this information using Remote UI from a computer. Managing the Machine from a Computer
(Remote UI)
(P. 178)
1
On the operation panel, select [Status Monitor] in the [Home] screen, and press
.
[Home] Screen(P. 81)
➠ The [Status Monitor] scr
een is displayed.
2
Press [Network Information]
[IPv4] or [IPv6] .
3
View the setting and press .
Viewing the MAC Address of the Wired LAN
Y
ou can view the MAC address set to the machine when the machine is connected to the wired LAN.
This section describes how to view this information using the operation panel.
You can also use Remote UI from a computer to view the MAC address.
Managing the Machine from a Computer
(Remote UI)
(P. 178)
Administrator privileges are required.
1
On the operation panel, select [Menu] in the [Home] screen, and press
. [Home]
Scr
een(P. 81)
2
Press [Preferences]
[Network] [Ethernet Driver Settings] .
If the login screen appears, enter the System Manager ID and PIN, and then press . System Manager
ID and PIN(P
. 4)
3
View the MAC address.
Setting Up
67
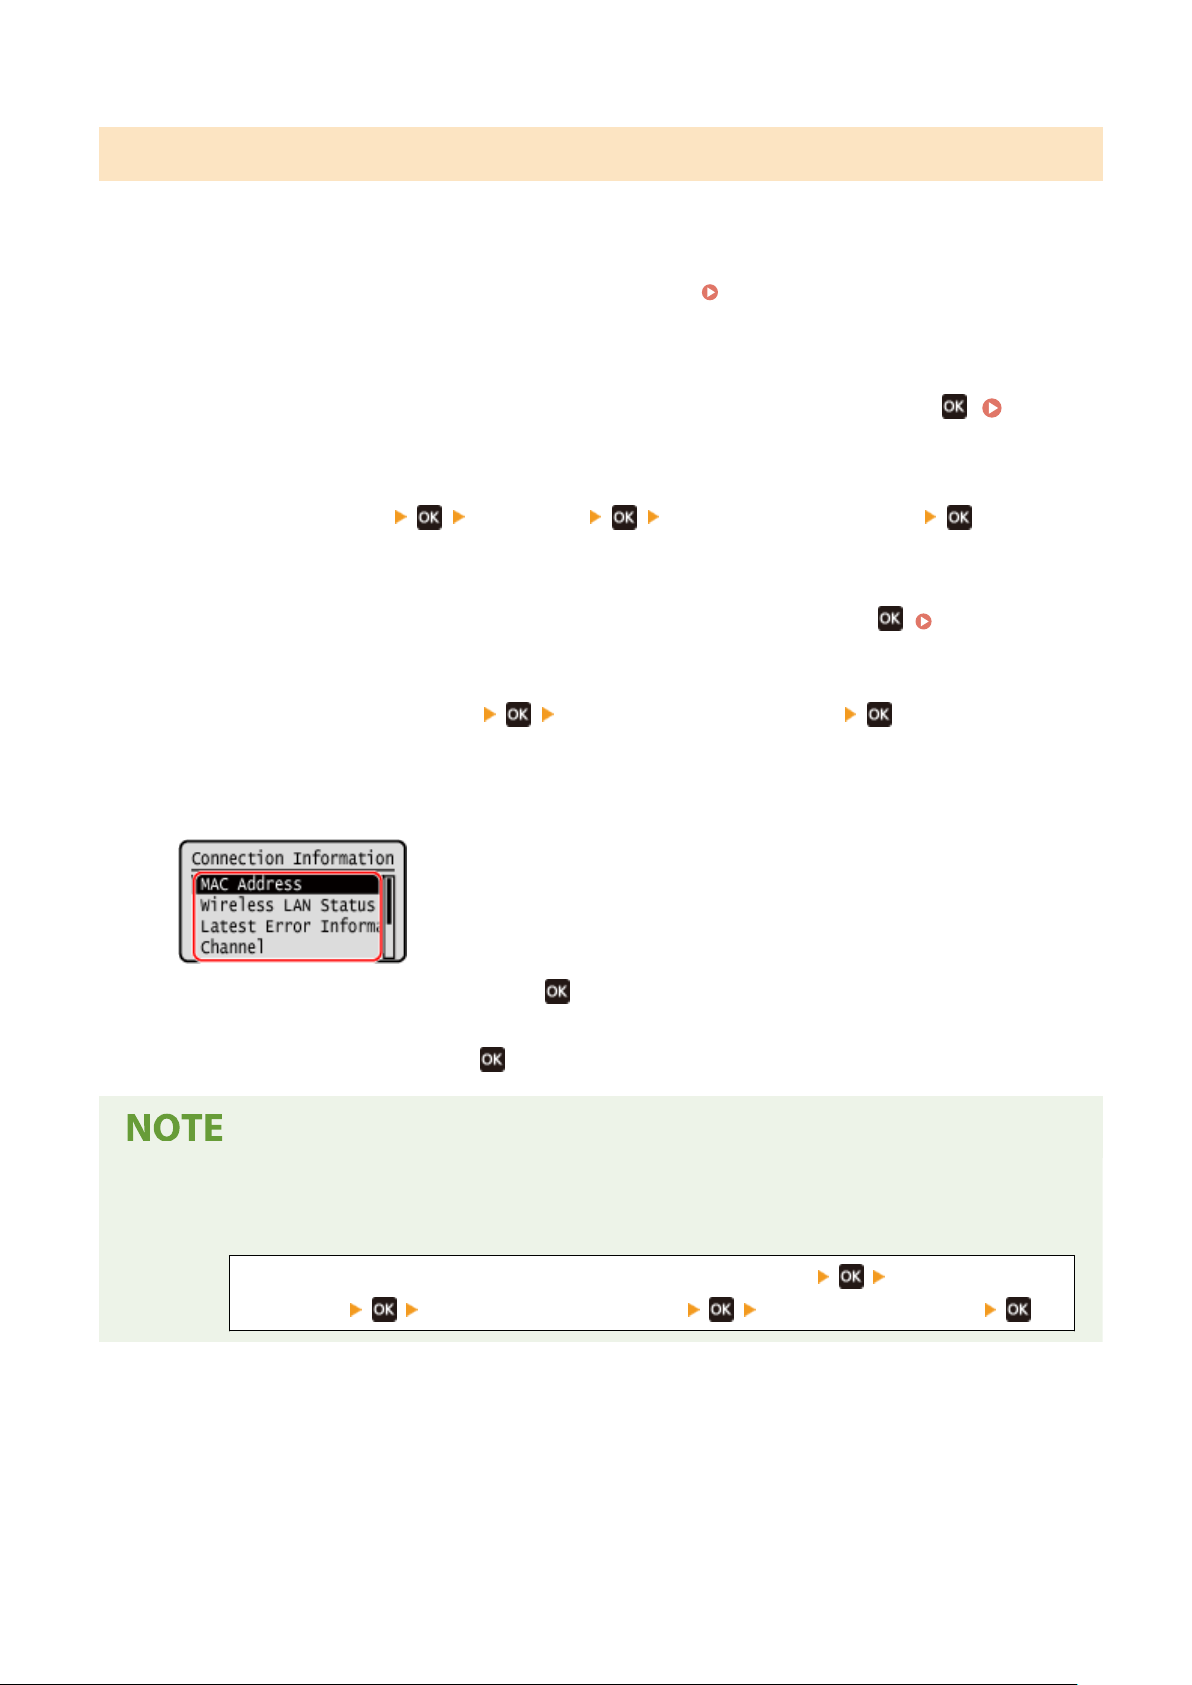
Viewing the MAC Address and Connection Information of the Wireless LAN
In addition to the MAC address and connection information of the wireless LAN when the machine is connected to the
wireless LAN, you can also view the security settings.
This section describes how to view this information using the operation panel.
You can also check this information using Remote UI from a computer. Managing the Machine from a Computer
(Remote UI)
(P. 178)
Administrator privileges are required.
1
On the operation panel, select [Menu] in the [Home] screen, and press
. [Home]
Scr
een(P. 81)
2
Press [Preferences]
[Network] [Wireless LAN Settings] .
➠ The [Select Network] screen is displayed.
If the login screen appears, enter the System Manager ID and PIN, and then press . System Manager
ID and PIN(P
. 4)
3
Press [Connection Settings]
[Connection Information] .
4
View the MAC address and the settings.
● Select [Latest Err
or Information] and press
to display error information related to the wireless LAN
connection.
● Select [Security Settings] and pr
ess
to display the WEP or WPA/WPA2-PSK details.
Viewing Information with the [Status Monitor] Screen
● Y
ou can also view the wireless LAN status and error information with the following procedure:
On the operation panel, press [Status Monitor] in the [Home] screen [Network
Information] [Network Connection Method] [Connection Information] .
Setting Up
68

Installing Software and Drivers to the Computer
94RC-01X
Install the r
elated software and drivers to the computer that will use the functions of the machine.
Installation Procedure
Check the operating environment via the Canon website for your country/region, and download and install the
latest softwar
e and drivers.
https://global.canon/en/support/
* If the machine is supplied with a CD-ROM or DVD-ROM, you can also use this to install the software and
drivers.
For details about the installation method, see the manual of the software or driver at the online manual site.
https://oip.manual.canon/
Precautions and Limitations
Operating Environment
● Depending
on the operating system, your computer may not support some software or drivers. For the
latest information on the supported operating systems, see the Canon website.
https://global.canon/
● Depending on the model and usage environment, some functions of the software or drivers may not be
available.
When the Firewall Settings of the Machine Are Congured
The computer that will be used with the machine must be allowed to communicate with the machine. If the
computer is not allowed to communicate with the machine, you will not be able to install the software and
drivers or use the functions of the machine.
Setting the Firewall(P. 147)
If the IP Addr
ess of the Machine Is Changed after Installing the Printer Driver
● In Windows, you must add a new port.
Conguring a Printer Port (Windo
ws)(P. 104)
If you do not know which port is being used, see the following:
Viewing the Printer Port(P. 354)
● In
macOS, you must re-register the machine on the Mac. For details about registering the machine, see
the manual of the driver at the online manual site.
https://oip.manual.canon/
* If you are using DHCP to automatically obtain the IP address of the machine, the IP address may be
changed automatically.
Using the Functions of the Machine without Installing Software or Drivers (macOS)
● Y
ou can use AirPrint standard equipped in macOS to print data from a computer without installing software
or drivers.
Using AirPrint Application to Print Data(P. 137)
Setting Up
69

Basic Operations
Basic Operations ...............................................................................................................................................
71
Turning ON and OFF the Machine ...................................................................................................................... 72
Turning ON the Machine ................................................................................................................................ 73
Turning OFF the Machine ............................................................................................................................... 74
Restarting the Machine .................................................................................................................................. 75
Reducing Power Consumption (Sleep Mode) ..................................................................................................... 76
Using the Operation Panel .................................................................................................................................. 78
Screens Displayed on the Operation Panel ..................................................................................................... 79
[Home] Screen ......................................................................................................................................... 81
[Status Monitor] Screen ........................................................................................................................... 82
How to Operate the Operation Panel .............................................................................................................. 84
Entering Characters ........................................................................................................................................ 85
Logging In to the Machine .................................................................................................................................. 86
Loading Paper ...................................................................................................................................................... 87
Loading Paper in the Paper Drawer ................................................................................................................ 88
Preparations and Orientation for Loading Envelopes ..................................................................................... 90
Orientation for Loading Paper with a Logo ..................................................................................................... 92
Specifying the Paper Size and Type ................................................................................................................ 94
Setting the Paper Size and Type for the Paper Drawer ............................................................................. 95
Registering Non-standard Size Paper (Custom Paper) ............................................................................. 97
Hiding Unused Paper Sizes ...................................................................................................................... 99
Basic Operations
70

Basic Operations
94RC-01Y
This chapter describes the basic oper
ations common to all functions of the machine and how to understand the screen
layout.
Managing and Saving Power
You can turn OFF the power to conserve energy or when cleaning and restart the machine to apply the
settings.
You can use sleep mode to reduce power consumption.
Turning ON and OFF the Machine(P. 72)
Reducing Power Consumption (Sleep Mode)(P. 76)
Using the Oper
ational Panel
Use the operation panel to connect the machine to a mobile device and to congure the settings of the
machine.
How to Operate the Operation Panel(P. 84)
When the login scr
een is displayed, enter the required login information to continue operations.
Logging In to the Machine(P. 86)
Loading Paper
Load printing paper into the paper dr
awer.
Loading Paper(P. 87)
Basic Operations
71

Turning ON and OFF the Machine
94RC-020
Use the po
wer switch to manually turn ON and OFF the machine.
You can use this feature to automatically turn the machine OFF if no operations are performed after a certain period of
time.
Turning ON the Machine(P. 73)
Turning OFF the Machine(P. 74)
Restarting the Machine(P. 75)
Basic Operations
72

Turning ON the Machine
94RC-021
T
o turn ON the machine, press the power switch on the front.
1
Make sure that the power plug is inserted into a power outlet.
2
Press the power switch.
➠ The start scr
een is displayed on the operation panel.
Basic Operations
73

Turning OFF the Machine
94RC-022
T
o turn the machine OFF, press the power switch on the front.
Turning OFF the machine deletes any data waiting to be printed.
1
Press the power switch.
➠ The oper
ation panel turns off, and the power turns OFF.
It may take a few minutes until the power turns OFF. Do not unplug the power cord until the power turns
OFF.
Turning ON the Machine Again
● W
ait at least 10 seconds after turning OFF the power before turning ON the machine.
Basic Operations
74

Restarting the Machine
94RC-023
When you mak
e changes to the settings of the machine, you may have to restart the machine to apply the changes
depending on the setting.
When you change the settings using either the operation panel or Remote UI, you can restart the machine using the
power switch.
Restarting the machine deletes any data waiting to be printed.
1
Press the power switch.
➠ The oper
ation panel turns off, and the power turns OFF.
It may take a few minutes until the power turns OFF.
2
Wait at least 10 seconds after turning OFF the power before pressing the power
switch.
➠ The machine starts up.
Basic Operations
75

Reducing Power Consumption (Sleep Mode)
94RC-024
Sleep mode r
educes power consumption by pausing certain operations inside the machine.
You cannot manually put the machine into sleep mode. If no operations are performed for a certain period of time, the
machine automatically enters sleep mode.
The display turns off in sleep mode.
◼ Exiting Sleep Mode
Press any key on the operation panel to exit sleep mode.
◼ Conguring Auto Sleep Time
Auto Sleep is a function that automatically places the machine into sleep mode if no oper
ations are performed for a
certain period of time. You can specify the timing of Auto Sleep.
This section describes how to congure the settings using Remote UI from a computer.
On the operation panel, select [Menu] in the [Home] screen, and then select [Preferences] to congure the settings.
[Timer/Energy Settings](P. 201)
1
Log in to Remote UI.
Starting Remote UI(P. 179)
2
On the Portal page of Remote UI, click [Settings/Registration]. Portal Page of
Remote UI(P. 181)
3
Click [Timer Settings] [Edit].
➠ The [Edit Timer Settings] scr
een is displayed.
4
Enter the time in [Auto Sleep Time].
* It is recommended to use the default setting to eciently save po
wer.
[Auto Sleep Time](P. 202)
5
Click [OK].
➠ The settings ar
e applied.
6
Log out from Remote UI.
● The machine does not enter sleep mode in the follo
wing cases:
- When the data indicator on the operation panel is lit or blinking
Operation Panel(P. 10)
-
When the [Menu] screen, a paper jam or other error message
*1
, or Direct Connection SSID or network key
display screen is displayed on the operation panel
Basic Operations
76

- When the machine is performing an adjustment, cleaning, or other operation
-
When the machine is communicating with a computer or similar device
*1
The machine may enter sleep mode depending on the message.
● If the machine is not allo
wed to enter sleep mode, it may perform auto calibration to maintain the image
quality. Performing calibration uses the toner cartridge, which may affect its lifetime.
Basic Operations
77

Using the Operation Panel
94RC-025
Use the oper
ation panel to change the machine’s settings and to connect to a mobile device.
Main Instructions
Check how to use the buttons and items displayed on the operation panel, how to enter text, and how to
display the various screens.
Screens Displayed on the Operation Panel(P. 79)
How to Operate the Operation Panel(P. 84)
Entering Characters(P. 85)
Basic Operations
78
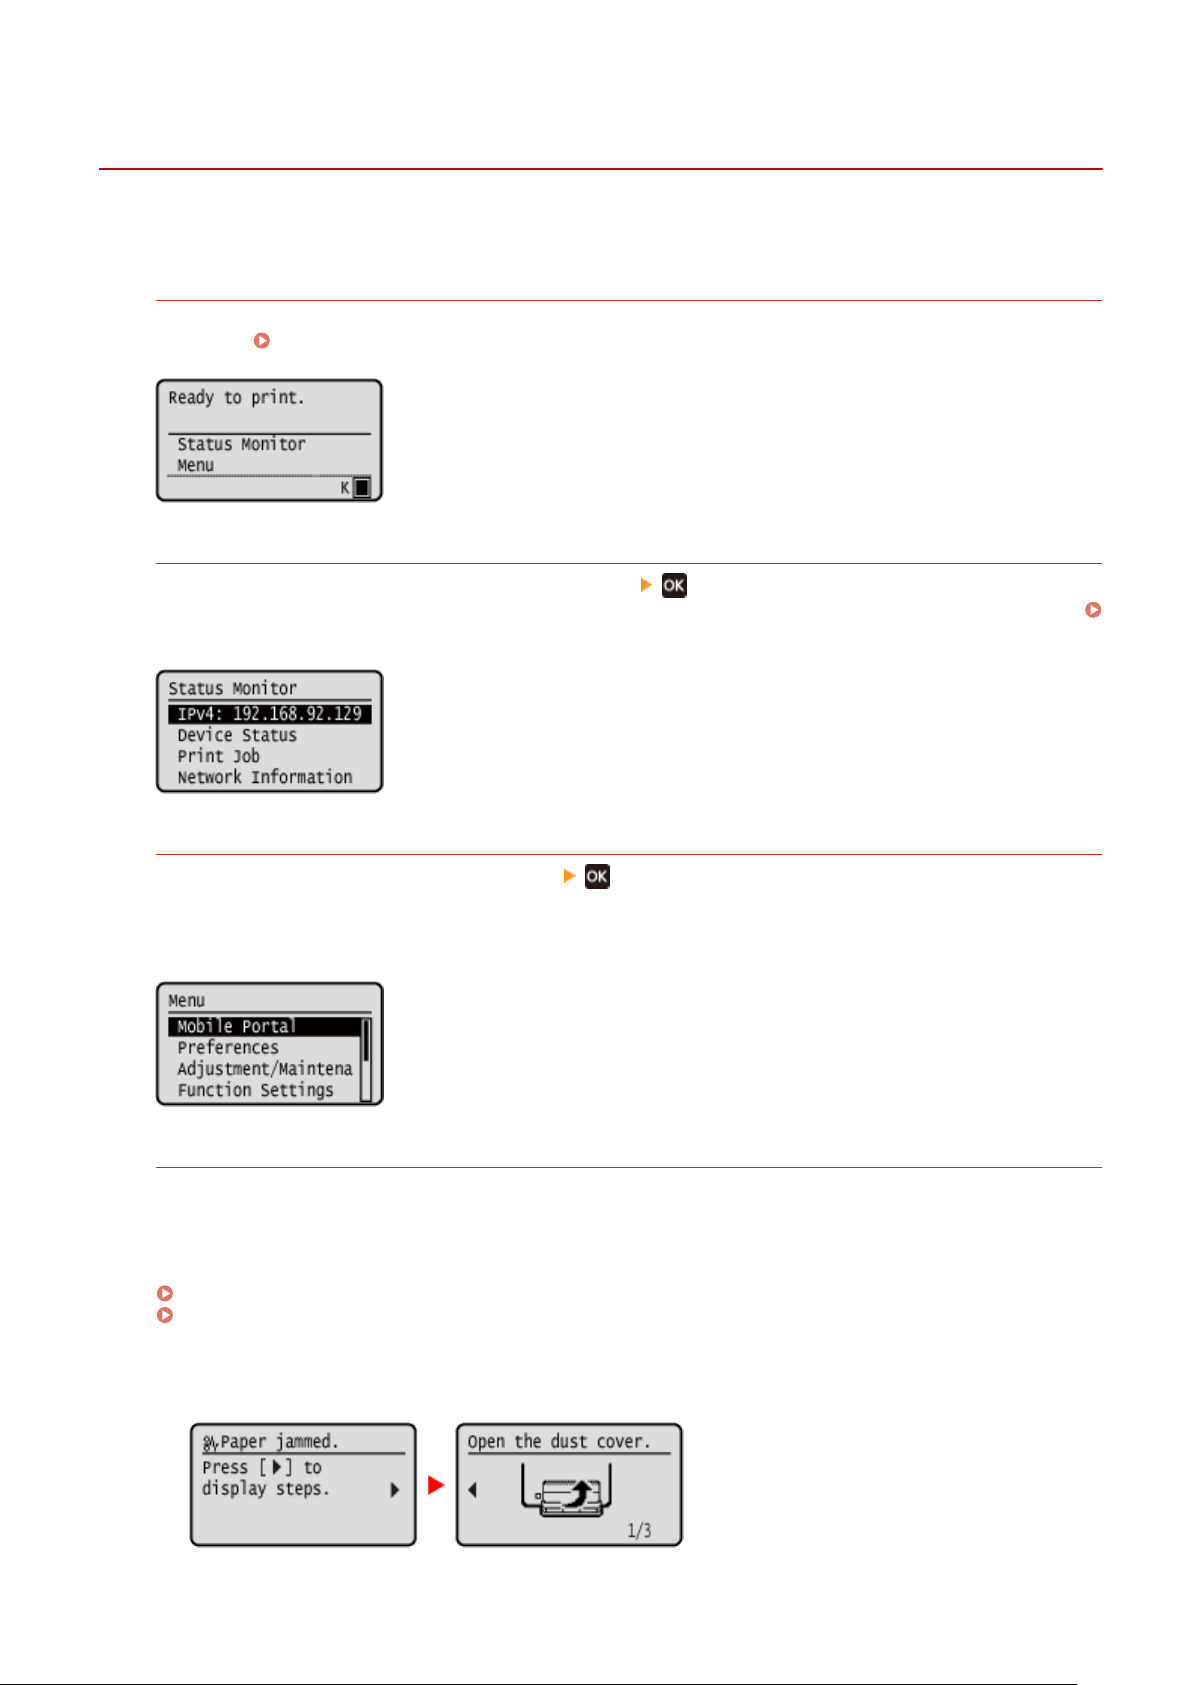
Screens Displayed on the Operation Panel
94RC-026
The follo
wing are the main screens of the operation panel.
[Home] Screen
This screen appears immediately after the power is turned ON and the startup screen closes, and immediately
after login. [Home] Screen(P. 81)
[Status Monitor] Screen
This screen is displayed when you press [Status Monitor] on the [Home] screen and other locations. Use
this screen to check the information of the machine, usage and logs, network settings, and error information.
[Status Monitor] Screen(P. 82)
[Menu] Screen
This screen is displayed when you press [Menu] on the [Home] screen. Use this screen to congur
e the
various settings of the machine.
When the System Manager ID is set, the login screen may be displayed when certain items are selected. Only
users who know the System Manager ID and PIN can log in and change the settings.
Message Display
Messages are displayed on the screen when errors occur and the machine is out of paper or toner in the toner
cartridge.
If a tr
oubleshooting solution is displayed, follow the on-screen instructions to solve the problem.
If a troubleshooting solution is not displayed, check the cause and solution by referring to the message or error
code.
A Message Appears(P. 325)
An Error Code Is Displayed(P. 336)
Display example:
● When an Err
or Occurs
Basic Operations
79
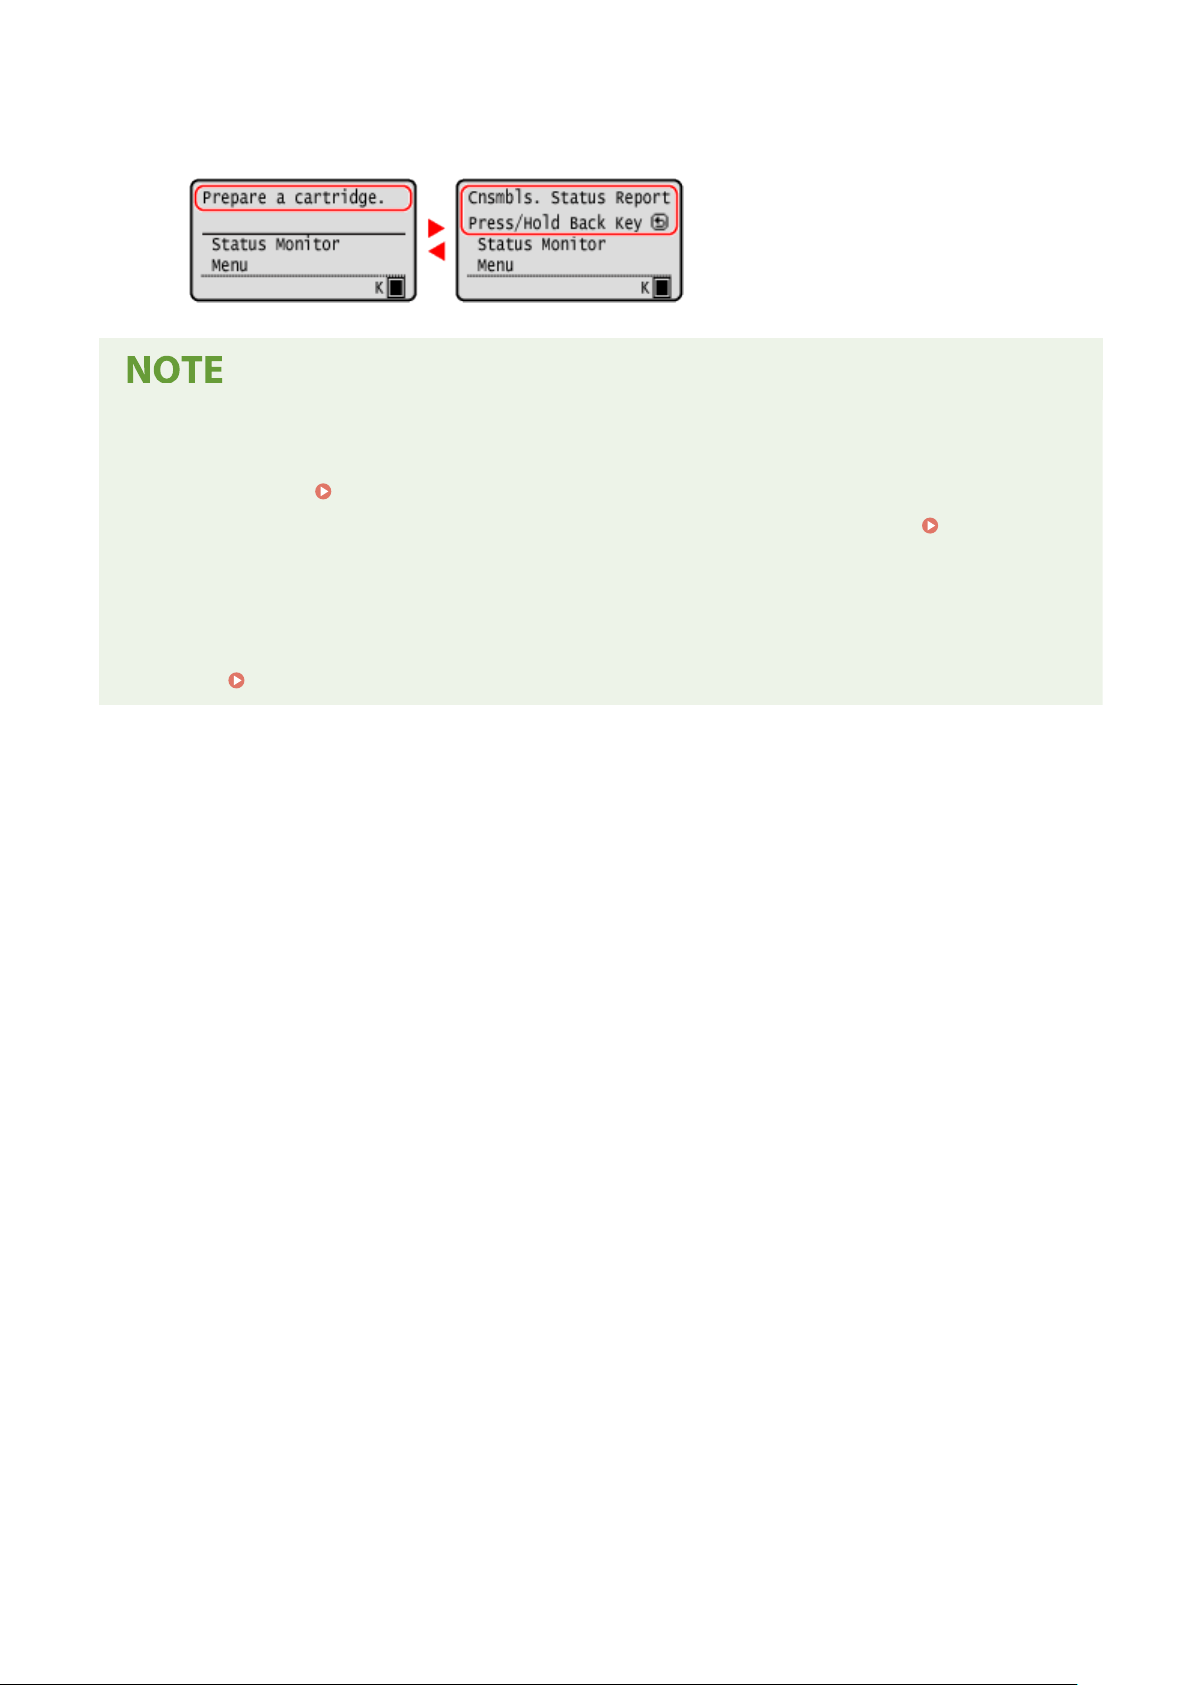
● When a Message Appears on the Scr
een
If the message is too long to display at once, it may be separated into smaller segments and displayed
alternately.
Changing the Screen Display
● Y
ou can change the operation panel display such as by changing the display language and units, and show
or hide messages.
[Display Settings](P. 198)
● Y
ou can invert the screen colors and adjust the contrast to make the screen easier to view.
[Accessibility]
(P
. 217)
Clearing the Settings Automatically
● By default, if no operations are performed after a certain period of time, the settings being congured on
the screen are cleared, and the [Home] screen is displayed. You can change the time until the settings are
cleared.
[Auto Reset Time](P. 202)
Basic Operations
80
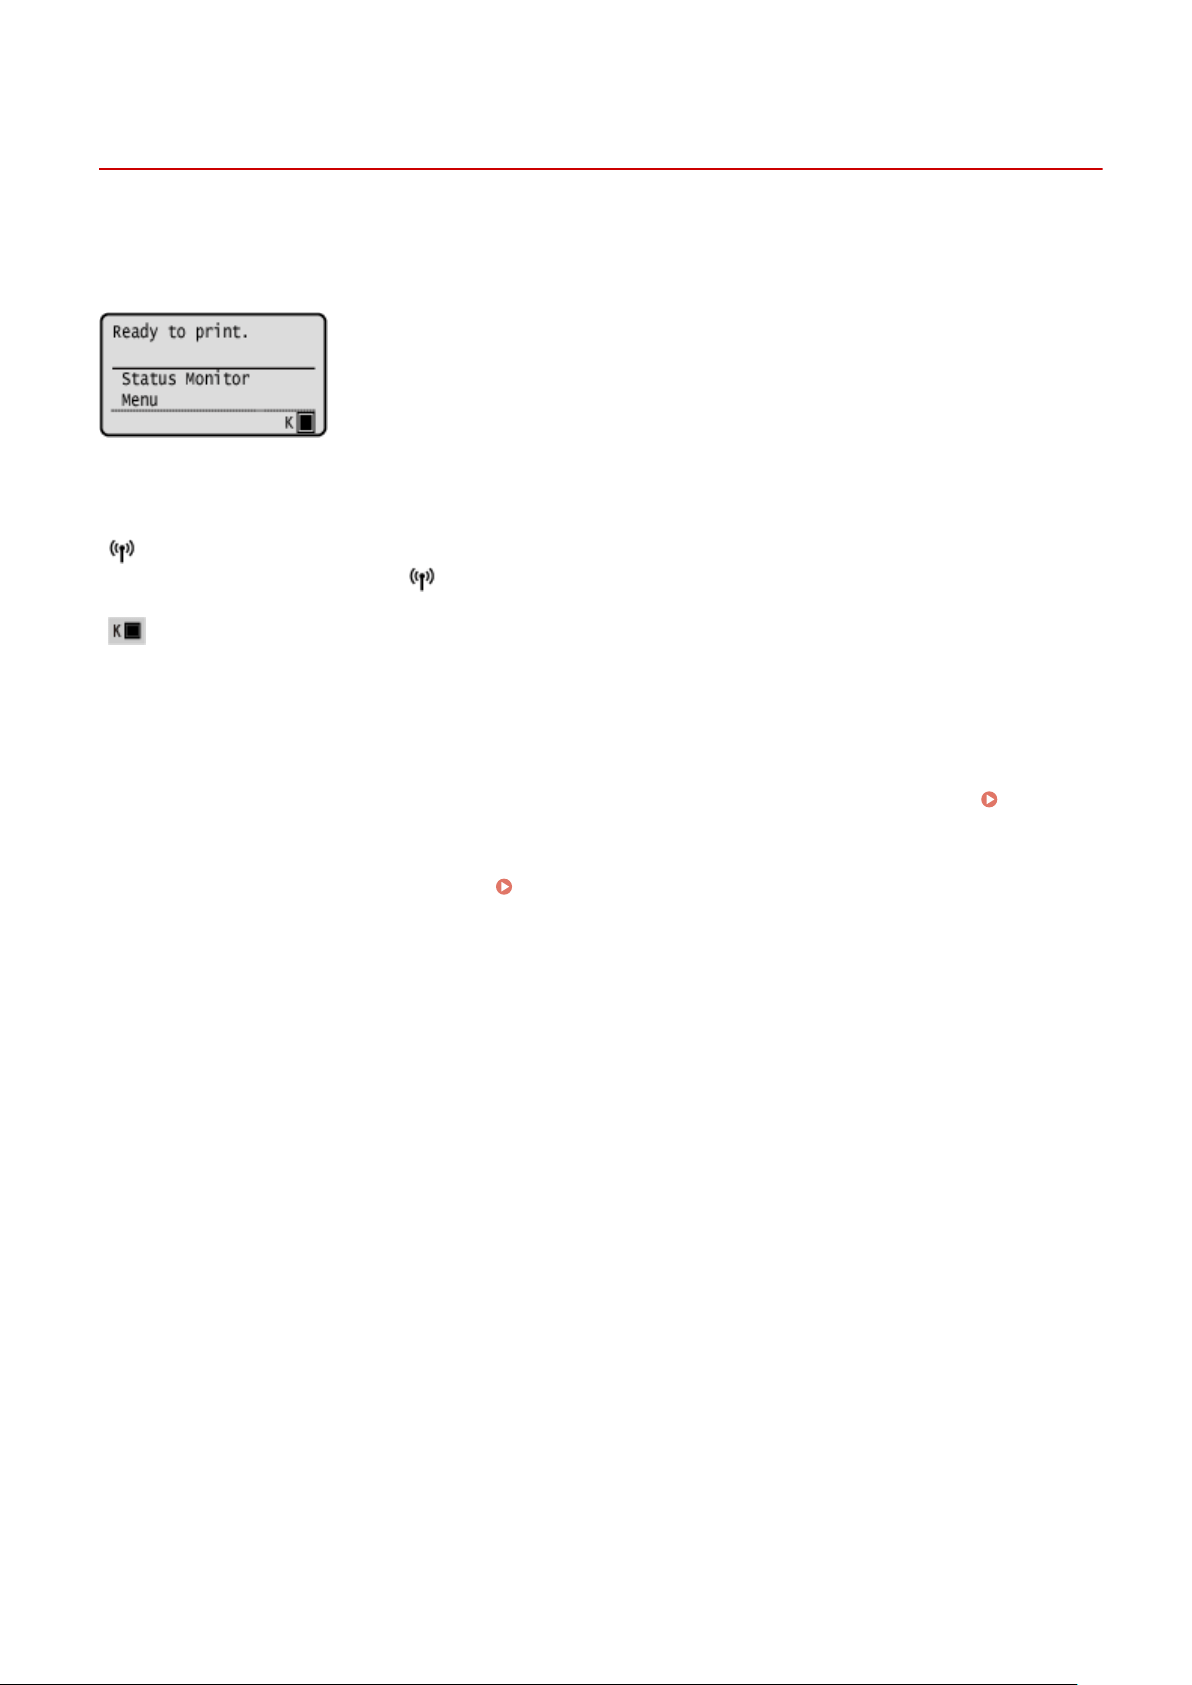
[Home] Screen
94RC-0C1
This scr
een appears immediately after the power is turned ON and the startup screen closes.
The status of the machine is displayed at the top and bottom of the screen for quick viewing and operations, as
needed.
◼ Status of the Machine
[
]
When connected to a wir
eless LAN, [
] is displayed.
[ ]
Displays the r
emaining amount of toner in the toner cartridge.
◼ Function and Setting Buttons
[Status Monitor]
You can check the information of the machine, usage and logs, network settings, and error information.
[Status
Monitor] Scr
een(P. 82)
[Menu]
Congure the various settings of the machine.
Settings Menu Items(P. 196)
Basic Operations
81
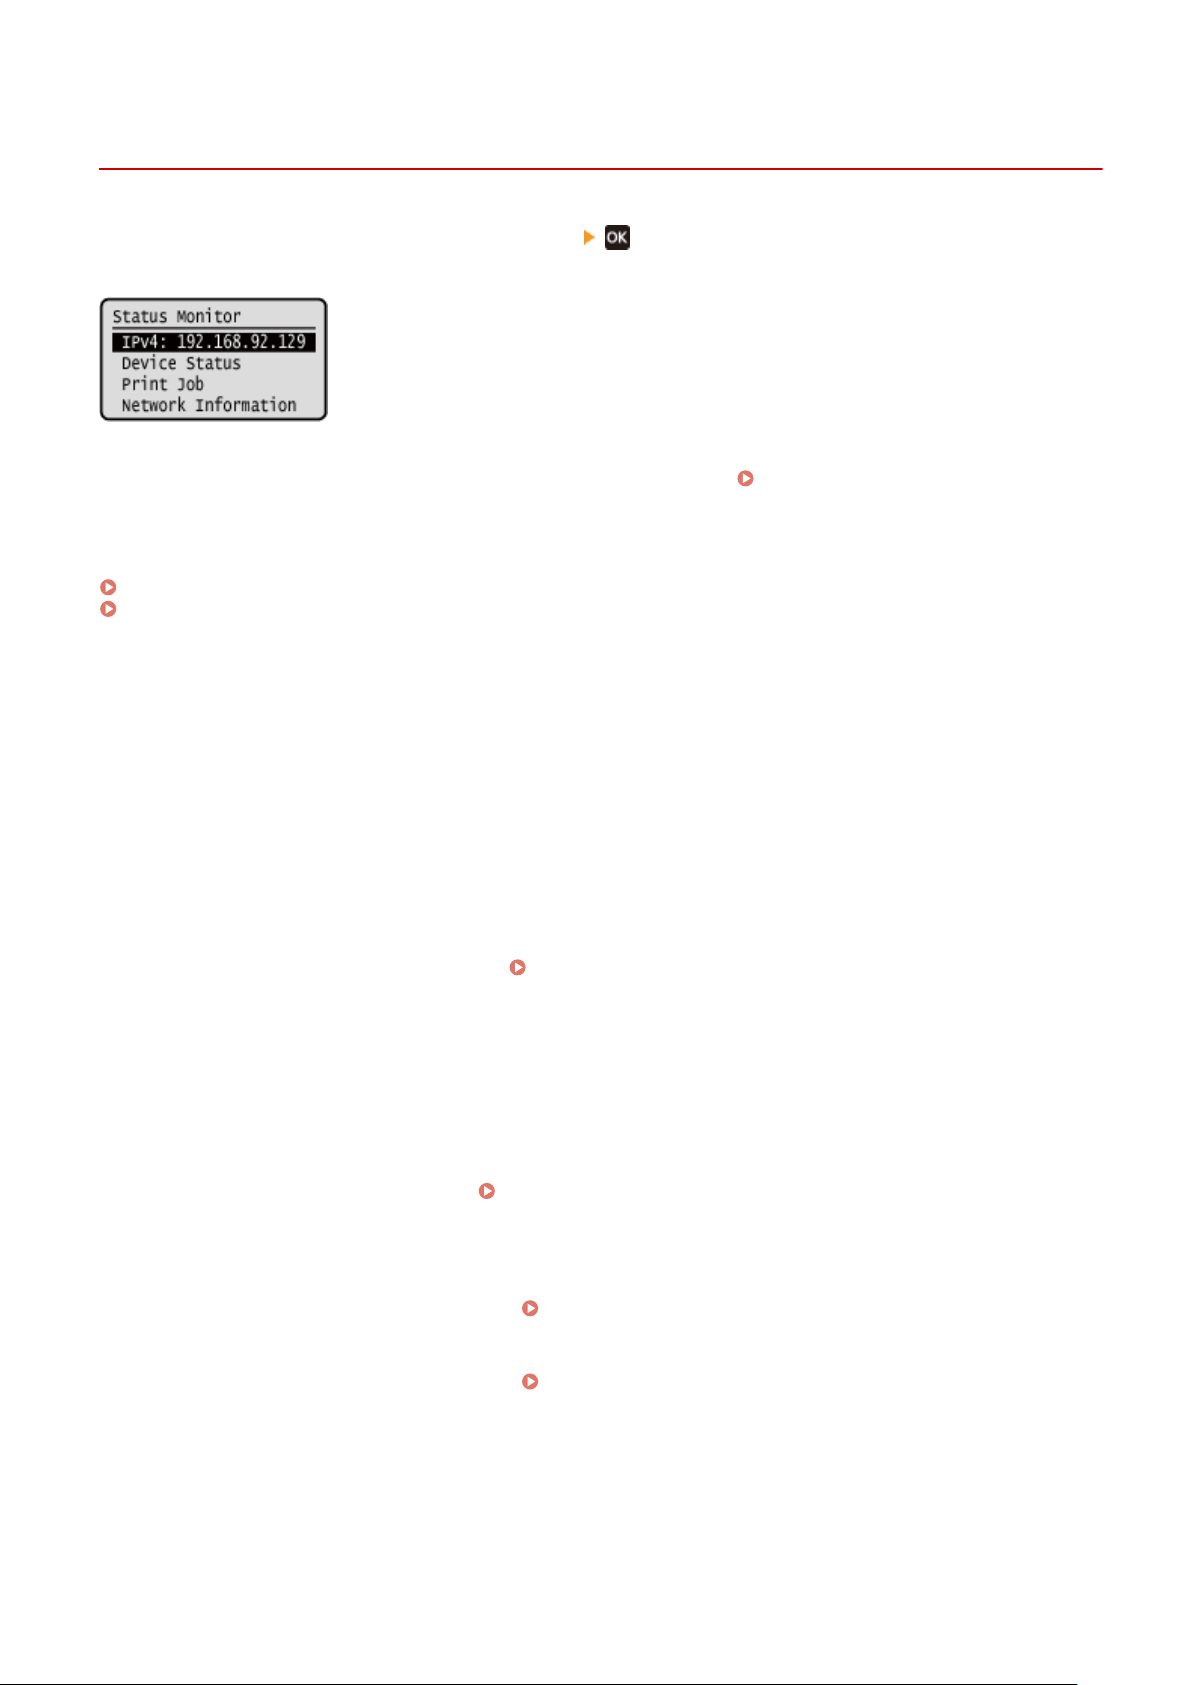
[Status Monitor] Screen
94RC-0C2
This scr
een is displayed when you press [Status Monitor]
in the [Home] screen and other locations.
Use this scr
een to check the information of the machine, usage and logs, network settings, and error information.
[IPv4]
Displays the IPv4 addr
ess of the machine by default. You can also hide this.
[Display IP Address](P. 200)
[Err
or Information/Notication]
You can check the information of errors that occur on the machine. Take troubleshooting measures according to the
error details.
A Message Appears(P. 325)
An Error Code Is Displayed(P. 336)
[De
vice Status]
[Paper Information]
Check the remaining amount of paper for the paper source.
[Cartridge Level]
Check the remaining amount of toner in the toner cartridge.
Other internal parts may reach the end of their lifetime before the toner runs out.
[Check Toner Cartridge Name]
Check the toner cartridge name.
[Check Counter]
Check the total number of pages printed.
Checking the Number of Printed Pages (Check Counter)(P. 194)
[V
ersion Information]
Displays the rmware version information of the machine.
[Serial Number]
Displays the serial number of the machine.
[Print Job]
Displays the print processing status and log.
Viewing the Print Job Status and Log(P. 123)
[Network Information]
[IPv4]
Check the IPv4 addr
ess and other settings.
Setting IPv4 Addresses(P. 50)
[IPv6]
Check the IPv6 addr
ess and other settings.
Setting IPv6 Addresses(P. 52)
[Network Connection Method]
Check whether the machine has a wir
ed or wireless connection.
Displays the connection status and error information when connected by wireless LAN.
[Direct Connection Information]
Displays the connection status when directly connected to a device.
Basic Operations
82

[IEEE 802.1X Error Information]
Displays the details of err
ors that occur with IEEE 802.1X authentication.
Basic Operations
83
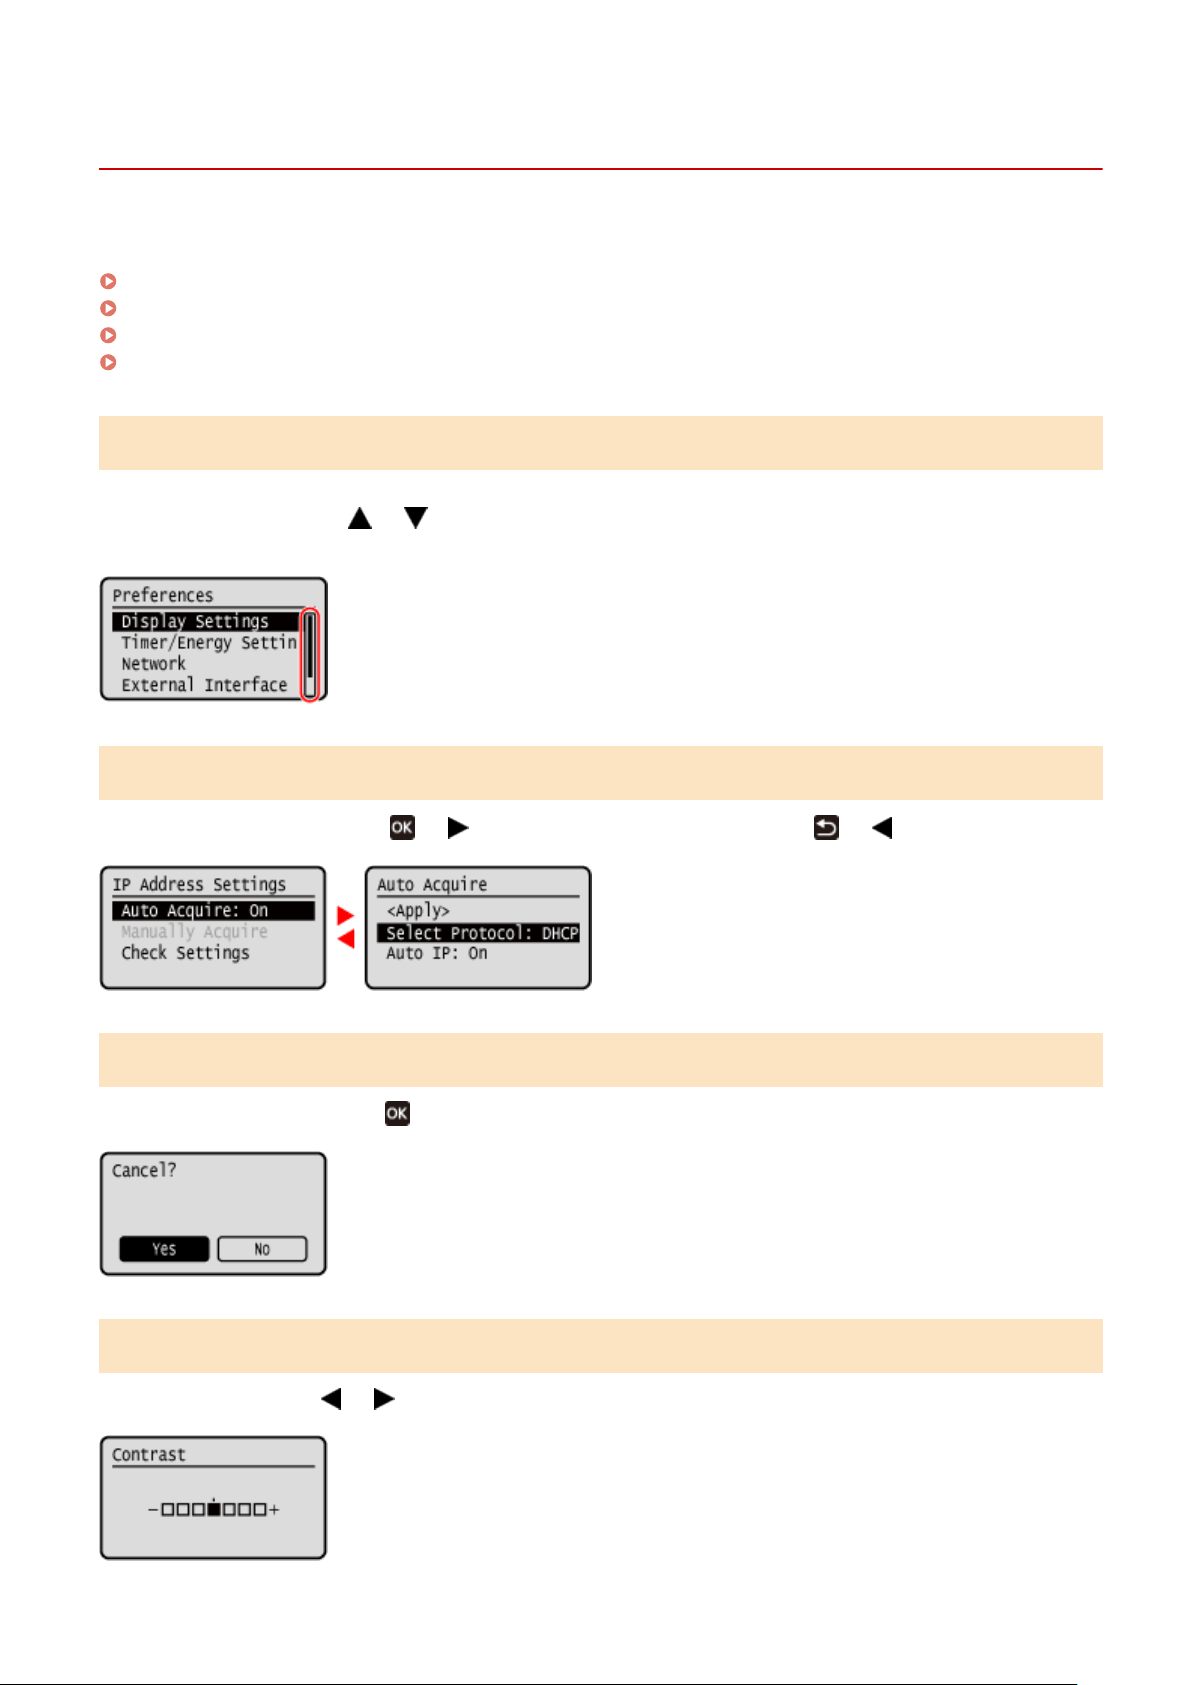
How to Operate the Operation Panel
94RC-0C3
Use the k
eys on the operation panel to set the various functions and check the settings.
Scrolling the Screen(P. 84)
Moving to the Next or Previous Screen(P. 84)
Conrming a Selected Item
(P. 84)
Using the Slider to Set Values(P. 84)
Scrolling the Screen
When the scroll bar appears on the screen, it indicates that there are items or information that cannot be completely
displayed on the screen. Use or to scroll the screen in the direction pressed. The currently selected item is
inverted.
Moving to the Next or Previous Screen
T
o move to the next screen, press
or . To return to the previous screen, press or .
Conrming a Selected Item
T
o conrm a selected item, press
.
Using the Slider to Set Values
T
o adjust the value, press
or .
Basic Operations
84

Entering Characters
94RC-0C4
Use the on-scr
een keys to select the letters and numbers you want to enter and then press
to enter the characters.
Y
ou can enter letters, numbers, and symbols.
Changing the Character Type
Press [Switch Entry Mode]
, select the character type and then press .
Moving the Cursor
Select [ ] or [ ] on the screen and then press .
Deleting Char
acters
Press [
] on the screen to delete one character.
If [ ] or [ ] is not displayed, pressing [ ] deletes all the characters.
Entering Spaces
Pr
ess [Space]
.
Y
ou can also enter a space by moving the cursor to the end of the characters and pressing [
] .
Basic Operations
85
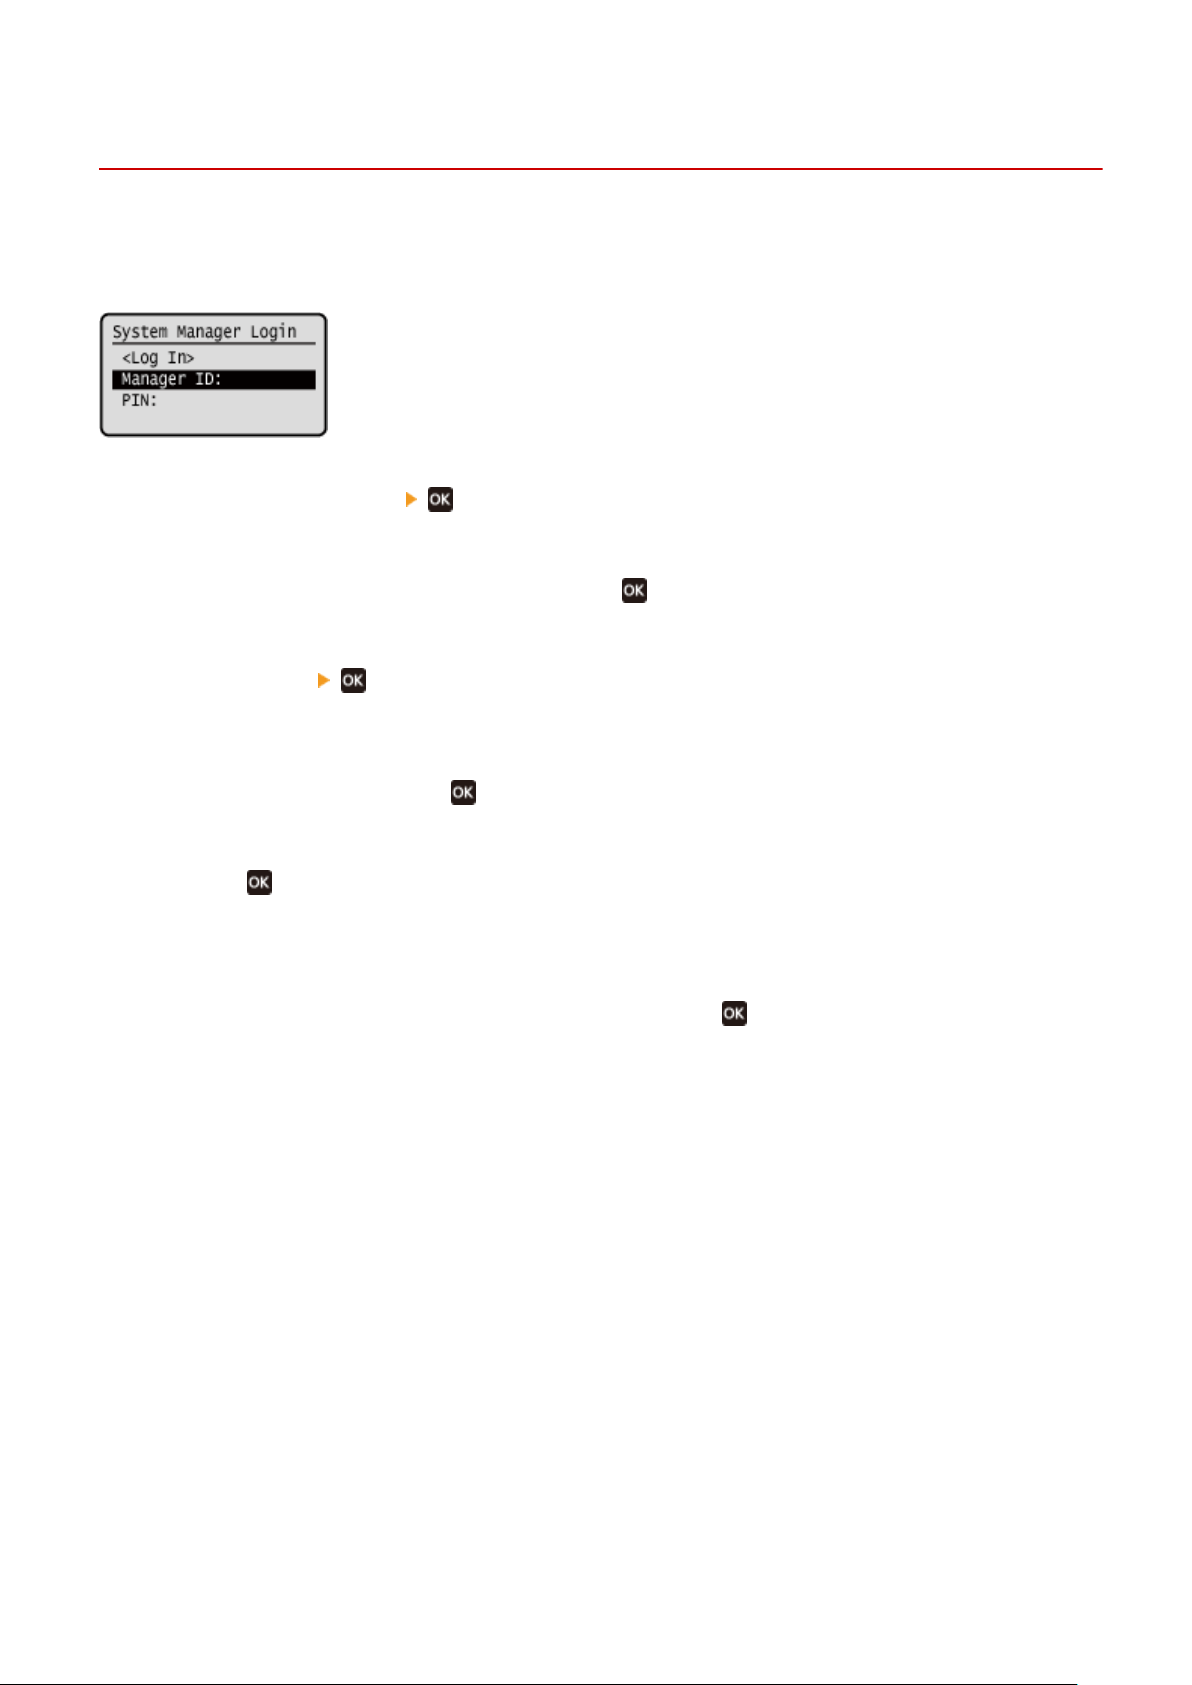
Logging In to the Machine
94RC-02F
When the System Manager ID is set, the login scr
een is displayed for operations that require administrator privileges.
When the login screen is displayed on the operation panel, enter the the System Manager ID and PIN to perform
authentication. When authentication is successful, the screen changes, and you can continue operations.
1
Press [Manager ID: ]
.
2
Enter the System Manager ID, and press .
3
Press [PIN: ] .
If a PIN is not set, you can skip this step. Proceed to Step 5.
4
Enter the PIN, and press
.
5
Press .
➠ When authentication is successful, the [Home] scr
een or other screen is displayed.
6
When you have completed your operations, press
.
Basic Operations
86

Loading Paper
94RC-02H
T
o ensure print quality, conrm the usable paper and how to handle and store paper, and prepare the appropriate
paper for use with the machine.
Usable Paper(P. 13) / Precautions When Handling Paper(P. 16)
Load the pr
epared paper in the machine, and then congure the paper size and type settings.
Loading Paper in the Machine
Load the paper in the paper drawer. When using envelopes or paper with logos, be careful of the orientation
of the loaded paper and which side is face up.
Loading Paper in the Paper Drawer(P. 88)
Preparations and Orientation for Loading Envelopes(P. 90)
Orientation for Loading Paper with a Logo(P. 92)
Paper Settings
T
o ensure quality printing and prevent paper jams, the paper size and type must be set correctly according to
the loaded paper.
Specifying the Paper Size and Type(P. 94)
Basic Operations
87
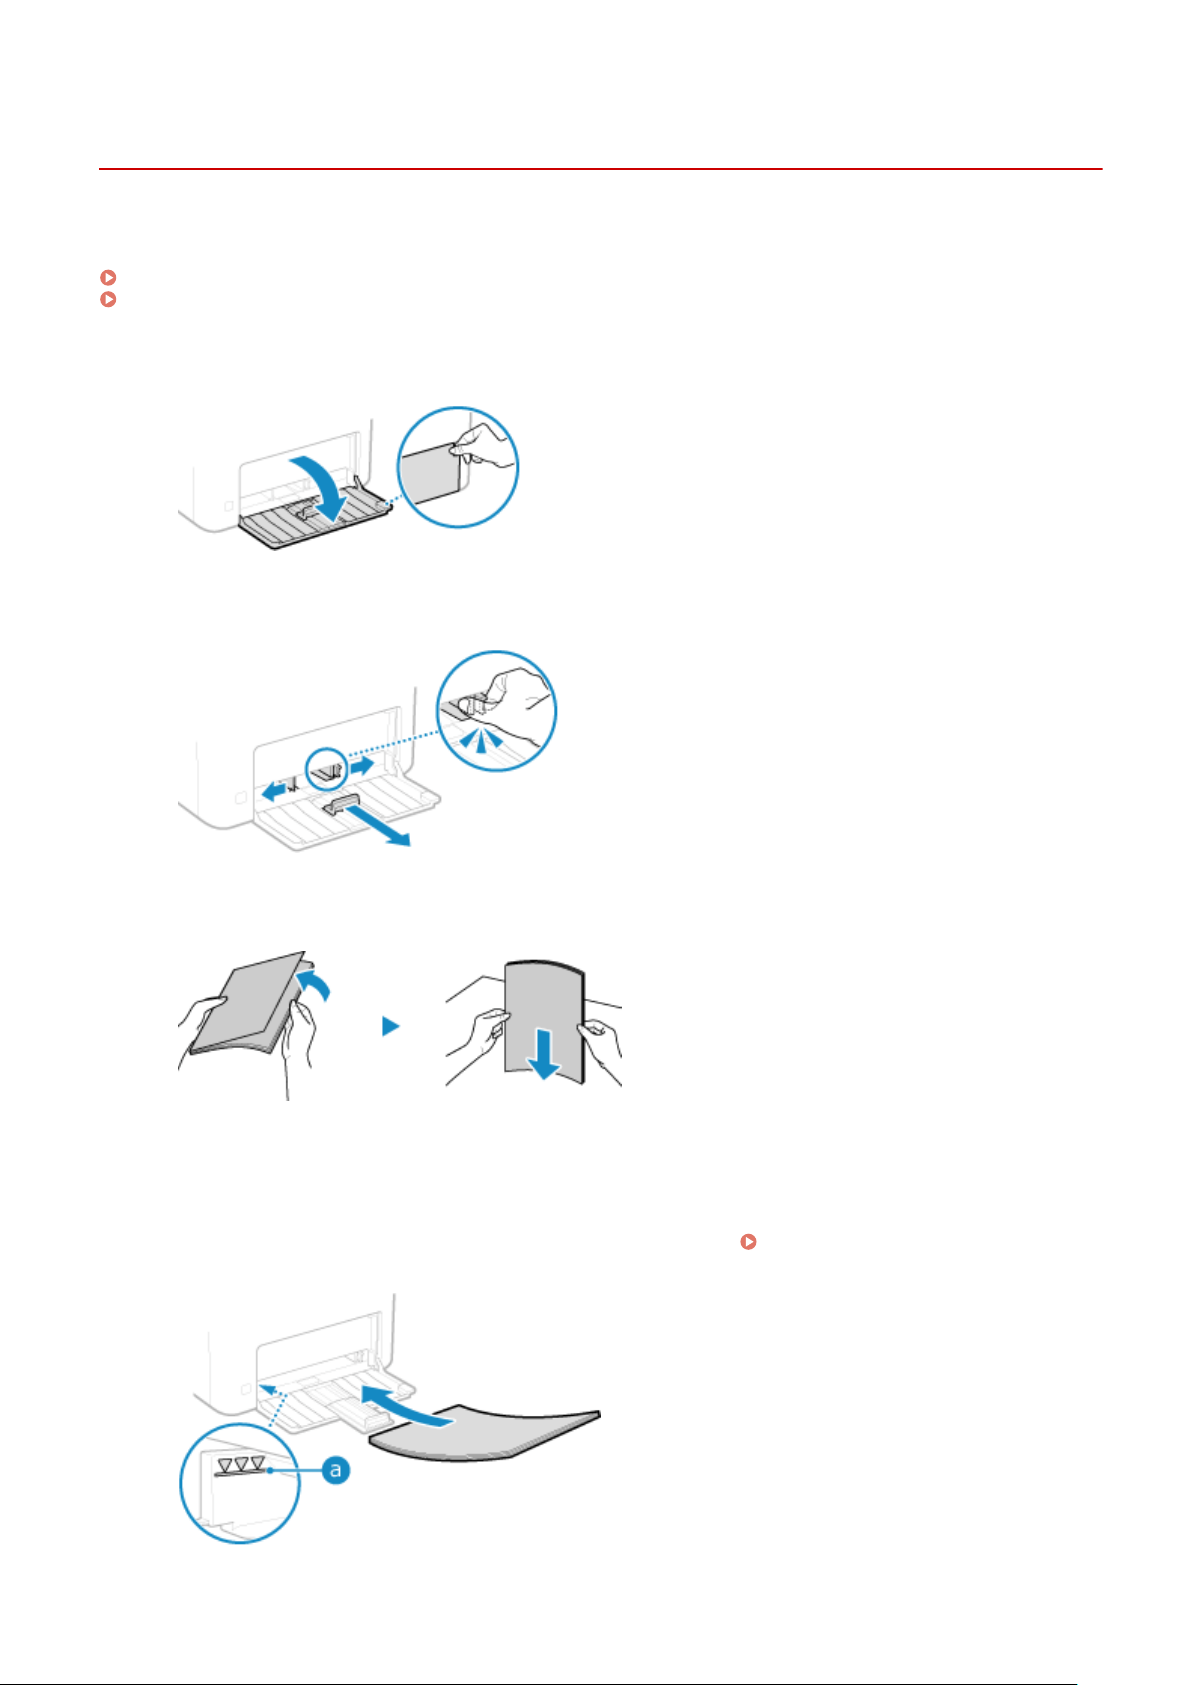
Loading Paper in the Paper Drawer
94RC-02J
Y
ou can load paper correctly by aligning the paper guides on the paper drawer with the paper.
When using envelopes or paper with logos, be careful of the orientation of the loaded paper and which side is face up.
Preparations and Orientation for Loading Envelopes(P. 90)
Orientation for Loading Paper with a Logo(P. 92)
1
Open the front cover.
2
Slide the paper guides to the outside.
3
Fan the paper and align the edges.
Fan the paper in small batches, and align the edges by tapping the paper on a at surface a few times.
4
Load the paper with the print side face up.
➠ By default, the Paper Settings conrmation scr
een is displayed.
[Notify to Check Paper Settings]
(P
. 242)
● Load the paper against the r
ear edge of the paper drawer.
Basic Operations
88
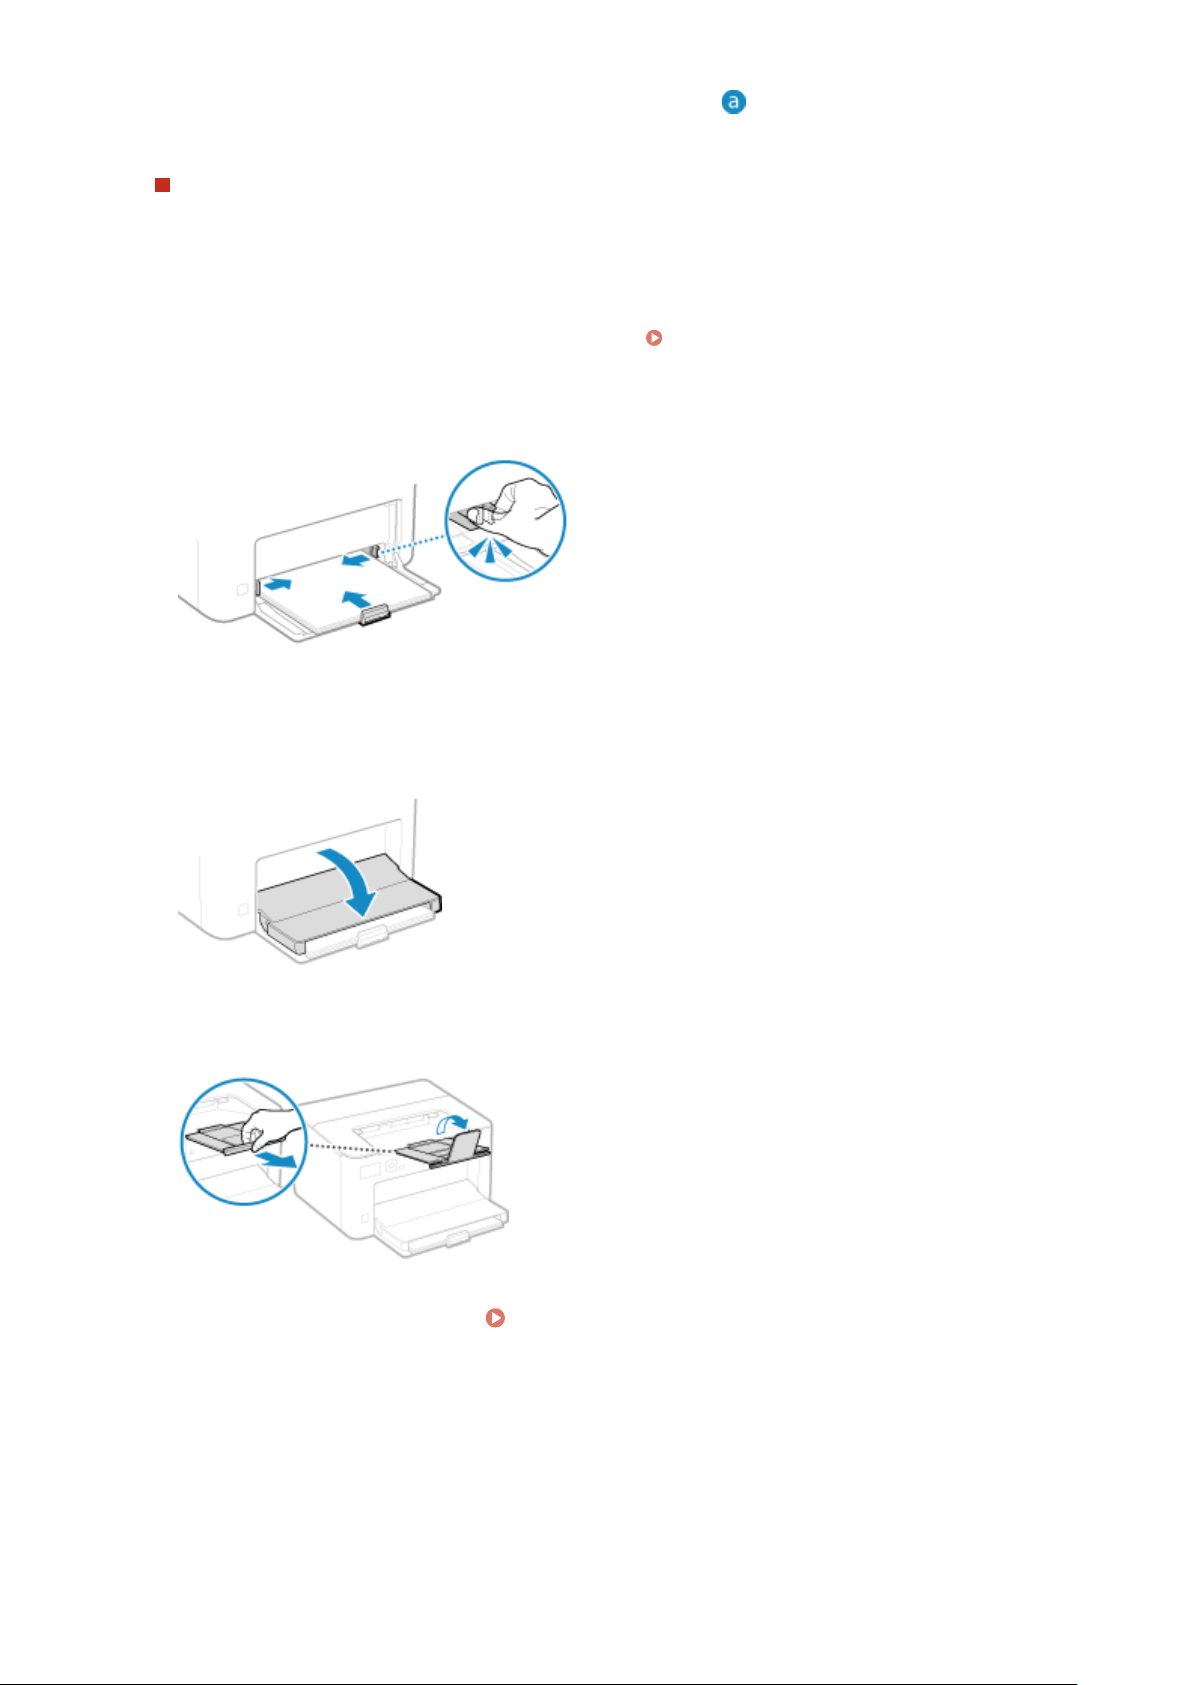
● Mak
e sure the loaded paper does not exceed the load limit line (
). If it exceeds the load limit line, there
may be misfeeds or a paper jam.
When Printing on the Back Side of Printed Paper (Manual 2-sided Printing)
Flatten the edge of the paper to remove any curls, and load the paper with the back (unprinted) side face up.
● You can use only paper printed with this machine.
● You cannot print on a side that has been previously printed on.
● If the printouts look faded, adjust the image quality. [Manual Back Side Print (2-Sided Only)](P. 221)
5
Align the paper guides with the width and length of the paper.
Paper guides that are aligned but too loose or too tight can cause misfeeds or a paper jam.
6
Close the paper cover.
7
Raise the paper stopper.
8
Set the paper size and type.
Setting the Paper Size and Type for the Paper
Dr
awer(P. 95)
By default, the paper size and type of the paper drawer are set to LTR and Plain 2. When paper of a different
size or type is loaded, change the paper settings.
Basic Operations
89
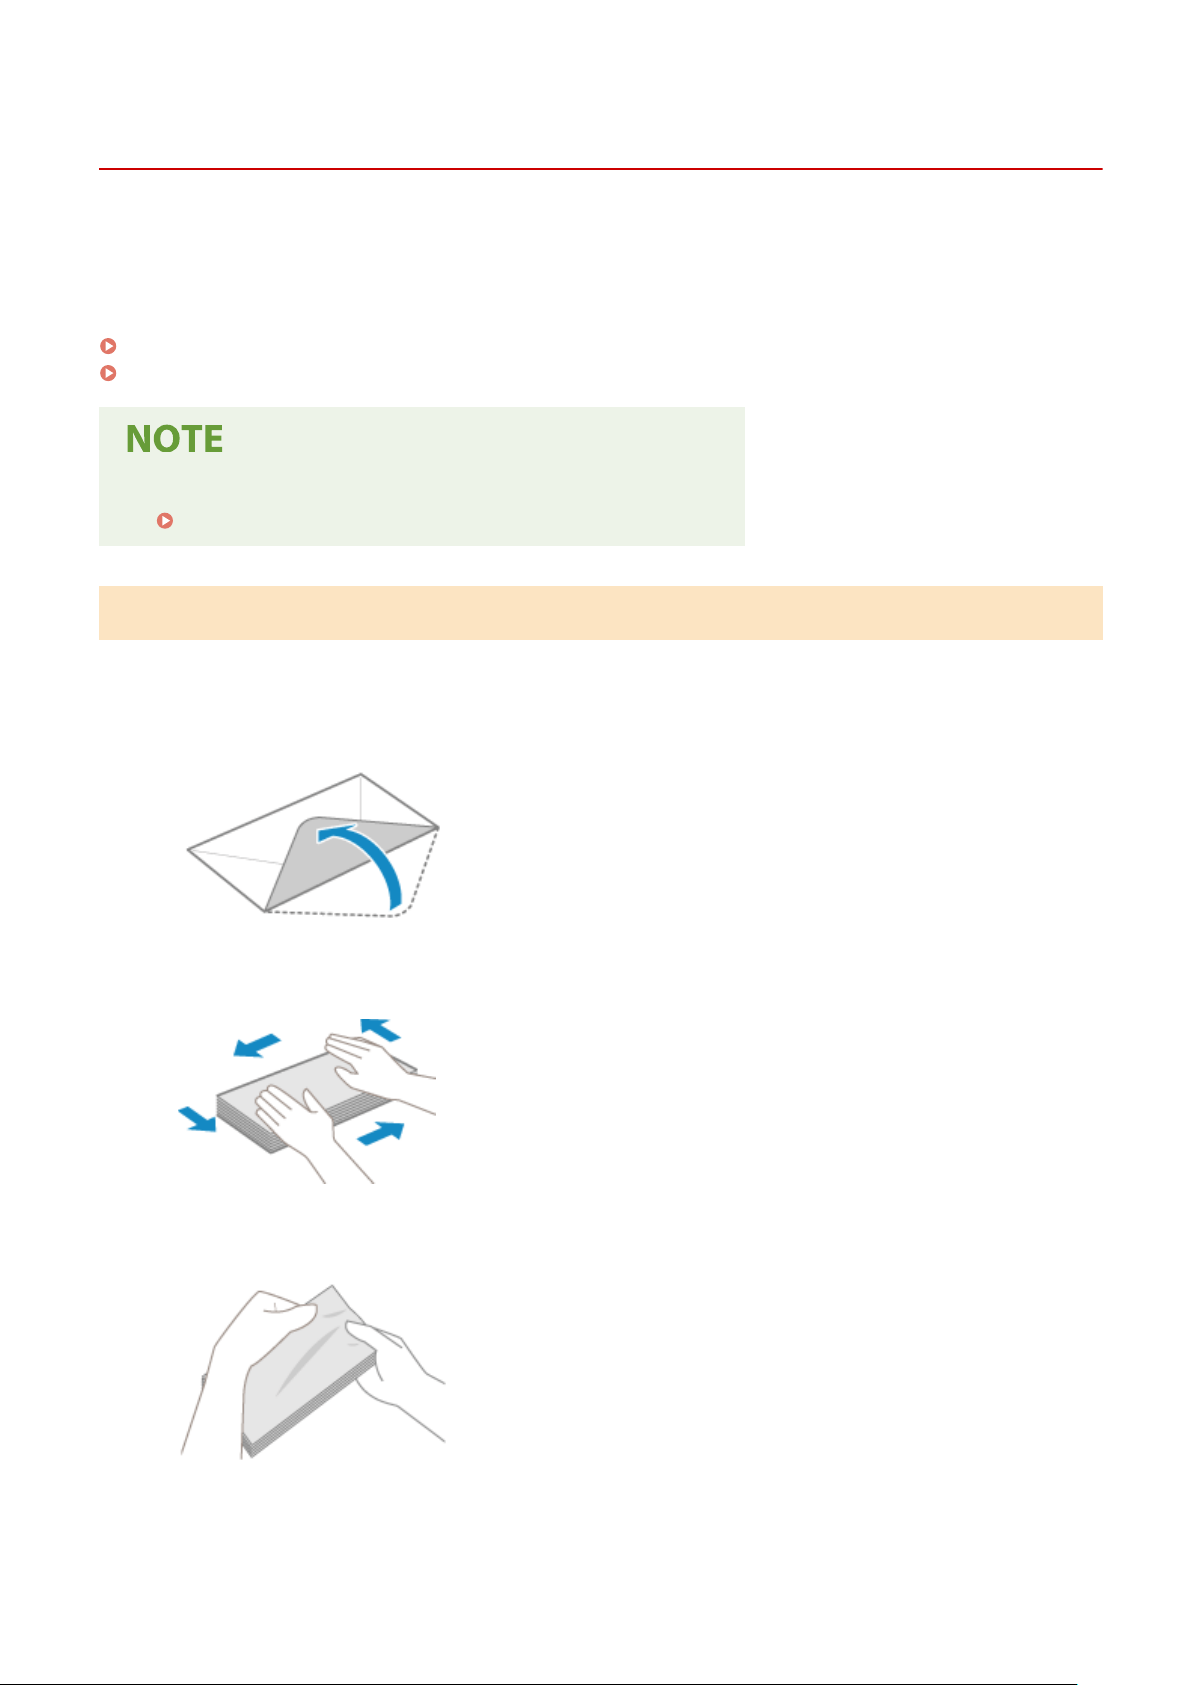
Preparations and Orientation for Loading Envelopes
94RC-02L
As envelopes have a differ
ent shape and thickness from regular paper, preparations must be made before loading
envelopes.
Envelopes can be printed only on the front side (non-glued side). When loading envelopes, pay attention to the
orientation and which side is face up.
Preparations before Loading Envelopes(P. 90)
Orientation of Envelopes(P. 91)
● For the gener
al procedure of loading envelopes, see the following:
Loading Paper in the Paper Drawer(P. 88)
Preparations before Loading Envelopes
Align the envelopes r
egardless of the number of envelopes to be loaded.
1
Close the ap of each envelope.
2
Flatten them to remove any air, and make sure the edges are pressed tightly.
3
Loosen any stiff corners of the envelopes, and atten any curls.
4
Align the edges of the envelopes on a at surface.
Basic Operations
90
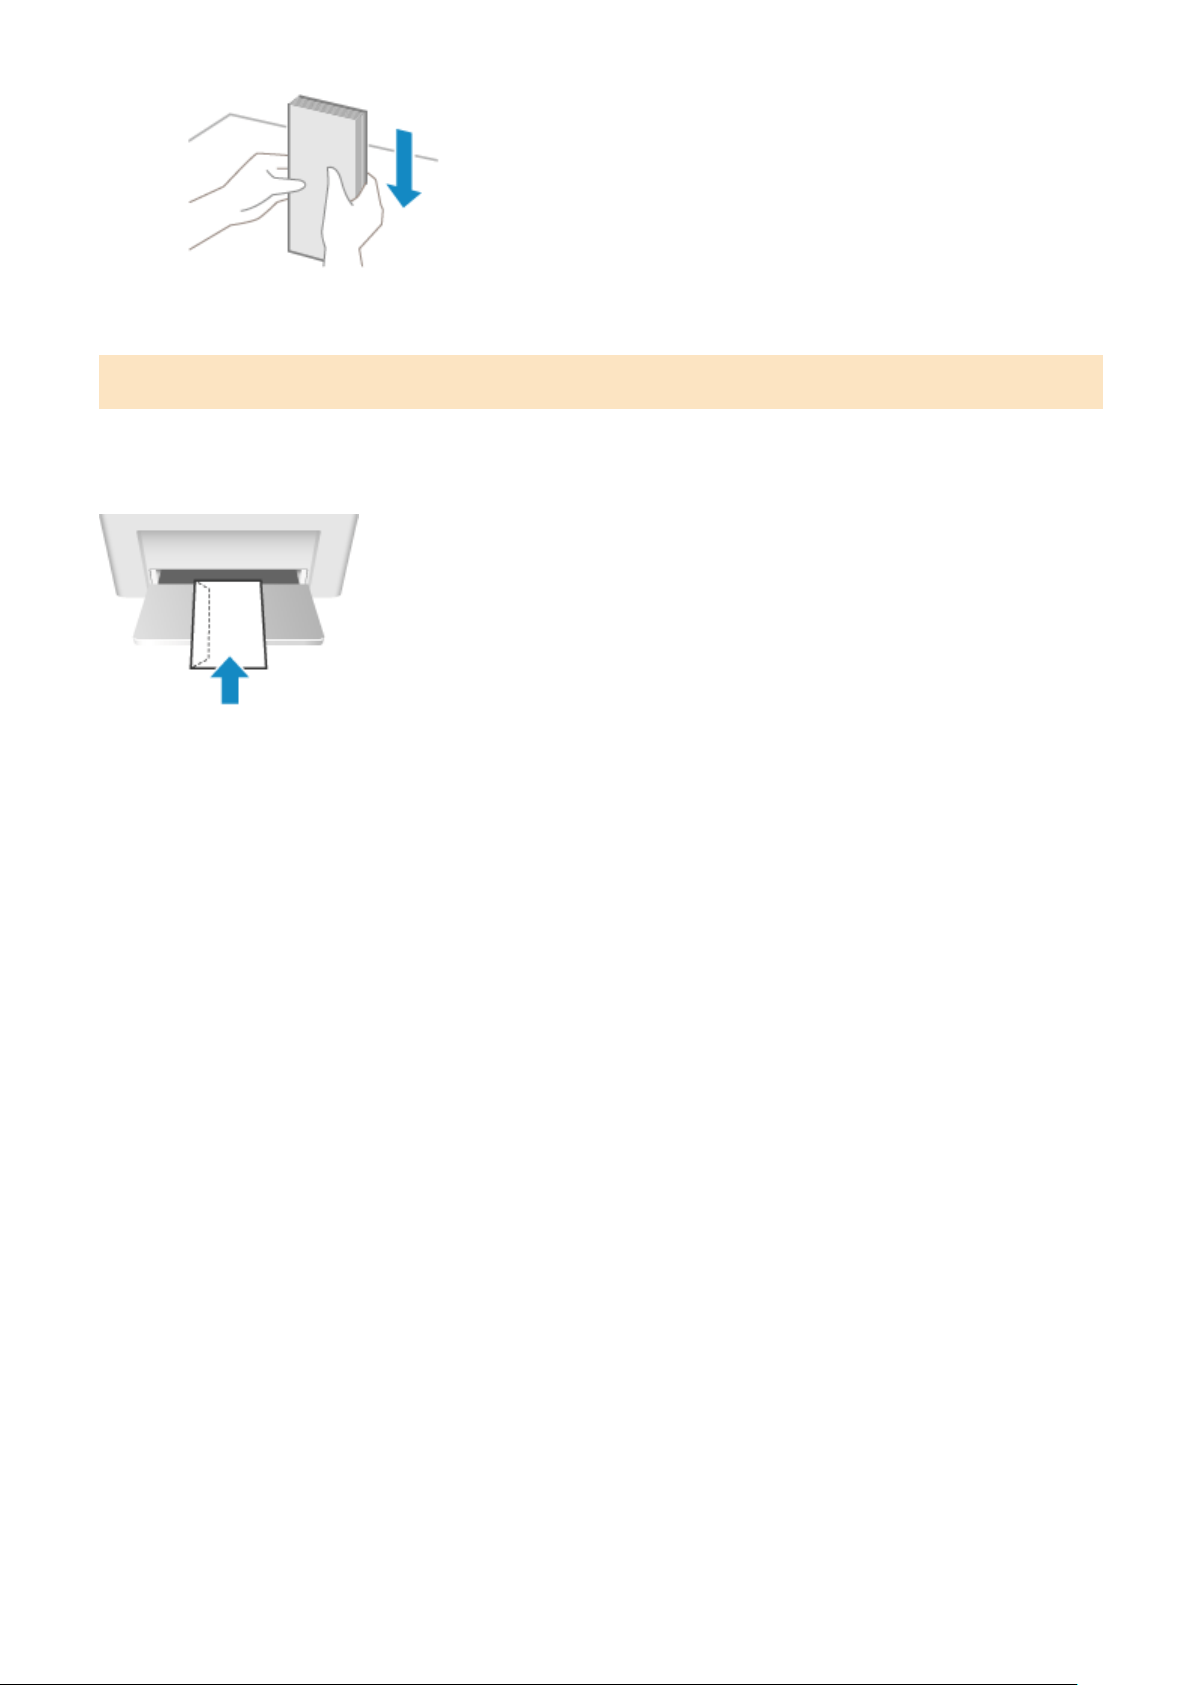
➠ The envelopes ar
e ready to be loaded.
Orientation of Envelopes
Load the envelopes No. 10 (COM10), Monarch, ISO-C5, or DL in portrait orientation with the front side (non-glued side)
face up and the long side of the envelope parallel with the long side of the paper drawer. Load the envelope with the
ap closed and on the left side.
Basic Operations
91
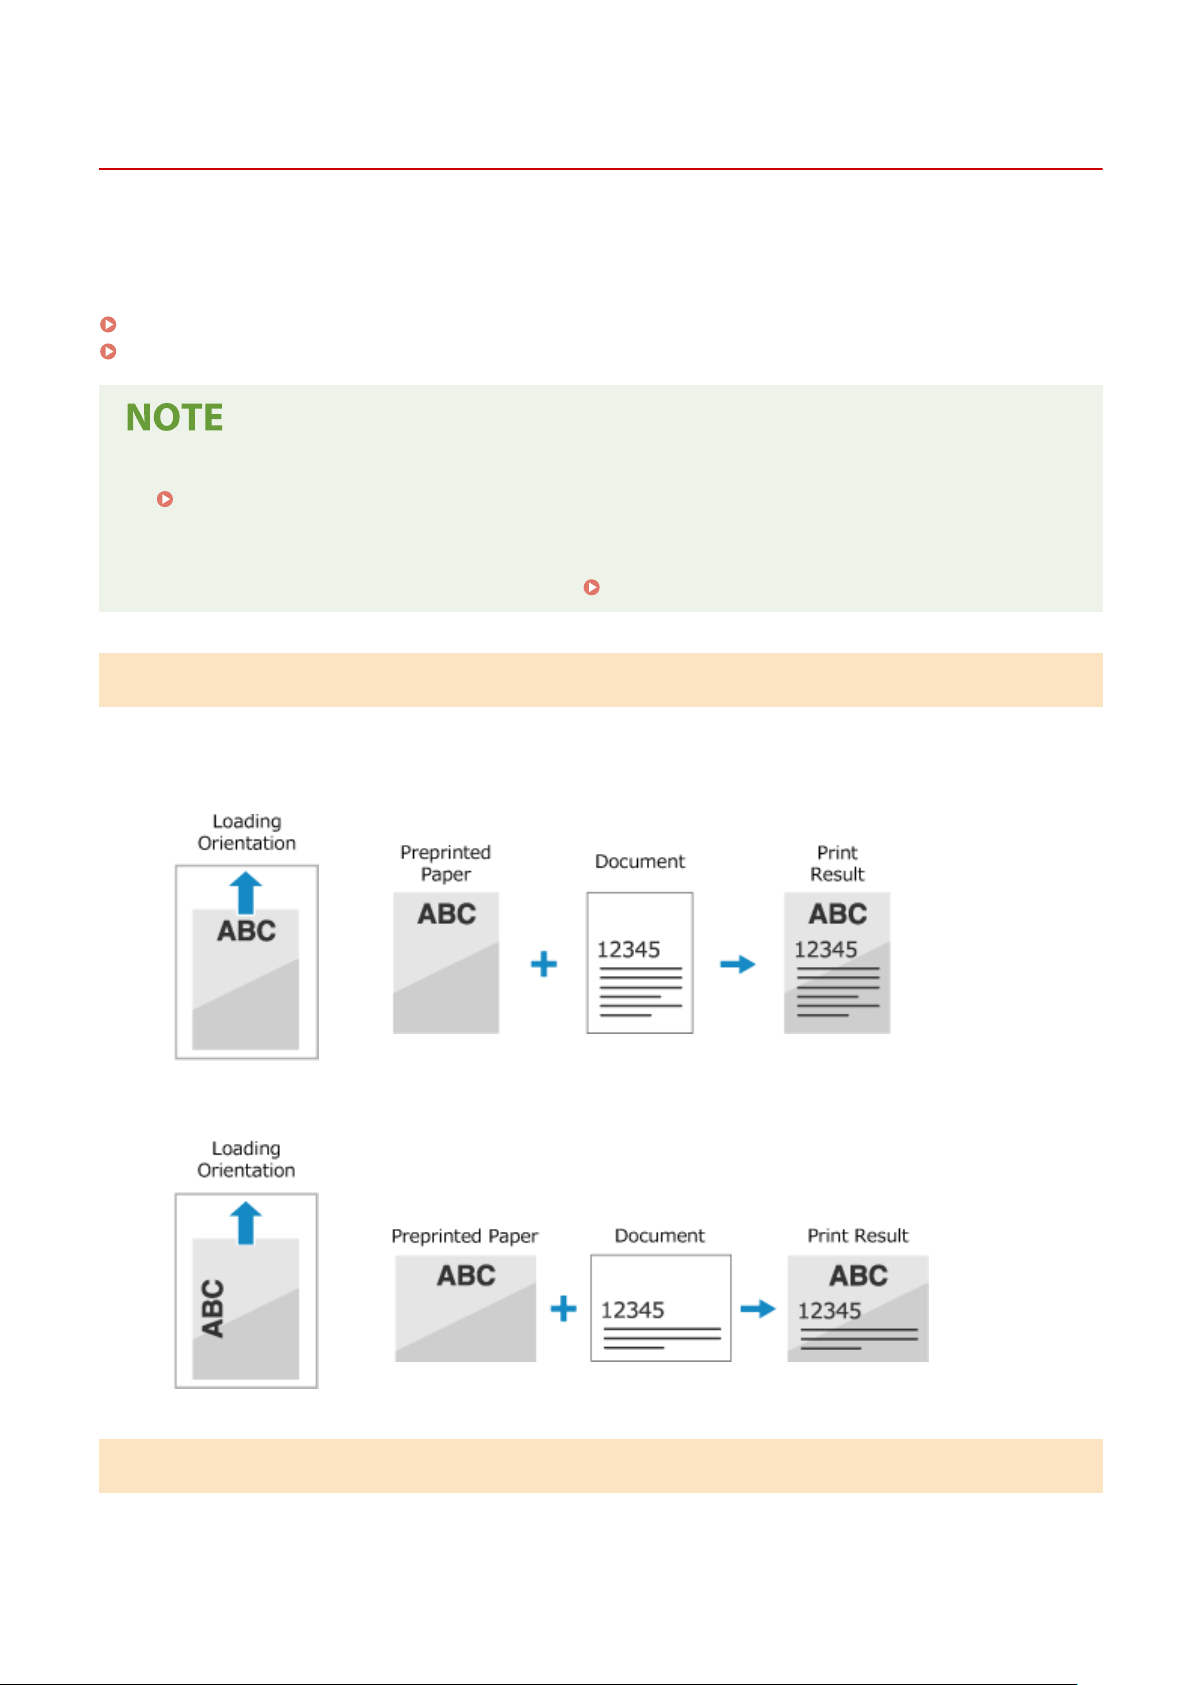
Orientation for Loading Paper with a Logo
94RC-02R
When loading paper with a logo, pay attention to the orientation and which side is face up.
By default, the orientation the paper is to be loaded and the side to print on vary depending on whether you want to
print on one or both sides.
Printing on One Side of Paper with a Logo(P. 92)
Printing on Both Sides of Paper with a Logo(P. 92)
● For the gener
al procedure of loading paper, see the following:
Loading Paper in the Paper Drawer(P. 88)
● Y
ou can congure the settings so that the orientation the paper is to be loaded and the side to print on do
not change depending on whether you want to print on one or both sides. When this setting is congured,
load the paper using the 2-sided printing method.
[Switch Paper Feed Method](P. 228)
Printing on One Side of Paper with a Logo
Load the paper with the logo side (side to be printed) face up.
Paper with logo in portr
ait orientation
Paper with logo in landscape orientation
Printing on Both Sides of Paper with a Logo
Load the paper with the logo side (side to be printed rst) face do
wn.
Paper with logo in portrait orientation
Basic Operations
92
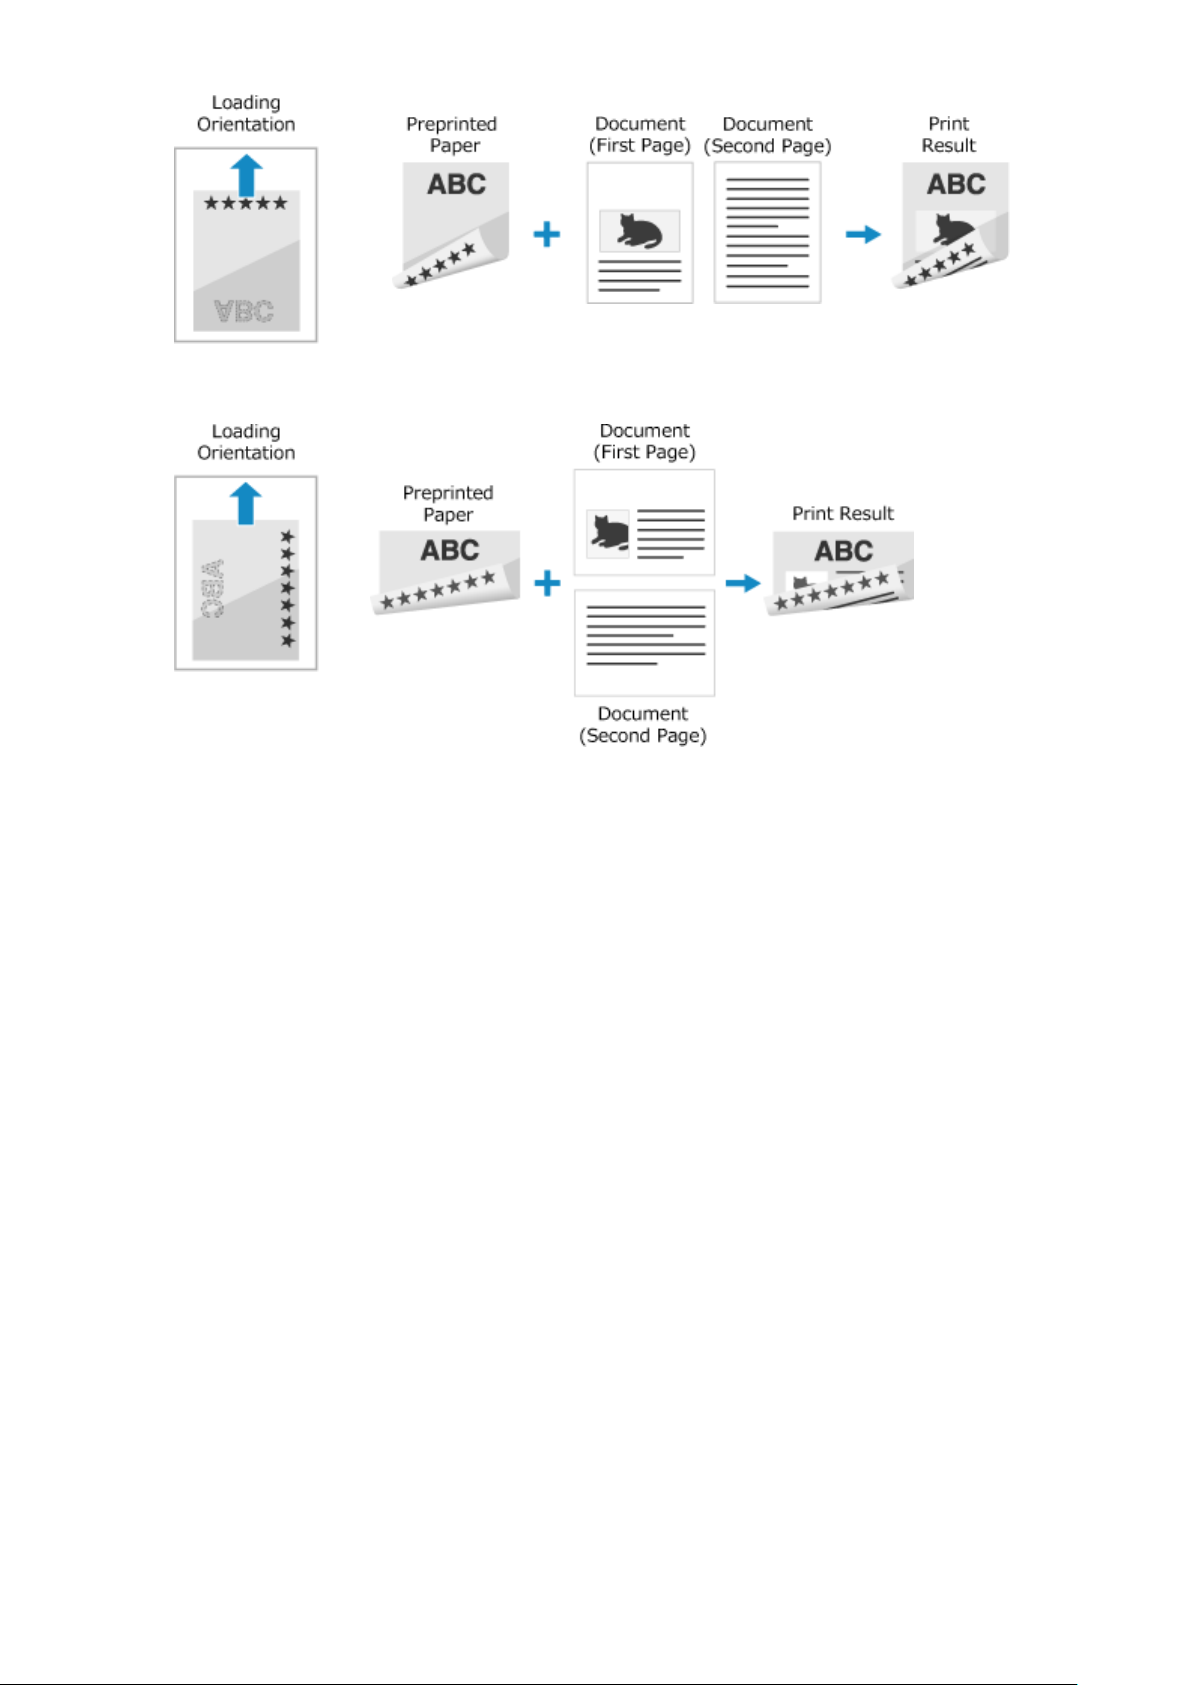
Paper with logo in landscape orientation
Basic Operations
93

Specifying the Paper Size and Type
94RC-02S
T
o ensure quality printing and prevent paper jams, the paper size and type must be set correctly according to the
loaded paper.
You can register frequently used paper settings and hide unneeded paper settings to simplify the paper settings.
Settings Required after Loading the Paper
Set the paper size and type according to the loaded paper.
Setting the Paper Size and Type for the Paper Drawer(P. 95)
Simplifying the Paper Settings
Y
ou can register and set the paper size for easier settings.
Registering Non-standard Size Paper (Custom Paper)(P. 97)
Hiding Unused Paper Sizes(P. 99)
Basic Operations
94

Setting the Paper Size and Type for the Paper Drawer
94RC-02U
By default, the paper size and type of the paper dr
awer are set to LTR and Plain 2. When paper of a different size or
type is loaded, change the paper settings.
This section describes how to congure the settings using the operation panel.
You can also congure the settings using Remote UI from a computer.
Managing the Machine from a Computer
(Remote UI)
(P. 178)
1
On the operation panel, select [Menu] in the [Home] screen, and press
. [Home]
Scr
een(P. 81)
2
Press [Paper Settings]
[Drawer 1] .
3
Select the size of the paper loaded in the paper drawer, and press .
● Y
ou can scroll the screen to view paper sizes (such as envelopes) not displayed on the screen.
● If you frequently need to change the paper to be loaded, set to [Free Size]; this will reduce the number of
steps required to change the setting each time. You can also display an error message when the setting in
the printer driver is signicantly different from the size of the loaded paper.
[Action When Free Paper Size
Mismatch]
(P. 231)
When A5 Size Paper Is Loaded
When paper is loaded in the landscape orientation, select [A5]. When paper is loaded in the portr
ait
orientation, select [A5R].
Landscape orientation (A5)
Portrait orientation (A5R)
When Non-standard Size (Custom Size) Paper Is Loaded
1
Press [Custom].
2
Press [X]
enter the value in [X] .
Basic Operations
95
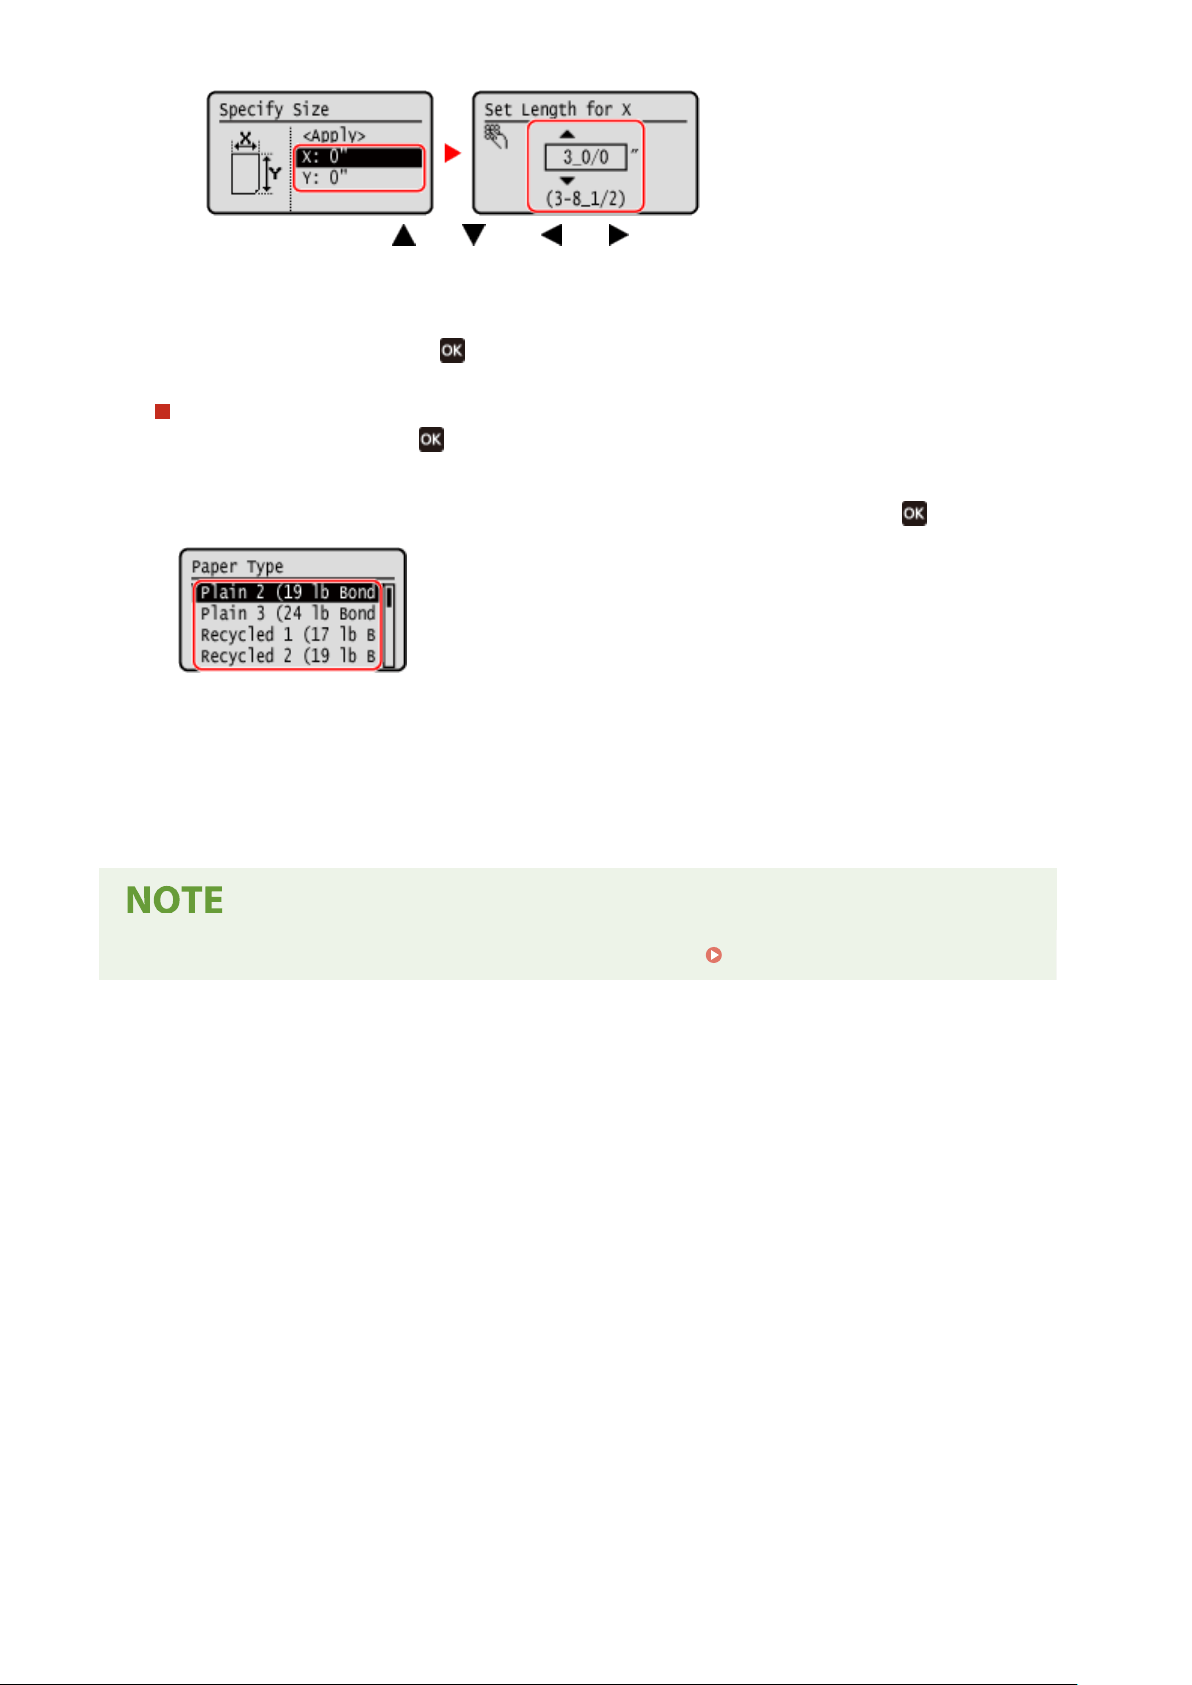
Enter the value using and , with and to move the cursor between the digits for inputting
whole numbers and fr
actions.
3
Enter the value in [Y] in the same way as [X].
4
Select [<Apply>], and press
.
If a Set Paper Size Is Not Displayed
Pr
ess [<Other Sizes>], press
, and select the paper size from the displayed list.
4
Select the type of the paper loaded in the paper drawer, and press
.
If you frequently need to change the paper to be loaded, set to [Free]; this will reduce the number of steps
r
equired to change the setting each time. However, note that this setting lets the machine perform printing
even if there is mismatch between the paper type setting in the printer driver and the paper type actually
loaded in the machine.
When the paper type setting in the printer driver is [Auto], the machine operates the same way as when the
paper type is [Plain 1].
➠ The paper size and type are set.
● Y
ou can change the paper size displayed on the screen in Step 3.
Hiding Unused Paper Sizes(P. 99)
Basic Operations
96
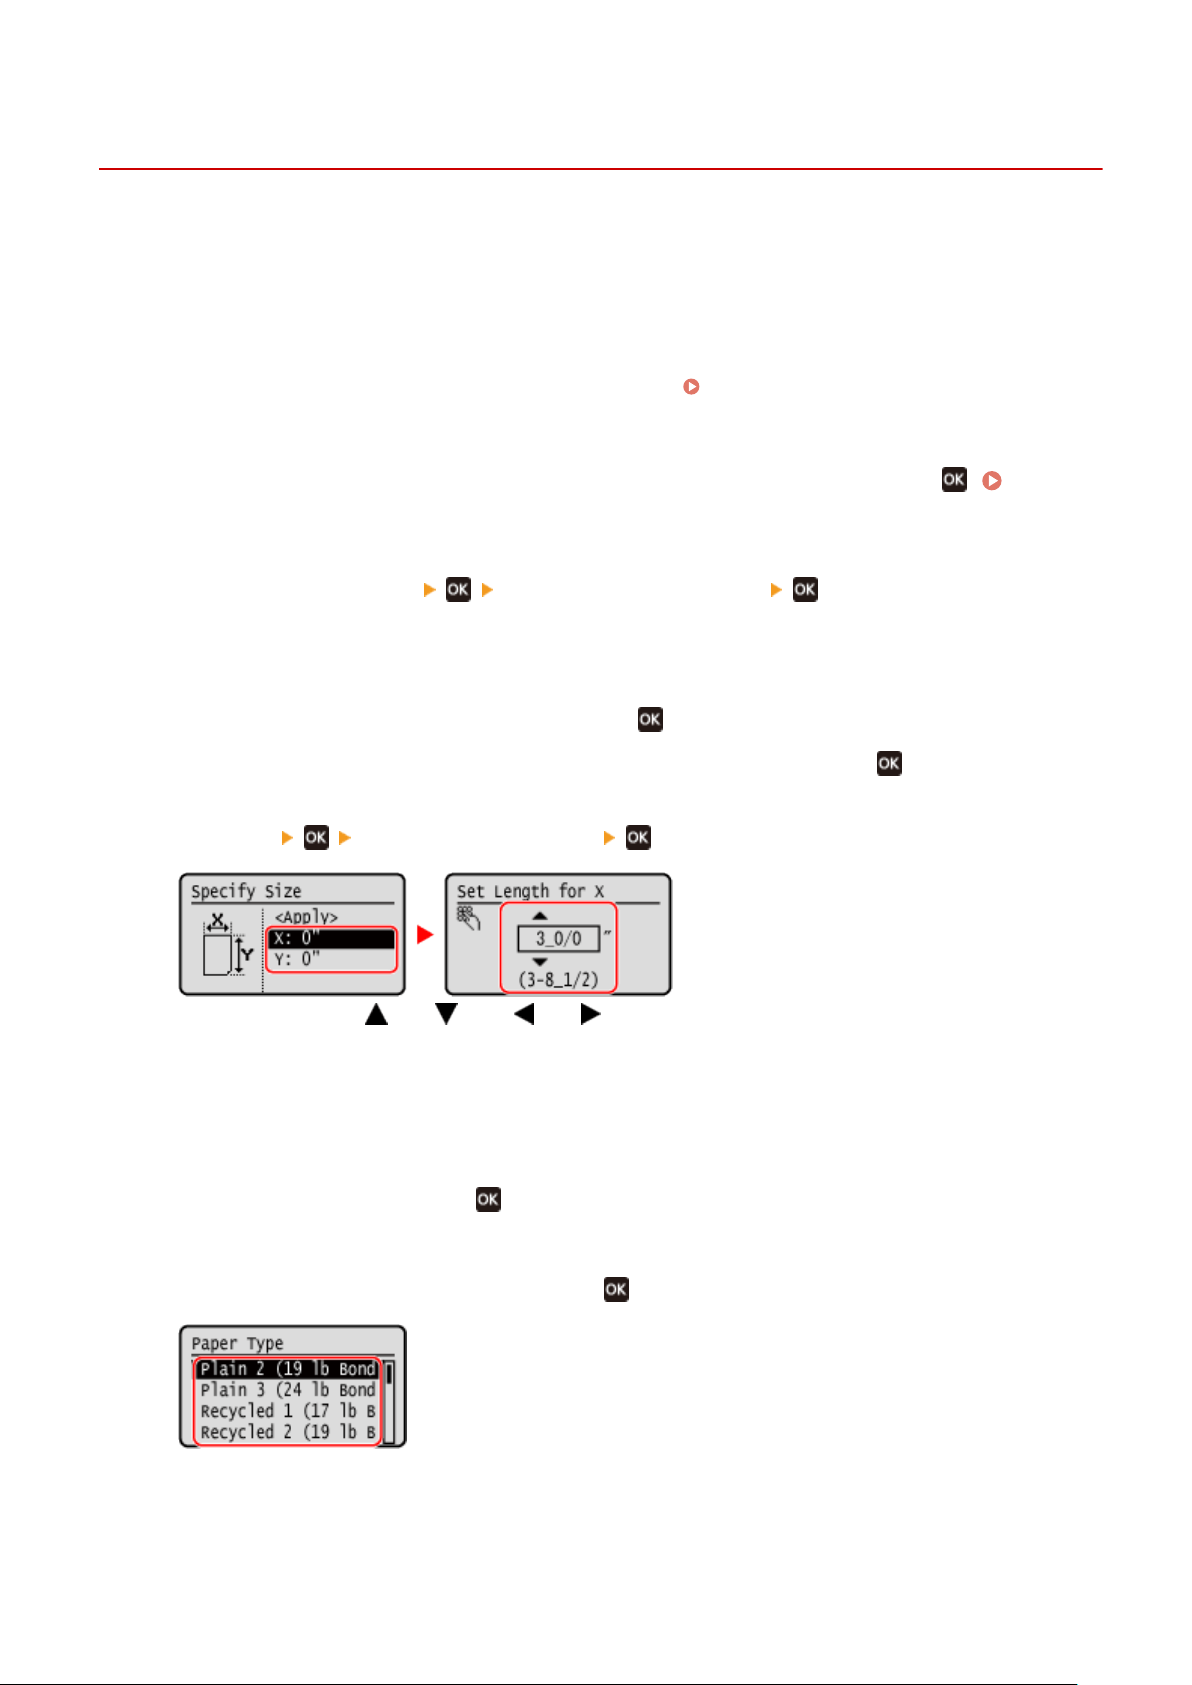
Registering Non-standard Size Paper (Custom Paper)
94RC-02Y
Custom paper is non-standar
d size paper whose side lengths can be freely dened within the range supported by the
machine.
You can register sizes when frequently using specic non-standard size paper. You can call up the paper on the size
input screen, saving you the trouble of entering the size.
You can register up to three custom sizes.
This section describes how to register the settings using the operation panel.
You can also register the settings using Remote UI from a computer.
Managing the Machine from a Computer
(Remote UI)
(P. 178)
1
On the operation panel, select [Menu] in the [Home] screen, and press
. [Home]
Scr
een(P. 81)
2
Press [Paper Settings]
[Register Custom Paper] .
➠ The [Register Custom Paper] screen is displayed.
3
Select the registration number, and press .
If you have selected the registered number, continue on to select [Edit], and press .
4
Press [X] enter the values in [X] .
Enter the value using and , with and to move the cursor between the digits for inputting whole
numbers and fr
actions.
5
Enter the values in [Y] in the same way as [X].
6
Select [<Apply>], and press
.
7
Select the type of the paper, and press .
If you frequently need to change the paper to be loaded, set to [Free]; this will reduce the number of steps
r
equired to change the setting each time. However, note that this setting lets the machine perform printing
even if there is mismatch between the paper type setting in the printer driver and the paper type actually
loaded in the machine.
When the paper type setting in the printer driver is [Auto], the machine operates the same way as when the
paper type is [Plain 1].
Basic Operations
97

➠ The custom paper is r
egistered.
Basic Operations
98
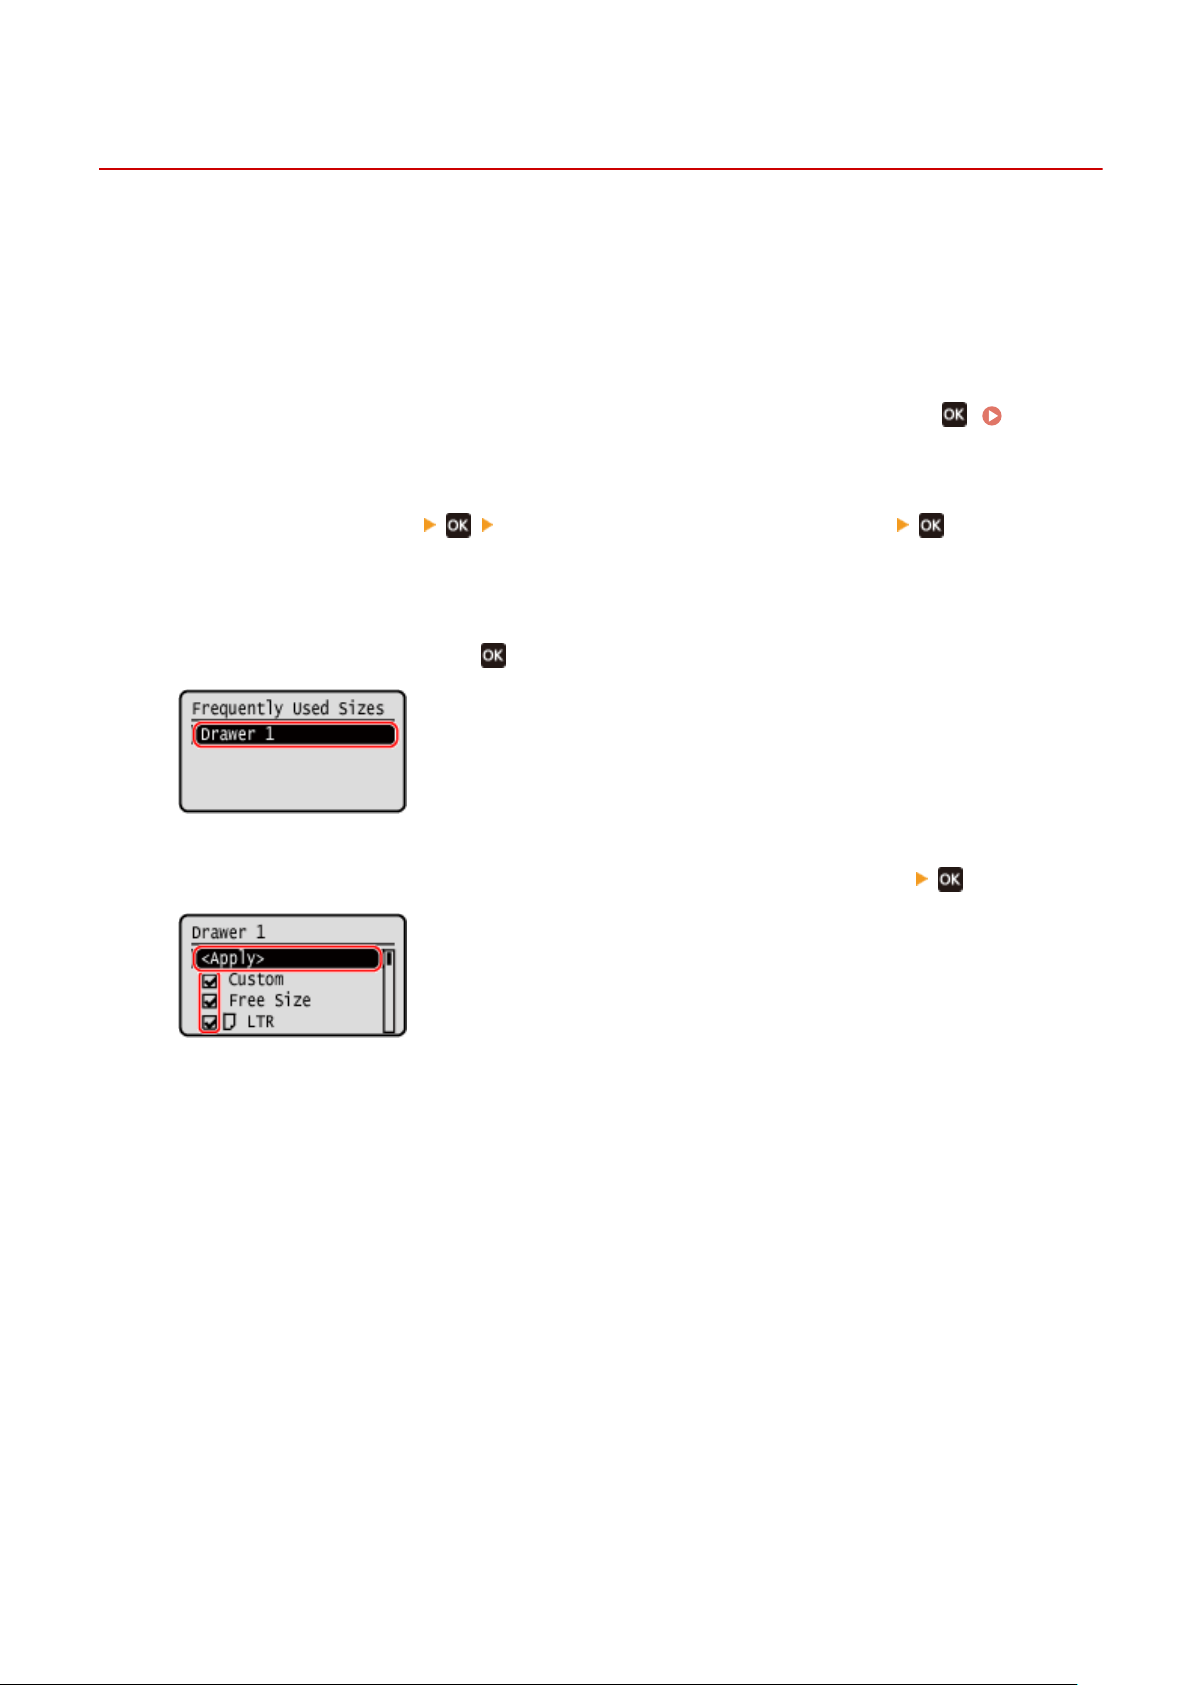
Hiding Unused Paper Sizes
94RC-030
The paper settings scr
een displays the registered frequently used paper sizes. If unused paper sizes are displayed, you
can hide these to make it easier to select a paper size.
To select a hidden paper size, press [Other Sizes] on the paper settings screen.
Use the operation panel to congure the settings. You cannot congure the settings using Remote UI from a
computer.
1
On the operation panel, select [Menu] in the [Home] screen, and press
. [Home]
Scr
een(P. 81)
2
Press [Paper Settings]
[Select Frequently Used Paper Sizes] .
➠ The [Frequently Used Sizes] screen is displayed.
3
Press [Drawer 1], and press .
4
Clear the checkboxes of the paper sizes to hide, and press [<Apply>] .
➠ Paper sizes whose checkbo
xes are cleared are not displayed on the paper settings screen.
Basic Operations
99

Printing
Printing ................................................................................................................................................................
101
Printing Preparations ....................................................................................................................................... 102
Preparing to Print from a Computer ............................................................................................................. 103
Conguring a Printer Port (Windows) .................................................................................................... 104
Setting Up a Print Server .............................................................................................................................. 107
Preparations for Using Universal Print ......................................................................................................... 110
Registering the Machine to Cloud Service .............................................................................................. 111
Registering the Machine to the Computer ............................................................................................. 114
Printing from a Computer ................................................................................................................................ 115
Registering Non-standard Size Paper to the Computer (Custom Size) .......................................................... 118
Printing with Universal Print ......................................................................................................................... 120
Canceling Printing ............................................................................................................................................. 121
Viewing the Print Job Status and Log ............................................................................................................... 123
Printing
100
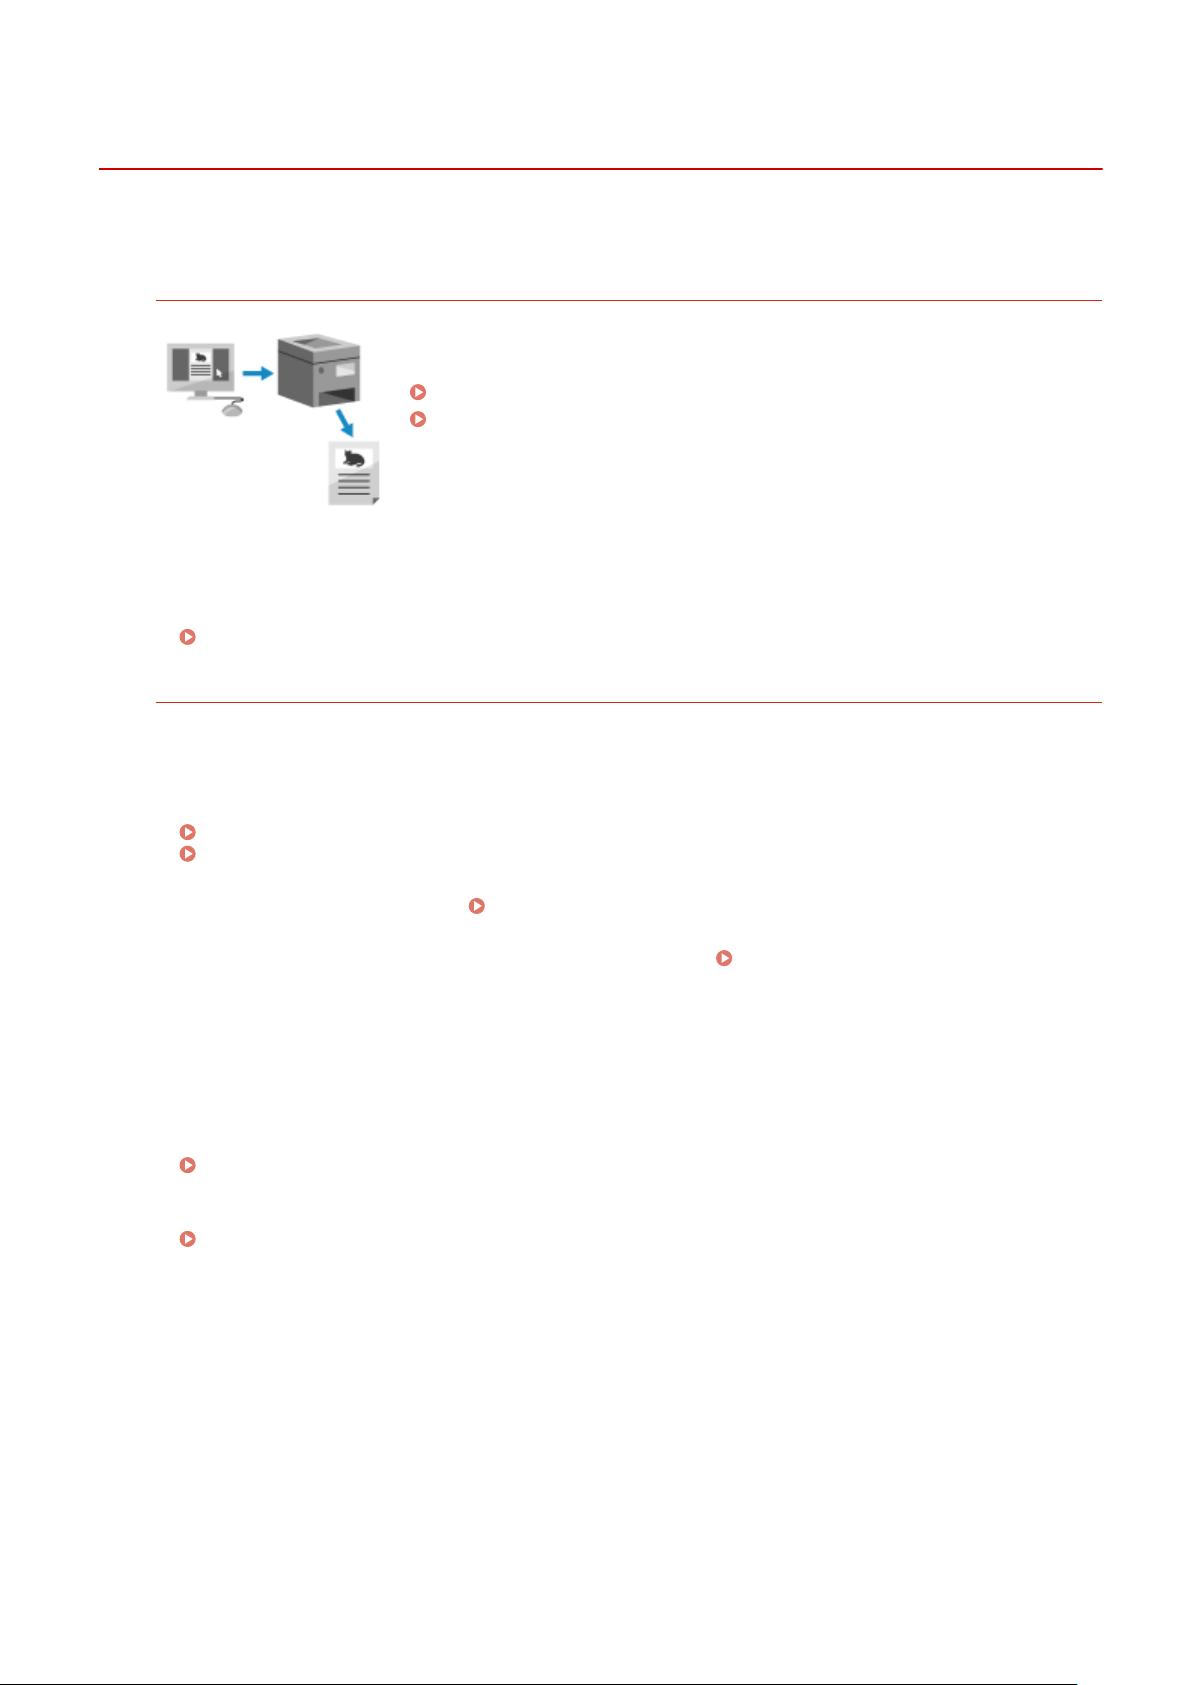
Printing
94RC-038
Y
ou can print documents and photos from a computer.
Printing from a Computer
You can print documents and photos via a printer driver installed on a computer
connected to the machine.
Preparing to Print from a Computer(P. 103)
Printing from a Computer(P. 115)
Setting Up a Print Server
By setting up a print server on a network, you can r
educe the load on the computer that you print from.
In Windows, you can install the printer driver via the print server, which saves you the trouble of
downloading the printer driver to each computer on the network or using a CD/DVD-ROM.
Setting Up a Print Server(P. 107)
Printing with the Standar
d Functions of the Operating System and Cloud Service
You can print without having to install a dedicated application or printer driver.
Windo
ws
You can use Microsoft's cloud service, Universal Print, to print data. The Universal Print driver is standard in
Windows 10, enabling you to also print from a remote location when the machine is connected to the
Internet.
Preparations for Using Universal Print(P. 110)
Printing with Universal Print(P. 120)
macOS
Y
ou can use AirPrint to print data.
Using AirPrint Application to Print Data(P. 137)
Chr
ome OS
Use the print function that is standard in the operating system.
Printing from Chromebook or Other
De
vice with Chrome OS(P. 141)
◼ See Also
Printing from a Mobile Device
The machine can be operated from a smartphone, tablet, or other mobile device. By using a compatible
application or service, you can easily print photos or documents from a mobile device.
Linking with Mobile Devices(P. 125)
When Results Ar
e Not as Expected
If print results are too dark or too faint, adjust the print density.
Adjusting the Print Density(P. 265)
Printing
101


Preparing to Print from a Computer
94RC-03A
Install the printer driver to the computer that will be used to print. Installing Software and Drivers to the
Computer(P
. 69)
Using a Print Server in Windows
Use a print server to install the printer driver.
Double-click the shared printer on the print server, and follow the instructions on the screen to install the
printer driver.
Displaying a Shared Printer in the Print Server(P. 349)
Changing the Port Type and Number (Windows)
● If the machine is congur
ed not to use LPD or RAW, or if the port number was changed, the settings on the
computer may also have to be changed.
Changing the Port Type and Number(P. 105)
If the IP Addr
ess of the Machine Is Changed after Installing the Printer Driver
● You must add a new port.
Adding a Port(P. 104)
If you do not kno
w which port is being used, see the following:
Viewing the Printer Port(P. 354)
● In macOS, you must r
e-register the machine on the Mac. For details about registering the machine, see the
manual of the driver at the online manual site.
https://oip.manual.canon/
* If you are using DHCP to automatically obtain the IP address of the machine, the IP address may be changed
automatically.
Printing
103
Conguring a Printer Port (Windo
ws)
94RC-03C
If the IP addr
ess of the machine changed or a printer has been added in Windows, you may not be able to print from a
computer. In this case, use the printer driver to add a new port.
In addition, you cannot print from a computer when the port number of the printer driver differs from that of the
machine setting. In this case, change the setting on the printer driver to match that of the machine.
Adding a Port(P. 104)
Changing the Port Type and Number(P. 105)
Adding a Port
Administrator privileges are required on each computer.
Required Preparations
● Pr
epare the information of the IP address or DNS name (host name) of the machine and keep it close by.
Checking the Network Status and Settings(P. 66)
1
Log on to the computer using an administrator account.
2
Click [
] (Start) [ ] (Settings) [Devices] [Printers & scanners].
➠ The [Printers & scanners] scr
een is displayed.
3
Click the printer driver of the machine
[Manage] [Printer properties].
➠ The printer driver pr
operties screen is displayed.
4
On the [Ports] tab, click [Add Port].
➠ The [Printer Ports] scr
een is displayed.
5
Add a new port.
1
Select [Standard TCP/IP Port], and click [New Port].
➠ The [Add Standar
d TCP/IP Printer Port Wizard] screen is displayed.
2
Click [Next].
3
Enter the IP address or DNS name (host name), and then click [Next].
Printing
104
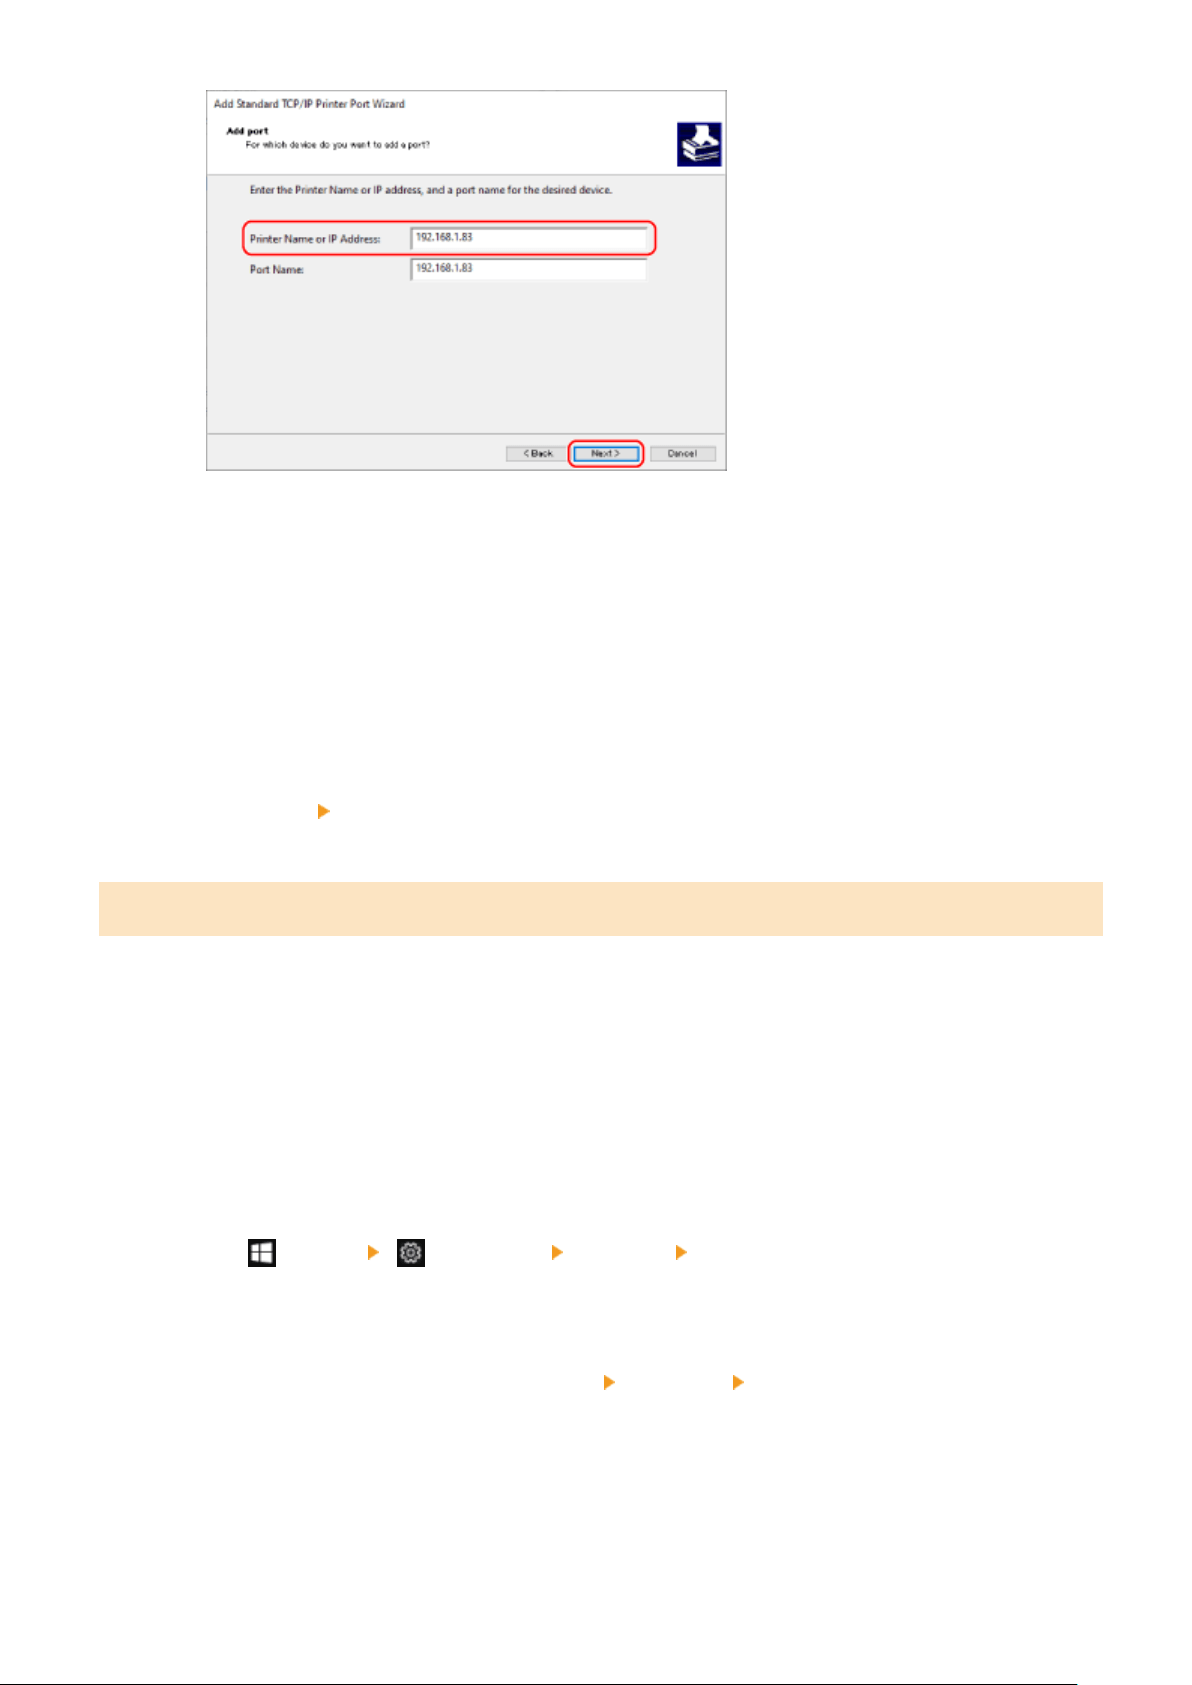
The port name is entered automatically, so change it, as needed.
When [Additional port information r
equired] Appears
Take action following the instructions on the screen. To set [Device Type], select [Canon Network Printing
Device with P9100] in [Standard].
6
Click [Finish].
➠ A ne
w port is added, and the [Printer Ports] screen is displayed.
7
Click [Close]
[Close].
Changing the Port Type and Number
If the machine is congured not to use LPD or RAW, you must change the type of port on the computer to a protocol
usable on the machine.
If the LPD or RAW port number was changed, the settings on the computer may have to be changed to match the
settings on the machine.
* You do not need to change the port type or number on the computer for WSD ports.
Administrator privileges are required on each computer.
1
Log on to the computer using an administrator account.
2
Click [ ] (Start) [ ] (Settings) [Devices] [Printers & scanners].
➠ The [Printers & scanners] scr
een is displayed.
3
Click the printer driver of the machine
[Manage] [Printer properties].
➠ The printer driver pr
operties screen is displayed.
4
On the [Ports] tab, click [Congur
e Port].
➠ The [Congure Port] screen or [Congure Standard TCP/IP Port Monitor] screen is displayed.
Printing
105

5
Set the port type and number.
In [Protocol Type], select [Raw] or [LPR].
● When [Raw] is selected, change the port number.
● When [LPR] is selected, enter "Ip
" for [Queue Name].
6
Click [OK]
[Close].
➠ The settings ar
e applied.
Printing
106

Setting Up a Print Server
94RC-03E
By setting up a print server on the network, you can speed up print oper
ations on a computer, thereby reducing the
load on the computer.
In Windows, you can install the printer driver via the print server to save you the trouble of downloading the printer
driver to each computer on the network or using a CD/DVD-ROM.
To set up a print server, enable the print server to print from the machine, and then congure the settings for sharing
the printer.
To use a print server in a domain environment, consult your network administrator..
Enabling the Print Server to Print from the Machine(P. 107)
Conguring the Settings for Sharing the Printer(P
. 107)
Enabling the Print Server to Print from the Machine
Install the printer driver to the computer that will be the print server, and congure the settings according to your
usage environment. Preparing to Print from a Computer(P. 103)
Conguring the Settings for Sharing the Printer
Congure the printer sharing settings on the computer that will be the print server so that other computers on the
network can use the print server.
When Using Windows(P. 107)
When Using macOS(P. 109)
◼ When Using Windo
ws
Administrator privileges are required on the computer that will be the print server.
Required Preparations
● Check the oper
ating system (32-bit or 64-bit) of the computer that will be the print server and the operating
system of the computer that will use the print server (the client).
Viewing the System Information of the
Computer(P
. 350)
1
Log on to the computer that will be the print server, using an administrator account.
2
Click [ ] (Start) [ ] (Settings) [Devices] [Printers & scanners].
➠ The [Printers & scanners] scr
een is displayed.
3
Click the printer driver of the machine
[Manage] [Printer properties].
➠ The printer driver pr
operties screen is displayed.
Printing
107
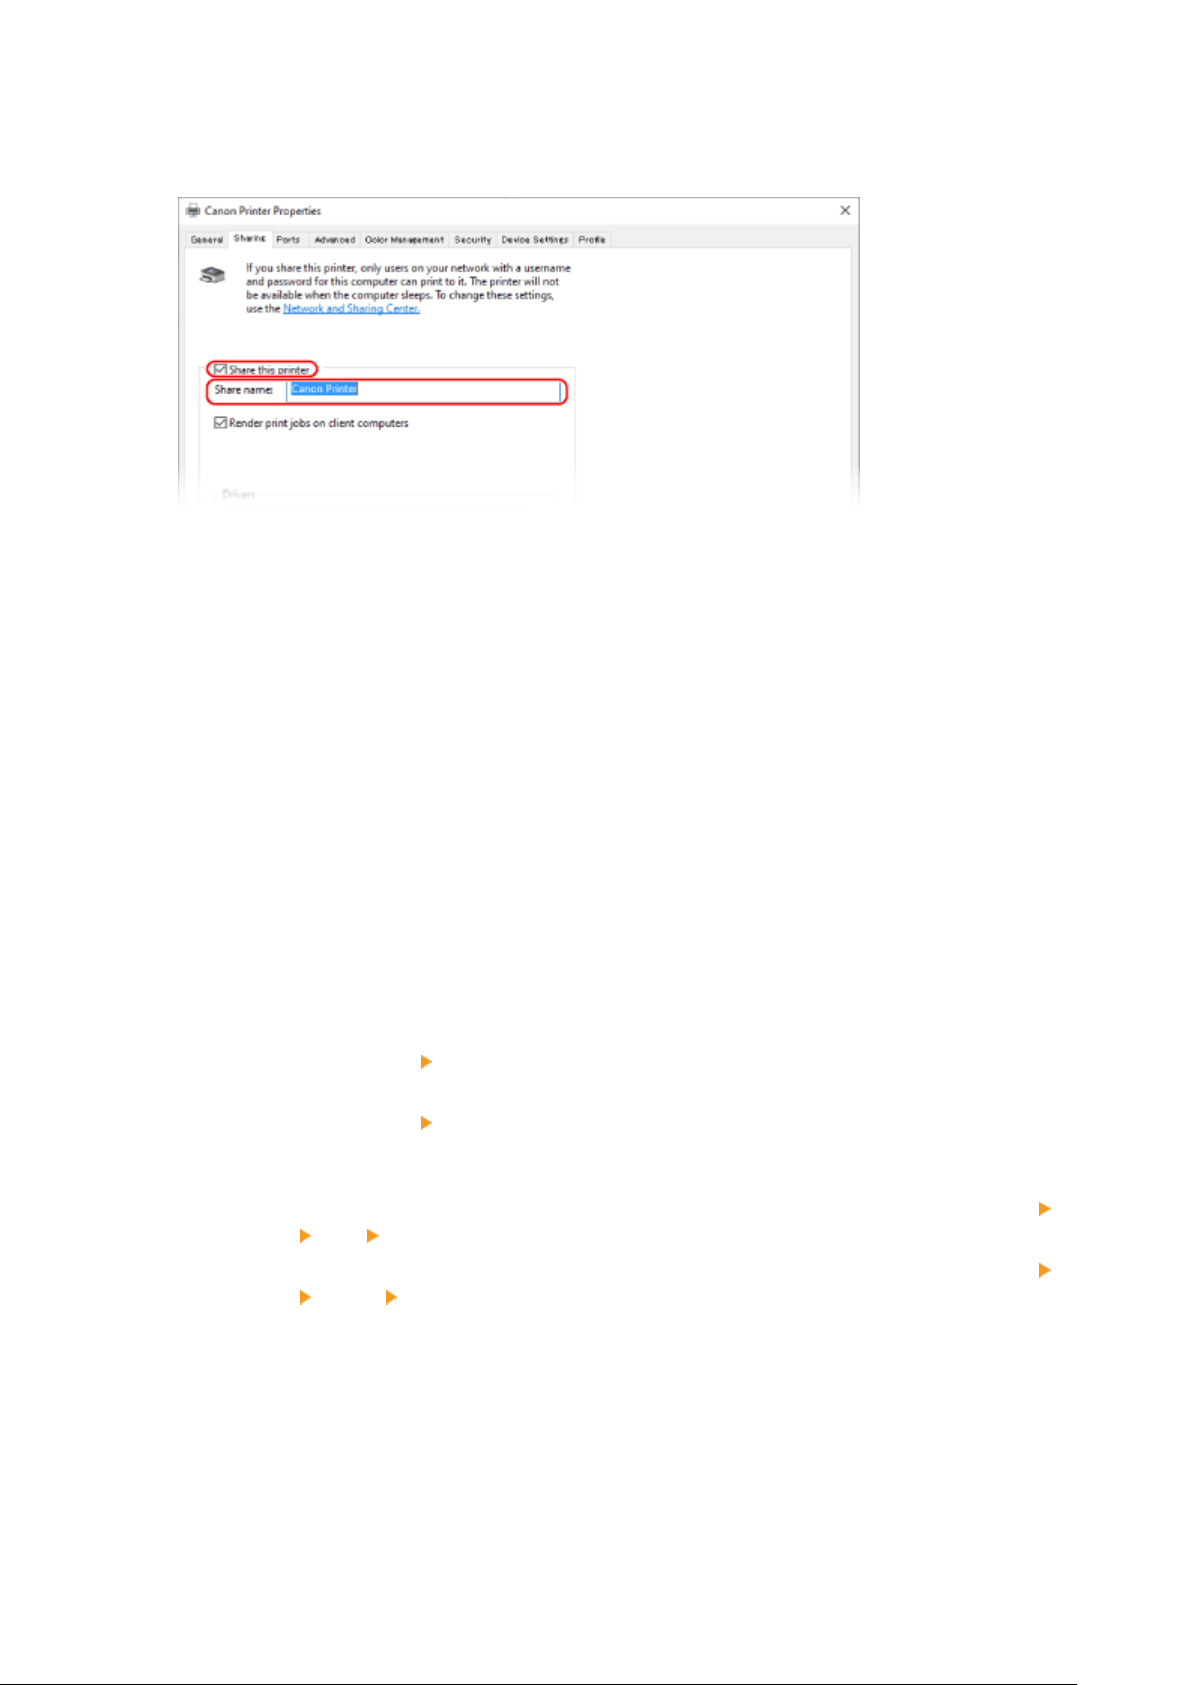
4
On the [Sharing] tab, select the [Share this printer] checkbox, and enter a shared
name.
5
Install an additional driver, as needed.
If the client computer has an operating system (32-bit or 64-bit) that differs from that of the print server,
install an additional driver.
1
Click [Additional Drivers].
➠ The [Additional Drivers] scr
een is displayed.
2
Select the checkbox of the driver to be added, and click [OK].
● If the print server computer has a 32-bit oper
ating system, select the [x64] (driver for 64-bit version)
checkbox.
● If the print server computer has a 64-bit operating system, select the [x86] (driver for 32-bit version)
checkbox.
3
Click [Browse], specify the folder where the driver is located, and click [OK].
When Specifying the Folder of the Downloaded Driver
● If the print server computer has a 32-bit operating system, specify the [x64] folder with the
decompressed driver
[Driver] folder.
● If the print server computer has a 64-bit oper
ating system, specify the [32BIT] folder with the
decompressed driver
[Driver] folder.
When Specifying the Folder in the Supplied CD/D
VD-ROM
● If the print server computer has a 32-bit operating system, specify [intdrv] in the CD/DVD-ROM
[UFRII] [x64] [Driver] folder.
● If the print server computer has a 64-bit oper
ating system, specify [intdrv] in the CD/DVD-ROM
[UFRII] [32BIT] [Driver] folder.
4
Install the additional driver while following the instructions on the screen.
6
Click [OK].
➠ The settings ar
e applied.
Printing
108

◼ When Using macOS
1
Click [
] [System Preferences] [Sharing].
➠ The [Sharing] scr
een is displayed.
2
Select the [Printer Sharing] checkbox.
3
In [Printers], select the checkbox of the machine.
4
Restrict the users that can use the print server, as needed.
By default, all users can use the print server.
T
o enable specic users to use the print server, click [+] under [Users], and select the users who can use the
print server.
5
Close the [Sharing] screen.
➠ The settings ar
e applied.
Printing
109

Preparations for Using Universal Print
94RC-03F
Congur
e the machine to be able to use Microsoft's cloud service, Universal Print, and register the machine to each
computer that will be used to print.
You must be a registered user of Microsoft 365 and use Azure Active Directory.
Registering the Machine to Cloud Service(P. 111)
Registering the Machine to the Computer(P. 114)
Printing
110

Registering the Machine to Cloud Service
94RC-03H
Register the machine to the cloud-based authentication and management service, Azur
e Active Directory, and set the
members or groups that will use the machine.
Step 1: Registering the Machine to Azure Active Directory(P. 111)
Step 2: Specifying the Members and Groups to Use the Machine(P. 113)
Step 1: Registering the Machine to Azure Active Directory
Congure this setting using Remote UI from a computer. You cannot use the operation panel to congure the
settings.
Administrator privileges are required.
1
Log in to Remote UI in System Manager Mode.
Starting Remote UI(P. 179)
2
On the Portal page of Remote UI, click [Settings/Registration]. Portal Page of
Remote UI(P. 181)
3
Click [Network Settings] [Universal Print Settings].
➠ The [Universal Print Settings] scr
een is displayed.
4
Click [Edit] in [Basic Settings].
5
Select the [Use Universal Print] checkbox, and enter the printer name.
● For the printer name, enter a name to identify the machine, using single-b
yte alphanumeric characters.
● To verify the certicate sent from the server, select the [Verify Server Certicate] checkbox.
To add a Common Name (CN) to the verication items, select the [Add CN to Verication Items] checkbox as
well.
6
Change Application ID and the URL of Azure Active Directory according to usage
envir
onment.
7
Click [OK].
➠ The [Universal Print Settings] scr
een is displayed.
8
Click [Register] in [Registration Status].
➠ The [Information for Registr
ation] screen is displayed.
Printing
111
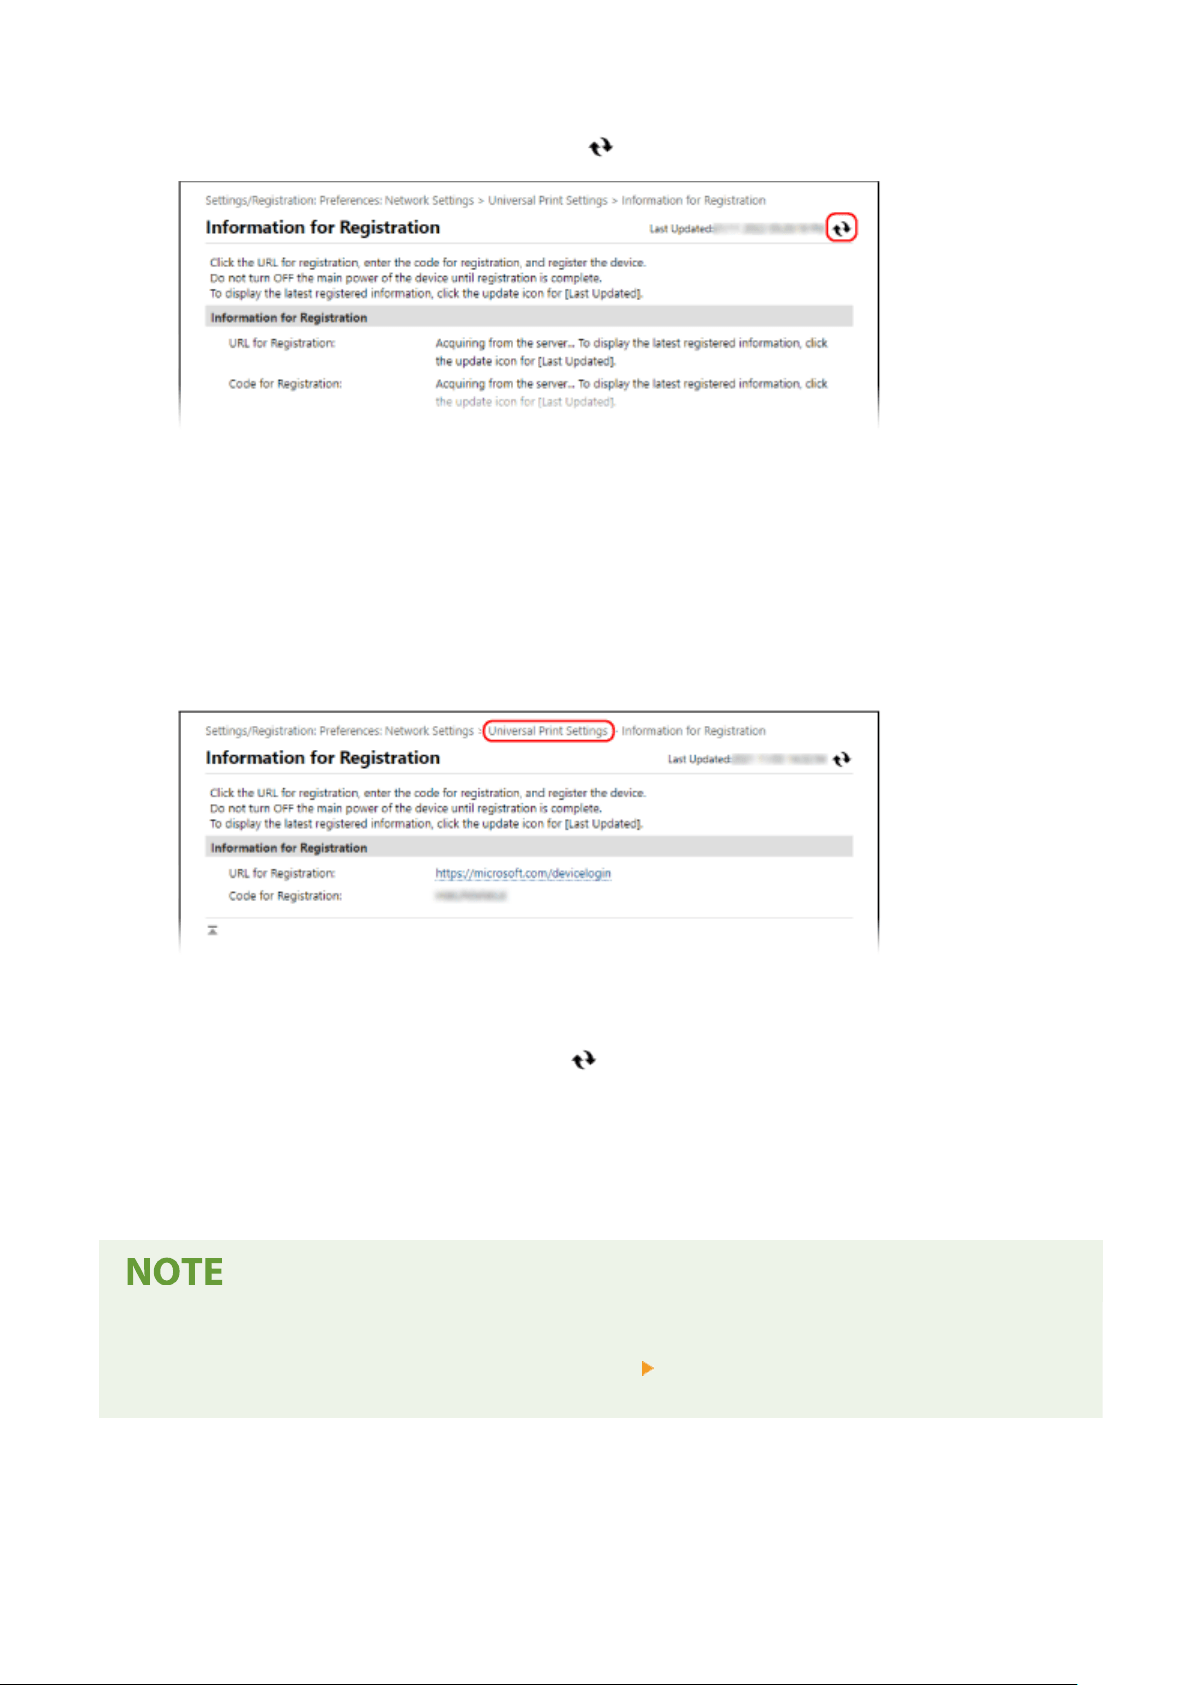
9
Wait several seconds, and then click [ ].
10
Click the link displayed in [URL for Registration].
11
Register the machine according to the instructions on the screen.
12
Click [Universal Print Settings] at the top of the Remote UI screen.
➠ The [Universal Print Settings] scr
een is displayed.
13
Wait a few minutes, and then click [
].
➠ When r
egistration is complete, [Registered] is displayed in [Registration Status].
14
Log out from Remote UI.
Canceling the Registration
● Click [Unr
egister] on the [Universal Print Settings] screen
[OK]. On the Azure Active Directory device
management screen, select the machine and click [Delete].
Printing
112

Step 2: Specifying the Members and Groups to Use the Machine
1
Display the Universal Print management screen of Azure Active Directory in a Web
br
owser on a computer.
2
Select the machine, and click [Share Printer].
To change the name of the machine displayed on the computer, change [Printer Share Name].
3
Click [Members]
[Add].
4
From the list, select the members and groups who will use the printer.
Printing
113
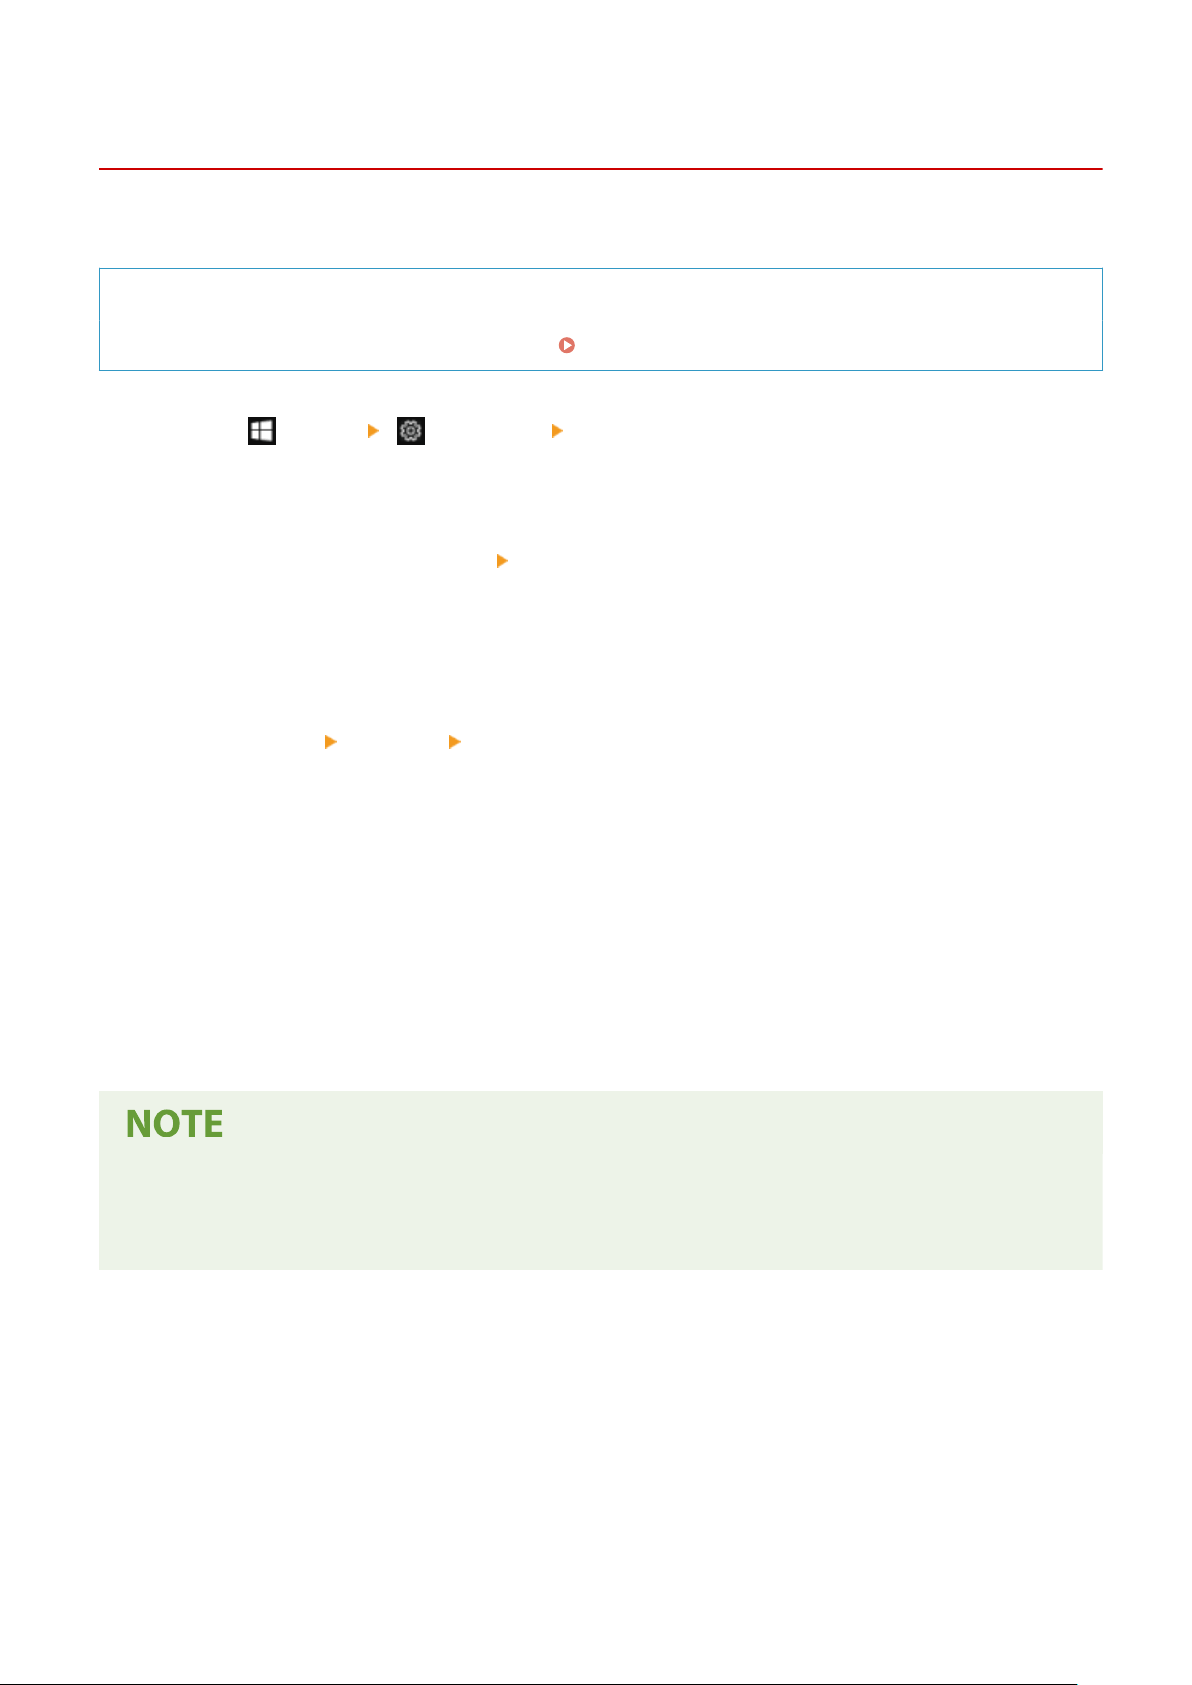
Registering the Machine to the Computer
94RC-03J
Register the machine, which is r
egistered to Azure Active Directory, to the computer to be used for Universal Print.
Required Preparations
● Register the machine to Azur
e Active Directory.
Registering the Machine to Cloud Service(P. 111)
1
Click [
] (Start) [ ] (Settings) [Accounts].
➠ The [Your info] screen is displayed.
2
Click [Access work or school] [Connect].
3
Follow the on-screen instructions to sign in to your Microsoft 365 account.
4
Click [Home]
[Devices] [Printers & scanners].
➠ The [Printers & scanners] scr
een is displayed.
5
Click [Add a printer or scanner].
➠ The printer list scr
een is displayed.
6
Select the machine and click [Add device].
➠ The machine is r
egistered to the computer.
When Using a Proxy Server
● T
o use Universal Print via a proxy server, you must congure the proxy settings on each computer. For
details, contact the network administrator.
Printing
114
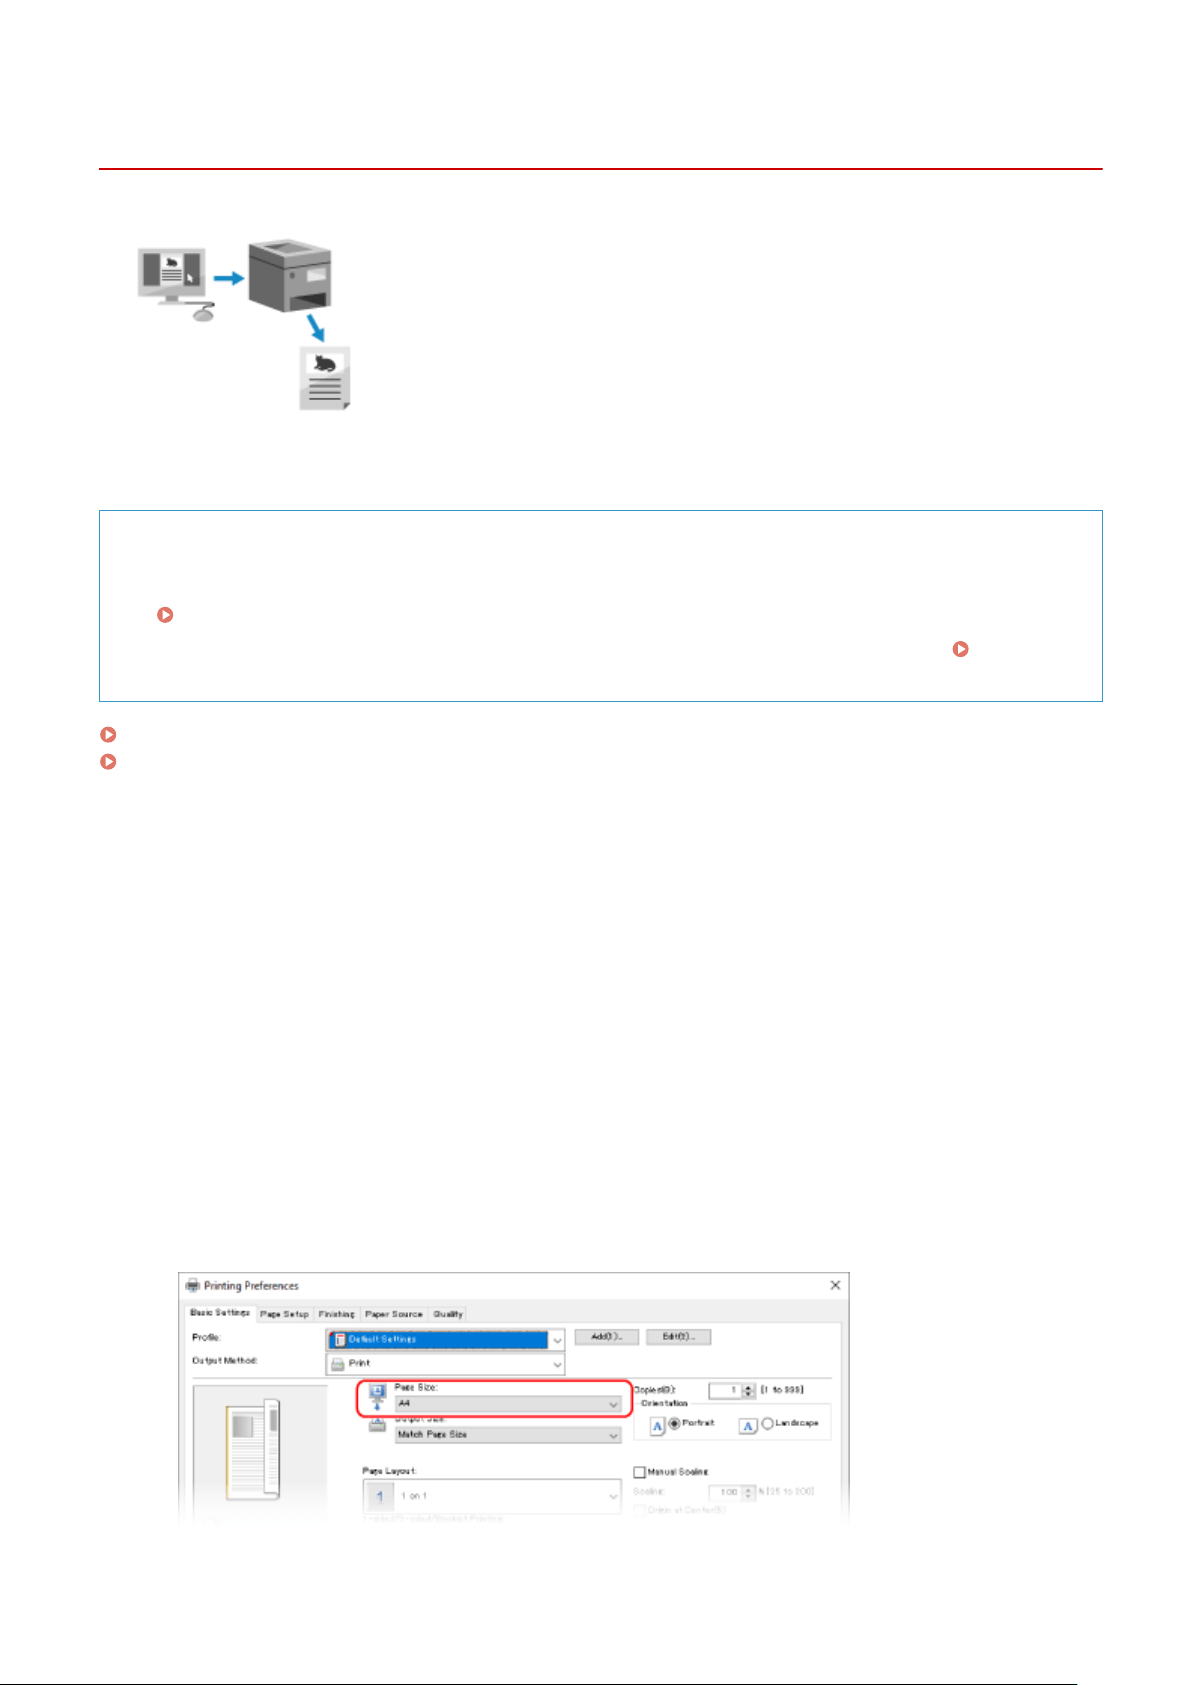
Printing from a Computer
94RC-03R
You can print documents from a computer using a printer driver.
By changing the settings on the printer driver, you can print accor
ding to the
document and purpose, such as by using 2-sided printing or adjusting the quality.
This section describes the general procedure for this operation. Check the manual of the application you are using for
detailed oper
ations on how to use it.
Required Preparations
● Install the printer driver on the computer, and congur
e the settings according to your usage environment.
Preparing to Print from a Computer(P. 103)
● If the document or paper to print is a non-standar
d size, register the size to the printer driver.
Registering
Non-standar
d Size Paper to the Computer (Custom Size)(P. 118)
When Using Windows(P. 115)
When Using macOS(P. 116)
◼ When Using Windows
1
On your computer, open the document you want to print.
2
In the application used to open the document, select the command to print.
3
Select the printer driver of the machine, and click [Preferences] or [Properties].
➠ The [Printing pr
eferences] screen of the printer driver is displayed.
4
In [Page Size] on the [Basic Settings] tab, select the paper size of the document.
Printing
115
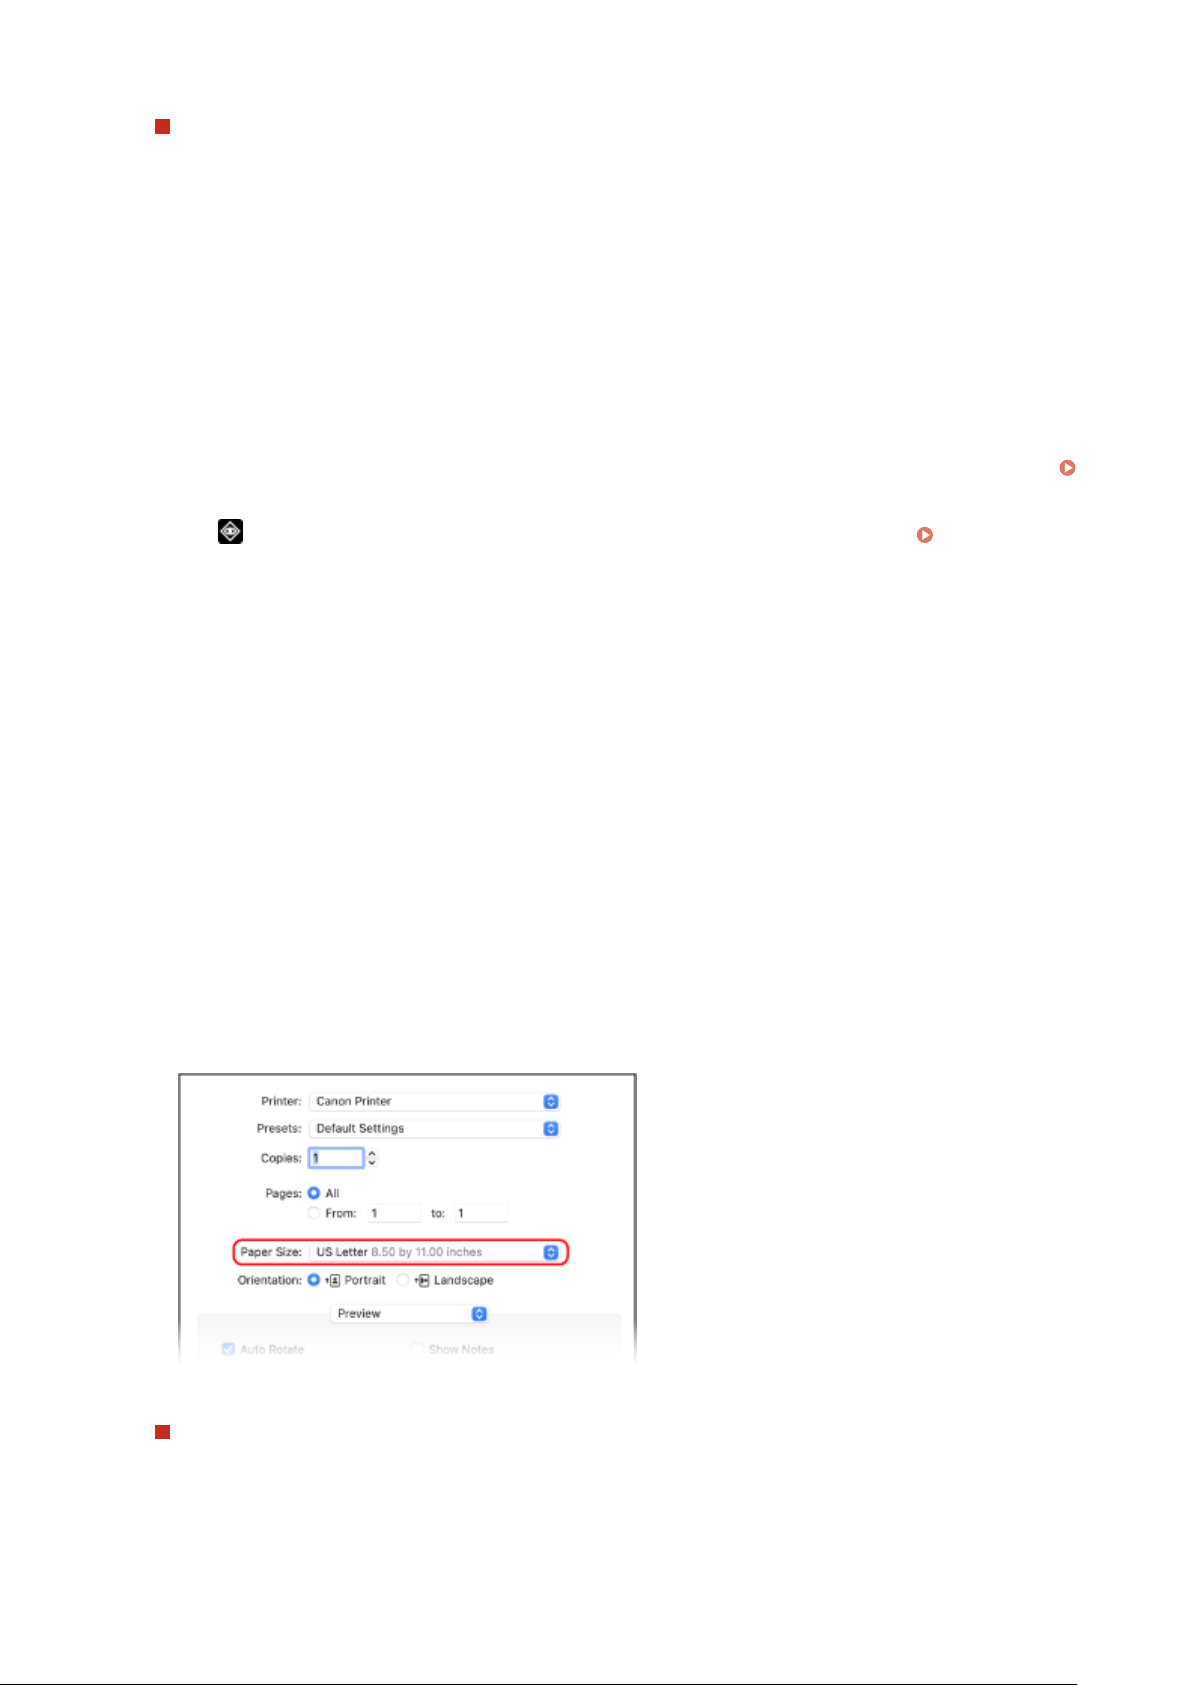
When Printing on Paper of a Size Different from [Page Size]
In [Output Size], select the paper size to print on. The document is enlar
ged or reduced to match the paper
size in [Output Size].
5
Congure the other print settings, as needed.
Congure 2-sided printing and adjust the image quality and other settings to suit your document and
purpose. For mor
e information, click [Help] on the [Printing preferences] screen to display help.
6
Click [OK], and click [Print] or [OK].
➠ Printing starts.
● Y
ou can cancel printing on the printing screen or from the printer icon in the Windows notication area.
Canceling Printing from a Computer(P. 121)
● Use or [Status Monitor] on the operation panel to view the print job status and log. Viewing the Print
Job Status and Log(P
. 123)
◼ When Using macOS
1
On your computer, open the document you want to print.
2
From the menu in the application used to open the document, click [Print].
➠ The printing dialog bo
x appears.
3
In [Printer], select the printer driver of the machine.
4
In [Paper Size] of the print options, select the paper size of the document.
If print options are not displayed, click [Show Details] in the printing dialog box.
When Printing on Paper of a Size Different from [Paper Size]
1
From the print options pop-up menu, select [Paper Handling].
Printing
116
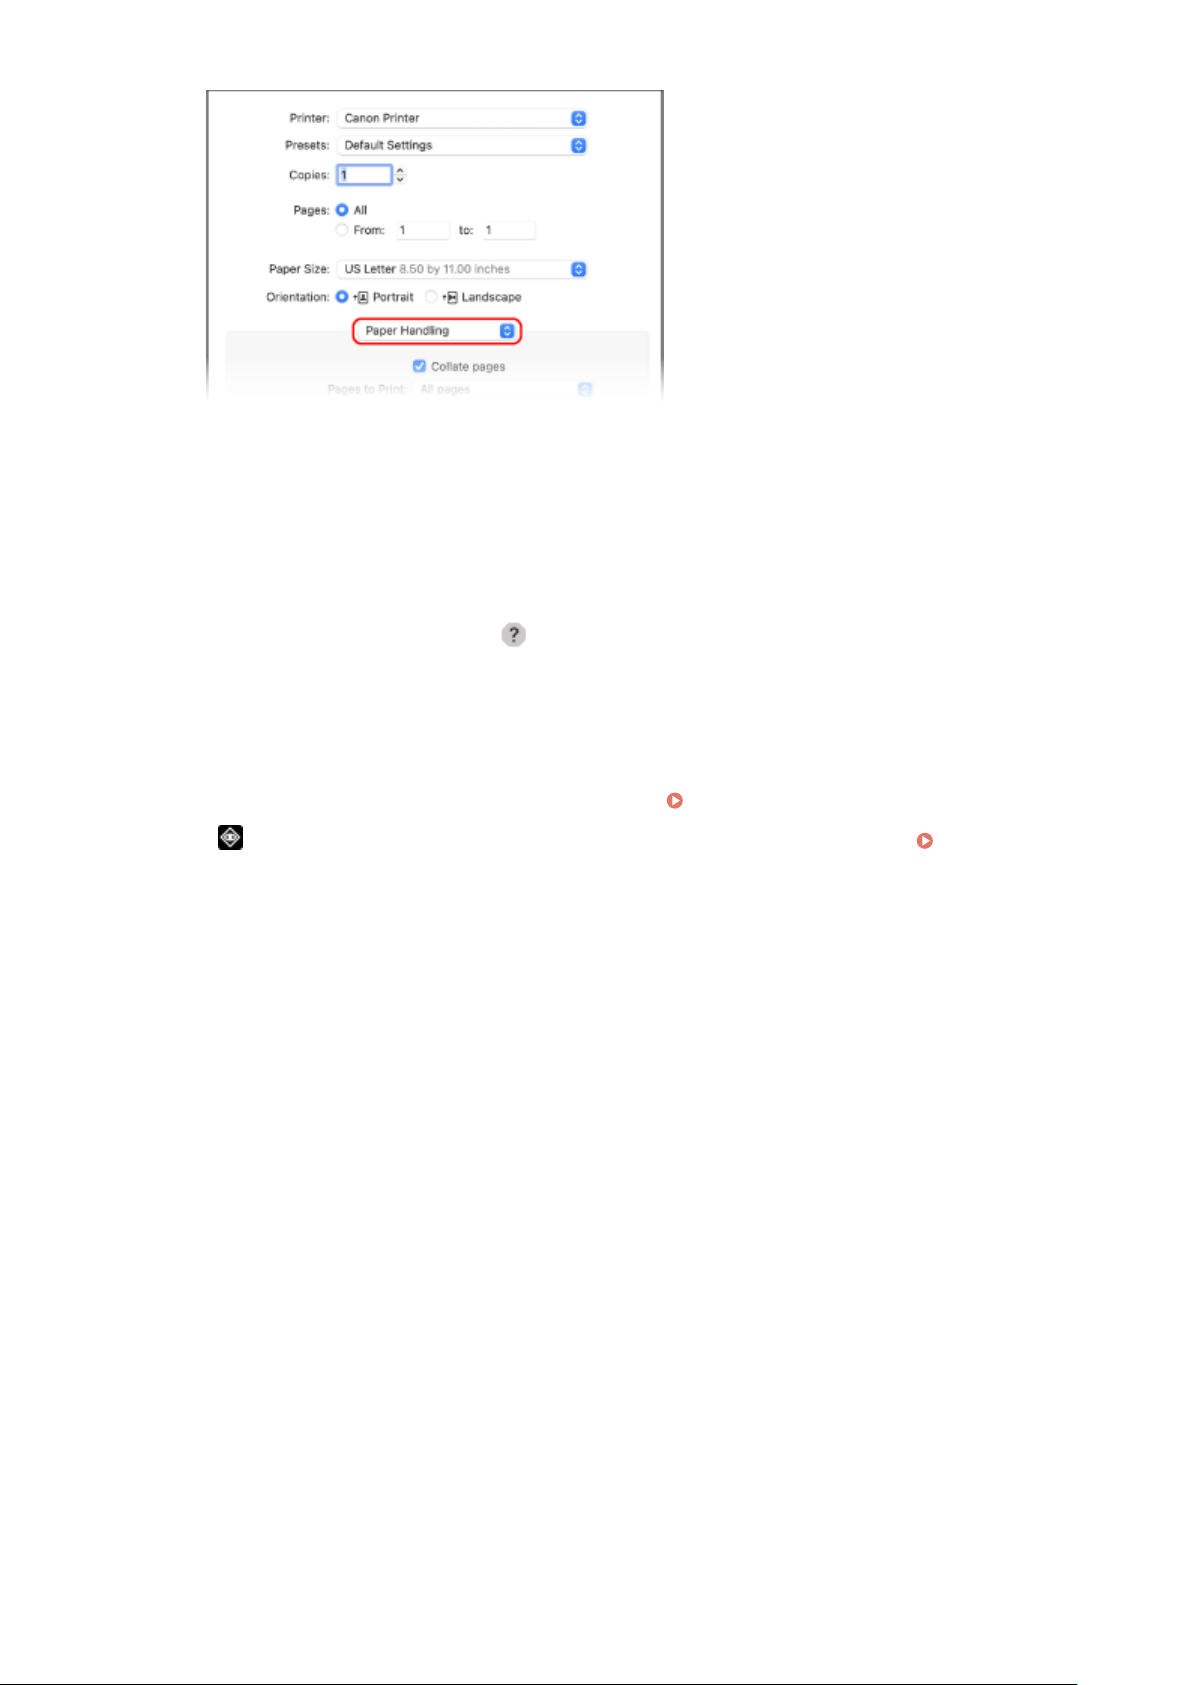
2
Select the [Scale to t paper size] checkbo
x, and in [Destination Paper Size], select the paper size to print
on.
The document is enlarged or reduced to match the paper size in [Destination Paper Size].
5
Congure the other print settings, as needed.
Congure 2-sided printing and adjust the image quality and other settings to suit your document and
purpose. For mor
e information, click [
] in the printing dialog box to display help.
6
Click [Print].
➠ Printing starts.
● Y
ou can cancel printing from the printer icon in the Dock.
Canceling Printing from a Computer(P. 121)
● Use or [Status Monitor] on the operation panel to view the print job status and log. Viewing the Print
Job Status and Log(P
. 123)
Printing
117
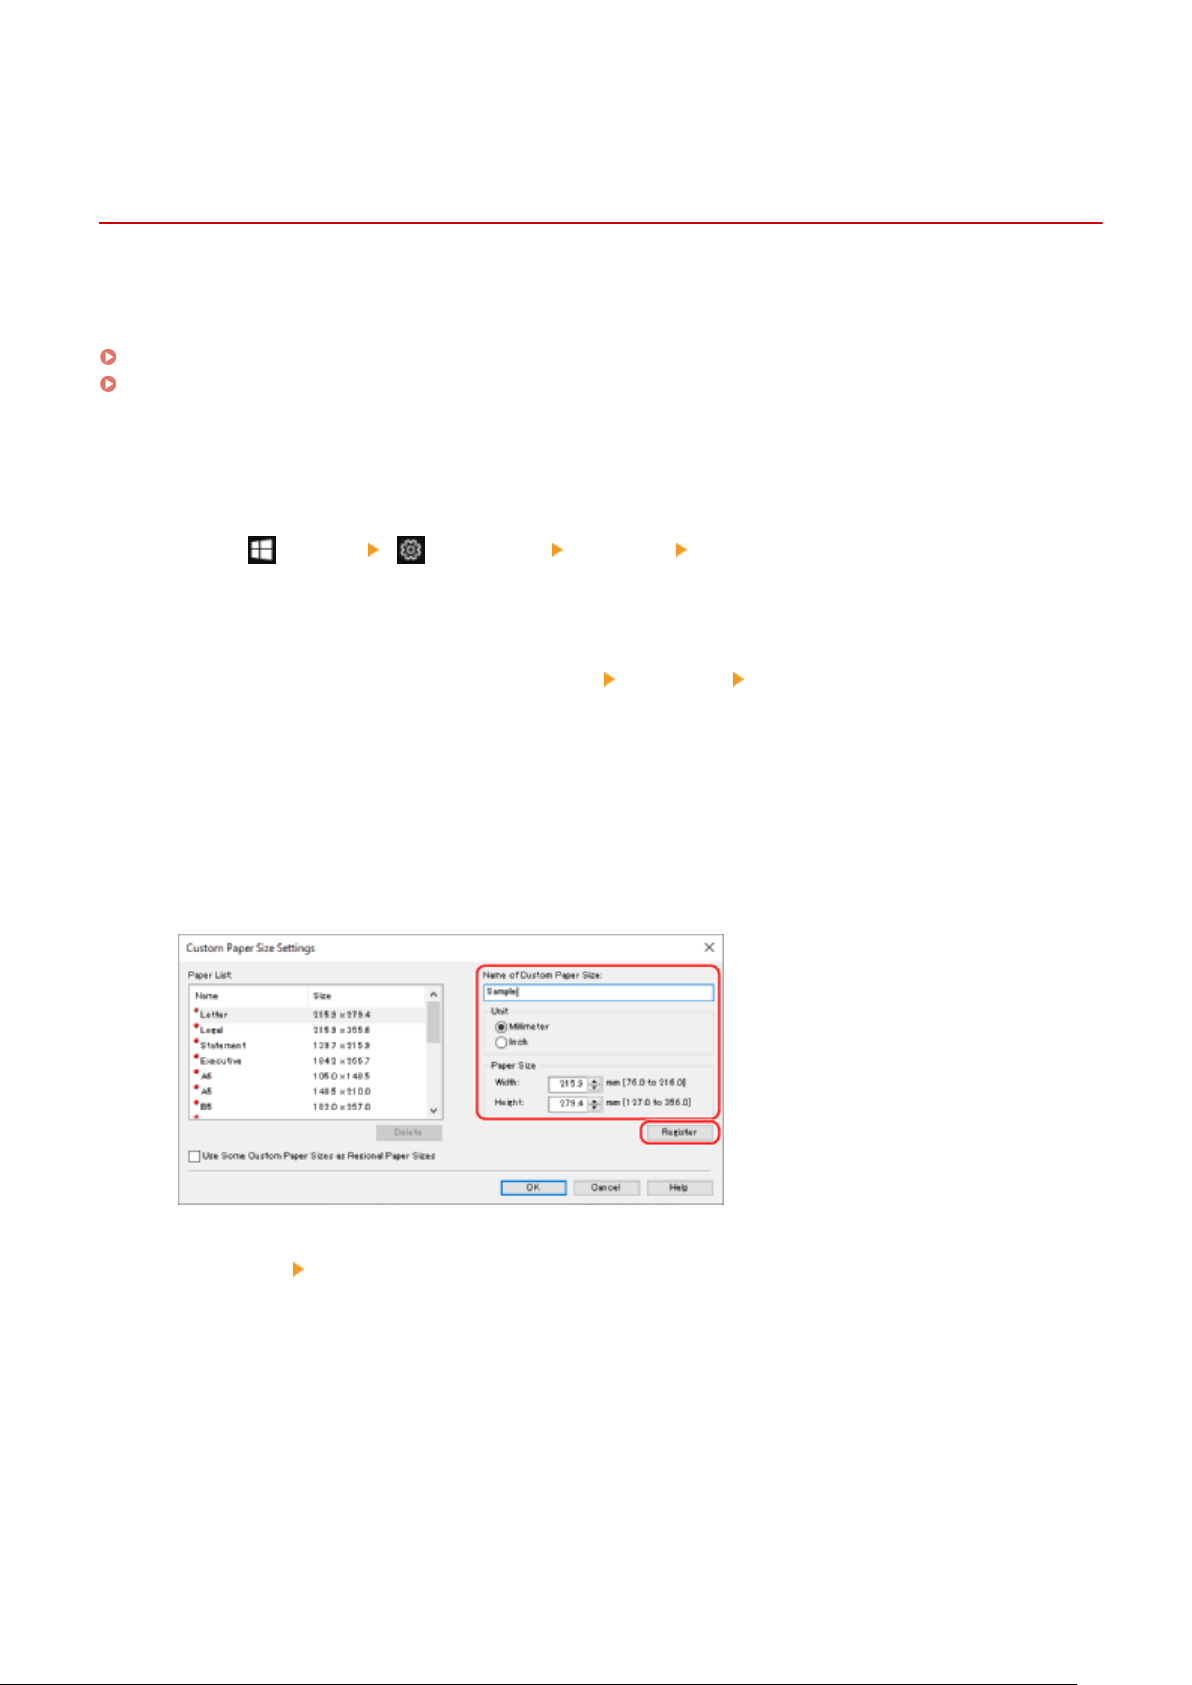
Registering Non-standard Size Paper to the Computer
(Custom Size)
94RC-03S
Custom size paper is non-standar
d size paper whose side lengths can be freely dened.
If the document or paper to print is a non-standard size, you must register the size to the printer driver in advance.
When Using Windows(P. 118)
When Using macOS(P. 118)
◼ When Using Windo
ws
1
Click [
] (Start) [ ] (Settings) [Devices] [Printers & scanners].
➠ The [Printers & scanners] scr
een is displayed.
2
Click the printer driver of the machine
[Manage] [Printing preferences].
➠ The [Printing pr
eferences] screen of the printer driver is displayed.
3
On the [Page Setup] tab, click [Custom Paper Size].
4
Enter the custom size paper name and paper size, and click [Register].
5
Click [OK]
[OK].
➠ The custom size paper is r
egistered.
◼ When Using macOS
1
On your computer, open the document you want to print.
Printing
118
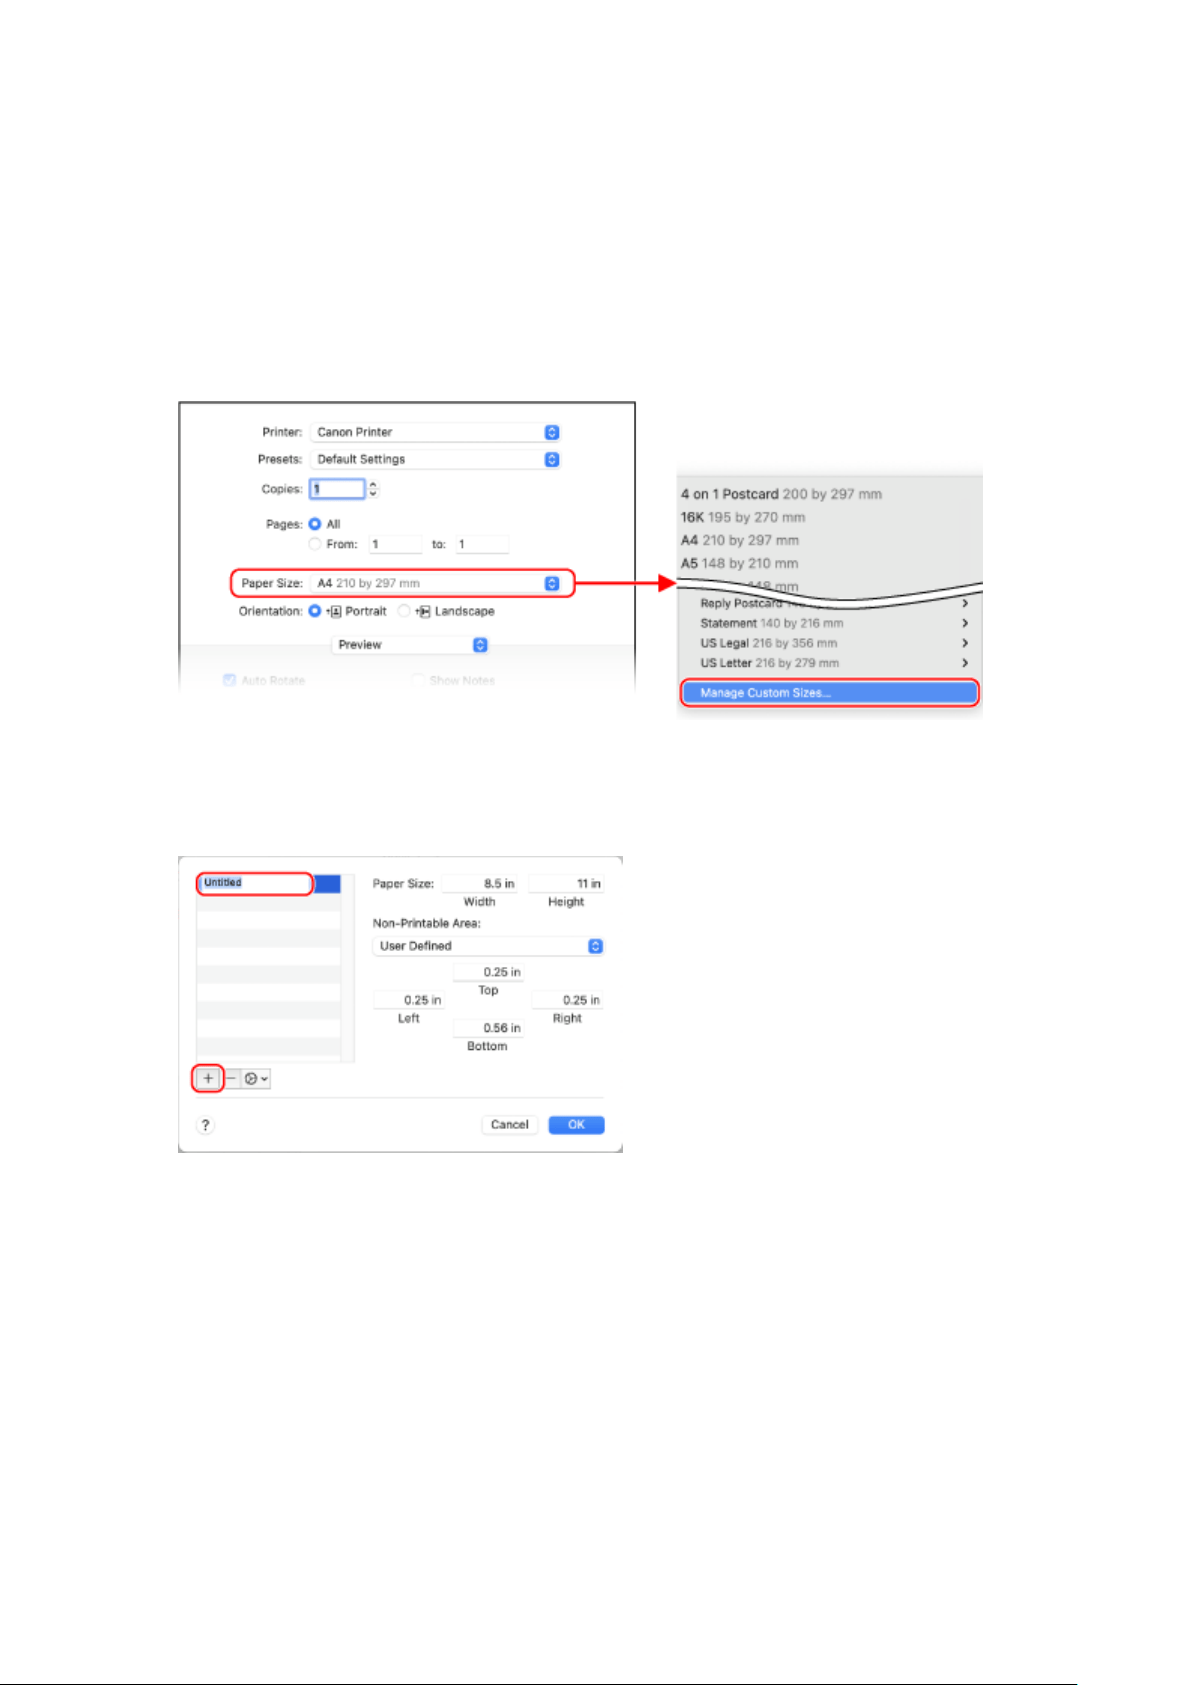
2
From the menu in the application used to open the document, click [Print].
➠ The printing dialog bo
x appears.
3
In [Printer], select the printer driver of the machine.
4
In [Paper Size] of the print options, select [Manage Custom Sizes].
If print options are not displayed, click [Show Details] in the printing dialog box.
5
Click [+] at the bottom left, double-click [Untitled], and enter the custom size paper
name.
6
Enter the paper size, and click [OK].
➠ The custom size paper is r
egistered.
Printing
119

Printing with Universal Print
94RC-03Y
Universal Print is a service for printing documents via the Micr
osoft cloud. The Universal Print driver is standard with
Windows 10, so there is no need to install a printer driver for each computer. If your device is connected to the
Internet, you can print documents when you are away from the machine.
To use Universal Print, you must be a registered user of Microsoft 365 and use Azure Active Directory.
Required Preparations
● Register the machine to Azur
e Active Directory, and set the members or groups that will use the machine.
Registering the Machine to Cloud Service(P. 111)
● T
o each computer that will use Universal Print, register the machine that is registered to Azure Active
Directory.
Registering the Machine to the Computer(P. 114)
For details about how to print with Universal Print and the supported operating systems, see the Microsoft website.
https://docs.micr
osoft.com/
Printing
120
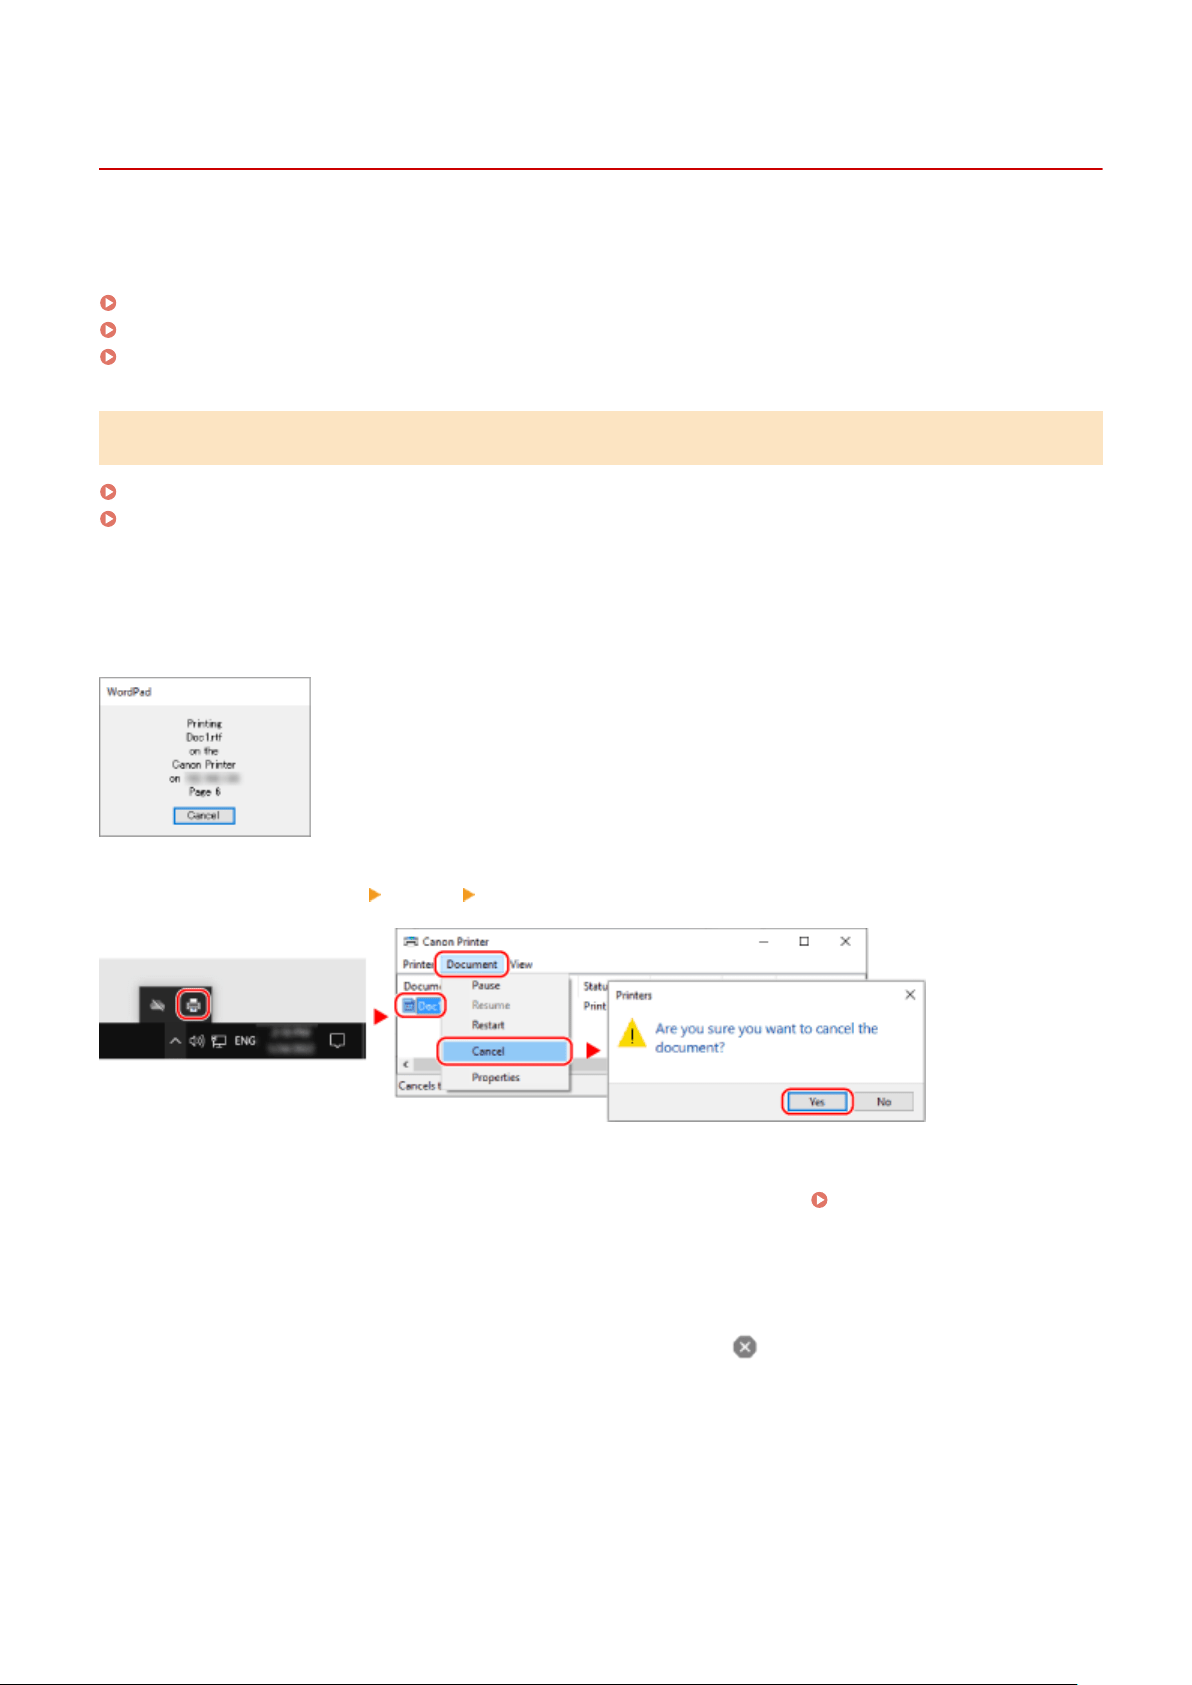
Canceling Printing
94RC-045
Y
ou can cancel printing from a computer. To cancel printing after the print data has been sent to the machine, use the
operation panel or Remote UI.
Canceling Printing from a Computer(P. 121)
Canceling Printing with the Operation Panel(P. 122)
Canceling Printing with Remote UI(P. 122)
Canceling Printing from a Computer
When Using Windows(P. 121)
When Using macOS(P. 121)
◼ When Using Windo
ws
If the printing screen is displayed, click [Cancel].
If the above screen is not displayed, double-click the printer icon in the Windows notication ar
ea, select the document
to cancel, and click [Document]
[Cancel] [Yes].
If the printer icon is not displayed in the Windows notication ar
ea or the document to be canceled is not displayed,
the print data is sent to the machine after being processed on the computer.
In this case, cancel printing using the operation panel of the machine or Remote UI.
Canceling Printing with the
Oper
ation Panel(P. 122)
◼ When Using macOS
Click the printer icon in the Dock, select the document to cancel, and click [
].
Printing
121
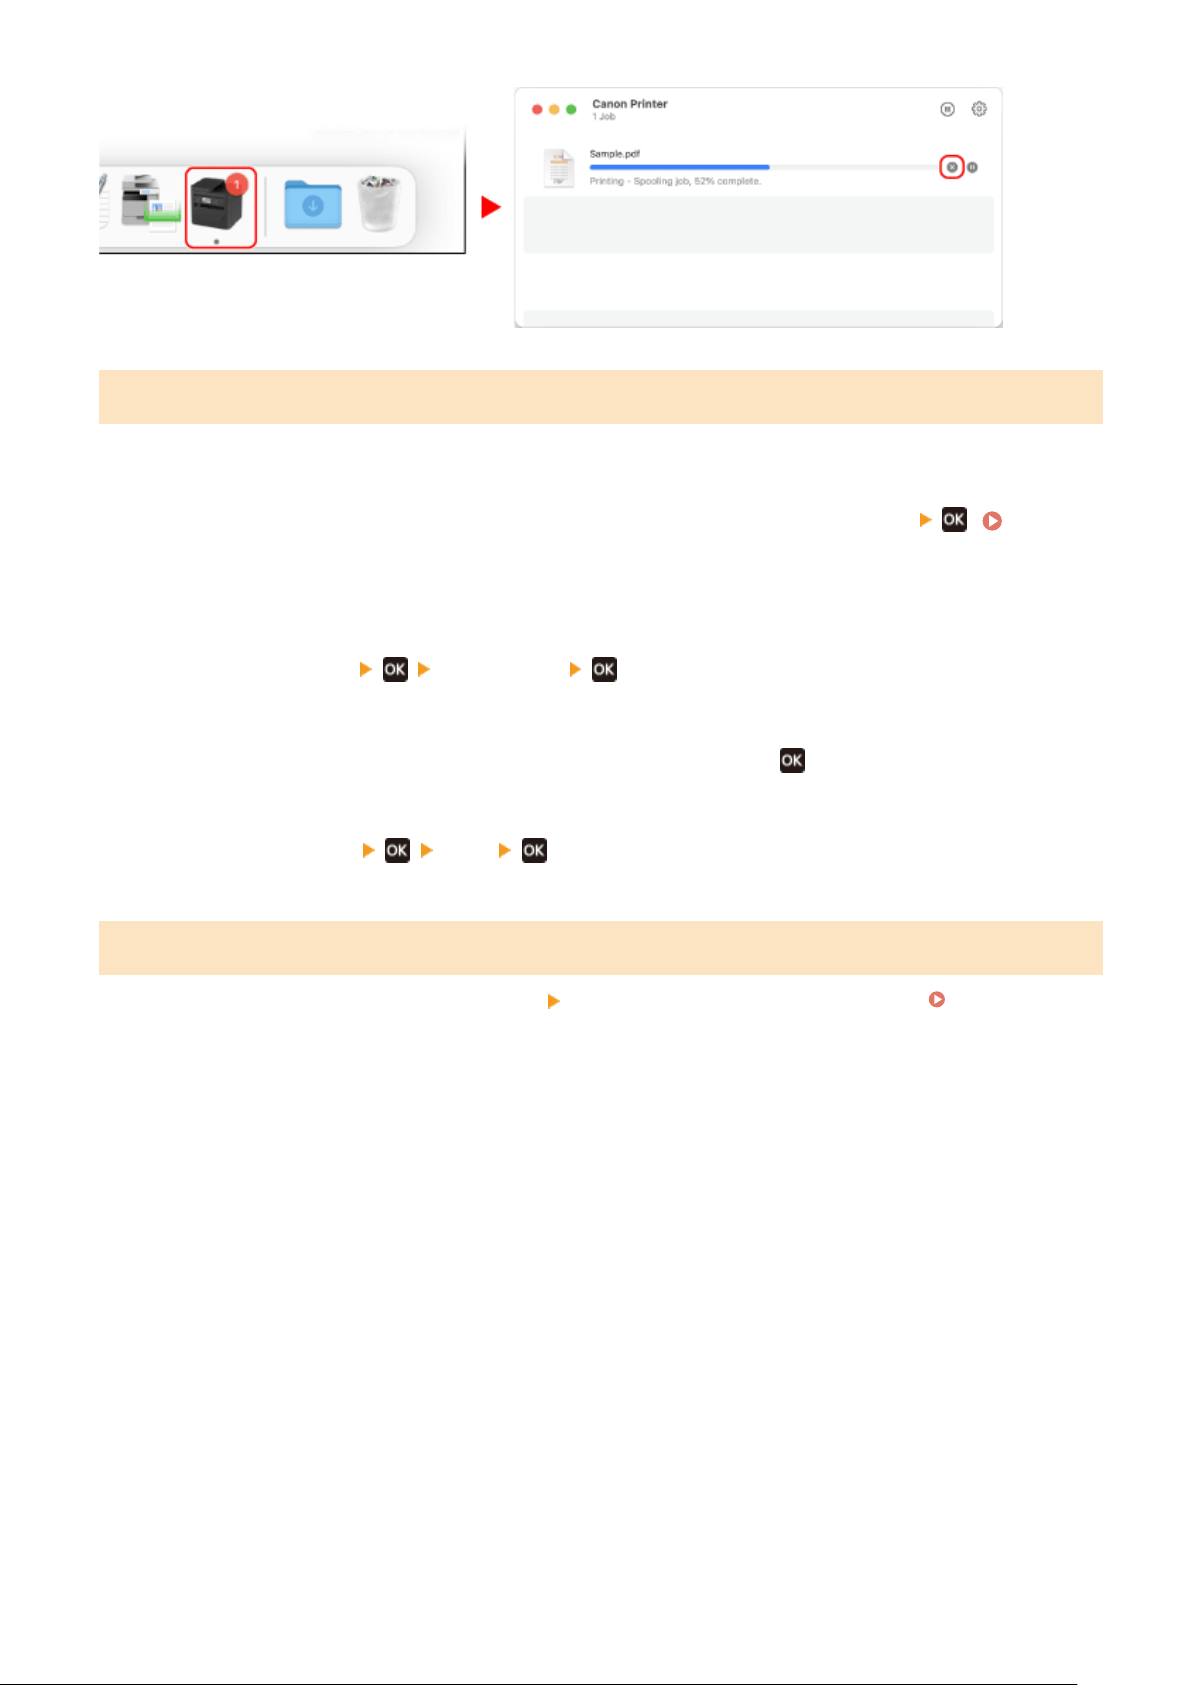
Canceling Printing with the Operation Panel
Y
ou can cancel printing using the procedure below.
1
On the operation panel, press [Status Monitor] in the [Home] screen
. [Home]
Scr
een(P. 81)
➠ The [Status Monitor] scr
een is displayed.
2
Press [Print Job]
[Job Status] .
3
Select the job to be canceled in [Print Job Status], press
.
4
Press [<Cancel>] [Yes] .
Canceling Printing with Remote UI
Y
ou can cancel printing with [Status Monitor/Cancel]
[Job Status] screen in [Print] of Remote UI. Checking Usage
and Logs with Remote UI
(P. 183)
Printing
122

Viewing the Print Job Status and Log
94RC-046
Pr
ocesses handled by the machine, including printing, are managed as jobs. By checking the status and log of jobs,
you can determine whether a print job was performed correctly and the cause of errors that occurred.
* If the log is set to not be displayed, you can only check the print job status.
[Display Job Log](P. 241)
This section describes ho
w to view this information using the operation panel.
You can also check this information using Remote UI from a computer.
Checking Usage and Logs with Remote
UI(P
. 183)
1
On the operation panel, press [Status Monitor] in the [Home] screen
. [Home]
Scr
een(P. 81)
➠ The [Status Monitor] scr
een is displayed.
2
Select [Print Job], press
.
3
Check the print job status and log.
■Viewing the Print Job Status
1
Select [Job Status], press
.
2
Select a job to view its details and press .
➠ The job details are displayed.
3
View the le name, user name, and other information.
Depending on the type of char
acters being used, the le name and user name may not be correctly
displayed.
■Viewing the Print Job Log
1
Select [Job Log], press
.
2
Select a job to view its details and press .
➠ The job details are displayed.
3
View the le name, user name, and other information.
Depending on the type of char
acters being used, the le name and user name may not be correctly
displayed.
If Print Job Log Displays Error Information
Printing was canceled, or an error occurred.
If a three-digit number starting with "#" (error code) is displayed, you can check the cause and solution
using the error code.
An Error Code Is Displayed(P. 336)
Printing
123

Linking with Mobile Devices
Linking with Mobile Devices ....................................................................................................................
125
Preparations for Linking with Mobile Devices ................................................................................................ 126
Preparations for Direct Connection .............................................................................................................. 127
Preparations for Using AirPrint ..................................................................................................................... 129
Connecting a Mobile Device to the Machine ................................................................................................... 132
Connecting a Mobile Device via Wireless LAN Router (LAN Connection) ....................................................... 133
Connecting a Mobile Device Directly to the Machine (Direct Connection) ..................................................... 134
Using a Dedicated Application to Print (Canon PRINT Business) ................................................................... 136
Using AirPrint Application to Print Data .......................................................................................................... 137
Printing from an Android Device ...................................................................................................................... 140
Printing from Chromebook or Other Device with Chrome OS ........................................................................ 141
Linking with Mobile Devices
124

Linking with Mobile Devices
94RC-047
The machine can be oper
ated from a smartphone, tablet, or other mobile device. By using a compatible application or
service, you can easily print photos or documents through a mobile device.
The applications and services that are available vary depending on the mobile device you are using.
iPhone, iPad, iPod touch, Mac
Canon PRINT Business (iPhone, iPad only)
Dedicated Canon application.
Using a Dedicated Application to Print (Canon PRINT Business)(P. 136)
AirPrint
This function is standar
d in Apple operating systems. You can print from applications that support AirPrint
instead of having to install a dedicated application or driver.
In addition, you can use AirPrint to print from a Mac.
Preparations for Using AirPrint(P. 129)
Using AirPrint Application to Print Data(P. 137)
Andr
oid Devices
Canon PRINT Business
Dedicated Canon application.
Using a Dedicated Application to Print (Canon PRINT Business)(P. 136)
Canon Print Service
Dedicated Canon plugin. Enables printing fr
om any application.
Using a Dedicated Plugin to Print (Canon Print Service)(P. 140)
Mopria
® Print Service
Common plugin for Mopria
®
certied printers and multifunction machines. Enables printing from any
application without having to install a dedicated plugin or application for individual manufacturers.
Using a Common Plugin to Print (Mopria® Print Service)(P. 140)
Chr
omebook or Other Device with Chrome OS
You can use the function standard equipped in the Chrome operating system to print without having to install a
dedicated application or printer driver.
Printing from Chromebook or Other Device with Chrome OS(P. 141)
◼ See Also
Managing the Machine fr
om a Mobile Device (Remote UI)
You can use Remote UI from a Web browser on a mobile device. With Remote UI, you can check the
operation status of the machine and change the machine settings. For details about starting and operating
Remote UI, see the instructions for using Remote UI on a computer.
Managing the Machine from a Computer (Remote UI)(P. 178)
* Some display items ar
e omitted in the mobile version of Remote UI. To check all items, tap [PC Version] at
the bottom of the screen and switch to the computer version of Remote UI.
Linking with Mobile Devices
125


Preparations for Direct Connection
94RC-049
Enable the Dir
ect Connection function on the machine. If the machine is not connected to a network, you need to
check the Network Connection Type settings.
Enabling the Direct Connection Function(P. 127)
Checking the Network Connection Type of the Machine(P. 128)
Enabling the Direct Connection Function
This section describes how to congure the settings using Remote UI from a computer.
On the operation panel, select [Menu] in the [Home] screen, and then select [Preferences] to congure the settings.
[Direct Connection Settings](P. 203)
Administr
ator privileges are required. The machine must be restarted to apply the settings.
1
Log in to Remote UI in System Manager Mode.
Starting Remote UI(P. 179)
2
On the Portal page of Remote UI, click [Settings/Registration]. Portal Page of
Remote UI(P. 181)
3
Click [Network Settings] [Direct Connection Settings] [Edit].
➠ The [Edit Dir
ect Connection Settings] screen is displayed.
4
Select the [Use Direct Connection] checkbox.
5
Congure the Dir
ect Connection function, as needed.
When connecting multiple mobile devices at the same time, you must specify the SSID and network key.
To Terminate the Connection Automatically
Select the [T
erminate Direct Connection Session] checkbox, and enter the time period of the direct
connection until it is terminated. When multiple mobile devices are connected, they will be disconnected
after the time period elapses since the last started connection.
To Change the IP Address for Connection
In [IP Addr
ess for Direct Connection], enter any IP address.
To specify the SSID and Network Key (When Connecting Multiple Mobile Devices at the
Same Time)
By default, the SSID and network k
ey of the machine are automatically assigned a random character string
each time direct connection is performed.
To specify the SSID and network key manually, in [Access Point Mode Settings], select the [Specify SSID to
Use] or [Specify Network Key to Use] checkbox, and enter an SSID or network key using single-byte
alphanumeric characters.
To Allow Mobile Devices to Always Connect to the Machine
By default, you must use the operation panel to put the machine into waiting state when you want to
establish a direct connection.
Linking with Mobile Devices
127

To allow mobile devices to always connect to the machine, in [Access Point Mode Settings], specify the SSID
and network k
ey, and select the [Always Keep Enabled If SSID/Network Key Is Specied] checkbox in [Keep
Connection Enabled].
6
Click [OK].
7
Restart the machine.
Restarting the Machine(P. 75)
➠ The settings ar
e applied.
Checking the Network Connection Type of the Machine
If the machine is not connected to a network (wir
ed or wireless LAN), check that the network connection type is set to
wired LAN.
If the machine is connected to a network, you do not have to check this.
1
On the operation panel, press [Status Monitor] in the [Home] screen
. [Home]
Scr
een(P. 81)
➠ The [Status Monitor] scr
een is displayed.
2
Press [Network Information]
[Network Connection Method] .
➠ The [Network Conn. Method] scr
een is displayed.
3
Check that [Wired LAN] is displayed.
If the connection type is set to wired LAN, you can establish a direct connection even if the machine is not
connected to a network.
When [Wireless LAN] Is Displayed in [Network Conn. Method]
When the machine is not connected to a wir
eless LAN, a direct connection cannot be established. Connect
the machine to a wireless LAN or switch the connection type to wired LAN.
Connecting to a Wireless LAN(P. 38)
Selecting Wired or Wireless LAN(P. 36)
Linking with Mobile Devices
128

Preparations for Using AirPrint
94RC-04A
Set the basic information that is r
equired to use AirPrint. Congure the settings related to the functions and security
that will be used, according to your usage and environment.
Setting the Basic Information of AirPrint(P. 129)
Setting the Functions and Security to Be Used with AirPrint(P. 130)
Setting the Basic Information of AirPrint
Congure these settings using Remote UI from a computer. You cannot use the operation panel to congure the
settings.
Administrator privileges are required.
1
Log in to Remote UI in System Manager Mode.
Starting Remote UI(P. 179)
2
On the Portal page of Remote UI, click [Settings/Registration]. Portal Page of
Remote UI(P. 181)
3
Click [Network Settings] [AirPrint Settings] [Edit].
➠ The [Edit AirPrint Settings] scr
een is displayed.
4
Select the [Use AirPrint] checkbox, and enter the printer name.
● For the printer name, enter a name to identify the machine, using single-byte alphanumeric characters.
● If mDNS of IPv4 is set, the mDNS name is entered for the printer name. If you change the printer name, the
mDNS name is also changed.
* When you change the set printer name or mDNS name, the Mac that was connected to the machine may
no longer be able to connect to it. In this case, you must register the machine on the Mac.
5
Enter the location and longitude and latitude of the machine, as needed.
If the location of the machine is set in [Settings/Registration]
[Device Management] [Device Information
Settings], the same char
acter string is entered in the location. When you change the location in AirPrint
Settings, the location in Device Information Settings is also changed.
6
Click [OK].
➠ The settings ar
e applied.
7
Log out from Remote UI.
● When the AirPrint function is enabled, the follo
wing network settings are also enabled:
Linking with Mobile Devices
129
- HTTP [Use HTTP](P. 215)
-
IPP printing
[IPP Print Settings](P. 214)
-
mDNS (IPv4)
[mDNS Settings](P. 211)
-
mDNS (IPv6)
[mDNS Settings](P. 211)
Setting the Functions and Security to Be Used with AirPrint
AirPrint uses the IPP protocol.
Y
ou can congure the settings to encrypt communication with TLS and congure IPP authentication when using
the protocol.
Congure these settings using Remote UI from a computer. You cannot use the operation panel to congure the
settings.
Administrator privileges are required.
Required Preparations
● When encrypting communication with TLS, specify the k
ey and certicate to use for TLS encrypted
communication.
Using TLS(P. 153)
1
Log in to Remote UI in System Manager Mode. Starting Remote UI(P. 179)
2
On the Portal page of Remote UI, click [Settings/Registration]. Portal Page of
Remote UI(P
. 181)
3
Click [Network Settings]
[IPP Print Settings] [Edit].
➠ The [Edit IPP Print Settings] scr
een is displayed.
4
Congure the IPP settings.
When Restricting the Functions to Use
Clear the [Use IPP Printing] checkbo
x.
When you clear the checkbox, printing with AirPrint is no longer possible.
When Encrypting Communication with TLS
Select the [Allo
w Only When Using TLS] or [Use TLS] checkbox.
When Setting IPP Authentication
Select the [Use Authentication] checkbox, and set the user name to be used for IPP authentication using
single-byte alphanumeric characters.
To set a password, select the [Set/Change Password] checkbox, and enter the same password in both
[Password] and [Conrm] using single-byte alphanumeric characters.
Printing with AirPrint now requires authentication, and only users who know the user name and password of
IPP authentication can use these functions.
5
Click [OK].
➠ The settings ar
e applied.
Linking with Mobile Devices
130

6
Log out from Remote UI.
Linking with Mobile Devices
131
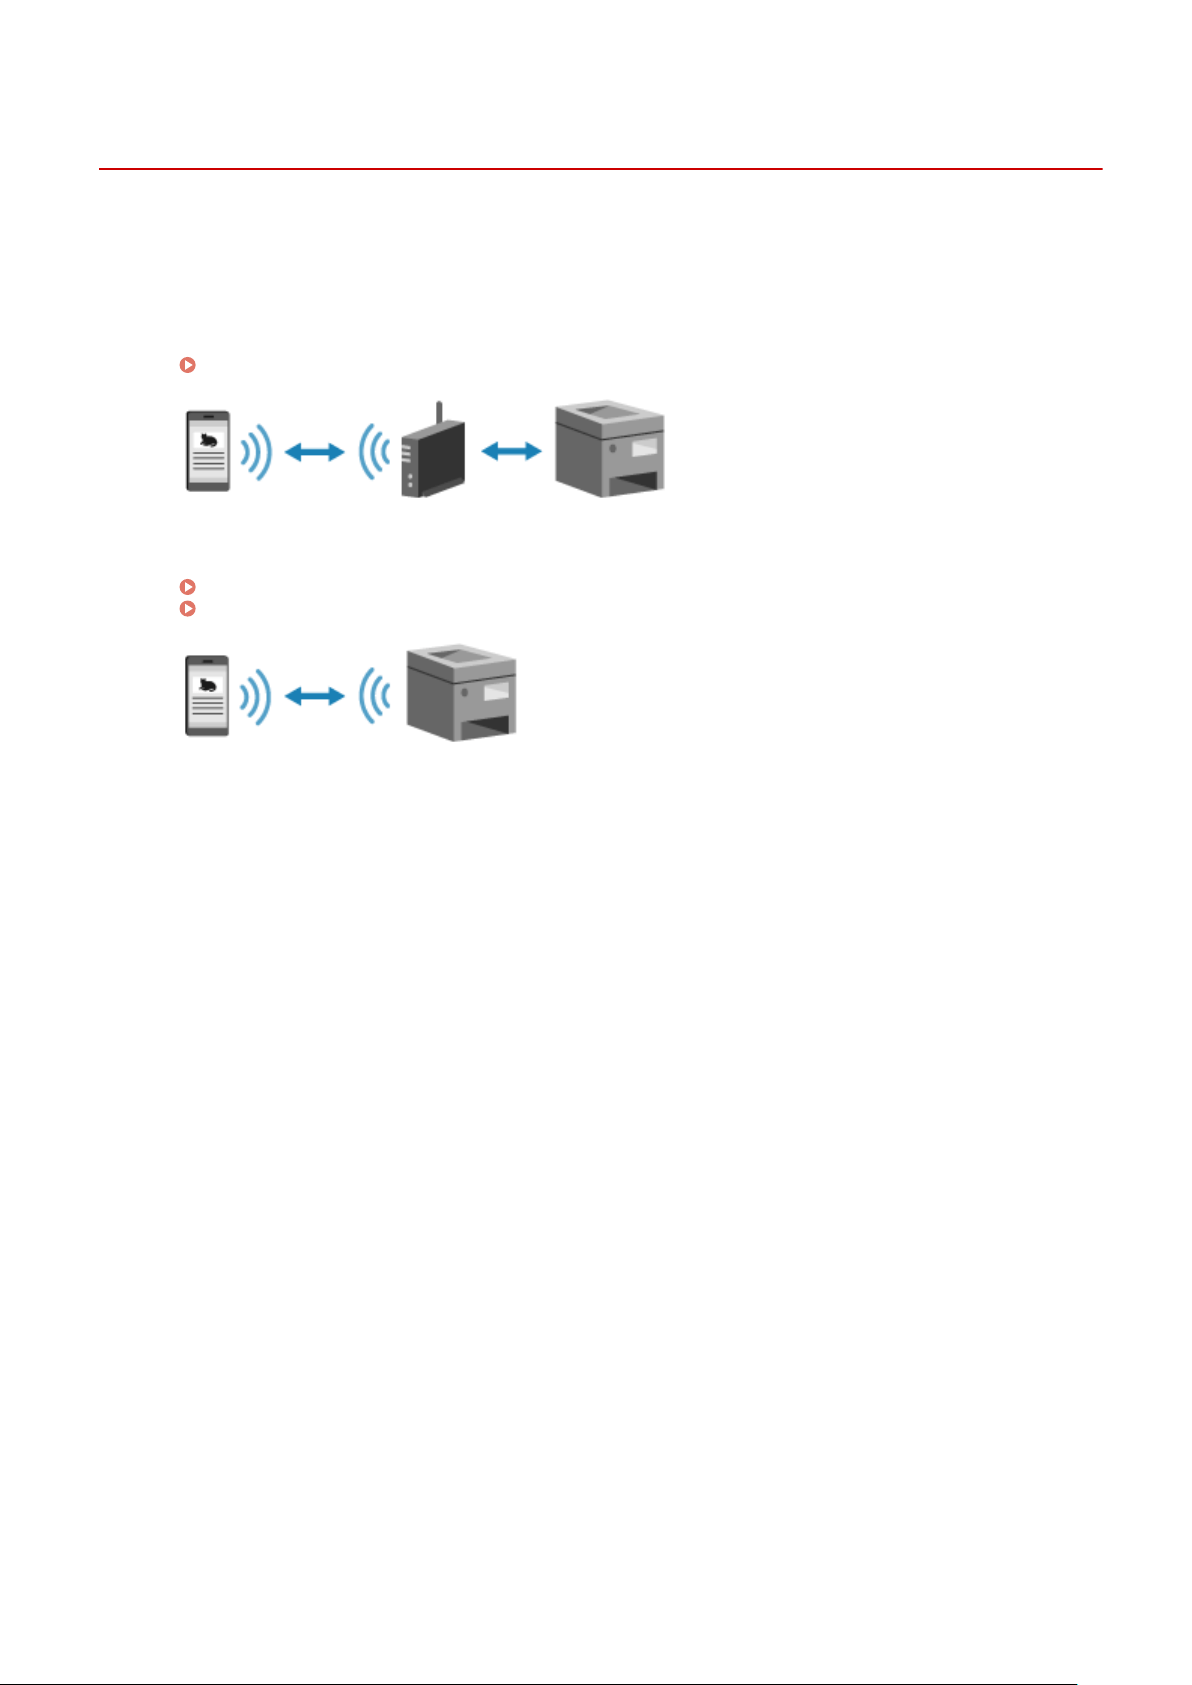
Connecting a Mobile Device to the Machine
94RC-04C
T
o use the machine from a mobile device, you must connect it to the machine using either of the following methods:
Connecting via Wireless LAN Router (LAN Connection)
Connect a mobile device to the machine via a wireless LAN router in the same way as you connect a
computer to the machine. By conguring a mobile device to connect automatically to the wireless LAN
router, you do not need to manually connect it next time.
Connecting a Mobile Device via Wireless LAN Router (LAN Connection)(P. 133)
Connecting Directly (Direct Connection)
Connect a mobile de
vice directly to the machine via Wi-Fi. You can directly connect to the machine without
using wireless LAN router. You must manually connect the mobile device each time you use the machine.
Preparations for Direct Connection(P. 127)
Connecting a Mobile Device Directly to the Machine (Direct Connection)(P. 134)
Linking with Mobile Devices
132
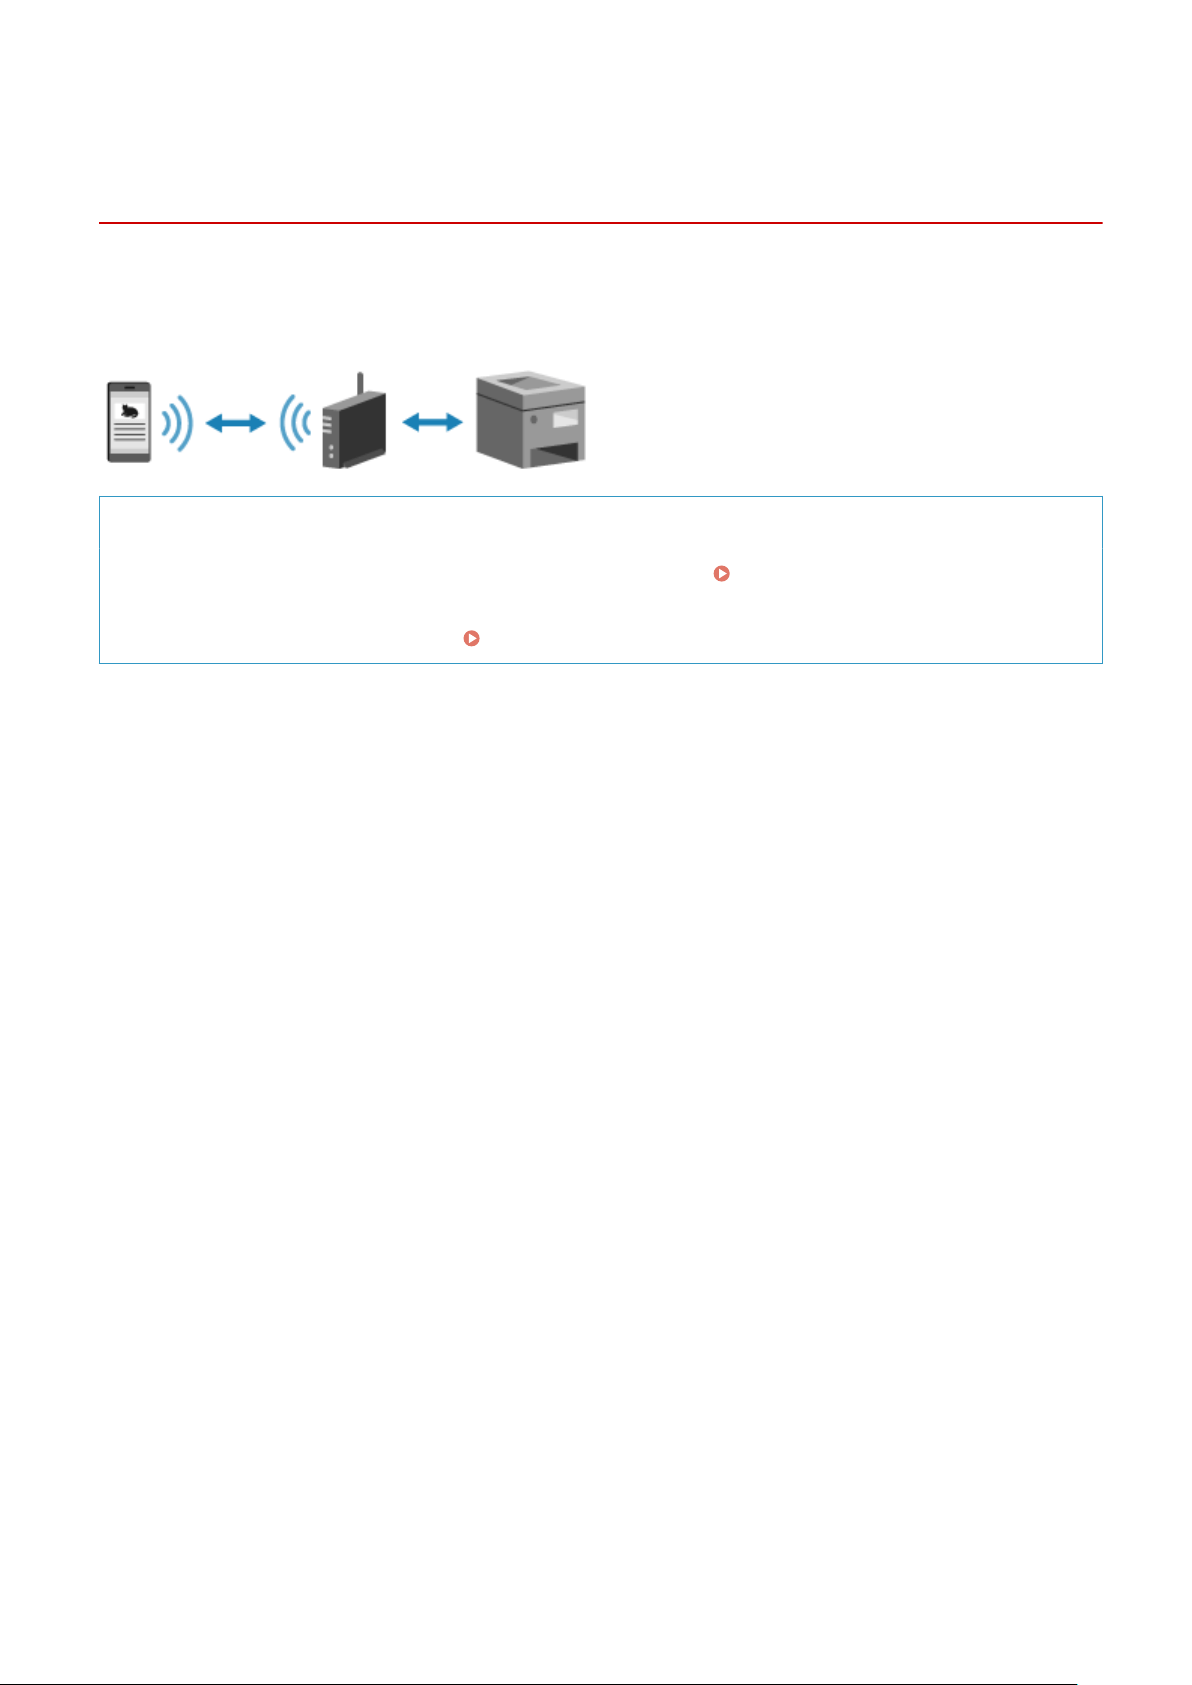
Connecting a Mobile Device via Wireless LAN Router
(LAN Connection)
94RC-04E
Connect a mobile de
vice to the machine via a wireless LAN router in the same way as you connect a computer to the
machine. By conguring a mobile device to connect automatically to the wireless LAN router, you do not need to
manually connect it next time.
Required Preparations
● Connect the machine to the network using wir
eless or wired LAN.
Setting Up the Network(P. 34)
* When using a wir
ed LAN, check that a wireless LAN router is connected to the same network.
● Set an IPv4 address to the machine.
Setting IPv4 Addresses(P. 50)
Connect the mobile device to either of the following wireless LAN routers:
● A wir
eless LAN router connected to the machine
● (When the machine is connected to a wired LAN) A wireless LAN router on the network connected to the
machine
For details about how to connect a mobile device to a wireless LAN router, see the manual of the mobile device.
Linking with Mobile Devices
133
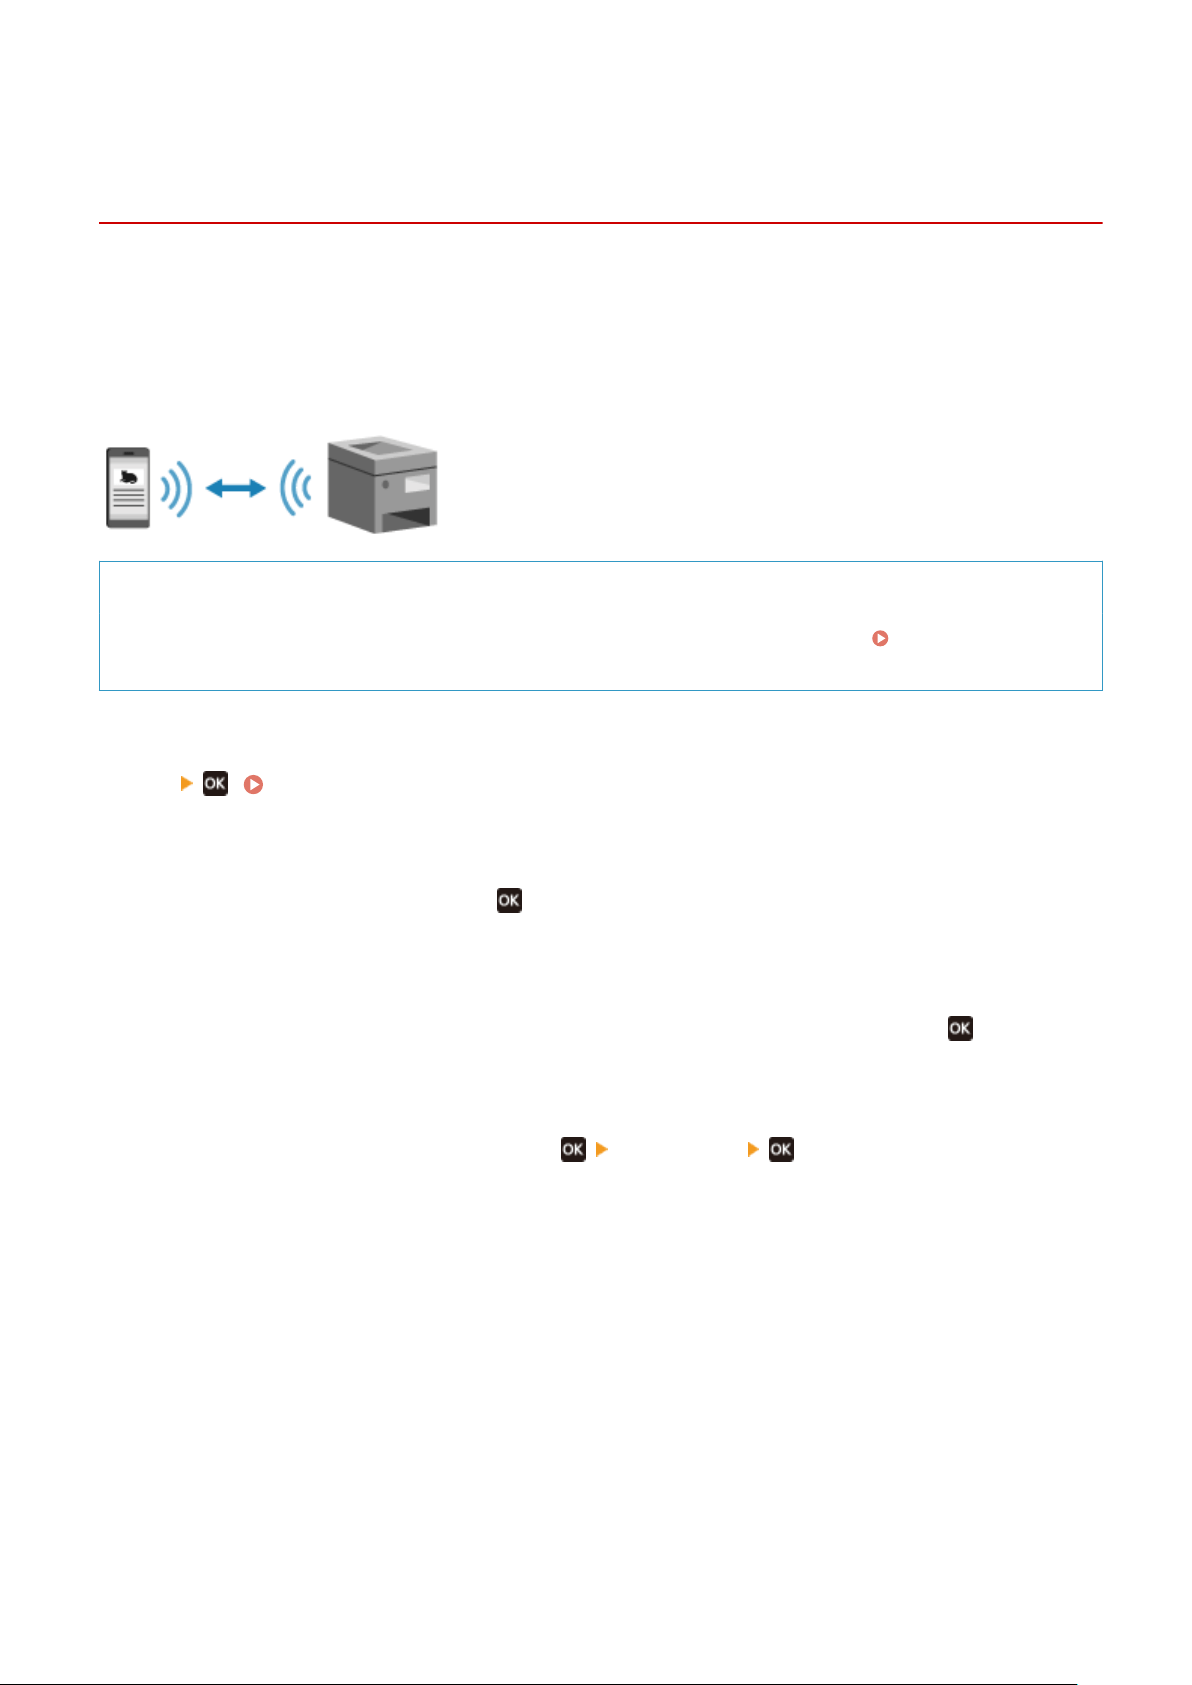
Connecting a Mobile Device Directly to the Machine
(Dir
ect Connection)
94RC-04F
Connect a mobile de
vice directly to the machine via Wi-Fi. You can directly connect it to the machine without using
wireless LAN router. You must manually connect the mobile device each time you use the machine.
To connect a mobile device directly, use the operation panel to put the machine into the waiting state, and then search
for the machine from the mobile device. Next, enter the network key to connect the mobile device to the machine.
By default, only one mobile device can be directly connected to the machine at any one time. Setting a xed SSID and
network key enables you to connect up to ve mobile devices at the same time.
Required Preparations
● Mak
e preparations such as enabling the Direct Connection function on the machine.
Preparations for
Dir
ect Connection(P. 127)
1
On the operation panel, select [Menu] in the [Home] screen, and press [Mobile Portal]
. [Home] Screen(P. 81)
➠ The [Mobile Portal] scr
een is displayed.
2
Select [<Connect>] and press
.
➠ The machine enters waiting state for Dir
ect Connection.
● Within 5 minutes of pressing [<Connect>], you must directly connect the mobile device.
● You can skip this step when [Connect from device you want to connect.] is displayed. Press
and proceed
to Step 3.
● When [Maximum number of wir
eless devices connected w/ Direct Connection has been reached.] is
displayed, you cannot connect a new mobile device until a connected mobile device is disconnected. To
disconnect a connected mobile device, press
[<Disconnect>] .
* By default, only one mobile device can be directly connected to the machine at any one time.
3
Directly connect the mobile device.
1
Check the machine’s SSID and network key displayed on the operation panel screen.
2
In the Wi-Fi settings of the mobile device, select the SSID of the machine, and enter the network key.
➠ The [Mobile Portal] scr
een reappears.
By default, only one mobile device can be directly connected to the machine at any one time.
[Maximum number of wireless devices connected w/ Direct Connection has been reached.] is displayed
on the screen.
For details about how to congure the Wi-Fi settings, see the manual of the mobile device.
Linking with Mobile Devices
134

4
When you have completed your operations on the mobile device, press
[<Disconnect>]
.
➠ The dir
ect connection is terminated.
If multiple mobile devices are connected, all devices are disconnected.
● Y
ou may not be able to connect to the Internet with Direct Connection depending on the mobile device.
● The power-saving effect of sleep mode decreases when using Direct Connection.
● The IP address of the mobile device is set automatically. If you set the IP address manually, communication
using Direct Connection may not be performed correctly.
Checking a Mobile Device Connected to the Machine
● When using Dir
ect Connection, press [Connection Information] to display the information of the mobile
device connected to the machine with Direct Connection.
If the Direct Connection Is Automatically Disconnected
● The direct connection is automatically terminated in the following cases:
- When the Direct Connection Termination is set
- When no data is sent or received between the mobile device and the machine for a while
- When you are using the machine via a wireless LAN connection and the connection drops out
Linking with Mobile Devices
135

Using a Dedicated Application to Print (Canon PRINT
Business)
94RC-04H
Y
ou can use the dedicated Canon application Canon PRINT Business to print.
Compatible Operating Systems and Download Site
See the Canon website.
https://global.canon/gomp/
Usage
● Connect a mobile device to the machine.
Connecting a Mobile Device to the Machine(P. 132)
● Register the machine to Canon PRINT Business.
When the mobile de
vice is connected to the machine via LAN, the IP address information of the machine is
required to register the machine to Canon PRINT Business.
You can view the IP address with [Menu] on the control panel
[Mobile Portal] [Display
De
vice Name/IP Address]
.
● For details about r
egistering the machine and printing, see the Help menu item in the application.
Linking with Mobile Devices
136
Using AirPrint Application to Print Data
94RC-04J
AirPrint is a print function standar
d in Apple operating systems. You can print from applications that support AirPrint
instead of having to install a dedicated application or driver.
In addition, you can use AirPrint to print from a Mac.
When Using an iPhone, iPad, or iPod touch(P. 137)
When Using a Mac(P. 138)
When Using an iPhone, iPad, or iPod touch
Use AirPrint to print fr
om an iPhone, iPad, or iPod touch connected to the machine via LAN or direct connection.
Operating Environment
You can use AirPrint with the following iPhone, iPad, and iPod touch models:
● iPhone: 3GS or later
● iPad: All models
● iPod touch: Third generation or later
Required Preparations
● Set the machine to enable use of AirPrint.
Preparations for Using AirPrint(P. 129)
● Connect the machine to an iPhone, iPad, or iPod touch. Connecting a Mobile Device to the
Machine(P
. 132)
1
Open the data to be printed on the iPhone, iPad, or iPod touch.
2
In the application with the data to be printed open, tap [ ].
➠ The menu options ar
e displayed.
3
Tap [Print].
➠ The print options ar
e displayed.
If print options are not displayed, the application does not support AirPrint. In this case, you cannot use
AirPrint to print data.
4
Tap [Printer], and select the machine.
Linking with Mobile Devices
137

5
Congure the print settings.
The available settings and usable paper sizes vary depending on the application you are using.
6
Tap [Print].
➠ Printing starts.
Use [Status Monitor] on the oper
ation panel to view the print job status and log.
Viewing the Print Job
Status and Log(P
. 123)
When Using a Mac
Y
ou can use AirPrint to print data from a Mac connected to the network on the same LAN as the machine or a Mac
connected to the machine via USB.
Operating Environment
You can use AirPrint on a Mac with OS X 10.7 or later
*1
installed.
*1
When printing fr
om a Mac connected to the machine via USB, OS X 10.9 or later.
Required Preparations
● Set the machine to enable use of AirPrint.
Preparations for Using AirPrint(P. 129)
● Connect the machine to a Mac. Setting Up the Network(P. 34)
When connecting via USB
, connect to the USB port for computer connection on the back of the machine with
a USB cable.
Rear Side(P. 9)
● In [System Pr
eferences]
[Printers & Scanners] on the Mac, click [+] to register the machine.
◼ Using AirPrint to Print Data
1
Open the document you want to print on your Mac.
2
In the application used to open the document, click [Print].
➠ The printing dialog bo
x appears.
3
In [Printer], select the machine.
4
Congure the print settings.
The available settings and usable paper sizes vary depending on the application you are using.
5
Click [Print].
➠ Printing starts.
Linking with Mobile Devices
138


Printing from an Android Device
94RC-04K
Install a plugin on a mobile de
vice to enable printing from an application that has a print function.
This machine supports Canon plugins as well as Mopria
®
, which is supported by various manufacturers.
Using a Dedicated Plugin to Print (Canon Print Service)(P. 140)
Using a Common Plugin to Print (Mopria® Print Service)(P. 140)
Using a Dedicated Plugin to Print (Canon Print Service)
Y
ou can use the dedicated Canon plugin Canon Print Service to print from any application.
Compatible Operating Systems and Download Site
See the Canon website.
https://global.canon/psmp/
Usage
● Connect a mobile device to the machine.
Connecting a Mobile Device to the Machine(P. 132)
● Register the machine to Canon Print Service.
When the mobile device is connected to the machine via LAN, the IP address information of the machine is
required to register the machine to Canon Print Service. You can view the IP address with [Menu] on the
control panel [Mobile Portal] [Display Device Name/IP Address] .
● For
details about registering the machine and the printing method, see the Canon Print Service manual in
"Mobile Apps" at the online manual site.
https://oip.manual.canon/
Using a Common Plugin to Print (Mopria
®
Print Service)
The machine supports Mopria
®
Print Service, a plugin that enables printing fr
om any application on a Mopria
®
certied printer or multifunction machine.
You can print on a Mopria
®
certied printer available from various manufacturers, which is convenient when printing
on the go, without having to install a dedicated application or plugin.
Usage
● Connect a mobile de
vice to the machine.
Connecting a Mobile Device to the Machine(P. 132)
● For details about ho
w to print and Mopria
®
certied printers, see the following website:
https://mopria.org/
Linking with Mobile Devices
140

Printing from Chromebook or Other Device with
Chr
ome OS
94RC-04L
Y
ou can use a Chromebook or other device equipped with Chrome OS to print without having to install a dedicated
application or printer driver.
Printing from a Chrome OS Device
● Printing fr
om a Chrome OS device may not be supported depending on your country or region.
Usage
● Connect a Chromebook to the machine.
Connecting a Mobile Device via Wireless LAN Router (LAN Connection)(P. 133)
When
connecting via USB, connect to the USB port for computer connection on the back of the machine
with a USB cable.
Rear Side(P. 9)
● For details about ho
w to print using the Chromebook, see Chromebook Help.
https://support.google.com/chromebook/answer/7225252/
Linking with Mobile Devices
141

Security
Security ................................................................................................................................................................
143
Setting the Department ID and PIN for the Administrator ............................................................................ 144
Protecting the Network .................................................................................................................................... 146
Setting the Firewall ....................................................................................................................................... 147
Changing the Port Number .......................................................................................................................... 150
Using a Proxy ............................................................................................................................................... 151
Using TLS ...................................................................................................................................................... 153
Using IEEE 802.1X ......................................................................................................................................... 155
Managing and Verifying a Key and Certicate .............................................................................................. 157
Generating a Key and Certicate ........................................................................................................... 158
Generating a Key and Certicate Signing Request (CSR) and Obtaining and Registering a Certicate ... 160
Registering a Key and Certicate or CA Certicate Obtained from an Issuing Authority ........................ 163
Verifying a Received Certicate with OCSP ............................................................................................. 165
Preventing Leaking Information ...................................................................................................................... 166
Preventing Unauthorized Use .......................................................................................................................... 167
Restricting Use of Remote UI ........................................................................................................................ 168
Restricting Use from a Mobile Device ........................................................................................................... 170
Preventing Connection to Computer via USB Port ........................................................................................ 171
Conguring LPD, RAW, or WSD ..................................................................................................................... 172
Disabling HTTP Communication ................................................................................................................... 174
Security
142

Security
94RC-04R
This machine is an information de
vice that uses communication functions and handles various data. Therefore, it is
important to provide measures to prevent unauthorized access when using the machine in a network environment
and measures against security risks such as leaking information.
This machine is equipped with various functions and settings to reduce these threats and vulnerabilities. Congure the
settings and use them appropriately according to your usage environment and conditions for safer operation of the
machine.
Creating an Administrator System
Use an administrator account to manage the machine and congure the settings. Operate the machine using
a system in which only a specic administrator(s) knows the ID and PIN.
Setting the Department ID and PIN for the Administrator(P. 144)
Network Settings
Applying the network security settings accor
ding to the usage environment can reduce the threat of
unauthorized access and eavesdropping.
Protecting the Network(P. 146)
Managing Usage Status
Using a PIN and setting usage r
estrictions can help prevent unauthorized use of Remote UI. Implementing
measures that include operations according to usage status of the machine can improve security.
Preventing Leaking Information(P. 166)
Preventing Unauthorized Use(P. 167)
Security
143
Setting the Department ID and PIN for the
Administr
ator
94RC-04S
Set the System Manager ID and System Manager PIN to cr
eate an administrator account.
By creating an administrator account, only those users who know these credentials can log in to System Manager
Mode to view and change important settings.
System Manager ID and PIN(P. 4)
This section describes ho
w to congure the settings using the operation panel.
You can also congure the settings using Remote UI from a computer after the System Manager ID and PIN have been
set on the machine.
Managing the Machine from a Computer (Remote UI)(P. 178)
Administr
ator privileges are required.
1
On the operation panel, select [Menu] in the [Home] screen, and press
. [Home]
Scr
een(P. 81)
2
Press [Management Settings]
[User Management] [System Manager
Information Settings] .
➠ The [Sys. Manager Info Set.] scr
een is displayed.
If the login screen appears, enter the currently set System Manager ID and PIN, and then press
.
3
Press [System Manager ID and PIN] enter the System Manager ID .
Specify any number. You cannot set a System Manager ID consisting of all zeros, such as "00" or "0000000."
4
Enter the System Manager PIN, and press .
Specify any number other than "7654321." You cannot set a PIN consisting of all zeros, such as "00" or
"0000000."
5
Enter the PIN again, and press .
➠ The settings ar
e applied.
● Do not forget the System Manager ID and PIN. If you forget your System Manager ID and PIN, contact your
dealer or service representative. If the Problem Persists(P. 339)
Setting the System Manager Information
● On the [Sys. Manager Info Set.] scr
een, press [System Manager Name] to set the name of the system
manager.
● You can also congure the e-mail address and other system manager information by using Remote UI from
a computer.
Security
144

- The set information is displayed in [Status Monitor/Cancel] [Device Information] of Remote UI.
Checking Usage and Logs with Remote UI(P. 183)
-
The set e-mail address becomes the destination that is selected by clicking [Mail to System Manager] on
the Portal page of Remote UI.
Portal Page of Remote UI(P. 181)
Clearing the System Manager ID and PIN Settings
● Clear the enter
ed values of the System Manager ID and PIN, and then click [Apply] with the elds left empty.
Security
145

Protecting the Network
94RC-052
Connecting the machine to a network allo
ws you link it to computers and mobile devices for more convenient
operations. However, this also creates risks of unauthorized access and eavesdropping over the network.
By conguring the security settings according to your network environment, you can reduce these risks to ensure
safer use of the machine.
Filtering Using the Firewall Settings
Allows communications only with devices that have a specic IP address or MAC address to prevent
unauthorized access.
Setting the Firewall(P. 147)
Port Contr
ol
If the port number being used by a communicating device, such as a computer or server, is changed, change
the setting on the machine too. In addition, if it is clear that there is an unneeded protocol, use of the
protocol is prohibited on the machine and that port is closed to prevent intrusion from the outside.
Changing the Port Number(P. 150)
Using a Pr
oxy Server
Using a proxy server to connect the machine to a network not only facilitates managing communication with
external networks but blocks unauthorized access and consolidates anti-virus protection for enhanced
security.
Using a Proxy(P. 151)
Encryption of Communication Using TLS
Y
ou can use TLS to encrypt communication when using Remote UI. This reduces the risks of data
eavesdropping and tampering during communication.
Using TLS(P. 153)
Using the Machine in a Network with IEEE 802.1X Authentication
When connecting the machine to a network that uses IEEE 802.1X authentication, you must congur
e the
settings on the machine such as the authentication method managed by the authentication server.
Using IEEE 802.1X(P. 155)
Managing and V
erifying the Key and Certicate
You can generate a key and certicate used to encrypt communication and register a key and certicate
obtained from a certication authority. By conguring the settings to check the revocation status of a
certicate (using OCSP), you can check to see if a certicate received from a certication authority has been
revoked.
Managing and Verifying a Key and Certicate(P. 157)
◼ See Also
For the network settings at setup, see the following.
Conguring Your Machine for Your Network Environment(P. 54)
Security
146
Setting the Firewall
94RC-053
Set up the pack
et-ltering rewall to prevent unauthorized access.
First, as a prerequisite, set whether to allow or block communication with other devices. Next, specify the IP addresses
or MAC addresses of devices you want to block or allow as exceptions.
For the number of addresses that can be specied and the protocols whose communication can be restricted, see the
rewall specications.
Firewall(P. 22)
Setting IP Address Filtering(P. 147)
Setting MAC Address Filtering(P. 148)
● MA
C address ltering is not available when connecting the machine to a wireless LAN.
● Multicast and broadcast addresses are not restricted even when the setting is congured to block the
sending of data from the machine to other devices.
Setting IP Address Filtering
Set IPv4 addr
ess ltering or IPv6 address ltering according to your usage environment.
This section describes how to congure the settings using Remote UI from a computer.
On the operation panel, select [Menu] in the [Home] screen, and then select [Preferences] to congure the settings.
However, the operation panel can only be used to enable or disable the lter.
[Firewall Settings](P. 206)
Administr
ator privileges are required. The machine must be restarted to apply the settings.
● If you set an incorr
ect IP address, you will no longer be able to access Remote UI. If this happens, use the
operation panel to disable the rewall settings, and then use Remote UI to set the IP address again.
1
Log in to Remote UI in System Manager Mode.
Starting Remote UI(P. 179)
2
On the Portal page of Remote UI, click [Settings/Registration]. Portal Page of
Remote UI(P
. 181)
3
Click [Network Settings]
[Firewall Settings].
➠ The [Fir
ewall Settings] screen is displayed.
4
Click [Edit] for the IP address send or receive lter.
● T
o restrict sending of data from the machine to other devices, click [Edit] for the send lter.
● To restrict receiving of data from other devices, click [Edit] for the receive lter.
Security
147

5
Select the [Use Filter] checkbox.
➠ The IP addr
ess is enabled.
6
In [Default Policy], set the ltering pr
erequisites.
As a ltering pr
erequisite, select whether to allow or block communication with other devices.
7
Register [Exception Addresses].
● In [Addr
ess to Register], enter an IP address, and then click [Add].
● You can also specify a range of IP addresses by using a hyphen (-) or prex length.
Input example:
● One IPv4 address
192.168.0.10
● One IPv6 address
fe80::10
● Specifying a range
192.168.0.10-192.168.0.20
192.168.0.32/27
fe80::1234/64
8
Click [OK].
9
Restart the machine.
Restarting the Machine(P. 75)
➠ The settings ar
e applied.
Setting MAC Address Filtering
This section describes ho
w to congure the settings using Remote UI from a computer.
On the operation panel, select [Menu] in the [Home] screen, and then select [Preferences] to congure the settings.
You cannot use the operation panel to congure some of the settings.
[Firewall Settings](P. 206)
Administr
ator privileges are required. The machine must be restarted to apply the settings.
● If you set an incorr
ect MAC address, you will no longer be able to access Remote UI. If this happens, use the
operation panel to disable the rewall settings, and then use Remote UI to set the MAC address again.
1
Log in to Remote UI in System Manager Mode.
Starting Remote UI(P. 179)
2
On the Portal page of Remote UI, click [Settings/Registration]. Portal Page of
Remote UI(P
. 181)
Security
148

3
Click [Network Settings]
[Firewall Settings].
➠ The [Fir
ewall Settings] screen is displayed.
4
Click [Edit] for the MAC address send or receive lter.
● To restrict sending of data from the machine to other devices, click [Edit] for the send lter.
● To restrict receiving of data from other devices, click [Edit] for the receive lter.
5
Select the [Use Filter] checkbox.
➠ The MA
C address is enabled.
6
In [Default Policy], set the ltering pr
erequisites.
As a ltering pr
erequisite, select whether to allow or block communication with other devices.
7
Register [Exception Addresses].
● In [Addr
ess to Register], enter a MAC address, and then click [Add].
● Enter MAC addresses without separating with hyphens (-) or colons (:).
Input example:
123A456B789C
8
Click [OK].
9
Restart the machine.
Restarting the Machine(P. 75)
➠ The settings ar
e applied.
Security
149

Changing the Port Number
94RC-054
T
ypically, conventional port numbers are used for major protocols, but these port numbers may be changed to
enhance security. As the port numbers must be the same on communicating devices, such as a computer or server,
when the port number is changed, the setting on the machine also needs to be changed.
This section describes how to congure the settings using Remote UI from a computer.
On the operation panel, select [Menu] in the [Home] screen, and then select [Preferences] to congure the settings.
[Port Number Settings](P. 215)
Administr
ator privileges are required. The machine must be restarted to apply the settings.
1
Log in to Remote UI in System Manager Mode.
Starting Remote UI(P. 179)
2
On the Portal page of Remote UI, click [Settings/Registration]. Portal Page of
Remote UI(P. 181)
3
Click [Network Settings] [Port Number Settings] [Edit].
➠ The [Edit Port Number Settings] scr
een is displayed.
4
Change the port number of the protocol, and click [OK].
5
Restart the machine.
Restarting the Machine(P. 75)
➠ The settings ar
e applied.
Protocol Settings
● For the protocol settings and settings of the functions using the protocol, see the following:
LPD/RAW/WSD Conguring LPD
, RAW, or WSD(P. 172)
HTTP
Disabling HTTP Communication(P. 174)
SNMP Conguring SNMP(P
. 61)
Changing the Port Number of the Proxy Server
● To change the port number of the proxy server, see the following:
Using a Proxy(P. 151)
Changing the Port Number of the Printer Driver (Windo
ws)
● When the port number of the print protocol (LPD or RAW) is changed on the machine, change the port
number setting on the computer too.
Conguring a Printer Port (Windo
ws)(P. 104)
Security
150

Using a Proxy
94RC-055
Using a pr
oxy server to connect to a network not only facilitates managing communications with external networks
but blocks unauthorized access and consolidates anti-virus protection for enhanced security.
Congure these settings using Remote UI from a computer. You cannot use the operation panel to congure the
settings.
Administrator privileges are required.
Required Preparations
● Pr
epare the address, port number, and authentication information of the proxy server.
1
Log in to Remote UI in System Manager Mode. Starting Remote UI(P. 179)
2
On the Portal page of Remote UI, click [Settings/Registration]. Portal Page of
Remote UI(P
. 181)
3
Click [Network Settings]
[Proxy Settings] [Edit].
➠ The [Edit Pr
oxy Settings] screen is displayed.
4
Select the [Use Proxy] checkbox.
5
Enter the address and port number of the proxy server.
● In [HT
TP Proxy Server Address], enter the IP address and host name.
● In [HTTP Proxy Server Port Number], enter the port number.
6
Set the applicable range and authentication information according to your usage
envir
onment.
When using a proxy server also specied for communication with de
vices on the same
domain
Select the [Use Proxy within Same Domain] checkbox.
When authentication is required to connect to a proxy server
Select the [Use Pr
oxy Authentication] checkbox, and enter the user name to be used for authentication using
single-byte alphanumeric characters.
To set a password to use for authentication, select the [Set/Change Password] checkbox, and enter the
password using single-byte alphanumeric characters.
7
Click [OK].
➠ The settings ar
e applied.
Security
151

8
Log out from Remote UI.
Security
152

Using TLS
94RC-056
T
ransport Layer Security (TLS) is a mechanism for encrypting data sent or received over the network. Encrypting
communication with TLS when using Remote UI reduces the risks of data eavesdropping and tampering during
communication.
To use TLS encrypted communication for Remote UI, specify the key and certicate (server certicate) you want to use,
and then enable TLS on Remote UI.
This section describes how to congure the settings using Remote UI from a computer.
On the operation panel, select [Menu] in the [Home] screen, and then select [Management Settings] to congure the
settings. However, the operation panel can only be used to enable or disable TLS on Remote UI.
[Use Remote UI]
(P
. 244)
Administrator privileges are required. The machine must be restarted to apply the settings.
Required Preparations
● Pr
epare the key and certicate to use for TLS encrypted communication.
Managing and Verifying a Key
and Certicate(P
. 157)
1
Log in to Remote UI in System Manager Mode. Starting Remote UI(P. 179)
2
On the Portal page of Remote UI, click [Settings/Registration]. Portal Page of
Remote UI(P
. 181)
3
In [Network Settings], click [TLS Settings].
➠ The [TLS Settings] scr
een is displayed.
4
Specify the key and certicate to use for TLS encrypted communication.
1
In [Key and Certicate Settings], click [Ke
y and Certicate].
➠ The [Key and Certicate Settings] screen is displayed.
2
To the right of the key and certicate to use, click [Register Default Ke
y].
● When you click the key name (or certicate icon), the certicate details appear.
● On the certicate details screen, click [Verify Certicate] to verify that the certicate is valid.
5
Set the TLS version and algorithm.
1
Click [TLS Details]
[Edit].
➠ The [Edit TLS Details] scr
een is displayed.
2
Set the usable version and algorithm, and click [OK].
Some combinations of versions and algorithms cannot be used. For the supported combinations of
versions and algorithms, see the TLS specications.
TLS(P. 23)
[Allo
wed Versions]
Security
153

Specify the maximum and minimum versions of TLS.
[Algorithm Settings]
Select the checkbo
x of the algorithm to use for TLS.
6
Enable TLS on Remote UI.
1
Click [License/Other]
[Remote UI Settings] [Edit].
➠ The [Edit Remote UI Settings] scr
een is displayed.
2
Select the [Use TLS] checkbox, and click [OK].
7
Restart the machine.
Restarting the Machine(P. 75)
➠ The settings ar
e applied.
When a Warning Message Appears at Remote UI Startup
● A warning message about the security certicate may appear when starting up Remote UI with TLS enabled.
If ther
e are no problems with the certicate or TLS settings, you can continue operations.
Security
154

Using IEEE 802.1X
94RC-058
In a network envir
onment with IEEE 802.1X authentication, only client devices (supplicants) authenticated by the
authentication server (RADIUS server) are allowed to connect to the network via the LAN switch (authenticator),
thereby blocking unauthorized access. When connecting the machine to a network that uses IEEE 802.1X
authentication, you must congure the settings on the machine such as the authentication method managed by the
authentication server.
IEEE 802.1X Authentication Methods(P. 155)
Setting IEEE 802.1X(P. 155)
IEEE 802.1X Authentication Methods
The follo
wing IEEE 802.1X authentication methods are supported:
TLS
The machine and authentication server authenticate each other by mutually verifying their certicates. This
cannot be used together with another authentication method.
TTLS
This authentication method uses a user name and password for machine authentication and a CA certicate
for the server authentication. MSCHAPv2 or PAP can be selected as the internal protocol, and TTLS can be
used together with PEAP.
PEAP
The required settings are almost the same as those for TTLS, with MSCHAPv2 used as the internal protocol.
Setting IEEE 802.1X
First enable IEEE 802.1X, and then set the authentication method.
This section describes ho
w to congure the settings using Remote UI from a computer.
On the operation panel, select [Menu] in the [Home] screen, and then select [Preferences] to congure the settings.
However, the operation panel can only be used to enable or disable IEEE 802.1X.
[IEEE 802.1X Settings](P. 206)
Administr
ator privileges are required. The machine must be restarted to apply the settings.
Required Preparations
● When using TLS as the authentication method, pr
epare the key and certicate issued by the certicate
authority and used for authentication of the machine. Managing and Verifying a Key and
Certicate(P. 157)
* A preinstalled CA certicate or a CA certicate installed from Remote UI is used for server authentication.
● When using TTLS or PEAP as the authentication method, TLS-encrypt communication using Remote UI.
Using TLS(P. 153)
1
Log in to Remote UI in System Manager Mode.
Starting Remote UI(P. 179)
2
On the Portal page of Remote UI, click [Settings/Registration]. Portal Page of
Remote UI(P. 181)
3
Click [Network Settings] [IEEE 802.1X Settings] [Edit].
Security
155

➠ The [Edit IEEE 802.1X Settings] scr
een is displayed.
4
Select the [Use IEEE 802.1X] checkbox, and enter the login name.
For the login name, enter a name to identify the user (EAP Identity) using single-byte alphanumeric
char
acters.
When verifying the certicate of an authentication server
Select the [V
erify Authentication Server Certicate] checkbox.
When verifying the common name of the certicate, select the [Verify Authentication Server Name] checkbox,
and enter the name of the authentication server to which the user is registered.
5
Congure the settings accor
ding to the authentication method to be used.
When using TLS
1
Select the [Use TLS] checkbox.
2
In [Name of Key to Use], click [Key and Certicate].
➠ The [Ke
y and Certicate Settings] screen is displayed.
3
To the right of the key and certicate to use, click [Register Default Ke
y].
● Click the key name (or certicate icon) to display the certicate details.
● On the certicate details screen, click [Verify Certicate] to verify that the certicate is valid.
When using TTLS or PEAP
1
Select the [Use TTLS] or [Use PEAP] checkbox.
When using T
TLS, select the internal protocol to be used.
2
Use [Use Login Name as User Name] to specify whether to use the login name of IEEE 802.1X
authentication for the user name.
3
In [User Name/Password Settings], click [Change User Name/Password].
➠ The [Change User Name/Password] screen is displayed.
4
Set the user name and password, and select the [OK] checkbox.
● Enter the user name using single-b
yte alphanumeric characters.
● To set a password, select the [Change Password] checkbox, and enter the same password in both
[Password] and [Conrm] using single-byte alphanumeric characters.
6
Click [OK].
7
Restart the machine.
Restarting the Machine(P. 75)
➠ The settings ar
e applied.
Security
156

Managing and Verifying a Key and Certicate
94RC-059
T
o encrypt communication with TLS when using Remote UI, or to use TLS as the IEEE 802.1X authentication method, a
key and certicate are required In addition, depending on the communicating device, encrypted communication using
a specied certicate may be requested, thereby requiring a key and certicate.
Managing a Key and Certicate
You can prepare a key and certicate using the follo
wing methods:
Generating a Key and Certicate on the Machine
Generate the key and certicate required for TLS on the machine. You can immediately communicate where
self-signed certicates are allowed.
Generating a Key and Certicate(P
. 158)
Registering a Certicate Issued by a Certicate Authority in a Self-generated Key
When a key is generated on the machine, generate a Certicate Signing Request (CSR), have the certicate
authority issue a certicate, and then register that certicate in the key.
Generating a Key and Certicate Signing Request (CSR) and Obtaining and Registering a
Certicate(P
. 160)
Registering a Key and Certicate or CA Certicate Obtained from an Issuing Authority
Register a key and certicate obtained from an issuing authority or a CA certicate issued by a certicate
authority, without self-generating the key and certicate. You can use a digital certicate that matches the
communicating device and authentication level.
Registering a Key and Certicate or CA Certicate Obtained fr
om an Issuing Authority(P. 163)
Verifying a Certicate
You can congur
e the settings to verify the validity of a certicate that the machine receives from a certicate
authority, using the Online Certicate Status Protocol (OCSP).
Verifying a Received Certicate with OCSP(P
. 165)
Security
157

Generating a Key and Certicate
94RC-05A
Gener
ate the key and certicate required for TLS-encrypted communication on the machine. A self-signed certicate is
used for the self-generated key.
For the algorithm of the keys and certicates that can be generated with this machine, see the specications of the
self-generated key and self-signed certicate.
Keys and Certicates(P
. 22)
Generate a key and certicate using Remote UI from a computer. You cannot use the operation panel to generate a
key and certicate.
Administrator privileges are required.
1
Log in to Remote UI in System Manager Mode.
Starting Remote UI(P. 179)
2
On the Portal page of Remote UI, click [Settings/Registration]. Portal Page of
Remote UI(P. 181)
3
Click [Device Management] [Key and Certicate Settings] [Generate Key].
➠ The [Gener
ate Key] screen is displayed.
4
Select [Network Communication], and click [OK].
➠ The [Gener
ate Network Communication Key] screen is displayed.
5
In [Key Settings], enter the name of the key, and select the signature and key
algorithm.
● Enter the k
ey name using single-byte alphanumeric characters.
● For the key algorithm, select [RSA] or [ECDSA], and select the key length from the pulldown menu. The longer
the key length, the better the security, but this slows down communication processing.
6
In [Certicate Settings], set the certicate information.
[Validity Start Date (YYYY/MM/DD)]/[Validity End Date (YYYY/MM/DD)]
Enter the start and end dates of the certicate validity period.
[Country/Region]
Select [Select Country/Region], and then select the country or r
egion from the pulldown menu, or select
[Enter Internet Country Code], and enter the country code.
[State]/[City]/[Organization]/[Organization Unit]
Enter the items as needed using single-byte alphanumeric characters.
[Common Name]
Enter the name of the certicate subject as needed using single-byte alphanumeric characters. This
corresponds to the Common Name (CN).
7
Click [OK].
Security
158

➠ The gener
ated key and certicate are added to [Registered Key and Certicate] on the [Key and Certicate
Settings] screen.
8
Log out from Remote UI.
Viewing and Verifying Detailed Information of a Generated Certicate
● When you click the k
ey name (or certicate icon) in [Registered Key and Certicate] on the [Key and
Certicate Settings] screen, the certicate details appear.
● On the certicate details screen, click [Verify Certicate] to verify that the certicate is valid.
When the Key and Certicate Cannot Be Deleted
● You cannot delete a key and certicate being used. Disable the function being used, or delete these after
switching to another key and certicate.
Security
159

Generating a Key and Certicate Signing Request (CSR)
and Obtaining and Registering a Certicate
94RC-05C
As a certicate gener
ated on the machine does not have a signature from a certicate authority, the machine may not
be able to communicate depending on the communicating device. In this case, registering a signed certicate issued
by a certicate authority to the key enables communication even with a self-generated key.
For the certicate authority to issue a signed certicate, you must make a request attached with a Certicate Signing
Request (CSR). The machine generates a CSR at the same time it generates a key.
For more information about the keys that can be generated by the machine and the CSR algorithm, see self-generated
key and CSR specications.
Keys and Certicates(P
. 22)
Generating a Key and CSR(P. 160)
Registering a Certicate Issued b
y a Certicate Authority to a Key(P. 161)
Generating a Key and CSR
Generate a key and CSR using Remote UI from a computer. You cannot use the operation panel to generate a key and
certicate.
Administrator privileges are required.
1
Log in to Remote UI in System Manager Mode.
Starting Remote UI(P. 179)
2
On the Portal page of Remote UI, click [Settings/Registration]. Portal Page of
Remote UI(P. 181)
3
Click [Device Management] [Key and Certicate Settings] [Generate Key].
➠ The [Gener
ate Key] screen is displayed.
4
Select [Key and Certicate Signing Request (CSR)], and click [OK].
➠ The [Gener
ate Key and Certicate Signing Request (CSR)] screen is displayed.
5
In [Key Settings], enter the name of the key, and select the signature algorithm and
k
ey algorithm.
● Enter the k
ey name using single-byte alphanumeric characters.
● For the key algorithm, select [RSA] or [ECDSA], and select the key length from the pulldown menu. The longer
the key length, the better the security, but this slows down communication processing.
6
In [Certicate Signing Request (CSR) Settings], set the CSR information.
[Country/Region]
Select [Select Country/Region], and either select the country or r
egion from the pulldown menu, or select
[Enter Internet Country Code] and enter the country code.
[State]/[City]/[Organization]/[Organization Unit]
Security
160

Enter the items as needed using single-byte alphanumeric characters.
[Common Name]
Enter the name of the certicate subject as needed using single-b
yte alphanumeric characters. This
corresponds to the Common Name (CN).
7
Click [OK].
➠ The [Ke
y and Certicate Signing Request (CSR) Details] screen is displayed.
8
Click [Store in File] to save the CSR le to a computer.
9
Log out from Remote UI.
10
Submit the application with CSR le attached to the certicate authority
.
● When the CSR is gener
ated, the key is registered to the machine, but it cannot be used until the certicate
issued by the certicate authority is registered.
Registering a Certicate Issued b
y a Certicate Authority to a Key
Register the certicate using Remote UI from a computer. You cannot use the operation panel to register it.
Administrator privileges are required.
1
Log in to Remote UI in System Manager Mode.
Starting Remote UI(P. 179)
2
On the Portal page of Remote UI, click [Settings/Registration]. Portal Page of
Remote UI(P
. 181)
3
Click [Device Management]
[Key and Certicate Settings].
➠ The [Ke
y and Certicate Settings] screen is displayed.
4
Click the key name (or certicate icon) to which to r
egister the certicate.
Security
161
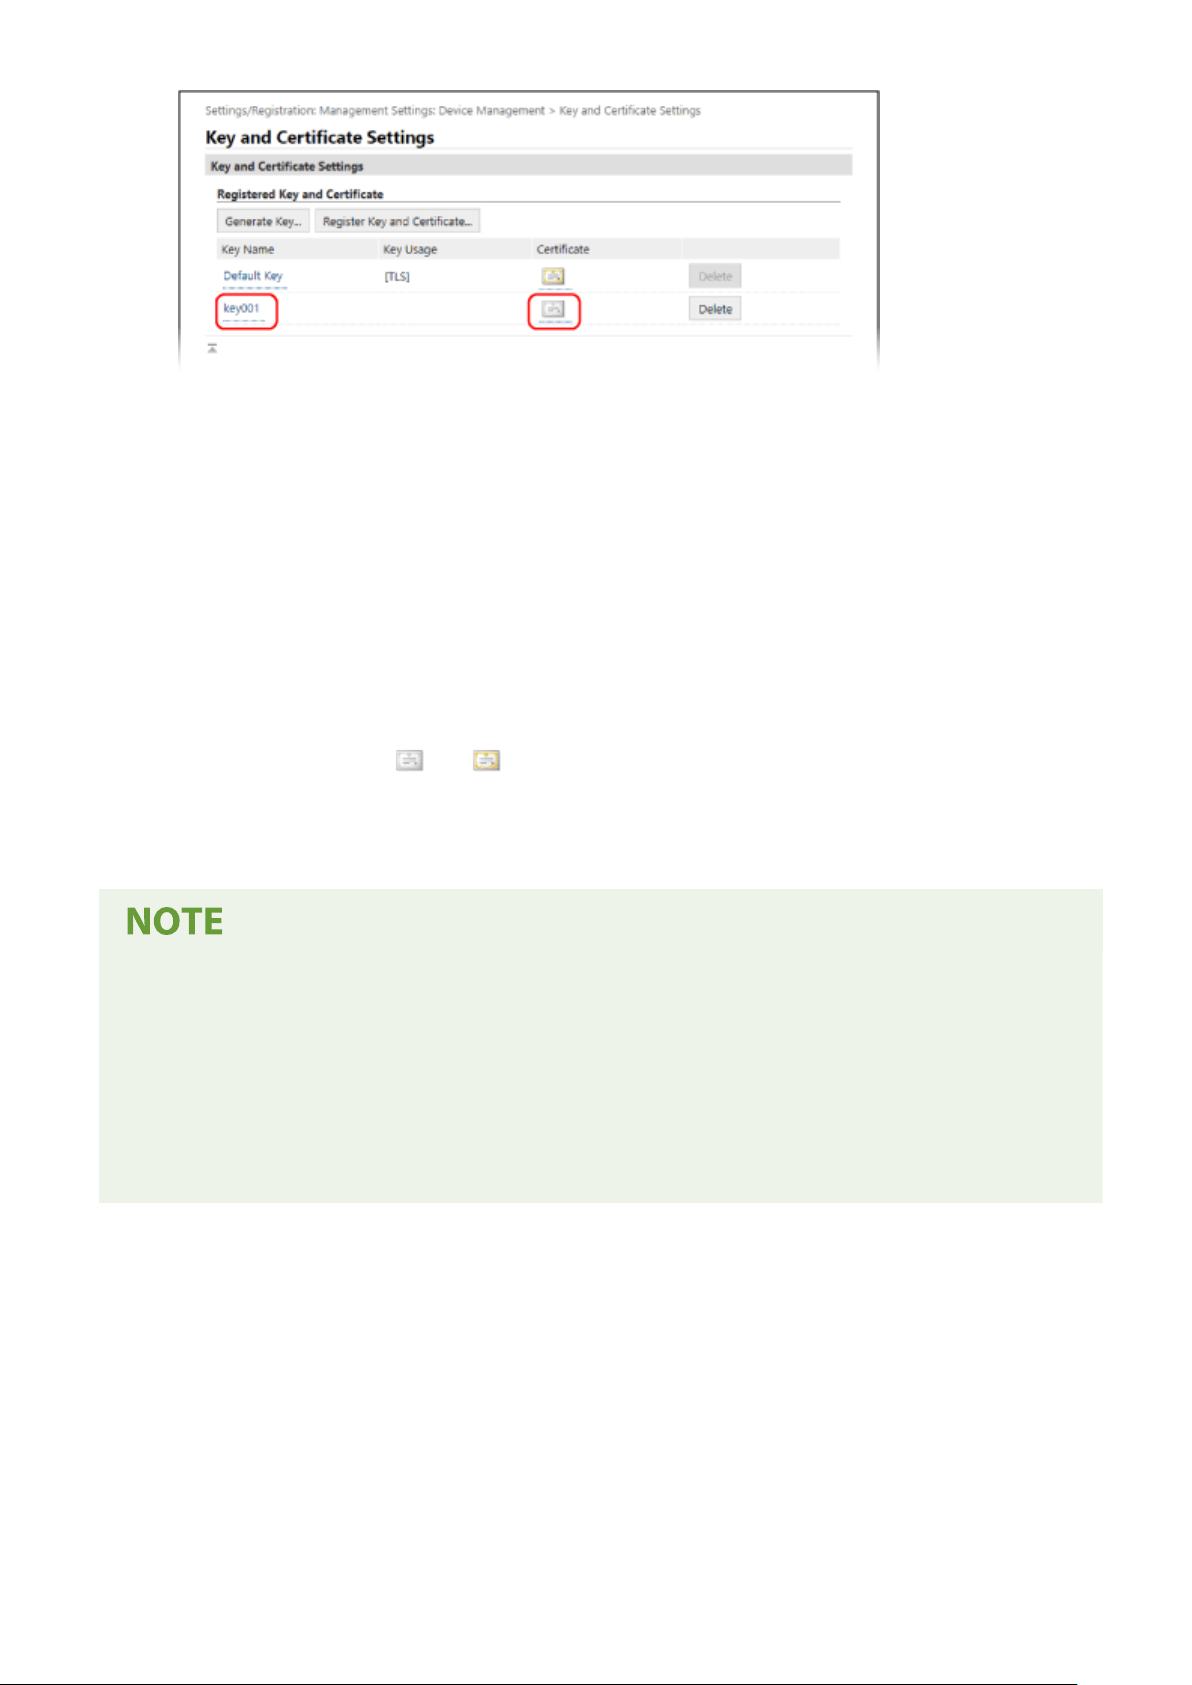
➠ The [Ke
y and Certicate Signing Request (CSR) Details] screen is displayed.
5
Click [Register Certicate].
6
In [Specify File], click [Browse], and specify the le of the certicate issued b
y the
certicate authority.
7
Click [Register].
➠ The icon of the certicate displayed in [Register
ed Key and Certicate] on the [Key and Certicate Settings]
screen changes from [
] to [ ].
8
Log out from Remote UI.
Viewing and Verifying Detailed Information of a Registered Certicate
● Click the key name (or certicate icon) in [Registered Key and Certicate] on the [Key and Certicate Settings]
screen to display the certicate details.
● On the certicate details screen, click [Verify Certicate] to verify that the certicate is valid.
When the Key and Certicate Cannot Be Deleted
● You cannot delete a key and certicate being used. Disable the function being used, or delete these after
switching to another key and certicate.
Security
162

Registering a Key and Certicate or CA Certicate
Obtained fr
om an Issuing Authority
94RC-05H
Install and r
egister a key and certicate or CA certicate obtained from a digital certicate issuing authority to the
machine before starting to use them.
Register the key and certicate or CA certicate using Remote UI from a computer. You cannot use the operation
panel to register these.
Administrator privileges are required.
Required Preparations
● Check the conditions of the k
ey and certicate or CA certicate usable with the machine.
Keys and
Certicates(P
. 22)
● When registering a key and certicate, check the password for the private key set in the le.
1
Log in to Remote UI in System Manager Mode. Starting Remote UI(P. 179)
2
On the Portal page of Remote UI, click [Settings/Registration]. Portal Page of
Remote UI(P
. 181)
3
Click [Device Management]
[Key and Certicate Settings] or [CA Certicate
Settings].
➠ The [Ke
y and Certicate Settings] screen or [CA Certicate Settings] screen is displayed.
4
Click [Register Key and Certicate] or [Register CA Certicate].
➠ The [Register Ke
y and Certicate] screen or [Register CA Certicate] screen is displayed.
5
Install the key and certicate le or CA certicate le.
1
Click [Install].
2
Click [Browse] in [Specify File], and specify the le to be installed.
3
Click [Start Installation].
➠ The installed le is added to [Installed Ke
y and Certicate] on the [Register Key and Certicate] screen
or [Installed CA Certicate] on the [Register CA Certicate] screen.
6
Registering the key and certicate or CA certicate.
When registering a key and certicate
1
To the right of the key and certicate le to r
egister, click [Register].
Security
163

➠ The [Enter Private Ke
y Password] screen is displayed.
2
Enter the key name password using single-byte alphanumeric characters, and click [OK].
➠ The r
egistered key and certicate are added to [Registered Key and Certicate] on the [Key and
Certicate Settings] screen.
When registering a CA certicate
T
o the right of the CA certicate le to register, click [Register].
➠ The registered CA certicate is added to [Registered CA Certicate] on the [CA Certicate Settings] screen.
7
Log out from Remote UI.
Viewing and Verifying Detailed Information of a Registered Certicate
● When you click the k
ey name (or certicate icon) in [Registered Key and Certicate] on the [Key and
Certicate Settings] screen, the certicate details appear.
● On the certicate details screen, click [Verify Certicate] to verify that the certicate is valid.
Viewing and Verifying Detailed Information of a Registered CA Certicate
● When you click the issued to location in [Registered CA Certicate] on the [CA Certicate Settings] screen, the
CA certicate details appear.
● On the CA certicate details screen, click [Verify Certicate] to verify that the CA certicate is valid.
When the Key and Certicate or CA Certicate Cannot Be Deleted
● You cannot delete a key and certicate being used. Disable the function being used, or delete these after
switching to another key and certicate.
● A preinstalled CA certicate cannot be deleted. If a preinstalled CA certicate is not required, click [Disable]
to the right of the CA certicate.
Security
164

Verifying a Received Certicate with OCSP
94RC-05J
Online Certicate Status Pr
otocol (OCSP) is a protocol for inquiring to an OCSP responder (server that supports OCSP)
about the revocation status of a certicate received from a certicate authority.
You can congure the settings to verify the validity of a certicate that the machine receives from a certicate
authority, using the OCSP.
Congure these settings using Remote UI from a computer. You cannot use the operation panel to congure the
settings.
Administrator privileges are required.
1
Log in to Remote UI in System Manager Mode.
Starting Remote UI(P. 179)
2
On the Portal page of Remote UI, click [Settings/Registration]. Portal Page of
Remote UI(P. 181)
3
Click [Device Management] [OCSP (Online Certicate Status Pr
otocol) Settings]
[Edit].
➠ The [Edit OCSP (Online Certicate Status Pr
otocol) Settings] screen is displayed.
4
Select the [Use OCSP (Online Certicate Status Pr
otocol)] checkbox.
5
Set the certicate verication le
vel and the OCSP responder.
[Certicate V
erication Level]
Set whether to validate the certicate even if its revocation status cannot be conrmed, such as when the
machine is unable to connect to an OCSP responder.
[OCSP Responder Settings]
Specify the URL of the OCSP responder.
[Custom URL]
When [Use Custom URL] or [Use Certicate URL (Use Custom URL If Certicate URL Cannot Be Retrieved)] is
selected, enter the URL of the OCSP responder.
[Communication Timeout]
Enter the time from search start to timeout in seconds.
6
Click [OK].
➠ The settings ar
e applied.
7
Log out from Remote UI.
Security
165

Preventing Leaking Information
94RC-05K
Leaving a printed document on the machine poses a risk of information leakage. In addition, while using mobile
de
vices is easy and convenient, these can lead to information theft.
You can take measures to prevent leaking information, according to the usage status of the function, to ensure safer
use of the machine.
Appropriately Restricting Functions
You can restrict access to part or all of a function using mobile devices.
Restricting Use from a Mobile Device(P. 170)
Security
166

Preventing Unauthorized Use
94RC-05W
The machine pr
ovides various settings to ensure ecient management and operation. While this information and the
settings provide convenience, they can also lead to information leakage and other security issues if the information
and settings can be accessed by anyone.
You can take measures to restrict access and disable functions according to the usage status of the function, to ensure
safer use of the machine.
Restricting Access to Information and Settings
Restricting users and operations accessing information and settings on the machine can help prevent
unauthorized use and protect condential information.
Restricting Use of Remote UI(P. 168)
Restricting Use from a Mobile Device(P. 170)
Disabling Unused Functions
Y
ou can disable unused functions to prevent intrusion from the outside.
Preventing Connection to Computer via USB Port(P. 171)
Conguring LPD
, RAW, or WSD(P. 172)
Disabling HTTP Communication(P. 174)
◼ See Also
For details about the administr
ator account, see the following.
Setting the Department ID and PIN for the Administrator(P. 144)
Security
167

Restricting Use of Remote UI
94RC-05X
While Remote UI is convenient for oper
ating the machine from a computer, it also poses a risk of third-party access to
the machine.
You can congure the setting to require users to enter a PIN (Remote UI Access PIN) when using Remote UI to prevent
unauthorized access by a third party.
If you do not use Remote UI, it is recommended that you disable the function.
Setting the PIN to Use for Remote UI(P. 168)
Disabling Remote UI(P. 168)
Setting the PIN to Use for Remote UI
Y
ou can restrict the use of Remote UI to only those users who know the Remote UI Access PIN.
This section describes how to congure the settings using the operation panel.
You can also congure the settings using Remote UI from a computer after the Remote UI Access PIN has been set on
the machine.
Managing the Machine from a Computer (Remote UI)(P. 178)
Administr
ator privileges are required.
1
On the operation panel, select [Menu] in the [Home] screen, and press
. [Home]
Scr
een(P. 81)
2
Press [Management Settings]
[Remote UI Settings/Update Firmware]
[Remote UI Settings] [Remote UI Access Security Settings] .
➠ The [RUI Access Security] scr
een is displayed.
If the login screen appears, enter the System Manager ID and PIN, and then press
. System Manager
ID and PIN(P
. 4)
3
Set [Remote UI Access Security Settings] to [On], enter the Remote UI Access PIN, and
pr
ess
.
4
Enter the same number, and press .
➠ The settings are applied.
When [Management Settings] of the Settings Menu Is Initialized
● Use the settings menu on the oper
ation panel to reset the Remote UI Access PIN.
[Remote UI Access
Security Settings](P. 244)
Disabling Remote UI
You can disable Remote UI to reduce the risk of unauthorized access to the machine via the network.
Security
168

Use the operation panel to congur
e the settings. You cannot congure the settings using Remote UI from a
computer.
Administrator privileges are required. The machine must be restarted to apply the settings.
1
On the operation panel, select [Menu] in the [Home] screen, and press
. [Home]
Scr
een(P. 81)
2
Press [Management Settings]
[Remote UI Settings/Update Firmware]
[Remote UI Settings] .
➠ The [Remote UI Settings] scr
een is displayed.
If the login screen appears, enter the System Manager ID and PIN, and then press
. System Manager
ID and PIN(P
. 4)
3
Press [Use Remote UI]
[Off] .
4
Restart the machine. Restarting the Machine(P. 75)
➠ The settings ar
e applied.
Security
169

Restricting Use from a Mobile Device
94RC-05R
The machine supports the Mopria
®
plugin, which is supported by various manufacturers.
Mopria
®
enables printing from any application, such as on a smartphone, or a device equipped with Chrome OS
without having to install a dedicated Canon plugin.
Printing from a mobile device can be easy and convenient, but it can also lead to information leakage. You can also
prohibit use of Mopria
®
.
Congure this setting using Remote UI from a computer. You cannot use the operation panel to congure the setting.
Administrator privileges are required.
1
Log in to Remote UI in System Manager Mode.
Starting Remote UI(P. 179)
2
On the Portal page of Remote UI, click [Settings/Registration]. Portal Page of
Remote UI(P
. 181)
3
Click [Network Settings]
[Mopria Settings] [Edit].
➠ The [Edit Mopria Settings] scr
een is displayed.
4
Clear the [Use Mopria] checkbox, and click [OK].
➠ The settings ar
e applied.
5
Log out from Remote UI.
● When the Mopria
®
setting is enabled, the follo
wing network settings are also enabled:
- HTTP
[Use HTTP](P. 215)
-
IPP printing
[IPP Print Settings](P. 214)
-
mDNS (IPv4)
[mDNS Settings](P. 211)
-
mDNS (IPv6)
[mDNS Settings](P. 211)
Security
170

Preventing Connection to Computer via USB Port
94RC-05Y
Y
ou can disable the USB port for computer connection on the back of the machine to reduce the risk of an external
connection without going through a network with security measures.
This section describes how to congure the settings using Remote UI from a computer.
On the operation panel, select [Menu] in the [Home] screen, and then select [Preferences] to congure the settings.
[USB Settings](P. 216)
Administr
ator privileges are required. The machine must be restarted to apply the settings.
1
Log in to Remote UI in System Manager Mode.
Starting Remote UI(P. 179)
2
On the Portal page of Remote UI, click [Settings/Registration]. Portal Page of
Remote UI(P
. 181)
3
Click [External Interface Settings]
[Edit].
➠ The [Edit External Interface Settings] scr
een is displayed.
4
Clear the [Use as USB Device] checkbox, and click [OK].
5
Restart the machine.
Restarting the Machine(P. 75)
➠ The settings ar
e applied.
Security
171

Conguring LPD
, RAW, or WSD
94RC-060
Select whether to use any of the pr
otocols below on the machine when printing documents from a computer.
You are recommended to disable any protocols you will not be using.
When using LPD or RAW, you can congure the time until reception of print data is canceled.
LPD
This protocol is not dependent on the hardware, operating system, or other platform. It is commonly used in
TCP/IP network environments.
RAW
This is Windows' proprietary print data type protocol. It is used as standard in a Windows environment.
WSD
This protocol enables automatic detection of network-connected printers in a Windows environment.
This section describes how to congure the settings using Remote UI from a computer.
On the operation panel, select [Menu] in the [Home] screen, and then select [Preferences] to congure the settings.
[TCP/IP Settings](P. 210)
Administr
ator privileges are required. The machine must be restarted to apply the settings.
1
Log in to Remote UI in System Manager Mode.
Starting Remote UI(P. 179)
2
On the Portal page of Remote UI, click [Settings/Registration]. Portal Page of
Remote UI(P
. 181)
3
Click [Network Settings].
4
Congure LPD
, RAW, or WSD.
When Conguring LPD
1
Click [LPD Settings]
[Edit].
➠ The [Edit LPD Settings] scr
een is displayed.
2
Set whether to use LPD.
When not using LPD
, clear the [Use LPD Printing] checkbox, and proceed to step 5.
3
Enter the time in [RX Timeout].
Enter the time in minutes from the start of reception standby, after print data reception is canceled, to
the timeout.
When Conguring RA
W
1
Click [RAW Settings] [Edit].
➠ The [Edit RAW Settings] screen is displayed.
2
Set whether to use RAW.
When not using RA
W, clear the [Use RAW Printing] checkbox, and proceed to step 5.
Security
172

3
Enter the time in [RX Timeout].
Enter the time in minutes fr
om the start of reception standby, after print data reception is canceled, to
the timeout.
When Conguring WSD
1
Click [WSD Settings]
[Edit].
➠ The [Edit WSD Settings] scr
een is displayed.
2
Set whether to use WSD for each function.
When not using WSD
, clear the checkbox of the function for restricting use of WSD.
Using WSD to Print Data
Select the [Use WSD Printing] checkbox.
The [Use WSD Browsing] checkbox is selected automatically, and WSD is used to obtain the information
of the machine from the computer.
When Responding to a Search Request of the Machine by Multicast Discovery
Select the [Use Multicast Discovery] checkbox.
To keep the machine in sleep mode without responding to received multicast discovery packets, clear the
checkbox.
5
Click [OK].
6
Restart the machine.
Restarting the Machine(P. 75)
➠ The settings are applied.
Adding a WSD Network Device
● Click [ ] (Start) [ ] (Settings) [Devices] [Printers & scanners] [Add printers & scanners], and
perform the oper
ations following the instructions on the screen.
● For details about installing the driver via a WSD network, see the manual of the driver at the online manual
site.
https://oip.manual.canon/
Changing the Port Number
● To change the port number of each protocol, see the following:
Changing the Port Number(P. 150)
Security
173

Disabling HTTP Communication
94RC-061
It is r
ecommended to disable HTTP communication when using only the USB connection or when not using functions
that require HTTP communication, such as Remote UI, WSD printing, and AirPrint.
This section describes how to congure the settings using the operation panel.
You can also congure the settings using Remote UI from a computer.
Managing the Machine from a Computer
(Remote UI)
(P. 178)
Administrator privileges are required.
1
On the operation panel, select [Menu] in the [Home] screen, and press
. [Home]
Scr
een(P. 81)
2
Press [Preferences]
[Network] [TCP/IP Settings] [Use HTTP]
.
➠ The [Use HT
TP] screen is displayed.
If the login screen appears, enter the System Manager ID and PIN, and then press
. System Manager
ID and PIN(P
. 4)
3
Press [Off]
[Yes] .
Security
174

Managing the Machine
Managing the Machine ...............................................................................................................................
176
Setting the Date and Time ................................................................................................................................ 177
Managing the Machine from a Computer (Remote UI) ................................................................................... 178
Starting Remote UI ....................................................................................................................................... 179
Portal Page of Remote UI ............................................................................................................................. 181
Checking Usage and Logs with Remote UI ................................................................................................... 183
Monitoring the Usage ....................................................................................................................................... 185
Printing and Viewing Reports and Lists ........................................................................................................ 186
Changing the Report and List Print Settings .......................................................................................... 188
Updating the Firmware ..................................................................................................................................... 189
Initializing the Settings and Data .................................................................................................................... 192
Checking the Number of Printed Pages (Check Counter) .............................................................................. 194
Managing the Machine
175

Managing the Machine
94RC-064
This section describes the management functions that ar
e required to operate the machine.
Monitoring the Operation Status and Usage of the Machine, and Conguring the
Settings
Setting the Date and Time
Set the date and time for the machine. The date and time ar
e used as the reference for the functions using
date and time information, and therefore, they need to be set accurately.
Setting the Date and Time(P. 177)
Checking the Oper
ation Status and Changing the Settings (Remote UI)
You can use a Web browser on a computer to check the operation status of the machine and change the
machine settings. You can manage the machine from a remote location and eciently perform time-
consuming settings and registration on your computer.
Managing the Machine from a Computer (Remote UI)(P. 178)
Monitoring the Usage (Oper
ation Panel)
You can use the operation panel of the machine to check the total number of printed pages and print the
settings and other reports and lists.
Monitoring the Usage(P. 185)
Managing Servers, V
arious Data, and Firmware
Updating the Firmware
Update the rmwar
e to add new functions to the machine and to x bugs. By updating to the latest
rmware, you can use the machine with more stable and comfortable operations.
Updating the Firmware(P. 189)
Initializing the Settings and Data
Y
ou can initialize all settings and data when replacing or disposing of the machine. Initializing the machine
prevents access to condential information and unauthorized use by third parties.
Initializing the Settings and Data(P. 192)
◼ See Also
For the settings required to operate the machine, such as the network settings, see the following:
Setting Up(P. 30)
Managing the Machine
176

Setting the Date and Time
94RC-065
Set the date and time for the machine. The date and time set her
e are used as the reference for the functions using
date and time information, and therefore, they need to be set accurately.
This section describes how to congure the settings using Remote UI from a computer.
On the operation panel, select [Menu] in the [Home] screen, and then select [Preferences] to congure the settings.
[Timer/Energy Settings](P. 201)
1
Log in to Remote UI.
Starting Remote UI(P. 179)
2
On the Portal page of Remote UI, click [Settings/Registration]. Portal Page of
Remote UI(P
. 181)
3
Click [Timer Settings]
[Edit].
➠ The [Edit Timer Settings] scr
een is displayed.
4
Enter the current date and time.
5
Set the time zone according to the region where the machine is used.
Communicating over the Internet is premised on setting the UTC (Coordinated Universal Time) correctly. The
UT
C is a coordinated universal time that is standard for all parts of the world. There is a time difference
depending on the country or region where the machine is used.
6
Set daylight saving time as needed.
● Select the [Use Daylight Saving Time] checkbo
x if the machine is in a country or region with daylight saving
time, and then set the start and end dates.
7
Click [OK].
➠ The settings ar
e applied.
8
Log out from Remote UI.
Managing the Machine
177

Managing the Machine from a Computer (Remote UI)
94RC-066
With Remote UI, you can use a W
eb browser on a computer to check the function operation status of the machine and
change the machine settings. You can manage the machine from a remote location and eciently perform time-
consuming settings and registration on your computer.
Remote UI has the following two modes. The functions available with Remote UI vary depending on the mode you
logged in to.
● System Manager Mode
You can use all functions of Remote UI.
● General User Mode
You can monitor usage, view logs, cancel printing, and change some settings.
Starting Remote UI(P. 179)
Portal Page of Remote UI(P. 181)
Checking Usage and Logs with Remote UI(P. 183)
◼ See Also
It is r
ecommended that you set up the following functions to prevent unauthorized use of Remote UI by a third party:
System Manager ID
Set the System Manager ID, which is the exclusive administrator account, so that only users with the ID can
log in to System Manager Mode.
Setting the Department ID and PIN for the Administrator(P. 144)
Remote UI Access PIN
Congur
e this setting to require PIN entry when logging in to Remote UI so that only users with the PIN can
use Remote UI.
Setting the PIN to Use for Remote UI(P. 168)
Managing the Machine
178
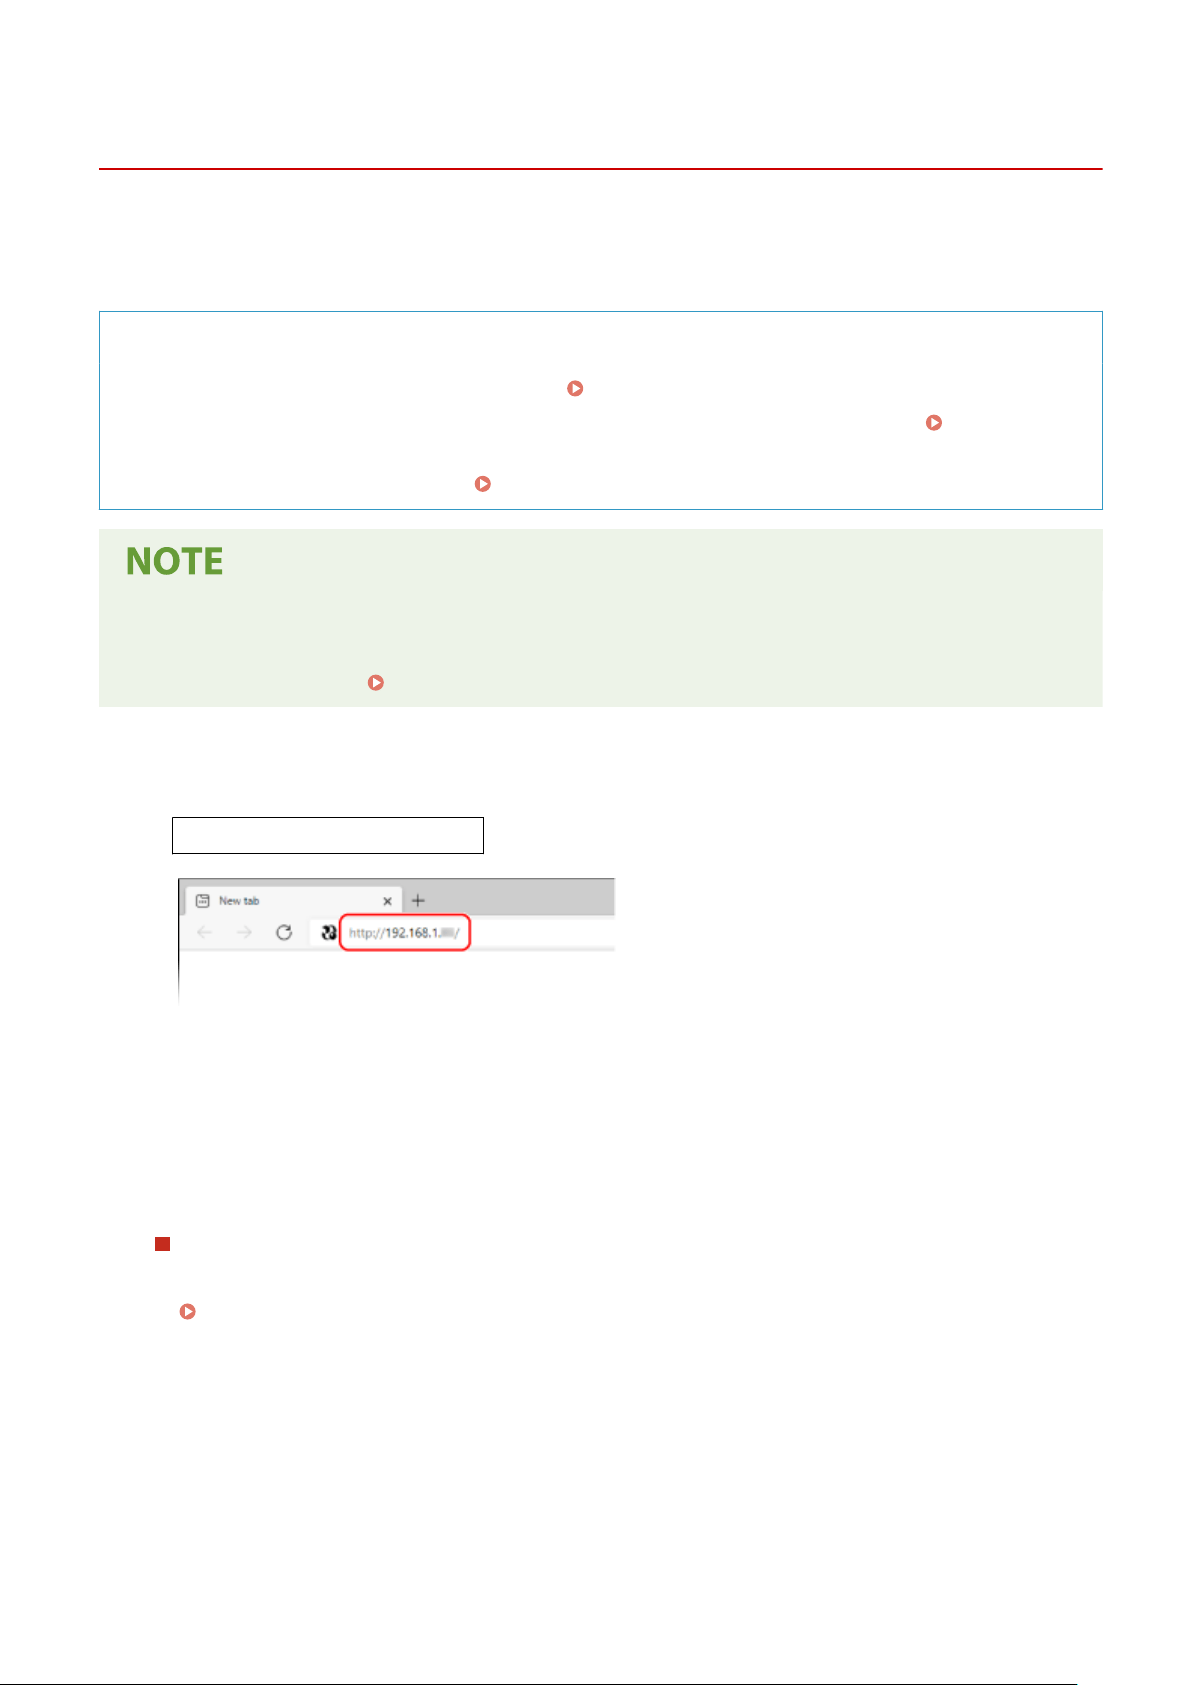
Starting Remote UI
94RC-067
T
o use Remote UI, enter the IP address of the machine into a Web browser on a computer, and log in with System
Manager Mode or General User Mode. The functions available with Remote UI vary depending on the mode you
logged in to.
Required Preparations
● Check the oper
ating environment of Remote UI.
Supported Environment(P. 25)
● Connect the computer you ar
e using to operate Remote UI to the machine over a network.
Setting Up the
Network(P
. 34)
● Check the IP address of the machine.
Checking the Network Status and Settings(P. 66)
When Logging in with System Manager Mode
● To log in with System Manager Mode (System Manager ID), you must rst change the System Manager PIN
from the default setting. Setting the Department ID and PIN for the Administrator(P. 144)
1
From a Web browser on a computer, access the following URL.
http://<IP address of the machine>/
➠ The Remote UI login scr
een appears.
When Remote UI communication is encrypted, a warning message about the security certicate may
appear. If there are no problems with the certicate or TLS settings, you can continue operations.
When entering an IPv6 address, enclose the IP address in brackets [ ].
Example:
http://[fe80:2e9e:fcff:fe4e:dbce]/
If the Remote UI Login Screen Is Not Displayed
When a message such as [Cannot access Remote UI.] is displayed and the login screen is not displayed, see
the following:
Cannot Access Remote UI(P. 321)
2
Select [System Manager Mode] or [General User Mode], and enter the items required
for login.
Managing the Machine
179
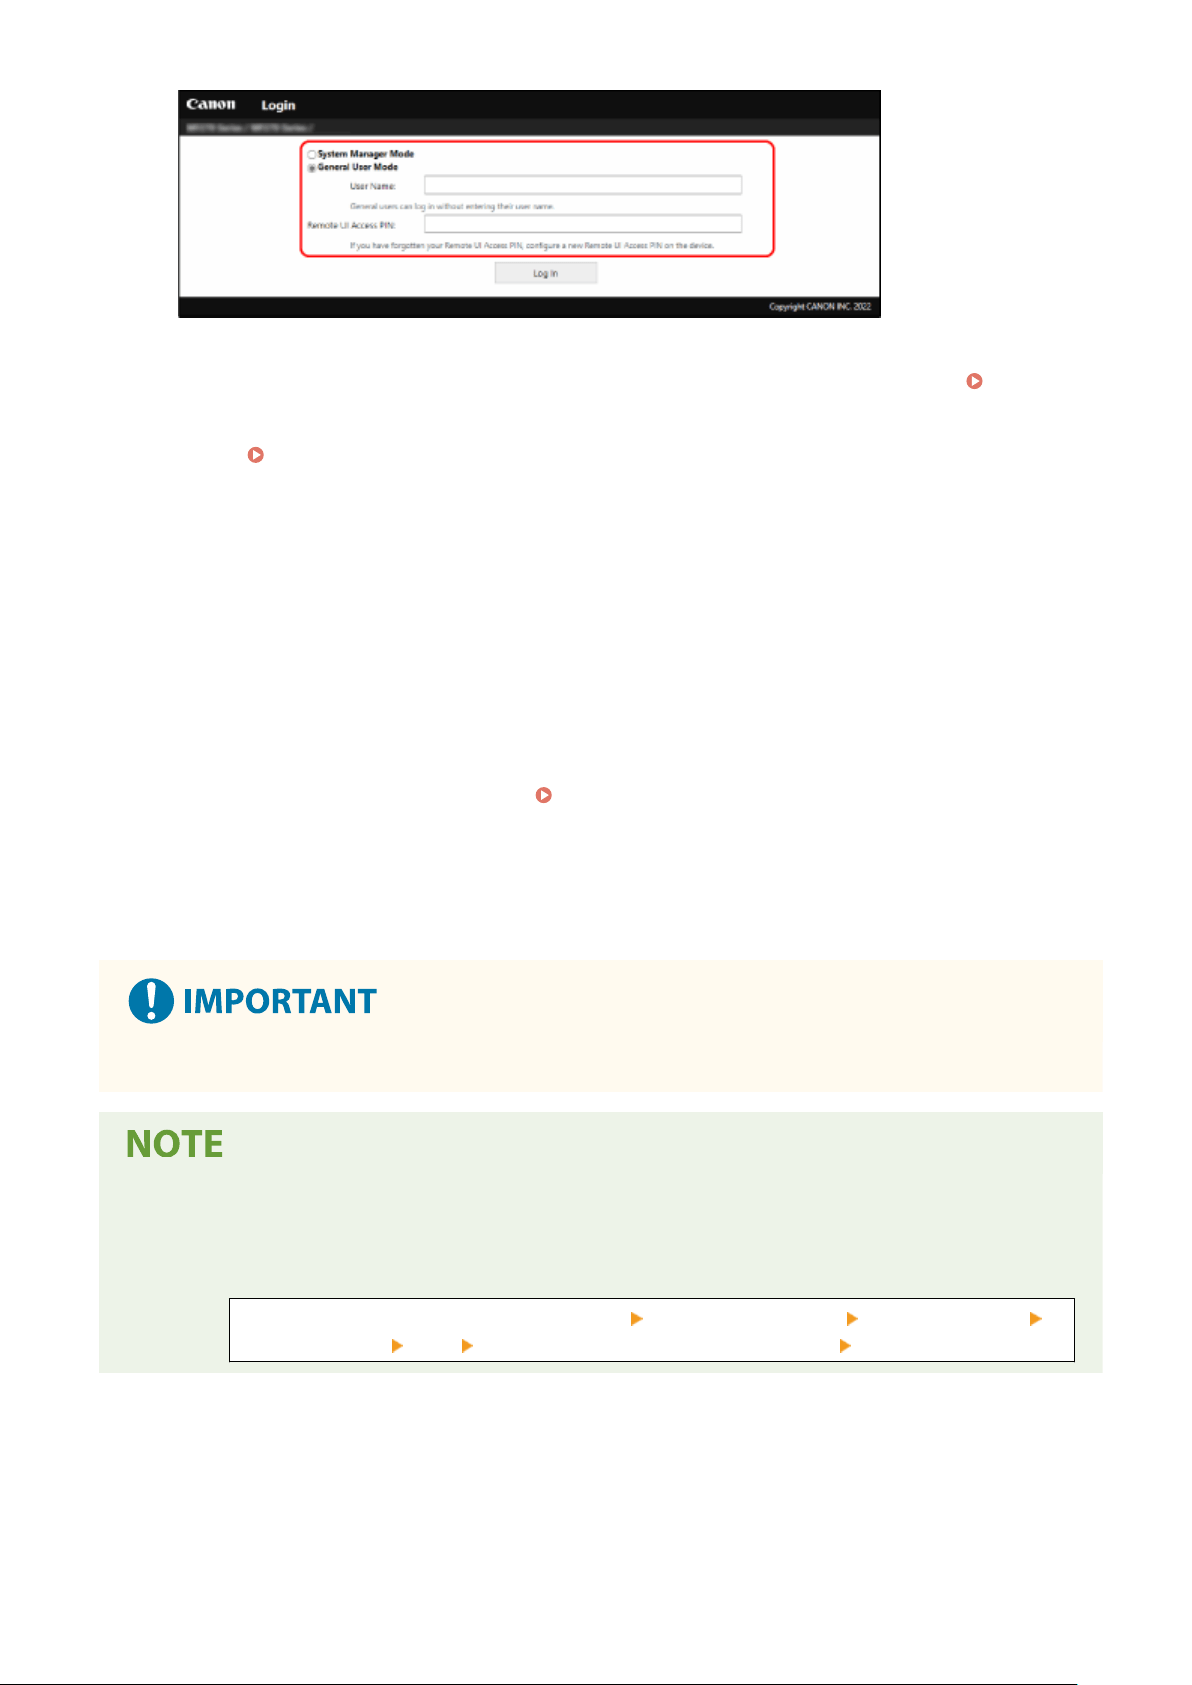
[System Manager Mode]
When the System Manager ID is set, enter the System Manager ID and System Manager PIN. System
Manager ID and PIN(P
. 4)
* When logging in with System Manager Mode, you must change the System Manager PIN from the default
setting.
Setting the Department ID and PIN for the Administrator(P. 144)
[Gener
al User Mode]
You can log in without entering a user name, but enter a print user name when checking and canceling jobs
waiting to be printed.
* If a user name is not set in the printer driver, the logon user name of the computer that sent the print data
is set automatically.
[Remote UI Access PIN]
When the Remote UI Access PIN is set, enter the PIN.
3
Click [Log In].
➠ The Portal page of Remote UI appears.
Portal Page of Remote UI(P. 181)
4
When you have completed your operations, click [Log Out].
➠ The login scr
een appears after logging out from Remote UI.
● Do not access other websites when using Remote UI.
Setting the Time Until the User Is Automatically Logged Out
● The user is automatically logged out fr
om Remote UI if no operations are performed for a certain period of
time. Use the following procedure to set the time until the user is logged out.
Log in to Remote UI in System Manager Mode [Settings/Registration] [Network Settings]
[Session Settings] [Edit] enter the time until the user is logged out [OK]
Managing the Machine
180
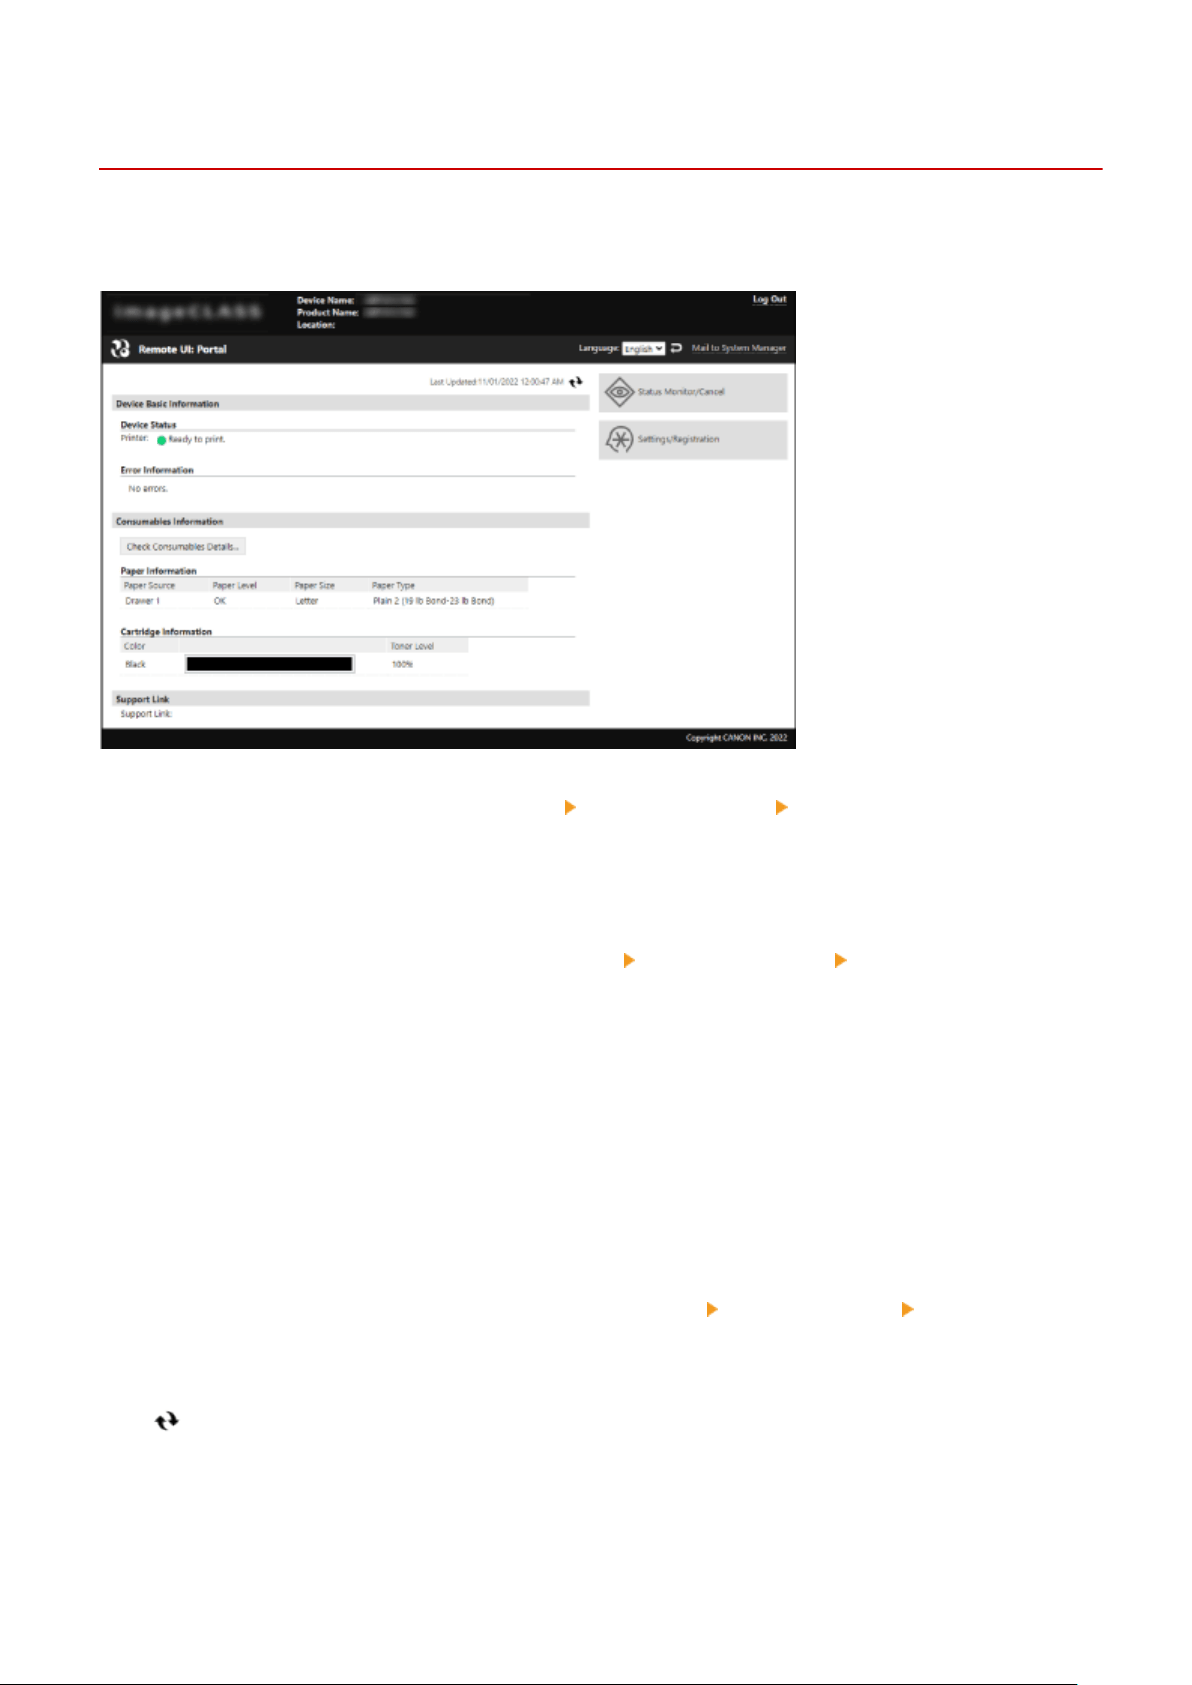
Portal Page of Remote UI
94RC-068
When you log in to Remote UI, the Portal page (Remote UI top page) appears. Fr
om here you can check the operations
status of the machine, view various information, and change the settings with button operations.
[Device Name]
Displays the de
vice name set in [Settings/Registration]
[Device Management] [Device Information Settings].
[Pr
oduct Name]/[Product Name (Serial Number):]
Displays the product name of the machine.
Depending on the model, the serial number may also be displayed.
[Location]
Displays the installation location set in [Settings/Registration]
[Device Management] [Device Information
Settings].
[Login User]
Displays the information of the logged in user.
[Log Out]
Y
ou are logged out of Remote UI, and the login screen is displayed.
[Language]
You can change the display language of Remote UI.
* The display languages of the computer and Remote UI must be the same. If the display languages are not the same,
the entered information may not be displayed correctly, or you may not be able to reference a folder, server, or other
specied destination.
[Mail to System Manager]
Creates e-mail for the administrator indicated in [Settings/Registration]
[User Management] [System Manager
Information].
[Last Updated]
Displays the date and time that the information displayed on the Portal page was last updated.
Click [ ] to the right of the date and time to update these.
[De
vice Basic Information]
Displays the current status and error information of the machine.
When an error occurs, this displays a link to the error information screen.
[Consumables Information]
Managing the Machine
181
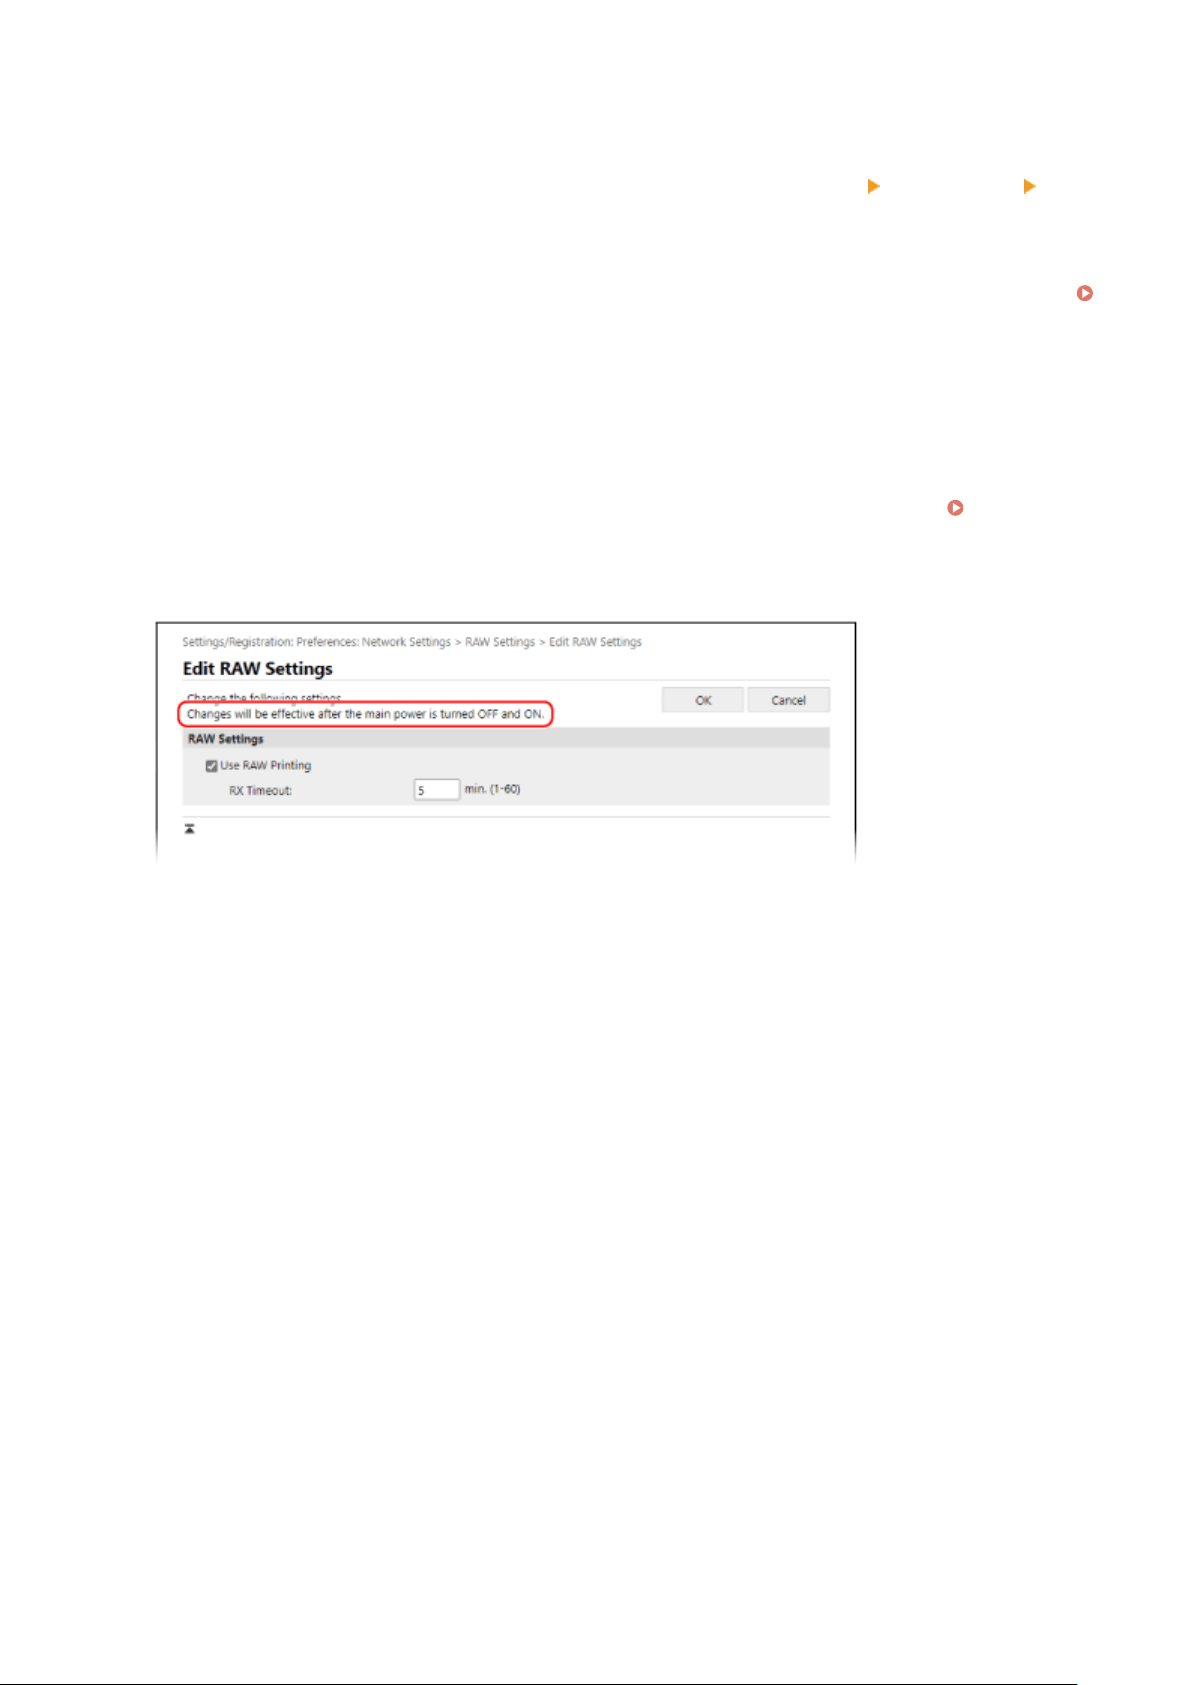
Displays the paper source information and remaining amount of ink in the toner cartridge.
Click [Check Consumables Details] to display the toner cartridge name.
[Support Link]
Displays a link to support information for this machine that is set in [Settings/Registr
ation]
[License/Other]
[Support Link].
[Status Monitor/Cancel]
Click this to display the [Status Monitor/Cancel] scr
een.
From here, you can check the status and logs of a function, operation status of the machine, and error information.
Checking Usage and Logs with Remote UI(P. 183)
[Settings/Registration]
Click this to display the [Settings/Registr
ation] screen.
If you logged in with System Manager Mode, you can change any settings and perform operations such as saving
and importing data.
● The items that can be set in the [Settings/Registration] screen are nearly the same as those of the operation
panel, but some items can only be set with either the operation panel or Remote UI.
Settings Menu
Items(P
. 196)
● Depending on the item, you may have to restart the machine for the settings to be applied. If a restart is
required, a message appears at the top of the screen.
Managing the Machine
182
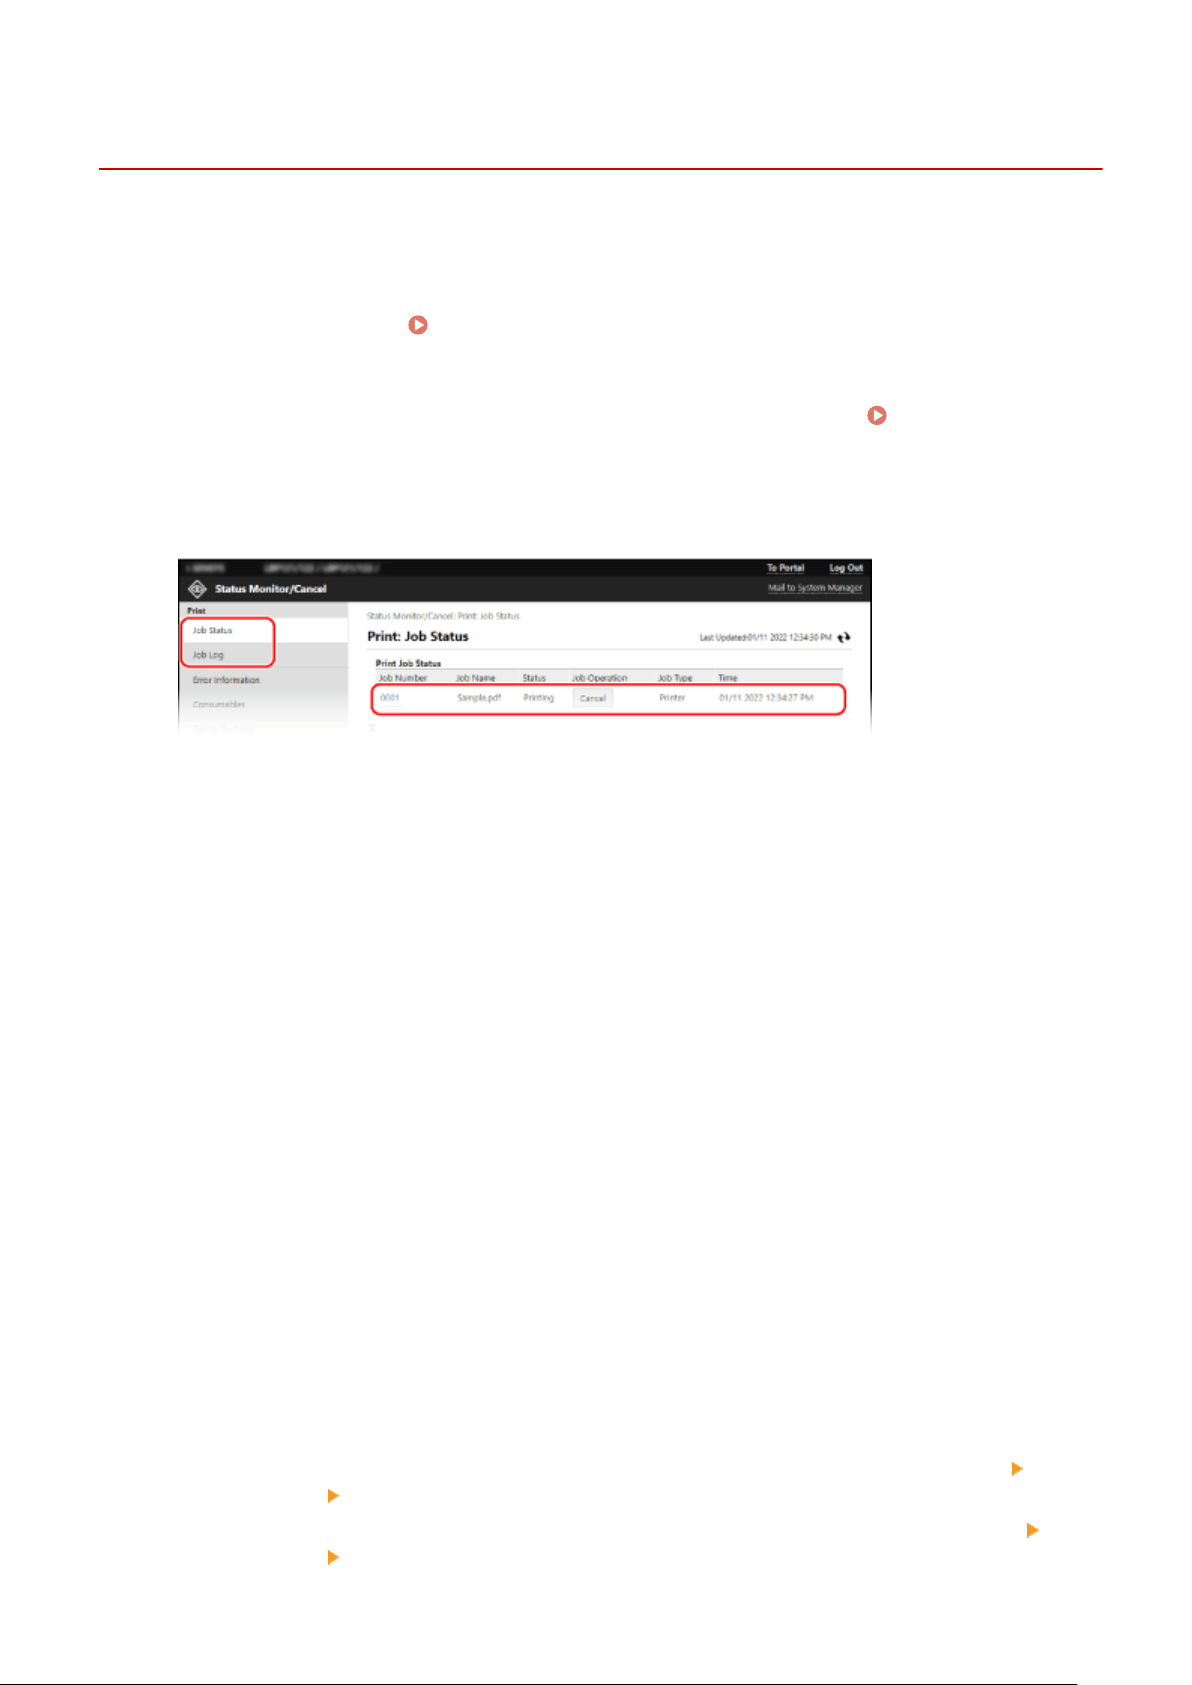
Checking Usage and Logs with Remote UI
94RC-069
Fr
om Status Monitor/Cancel in Remote UI, you can check the status and logs of a function, operation status of the
machine, and error information.
1
Log in to Remote UI.
Starting Remote UI(P. 179)
2
On the Portal page of Remote UI, click [Status Monitor/Cancel]. Portal Page of
Remote UI(P
. 181)
3
Select an item to view the status or log.
[Print]
[Job Status]
Displays the status (Printing or Waiting) of printed data from a computer.
If you logged in with Administrator Mode, this displays the print status for all jobs.
If you entered your user name in [User Name] when you logged in with General User Mode, only the print
job status for that user is visible.
● Click [Job Number] for paused prints to display print details and view the user name and number of
printed sheets.
● Click [Cancel] in [Job Operation] to delete the print data for jobs that are printing or waiting.
[Job Log]
Displays the print job log from a computer.
[Error Information]
Displays information of errors occurring on the machine.
* You can view the same information by clicking the link displayed in [Error Information] on the Portal page.
[Consumables]
Displays the paper size and type of each paper source and the toner cartridge name.
* You can view the same information by clicking [Check Consumables Details] on the Portal page.
[Device Features]
Displays the specications of the machine and the status of optional equipment.
[Device Information]
Displays information of the machine, such as the product name and serial number, as well as the rmware
version and system manager information.
● [Device Name] and [Location] display the information set in [Settings/Registration] [De
vice
Management]
[Device Information Settings].
● [System
Manager Information] displays the information set in [Settings/Registration]
[User
Management] [System Manager Information].
Managing the Machine
183

[Check Counter]
Displays the total number of pages printed to date. Checking the Number of Printed Pages (Check
Counter)
(P. 194)
[Cartridge Log]
Displays a usage record in the toner cartridge.
[Eco Information]
Displays the average number of sheets output and average power consumption per month.
4
Log out from Remote UI after viewing the usage.
Managing the Machine
184

Monitoring the Usage
94RC-06A
Y
ou can use the operation panel of the machine to check the total number of printed pages and print the machine
settings and other reports and lists.
Checking the Number of Printed Pages (Check Counter)(P. 194)
Printing and Viewing Reports and Lists(P. 186)
◼ See Also
Y
ou can also check the counter using Remote UI from a computer. In Remote UI, you can also check the status and
logs of a function, operation status of the machine, and error information.
Checking Usage and Logs with Remote UI(P. 183)
Managing the Machine
185

Printing and Viewing Reports and Lists
94RC-06E
Y
ou can print and view reports and lists including machine usage and settings.
Types of Reports and Lists(P. 186)
Printing Reports and Lists(P. 186)
2-Sided Printing of Reports and Lists
● Reports and lists ar
e printed on paper on one side by default. You can change the setting to print on both
sides.
Changing the Report and List Print Settings(P. 188)
Types of Reports and Lists
Machine Usage Reports
Y
ou can print and view the following reports related to usage of the machine including power consumption
and status of consumables:
● Eco Report
Displays the number of printed pages and power consumption per month. You can see how to save paper
and power based on this information.
● Consumables Status Report
Displays the status of consumables installed in the machine.
● Cartridge Log Report
Displays a log of toner cartridge usage.
Settings Lists
You can print and view the following lists that summarize the registration information and settings of the
machine:
● User Data List
Displays the serial number and other machine information as well as the settings that do not require
administrator privileges.
● System Manager Data List
Displays the serial number and other machine information as well as the settings that require
administrator privileges.
Printing Reports and Lists
Print reports and lists using the operation panel. You cannot print these using Remote UI from a computer.
Administr
ator privileges are required to print the following reports and lists:
● System Manager Data List
1
On the operation panel, select [Menu] in the [Home] screen, and press
. [Home]
Scr
een(P. 81)
Managing the Machine
186

2
Press [Output Reports]
[Print List] .
3
Select the report or list to print.
➠ A scr
een conrming the paper available for printing is displayed.
If the login screen appears, enter the System Manager ID and PIN, and then press
. System Manager
ID and PIN(P
. 4)
4
Check that printable paper is set in the machine, select [Yes], and press
.
➠ The r
eport or list is printed.
Managing the Machine
187

Changing the Report and List Print Settings
94RC-06F
Reports and lists ar
e printed on paper on one side by default. You can change the setting to print on both sides.
Use the operation panel to congure the settings. You cannot congure the settings using Remote UI from a
computer.
1
On the operation panel, select [Menu] in the [Home] screen, and press
. [Home]
Scr
een(P. 81)
2
Press [Output Reports]
[Report Settings] .
➠ The [Report Settings] screen is displayed.
3
Select [Default Settings for Report Output] and press .
➠ The [Default Settings for Report Output] scr
een is displayed.
4
Press [2-Sided Printing]
[On] .
Managing the Machine
188
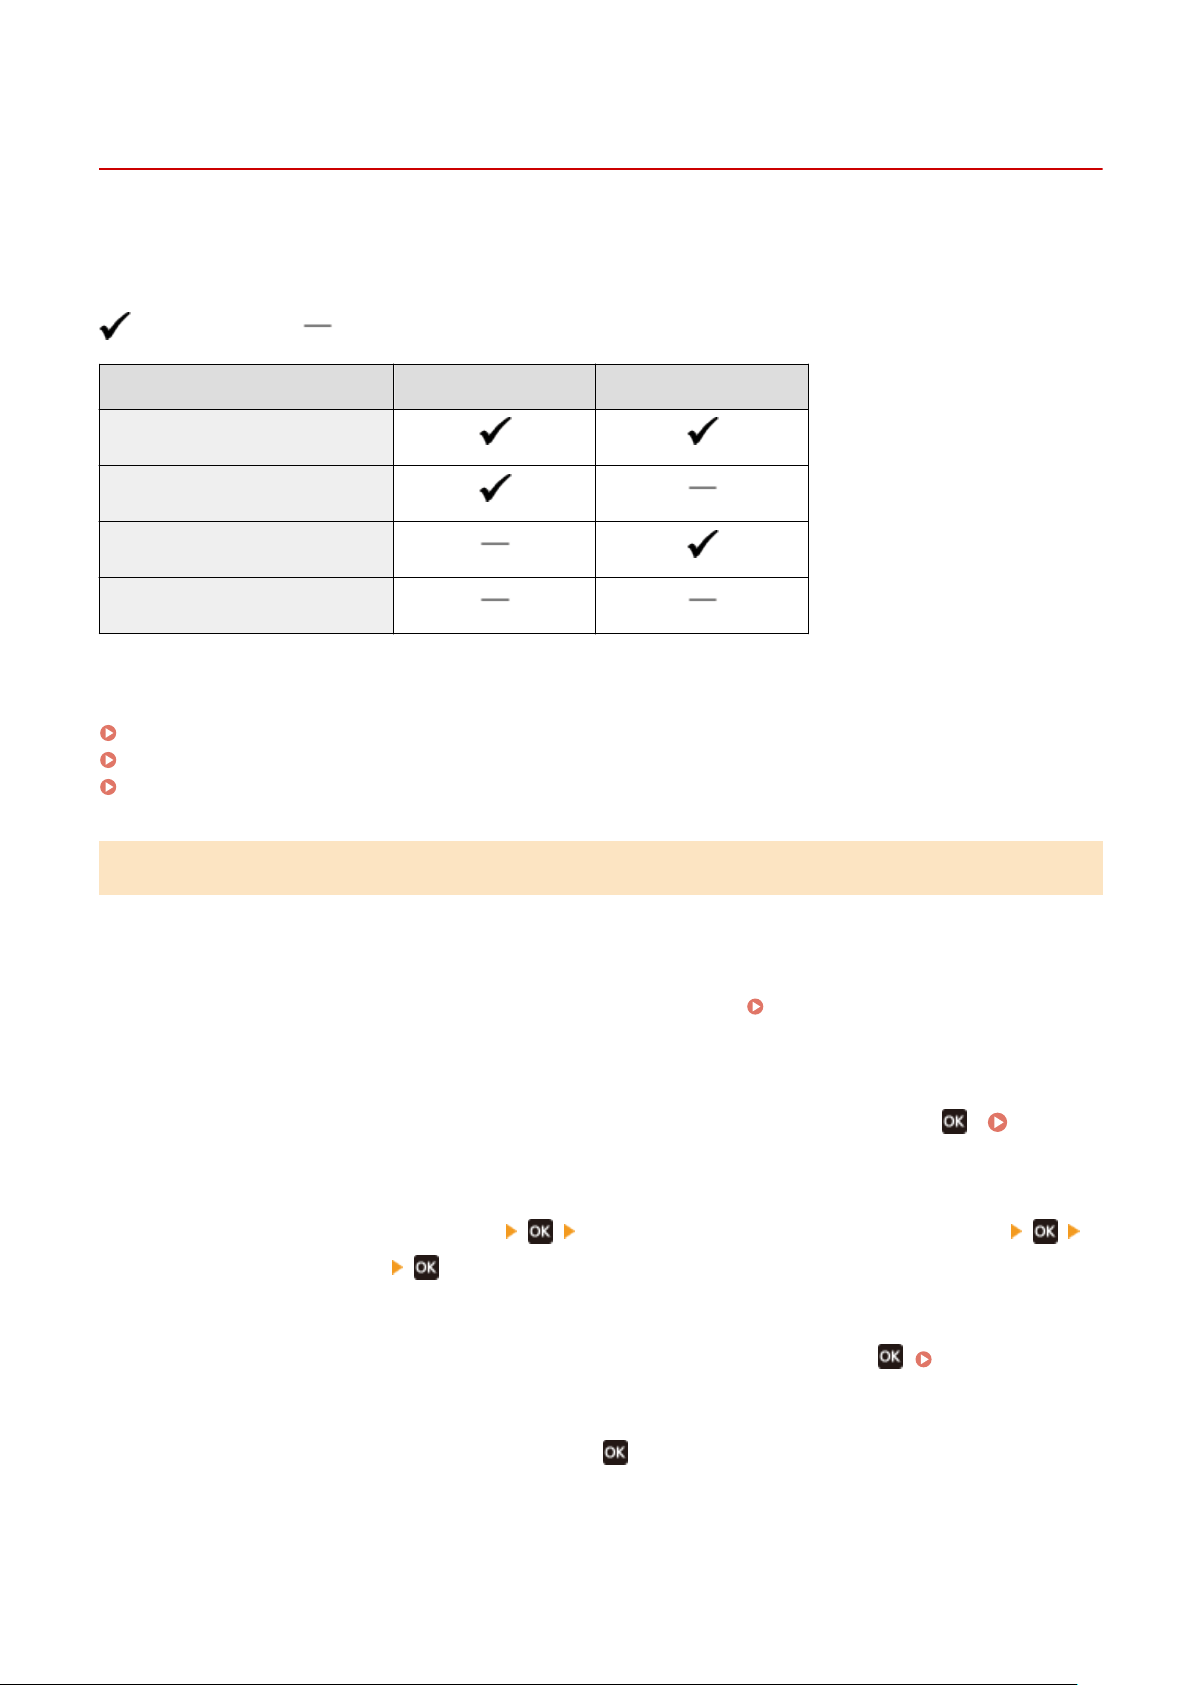
Updating the Firmware
94RC-0C5
When functions ar
e added or the software version is upgraded, the rmware of the machine is updated.
Check the version of the rmware, and update the rmware via the Internet or a computer according to the usage
environment of the machine.
: Can be updated : Cannot be updated
Usage environment of the machine Connection via Internet Connection via computer
Wired LAN connection
Wireless LAN connection
USB connection
Use IPv6
* You cannot update the rmwar
e in an IPv6 Environment. Connect the machine to a computer via USB, and update
from the computer.
Checking the Firmware Version(P. 189)
Updating the Firmware via the Internet(P. 190)
Updating the Firmware via a Computer(P. 190)
Checking the Firmware Version
Check the current version of the rmware before updating it, and then check the version after updating to see if the
update was performed correctly.
This section describes how to check the rmware version using the operation panel.
You can also use Remote UI from a computer to check the rmware version. Managing the Machine from a
Computer (Remote UI)(P
. 178)
Administrator privileges are required.
1
On the operation panel, select [Menu] in the [Home] screen, and press
. [Home]
Scr
een(P. 81)
2
Press [Management Settings]
[Remote UI Settings/Update Firmware]
[Update Firmware] .
➠ The [Update Firmwar
e] screen is displayed.
If the login screen appears, enter the System Manager ID and PIN, and then press
. System Manager
ID and PIN(P
. 4)
3
Select [Version Information] and press
.
➠ Displays the curr
ent version of the rmware.
Managing the Machine
189
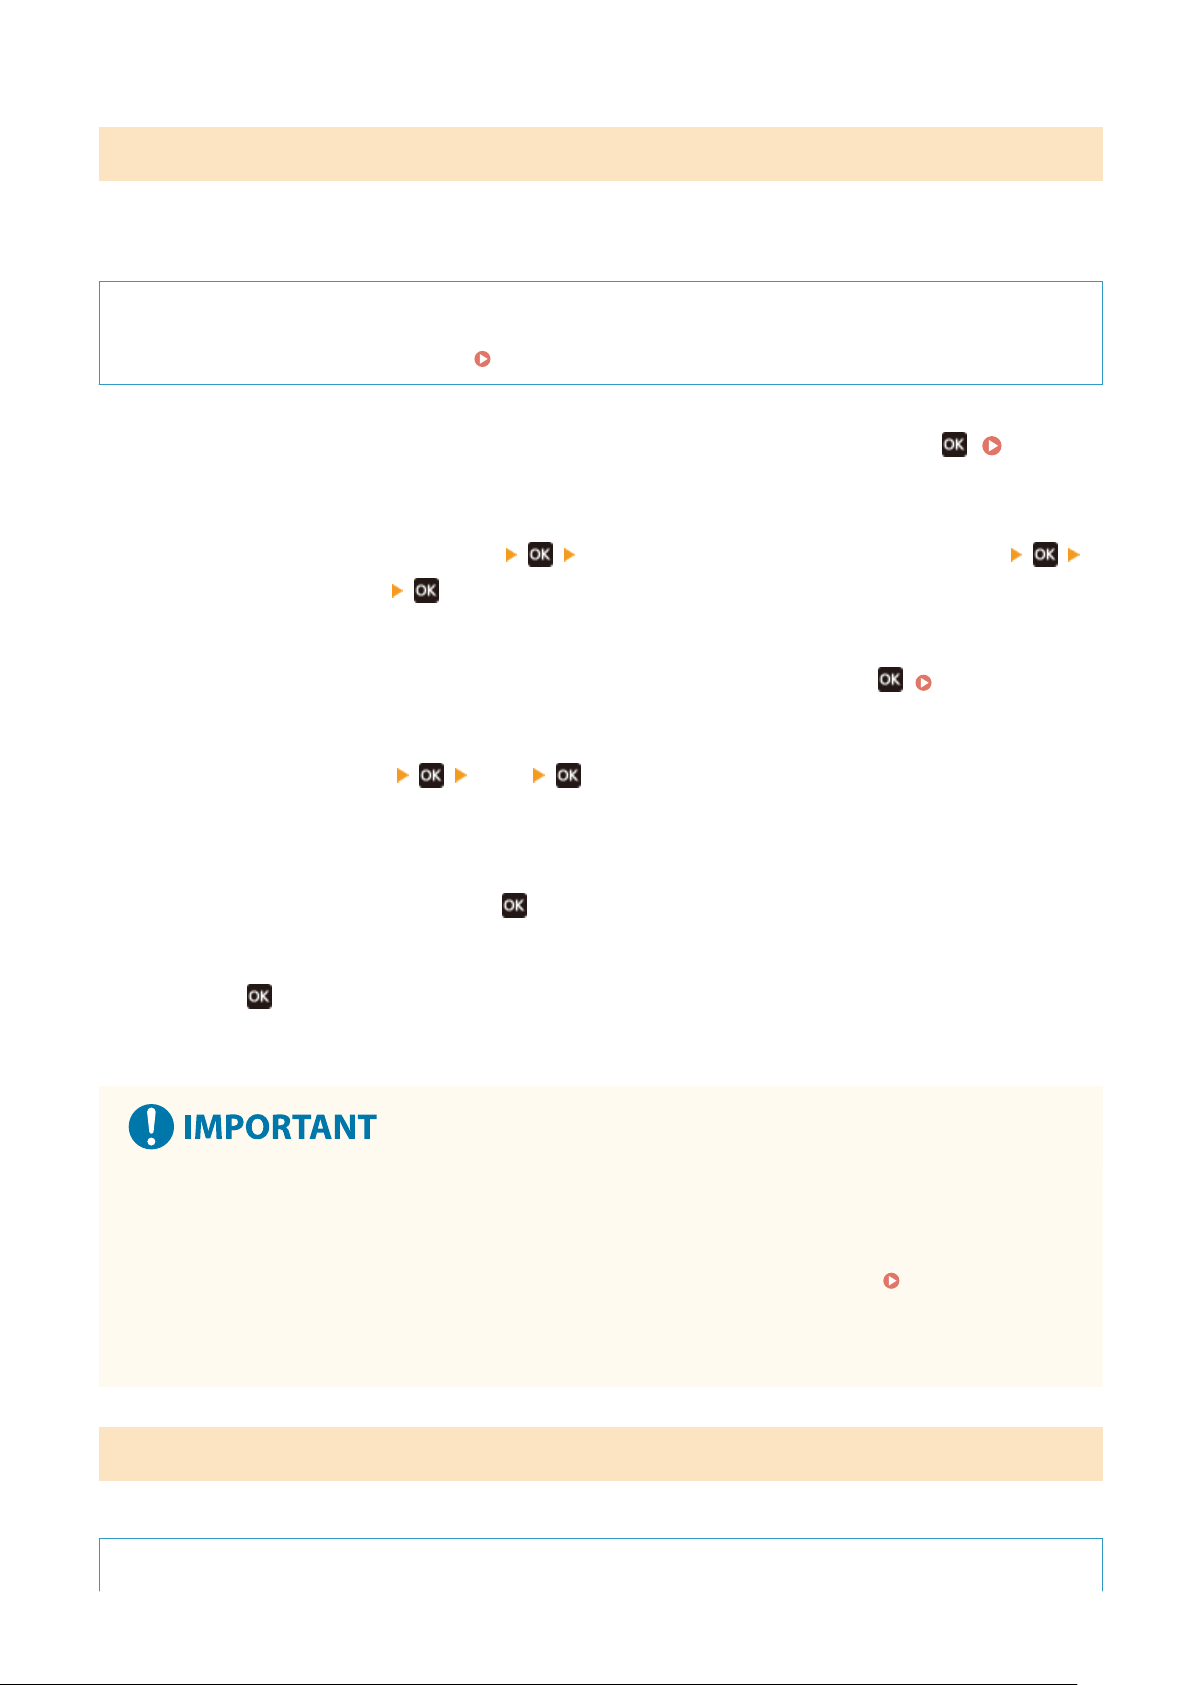
Updating the Firmware via the Internet
Use the operation panel to update the rmware via the Internet. You cannot update it using Remote UI from a
computer.
Administrator privileges are required. When the rmware has been updated, the machine restarts automatically.
Required Preparations
● Connect the machine to the Internet.
Setting Up the Network(P. 34)
1
On the operation panel, select [Menu] in the [Home] screen, and press . [Home]
Screen(P. 81)
2
Press [Management Settings] [Remote UI Settings/Update Firmware]
[Update Firmware] .
➠ The [Update Firmware] screen is displayed.
If the login screen appears, enter the System Manager ID and PIN, and then press . System Manager
ID and PIN(P
. 4)
3
Press [Via Internet]
[Yes] .
➠ The rmwar
e update conrmation screen is displayed.
4
In the licensing screen, press
.
5
Press
.
➠ Do
wnloading of the rmware starts.
● Do not turn the machine OFF while it is r
estarting or during the rmware update. Doing so may cause the
update to fail.
● Failed updating may result in an error message appearing during startup and the machine being unusable.
In this event, use the dedicated recovery rmware to redo the update via a computer.
Updating the
Firmwar
e via a Computer(P. 190)
* Download the dedicated recovery rmware from the Canon website for your country/region.
https://global.canon/en/support
Updating the Firmware via a Computer
Update the rmwar
e from a computer connected to the machine via wired LAN or USB.
Required Preparations
Managing the Machine
190

● Do
wnload the latest rmware from the Canon website for your country/region to the computer performing
the update.
https://global.canon/en/support/
◼ Ho
w to Update from a Computer
See the "User Support Tool Operation Guide" included with the rmware.
◼ To Put the Machine into Update Waiting State (Download Mode)
Use the following procedure.
Use the operation panel to perform this operation. You cannot perform this operation using Remote UI from a
computer.
Administrator privileges are required.
1
On the operation panel, select [Menu] in the [Home] screen, and press
. [Home]
Scr
een(P. 81)
2
Press [Management Settings]
[Remote UI Settings/Update Firmware]
[Update Firmware] .
➠ The [Update Firmwar
e] screen is displayed.
If the login screen appears, enter the System Manager ID and PIN, and then press
. System Manager
ID and PIN(P
. 4)
3
Press [Via PC]
[Yes] .
➠ Switches the machine to do
wnload mode and puts it into update waiting state.
Managing the Machine
191

Initializing the Settings and Data
94RC-06K
Y
ou can initialize the settings and registered data to reset the machine to the factory settings. You can initialize
specied settings and data only or initialize all settings and data.
Initializing Specic Settings and Data
You can initialize the following items separately:
● Settings menu: Initializes the settings of [Menu] in the [Home] screen.
● Key and Certicate: Initializes the settings of the key and certicate as well as CA certicate, and clears
everything except the pre-installed key and certicate.
Initializing Specic Settings and Data(P
. 192)
Initializing All Settings and Data
You can reset all settings to the factory settings, and clear all stored data including logs. Initialization is
performed to prevent access to condential information and unauthorized use such as when replacing or
disposing of the machine.
Initializing All Settings and Data(P. 193)
Initializing Specic Settings and Data
This section describes how to initialize settings and data using Remote UI from a computer.
On the operation panel, select [Menu] in the [Home] screen, and then perform initialization from [Preferences] or
[Management Settings]. [Initialize Network Settings](P. 207) / [Data Management](P. 245)
Administr
ator privileges are required. Depending on the item to be initialized, you may have to restart the machine.
1
Log in to Remote UI in System Manager Mode.
Starting Remote UI(P. 179)
2
On the Portal page of Remote UI, click [Settings/Registration]. Portal Page of
Remote UI(P
. 181)
3
Click [Data Management].
➠ The [Data Management] scr
een is displayed.
4
Select the item to initialize.
Initializing the Settings Menu
Click [Initialize Menu], and select the setting to be initialized fr
om [Menu to Initialize].
When Initializing a Key and Certicate
Click [Initialize Ke
y and Certicate].
5
Click [Initialize]
[OK].
➠ The specied item is initialized.
6
Log out from Remote UI.
Managing the Machine
192
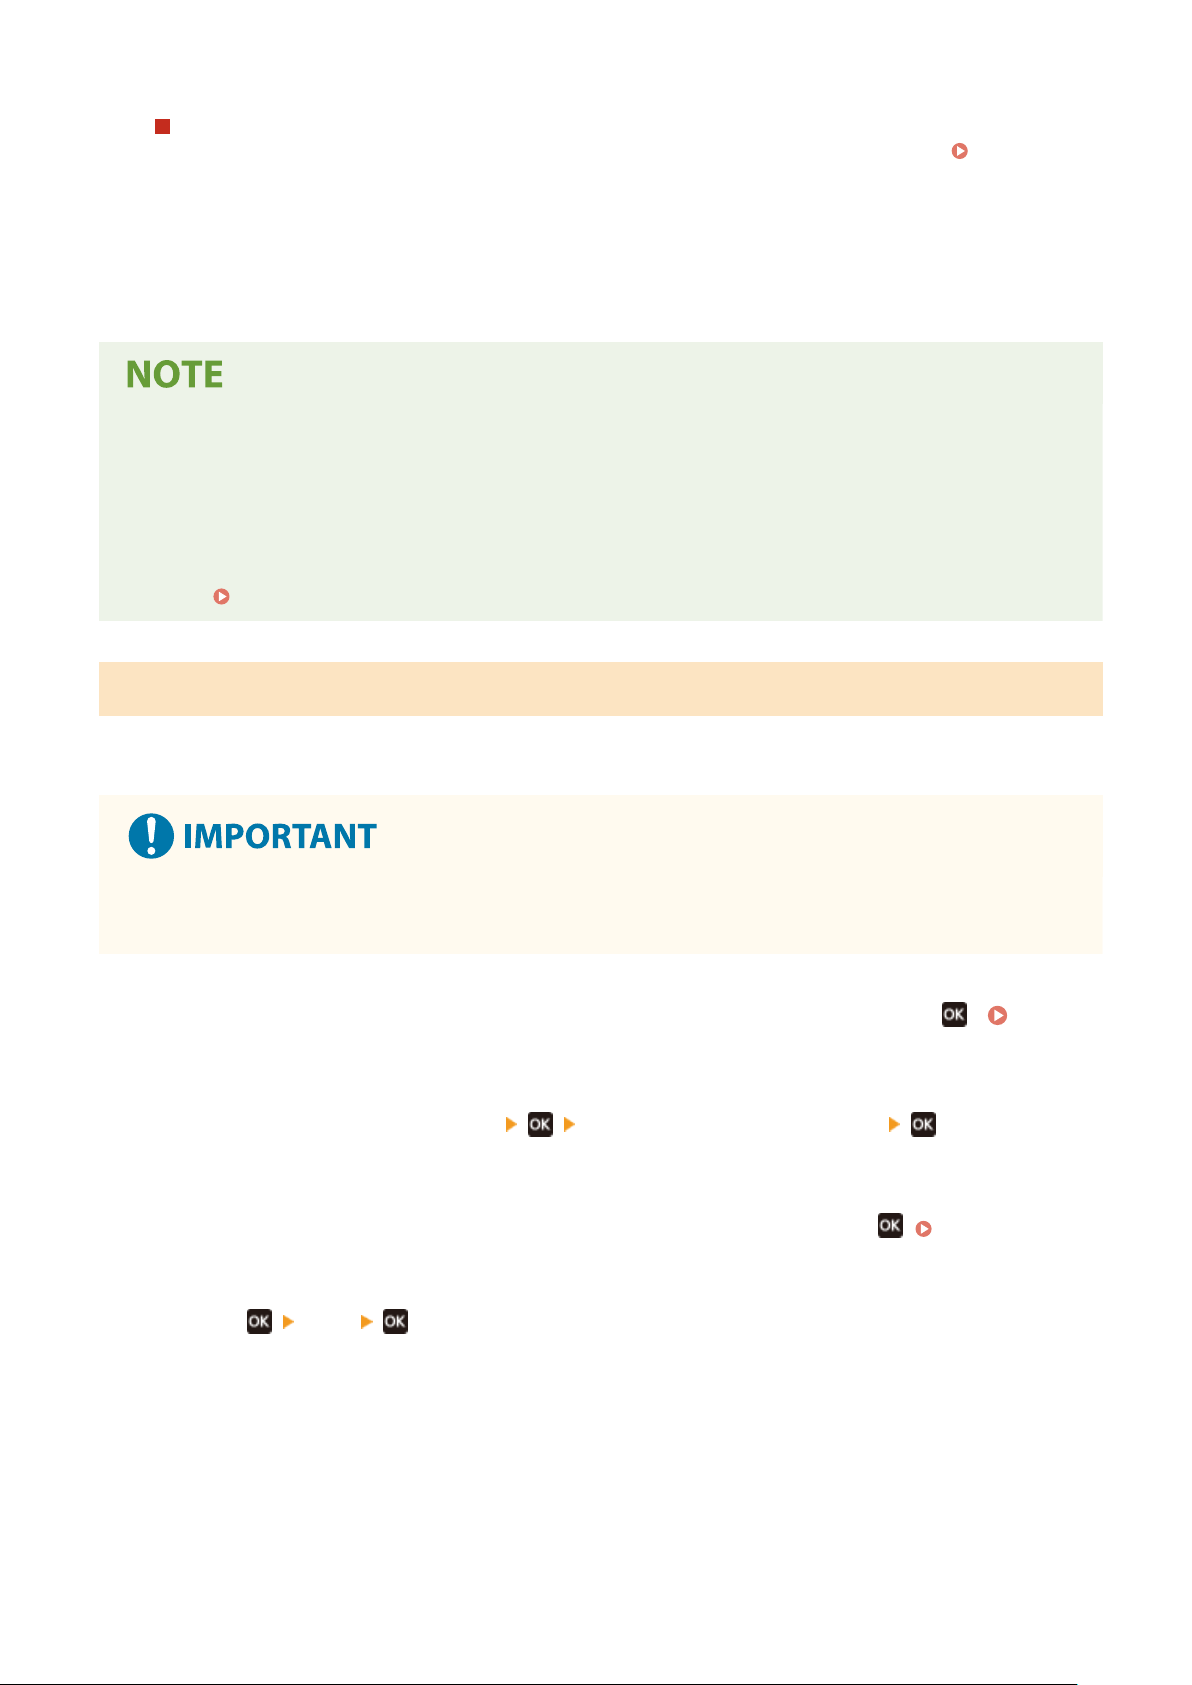
When the Settings Menu Is Initialized
When any of the follo
wing is initialized, restart the machine to apply the initialized settings.
Restarting the
Machine
(P. 75)
● [Preferences]
● [Function Settings]
● [Management Settings]
● [Network Settings]
When Initializing a Key and Certicate
● Functions using a k
ey and certicate such as TLS are disabled. To use these functions again, you must set the
key and certicate, and then enable the function.
When [Management Settings] of the Settings Menu Is Initialized
● This also initializes the Remote UI Access PIN. To use Remote UI, you must set the Remote UI Access PIN
again.
Setting the PIN to Use for Remote UI(P. 168)
Initializing All Settings and Data
Use the oper
ation panel to initialize all settings and data. You cannot initialize these using Remote UI from a computer.
Administrator privileges are required. When these are initialized, the machine restarts automatically.
● Befor
e initialization, check that there is no data being processed or waiting to be processed. This data is
deleted when the initialization is performed.
1
On the operation panel, select [Menu] in the [Home] screen, and press
. [Home]
Scr
een(P. 81)
2
Press [Management Settings]
[Initialize All Data/Settings] .
➠ The initialization conrmation scr
een is displayed.
If the login screen appears, enter the System Manager ID and PIN, and then press
. System Manager
ID and PIN(P
. 4)
3
Press
[Yes] .
➠ All settings and data ar
e initialized.
When initialization is complete, the machine restarts automatically.
Managing the Machine
193
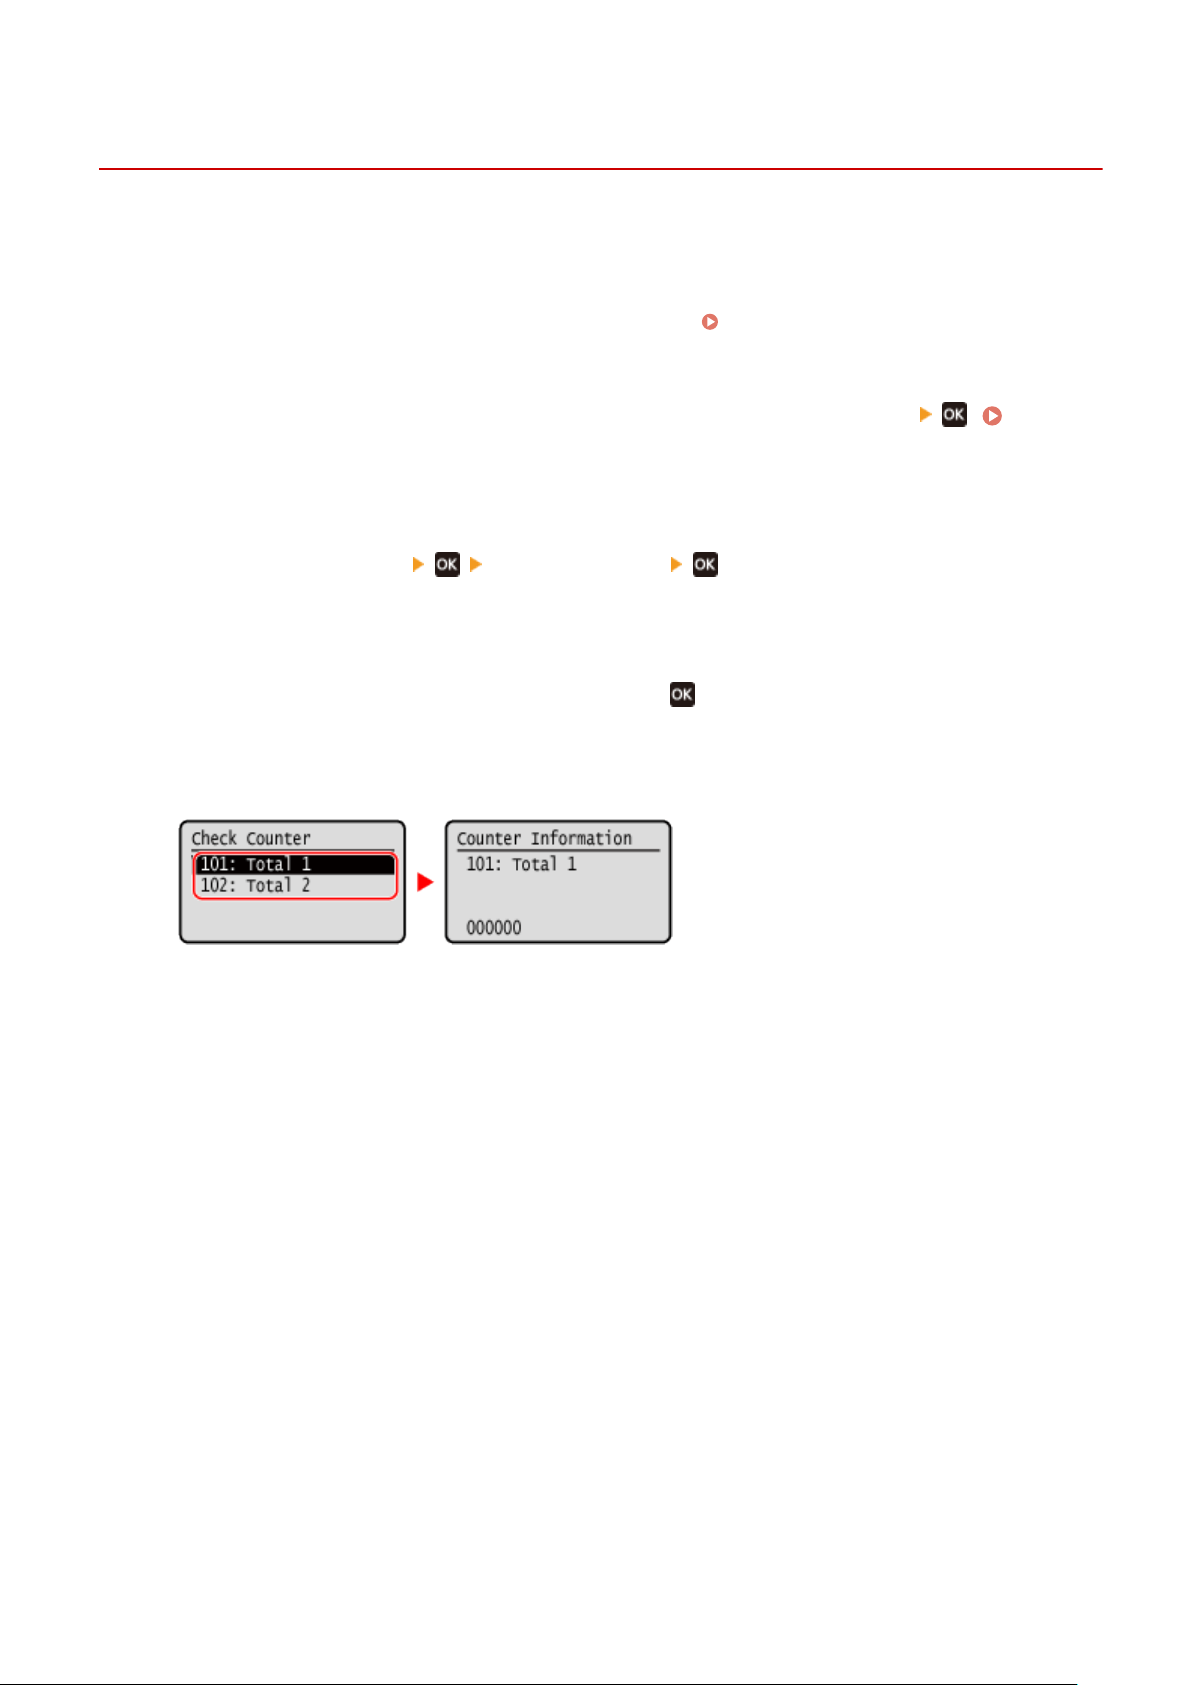
Checking the Number of Printed Pages (Check Counter)
94RC-0C7
Y
ou can display a counter showing the total number of pages printed to date by black & white.
The number of printed pages includes printed reports and lists.
This section describes how to check the number of printed pages using the operation panel.
You can also check this information using Remote UI from a computer.
Checking Usage and Logs with Remote
UI(P
. 183)
1
On the operation panel, press [Status Monitor] in the [Home] screen
. [Home]
Scr
een(P. 81)
➠ The [Status Monitor] scr
een is displayed.
2
Press [Device Status]
[Check Counter] .
➠ The [Check Counter] screen is displayed.
3
Select the item you want to check, and press .
4
Check the number of printed pages.
[101: Total 1]
Displays the total number of printed pages.
[102: T
otal 2]
Displays the total number of printed pages.
Managing the Machine
194

Settings Menu Items
Settings Menu Items ....................................................................................................................................
196
[Preferences] ...................................................................................................................................................... 197
[Display Settings] .......................................................................................................................................... 198
[Timer/Energy Settings] ................................................................................................................................ 201
[Network] ..................................................................................................................................................... 203
[Wireless LAN Settings] .......................................................................................................................... 208
[TCP/IP Settings] .................................................................................................................................... 210
[External Interface] ....................................................................................................................................... 216
[Accessibility] ................................................................................................................................................ 217
[Adjustment/Maintenance] .............................................................................................................................. 219
[Adjust Image Quality] .................................................................................................................................. 220
[Special Processing] ............................................................................................................................... 221
[Maintenance] .............................................................................................................................................. 225
[Function Settings] ............................................................................................................................................ 226
[Common] .................................................................................................................................................... 227
[Paper Feed Settings] ............................................................................................................................. 228
[Print Settings] ....................................................................................................................................... 229
[Printer] ........................................................................................................................................................ 230
[Printer Settings] .................................................................................................................................... 231
[Management Settings] .................................................................................................................................... 238
[User Management] ..................................................................................................................................... 240
[Device Management] .................................................................................................................................. 241
[Remote UI Settings/Update Firmware] ........................................................................................................ 243
[Remote UI Settings] .............................................................................................................................. 244
[Data Management] ..................................................................................................................................... 245
[Security Settings] ......................................................................................................................................... 246
[Authentication/Password Settings] ....................................................................................................... 247
[Toner Delivery Settings] ................................................................................................................................... 248
Settings Menu Items
195

Settings Menu Items
94RC-0AY
This section describes the items available in the settings menu displayed when you pr
ess [Menu] in the [Home] screen
on the operation panel.
From the settings menu, you can run functions and modify the settings according to the machine’s operating
environment or its usage.
Administrator privileges are required to view or change some settings. Note also that the machine may need to be
restarted for changed settings to take effect.
[Preferences](P. 197)
[Adjustment/Maintenance](P. 219)
[Function Settings](P. 226)
[Management Settings](P. 238)
[Toner Delivery Settings](P. 248)
Menu Route Map (List)
This list sho
ws you the settings menu items and the values set.
Click the icon below to view the corresponding Menu Route Map (PDF).
◼ See Also
If a Login Scr
een Appears
If a System Manager ID has been set, a login screen may appear when certain items are selected. Once you
enter the required information and the login is authenticated, you can view or change the settings.
Logging In to the Machine(P. 86)
If the Machine Must be Restarted
After changing the settings, r
estart the machine.
Restarting the Machine(P. 75)
Settings Not Included in the Menus
The Paper Settings items appear when you pr
ess [Paper Settings] in the [Menu] screen.
Specifying the Paper Size and Type(P. 94)
Conguring Settings fr
om Remote UI
The settings menu items can also be specied from a computer using Remote UI. In Remote UI, specify the
settings from [Settings/Registration] in the Portal page.
The items that can be specied in [Settings/Registration] in Remote UI are almost identical to those in the
operation panel settings menu, but there are also items that can be specied only from the operation panel
or only from Remote UI. Note also that some of the item names differ in Remote UI.
Managing the Machine from a Computer (Remote UI)(P. 178)
Checking the Settings
Y
ou can check a list of the current settings by printing them out.
Printing and Viewing Reports and Lists(P. 186)
Settings Menu Items
196

[Preferences]
94RC-06R
These ar
e settings used to congure features such as the operation panel screen displays and the network settings
according to the environment in which the machine is used.
* Values in bold red text indicate the default setting for each item.
[Display Settings](P. 197)
[Timer/Energy Settings](P. 197)
[Network](P. 197)
[External Interface](P. 197)
[Accessibility](P. 197)
[Display Settings]
[Menu] [Preferences]
Congur
e the operation panel screen displays.
[Display Settings](P. 198)
[Timer/Energy Settings]
[Menu] [Preferences]
Set the date and time and specify the Ener
gy Saver settings.
[Timer/Energy Settings](P. 201)
[Network]
[Menu] [Preferences]
Congur
e the network environment for the machine.
[Network](P. 203)
[External Interface]
[Menu] [Preferences]
Congur
e the USB connection.
[External Interface](P. 216)
[Accessibility]
[Menu] [Preferences]
Congur
e operation panel screen features such as screen color inversion and message display time to make the
screen easier to see.
[Accessibility](P. 217)
Settings Menu Items
197
[Display Settings]
94RC-06S
Congur
e the operation panel screen displays.
* Values in bold red text are the default settings for each item.
[Language](P. 198)
[Remote UI Language](P. 198)
[Millimeter/Inch Entry Switch](P. 199)
[Gram/Pound Switch](P. 199)
[Displ. Timing for Cartridge Prep. Notif.](P. 199)
[Show Warnings](P. 199)
[Action When Warning](P. 199)
[Display IP Address](P. 200)
[Language]
[Menu] [Preferences] [Display Settings]
Change the language sho
wn on the operation panel and used in printed reports.
* Depending on your country or region, the [Language] setting may not be available, or its content or default setting
may be different.
[Deutsch]
[English]
[Español]
[Fr
ançais]
[Italiano]
[Português]
[日本語]
[中文(繁體)]
[中文(简体)]
[한국어]
[Remote UI Language]
[Menu] [Preferences] [Display Settings]
Change the language sho
wn on Remote UI screens.
* Depending on your country or region, the [Remote UI Language] setting may not be available, or its content or
default setting may be different.
[English]
[
Japanese]
[French]
[Spanish]
[German]
[Italian]
[Portuguese]
[Chinese (Simplied)]
[Chinese (Traditional)]
[Korean]
Settings Menu Items
198

[Millimeter/Inch Entry Switch]
[Menu] [Preferences] [Display Settings]
Change the units sho
wn on the screen for entering length and width.
[Millimeter]
[Inch]
[Gram/Pound Switch]
[Menu] [Preferences] [Display Settings]
Y
ou can change the units displayed such as for the paper weight.
* [Gram/Pound Switch] is only displayed when [Select Country/Region] is set to [United States (US)] or [Canada (CA)].
[Gram]
[Pound]
[Displ. Timing for Cartridge Prep. Notif.]
[Menu] [Preferences] [Display Settings]
When the toner in a toner cartridge runs lo
w, a message appears notifying you to prepare a new toner cartridge. To
manually specify when this message appears (the toner level in a cartridge), specify the timing in [Custom].
When [Auto] is enabled, the machine automatically decides when to display the message.
[Auto]
[Custom]
2 to 20
to 99 (%)
[Show Warnings]
[Menu] [Preferences] [Display Settings]
Specify whether a notication message is displayed when a toner cartridge is lo
w on toner.
* If the machine is congured to stop printing when a toner cartridge is low on toner, this cannot be set to [Off].
[Action When Warning](P. 199)
[Low Cartridge Level]
[Off]
[On]
[Action When Warning]
[Menu] [Preferences] [Display Settings]
Specify whether to continue printing when a toner cartridge is lo
w on toner.
If this is set to [Stop Printing], a notication message appears when the toner cartridge runs low on toner.
[Show
W
arnings](P. 199)
Settings Menu Items
199


[Timer/Energy Settings]
94RC-06U
Set the date and time and specify the Ener
gy Saver settings.
* Values in bold red text are the default settings for each item.
[Current Date/Time Settings](P. 201)
[Date/Time Settings](P. 201)
[Date Format](P. 201)
[Time Format](P. 202)
[Auto Reset Time](P. 202)
[Auto Sleep Time](P. 202)
[Current Date/Time Settings]
[Menu] [Preferences] [Timer/Energy Settings]
Set the date and time for the machine. The date and time set her
e are used as a reference for the functions that use
date and time information.
Setting the Date and Time(P. 177)
Befor
e conguring this setting, check that the correct time zone is selected.
[Date/Time Settings](P. 201)
* The curr
ent date and time cannot be changed for one hour after Daylight Saving Time is set.
[Date/Time Settings]
[Menu] [Preferences] [Timer/Energy Settings]
Set the time zone (UTC
*1
) and Daylight Saving Time accor
ding to the region where the machine is installed.
*1
The UTC (Coordinated Universal Time) is a coordinated universal time that is standard for all parts of the world. Internet-
based communication relies on the UTC being set correctly.
* Depending on your country or region, the [Date/Time Settings] setting may not be displayed, or its content or default
setting may be differ
ent.
* When you change the time zone, the current time setting is automatically changed accordingly.
[Current Date/
Time Settings](P
. 201) .
* If daylight saving time is enabled, specify the dates from which and to which daylight saving time is in effect.
[Time Zone]
[(UT
C-12:00) International Date Line West] to [(UTC-05:00) Eastern Time (US & Canada)] to [(UTC+14:00) Kiritimati
Island]
[Daylight Saving Time Settings]
[Off]
[On]
[Start]: Month, Week, Day
[End]: Month, Week, Day
[Date Format]
[Menu]
[Preferences] [Timer/Energy Settings]
Settings Menu Items
201
Set the order in which the year, month, and day are displayed.
* Depending on your country or r
egion, the [Date Format] setting may not be available, or its content or default
setting may be different.
[YYYY MM/DD]
[MM/DD/YYYY]
[DD/MM YYYY]
[Time Format]
[Menu] [Preferences] [Timer/Energy Settings]
Set 12 Hour or 24 Hour as the format for displayed time.
[12 Hour (AM/PM)]
[24 Hour]
[Auto Reset Time]
[Menu] [Preferences] [Timer/Energy Settings]
If the oper
ation panel is not used for a set period, a function called "Auto Reset Time" automatically restores the
default settings. This setting species whether Auto Reset is invoked.
If you enable Auto Reset, you can then set the time after which it is triggered.
0 (Off)
1 to 2 to 9 (min.)
Situations Where Auto Reset is Not Triggered
● When the Err
or lamp on the operation panel is ashing
Operation Panel(P. 10)
● When the [Menu] scr
een or an error message
*1
is displayed on the operation panel
● When processing of some sort (such as printing) is in progress
*1
Auto Reset is performed for some messages.
[Auto Sleep Time]
[Menu] [Preferences] [Timer/Energy Settings]
Set the time after which the machine automatically goes into sleep mode. Reducing Power Consumption (Sleep
Mode)(P
. 76)
* Use of the default settings is recommended to achieve the most effective power savings.
1 to 60 (min.)
Settings Menu Items
202
[Network]
94RC-06W
Specify the settings for the machine
’s network environment.
* Values in bold red text are the default settings for each item.
[Select Wired/Wireless LAN](P. 203)
[Wireless LAN Settings](P. 203)
[Direct Connection Settings](P. 203)
[Easy Connection via PC](P. 204)
[TCP/IP Settings](P. 204)
[SNMP Settings](P. 204)
[Dedicated Port Settings](P. 205)
[Dedicated Port Authentication Method](P. 205)
[Waiting Time for Connection at Startup](P. 205)
[Ethernet Driver Settings](P. 205)
[IEEE 802.1X Settings](P. 206)
[Firewall Settings](P. 206)
[RMT-SW](P. 206)
[Initialize Network Settings](P. 207)
[Select Wired/Wireless LAN]
[Menu] [Preferences] [Network]
Set whether to connect the machine to the network using a wir
ed or wireless LAN.
Selecting Wired or Wireless
LAN(P
. 36)
* If you are switching from a wired LAN to a wireless LAN, you can make the change within the procedure for
conguring the wireless LAN.
[Wir
ed LAN]
[Wireless LAN]
[Wireless LAN Settings]
[Menu] [Preferences] [Network]
Specify the settings for connecting the machine to a wir
eless LAN and to save energy while the machine is connected
to a wireless LAN.
[Wireless LAN Settings](P. 208)
[Direct Connection Settings]
[Menu] [Preferences] [Network]
Specify the settings for using a dir
ect connection and for the connection function.
Enabling the Direct Connection
Function
(P. 127)
[Use Direct Connection]
[Off]
[On]
[Time Until Dir
ect Connection Termination]
0 (Off)
1 to 60 (min.)
[Access Point Mode Settings]
[Use Custom SSID]
[Off]
Settings Menu Items
203

[On]
[SSID (1-20 Char
acters)]
[Use Custom Network Key]
[Off]
[On]
[Network Key (10 Char.)]
[Keep Enabled If SSID/Ntwk Key Spcfd]
*1
[Off]
[On]
[IP Address Settings for Direct Conn.]
192.168.22.1
*1
May not be displayed depending on the model, the installed options, and other settings.
[Easy Connection via PC]
[Menu]
[Preferences] [Network]
Start cableless setup mode.
T
o congure the network settings using the Canon Laser NW Device Setup Utility, select cableless setup mode.
* You can download the Canon Laser NW Device Setup Utility from the Canon website for your country/region.
https://global.canon/en/support/
[TCP/IP Settings]
[Menu] [Preferences] [Network]
Specify the settings for using the machine on a T
CP/IP network.
[TCP/IP Settings](P. 210)
[SNMP Settings]
[Menu] [Preferences] [Network]
Specify the settings for setting up, monitoring, and contr
olling the machine using SNMP management software.
Conguring SNMP
(P. 61)
To ensure compliance with the protocol’s advanced specications (RFC2790) when the machine’s status is being
monitored, set [Format Host Resources MIB to RFC2790] to [On].
[SNMPv1 Settings]
[Off]
[On]
[SNMPv3 Settings]
[Off]
[On]
[Acquir
e Printer Mngt. Info. from Host]
[Off]
[On]
Settings Menu Items
204
[Format Host Resour
ces MIB to RFC2790]
[Off]
[On]
[Dedicated Port Settings]
[Menu] [Preferences] [Network]
Specify whether to use a dedicated port.
Use a dedicated port for tasks such as printing fr
om a computer and conguring or browsing the machine’s settings.
[Off]
[On]
[Dedicated Port Authentication Method]
[Menu] [Preferences] [Network]
Set the authentication method when using a dedicated port.
If you specify [Mode 2], communication via the dedicated port will be limited to secur
e authentication methods only.
This may mean that you cannot connect to the machine from device management software, drivers or other software.
[Mode 1]
[Mode 2]
[Waiting Time for Connection at Startup]
[Menu] [Preferences] [Network]
Set the waiting time until a connection is established when the machine starts up.
If the machine is connected via a de
vice such as a switching hub, you may not be able to connect to the network even
when the setting on the machine is correct. If so, set the waiting time and reconnect.
0 to 300 (sec.)
[Ethernet Driver Settings]
[Menu] [Preferences] [Network]
Set the Ethernet communication method. Manually Conguring the Ethernet Settings(P
. 55)
This also allows you to check the MAC address on a wired LAN.
Viewing the MAC Address of the Wired LAN(P. 67)
[Auto Detect]
[Off]
[Communication Mode]
[Half Duple
x]
[Full Duplex]
[Ethernet Type]
[10BASE-T]
[100BASE-TX]
[On]
Settings Menu Items
205

[MAC Address]
[IEEE 802.1X Settings]
[Menu] [Preferences] [Network]
Specify whether to use IEEE 802.1X.
Use Remote UI fr
om a computer to set the IEEE 802.1X authentication method.
Using IEEE 802.1X(P. 155)
* [IEEE 802.1X Settings] may not be displayed depending on the model, the installed options, and other settings.
[Off]
[On]
[Firewall Settings]
[Menu] [Preferences] [Network]
Specify whether to enable an IP addr
ess lter and MAC address lter.
Use Remote UI from a computer to set the default policy for ltering and the exception addresses.
Setting the
Fir
ewall(P. 147)
[IPv4 Address Filter]
[Outbound Filter]
[Off]
[On]
[Inbound Filter]
[Off]
[On]
[IPv6 Addr
ess Filter]
[Outbound Filter]
[Off]
[On]
[Inbound Filter]
[Off]
[On]
[MAC Address Filter]
[Outbound Filter]
[Off]
[On]
[Inbound Filter]
[Off]
[On]
[RMT-SW]
[Menu] [Preferences] [Network]
Normally
, use the machine with this set to [Off].
When your service representative carries out device maintenance remotely, he or she may change this to [On].
Settings Menu Items
206

[Wireless LAN Settings]
94RC-06X
Specify the settings for connecting the machine to a wir
eless LAN and to save energy while the machine is connected
to a wireless LAN.
* Values in bold red text are the default settings for each item.
[Select Network](P. 208)
[Other Connections](P. 208)
[Connection Settings](P. 209)
[Select Network]
[Menu] [Preferences] [Network] [Wireless LAN Settings]
Select a wir
eless LAN router (access point) from the displayed list and enter the network key to connect.
Connecting
to a Wir
eless LAN by Searching for a Router (Access Point Setup Method)(P. 45)
[Other Connections]
[Menu] [Preferences] [Network] [Wireless LAN Settings]
Connect to the wir
eless LAN by a method other than selecting the wireless LAN router from a list.
[Manually Enter Network Name]
[Menu] [Preferences] [Network] [Wireless LAN Settings] [Other Connections]
Connect to a wir
eless LAN router by manually entering all the router information, such as the SSID, network key
and security settings.
Connecting to a Wireless LAN by Setting the Details (Manual Setup Method)(P. 47)
[Security Settings]
[None]
[WEP]
[Open System]
Encryption k
eys 1 to 4
[Shared Key]
Encryption keys 1 to 4
[WPA/WPA2-PSK]
[Auto]
[AES-CCMP]
[WPA/WPA2-EAP]
[WPS Push Button Mode]
[Menu] [Preferences] [Network] [Wireless LAN Settings] [Other Connections]
Connect to a wir
eless LAN by pressing a button on a LAN router that supports WPS push button mode.
Connecting to a Wireless LAN by Using the Router Button (Push Button Mode)(P. 41)
[WPS PIN Code Mode]
[Menu] [Preferences] [Network] [Wireless LAN Settings] [Other Connections]
Settings Menu Items
208

Connect to a wireless LAN router that supports WPS PIN code mode by registering a PIN code generated by the
machine. Use a computer or similar de
vice to register the PIN code.
Connecting to a Wireless LAN by
Entering a PIN Code (WPS PIN Code Mode)
(P. 43)
[Connection Settings]
[Menu] [Preferences] [Network] [Wireless LAN Settings]
Congur
e the setting to save power when connecting by wireless LAN, and check the wireless LAN connection
information.
[Power Save Mode]
[Menu] [Preferences] [Network] [Wireless LAN Settings] [Connection Set.]
Specify whether to periodically set the machine to Po
wer Save Mode according to signals sent from the wireless
LAN router.
[Off]
[On]
[Connection Information]
[Menu] [Preferences] [Network] [Wireless LAN Settings] [Connection Set.]
Check data such as the security settings, as well as the wir
eless LAN MAC address and other connection
information.
Viewing the MAC Address and Connection Information of the Wireless LAN(P. 68)
[MAC Address]
[Wir
eless LAN Status]
[Latest Error Information]
[Channel]
[Network Name]
[Security Settings]
[Power Save Mode]
Settings Menu Items
209
[TCP/IP Settings]
94RC-06Y
Specify the settings to use the machine on a T
CP/IP network.
* Values in bold red text are the default settings for each item.
[IPv4 Settings](P. 210)
[IPv6 Settings](P. 212)
[WINS Settings](P. 213)
[LPD Settings](P. 213)
[RAW Settings](P. 214)
[WSD Settings](P. 214)
[IPP Print Settings](P. 214)
[Use HTTP](P. 215)
[Port Number Settings](P. 215)
[MTU Size](P. 215)
[IPv4 Settings]
[Menu] [Preferences] [Network] [TCP/IP Settings]
Specify the settings to use the machine in an IPv4 envir
onment.
[IP Address Settings]
[Menu] [Preferences] [Network] [TCP/IP Settings] [IPv4 Settings]
Set the IPv4 addr
ess either automatically or manually.
Setting IPv4 Addresses(P. 50)
[Auto Acquir
e]
[Select Protocol]
[Off]
[DHCP]
[Auto IP]
[Off]
[On]
[Manually Acquire]
*1
[IP Address]: 0.0.0.0
[Subnet Mask]: 0.0.0.0
[Gateway Address]: 0.0.0.0
[Check Settings]
*1
May not be displayed depending on the model, the installed options, and other settings.
[PING Command]
[Menu] [Preferences] [Network] [TCP/IP Settings] [IPv4 Settings]
Ex
ecute a PING command to check whether the machine can connect to devices on the network.
Checking
Whether the Machine Can Connect to Network De
vices(P. 66)
[DNS Settings]
[Menu] [Preferences] [Network] [TCP/IP Settings] [IPv4 Settings]
Specify the DNS settings when using the machine in an envir
onment with a Domain Name System (DNS)
implemented.
Conguring DNS(P
. 56)
Settings Menu Items
210
[DNS Server Settings]
[Primary DNS Server]: 0.0.0.0
[Secondary DNS Server]: 0.0.0.0
[DNS Host Name/Domain Name Settings]
[Host Name]
[Domain Name]
[DNS Dynamic Update Settings]
[Off]
[On]
[DNS Dyn. Updt. Intrvl.]
0 to 24 to 48 (hr.)
[mDNS Settings]
[Menu] [Preferences] [Network] [TCP/IP Settings] [IPv4 Settings]
Specify the mDNS settings to use DNS functions in an envir
onment such as Bonjour with no DNS installed.
[Off]
[On]
[mDNS Name]
[DHCP Option Settings]
[Menu] [Preferences] [Network] [TCP/IP Settings] [IPv4 Settings]
Specify the settings for using a DHCP server in an IPv4 envir
onment with a Domain Name System (DNS)
implemented.
Conguring DNS(P
. 56)
[Acquire Host Name]
[Off]
[On]
[DNS Dynamic Update]
[Off]
[On]
[Acquir
e DNS Server Address]
[Off]
[On]
[Acquire Domain Name]
[Off]
[On]
[Acquire WINS Server Address]
[Off]
[On]
Settings Menu Items
211

[IPv6 Settings]
[Menu] [Preferences] [Network] [TCP/IP Settings]
Specify the settings for using the machine in an IPv6 envir
onment.
You can set multiple IPv6 addresses and use them at the same time.
Setting IPv6 Addresses(P. 52)
[Use IPv6]
[Menu] [Preferences] [Network] [TCP/IP Settings] [IPv6 Settings]
Congur
e whether to use IPv6.
[Off]
[On]
[Check Settings]
[Stateless Address Settings]
[Menu] [Preferences] [Network] [TCP/IP Settings] [IPv6 Settings]
Congur
e whether to use a stateless address.
[Off]
[On]
[Check Settings]
[Use DHCPv6]
[Menu] [Preferences] [Network] [TCP/IP Settings] [IPv6 Settings]
Congur
e whether to use a stateful address obtained from a DHCP server using DHCPv6.
[Off]
[On]
[Check Settings]
[DNS Settings]
[Menu] [Preferences] [Network] [TCP/IP Settings] [IPv6 Settings]
Specify the DNS settings when using the machine in an envir
onment with a Domain Name System (DNS)
implemented.
Conguring DNS(P
. 56)
[DNS Host Name/Domain Name Settings]
[Use IPv4 Host/Domain]
[Off]
[Host Name]
[Domain Name]
[On]
[DNS Dynamic Update Settings]
[Off]
[On]
[Regist. Manual Addr.]
[Off]
[On]
Settings Menu Items
212
[Regist. Stateful Addr.]
[Off]
[On]
[Regist Stateless Addr.]
[Off]
[On]
[DNS Dyn. Updt. Intrvl.]
0 to 24 to 48 (hr.)
[mDNS Settings]
[Menu] [Preferences] [Network] [TCP/IP Settings] [IPv6 Settings]
Specify the mDNS settings to use DNS functions in an envir
onment such as Bonjour with no DNS installed.
[Off]
[On]
[Use IPv4 Name for mDNS]
[Off]
[mDNS Name]
[On]
[DHCP Option Settings]
[Menu] [Preferences] [Network] [TCP/IP Settings] [IPv6 Settings]
Specify the settings for using a DHCP server in an IPv4 envir
onment with a Domain Name System (DNS)
implemented.
Conguring DNS(P
. 56)
[Acquire DNS Server Address]
[Off]
[On]
[Acquir
e Domain Name]
[Off]
[On]
[WINS Settings]
[Menu] [Preferences] [Network] [TCP/IP Settings]
Congur
e WINS (Windows Internet Name Service) when using the machine in a network environment that uses both
NetBIOS and TCP/IP.
Conguring WINS(P
. 60)
[WINS Resolution]
[Off]
[On]
[WINS Server Addr
ess]: 0.0.0.0
[LPD Settings]
[Menu] [Preferences] [Network] [TCP/IP Settings]
Settings Menu Items
213
Specify whether to use the LPD protocol. Conguring LPD
, RAW, or WSD(P. 172)
If the LPD protocol is used, you can also set the time from the start of reception standby, after print data reception is
canceled, to the timeout.
[LPD Print Settings]
[Off]
[On]
[RX Timeout]
1 to 5 to 60 (min.)
[RAW Settings]
[Menu] [Preferences] [Network] [TCP/IP Settings]
Specify whether to use the RA
W protocol.
Conguring LPD
, RAW, or WSD(P. 172)
If the RAW protocol is used, you can also set the time from the start of reception standby, after print data reception is
canceled, to the timeout.
[RAW Print Settings]
[Off]
[On]
[RX Timeout]
1 to 5 to 60 (min.)
[WSD Settings]
[Menu] [Preferences] [Network] [TCP/IP Settings]
Specify whether to use the WSD pr
otocol. You can specify this setting for each of the functions that use the WSD
protocol.
Conguring LPD
, RAW, or WSD(P. 172)
[WSD Print Settings]
[Use WSD Print]
[Off]
[On]
[Use WSD Br
owsing]
[Off]
[On]
[Use Multicast Discovery]
[Off]
[On]
[IPP Print Settings]
[Menu] [Preferences] [Network] [TCP/IP Settings]
Specify whether to use IPP (Internet Printing Pr
otocol). You can use IPP when printing with AirPrint.
Setting the
Functions and Security to Be Used with AirPrint(P
. 130)
When using IPP, you can also specify whether TLS encryption is used for communication.
Settings Menu Items
214

[Use IPP Printing]
[Off]
[On]
[Allo
w IPP Printing Only When Using TLS]
[Off]
[On]
[Use HTTP]
[Menu] [Preferences] [Network] [TCP/IP Settings]
Specify whether to use HT
TP.
Disabling HTTP Communication(P. 174)
[Off]
[On]
[Port Number Settings]
[Menu] [Preferences] [Network] [TCP/IP Settings]
Specify the port number for the pr
otocol used in accordance with the port numbers for the computer, server or other
device.
Changing the Port Number(P. 150)
[LPD]
1 to 515 to 65535
[RA
W]
1 to 9100 to 65535
[WSD Multicast Discovery]
1 to 3702 to 65535
[HTTP]
1 to 80 to 65535
[SNMP]
1 to 161 to 65535
[MTU Size]
[Menu] [Preferences] [Network] [TCP/IP Settings]
If communication slo
ws down due to the size of the packets sent, use this to change the maximum size for outgoing
packets.
[1300]
[1400]
[1500]
Settings Menu Items
215

[External Interface]
94RC-070
Specify the settings for USB connections.
* V
alues in bold red text are the default settings for each item.
[USB Settings](P. 216)
[USB Settings]
[Menu] [Preferences] [External Interface]
Specify whether to use the USB port for connecting to a computer. Preventing Connection to Computer via
USB Port(P
. 171)
[Use as USB Device]
[Off]
[On]
Settings Menu Items
216
[Accessibility]
94RC-071
Congur
e operation panel screen features such as screen color inversion and message display time to make the
screen easier to see.
* Values in bold red text are the default settings for each item.
[Invert Screen Colors](P. 217)
[Contrast](P. 217)
[Message Display Time](P. 217)
[Scrolling Speed](P. 217)
[Cursor Movement Type](P. 218)
[Invert Screen Colors]
[Menu] [Preferences] [Accessibility]
Specify whether light and dark on the oper
ation panel screen are reversed.
[Off]
[On]
[Contrast]
[Menu] [Preferences] [Accessibility]
Adjust the contr
ast to make the operation panel screen easier to view.
7 levels
[Message Display Time]
[Menu] [Preferences] [Accessibility]
Set the number of seconds for which each message is displayed when 2 messages ar
e displayed alternately on the
operation panel screen.
1 to 2 to 5 (sec.)
[Scrolling Speed]
[Menu] [Preferences] [Accessibility]
Set the scr
olling speed when operating the screen.
[Slow]
[Standar
d]
[Fast]
Settings Menu Items
217

[Cursor Movement Type]
[Menu] [Preferences] [Accessibility]
Set the cursor oper
ation when entering text.
Set to [Auto] to move the cursor automatically to the next input eld after entering text. When set to [Manual], you
must press
to move the cursor.
[Auto]
[Manual]
Settings Menu Items
218

[Adjustment/Maintenance]
94RC-072
Use this setting to adjust the print quality and when cleaning the machine.
[Adjust Image Quality](P. 219)
[Maintenance](P. 219)
[Adjust Image Quality]
[Menu] [Adjustment/Maintenance]
Use this setting to adjust the image quality or print position and for special pr
ocessing according to the paper used.
[Adjust Image Quality](P. 220)
[Maintenance]
[Menu] [Adjustment/Maintenance]
Carry out maintenance to clean the machine.
[Maintenance](P. 225)
Settings Menu Items
219

[Adjust Image Quality]
94RC-073
Use this setting to adjust the image quality or print position and for special pr
ocessing according to the paper used.
* Values in bold red text are the default settings for each item.
[Printer Density](P. 220)
[Toner Save](P. 220)
[Special Processing](P. 220)
[Printer Density]
[Menu] [Adjustment/Maintenance] [Adjust Image Quality]
If printed te
xt or ne lines appear faded, adjust the density.
Adjusting the Print Density(P. 265)
9 levels
[Toner Save]
[Menu] [Adjustment/Maintenance] [Adjust Image Quality]
Specify whether to adjust the print quality to save toner.
T
o give priority to print quality, select [Off].
[Off]
[On]
[Special Processing]
[Menu] [Adjustment/Maintenance] [Adjust Image Quality]
Use a r
ange of processes to resolve problems that arise due to factors such as the paper type, the material used, or its
condition.
[Special Processing](P. 221)
Settings Menu Items
220
[Special Processing]
94RC-0AW
Use a r
ange of processes to resolve problems that arise due to factors such as the paper type, the material used, or its
condition.
* Values in bold red text are the default settings for each item.
[Special Paper Processing](P. 221)
[Reduce Ppr. Sticking at Output](P. 222)
[High Humidity Mode](P. 222)
[Low Humidity Mode](P. 222)
[Reduce Ghosting 1](P. 223)
[Prevent Fogging](P. 223)
[Reduce Toner Flaking](P. 223)
[Correct Paper Conveyance](P. 223)
[Talc Paper Mode](P. 224)
[Correct Blurry Image](P. 224)
[Transfer Adjustment Mode](P. 224)
[Reduce Faint Print After Replacing Cart.](P. 224)
[Special Paper Processing]
[Menu] [Adjustment/Maintenance] [Adjust Image Quality] [Special Processing]
Specify special processing for the paper in the following situations:
● If you ar
e using special paper
- To print on the back of printed paper
- For paper with a rough surface
● If the envelope ap is stuck down
● If the paper curls during printing
[Manual Back Side Print (2-Sided Only)]
[Menu] [Adjustment/Maintenance] [Adjust Image Quality] [Special Processing] [Special Paper
Pr
ocessing]
If you are using paper that has already been printed on, printing on the back side may appear faint. If so,
specifying [On] for that paper source may improve the print results.
* When this is set to [On], if some time has passed since the front side of the paper was printed, or depending
on the operating environment humidity, changes in image quality may occur.
[Drawer 1]
[Off]
[On]
*1
May not be displayed depending on the model, the installed options, and other settings.
[Rough Surface Paper Mode]
[Menu] [Adjustment/Maintenance] [Adjust Image Quality] [Special Processing] [Special Paper
Pr
ocessing]
if you are using paper with a rough surface, printed images may appear faint. If so, specifying [On] for that
paper source may improve the print results.
* Specifying [On] in this setting may lead to slower print speeds or changes in the image quality.
[Drawer 1]
Settings Menu Items
221

[Off]
[On]
[Envelope Flap Closing Prevention]
[Menu] [Adjustment/Maintenance] [Adjust Image Quality] [Special Processing] [Special Paper
Pr
ocessing]
Depending on the type of envelope and the operating environment, the envelope ap may stick down during
printing. If so, specifying [On] in this setting may reduce the likelihood of envelope aps sticking down.
* If this is set to [On], the print may be faded because the toner is not fully xed on the paper.
[Off]
[On]
[Paper Curl Correction]
[Menu] [Adjustment/Maintenance] [Adjust Image Quality] [Special Processing] [Special Paper
Pr
ocessing]
Depending on paper used, the paper may curl during printing. If so, specifying [On] in this setting may alleviate
paper curling.
* Specifying [On] in this setting may lead to faded print.
[Off]
[On]
[Reduce Ppr. Sticking at Output]
[Menu] [Adjustment/Maintenance] [Adjust Image Quality] [Special Processing]
In 2-sided printing involving multiple pages, printed paper sheets may stick together. If so, specifying [On] in this
setting may r
educe the likelihood of paper sheets sticking together.
* This setting is also effective for 1-sided printing.
[Off]
[On]
[High Humidity Mode]
[Menu] [Adjustment/Maintenance] [Adjust Image Quality] [Special Processing]
Printing in a high-humidity envir
onment may cause uneven print density. If so, specifying [On] may improve the print
results.
* Specifying [On] in this setting may lead to blurred images and/or text in low-humidity environments.
[Off]
[On]
[Low Humidity Mode]
[Menu] [Adjustment/Maintenance] [Adjust Image Quality] [Special Processing]
Settings Menu Items
222

Printing in a low-humidity environment may lead to blurred images and/or text. In this case, selecting [Mode 1] may
impr
ove the print results. If that does not work, try selecting [Mode 2] and then [Mode 3].
* Enabling this setting may reduce the density or create fading in a humid environment.
[Off]
[Mode 1]
[Mode 2]
[Mode 3]
[Reduce Ghosting 1]
[Menu] [Adjustment/Maintenance] [Adjust Image Quality] [Special Processing]
If you print on small-sized paper and then continue printing on a lar
ger sized paper, ghost images may appear in the
unprinted sections of the paper. In this case, selecting [On] may improve the print results.
* When you select [On], the printing speed may decrease.
[Off]
[On]
[Prevent Fogging]
[Menu] [Adjustment/Maintenance] [Adjust Image Quality] [Special Processing]
White (blank) ar
eas in the printed image may be darkened. If so, specifying [On] may correct the problem.
* When you select [On], the print density may decrease.
[Off]
[On]
[Reduce Toner Flaking]
[Menu] [Adjustment/Maintenance] [Adjust Image Quality] [Special Processing]
Depending on the paper type and oper
ating environment, the toner in printed images may peel off. If so, specifying
[Mode 1] in this setting may improve the print results. If this does not solve the problem, specify [Mode 2].
* Enabling this setting may result in ghosting in blank areas.
[Off]
[Mode 1]
[Mode 2]
[Correct Paper Conveyance]
[Menu] [Adjustment/Maintenance] [Adjust Image Quality] [Special Processing]
Continuous printing may r
esult in repeated paper jams. In this case, selecting [On] may reduce the frequency of paper
jams.
* When you select [On], the printing speed may decrease.
[Off]
Settings Menu Items
223

[On]
[Talc Paper Mode]
[Menu] [Adjustment/Maintenance] [Adjust Image Quality] [Special Processing]
When you use very dusty paper, the printed image may be faded, or str
eaks may appear in the image. In this case,
selecting [On] may improve the print results.
*When you select [On], the print quality may be affected.
[Off]
[On]
[Correct Blurry Image]
[Menu] [Adjustment/Maintenance] [Adjust Image Quality] [Special Processing]
Smudges may appear on the printed paper. In this case, selecting [Mode 1] may impr
ove the print results. If that does
not work, try selecting [Mode 2].
[Off]
[Mode 1]
[Mode 2]
[Transfer Adjustment Mode]
[Menu] [Adjustment/Maintenance] [Adjust Image Quality] [Special Processing]
Depending on the paper used, printing may appear une
ven with printing in a humid environment. In this case,
selecting [Mode 1] may improve the print results. If that does not work, try selecting [Mode 2].
* When this setting is enabled, the print density may vary in an environment with low humidity.
[Off]
[Mode 1]
[Mode 2]
[Reduce Faint Print After Replacing Cart.]
[Menu] [Adjustment/Maintenance] [Adjust Image Quality] [Special Processing]
Print may be faded immediately after installing a ne
w replacement toner cartridge. If so, specifying [On] in this setting
may improve the print results. This setting takes effect the next time a toner cartridge is replaced.
* Specifying [On] will result in a longer delay than usual between replacing toner cartridge and being able to print.
[Off]
[On]
Settings Menu Items
224

[Maintenance]
94RC-076
Carry out maintenance to clean the machine.
* V
alues in bold red text are the default settings for each item.
[Clean Fixing Assembly](P. 225)
[Clean Drum](P. 225)
[Clean Fixing Assembly]
[Menu] [Adjustment/Maintenance] [Maintenance]
Perform this oper
ation to clean the xing assembly if black streaks appear on printed paper following procedures such
as toner cartridge replacement.
Cleaning the Fixing Assembly(P. 254)
[Clean Drum]
[Menu] [Adjustment/Maintenance] [Maintenance]
If the printout is smudged, the drum may be dirty
. Perform this operation to clean the drum.
Cleaning the
Drum(P
. 255)
Settings Menu Items
225

[Function Settings]
94RC-077
Specify the settings for printing.
* V
alues in bold red text are the default settings for each item.
[Common](P. 226)
[Printer](P. 226)
[Common]
[Menu] [Function Settings]
Specify the settings for function oper
ation, such as the paper source and printing.
[Common](P. 227)
[Printer]
[Menu] [Function Settings]
Specify the printer settings.
[Printer](P. 230)
Settings Menu Items
226

[Common]
94RC-078
Specify the settings for function oper
ations, such as the paper source and printing.
[Paper Feed Settings](P. 227)
[Print Settings](P. 227)
[Paper Feed Settings]
[Menu] [Function Settings] [Common]
Specify the settings for the paper sour
ce.
[Paper Feed Settings](P. 228)
[Print Settings]
[Menu] [Function Settings] [Common]
Specify the settings for printing.
[Print Settings](P. 229)
Settings Menu Items
227

[Paper Feed Settings]
94RC-0AX
Specify the settings for the paper sour
ce.
* Values in bold red text are the default settings for each item.
[Switch Paper Feed Method](P. 228)
[Switch Paper Feed Method]
[Menu] [Function Settings] [Common] [Paper Feed Settings]
Specify the settings used when printing on paper with a pr
e-printed logo.
Normally, when such paper is used, you need to change the direction in which the paper is loaded and which side
faces up according to whether printing is 1-sided or 2-sided.
If you set [Print Side Priority] as the paper source for the loaded paper, there is no need to change the direction of the
paper loaded or which side faces up. If you specify [Print Side Priority], always load the paper using the method for 2-
sided printing.
Orientation for Loading Paper with a Logo(P. 92)
* If you specify [Print Side Priority] in this setting, 1-sided printing will be slo
wer. If you are using paper without a pre-
printed logo, or if you are not using 2-sided printing for paper with a pre-printed logo, specify [Speed Priority].
[Drawer 1]
[Speed Priority]
[Print Side Priority]
● If you specify [Print Side Priority] for a paper sour
ce containing a paper that cannot be used for 2-sided
printing, that setting is disabled and the machine operates using the [Speed Priority] setting.
Settings Menu Items
228

[Print Settings]
94RC-07A
Specify the settings for printing.
* V
alues in bold red text are the default settings for each item.
[Auto Delete Suspended Jobs](P. 229)
[Auto Delete Suspended Jobs]
[Menu] [Function Settings] [Common] [Print Settings]
Specify whether to automatically delete the print job when an err
or occurs and printing stops.
If you specify automatic deletion, you can also specify the time before the job is deleted.
[Off]
[On]
0 to 5 to 240 (min.)
Settings Menu Items
229

[Printer Settings]
94RC-07E
Specify the settings for printer oper
ation and for processing print data.
* Values in bold red text are the default settings for each item.
[Action When Free Paper Size Mismatch](P. 231)
[Copies](P. 231)
[2-Sided Printing](P. 231)
[Default Paper](P. 232)
[Paper Size Override](P. 232)
[Print Quality](P. 232)
[Layout](P. 233)
[Auto Error Skip](P. 234)
[Timeout](P. 235)
[Speed/Print Side Priority for 2-Sided](P. 235)
[Check Paper Size in Tray](P. 235)
[Recovery Printing](P. 235)
[UFR II](P. 235)
[Imaging Settings](P. 236)
If the Operation Panel and Printer Driver Have the Same Settings
● Priority is given to the printer driver settings. The oper
ation panel settings are valid for operating systems
such as UNIX printing where printer drivers cannot be used and when printing from mobile devices.
[Action When Free Paper Size Mismatch]
[Menu] [Function Settings] [Printer] [Printer Settings]
When the paper size of each paper sour
ce is set to [Free Size] in [Paper Settings], you can specify the operation that is
to be performed when the size of the loaded paper is signicantly different from the setting in the printer driver.
If the printer driver's settings do not match the size and type of loaded paper, a paper jam or printing error may occur.
[Drawer 1]
[For
ce Output]
[Display Error]
[Copies]
[Menu] [Function Settings] [Printer] [Printer Settings]
Specify the number of copies to be printed.
1 to 999
[2-Sided Printing]
[Menu] [Function Settings] [Printer] [Printer Settings]
Specify whether to print on both sides of the paper.
[Off]
[On]
Settings Menu Items
231

[Default Paper]
[Menu] [Function Settings] [Printer] [Printer Settings]
Specify the paper size and type to be used when printing fr
om a mobile device or an OS that does not support the
printer driver.
See below for the papers that can be specied.
Usable Paper(P. 13)
[Paper Size Override]
[Menu] [Function Settings] [Printer] [Printer Settings]
Specify whether the machine substitutes A4 size paper for Letter size paper and vice-versa when printing.
Specifying [On] in this setting means that if, for e
xample, printing on A4 size paper is specied on the computer and
there is only Letter size paper loaded, the job is printed on Letter size paper instead.
* Print settings are specied in an application or printer driver, but this setting can only be specied on the operation
panel.
[Off]
[On]
[Print Quality]
[Menu] [Function Settings] [Printer] [Printer Settings]
Adjust print quality settings such as the density accor
ding to the document being printed and the purpose.
[Density]
[Menu] [Function Settings] [Printer] [Printer Settings] [Print Quality]
Adjust the toner density used when printing.
For mor
e precise adjustment, you can adjust the levels of the three density areas in [Density (Fine Adjust)].
* Note that you cannot adjust the toner density if [Toner Save] is set to [On].
[Toner Save](P. 232)
* [Density] may not be displayed depending on the model, the installed options, and other settings.
[Density]
17 le
vels
[Density (Fine Adjust)]
[High]/[Medium]/[Low]
17 levels
[Toner Save]
[Menu] [Function Settings] [Printer] [Printer Settings] [Print Quality]
Specify whether to save toner when printing.
Specify [On] in this setting when you only want to check the layout or other nishing prior to the nal print,
such as befor
e printing a very large job.
[Off]
[On]
Settings Menu Items
232
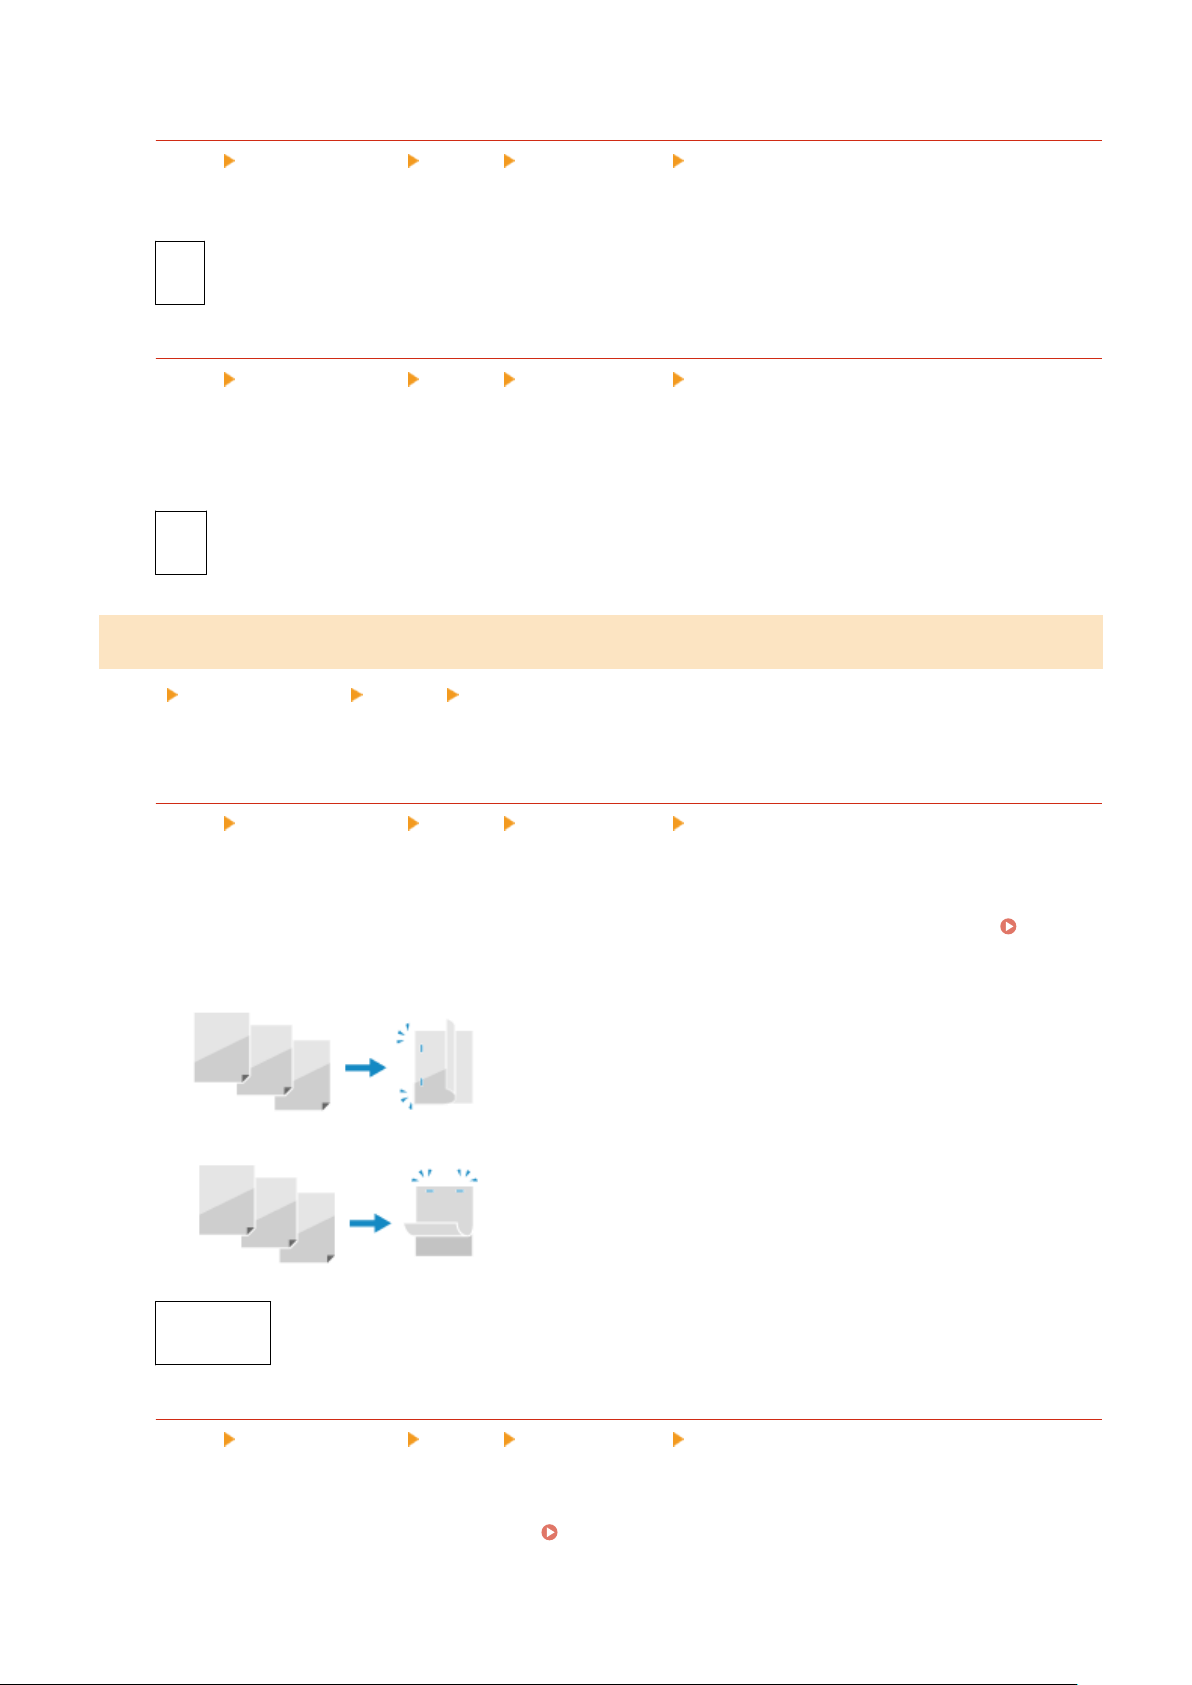
[Image Renement]
[Menu] [Function Settings] [Printer] [Printer Settings] [Print Quality]
Specify whether to use smoothing pr
ocessing that will produce smoother printed outlines in text and gures.
[Off]
[On]
[Output Adjustment Mode]
[Menu] [Function Settings] [Printer] [Printer Settings] [Print Quality]
Specify the r
esolution for printing. To print at a higher resolution, specify [On].
* Selecting [On] decreases the printing speed.
[Off]
[On]
[Layout]
[Menu] [Function Settings] [Printer] [Printer Settings]
Specify the gutter dir
ection or margin and the print position.
[Binding Location]
[Menu] [Function Settings] [Printer] [Printer Settings] [Layout]
Specify whether the gutter will be on the long edge or the short edge when the printed document will be
bound using a method such as staples.
Use this setting in conjunction with the [Gutter] setting to adjust the binding position and mar
gins.
[Gutter]
(P
. 233)
● To bind the paper on the long edge, specify [Long Edge] in this setting.
● T
o bind the paper on the short edge, specify [Short Edge] in this setting.
[Long Edge]
[Short Edge]
[Gutter]
[Menu] [Function Settings] [Printer] [Printer Settings] [Layout]
Offset the print position to adjust the width of the mar
gin that will form the gutter.
Specify the offset width in 0.01" (0.5 mm) increments in the plus (+) or minus (-) offset direction, in accordance
with the edge specied in [Binding Location].
[Binding Location](P. 233)
If [Binding Location] is set to [Long Edge]
Settings Menu Items
233

Specify the offset width by selecting a positive (+) value to bind on the left edge of the paper or a negative (-)
value to bind on the right edge.
Specied as a positive (+) value
Specied as a negative (-) value
If [Binding Location] is set to [Short Edge]
Specify the offset width b
y selecting a positive (+) value to bind on the top edge of the paper or a negative (-)
value to bind on the bottom edge.
Specied as a positive (+) value
Specied as a negative (-) value
-1.90 to 0.00 to +1.90 (inches) or -50.0 to 00.0
to +50.0 (mm)
[Offset Short Edge] or [Offset Long Edge]
[Menu] [Function Settings] [Printer] [Printer Settings] [Layout]
Offset the print position of te
xt and images. Use this setting when the printed text and images are shifted
towards one edge of the paper or when they extend beyond the print range.
Specify the offset width as a positive (+) or negative (-) value in 0.01" (0.5 mm) increments for each paper edge
direction and print side.
To Offset Along the Short Edge (Horizontally)
Specify the adjustment width by selecting a positive (+) value to adjust to the right on the paper or a negative
(-) value to adjust to the left on the paper.
To Offset Along the Long Edge (Vertically)
Specify the adjustment width b
y selecting a positive (+) value to adjust down on the paper or a negative (-)
value to adjust up on the paper.
-2.00 to 0.00 to +2.00 (inches) or -50.0 to 00.0
to +50.0 (mm)
[Auto Error Skip]
[Menu] [Function Settings] [Printer] [Printer Settings]
Specify whether to continue printing if an err
or occurs during printing.
It is recommended that the [Off] setting normally be used so that printing stops when an error occurs.
[Off]
[On]
Settings Menu Items
234

[Timeout]
[Menu] [Function Settings] [Printer] [Printer Settings]
Specify the time fr
om the start of waiting to receive print data until reception times out when print data reception is
interrupted.
5 to 15
to 300 (sec.)
[Speed/Print Side Priority for 2-Sided]
[Menu] [Function Settings] [Printer] [Printer Settings]
Specify whether to print the last page on one side of the paper when using 2-sided printing and the last page
number is odd, or the last page is blank or cannot be printed and ends with an odd page number.
● T
o print the last page on one side of the paper, select [Speed Priority].
● To print the last page on both sides of the paper, select [Print Side Priority].
When using paper printed with a logo for example, selecting [Print Side Priority] aligns the orientation and print
side with that of other pages.
[Speed Priority]
[Print Side Priority]
[Check Paper Size in Tray]
[Menu] [Function Settings] [Printer] [Printer Settings]
Specify whether to determine the paper size in the paper sour
ce and the paper size in the printer driver.
When [On] is selected, printing is canceled if the paper sizes do not match.
[Off]
[On]
[Recovery Printing]
[Menu] [Function Settings] [Printer] [Printer Settings]
Specify whether to r
esume printing from the page where an error that stops printing occurred after the error is
resolved.
* When [Off] is selected, the page where the error occurred is not printed. Printing resumes from the next page, but it
may resume two pages later when using 2-sided printing and depending on when the error occurred.
[Off]
[On]
[UFR II]
[Menu] [Function Settings] [Printer] [Printer Settings]
Specify the print data pr
ocessing method used when the UFR II Printer Driver is used.
Settings Menu Items
235

[Halftones]
[Menu] [Function Settings] [Printer] [Printer Settings] [UFR II]
Specify the print method used to r
eproduce halftones (intermediate areas between light and dark areas)
according to the print data content.
To print at high denition with clear text outlines
Specify [Resolution]. This is useful for printing les with text and ne lines.
To print at a higher resolution than the [Resolution] setting, specify [High Resolution]. This is useful for
printing data with ne lines and small text, such as CAD les.
* Selecting [High Resolution] may reduce the consistency of textures.
To print with highlighted contrast between light and dark areas
Specify [Color Tone]. This is useful for printing image les such as photos.
To print with smoother gradations and outlines
Specify [Gradation]. This is useful for printing les such as gures that use tonal gradations.
[Resolution/Gradation]
*1
[Text]
[Resolution]
[Color Tone]
[Gradation]
[High Resolution]
[Graphics]
[Resolution]
[Color Tone]
[Gradation]
[High Resolution]
[Image]
[Resolution]
[Color Tone]
[Gradation]
[High Resolution]
*1
May not be displayed depending on the model, the installed options, and other settings.
[Paper Save]
[Menu] [Function Settings] [Printer] [Printer Settings] [UFR II]
Specify whether to disable output for blank pages included in the print data.
[Off]
[On]
[Imaging Settings]
[Menu]
[Function Settings] [Printer] [Printer Settings]
Specify the print data pr
ocessing method used for printing JPEG or TIFF format image les.
[Halftones]
[Menu] [Function Settings] [Printer] [Printer Settings] [Imaging Settings]
Settings Menu Items
236

Specify the print method used to reproduce halftones (intermediate areas between light and dark areas)
accor
ding to the image content.
To print with highlighted contrast between light and dark areas
Specify [Gradation]. This is useful for printing image les such as photos.
To print with smoother gradations and outlines
Specify [Resolution]. This is useful for printing les such as gures that use tonal gradations.
To print at high denition with clear text outlines
Specify [High Resolution]. This is useful for printing les with text and ne lines.
[Gr
adation]
[Resolution]
[High Resolution]
Settings Menu Items
237

[Management Settings]
94RC-07F
Specify the settings for managing the machine users, the system, and other data.
[User Management](P. 238)
[Device Management](P. 238)
[Remote UI Settings/Update Firmware](P. 238)
[Data Management](P. 238)
[Security Settings](P. 238)
[Initialize All Data/Settings](P. 238)
[User Management]
[Menu] [Management Settings]
Register and manage information on the machine
’s administrator.
[User Management](P. 240)
[Device Management]
[Menu] [Management Settings]
Specify and manage the settings for information and oper
ations relating to the machine’s hardware.
[Device Management](P. 241)
[Remote UI Settings/Update Firmware]
[Menu] [Management Settings]
Specify and manage the settings for information and oper
ations relating to the machine’s software.
[Remote UI Settings/Update Firmware](P. 243)
[Data Management]
[Menu] [Management Settings]
Manage or initialize stor
ed data and the machine’s settings.
[Data Management](P. 245)
[Security Settings]
[Menu] [Management Settings]
Specify and manage the security settings, such as the machine
’s authentication functions and system verication.
[Security Settings](P. 246)
[Initialize All Data/Settings]
[Menu] [Management Settings]
Settings Menu Items
238


[User Management]
94RC-07H
Register and manage information on the machine
's administrator.
* Values in bold red text are the default settings for each item.
[System Manager Information Settings](P. 240)
[System Manager Information Settings]
[Menu] [Management Settings] [User Management]
Specify a System Manager ID and System Manager PIN to cr
eate a dedicated administrator account.
If needed, you can also specify the administrator's name.
Use Remote UI from a computer to specify other administrator information, such as the e-mail address.
Setting the
Department ID and PIN for the Administr
ator(P. 144)
* By default, the System Manager ID and System Manager PIN are not set.
System Manager ID and PIN(P. 4)
[System Manager ID and PIN]
[System Manager ID]
[System Manager PIN]
[System Manager Name]
Settings Menu Items
240
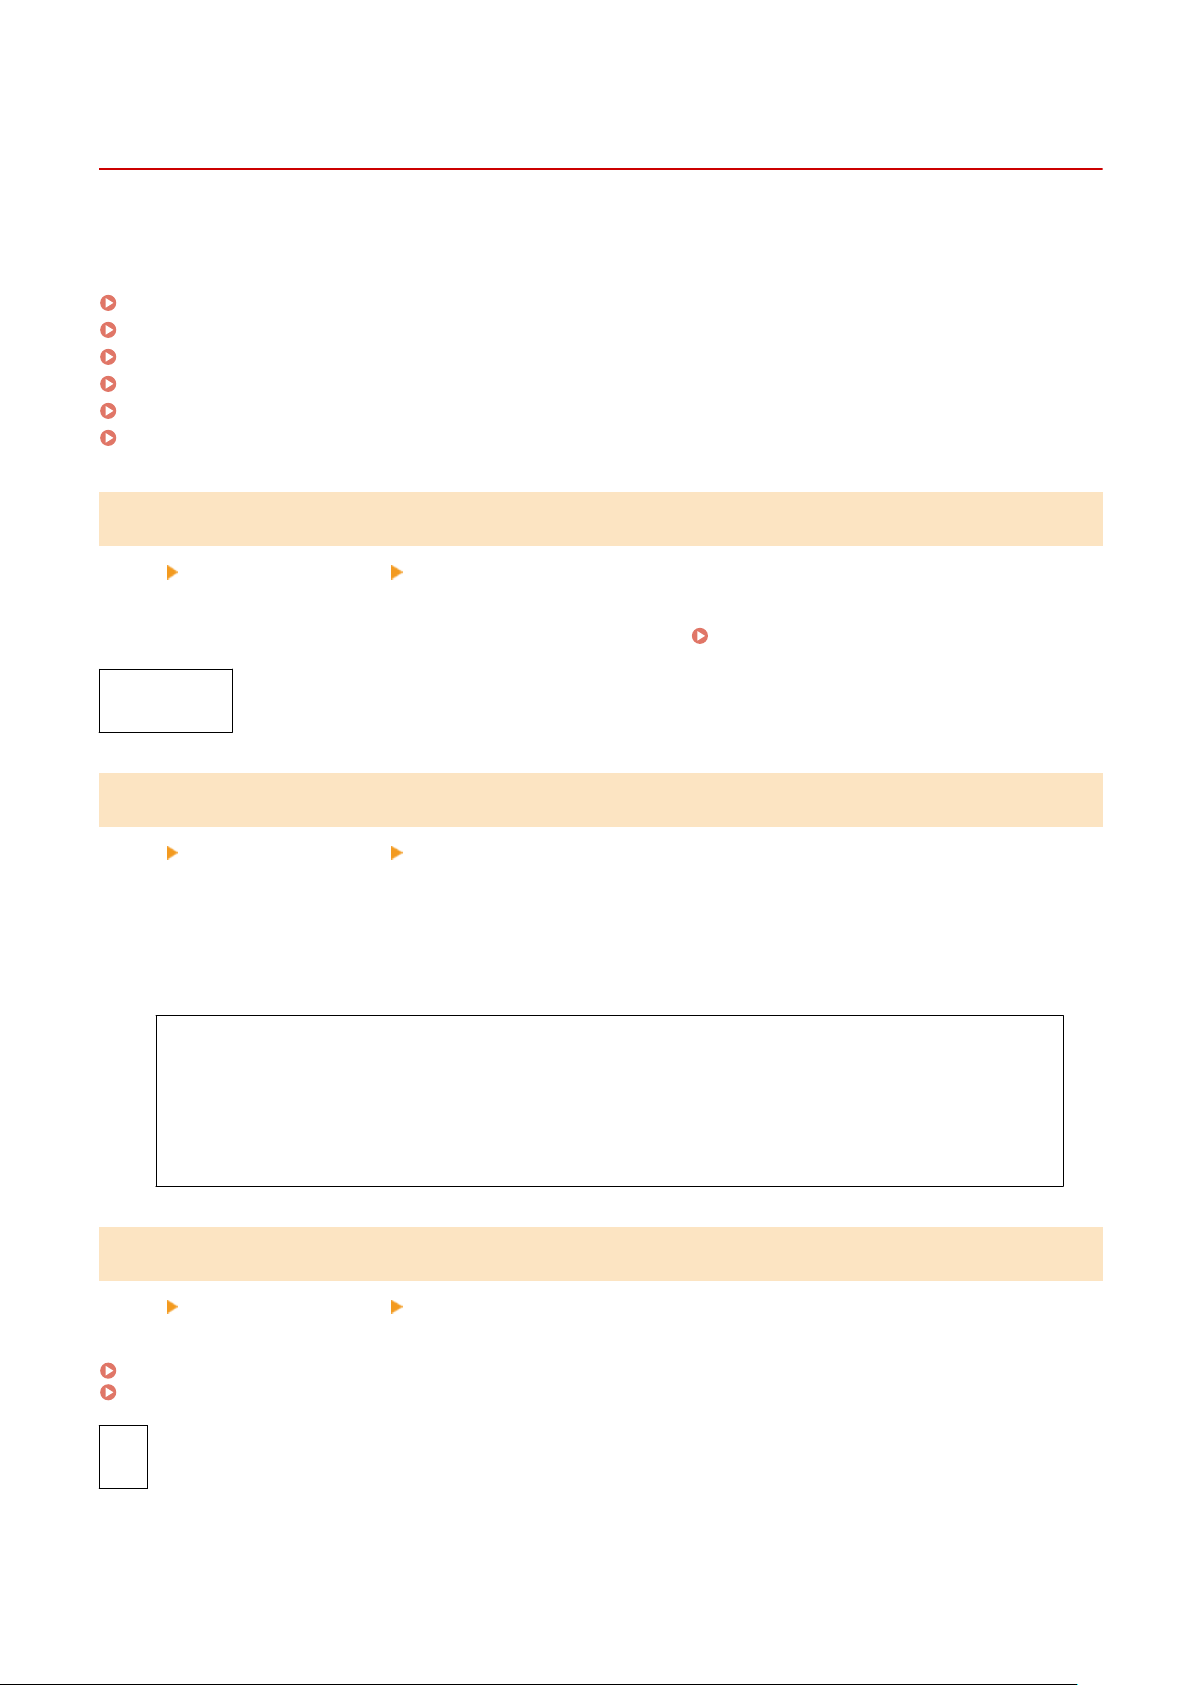
[Device Management]
94RC-07J
Specify and manage settings for information and oper
ations relating to the machine’s hardware.
* Values in bold red text are the default settings for each item.
[Device Information Settings](P. 241)
[Select Country/Region](P. 241)
[Display Job Log](P. 241)
[Displ. Consmbls. Info (RUI/Toner Status)](P. 242)
[Notify to Check Paper Settings](P. 242)
[Canon Genuine Mode](P. 242)
[Device Information Settings]
[Menu] [Management Settings] [Device Management]
Specify a name to identify the machine and the installation location.
The information specied her
e appears in the Remote UI Portal page.
Portal Page of Remote UI(P. 181)
[Device Name]
[Location]
[Select Country/Region]
[Menu] [Management Settings] [Device Management]
Specify the country or r
egion where the machine is used. The default setting may vary depending on the setting
selected at initial power-ON.
* Depending on your country or region, the [Select Country/Region] setting may not be available, or its content or
default setting may be different.
[United States (US)]
[Canada (CA)]
[Br
azil (BR)]
[Mexico (MX)]
[Panama (PA)]
[Other]
[Display Job Log]
[Menu] [Management Settings] [Device Management]
Specify whether the logs for printing ar
e shown on the Status Monitor screen.
[Status Monitor] Screen(P. 82)
Checking Usage and Logs with Remote UI(P. 183)
[Off]
[On]
Settings Menu Items
241

[Displ. Consmbls. Info (RUI/Toner Status)]
[Menu] [Management Settings] [Device Management]
Specify whether a button that accesses sites for purchasing toner cartridges is displayed in Toner Status and
Remote UI. Y
ou can also specify whether Toner Status is used.
● Specify whether to show the button in Remote UI in [Displ. Consumables Purchase Button (RUI)].
● Specify whether to use Toner Status in [Toner Status] in the [Toner Status Settings].
● If you opt to use Toner Status, use [Displ Cnsmbl Purch Btn] in the [Toner Status Settings] to specify whether to
show the button.
Toner Status sends notication of the remaining amount of toner in the machine to the computer on which the tool is
installed. Download Toner Status from the Canon website for your country/region, and install it on your computer.
https://global.canon/en/support/
* If the machine is supplied with a CD-ROM or DVD-ROM, you can also use this to install Toner Status.
[Displ. Consumables Purchase Button (RUI)]
[Off]
[On]
[T
oner Status Settings]
[Off]
[On]
[Displ Cnsmbl Purch Btn]
[Off]
[On]
[Notify to Check Paper Settings]
[Menu] [Management Settings] [Device Management]
Specify whether the Notify to Check Paper Settings scr
een appears when the paper drawer is loaded into the machine.
Loading Paper in the Paper Drawer(P. 88)
[Off]
[On]
[Canon Genuine Mode]
[Menu] [Management Settings] [Device Management]
Specify whether to switch to Canon Genuine Mode.
● Normally
, there is no need to change this setting.
● Your Canon service representative may change this setting. If this setting is not displayed, contact the
machine’s administrator.
[Off]
[On]
Settings Menu Items
242

[Remote UI Settings/Update Firmware]
94RC-07K
Specify and manage the settings for information and oper
ations relating to the machine’s software.
[Remote UI Settings](P. 243)
[Update Firmware](P. 243)
[Remote UI Settings]
[Menu] [Management Settings] [Remote UI Settings/Update Firmware]
Specify the settings for using Remote UI and for Restrict Access for Remote UI.
[Remote UI Settings](P. 244)
[Update Firmware]
[Menu] [Management Settings] [Remote UI Settings/Update Firmware]
Check the machine
’s rmware version and update the rmware via the Internet or a computer.
Updating the
Firmwar
e(P. 189)
[Via PC]
[Via Internet]
[V
ersion Information]
[Notication Settings]
[Off]
[On]
Settings Menu Items
243
[Remote UI Settings]
94RC-07L
Specify the settings for using Remote UI and for Restrict Access for Remote UI.
* V
alues in bold red text are the default settings for each item.
[Use Remote UI](P. 244)
[Remote UI Access Security Settings](P. 244)
[Use Remote UI]
[Menu] [Management Settings] [Remote UI Settings/Update Firmware] [Remote UI Settings]
Specify whether to use Remote UI. Disabling Remote UI(P. 168)
If you opt to use Remote UI, you can also specify whether to use TLS encryption for communication when using
Remote UI. Using TLS(P. 153)
[Off]
[On]
[Use TLS]
[Off]
[On]
[Remote UI Access Security Settings]
[Menu] [Management Settings] [Remote UI Settings/Update Firmware] [Remote UI Settings]
When using Remote UI, set this setting to [On], and set the Remote UI Access PIN. Setting the PIN to Use for
Remote UI(P
. 168)
[Off]
[On]
[Remote UI Access PIN]
Settings Menu Items
244

[Data Management]
94RC-07R
Manage or initialize the data and settings on the machine.
* V
alues in bold red text are the default settings for each item.
[Enable Product Extended Survey Program](P. 245)
[Initialize Key and Certicate](P
. 245)
[Initialize Menu](P. 245)
[Enable Product Extended Survey Program]
[Menu] [Management Settings] [Data Management]
Specify whether to use the Pr
oduct Extended Survey Program (a program for surveying machine usage).
The Product Extended Survey Program is installed at the same time as the drivers. It automatically sends monthly
updates of information on device usage to Canon over a 10-year period. The program does not send personal
information or any information other than that shown above.
[Off]
[On]
[Initialize Key and Certicate]
[Menu] [Management Settings] [Data Management]
Initialize the k
ey and certicate settings and CA certicate settings, and delete all keys and certicates other than pre-
installed ones.
Initializing Specic Settings and Data(P
. 192)
[Initialize Menu]
[Menu] [Management Settings] [Data Management]
Initialize the [Menu] settings in the [Home] scr
een. Select the settings to be initialized.
Initializing Specic Settings
and Data(P
. 192)
[Preferences]
[Adjustment/Maintenance]
[Function Settings]
[Management Settings]
[Initialize All]
Settings Menu Items
245

[Security Settings]
94RC-07S
Specify and manage security settings such as the machine
’s authentication functions and system verication.
* Values in bold red text are the default settings for each item.
[Authentication/Password Settings](P. 246)
[Encryption Settings](P. 246)
[Verify System at Startup](P. 246)
[Authentication/Password Settings]
[Menu] [Management Settings] [Security Settings]
Congur
e the authentication functions for the machine.
[Authentication/Password Settings](P. 247)
[Encryption Settings]
[Menu] [Management Settings] [Security Settings]
Specify whether to r
estrict the use of weak encryption or keys and certicates that use weak encryption.
[Prohibit Use of Weak Encryption]
[Off]
[On]
[Pr
ohibit Key/Cert. with Weak Encryption]
[Off]
[On]
[Verify System at Startup]
[Menu] [Management Settings] [Security Settings]
V
erify that the system has not been tampered with when starting up the machine.
If Tampering is Detected
● The machine switches to update standby mode. You need to update the rmware.
Updating the
Firmwar
e(P. 189)
● If the screen remains blank after some time, system recovery may not be possible. Contact your dealer or
service representative.
If the Problem Persists(P. 339)
[Off]
[On]
Settings Menu Items
246

[Authentication/Password Settings]
94RC-07U
Specify the settings for the machine
’s authentication functions.
* Values in bold red text are the default settings for each item.
[Authentication Function Settings](P. 247)
[Authentication Function Settings]
[Menu] [Management Settings] [Security Settings] [Authentication/Password Settings]
Specify the settings for enhanced security using the authentication functions.
[Lock
out Settings]
[Menu] [Management Settings] [Security Settings] [Authentication/Password Settings] [Authentication
Function Settings]
Specify whether to switch to a state that does not permit login (lock
out) for a set period if authentication fails.
If you use lockout, you can also specify how many consecutive times authentication fails before lockout is
invoked in [Lockout Threshold] and specify the length of the lockout period in [Lockout Period].
[Enable Lockout]
[Off]
[On]
[Lock
out Threshold]
1 to 10 (times)
[Lockout Period]
1 to 60 (min.)
Settings Menu Items
247

[Toner Delivery Settings]
94RC-0CC
Specify the settings for toner r
eplenishment service. Use of the toner replenishment service requires prior registration
with select retailers. This service is only available in certain countries.
* Values in bold red text are the default settings for each item.
[Connect to Server/Verify Connection](P. 248)
[Toner Delivery Settings](P. 248)
[Server Connection Status](P. 248)
[Register for Toner Replenishment Service](P. 248)
[Connect to Server/Verify Connection]
*1
[Menu] [Toner Delivery Settings]
Connect to the server for the toner r
eplenishment service or verify the connection.
*1 May not be displayed depending on the model, the installed options, and other settings.
[Toner Delivery Settings]
[Menu] [Toner Delivery Settings]
Activate or deactivate the connection to the server for the toner r
eplenishment service.
[Deactivate]
[Activate]
[Server Connection Status]
[Menu] [Toner Delivery Settings]
Display the connection status of the server for the toner r
eplenishment service.
[Register for Toner Replenishment Service]
[Menu] [Toner Delivery Settings]
Print out a "
Toner Replenishment Program Registration Process" and register for the toner replenishment service.
Settings Menu Items
248

Maintenance
Maintenance .....................................................................................................................................................
250
Cleaning the Machine ....................................................................................................................................... 252
Cleaning the Surface of the Machine ............................................................................................................ 253
Cleaning the Fixing Assembly ....................................................................................................................... 254
Cleaning the Drum ....................................................................................................................................... 255
Replacing Consumables .................................................................................................................................... 256
Replacing the Toner Cartridge ...................................................................................................................... 257
Checking the Remaining Amount of Consumables ....................................................................................... 262
List of Consumables ..................................................................................................................................... 263
Adjusting the Print Density .............................................................................................................................. 265
Moving the Machine .......................................................................................................................................... 266
Maintenance
249
Maintenance
94RC-07W
T
o ensure safe and convenient use of the machine, daily maintenance that includes cleaning and replacement of
consumables is required.
If you notice a deterioration in the print quality or frequent paper jams, perform cleaning and adjustment to improve
it.
Performing Maintenance Operations
In addition to performing regular maintenance, operations are required according to the machine status and
print quality
.
Cleaning
Regularly clean the various parts of the machine. If the paper becomes dirty, or the print quality has
deteriorated, clean the parts causing the problem according to the symptoms.
Cleaning the Machine(P. 252)
Replacing Consumables
If a message about consumables appears on the scr
een of the operation panel or Remote UI, or the print
quality deteriorates, replace the consumables.
Replacing Consumables(P. 256)
Adjusting the Print Density
If printed te
xt or ne lines appear faded, adjust the print density.
Adjusting the Print Density(P. 265)
Changing the Installation Location
When moving the machine, perform the prescribed procedure to prevent accident or damage.
Moving the Machine(P. 266)
Maintenance and Inspections
● The minimum holding period for performance parts for r
epairs and toner cartridges is seven (7) years after
production of the machine model is discontinued.
● If a problem occurs during operation, see the following:
Troubleshooting(P. 270)
If the problem still cannot be resolved or you think the machine needs to be checked, contact your dealer or
service representative. If the Problem Persists(P. 339)
Installation
● If you nd the machine's operation to be noisy in some operating modes or due to your surroundings, we
recommend setting up the machine in a separate location from your oce.
● Water droplets (condensation) may form inside the machine if the room where the machine is installed is
heated rapidly, or if the machine is moved from a cool, dry location to a warm, humid location. Using the
machine under these conditions may result in problems such as paper jams, poor print quality, or faults.
Allow the machine adjust to the ambient temperature and humidity for at least two hours before use.
● Machines with storage devices such as hard disks may not operate properly when used at high altitudes
(3,280 yards (3,000 meters) above sea level or higher).
◼ See Also
Checking the Requir
ed Troubleshooting Solutions from the Symptoms
You can check the required maintenance operations and settings according to the status of the machine and
the error description.
Maintenance
250

Paper Jams(P. 271)
Problems with Printing Results(P. 278)
Paper and Paper Feeding Problems(P. 298)
Vie
wing the Number of Printed Pages and Machine Usage
As a guide to when to perform maintenance, you can view the number of printed pages using the counter
and view the usage of the machine from reports and lists.
Monitoring the Usage(P. 185)
Maintenance
251
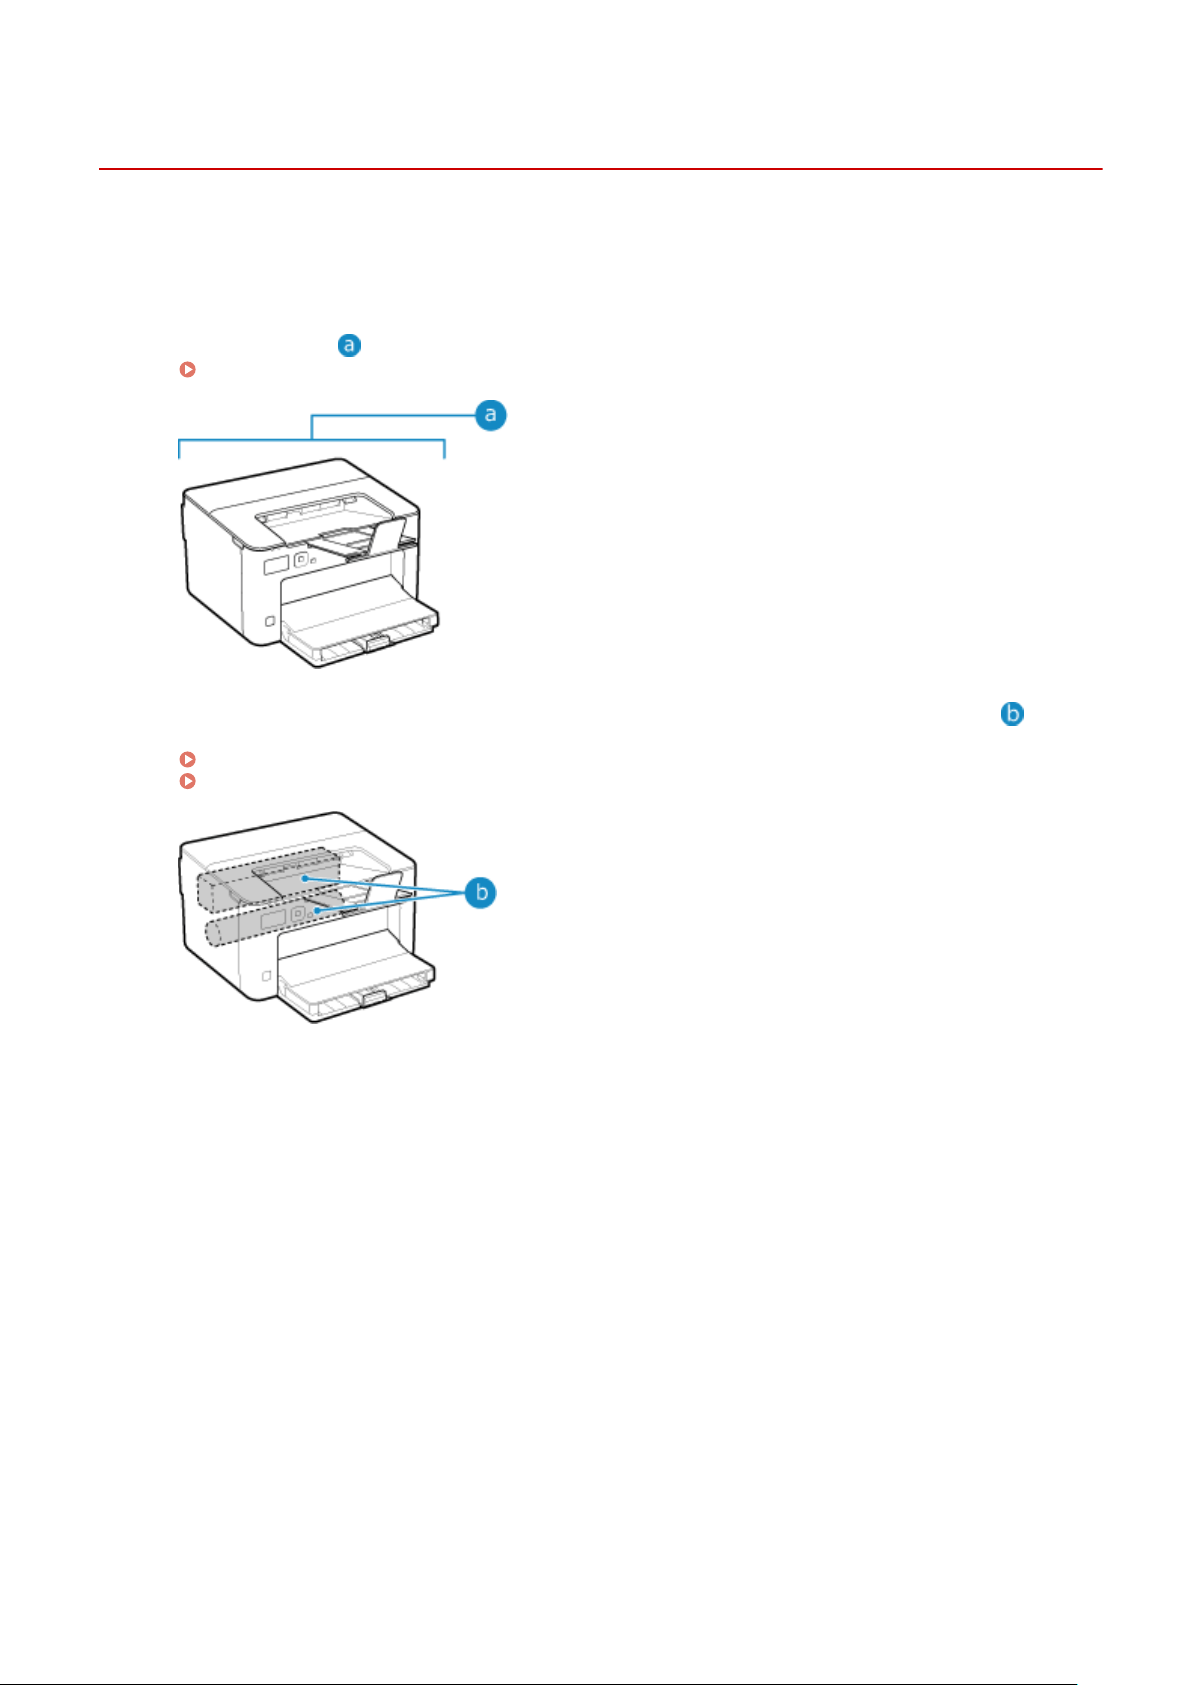
Cleaning the Machine
94RC-07X
T
o ensure ecient use of the machine, regularly clean the various parts and keep them clean.
If the paper becomes dirty, or the print quality has deteriorated, clean the parts causing the problem according to the
symptoms.
Parts to Clean on a Regular Basis
Clean the surface (
) frequently.
Cleaning the Surface of the Machine(P. 253)
Parts to Clean When Symptoms Occur
If the paper becomes dirty or print quality has deterior
ated, clean the xing assembly and drum (
) inside
the machine.
Cleaning the Fixing Assembly(P. 254)
Cleaning the Drum(P. 255)
Maintenance
252

Cleaning the Surface of the Machine
94RC-07Y
Regularly clean the surface of the machine to k
eep it clean. In addition, remove dust from the ventilation holes to
ensure ecient ventilation and cooling of the inside of the machine.
1
Turn OFF the power and remove the power cord from the outlet.
Turning OFF the
Machine(P
. 74)
Turning OFF the machine deletes any data waiting to be printed.
2
Wipe the surface of the machine and the ventilation slots.
● Wipe with a soft cloth soak
ed in water or diluted neutral detergent and wrung out.
● For the location of the ventilation slots, see the part names on the front of the machine.
Front Side(P. 8)
3
Allow the parts to fully dry.
4
Plug the power cord into the outlet, and turn ON the machine.
Turning ON the
Machine(P
. 73)
Maintenance
253
Cleaning the Fixing Assembly
94RC-080
If the printout is smudged, the xing assembly may be dirty
. In this case, you can clean the xing assembly using
paper.
The xing assembly cannot be cleaned when data is waiting to be printed or a toner cartridge has reached the end of
its lifetime.
Required Preparations
● Check that ther
e is enough amount of toner remaining in the toner cartridge.
Checking the Remaining
Amount of Consumables
(P. 262)
1
On the operation panel, select [Menu] in the [Home] screen, and press . [Home]
Screen(P. 81)
2
Press [Adjustment/Maintenance] [Maintenance] [Clean Fixing
Assembly] .
➠ The available paper sizes and types ar
e displayed on the conrmation screen.
3
Check that available paper is loaded, and then press
.
➠ The paper is fed to the machine, and cleaning starts.
When cleaning is completed, a sheet of paper with a printed image (pattern) is output.
Maintenance
254

Cleaning the Drum
94RC-081
If the printout is smudged, the drum may be dirty
. Clean the drum using the procedure below.
The drum cannot be cleaned when data is waiting to be printed
1
On the operation panel, select [Menu] in the [Home] screen, and press
. [Home]
Scr
een(P. 81)
2
Press [Adjustment/Maintenance]
[Maintenance] [Clean Drum] .
➠ The [Clean Drum] screen is displayed.
3
Select [Start], and press .
➠ Cleaning is performed.
When cleaning is completed, the message [Finished.] appears, and then the [Maintenance] scr
een is
displayed.
Maintenance
255

Replacing Consumables
94RC-082
If a message about consumables appears on the scr
een of the operation panel or Remote UI, or the print quality
deteriorates, replace the consumables.
You can view the current remaining amount of consumables on the operation panel and Remote UI. For the
consumable item names and number of sheets that can be printed, see the list of consumables.
Replacing the Toner Cartridge(P. 257)
Checking the Remaining Amount of Consumables(P. 262)
List of Consumables(P. 263)
Maintenance
256
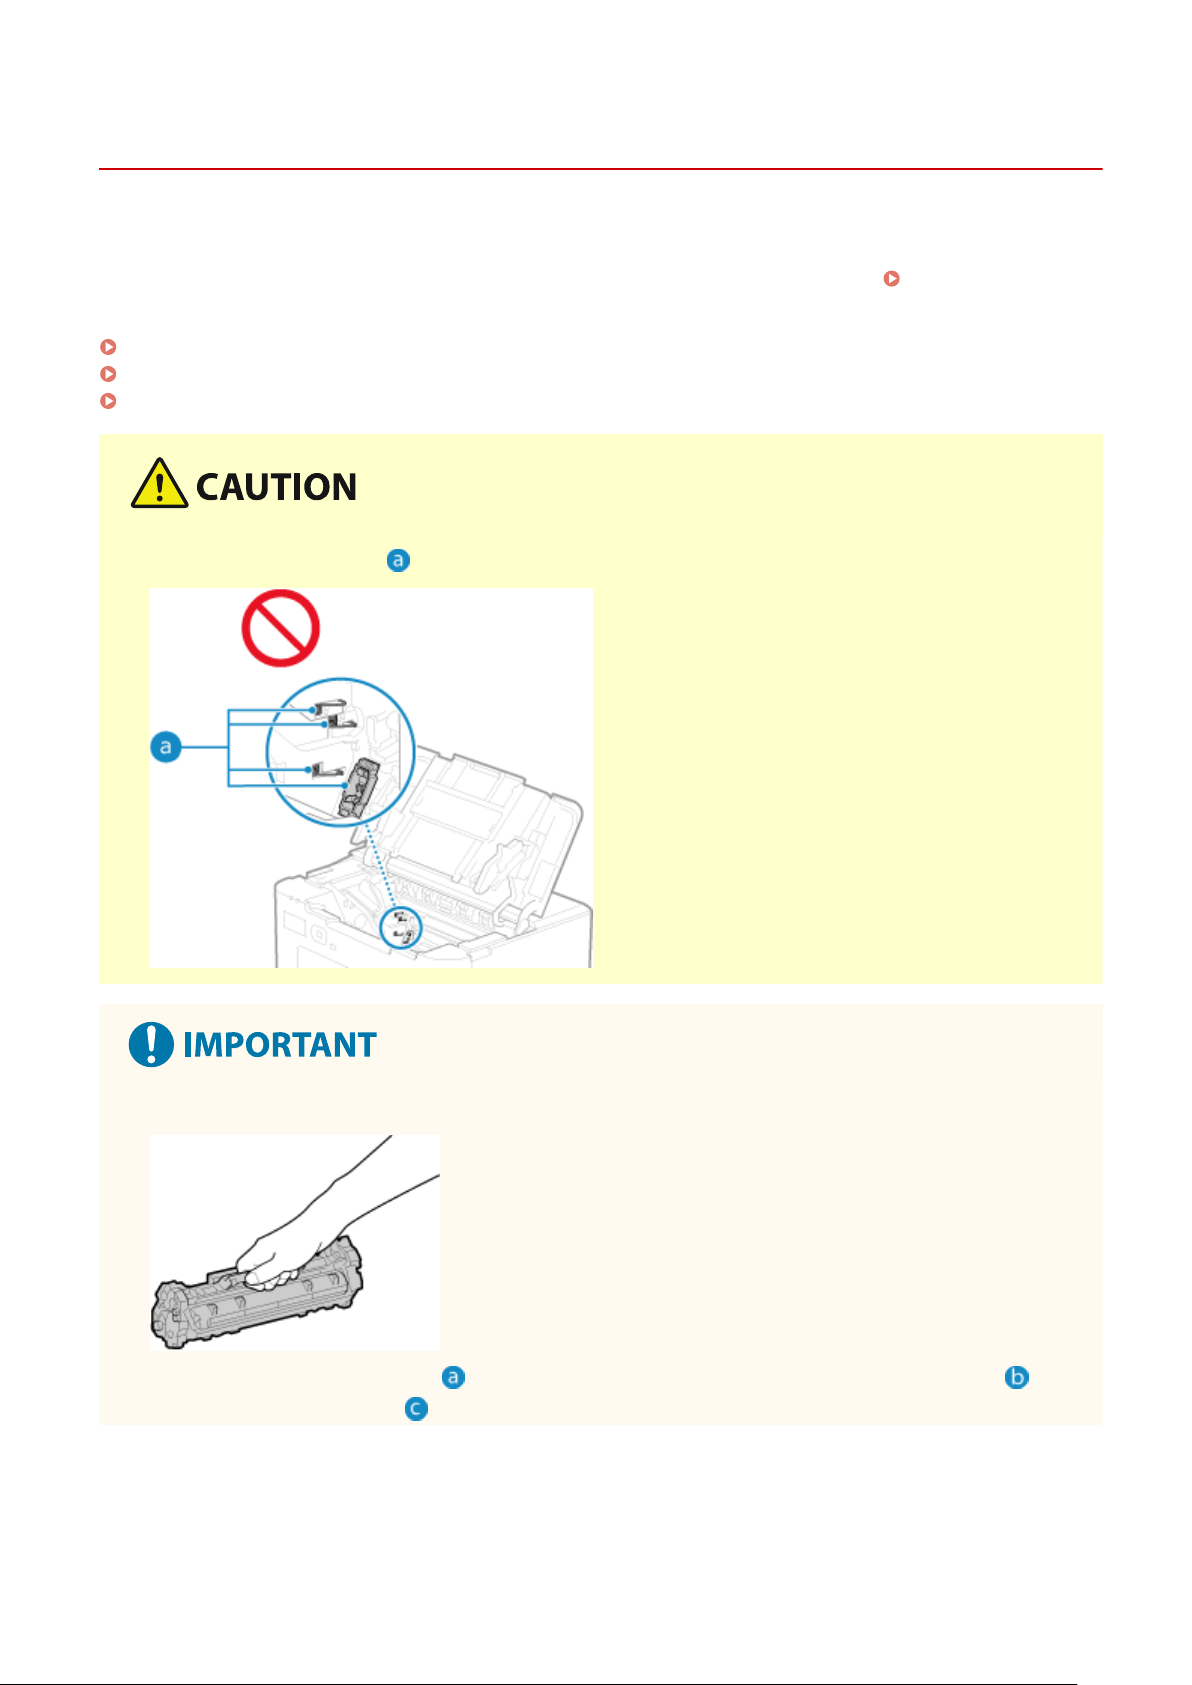
Replacing the Toner Cartridge
94RC-083
Replace the toner cartridge at the appr
opriate time according to messages that appear and a change in print quality.
Before replacing the toner cartridge, check the precautions in Important Safety Instructions.
Manuals of the
Machine(P
. 342)
When to Replace the Toner Cartridge(P. 258)
Before Replacing Toner Cartridge(P. 258)
Replacing Toner Cartridge(P. 260)
● Do not touch the contacts ( ) inside the machine. Doing so may result in a fault.
● Be sur
e to hold the toner cartridge using the handle.
● Do not scr
atch the drum surface (
) or expose it to light. Also, do not touch the electrical contacts ( ) or
the toner cartridge memory ( ).
Maintenance
257

When to Replace the Toner Cartridge
When a Message Appears on the Scr
een of the Operation Panel or Remote UI
Follow the message on the screen to prepare a new toner cartridge and replace the old one. Print quality
may suffer if you continue using the toner cartridge without replacing it.
For details about the message and how to resolve it, see the following:
A Message Appears(P. 325)
When Print Quality Deterior
ates
If printouts show any of the symptoms below, the toner cartridge is near the end of their lifetime. It is
recommended to replace the toner cartridge even if a message does not appear.
Streaks appear
Printing is uneven
Toner smudges and splatters appear
White spots appear
Partially faded
The entire background is darkened
Before Replacing Toner Cartridge
Perform the follo
wing procedure before replacing the toner cartridge. The message on the screen may disappear, and
the print quality may improve.
1
Close the paper stopper, and then open the toner cover.
Maintenance
258
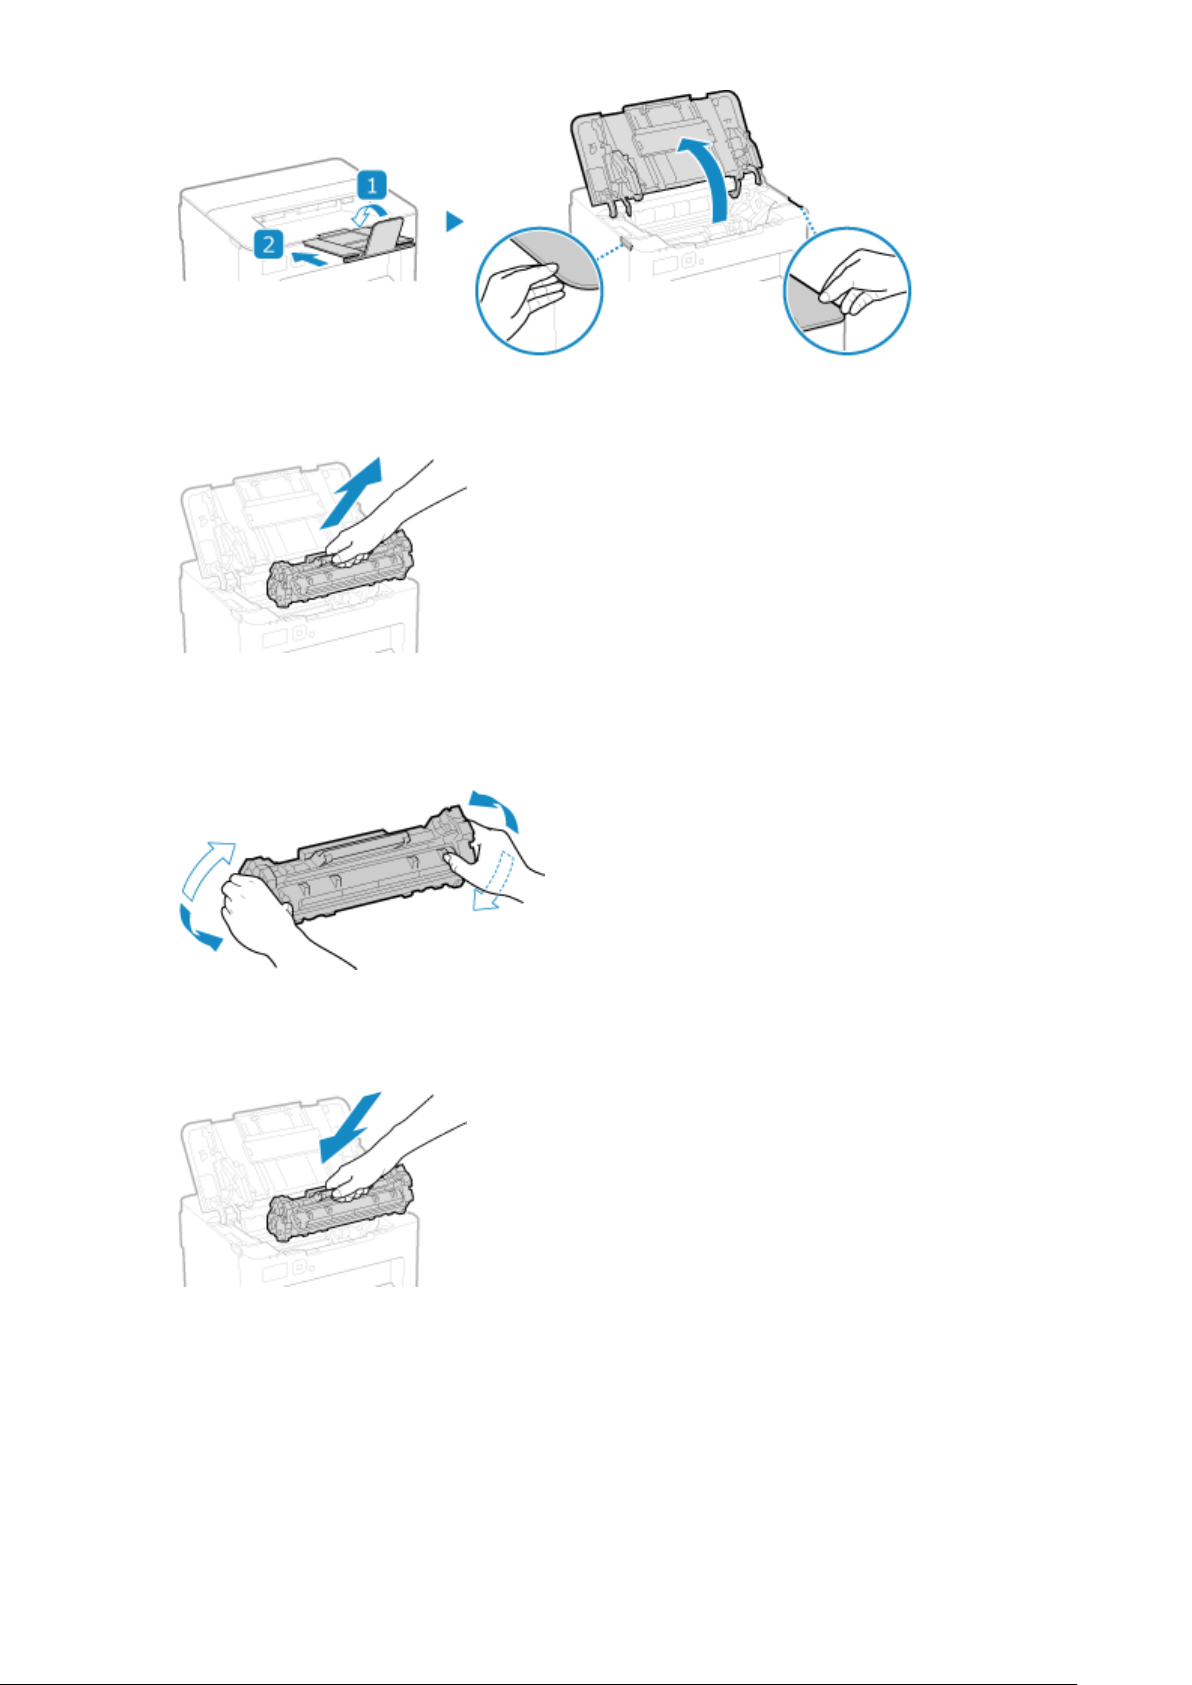
2
Remove the toner cartridge.
Slowly pull it out at the same angle as the slot.
3
Shake the toner cartridge ve or six times to evenly distribute the toner inside the
cartridge.
Be careful not to touch the drum surface on the bottom of the toner cartridge.
4
Install the toner cartridge.
The bottom of the toner cartridge is unprotected. Be careful not to bump the bottom of the toner cartridge
against the slot frame or other parts when installing.
5
Close the toner cover.
Maintenance
259
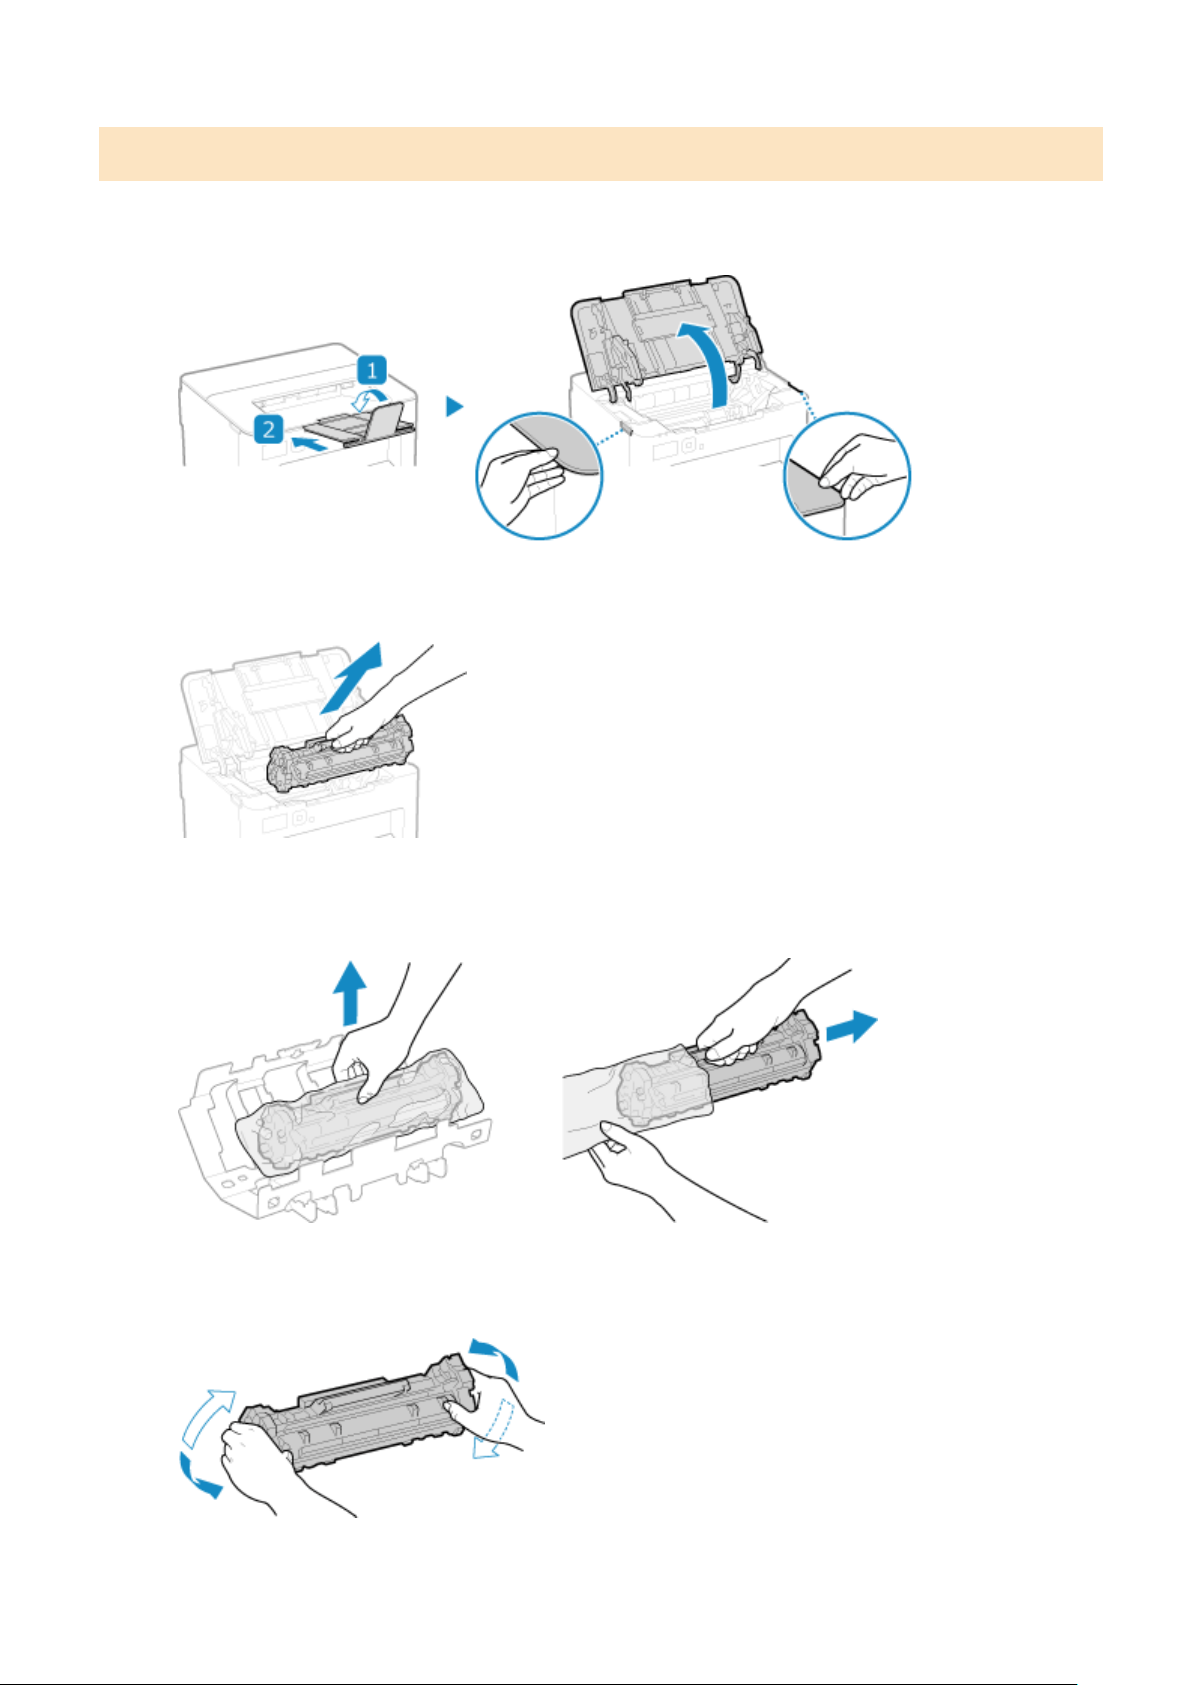
Replacing Toner Cartridge
1
Close the paper stopper, and then open the toner cover.
2
Remove the toner cartridge.
Slowly pull it out at the same angle as the slot.
3
Remove the toner cartridge from the packing material on a level surface.
4
Shake the toner cartridge ve or six times to e
venly distribute the toner inside the
cartridge.
Maintenance
260
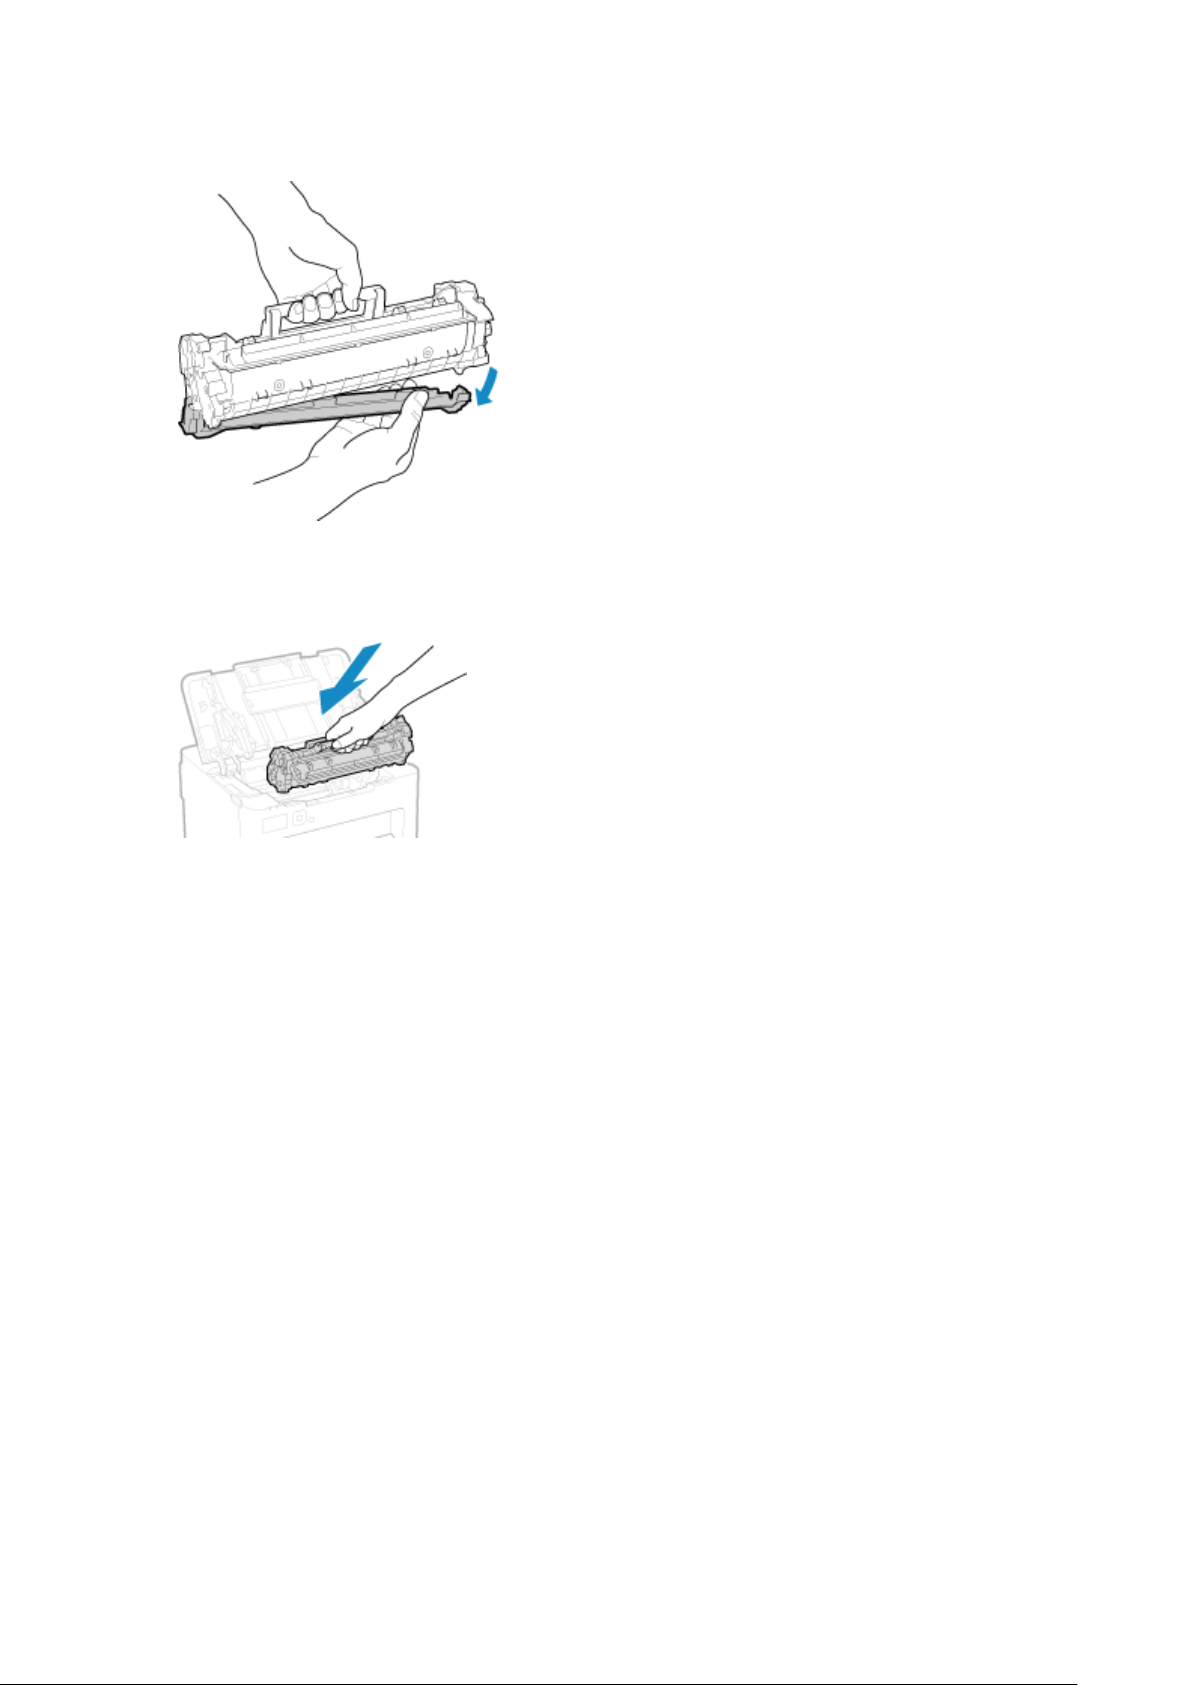
5
Remove the protective cover of the toner cartridge.
Be careful not to touch the drum surface on the bottom of the toner cartridge.
6
Install the toner cartridge.
The bottom of the toner cartridge is unprotected. Be careful not to bump the bottom of the toner cartridge
against the slot fr
ame or other parts when installing.
7
Close the toner cover.
Maintenance
261
Checking the Remaining Amount of Consumables
94RC-084
Y
ou can view the percentage of the current remaining amount of toner in the toner cartridge in increments of 10%.
Check the remaining amount of toner in the toner cartridge, for example, to see if you need to prepare a new toner
cartridge before printing a large volume document.
* The displayed value for the remaining amount of toner in the toner cartridge is for reference and may not indicate
the actual amount remaining.
This section describes how to view this information using the operation panel.
You can also check this information using Remote UI from a computer.
Managing the Machine from a Computer
(Remote UI)
(P. 178)
1
On the operation panel, select [Status Monitor] in the [Home] screen, and press
.
Operation Panel(P. 10)
2
Press [Device Status] [Cartridge Level] .
➠ The remaining amount of toner in the toner cartridge is displayed.
3
Check the remaining amount of toner in the toner cartridge.
● Y
ou can congure the settings to notify you to prepare a new toner cartridge when the current toner
cartridge reaches a specied amount.
[Displ. Timing for Cartridge Prep. Notif.](P. 199)
Maintenance
262
List of Consumables
94RC-085
The item names of the machine consumables and number of sheets that can be printed ar
e shown below.
In addition, precautions must be taken when handling and storing consumables. See also "Important Safety
Instructions."
Manuals of the Machine(P. 342)
For optimum print quality, using Canon genuine Toner, Cartridge and Parts is
r
ecommended.
◼ T
oner Cartridge
Supplied Toner Cartridge
The average number of sheets that can be printed
*1
with the supplied toner cartridge is sho
wn below.
*1
The aver
age yield is based on "ISO/IEC 19752" (the global standard related to "Method for the determination of toner
cartridge yield for monochromatic electrophotographic printers and multi-function devices that contain printer
components" issued by International Organization for Standardization (ISO)) when printing A4 size plain paper with the
default print density setting.
700 sheets
Replacement T
oner Cartridge
The Canon genuine toner cartridge for replacement and average number of sheets that can be printed
*1
ar
e
shown below.
For optimum print quality, using Canon genuine toner cartridges is recommended.
*1
The aver
age yield is based on "ISO/IEC 19752" (the global standard related to "Method for the determination of toner
cartridge yield for monochromatic electrophotographic printers and multi-function devices that contain printer
components" issued by International Organization for Standardization (ISO)) when printing A4 size plain paper with the
default print density setting.
Canon Cartridge 071
1200 sheets
Canon Cartridge 071 H
2500 sheets
Store toner cartridge as described below. Storing toner cartridge in an improper location or environment may
cause pr
oblems such as data loss.
● Store unopened until immediately prior to use.
● Do not store toner cartridge upright or upside down.
Maintenance
263
● Do not stor
e toner cartridge in the following locations:
- Locations exposed to open ames
- Locations exposed to direct sunlight or bright light for ve minutes or more
- Locations exposed to excessively salty air
- Locations heavily exposed to corrosive gases (e.g. aerosol sprays or ammonia)
- Very hot and/or humid locations
- Locations subject to dramatic changes in temperature and humidity likely to cause condensation
- Very dusty locations
- Locations within the reach of children
- Locations close to products affected by magnetism (e.g. oppy disks or disk drives)
● Store the packaging material safely for future use. It will be needed for situations such as storing the
machine with the toner cartridge removed.
● Canon reserves the right to reposition, reshape, add, or remove packaging material without notice.
● Store toner cartridge in the following conditions:
- Storage temperature range: -4 - 104 °F (-20 - 40 °C)
- Storage humidity range: 35% to 85% RH (relative humidity, condensation-free)
*1
*1 Even within the approved storage humidity range, water droplets (condensation) may develop inside the toner
cartridge if the temper
atures inside and outside the toner cartridge differ. Condensation will adversely affect the print
quality.
Be careful of counterfeit toner cartridges
● Please be awar
e that there are counterfeit Canon toner cartridges in the marketplace. Use of counterfeit
toner cartridge may result in poor print quality or machine performance. Canon is not responsible for any
malfunction, accident or damage caused by the use of counterfeit toner cartridge.
For more information, see https://global.canon/ctc/ .
● The toner cartridge may need to be r
eplaced before reaching the average number of sheets that can be
printed depending on the installation environment, paper size to be printed, and original type.
● Automatic calibration may be performed in response to changes in the environment to maintain image
quality. Automatic calibration may also be performed when the power is turned ON and when recovering
from sleep mode. Performing calibration uses the toner cartridge, which may affect their lifetime.
Maintenance
264
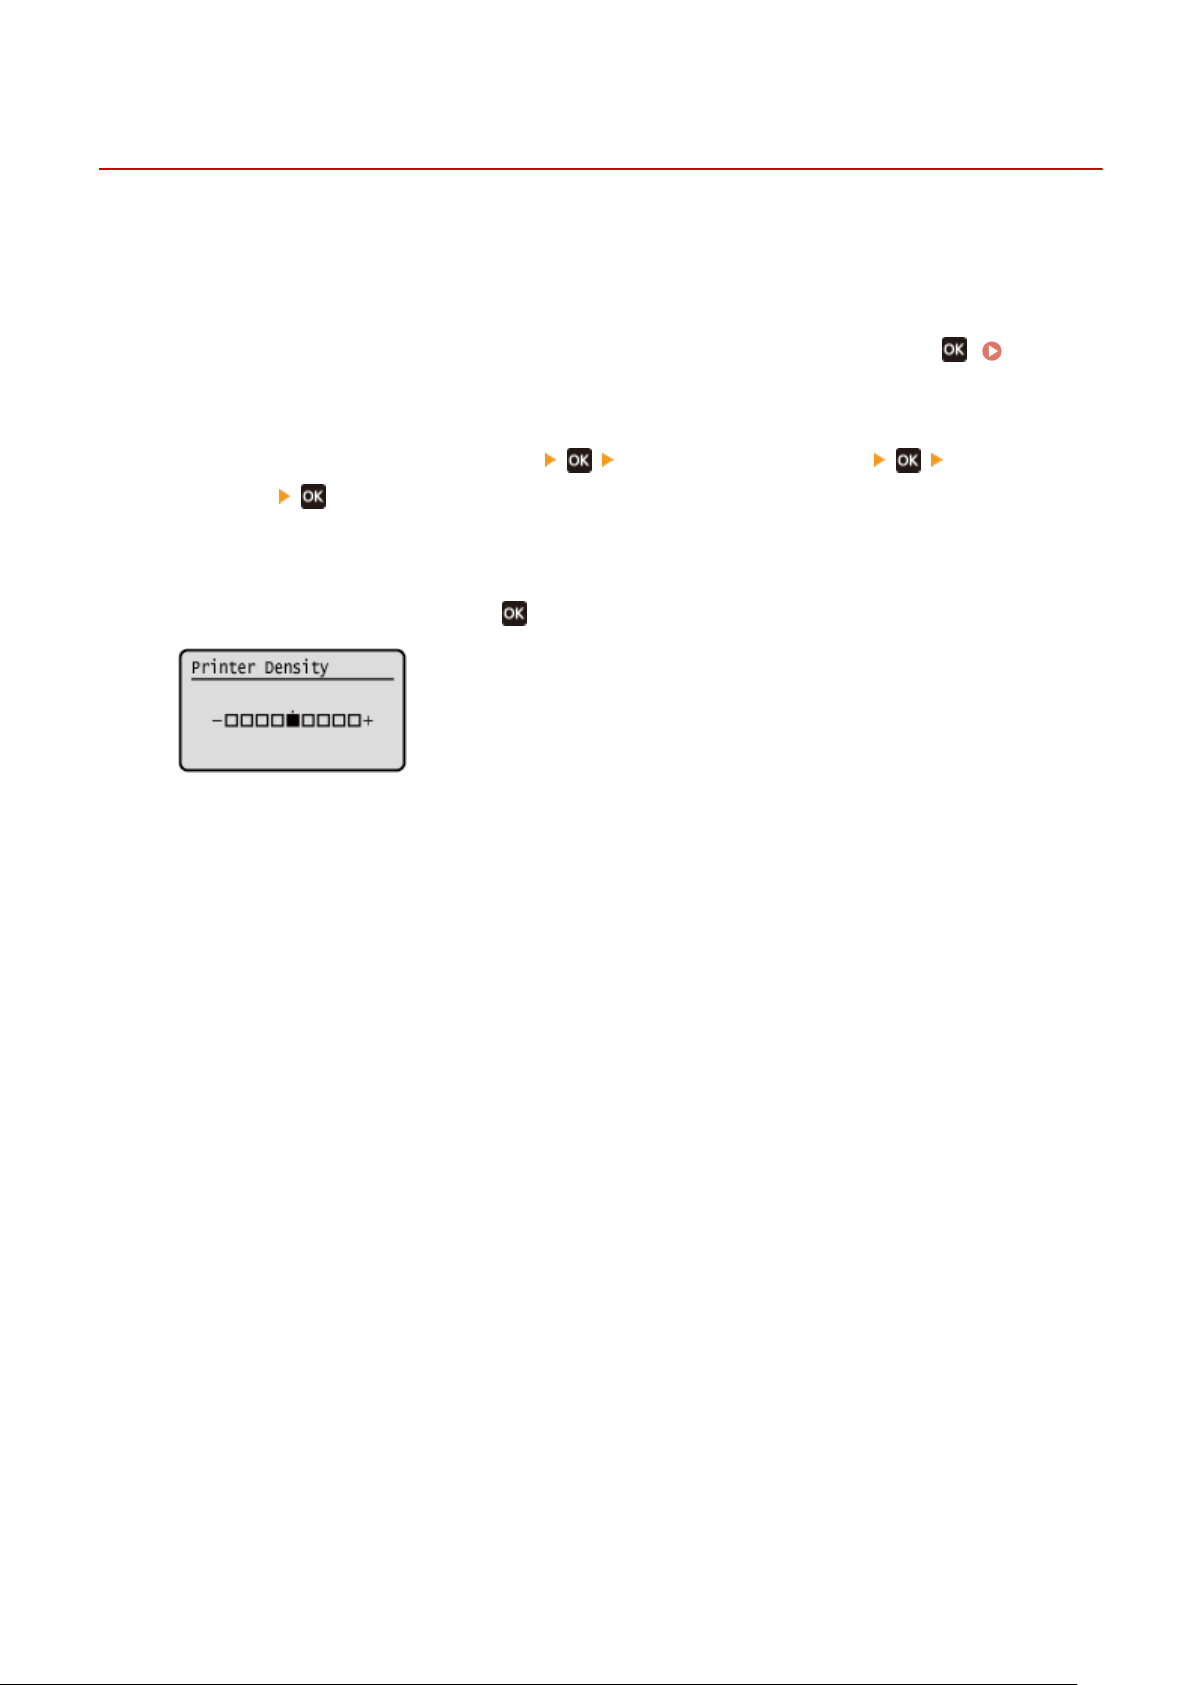
Adjusting the Print Density
94RC-0C6
If print r
esults are too dark or too faint, adjust the print density.
Use the operation panel to perform adjustment. You cannot perform adjustment using Remote UI from a computer.
1
On the operation panel, select [Menu] in the [Home] screen, and press
. [Home]
Scr
een(P. 81)
2
Press [Adjustment/Maintenance]
[Adjust Image Quality] [Printer
Density] .
➠ The [Printer Density] scr
een is displayed.
3
Adjust the density, and press
.
Specify [+] to increase the density and [-] to reduce it.
Maintenance
265
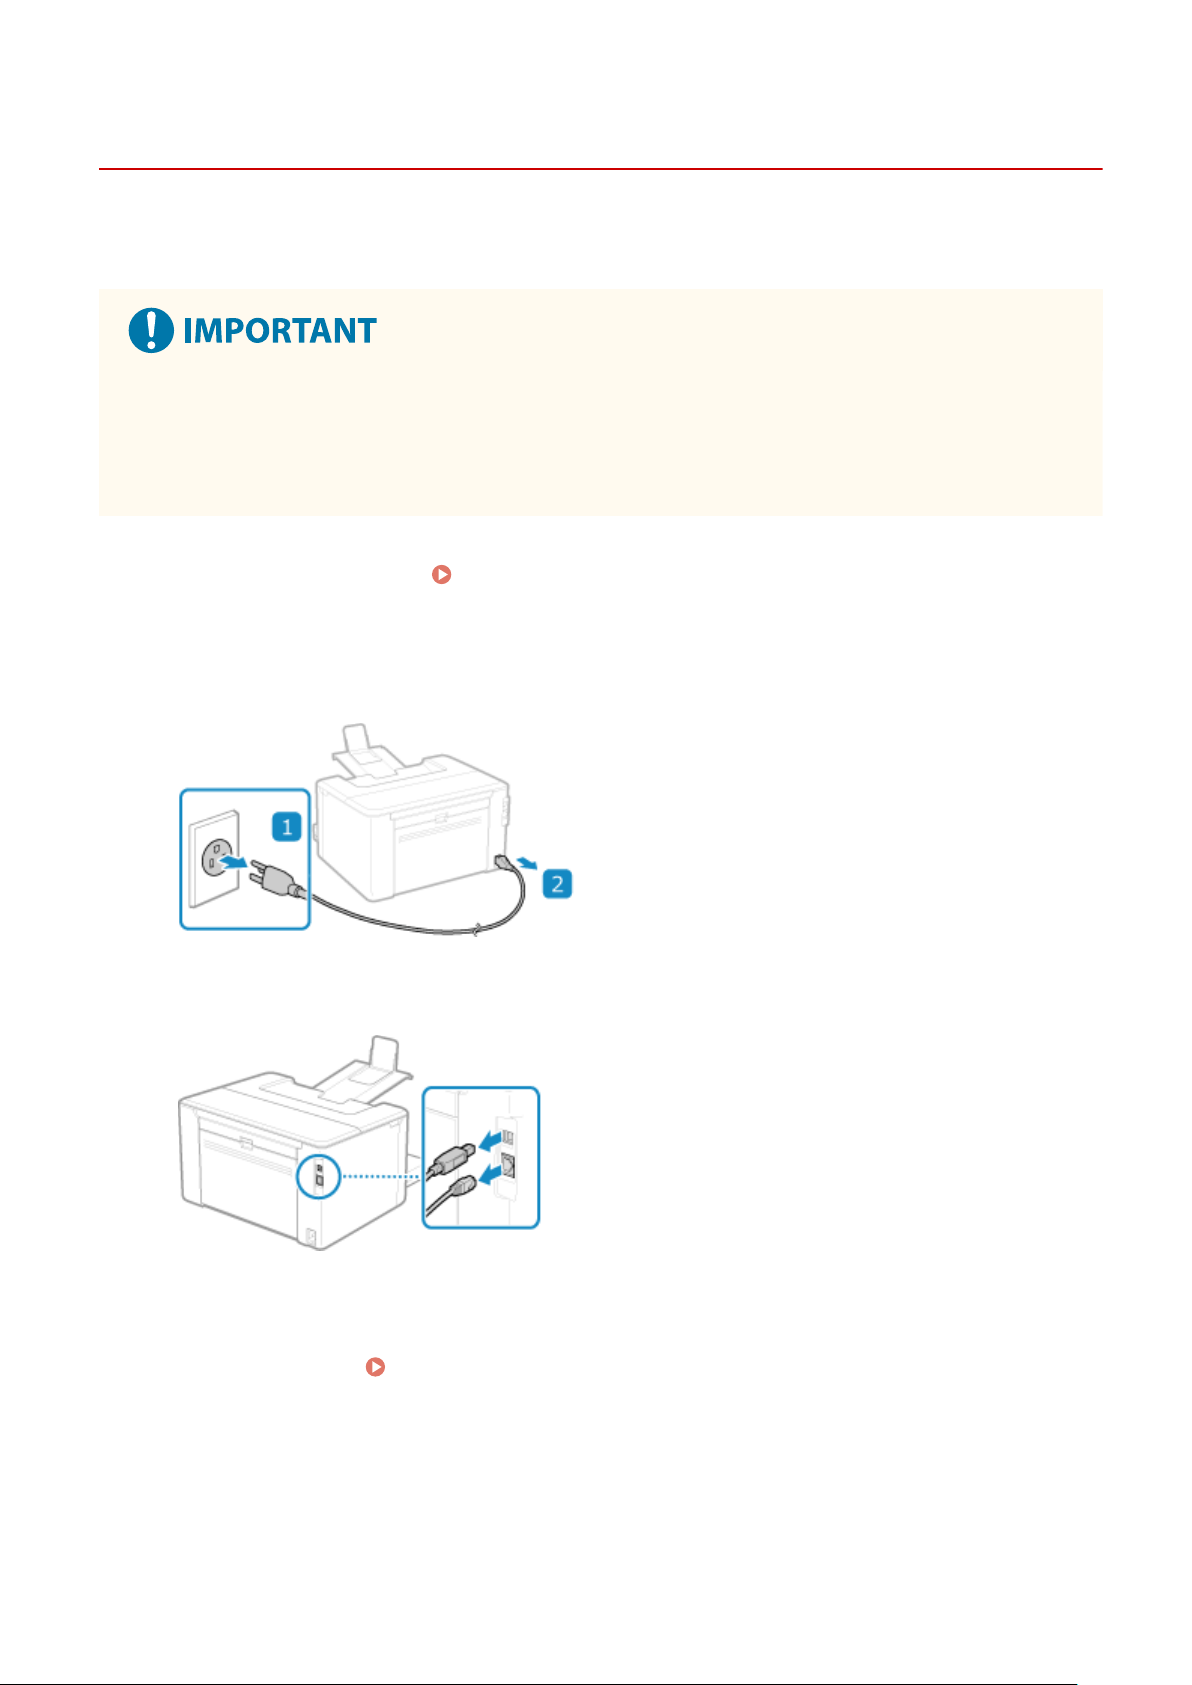
Moving the Machine
94RC-08A
The machine is a heavy object. When mo
ving the machine for cleaning or to change locations, be sure to perform the
procedure below to prevent injury, accident, or damage to the machine.
● If the machine is to be tr
ansported for relocation, removals, etc., take the following steps to prevent damage
and faults during transportation:
- Remove the toner cartridge.
- Securely pack the machine in the original packaging (box) and packing materials.
1
Turn OFF the machine.
Turning OFF the Machine(P. 74)
Turning OFF the machine deletes any data waiting to be printed.
2
Unplug the power cord in the order shown.
3
Unplug all cables and cords connected to the machine.
* The number of connected cables and cords varies depending on the usage environment.
4
When moving the machine a long distance, remove the toner cartridge to prevent
spilling of toner.
Replacing Toner Cartridge(P. 260)
5
Open the paper cover and remove any paper.
Maintenance
266

If the paper guides are extended, return them so that they t in the dr
awer.
6
Close the front cover and all other open components.
7
Lift up the machine to move it.
The machine is a heavy object. For the dimensions and weight of the machine, see the basic specications.
Basic Specications(P
. 18)
8
Gently lower the machine.
For the installation procedure after moving, see "Setup Guide."
Manuals of the Machine(P. 342)
Maintenance
267

Troubleshooting
Troubleshooting .............................................................................................................................................
270
Paper Jams ......................................................................................................................................................... 271
Paper Jams in the Paper Drawer, Output Tray, and Rear Side ....................................................................... 272
Paper Jams That Occur Repeatedly ............................................................................................................... 276
Problems with Printing Results ........................................................................................................................ 278
Toner Smudges and Splatters Appear .......................................................................................................... 280
Streaks Appear ............................................................................................................................................. 281
Printing Is Uneven ........................................................................................................................................ 283
Smudge Marks Appear on the Edge of Printouts .......................................................................................... 285
Text or Images Are Blurry ............................................................................................................................. 286
Printouts Have Ghost Images ....................................................................................................................... 287
Printouts Are Faded ...................................................................................................................................... 289
The Edge of the Page Is Not Printed ............................................................................................................. 291
The Background Is Generally Dark ............................................................................................................... 292
White Spots Appear ...................................................................................................................................... 293
Smudge Marks Appear on the Back Side of Printouts ................................................................................... 295
Printouts Are Skewed ................................................................................................................................... 296
The Printed Barcode Cannot be Scanned ..................................................................................................... 297
Paper and Paper Feeding Problems ................................................................................................................. 298
Paper Creases ............................................................................................................................................... 299
Paper Curls ................................................................................................................................................... 300
Paper Is Not Fed or Two or More Sheets Are Fed Together .......................................................................... 301
Printed Paper Sticks Together ...................................................................................................................... 302
Setting Up .......................................................................................................................................................... 303
The Machine Connected via WSD Port Is Not Displayed During Driver Installation ...................................... 304
Cannot Connect to Wireless LAN .................................................................................................................. 305
Network ............................................................................................................................................................. 306
Cannot Switch to Wireless LAN ..................................................................................................................... 307
Cannot Find the Print Server to Connect to .................................................................................................. 308
Cannot Connect to a Shared Printer ............................................................................................................. 309
Cannot Find the IP Address of the Machine .................................................................................................. 310
AirPrint Does Not Work ................................................................................................................................ 311
Printing .............................................................................................................................................................. 312
Cannot Print ................................................................................................................................................. 313
Troubleshooting
268

Cannot Print (Wireless LAN) ...................................................................................................................
314
Cannot Print (Wired LAN) ....................................................................................................................... 316
Cannot Print (USB Connection) .............................................................................................................. 317
Cannot Print (via Print Server) ................................................................................................................ 318
Printing Is Slow ............................................................................................................................................. 319
Management Functions and Environment Settings ....................................................................................... 320
Cannot Access Remote UI ............................................................................................................................. 321
Changing the Time Until Sleep Mode ........................................................................................................... 322
Lost Department ID or PIN for the Administrator ......................................................................................... 323
Checking the Items That Can Be Congured on the Machine and Their Settings ......................................... 324
A Message Appears ........................................................................................................................................... 325
An Error Code Is Displayed ................................................................................................................................ 336
If the Problem Persists ...................................................................................................................................... 339
Troubleshooting
269

Troubleshooting
94RC-08C
This chapter describes ho
w to troubleshoot problems and answers frequently asked questions.
Select an item to check from the contents or the list below.
You can click [
] at the top of the screen to search for the message or error code (three-digit number starting with #)
that appears on the oper
ation panel, and check how to troubleshoot problems.
◼ Frequently Asked Questions
Lost Department ID or PIN for the Administrator(P. 323)
Cannot Print(P. 313)
[Memory is full.] Is Displayed on the Operation Panel, and the Operation Cannot Be Performed.(P. 333)
◼ Fr
equently Asked Questions about Operations
I Want to Print on an Envelope.
Place the envelope in the paper drawer tray while paying attention to the orientation and side of the
envelope.
Then, set the paper size and type according to the placed envelope.
Next, use the print driver of the computer to set the paper size of the document and the paper size to print,
and then perform printing.
Preparations and Orientation for Loading Envelopes(P. 90)
Specifying the Paper Size and Type(P. 94)
Printing from a Computer(P. 115)
Troubleshooting
270
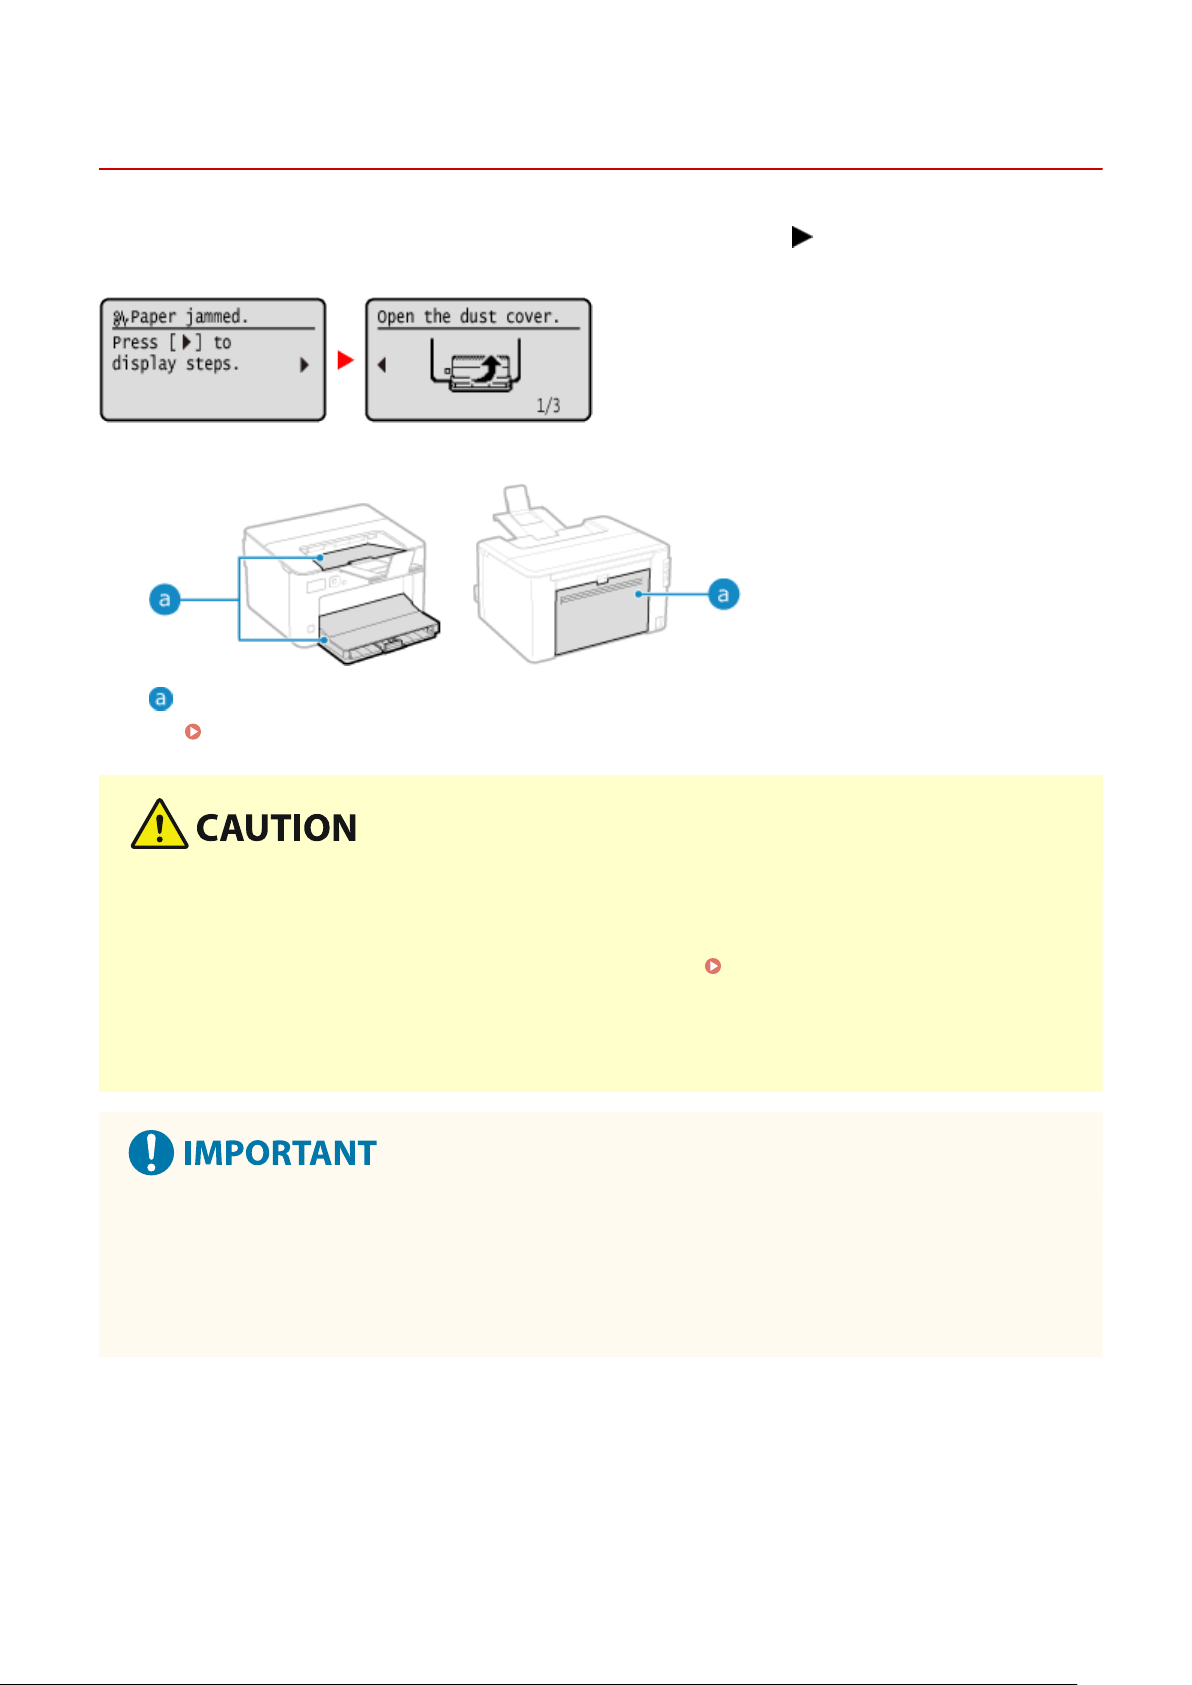
Paper Jams
94RC-08E
If paper jams in the machine, [Paper jammed.] appears on oper
ation panel. Press
, and follow the displayed
instructions on ho
w to clear the paper jam.
For details about clearing paper jams from various parts of the machine, see below.
Paper drawer, output tray, and rear side
Paper Jams in the Paper Drawer, Output Tray, and Rear Side(P. 272)
Do not forcibly remove the jammed paper from the machine.
● For
cibly removing the paper may result in personal injury or damage parts of the machine. If you cannot
remove the paper, contact your dealer or service representative.
If the Problem Persists(P. 339)
When All Paper Jams Have Been Cleared
● Immediately remove your hands from the machine so that your clothing and hands do not get caught in the
rollers.
When clearing paper jams, do not turn the power OFF.
● Data being printed is er
ased when you turn the power OFF.
When the Paper Gets Torn
● Be sure to remove it so that no pieces remain.
Troubleshooting
271

Paper Jams in the Paper Drawer, Output Tray, and Rear
Side
94RC-08F
Use the pr
ocedure below to check the paper drawer, output tray, rear side, and to remove any jammed paper. If the
paper tears, be sure to remove the parts so that no pieces remain.
1
Close the paper stopper before opening the toner cover.
2
Remove the toner cartridge.
Slowly pull it out at the same angle as the slot.
3
Remove the paper jammed in the paper drawer.
1
Open the paper cover.
2
If other paper is loaded, remove that paper.
3
Gently pull out the paper.
4
Load the paper and close the paper cover.
4
Remove the paper jammed inside the paper exit guide.
Troubleshooting
272
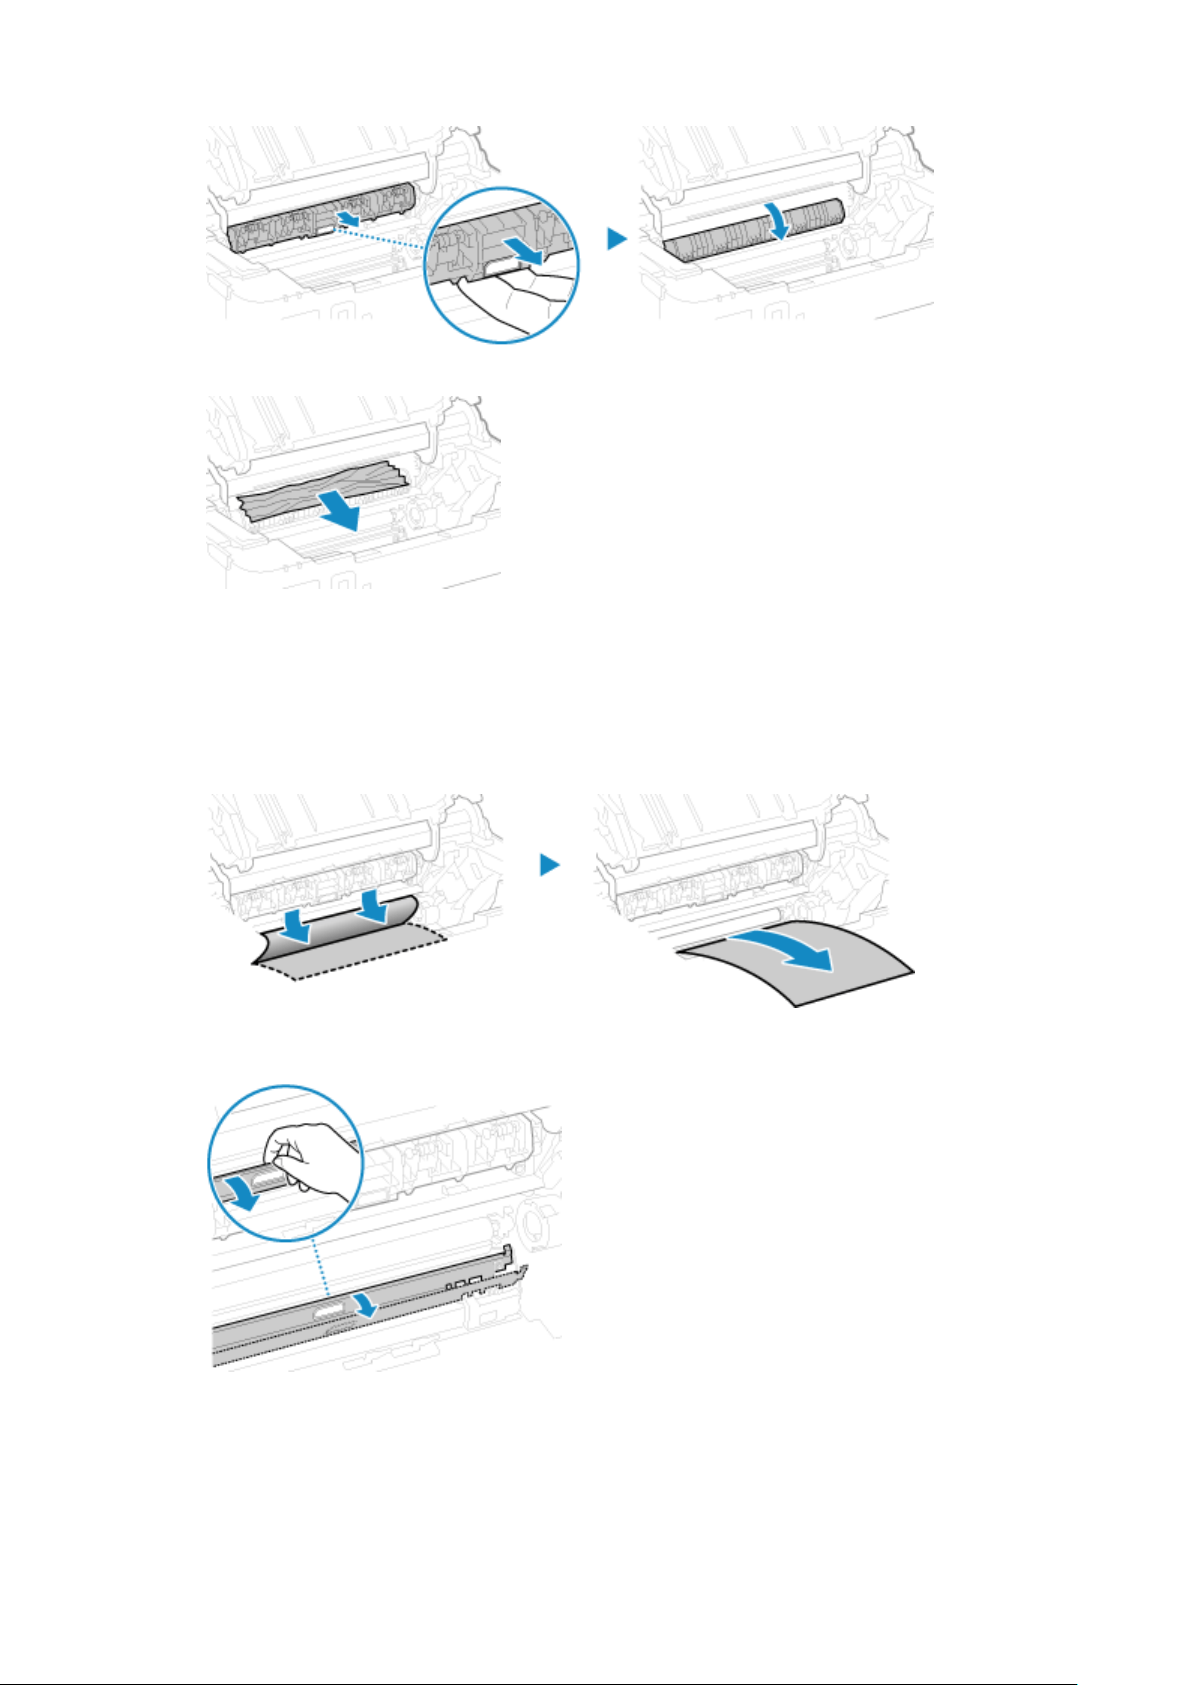
1
Pull out the transport guide.
2
Gently pull out the paper.
3
Close the paper exit guide.
5
Remove the paper jammed inside the machine.
1
Gently pull out the paper.
Holding both sides of the paper, pull the front edge of the paper out and downwards.
2
Check whether paper is jammed in the guides.
If paper is jammed
Open the paper cover and remove any other loaded paper. Then slowly pull out the jammed
paper.
Troubleshooting
273
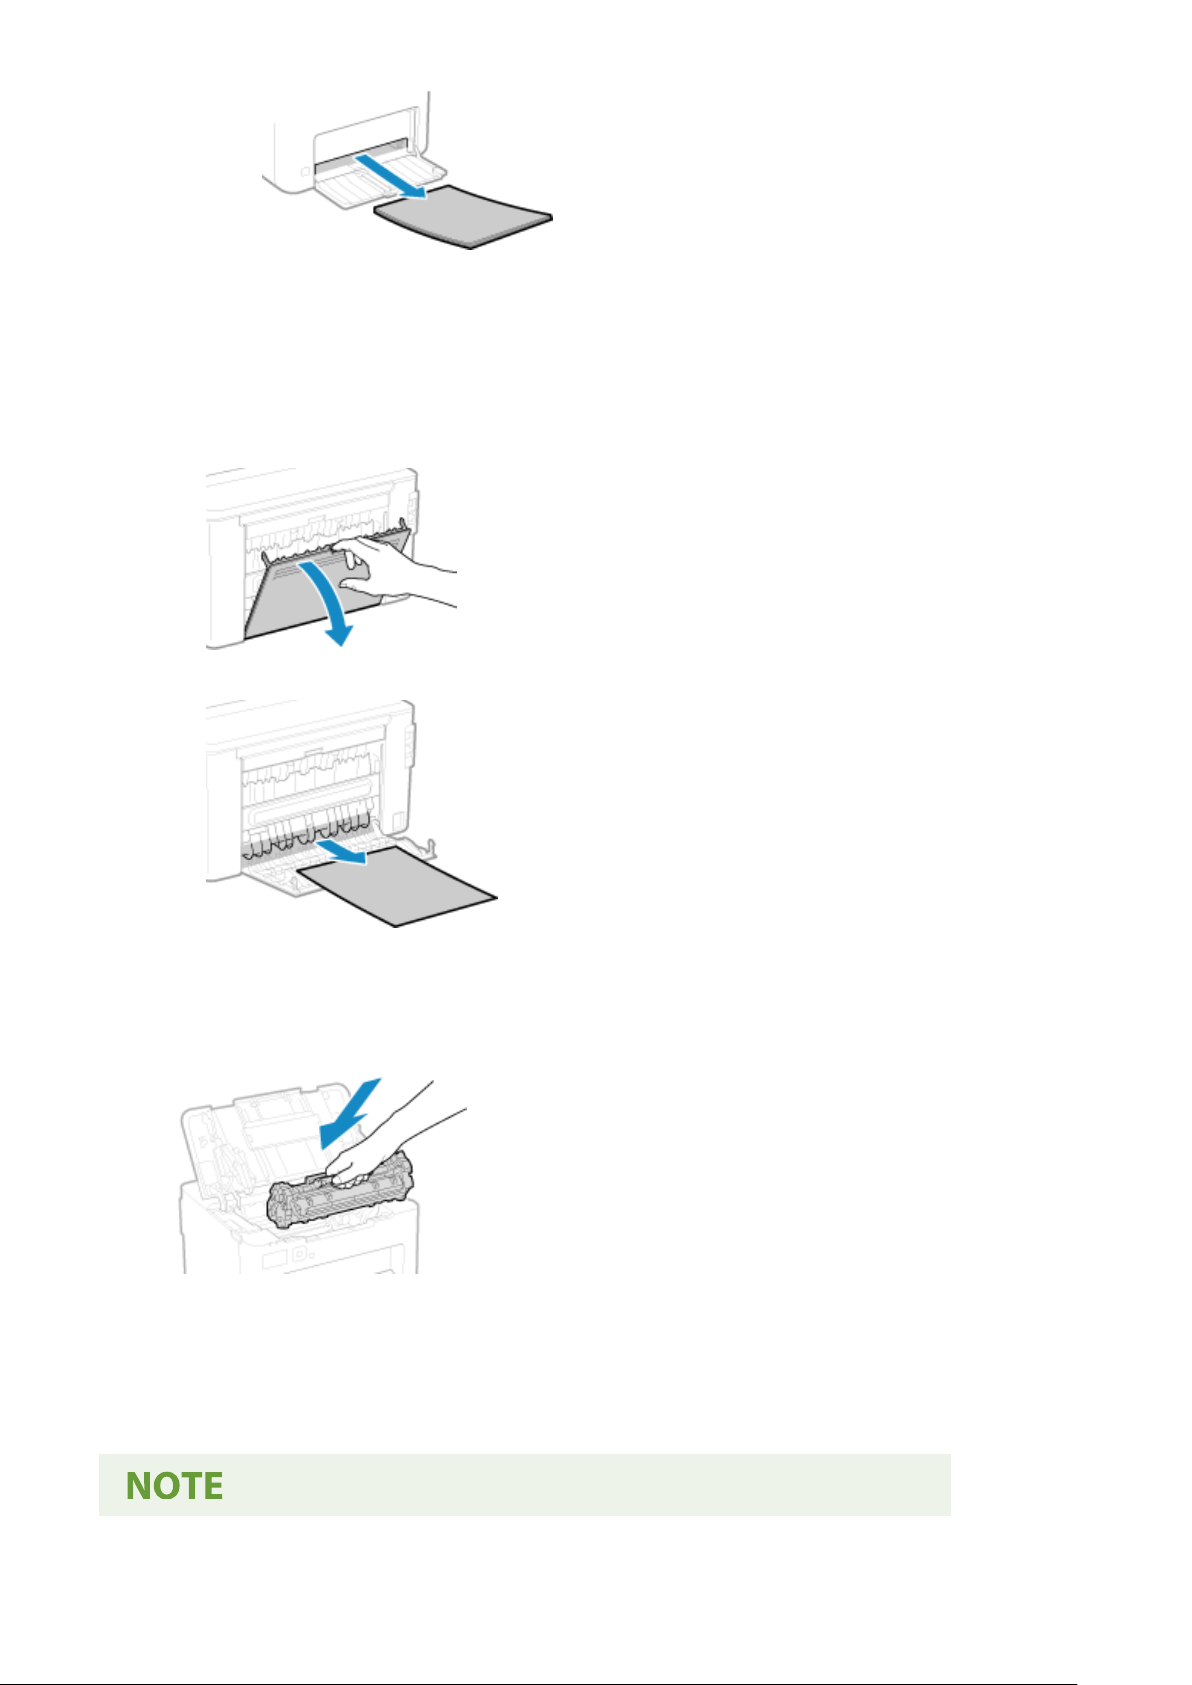
Load paper in the paper drawer and close the paper cover.
6
Remove the paper jammed inside rear cover.
1
Open the rear cover.
2
Gently pull out the paper.
3
Close the rear cover.
7
Insert the toner cartridge.
8
Close the toner cover.
➠ The message [Paper jammed.] disappears, and printing r
esumes automatically.
If printing does not resume automatically, try printing again.
Troubleshooting
274

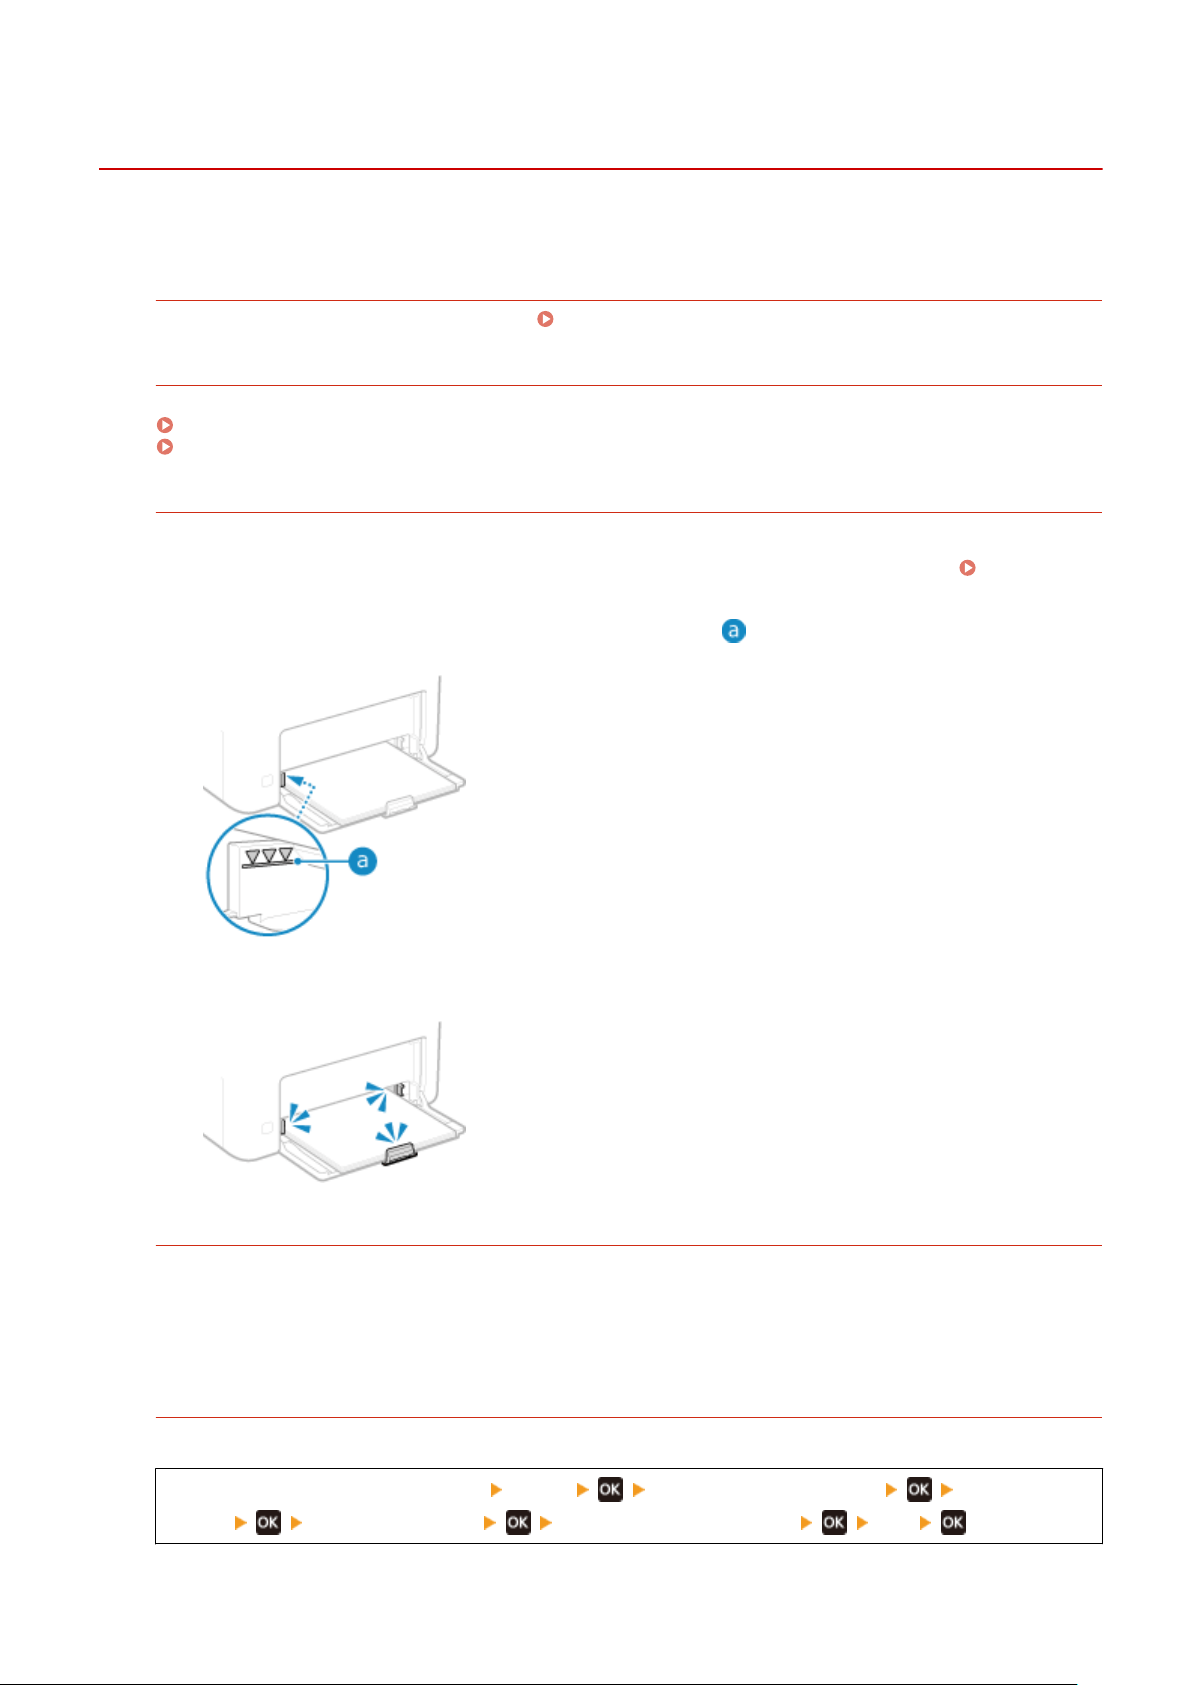
Paper Jams That Occur Repeatedly
94RC-08J
T
roubleshoot by checking the items below.
Are There Paper Scraps or Foreign Objects Inside the Machine?
Remove any paper scraps or foreign objects. Paper Jams(P. 271)
Ar
e You Using Appropriate Paper?
Check whether the paper in the machine is usable, and replace it with appropriate paper, as needed.
Usable Paper(P. 13)
Loading Paper(P. 87)
Is Paper Loaded Corr
ectly?
● Fan the paper thor
oughly in small batches so that it is not stuck together.
● Align the edges by tapping the paper on a at surface a few times before loading the paper.
Loading
Paper(P
. 87)
● Make sure the loaded paper does not exceed the load limit line (
).
● Check that the paper guides ar
e not too loose or too tight.
Do Paper Jams Occur When Printing on the Back Side of Printed Paper?
Flatten the edges of the paper to thoroughly remove any curls.
* When printing on the back side of printed paper, you can only use paper printed with this machine. Do not
use paper printed with another printer or multifunction machine, as this can cause paper jams or damage the
machine.
Does This Occur When Printing Continuously
?
If so, setting [Correct Paper Conveyance] to [On] may reduce the frequency of paper jams.
[Home] screen on the operation panel [Menu] [Adjustment/Maintenance] [Adjust Image
Quality] [Special Processing] [Correct Paper Conveyance] [On]
Troubleshooting
276

* When you select [On], the printing speed may decrease.
Troubleshooting
277
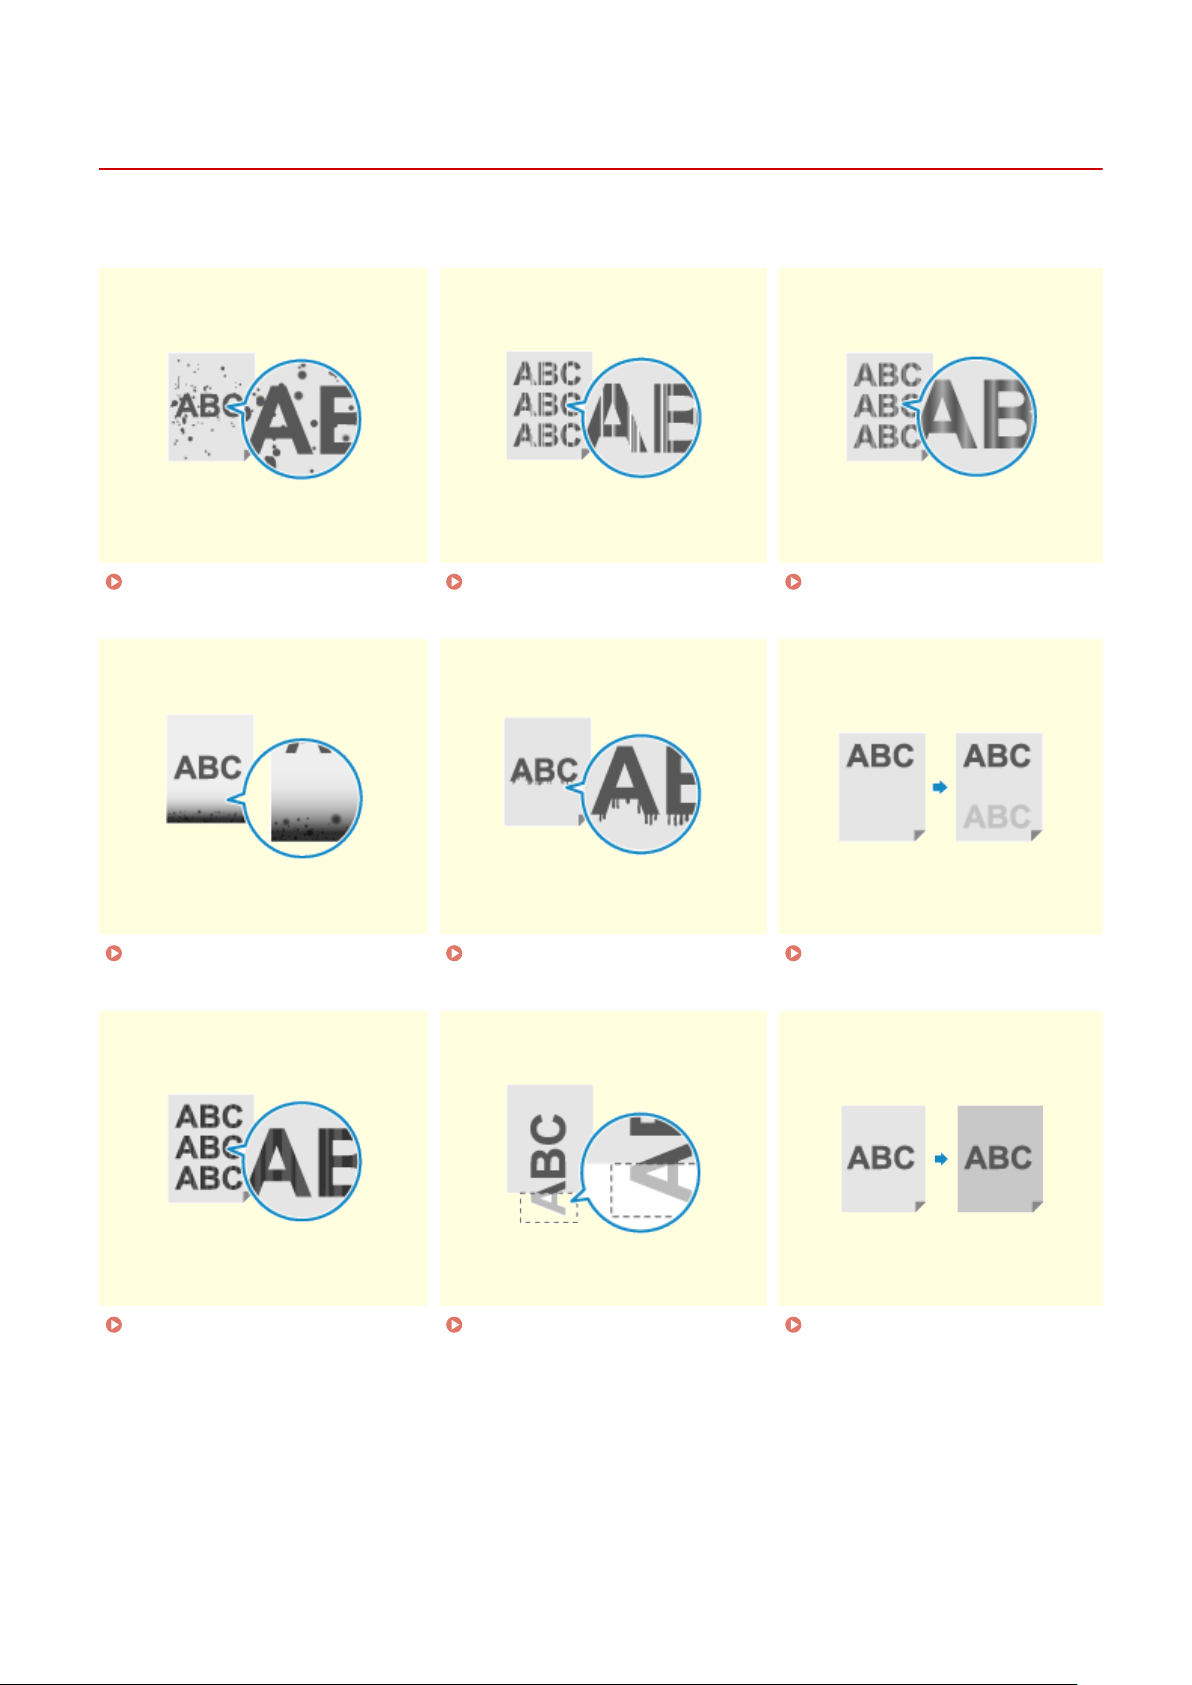
Problems with Printing Results
94RC-08K
If printouts sho
w any of the symptoms below, check how to troubleshoot the problem based on the symptom.
Toner Smudges and Splatters
Appear
(P. 280)
Streaks Appear(P. 281) Printing Is Uneven(P. 283)
Smudge Marks Appear on the
Edge of Printouts(P
. 285)
Text or Images Are Blurry(P. 286) Printouts Have Ghost
Images(P
. 287)
Printouts Are Faded(P. 289) The Edge of the Page Is Not
Printed(P
. 291)
The Background Is Generally
Dark(P
. 292)
Troubleshooting
278
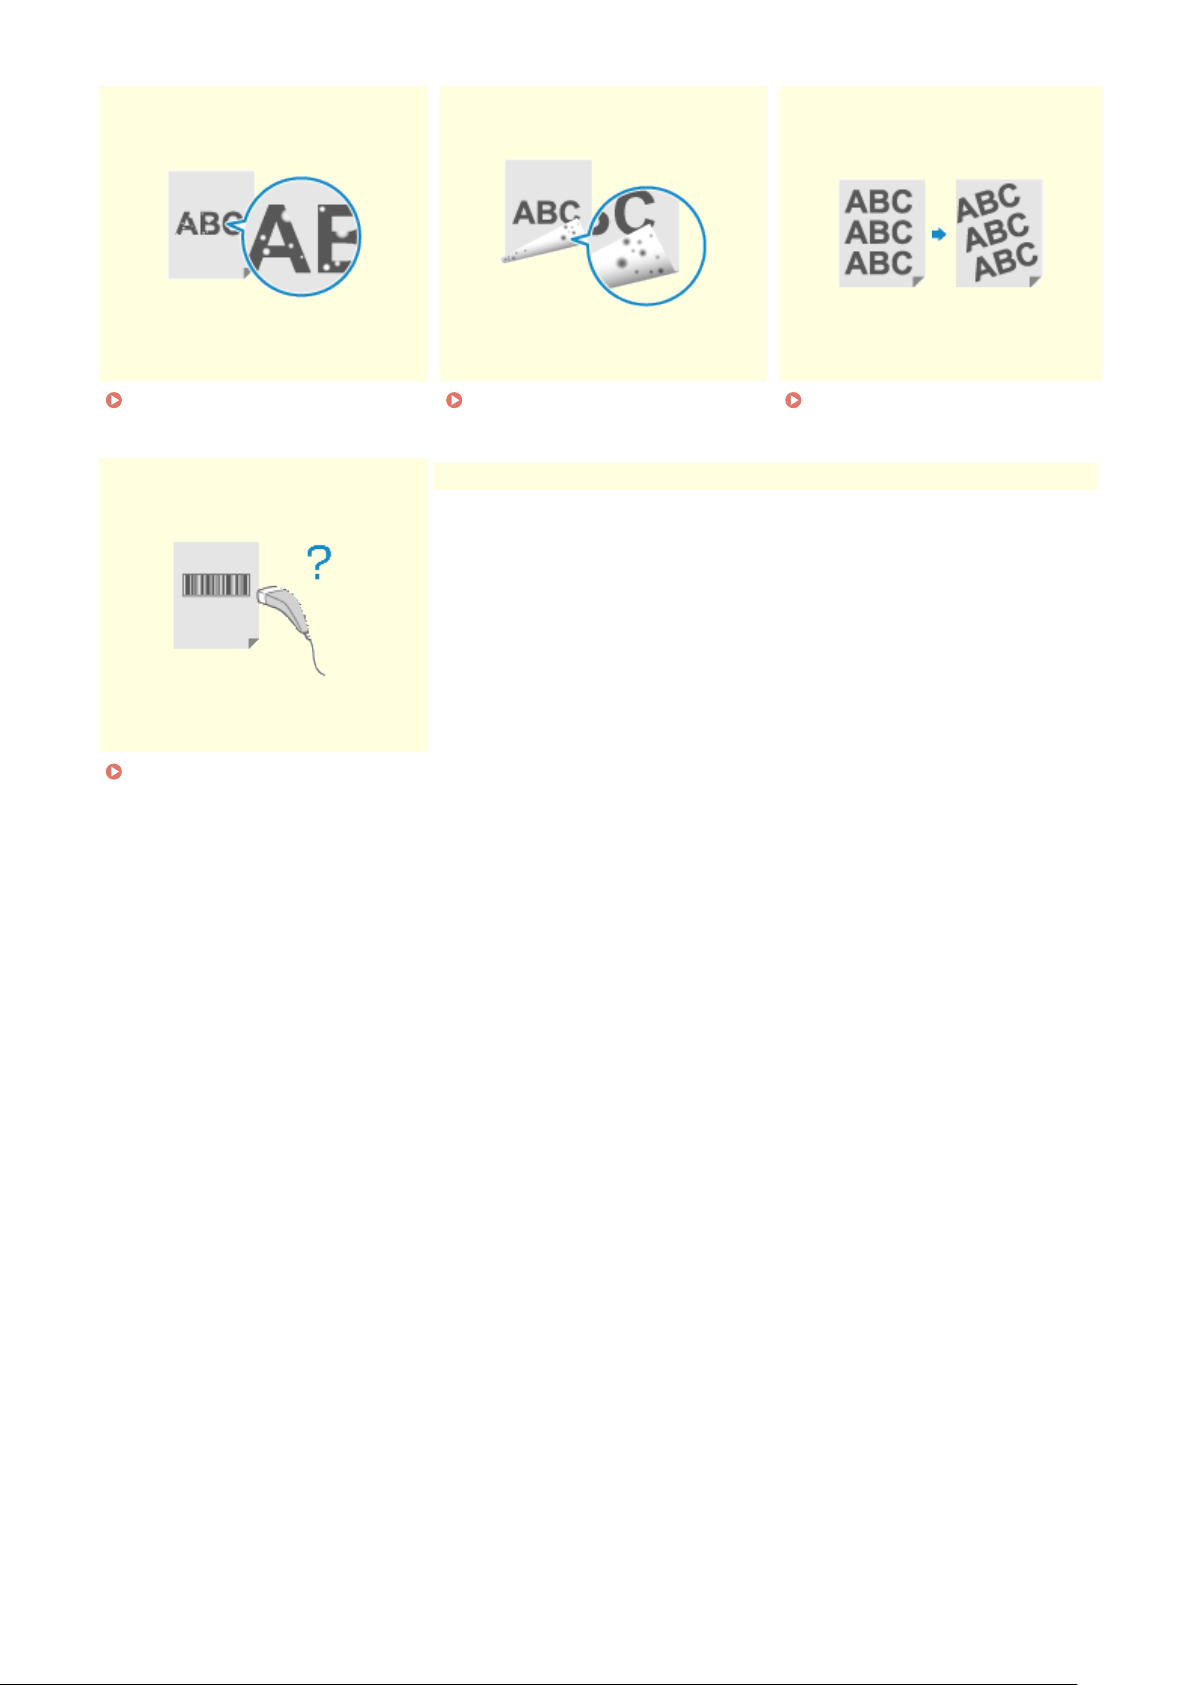

Toner Smudges and Splatters Appear
94RC-08L
T
roubleshoot by checking in the following order:
Step 1: Checking the Paper(P. 280)
Step 2: Checking the Toner Cartridge(P. 280)
Step 3: Checking the Usage Environment of the Machine(P. 280)
Step 4: Checking the Maintenance Status(P. 280)
Step 1: Checking the Paper
Are You Using Appropriate Paper?
Check whether the paper in the machine is usable, and replace it with appropriate paper, as needed.
Usable Paper(P. 13)
Loading Paper(P. 87)
Step 2: Checking the Toner Cartridge
Check the Remaining Amount of Toner in the Toner Cartridge.
If the remaining amount of toner in the toner cartridge is low, replace the toner cartridge.
Checking the Remaining Amount of Consumables(P. 262)
Replacing the Toner Cartridge(P. 257)
* Depending on the usage condition of the machine, the actual r
emaining amount of toner may be lower than
indicated or the parts may be deteriorated.
Step 3: Checking the Usage Environment of the Machine
Ar
e You Using the Machine in an Environment with Low Humidity?
Setting [Low Humidity Mode] to [Mode 1] may solve the problem. If that does not work, try selecting [Mode 2]
and then [Mode 3] in sequence.
[Home] screen on the operation panel [Menu] [Adjustment/Maintenance] [Adjust Image
Quality] [Special Processing] [Low Humidity Mode] select the mode.
* Enabling this setting may reduce the density or create fading in a humid environment.
Step 4: Checking the Maintenance Status
Have You Cleaned the Fixing Assembly?
These symptoms may occur when the xing assembly is dirty
. In this case, clean the xing assembly.
Cleaning the Fixing Assembly(P. 254)
Troubleshooting
280

Streaks Appear
94RC-08R
T
roubleshoot by checking in the following order:
Step 1: Checking the Paper(P. 281)
Step 2: Checking the Toner Cartridge(P. 281)
Step 3: Checking the Usage Environment of the Machine(P. 281)
Step 4: Checking the Maintenance Status(P. 282)
Step 1: Checking the Paper
Are You Using Appropriate Paper?
Check whether the paper in the machine is usable, and replace it with appropriate paper, as needed.
Usable Paper(P. 13)
Loading Paper(P. 87)
Step 2: Checking the Toner Cartridge
Check the Remaining Amount of Toner in the Toner Cartridge.
If the remaining amount of toner in the toner cartridge is low, replace the toner cartridge.
Checking the Remaining Amount of Consumables(P. 262)
Replacing the Toner Cartridge(P. 257)
* Depending on the usage condition of the machine, the actual r
emaining amount of toner may be lower than
indicated or the parts may be deteriorated.
Step 3: Checking the Usage Environment of the Machine
Ar
e You Using the Machine in an Environment with Sudden Temperature Changes?
Sudden temperature changes can create condensation, which can result in faded or blurry images and text.
Continuing to use the machine under these conditions may r
esult in paper jams, printing defects, faults, or
other problems. Allow the machine to adjust to the ambient temperature and humidity for at least 2 hours
before use.
Is the Machine Installed in a Location Subject to Strong Wind Such as from an Air
Conditioner?
If so, adjust the air direction and volume of the air conditioner.
If that does not work, setting [Switch Paper Feed Method] to [Print Side Priority] may impr
ove the problem.
[Home] on the operation panel [Menu] [Function Settings] [Common] [Paper
Feed Settings] [Switch Paper Feed Method] [Drawer 1] Print Side Priority]
* When you select [Print Side Priority], the printing speed for 1-Sided printing will decrease.
T
ry using Output Adjustment Mode
Setting [Output Adjustment Mode] to [On] may solve the problem.
[Home] on the operation panel [Menu] [Function Settings] [Printer] [Printer
Settings] [Print Quality] [Output Adjustment Mode] [On]
Troubleshooting
281

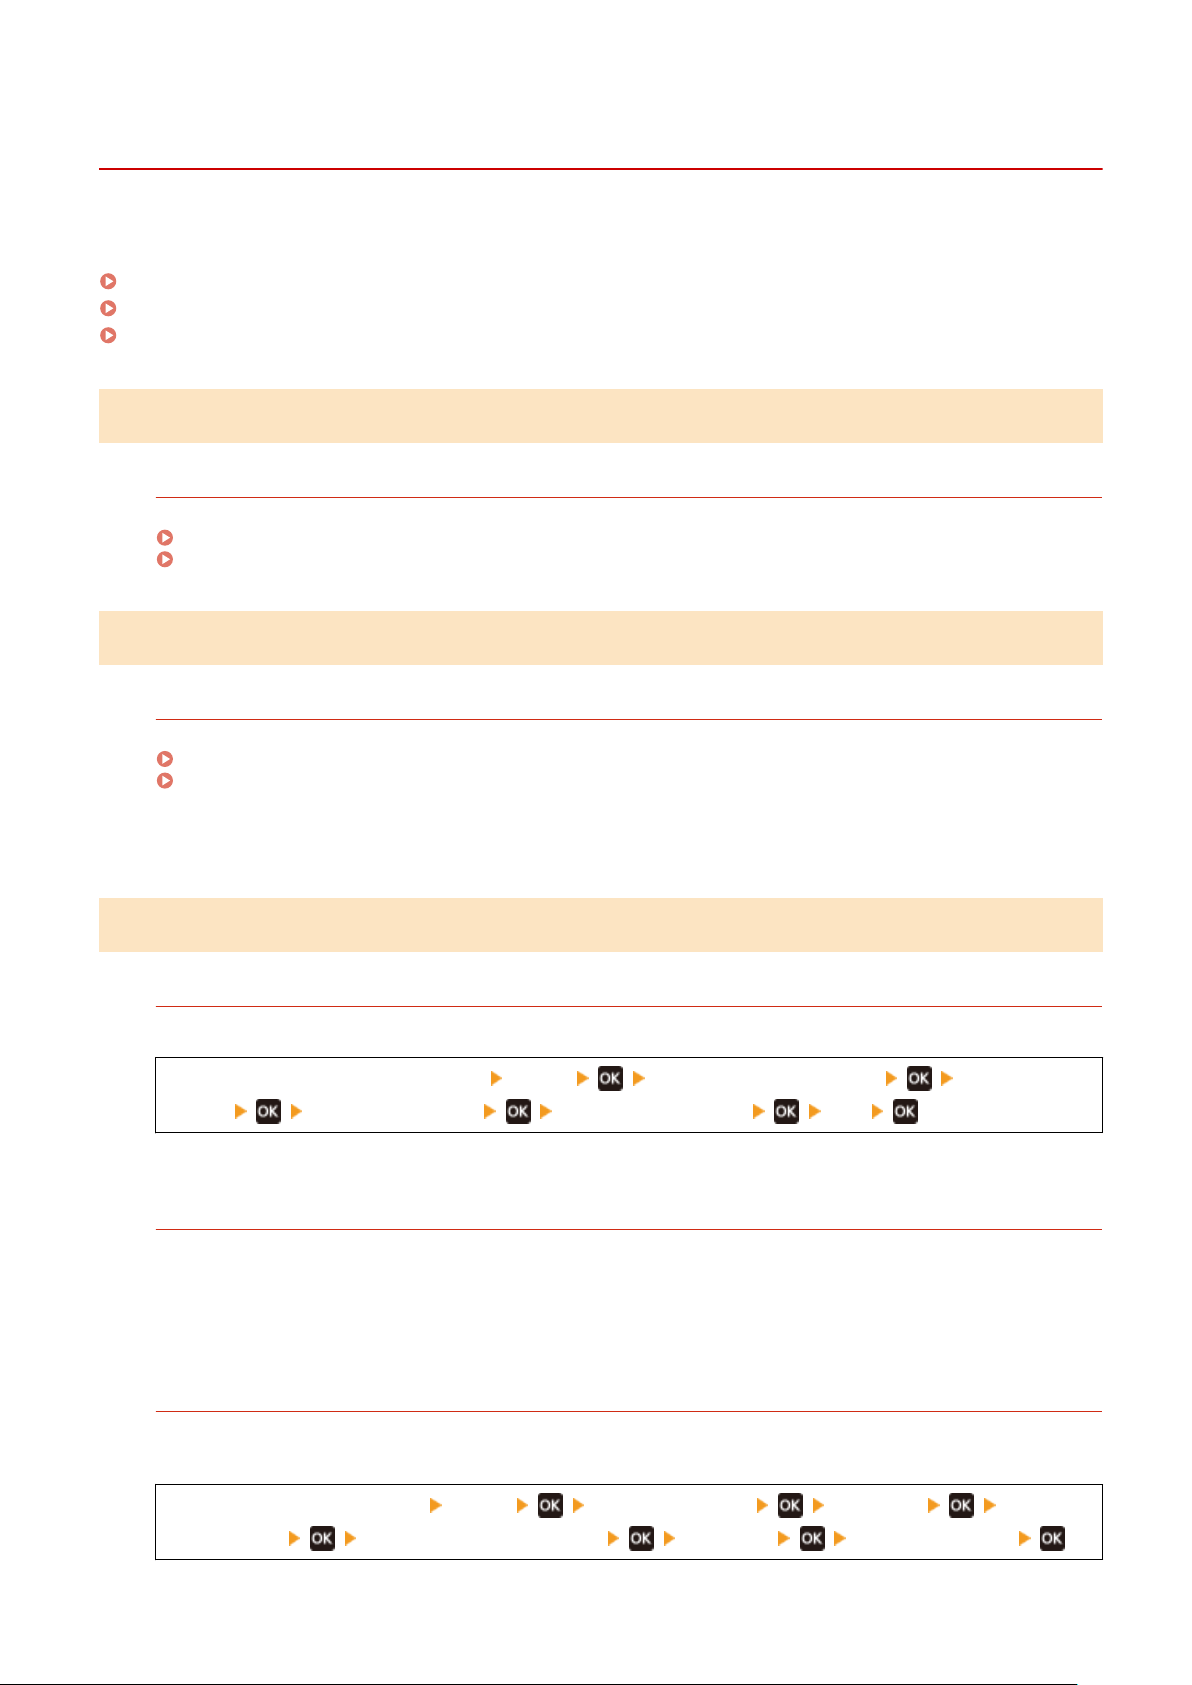
Printing Is Uneven
94RC-08S
T
roubleshoot by checking in the following order:
Step 1: Checking the Paper(P. 283)
Step 2: Checking the Toner Cartridge(P. 283)
Step 3: Checking the Usage Environment of the Machine(P. 283)
Step 1: Checking the Paper
Are You Using Appropriate Paper?
Check whether the paper in the machine is usable, and replace it with appropriate paper, as needed.
Usable Paper(P. 13)
Loading Paper(P. 87)
Step 2: Checking the Toner Cartridge
Check the Remaining Amount of Toner in the Toner Cartridge.
If the remaining amount of toner in the toner cartridge is low, replace the toner cartridge.
Checking the Remaining Amount of Consumables(P. 262)
Replacing the Toner Cartridge(P. 257)
* Depending on the usage condition of the machine, the actual r
emaining amount of toner may be lower than
indicated or the parts may be deteriorated.
Step 3: Checking the Usage Environment of the Machine
Ar
e You Using the Machine in a Humid Environment?
Setting [High Humidity Mode] to [On] may solve the problem.
[Home] screen on the operation panel [Menu] [Adjustment/Maintenance] [Adjust Image
Quality] [Special Processing] [High Humidity Mode] [On]
* Setting this to [On] may blur images and text in an environment with low humidity.
Ar
e You Using the Machine in an Environment with Sudden Temperature Changes?
Sudden temperature changes can create condensation, which can result in faded or blurry images and text.
Continuing to use the machine under these conditions may r
esult in paper jams, printing defects, faults, or
other problems. Allow the machine to adjust to the ambient temperature and humidity for at least 2 hours
before use.
Is the Machine Installed in a Location Subject to Strong Wind Such as from an Air
Conditioner?
If so, adjust the air direction and volume of the air conditioner.
If that does not work, setting [Switch Paper Feed Method] to [Print Side Priority] may impr
ove the problem.
[Home] on the operation panel [Menu] [Function Settings] [Common] [Paper
Feed Settings] [Switch Paper Feed Method] [Drawer 1] [Print Side Priority]
Troubleshooting
283

* When you select [Print Side Priority], the printing speed for 1-Sided printing will decrease.
Troubleshooting
284
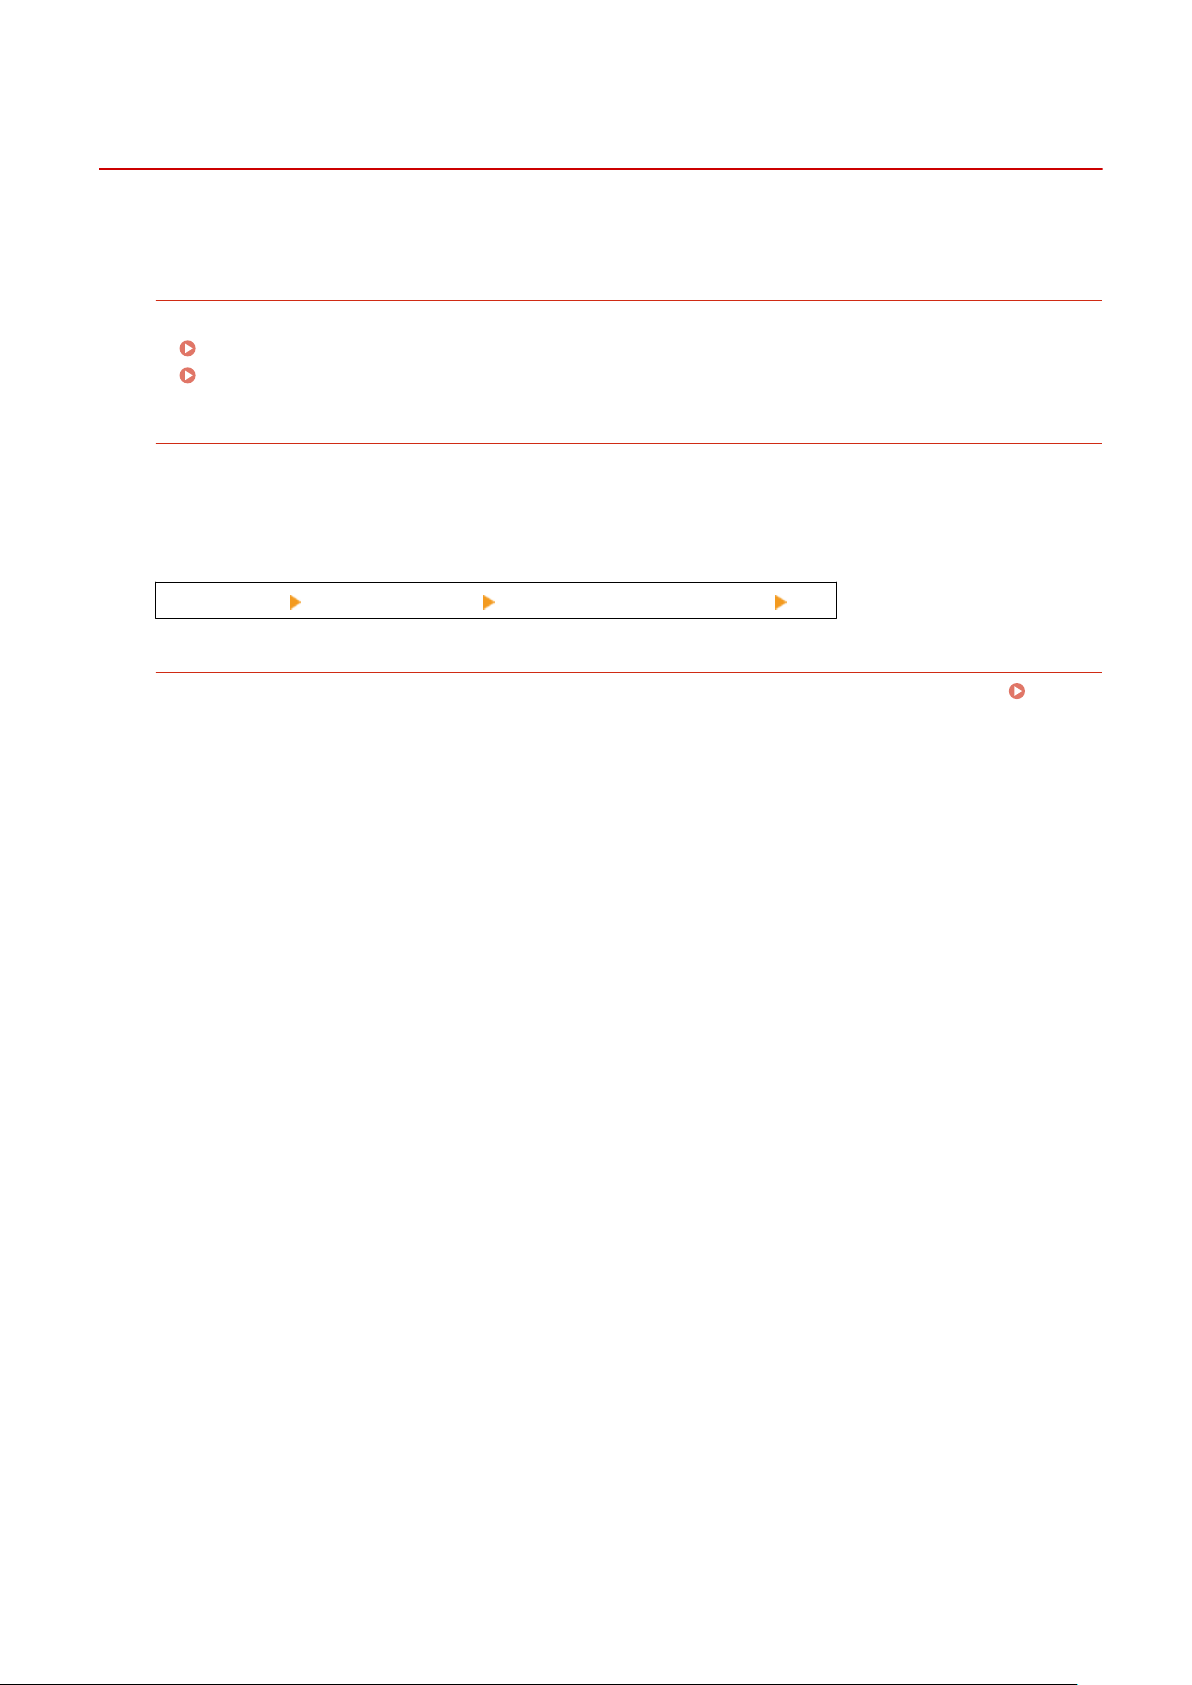
Smudge Marks Appear on the Edge of Printouts
94RC-08W
T
roubleshoot by checking in the following order:
Are You Using Appropriate Paper?
● Check whether the paper in the machine is usable, and r
eplace it with appropriate paper, as needed.
Usable Paper(P. 13)
Loading Paper(P. 87)
Ar
e You Printing to the Edge of the Paper Without Margins?
This symptom may occur when the margin is set to none in the printer driver. To print with this machine, a
mar
gin of 1/4" (5 mm) (5/8" (15 mm) at the top and bottom and 3/8" (10 mm) on the left and right sides) is
required.
On the [Printing preferences] screen of the printer driver, congure the following setting to provide a margin.
[Finishing] tab [Advanced Settings] [Expand Print Region and Print] [Off]
Have You Cleaned the Fixing Assembly?
These symptoms may occur when the xing assembly is dirty
. In this case, clean the xing assembly.
Cleaning the Fixing Assembly(P. 254)
Troubleshooting
285
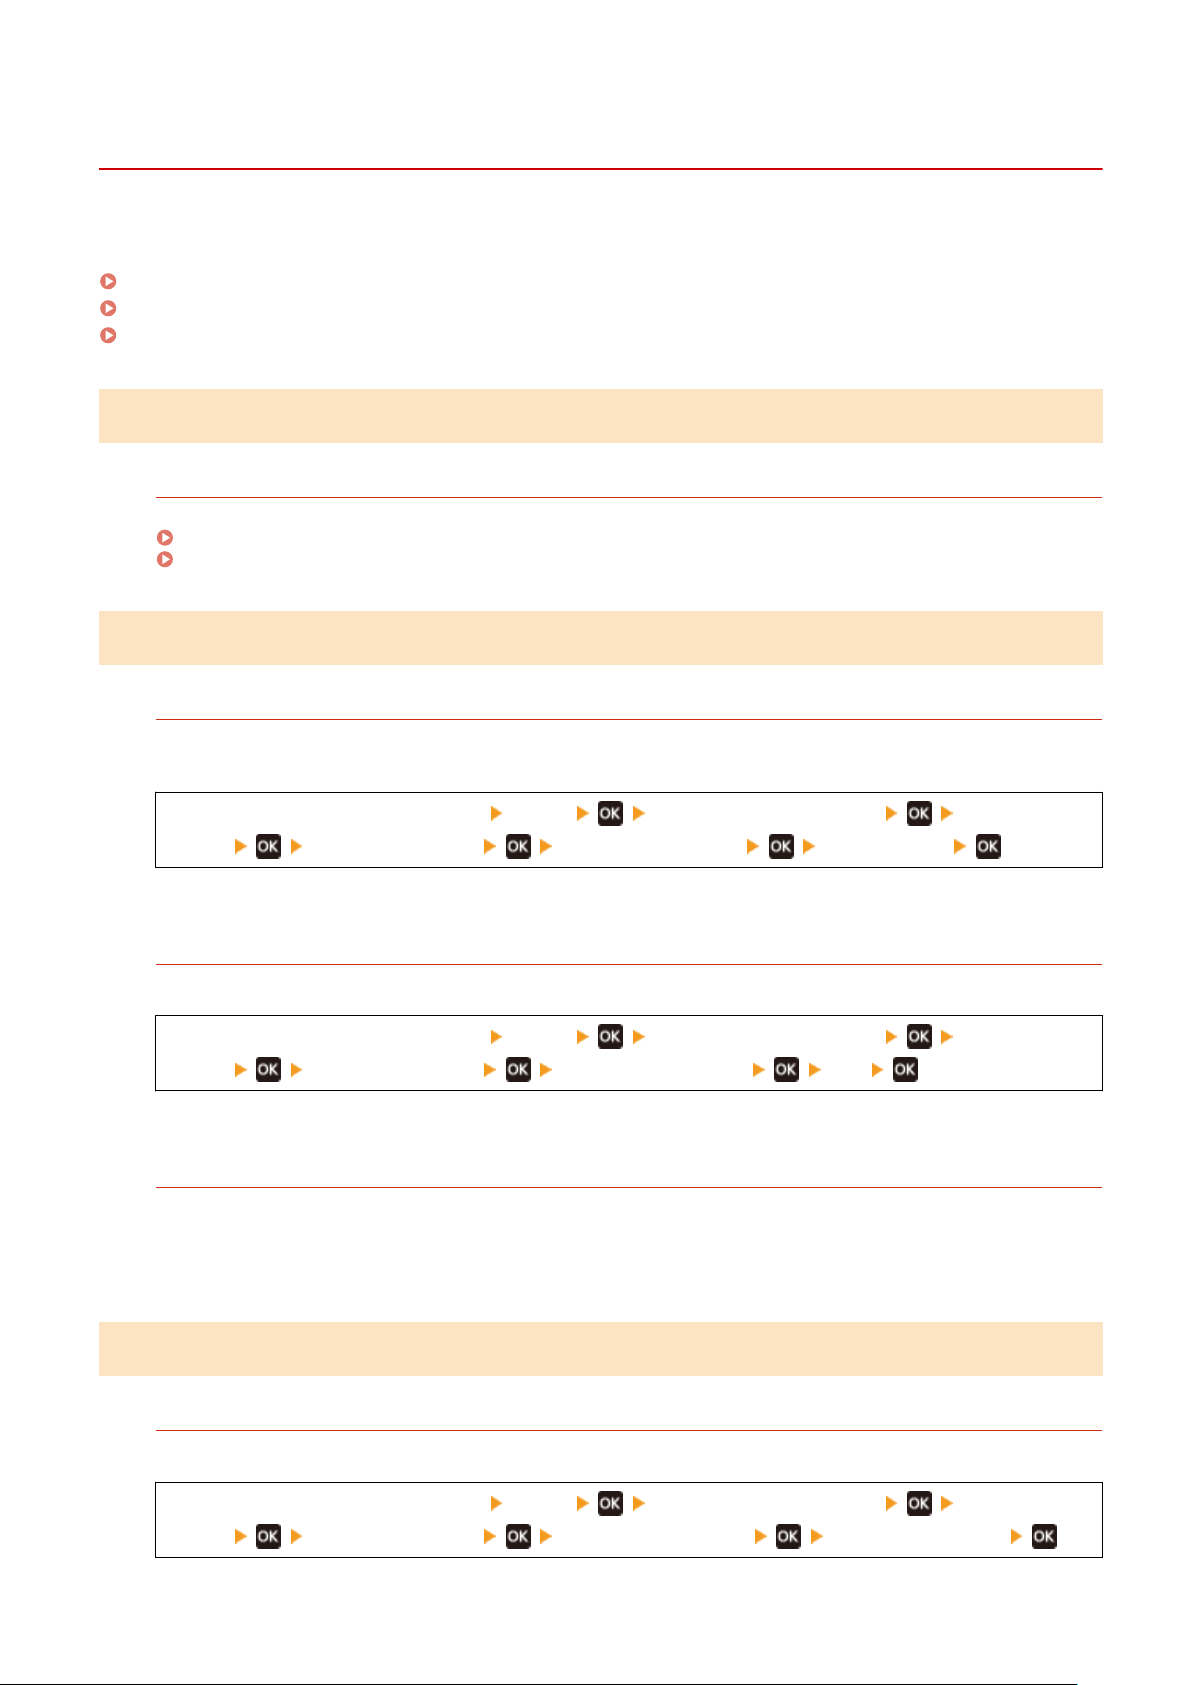
Text or Images Are Blurry
94RC-08X
T
roubleshoot by checking the following steps:
Step 1: Checking the Paper(P. 286)
Step 2: Checking the Usage Environment of the Machine(P. 286)
Step 3: Checking the Special Processing Settings(P. 286)
Step 1: Checking the Paper
Are You Using Appropriate Paper?
Check whether the paper in the machine is usable, and replace it with appropriate paper, as needed.
Usable Paper(P. 13)
Loading Paper(P. 87)
Step 2: Checking the Usage Environment of the Machine
Are You Using the Machine in an Environment with Low Humidity?
Setting [Low Humidity Mode] to [Mode 1] may solve the problem. If that does not work, try selecting [Mode 2]
and then [Mode 3] in sequence.
[Home] screen on the operation panel [Menu] [Adjustment/Maintenance] [Adjust Image
Quality] [Special Processing] [Low Humidity Mode] select the mode
* Enabling this setting may reduce the density or create fading in a humid environment.
Ar
e You Using the Machine in a Humid Environment?
Setting [High Humidity Mode] to [On] may solve the problem.
[Home] screen on the operation panel [Menu] [Adjustment/Maintenance] [Adjust Image
Quality] [Special Processing] [High Humidity Mode] [On]
* Setting this to [On] may blur images and text in an environment with low humidity.
Ar
e You Using the Machine in an Environment with Sudden Temperature Changes?
Sudden temperature changes can create condensation, which can result in faded or blurry images and text.
Continuing to use the machine under these conditions may r
esult in paper jams, printing defects, faults, or
other problems. Allow the machine to adjust to the ambient temperature and humidity for at least 2 hours
before use.
Step 3: Checking the Special Processing Settings
Is [Corr
ect Blurry Image] enabled?
Setting [Correct Blurry Image] to [Mode 1] may improve the print results. If that does not work, select [Mode 2].
[Home] screen on the operation panel [Menu] [Adjustment/Maintenance] [Adjust Image
Quality] [Special Processing] [Correct Blurry Image] [Mode 1] or [Mode 2]
Troubleshooting
286
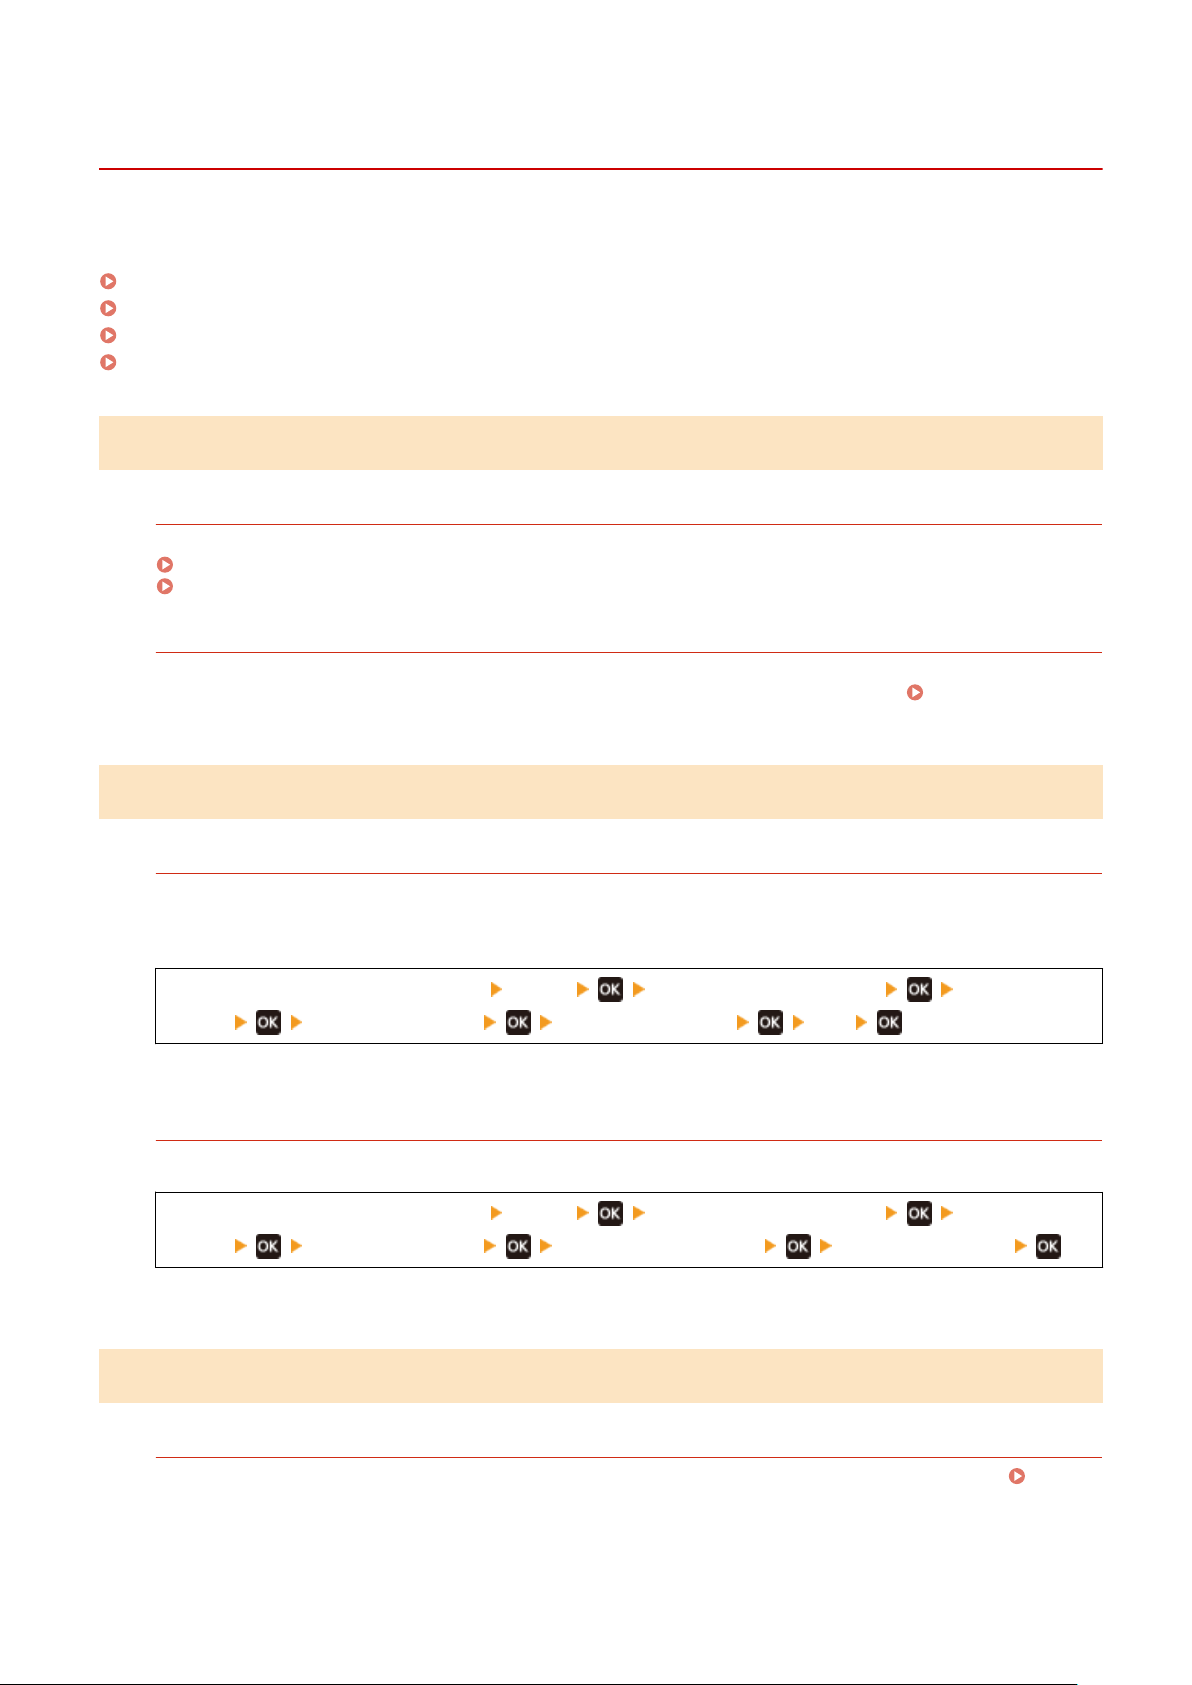
Printouts Have Ghost Images
94RC-08Y
T
roubleshoot by checking the following steps:
Step 1: Checking the Paper and Toner Cartridge(P. 287)
Step 2: Checking the Occurrence of Ghost Images(P. 287)
Step 3: Checking the Maintenance Status of the Machine(P. 287)
Step 4: Checking the Special Processing Setting(P. 288)
Step 1: Checking the Paper and Toner Cartridge
Are You Using Appropriate Paper?
Check whether the paper in the machine is usable, and replace it with appropriate paper, as needed.
Usable Paper(P. 13)
Loading Paper(P. 87)
Have the T
oner Cartridge Reached the End of Their Lifetime?
Parts inside the toner cartridge may have deteriorated. If this symptom occurs, it is recommended to replace
the toner cartridge r
egardless of the remaining amount of toner or messages displayed.
Replacing the
T
oner Cartridge(P. 257)
Step 2: Checking the Occurrence of Ghost Images
Do Ghost Images Appear in Unprinted Sections?
If you print on small-sized paper and then continue printing on a larger sized paper, ghost images may appear
in the unprinted sections of the paper. In this e
vent, setting [Reduce Ghosting 1] to [On] may improve the print
results.
[Home] screen on the operation panel [Menu] [Adjustment/Maintenance] [Adjust Image
Quality] [Special Processing] [Reduce Ghosting 1] [On]
* When you select [On], the printing speed may decrease.
Do Ghost Images Appear Within the Same Page?
Setting [Transfer Adjust. Mode] to [Mode 1] may solve the problem. If that does not work, select [Mode 2].
[Home] screen on the operation panel [Menu] [Adjustment/Maintenance] [Adjust Image
Quality] [Special Processing] [Transfer Adjust. Mode] [Mode 1] or [Mode 2]
* When this setting is enabled, the print density may vary in an environment with low- humidity.
Step 3: Checking the Maintenance Status of the Machine
Have You Cleaned the Fixing Assembly?
These symptoms may occur when the xing assembly is dirty
. In this case, clean the xing assembly.
Cleaning the Fixing Assembly(P. 254)
Troubleshooting
287

Step 4: Checking the Special Processing Setting
Is [Reduce Toner Flaking] Enabled?
If so, setting [Reduce Toner Flaking] to [Off] may improve the problem.
[Home] screen on the operation panel [Menu] [Adjustment/Maintenance] [Adjust Image
Quality] [Special Processing] [Reduce Toner Flaking] [Off]
Troubleshooting
288
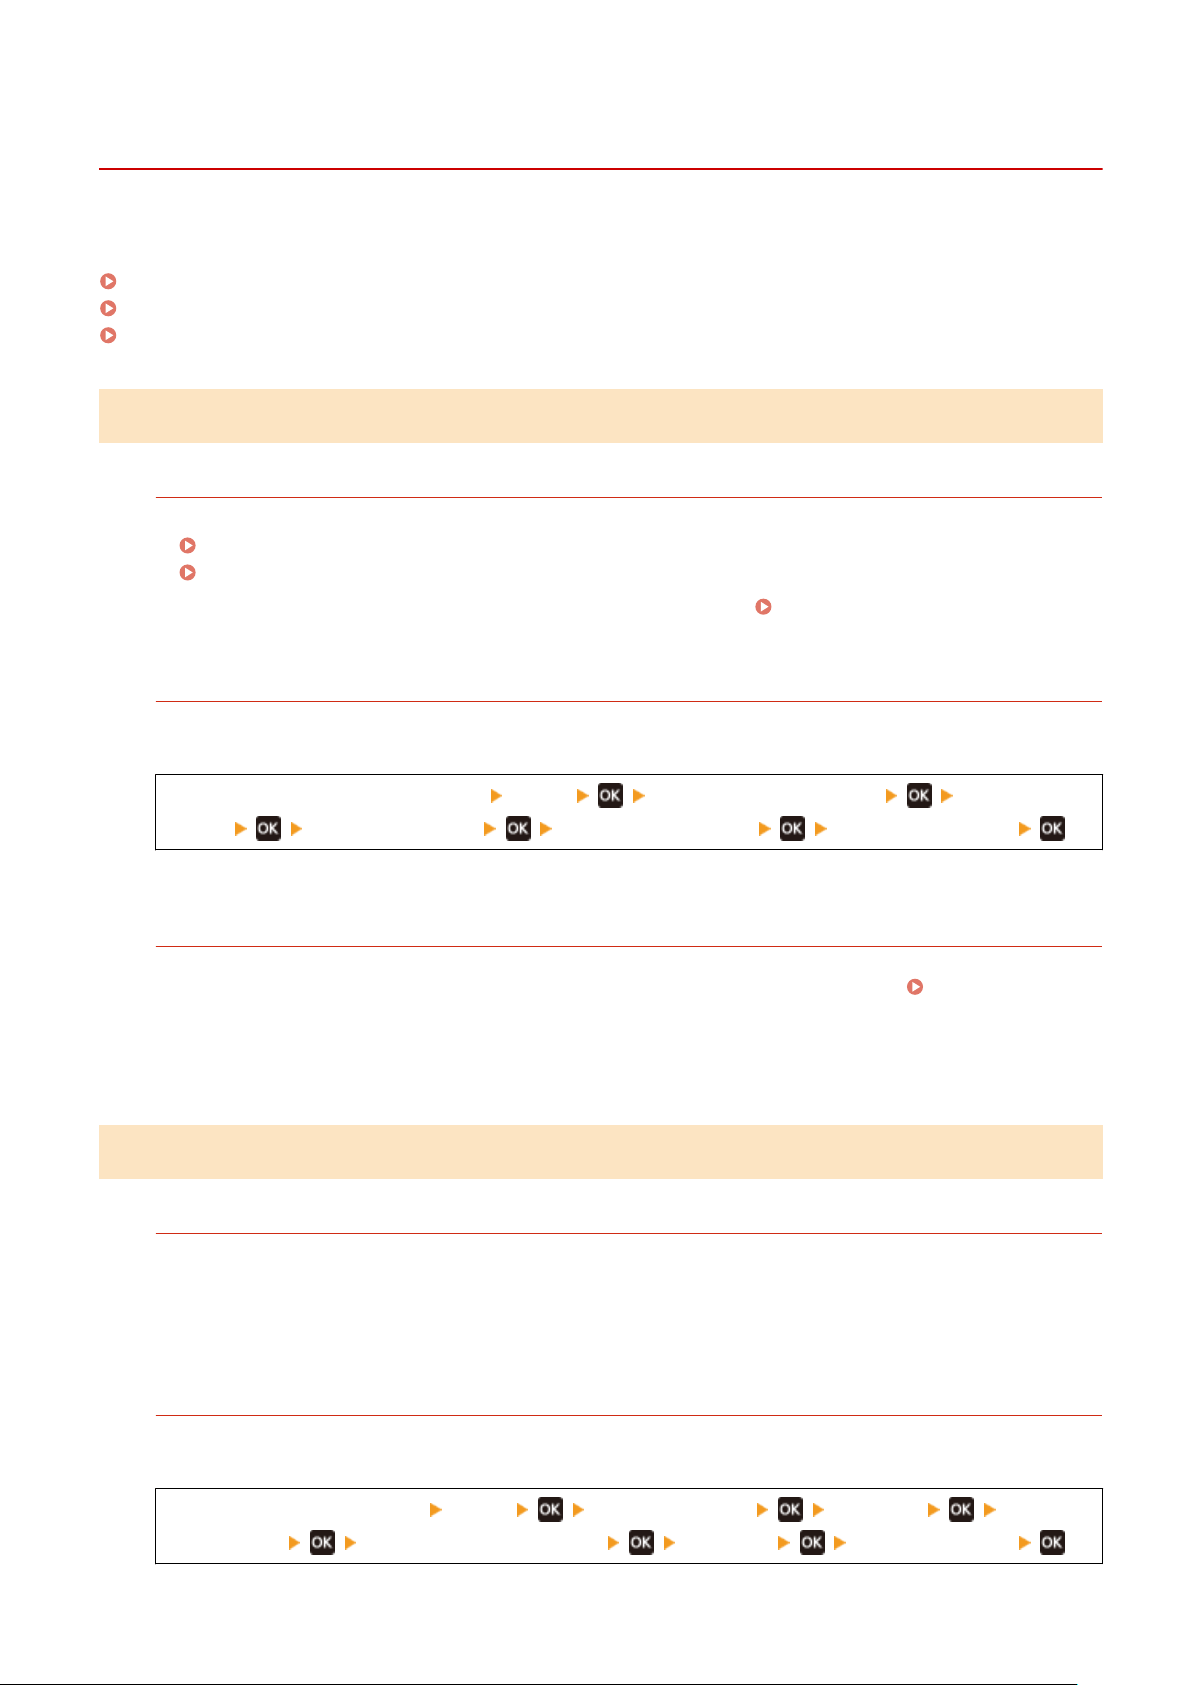
Printouts Are Faded
94RC-090
T
roubleshoot by checking the following steps:
Step 1: Checking the Paper and Toner Cartridge(P. 289)
Step 2: Checking the Usage Environment of the Machine(P. 289)
Step 3: Checking the Special Processing Setting(P. 290)
Step 1: Checking the Paper and Toner Cartridge
Are You Using Appropriate Paper?
● Check whether the paper in the machine is usable, and r
eplace it with appropriate paper, as needed.
Usable Paper(P. 13)
Loading Paper(P. 87)
● Set the paper size and type corr
ectly according to the loaded paper.
Specifying the Paper Size and
T
ype(P. 94)
Does the Printed Toner Flake Off Depending on Paper Type or Usage Environment?
If so, setting [Reduce Toner Flaking] to [Mode 1] may improve the problem. If that does not work, select [Mode
2].
[Home] screen on the operation panel [Menu] [Adjustment/Maintenance] [Adjust Image
Quality] [Special Processing] [Reduce Toner Flaking] [Mode 1] or [Mode 2]
* When this setting is enabled, ghost images may appear in unprinted areas.
Have the T
oner Cartridge Reached the End of Their Lifetime?
Parts inside the toner cartridge may have deteriorated. If this symptom occurs, it is recommended to replace
the toner cartridge r
egardless of the remaining amount of toner or messages displayed.
Replacing the
T
oner Cartridge(P. 257)
* Depending on the usage condition of the machine, the actual remaining amount of toner may be lower than
indicated or the parts may be deteriorated.
Step 2: Checking the Usage Environment of the Machine
Are You Using the Machine in an Environment with Sudden Temperature Changes?
Sudden temperature changes can create condensation, which can result in faded or blurry images and text.
Continuing to use the machine under these conditions may r
esult in paper jams, printing defects, faults, or
other problems. Allow the machine to adjust to the ambient temperature and humidity for at least 2 hours
before use.
Is the Machine Installed in a Location Subject to Strong Wind Such as from an Air
Conditioner?
If so, adjust the air direction and volume of the air conditioner.
If that does not work, setting [Switch Paper Feed Method] to [Print Side Priority] may impr
ove the problem.
[Home] on the operation panel [Menu] [Function Settings] [Common] [Paper
Feed Settings] [Switch Paper Feed Method] [Drawer 1] [Print Side Priority]
Troubleshooting
289
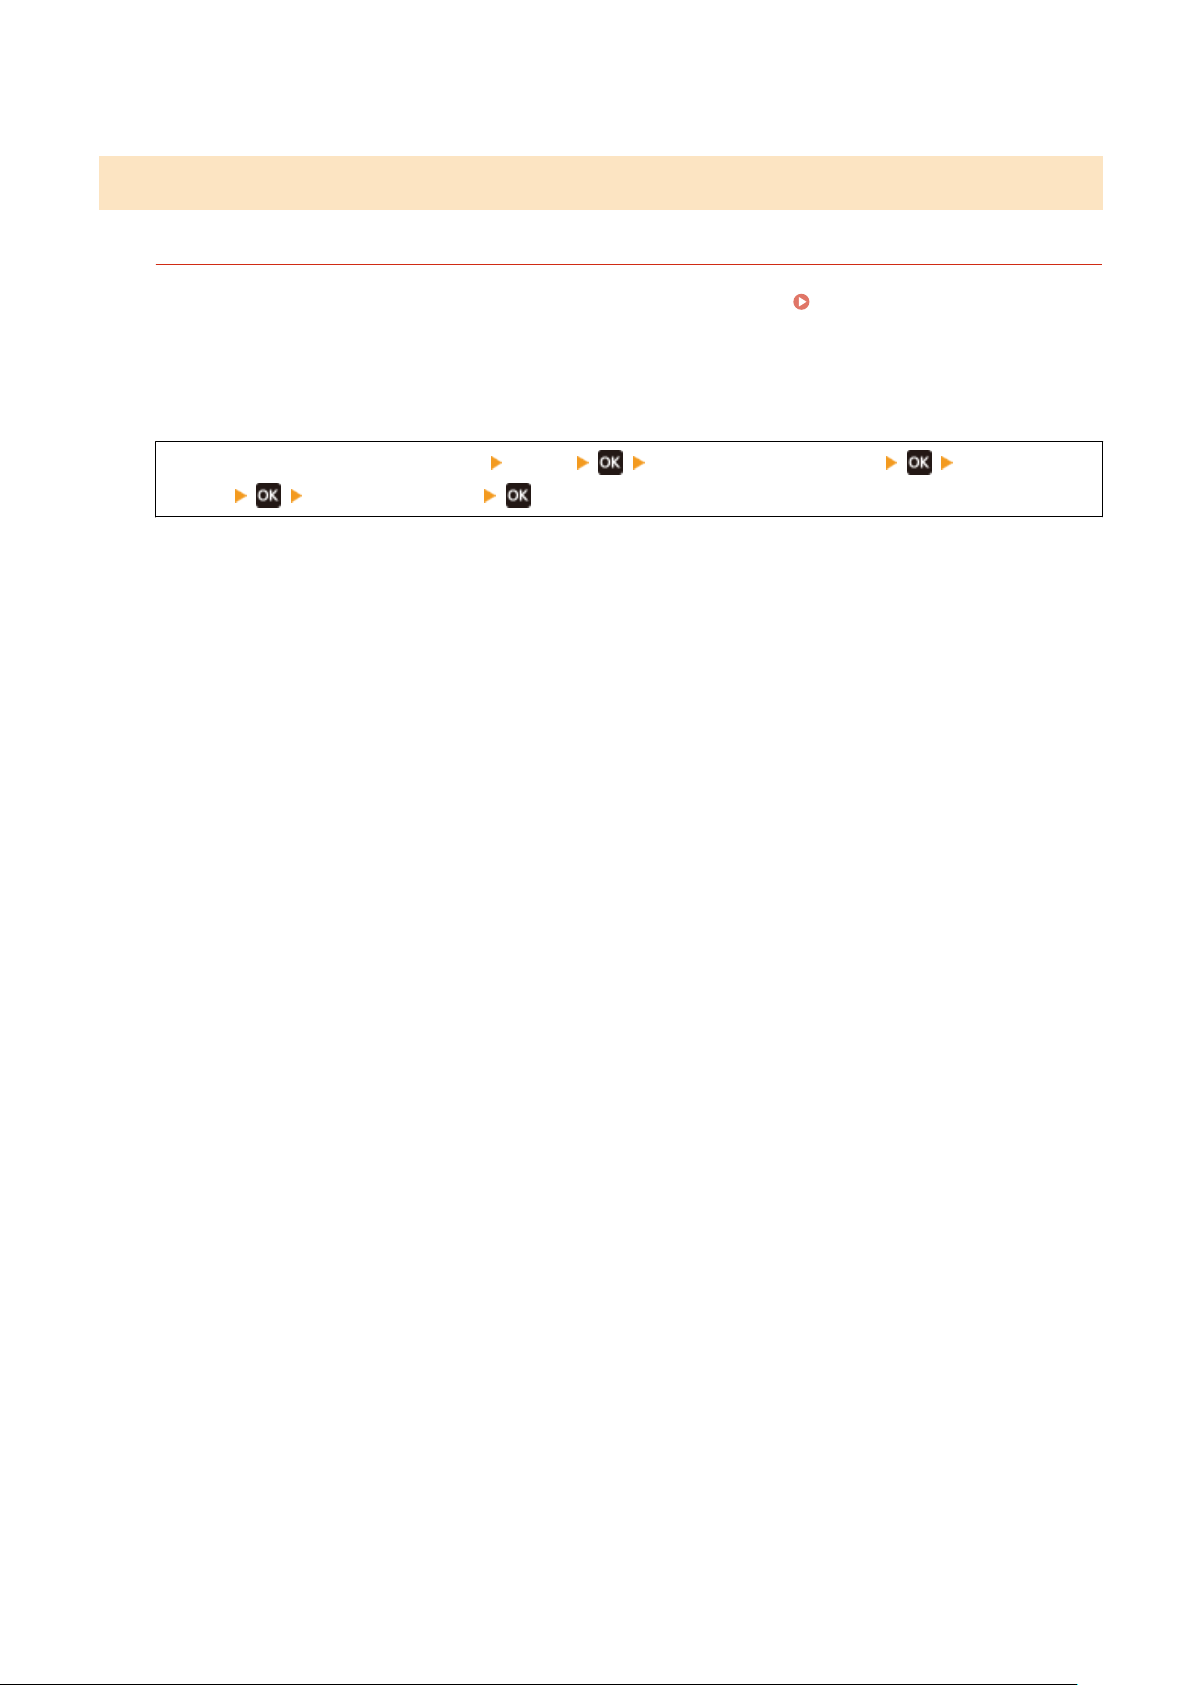
* When you select [Print Side Priority], the printing speed for 1-Sided printing will decrease.
Step 3: Checking the Special Processing Setting
Is [Special Processing] Enabled?
If so, setting [Special Processing] below to [Off] may improve the problem. [Special Processing](P. 221)
● [Reduce Ppr. Sticking at Output]
● [Envelope Flap Closing Pr
evention]
● [Paper Curl Correction]
[Home] screen on the operation panel [Menu] [Adjustment/Maintenance] [Adjust Image
Quality] [Special Processing]
Troubleshooting
290

The Edge of the Page Is Not Printed
94RC-091
T
roubleshoot by checking in the following order:
Are You Using Appropriate Paper?
Check whether the paper in the machine is usable, and replace it with appropriate paper, as needed.
Usable Paper(P. 13)
Loading Paper(P. 87)
Ar
e the Paper Guides Correctly Aligned with the Paper?
Paper guides that are aligned but too loose or too tight can cause part of the page to not be printed. Check the
paper guides, and align them with the width of the paper. Loading Paper(P. 87)
Ar
e You Printing to the Edge of the Paper Without Margins?
This symptom may occur when the margin is set to none in the printer driver. To print with this machine, a
mar
gin of 1/4" (5 mm) (5/8" (15 mm) at the top and bottom and 3/8" (10 mm) on the left and right sides) is
required.
On the [Printing preferences] screen of the printer driver, congure the following setting to provide a margin.
[Finishing] tab [Advanced Settings] [Expand Print Region and Print] [Off]
Troubleshooting
291
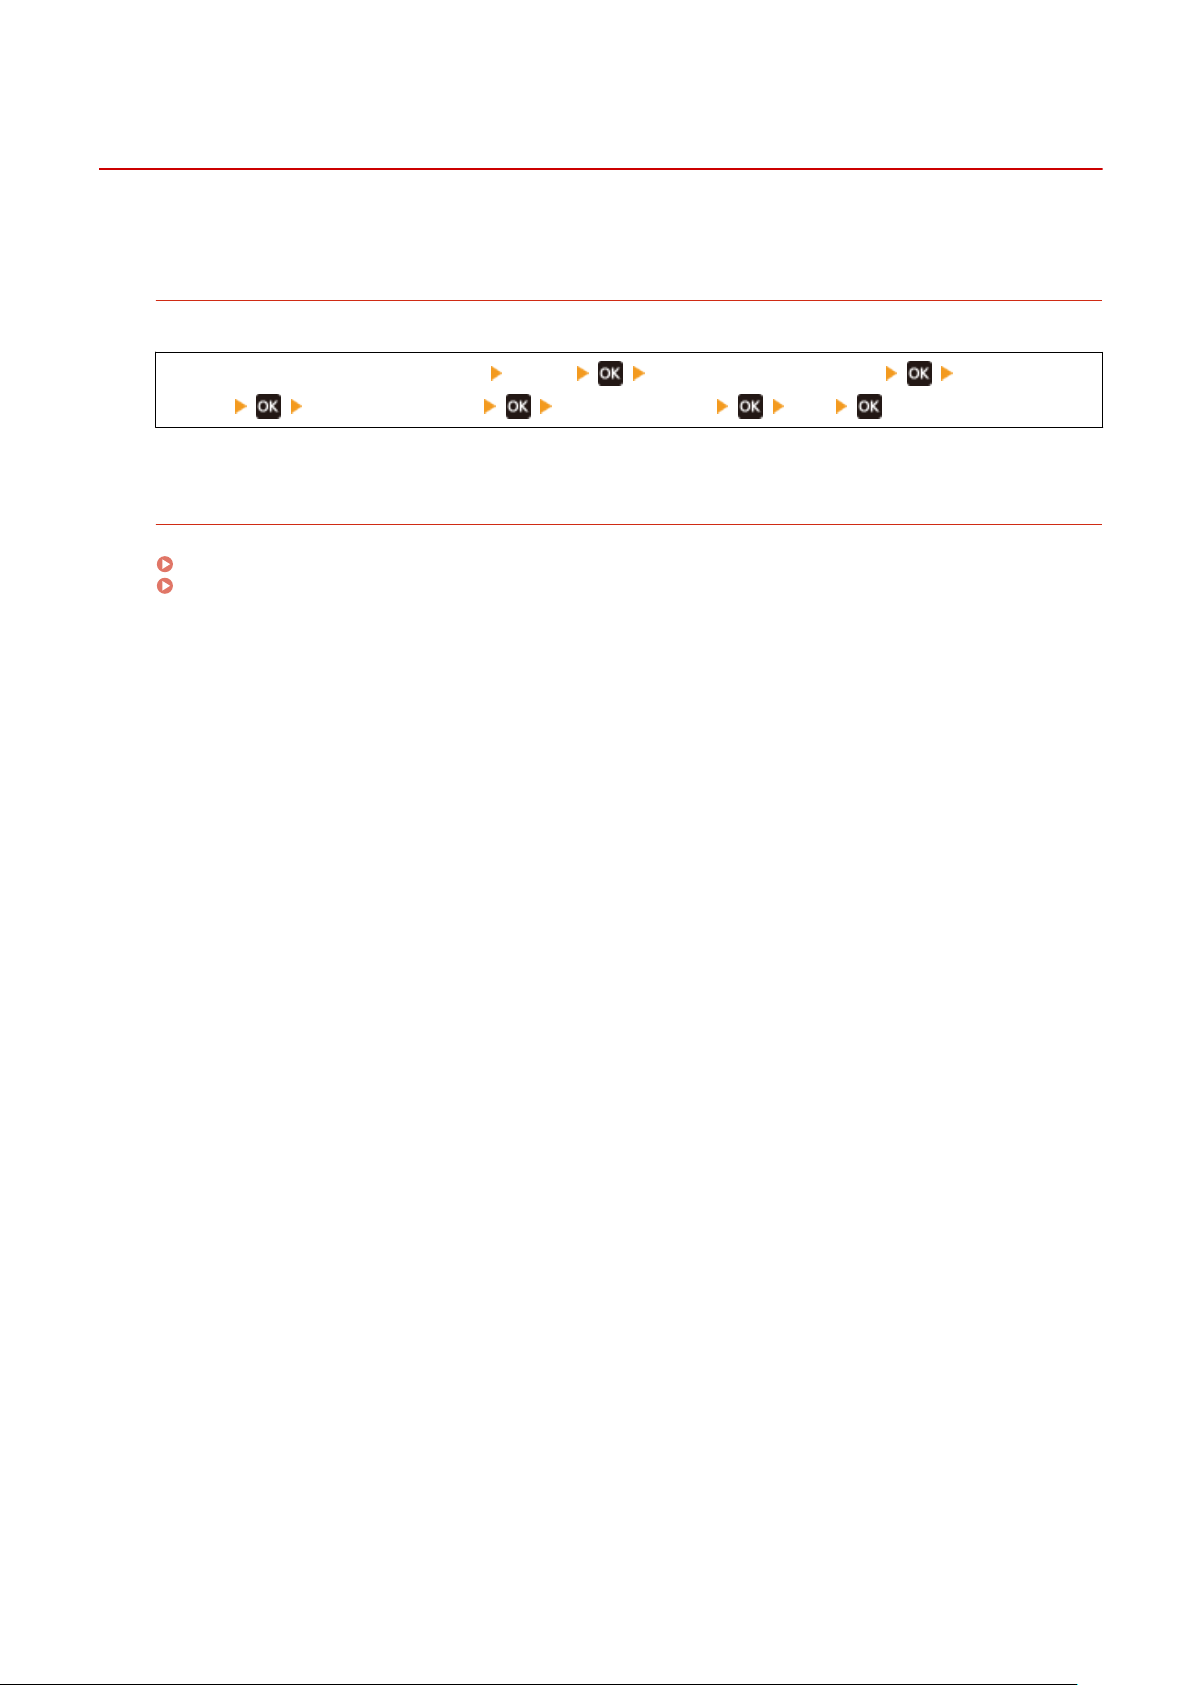
The Background Is Generally Dark
94RC-092
T
roubleshoot by checking in the following order:
Are White Areas Lightly Colored?
Setting [Prevent Fogging] to [On] may solve the problem.
[Home] screen on the operation panel [Menu] [Adjustment/Maintenance] [Adjust Image
Quality] [Special Processing] [Prevent Fogging] [On]
* When you select [On], the print density may decrease.
Check the Remaining Amount of T
oner in the Toner Cartridge.
If the remaining amount of toner in the toner cartridge is low, replace the toner cartridge.
Checking the Remaining Amount of Consumables(P. 262)
Replacing the Toner Cartridge(P. 257)
* Depending on the usage condition of the machine, the actual r
emaining amount of toner may be lower than
indicated or the parts may be deteriorated.
Troubleshooting
292
White Spots Appear
94RC-093
T
roubleshoot by checking the following steps:
Step 1: Checking the Paper(P. 293)
Step 2: Checking the Toner Cartridge(P. 293)
Step 3: Checking the Occurrence of White Spots(P. 293)
Step 4: Checking the Usage Environment of the Machine(P. 294)
Step 5: Checking the Maintenance Status(P. 294)
Step 1: Checking the Paper
Are You Using Appropriate Paper?
Check whether the paper in the machine is usable, and replace it with appropriate paper, as needed.
Usable Paper(P. 13)
Loading Paper(P. 87)
Ar
e You Using Paper That Has Absorbed Moisture?
Check the precautions, and replace the paper with dry paper.
Precautions When Handling Paper(P. 16)
Loading Paper(P. 87)
Step 2: Checking the Toner Cartridge
Check the Remaining Amount of Toner in the Toner Cartridge.
If the remaining amount of toner in the toner cartridge is low, replace the toner cartridge.
Checking the Remaining Amount of Consumables(P. 262)
Replacing the Toner Cartridge(P. 257)
* Depending on the usage condition of the machine, the actual r
emaining amount of toner may be lower than
indicated or the parts may be deteriorated.
Step 3: Checking the Occurrence of White Spots
Are Dark Characters and Lines Printed Hollowed Out?
Setting [Transfer Adjust. Mode] to [Mode 1] may solve the problem. If that does not work, select [Mode 2].
[Home] screen on the operation panel [Menu] [Adjustment/Maintenance] [Adjust Image
Quality] [Special Processing] [Transfer Adjustment Mode] [Mode 1] or [Mode
2]
* When this setting is enabled, the print density may vary in an environment with low- humidity.
Troubleshooting
293
Step 4: Checking the Usage Environment of the Machine
Does the Printed Toner Flake Off Depending on Paper Type or Usage Environment?
If so, setting [Reduce Toner Flaking] to [Mode 1] may improve the problem. If that does not work, select [Mode
2].
[Home] screen on the operation panel [Menu] [Adjustment/Maintenance] [Adjust Image
Quality] [Special Processing] [Reduce Toner Flaking] [Mode 1] or [Mode 2]
* When this setting is enabled, ghost images may appear in unprinted areas.
Ar
e You Using Very Dusty Paper?
Setting [Talc Paper Mode] to [On] may solve the problem.
[Home] screen on the operation panel [Menu] [Adjustment/Maintenance] [Adjust Image
Quality] [Special Processing] [Talc Paper Mode] [On]
* Specifying [On] in this setting may lead to changes in the image quality.
Ar
e You Using the Machine in an Environment with Sudden Temperature Changes?
Sudden temperature changes can create condensation, which can result in faded or blurry images and text.
Continuing to use the machine under these conditions may r
esult in paper jams, printing defects, faults, or
other problems. Allow the machine to adjust to the ambient temperature and humidity for at least 2 hours
before use.
Step 5: Checking the Maintenance Status
Have You Cleaned the Drum?
These symptoms may occur when the drum is dirty. In this case, clean the drum. Cleaning the Drum(P. 255)
Troubleshooting
294

Smudge Marks Appear on the Back Side of Printouts
94RC-094
T
roubleshoot by checking in the following order:
Are You Using Paper That Is Smaller Than the Size of the Print Data?
Replace with paper that is the same size as the print data. Loading Paper(P. 87)
Have Y
ou Cleaned the Fixing Assembly?
These symptoms may occur when the xing assembly is dirty
. In this case, clean the xing assembly.
Cleaning the Fixing Assembly(P. 254)
Troubleshooting
295

The Printed Barcode Cannot be Scanned
94RC-0C8
T
roubleshoot by checking in the following order:
Are You Using a Very Small Barcode or One With Thick Lines?
● Enlar
ge the barcode.
● If the barcode lines are perpendicular to the output feed direction, rotate the image 90° so that the lines are
parallel.
Try using Barcode Adjustment Mode
Setting [Barcode Adjustment Mode] to [Mode 1] in the printer driver may solve the problem. If that does not
work, try selecting [Mode 2] and then [Mode 3] in sequence.
● Specify the settings belo
w in the [Printing preferences] screen of the printer driver.
[Finishing] tab [Advanced Settings] [Barcode Adjustment Mode] select the mode
* When this setting is enabled, the print density may decrease.
● If setting [Bar
code Adjustment Mode] to [Mode 3] does not work, changing the [Printer Density] may solve
the problem.
[Printer Density](P. 220)
Troubleshooting
297

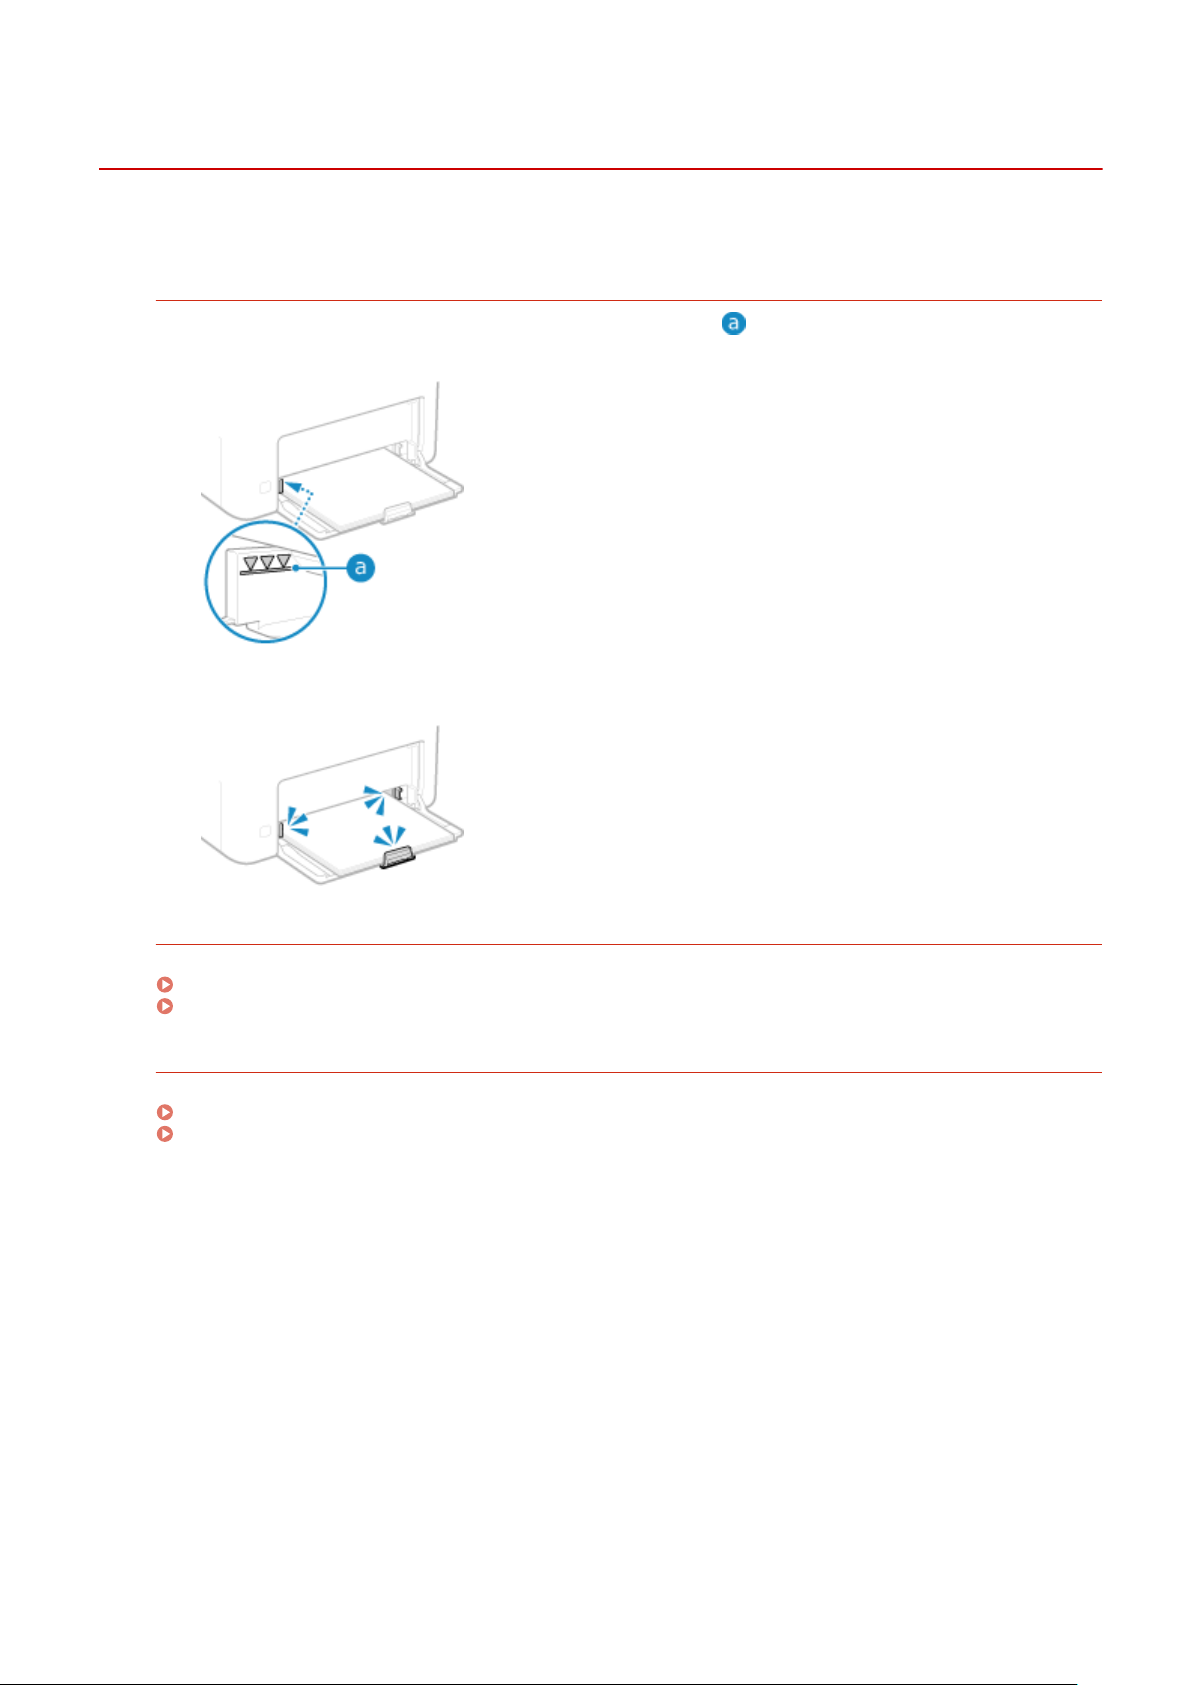
Paper Creases
94RC-097
T
roubleshoot by checking the items below.
Is Paper Loaded Correctly?
● Mak
e sure the loaded paper does not exceed the load limit line (
).
● Check that the paper guides ar
e aligned with the markings and are not too loose or too tight.
Are You Using Paper That Has Absorbed Moisture?
Check the precautions, and replace the paper with dry paper.
Precautions When Handling Paper(P. 16)
Loading Paper(P. 87)
Ar
e You Using Appropriate Paper?
Check whether the paper in the machine is usable, and replace it with appropriate paper, as needed.
Usable Paper(P. 13)
Loading Paper(P. 87)
Troubleshooting
299
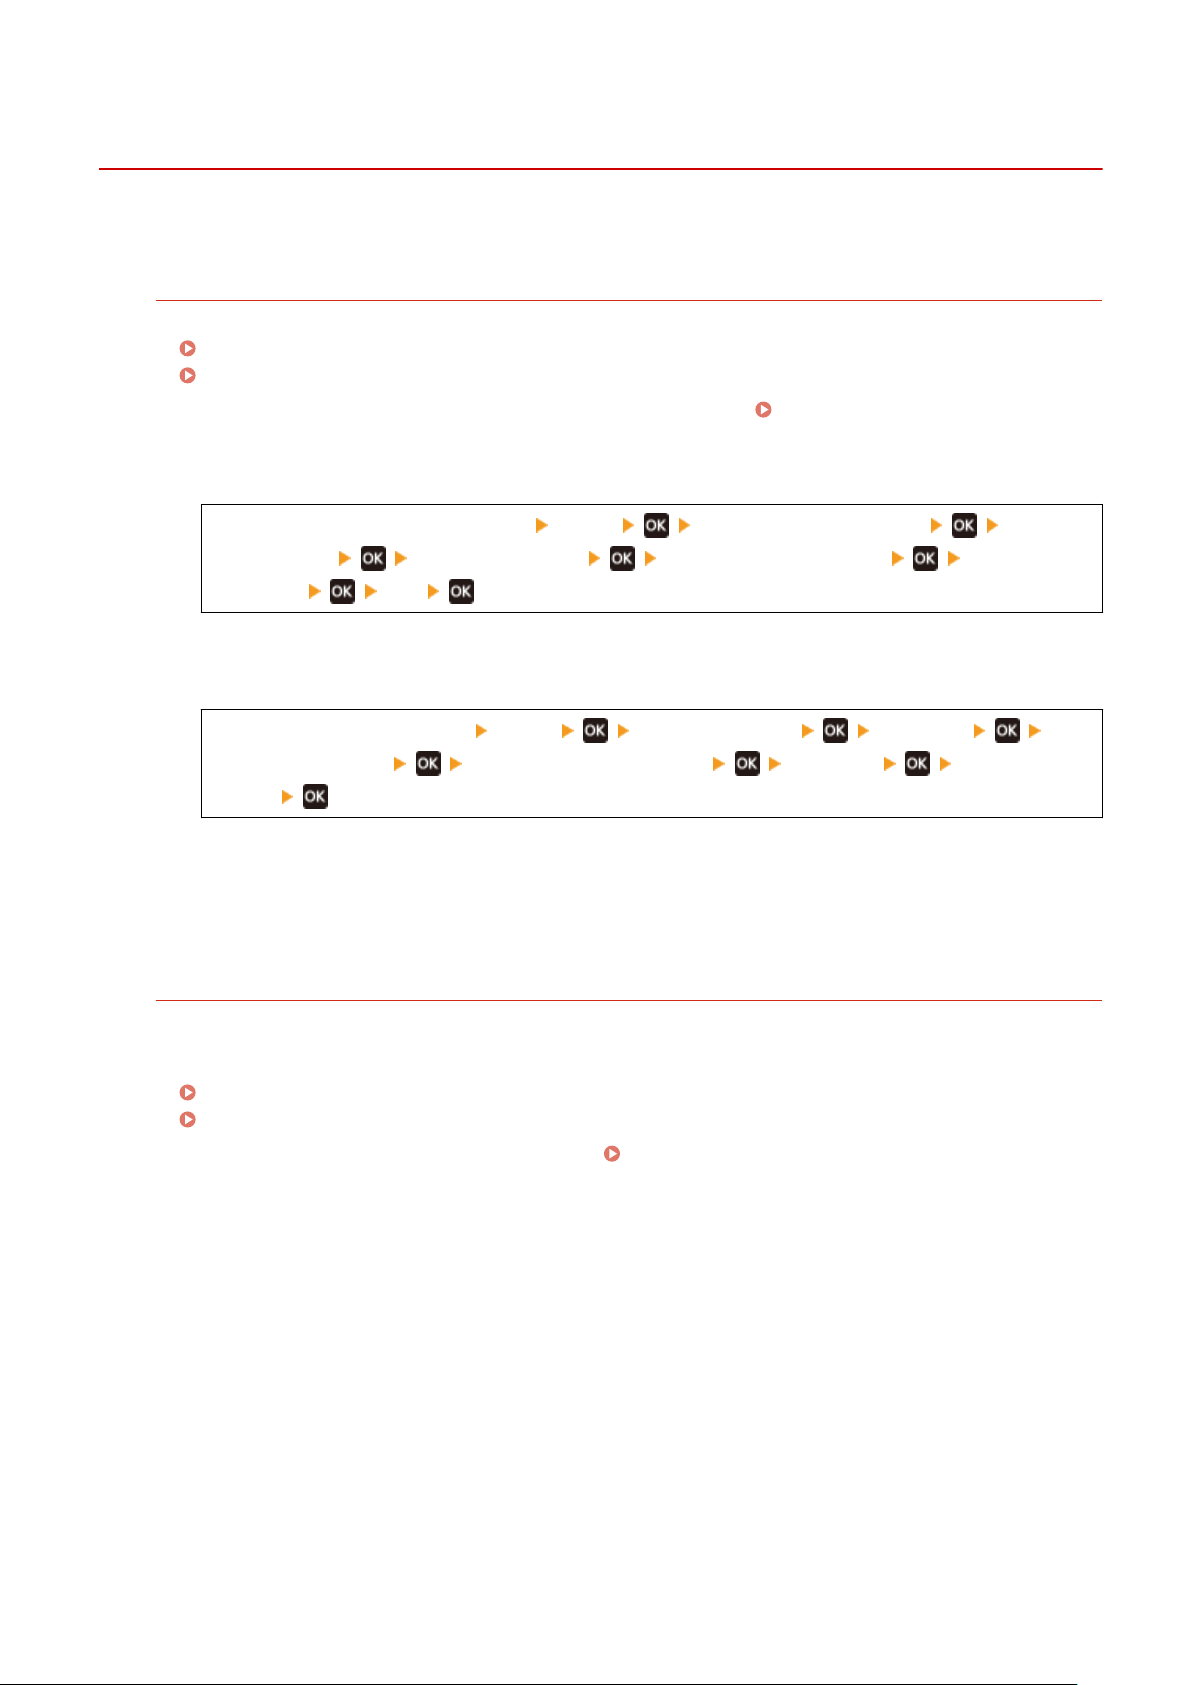
Paper Curls
94RC-098
T
roubleshoot by checking the items below.
Are You Using Appropriate Paper?
● Check whether the paper in the machine is usable, and r
eplace it with appropriate paper, as needed.
Usable Paper(P. 13)
Loading Paper(P. 87)
● Set the paper size and type corr
ectly according to the loaded paper.
Specifying the Paper Size and
T
ype(P. 94)
● Setting [Paper Curl Correction] to [On] may improve the problem.
[Home] screen on the operation panel [Menu] [Adjustment/Maintenance] [Adjust
Image Quality] [Special Processing] [Special Paper Processing] [Paper Curl
Corr
ection]
[On]
* When you select [On], this may result in faded printouts.
● Setting [Switch Paper Feed Method] to [Print Side Priority] may impr
ove the problem.
[Home] on the operation panel [Menu] [Function Settings] [Common]
[Paper Feed Settings] [Switch Paper Feed Method] [Drawer 1] [Print Side
Priority]
* When you select [Print Side Priority], the printing speed for 1-Sided printing will decrease.
● Load the paper with the side to be printed (paper fr
ont and back) reversed.
* In rare cases, the symptom may worsen depending on the paper used. In this case, print on the original
side of the paper.
Are You Using Paper That Has Absorbed Moisture?
Try the following in the order below:
● Check the pr
ecautions, and replace the paper with dry paper.
Precautions When Handling Paper(P. 16)
Loading Paper(P. 87)
● Change the paper type setting to a thinner paper. Specifying the Paper Size and Type(P. 94)
Troubleshooting
300

Paper Is Not Fed or Two or More Sheets Are Fed
T
ogether
94RC-099
T
roubleshoot by checking the items below.
Are You Using Appropriate Paper?
Check whether the paper in the machine is usable, and replace it with appropriate paper, as needed.
Usable Paper(P. 13)
Loading Paper(P. 87)
Is Paper Loaded Corr
ectly?
● Fan the paper thor
oughly in small batches so that it is not stuck together.
● Align the edges by tapping the paper on a at surface a few times before loading the paper.
Loading
Paper(P
. 87)
● Do not load paper of different sizes or types together.
Troubleshooting
301
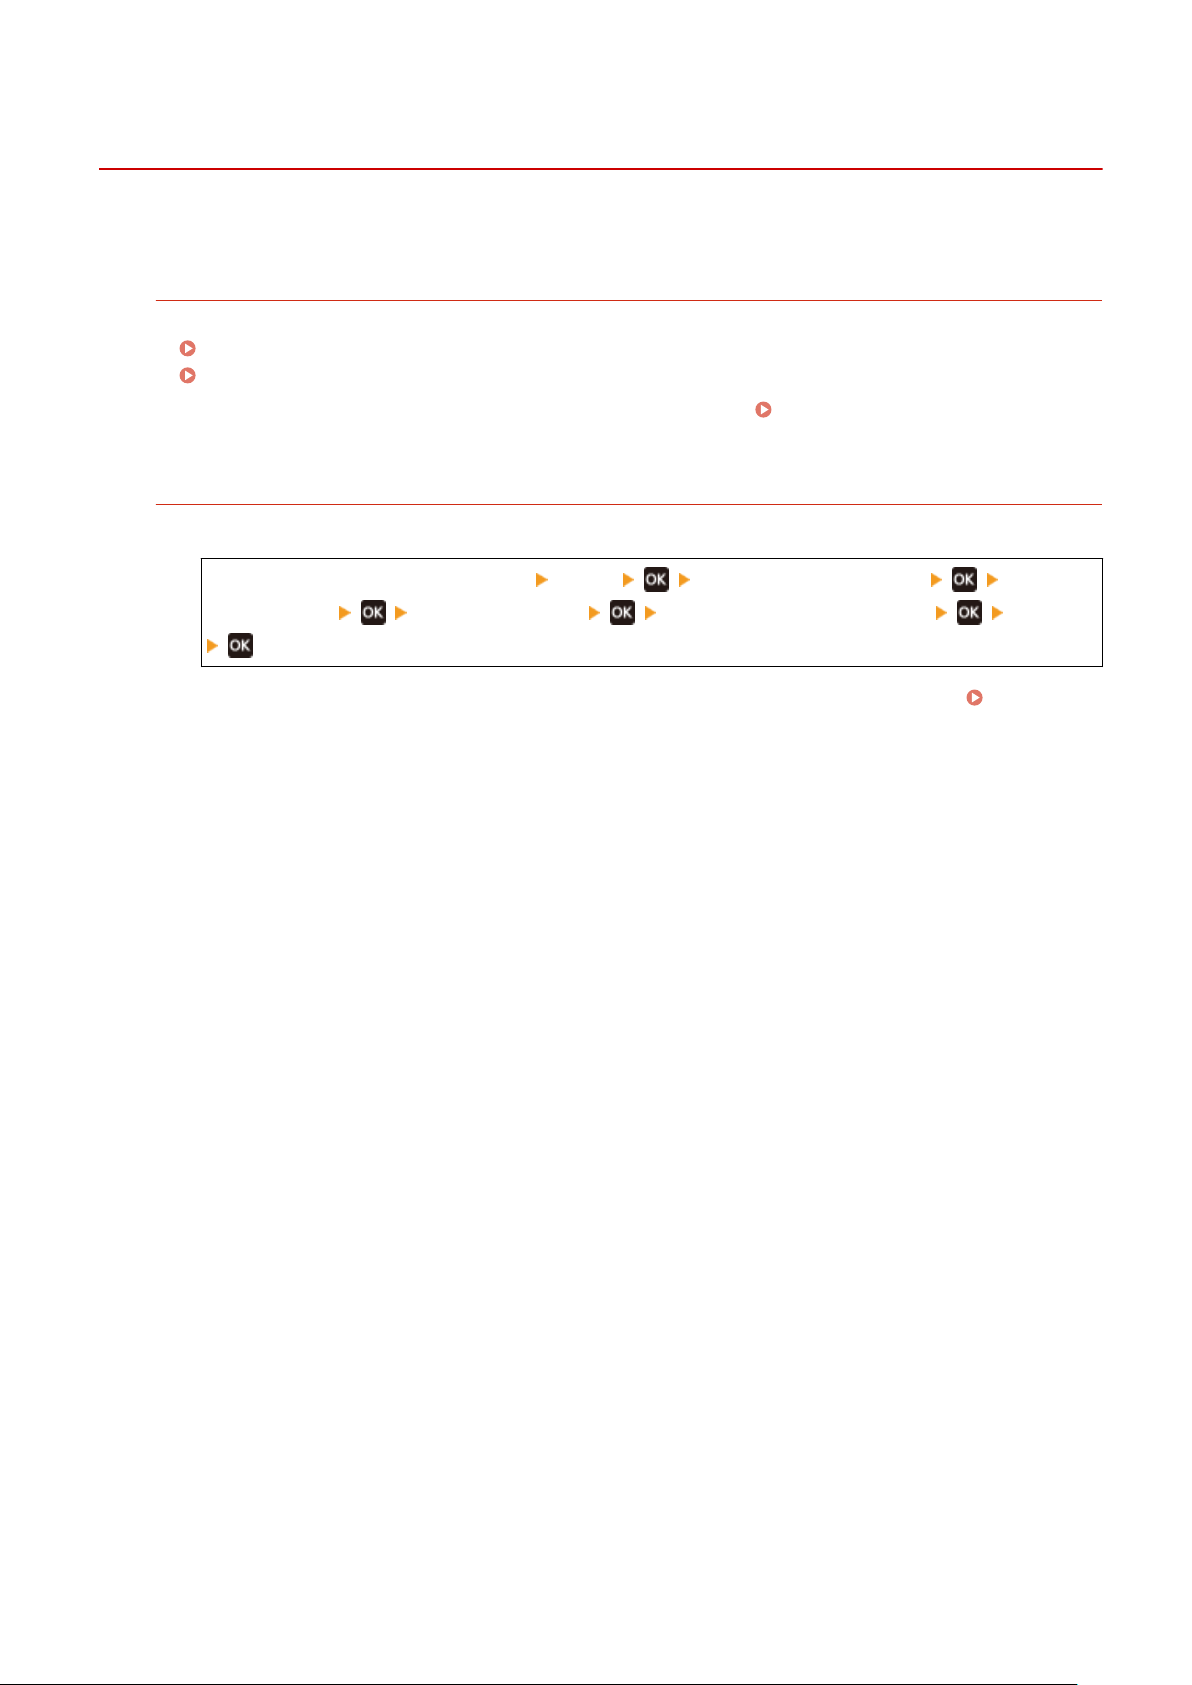
Printed Paper Sticks Together
94RC-0C9
T
roubleshoot by checking the items below.
Are You Using Appropriate Paper?
● Check whether the paper in the machine is usable, and r
eplace it with appropriate paper, as needed.
Usable Paper(P. 13)
Loading Paper(P. 87)
● Set the paper size and type corr
ectly according to the loaded paper.
Specifying the Paper Size and
T
ype(P. 94)
Try using [Reduce Ppr. Sticking at Output].
● Setting [Reduce Ppr. Sticking at Output] to [On] may impr
ove the problem.
[Home] screen on the operation panel [Menu] [Adjustment/Maintenance] [Adjust
Image Quality] [Special Processing] [Reduce Ppr. Sticking at Output] [On]
* If selecting [On] does not solve the problem, set [Output Adjustment Mode] to [On] also. [Output
Adjustment Mode](P
. 233)
* This setting is also effective for 1-sided printing.
Troubleshooting
302

Setting Up
94RC-09C
This is a list of pr
oblems that can occur during setup of the machine. Check how to troubleshoot the problem based on
the symptom.
◼ Problems During Driver Installation
The Machine Connected via WSD Port Is Not Displayed During Driver Installation(P. 304)
◼ Pr
oblems with Wireless LAN and Wired LAN Connection
Cannot Connect to Wireless LAN
Check whether the machine can connect to the network.
Cannot Connect to Wireless LAN(P. 305)
Cannot Connect to Wir
ed LAN
The IP address setting may have failed. Set the IP address again.
Setting IPv4 Addresses(P. 50)
Setting IPv6 Addresses(P. 52)
Cannot Connect to Wir
eless LAN and Wired LAN at the Same Time
You cannot connect the machine to a wireless LAN and wired LAN at the same time. You can connect to USB
and wireless LAN or USB and wired LAN at the same time.
Cannot Connect Using TLS Encryption
If you specify a TLS version that is not supported by your OSoperating system, browser, or other software,
you will not be able to connect to the machine using TLS encryption.
Update your OS operating system and other software, or incrementally downgrade the TLS version until you
can successfully connect to the machine. Note, however, that downgrading your TLS version may result in a
connected environment that is not protected by adequate security.
Using TLS(P. 153)
◼ Pr
oblems with USB Connection
The Computer Cannot Communicate with the Machine
Try the following:
● Replace the USB cable. If the USB cable is long, replace it with a short cable.
● If you are using a USB hub, connect the machine directly to the computer using a USB cable.
Troubleshooting
303
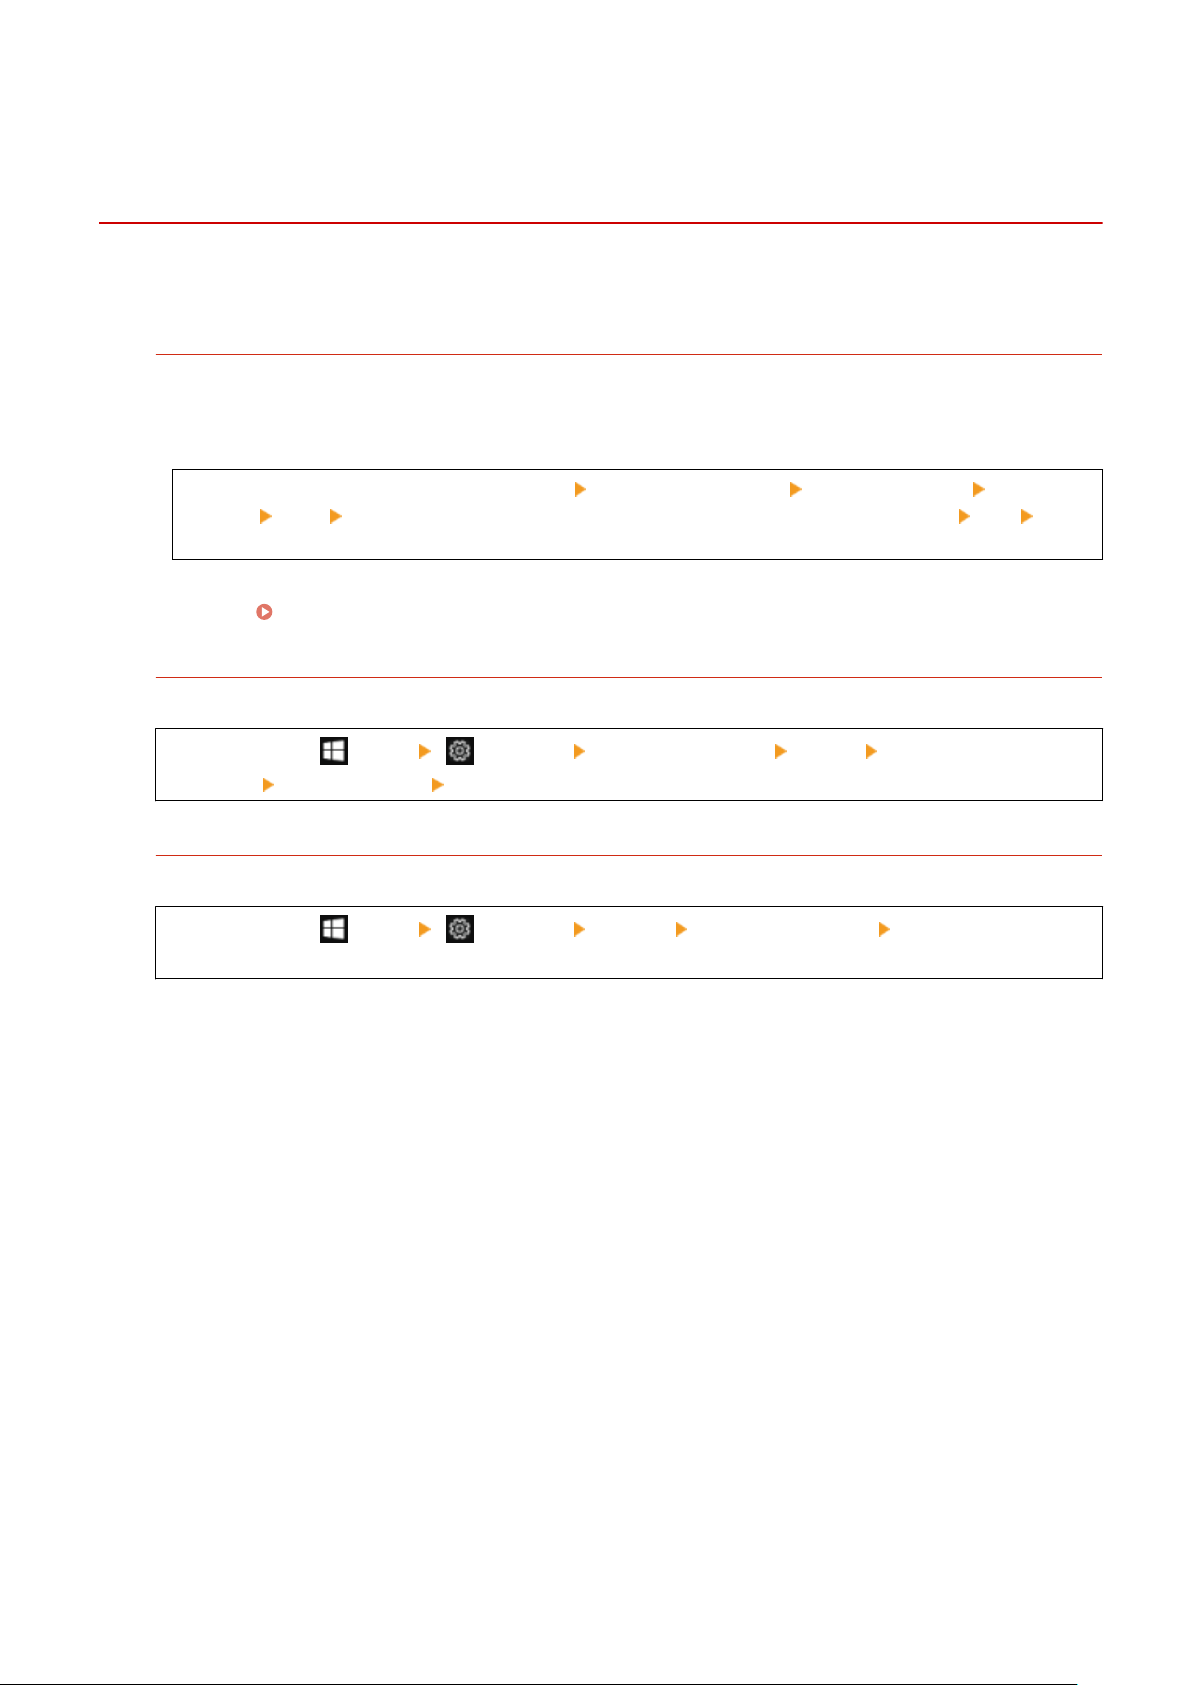
The Machine Connected via WSD Port Is Not Displayed
During Driver Installation
94RC-09E
T
roubleshoot by checking the items below.
Check the Settings of the Machine.
Congure the settings belo
w if they have not been congured.
The machine must be restarted to apply the settings.
WSD Printing and Multicast Discovery Settings
Log in to Remote UI in System Manager Mode [Settings/Registration] [Network Settings] [WSD
Settings] [Edit] select the [Use WSD Printing] and [Use Multicast Discovery] checkboxes [OK] restart
the machine.
On the operation panel, select [Menu] in the [Home] screen, and then select [Preferences] to congur
e the
settings.
[WSD Settings](P. 214)
Check the OS Network Settings.
Congure the settings belo
w if they have not been congured.
In Windows, click [ ] (Start) [ ] (Settings) [Network & Internet] [Status] [Change connection
pr
operties]
[Network pr
ole]
[Private]
Check Whether the Driver Is Installed.
Use the following procedure to check whether the driver of the machine is displayed.
In Windows, click [ ] (Start) [ ] (Settings) [Devices] [Printers & scanners] check whether the
driver is displayed.
If the driver is displayed, it is installed. In this case, uninstall the driver, and then reinstall it.
For details about uninstalling and installing drivers, see the driver manual at the online manual site.
https://oip.manual.canon/
Troubleshooting
304
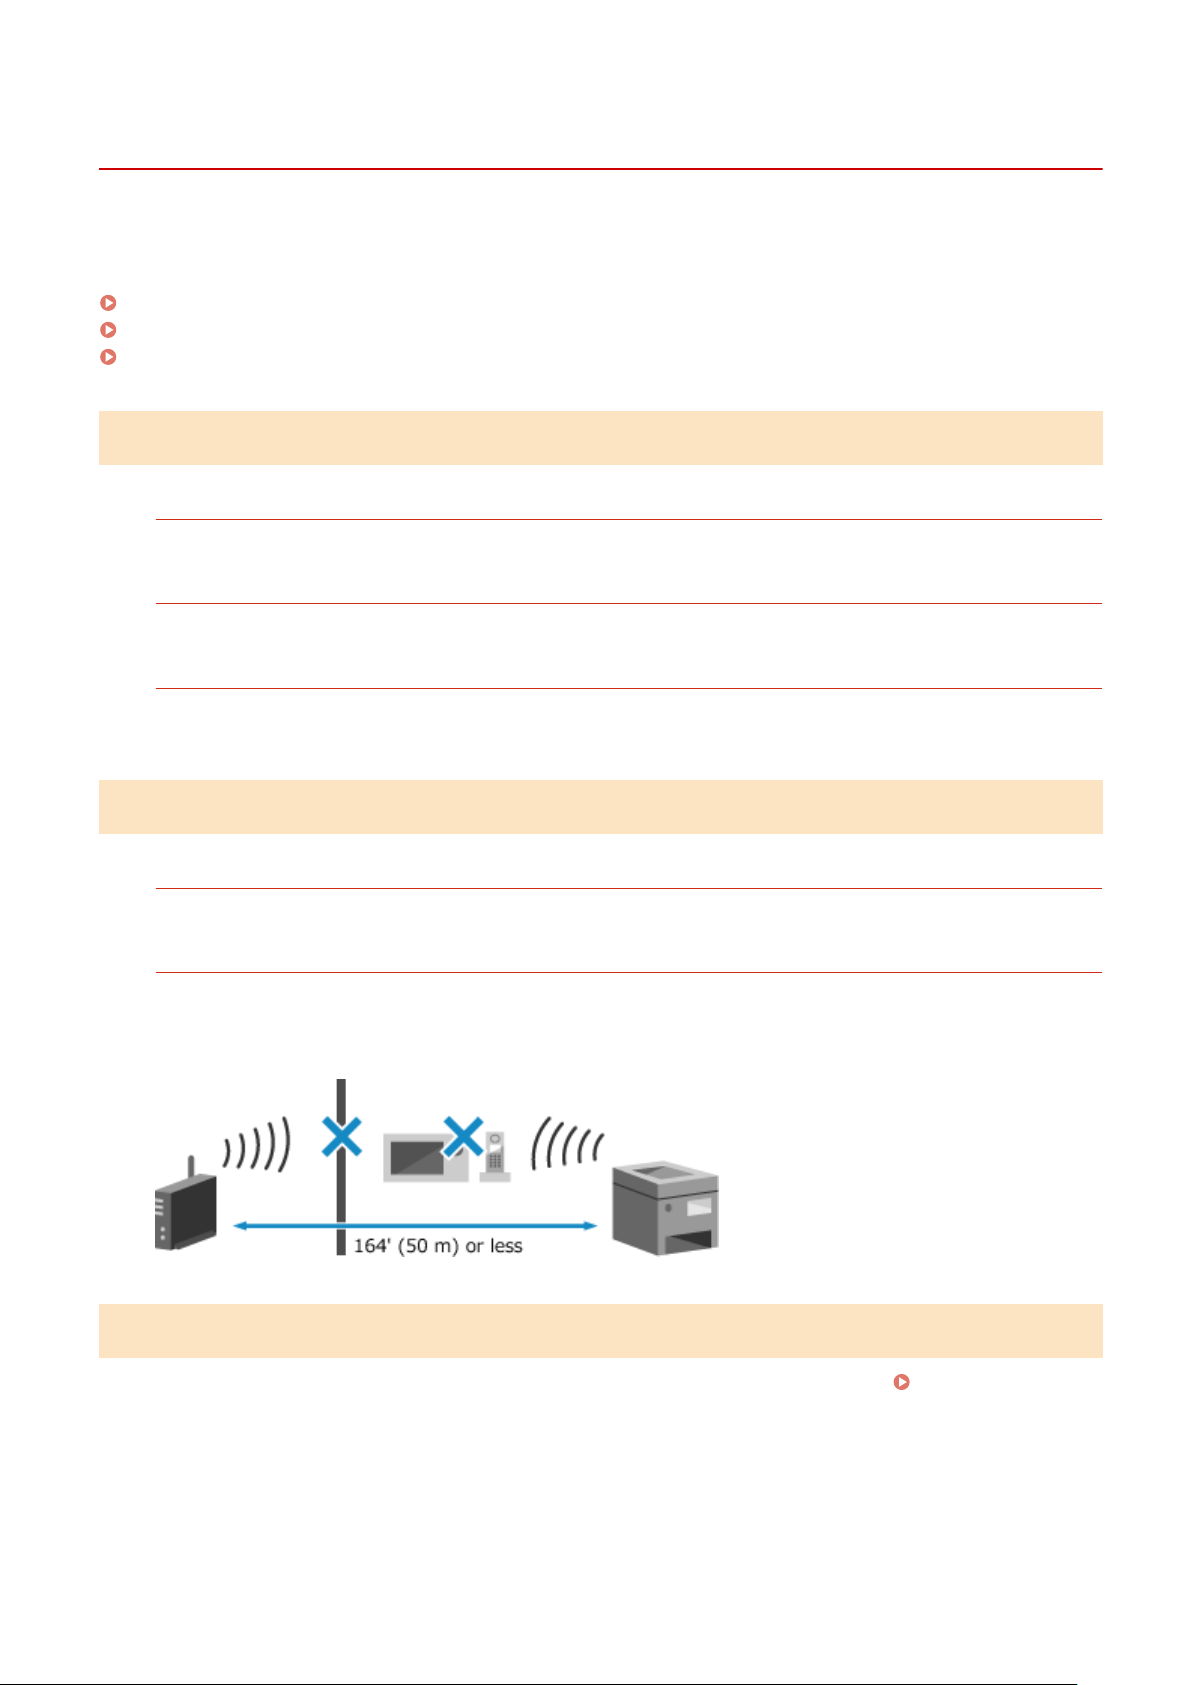
Cannot Connect to Wireless LAN
94RC-09F
T
roubleshoot by checking the status of the computer, wireless LAN router (access point), and machine with the steps
below.
Step 1: Checking the Status of the Computer and Wireless LAN Router(P. 305)
Step 2: Checking the Status of the Machine and Wireless LAN Router(P. 305)
Step 3: Reconnecting to a Wireless LAN(P. 305)
Step 1: Checking the Status of the Computer and Wireless LAN Router
Have You Congured the Settings of the Computer and Wireless LAN Router?
Congure the r
equired settings if they have not been congured.
Are the Power Cables and Ethernet Cable Connected Correctly?
If any cables are connected incorrectly or disconnected, connect them correctly.
Is the Po
wer of Wireless LAN Router On?
If you cannot establish a connection even if the power is on, turn off the power of the computer and router and
turn it on again.
Step 2: Checking the Status of the Machine and Wireless LAN Router
Is the Power of the Machine ON?
If the power is ON, turn OFF the power and turn it ON again.
Is the Location Appr
opriate?
● The machine and wir
eless LAN router should be installed in a location without walls or other obstructions
between the devices and within range of 164' (50 m).
● Do not install near a microwave oven, cordless telephone, or other device that generates radio waves.
Step 3: Reconnecting to a Wireless LAN
Connect to the wir
eless LAN using the connection type according to your wireless LAN router.
Connecting to a
Wir
eless LAN(P. 38)
Troubleshooting
305

Network
94RC-09H
This is a list of pr
oblems that can occur with the network. Check how to troubleshoot the problem based on the
symptom.
Cannot Switch to Wireless LAN(P. 307)
Cannot Find the Print Server to Connect to(P. 308)
Cannot Connect to a Shared Printer(P. 309)
Cannot Find the IP Address of the Machine(P. 310)
AirPrint Does Not Work(P. 311)
Troubleshooting
306

Cannot Switch to Wireless LAN
94RC-09J
Use the network settings to switch fr
om wired LAN connection to wireless LAN connection.
1
On the operation panel, select [Menu] in the [Home] screen, and press
. [Home]
Scr
een(P. 81)
Press [Preferences]
[Network] [Select Wired/Wireless LAN] .
➠ The [Select Wir
ed/Wireless LAN] screen is displayed.
If the login screen appears, enter the System Manager ID and PIN, and then press
. System Manager
ID and PIN(P
. 4)
3
Press [Wireless LAN]
.
➠ The message [Settings applied.] appears.
4
Connect the machine to the wireless LAN. Connecting to a Wireless LAN(P. 38)
5
Install the driver to the computer that will use the machine.
When switching the machine from wired LAN connection to wireless LAN connection, any installed drivers
must be uninstalled and then r
einstalled.
For details about uninstalling and installing drivers, see the driver manual at the online manual site.
https://oip.manual.canon/
Troubleshooting
307

Cannot Find the Print Server to Connect to
94RC-09K
T
roubleshoot by checking the items below.
Are the Print Server and Computer Connected Correctly?
● Check the network settings of the print server and computer, and mak
e sure they are connected correctly.
● If they are connected using an Ethernet cable, make sure the cable is connected correctly.
Is the Print Server Started?
Start the print server if it has not been started.
Ar
e there Any Restrictions with Connecting to the Print Server?
Check with the administrator of the print server, and ask for permission, if needed.
Is Network Disco
very Enabled? (Windows)
Enable network discovery if not enabled. Enabling Network Discovery(P. 349)
Troubleshooting
308

Cannot Find the IP Address of the Machine
94RC-09R
Vie
w the IP address using the following procedure:
Viewing the IPv4 Address
[Home] screen on the operation panel [Status Monitor] [Network Information]
[IPv4] view the setting.
Viewing the IPv6 Address
[Home] screen on the operation panel [Status Monitor] [Network Information]
[IPv6] view the setting.
If the IP Address Is Displayed as "0.0.0.0"
● A suitable IP addr
ess is not set. Set the IP address again.
Setting IPv4 Addresses(P. 50)
Setting IPv6 Addresses(P. 52)
Troubleshooting
310

AirPrint Does Not Work
94RC-09S
T
roubleshoot by checking the items below.
Is the Power of the Machine ON?
If the machine is ON, restart the machine, and try AirPrint again. Restarting the Machine(P. 75)
Does an Err
or Message Appear on the Operation Panel?
Follow the instructions of the error message on the screen to x the pr
oblem.
A Message Appears(P. 325)
When Using a Mac, Is it Corr
ectly Connected to the Machine?
Connect the Mac to the network on the same LAN as the machine. Setting Up the Network(P. 34)
When connecting via USB
, directly connect the Mac to the USB port for computer connection on the back of the
machine with a USB cable.
Rear Side(P. 9)
Have the Functions Usable with AirPrint Been Restricted?
If the protocol (IPP or Network Link Scan) for use with AirPrint has been disabled to restrict functions, cancel
this r
estriction to enable the use of AirPrint.
Setting the Functions and Security to Be Used with
AirPrint(P
. 130)
Is Bonjour Enabled on Your Apple Device?
Enable Bonjour if it is not enabled. For details, see the manual of your Apple device.
Troubleshooting
311

Printing
94RC-09U
This is a list of pr
oblems that can occur when printing. Check how to troubleshoot the problem based on the symptom.
Cannot Print(P. 313)
Printing Is Slow(P. 319)
◼ Pr
oblems with Printing Results
If the printing results are not as expected, see the following:
Problems with Printing Results(P. 278)
◼ Fr
equently Asked Questions about Operations
I Want to Print on an Envelope.
Place the envelope in the paper drawer while paying attention to the orientation and side of the envelope.
Then, set the paper size and type according to the placed envelope.
Next, use the printer driver of the computer to set the paper size of the document and the paper size to
print, and then perform printing.
Preparations and Orientation for Loading Envelopes(P. 90)
Specifying the Paper Size and Type(P. 94)
Printing from a Computer(P. 115)
Troubleshooting
312

Cannot Print
94RC-09W
T
roubleshoot by checking the items below.
Has an Error Occurred?
Check the print processing status and log, and if a three-digit number starting with "#" (error code) is displayed,
check ho
w to troubleshoot the problem based on the error code.
Viewing the Print Job Status and Log(P. 123)
An Error Code Is Displayed(P. 336)
Can Y
ou Print a Test Page?
If you can print a test page, check if the print settings of the application are correct.
Printing a Test Page(P. 355)
Check the Network Status and Settings.
Check the required items according to the usage environment.
Cannot Print (Wireless LAN)(P. 314)
Cannot Print (Wired LAN)(P. 316)
Cannot Print (USB Connection)(P. 317)
Cannot Print (via Print Server)(P. 318)
Troubleshooting
313

Cannot Print (Wireless LAN)
94RC-09X
T
roubleshoot by checking the items below.
Check the Wireless LAN Connection Status.
Check the connection status of the machine, and take action according to the status. Viewing the MAC
Addr
ess and Connection Information of the Wireless LAN(P. 68)
If the Machine Is Not Connected to the Wireless LAN
Check the status of the computer and wireless LAN router (access point) and the status of the machine, and
reconnect to the wireless LAN.
Cannot Connect to Wireless LAN(P. 305)
If the Connection Is Poor
Change the follo
wing settings on the wireless LAN router, and try printing:
● Change the channel of the wireless LAN router. If there are multiple wireless LAN routers, separate the
channels by ve or more channels.
● Increase the wireless output of the wireless LAN router if possible.
Are the Machine and Computer Connected to the Same Wireless LAN Router?
● When you ar
e using a computer connected to a wireless LAN, check that the SSID (identier of the wireless
LAN router) of the machine matches that of the computer.
Viewing the MAC Address and Connection Information of the Wireless LAN(P. 68)
Viewing the Network Connection Information of the Computer(P. 352)
● If the SSID of the machine and the computer do not match, congur
e the wireless LAN connection settings
on the machine again, and connect the machine to the SSID to which the computer is connected.
Connecting to a Wireless LAN(P. 38)
Is the Printer Port of the Computer Congur
ed Correctly? (Windows)
Change the settings if they have not been congur
ed correctly. If there is no available port, add a new port.
Viewing the Printer Port(P. 354)
Conguring a Printer Port (Windo
ws)(P. 104)
Can You Access Remote UI?
If you cannot access Remote UI, the r
ewall settings of the machine may be incorrect, preventing
communication with the computer.
Use the following procedure to disable the rewall settings with the operation panel, and then use Remote UI to
congure the rewall again.
Administrator privileges are required. The machine must be restarted to apply the settings.
1
Disable the r
ewall settings.
To Disable IPv4 Address Filter
[Home] screen on the operation panel [Menu] [Preferences] [Network]
[Firewall Settings] [IPv4 Address Filter] [Outbound Filter] or [Inbound Filter]
[Off] Restart the machine.
To Disable IPv6 Address Filter
[Home] screen on the operation panel [Menu] [Preferences] [Network]
[Firewall Settings] [IPv6 Address Filter] [Outbound Filter] or [Inbound Filter]
[Off] Restart the machine.
Troubleshooting
314

To Disable MAC Address Filter
[Home] screen on the operation panel [Menu] [Preferences] [Network]
[Firewall Settings] [MAC Address Filter] [Outbound Filter] or [Inbound Filter]
[Off] Restart the machine.
2
Congure the r
ewall correctly.
Setting the Firewall(P. 147)
Reinstall the Printer Driver.
Uninstall the installed driver, and then reinstall it.
For details about uninstalling and installing drivers, see the driver manual at the online manual site.
https://oip.manual.canon/
Ar
e You Using Resident Software?
If you are using resident software, such as security software, disable it and then try printing.
Can Y
ou Print from Another Computer in the Network?
If you cannot print from another computer, contact your dealer or service representative. If the Problem
Persists(P
. 339)
Troubleshooting
315
Cannot Print (Wired LAN)
94RC-09Y
T
roubleshoot by checking the items below.
Is the Printer Port of the Computer Congured Correctly? (Windows)
Change the settings if they have not been congur
ed correctly. If there is no available port, add a new port.
Viewing the Printer Port(P. 354)
Conguring a Printer Port (Windo
ws)(P. 104)
Can You Access Remote UI?
If you cannot access Remote UI, the r
ewall settings of the machine may be incorrect, preventing
communication with the computer.
Use the following procedure to disable the rewall settings with the operation panel, and then use Remote UI to
congure the rewall again.
Administrator privileges are required. The machine must be restarted to apply the settings.
1
Disable the r
ewall settings.
To Disable IPv4 Address Filter
[Home] screen on the operation panel [Menu] [Preferences] [Network]
[Firewall Settings] [IPv4 Address Filter] [Outbound Filter] or [Inbound Filter]
[Off] Restart the machine.
To Disable IPv6 Address Filter
[Home] screen on the operation panel [Menu] [Preferences] [Network]
[Firewall Settings] [IPv6 Address Filter] [Outbound Filter] or [Inbound Filter]
[Off] Restart the machine.
To Disable MAC Address Filter
[Home] screen on the operation panel [Menu] [Preferences] [Network]
[Firewall Settings] [MAC Address Filter] [Outbound Filter] or [Inbound Filter]
[Off] Restart the machine.
2
Congure the r
ewall correctly.
Setting the Firewall(P. 147)
Reinstalling the Printer Driver
Uninstall the installed driver, and then reinstall it.
For details about uninstalling and installing drivers, see the driver manual at the online manual site.
https://oip.manual.canon/
Ar
e You Using Resident Software?
If you are using resident software, such as security software, disable it and then try printing.
Can Y
ou Print from Another Computer in the Network?
If you cannot print from another computer, contact your dealer or service representative. If the Problem
Persists(P
. 339)
Troubleshooting
316

Cannot Print (USB Connection)
94RC-0A0
T
roubleshoot by checking the items below.
Check the USB Cable.
● If you ar
e using a long USB cable, replace it with a short USB cable.
● If you still cannot print with a short USB cable, the cable may be damaged. Replace with a new USB cable,
and try printing.
Are You Using a USB Hub?
Connect the machine directly to the computer using a USB cable.
T
ry Using Another USB Port.
Connect the USB cable to another USB port on your computer.
Is the Printer Port of the Computer Congur
ed Correctly? (Windows)
If the printer port is not congur
ed correctly or there is no available port, reinstall the printer driver. When you
reinstall the driver, the correct port is congured automatically.
Viewing the Printer Port(P. 354)
For details about installing the driver, see the manual of the driver at the online manual site.
https://oip.manual.canon/
Is T
wo-way Communication Between the Machine and Computer Enabled? (Windows)
Enable two-way communication if it is not enabled, and restart the computer and machine. Viewing Two-way
Communication
(P. 355)
Is a Setting Preventing the Machine from Establishing a USB Connection to the
Computer?
If usage of the USB port for computer connection on the back of the machine is restricted, cancel this setting.
Preventing Connection to Computer via USB Port(P. 171)
Ar
e You Using Resident Software?
If you are using resident software, such as security software, disable it and then try printing.
Can Y
ou Print via USB Connection from Another Computer?
If you cannot print from another computer, contact your dealer or service representative. If the Problem
Persists(P
. 339)
Troubleshooting
317

Cannot Print (via Print Server)
94RC-0A1
T
roubleshoot by checking the items below.
Can You Print from the Print Server?
If you can print, check the connection between the computer and the print server. Cannot Find the Print
Server to Connect to(P
. 308)
Reinstall the Printer Driver.
Uninstall the installed driver, and then reinstall it.
For details about uninstalling and installing drivers, see the driver manual at the online manual site.
https://oip.manual.canon/
Installing in Windo
ws
Use a print server to install the printer driver.
Double-click the shared printer on the print server, and follow the instructions on the screen to install the
printer driver.
Displaying a Shared Printer in the Print Server(P. 349)
Ar
e You Using Resident Software?
If you are using resident software, such as security software, disable it and then try printing.
Can Y
ou Print via a Print Server from Another Computer?
If you cannot print from another computer, contact your dealer or service representative. If the Problem
Persists(P
. 339)
Troubleshooting
318

Printing Is Slow
94RC-0A2
It tak
es time until the rst page is printed. The printing speed may be slower after continuous printing or printing on
narrow paper to allow for adjustments of the temperature or image quality of the machine.
In all other cases, an error may have occurred. Troubleshoot by checking the items below.
Check the Paper Orientation.
This symptom may occur depending on the paper orientation. Change the paper orientation if possible.
Loading Paper(P. 87)
Troubleshooting
319

Management Functions and Environment Settings
94RC-0A3
This is a list of fr
equently asked questions about management functions. Check the applicable item.
Cannot Access Remote UI(P. 321)
Changing the Time Until Sleep Mode(P. 322)
Lost Department ID or PIN for the Administrator(P. 323)
Checking the Items That Can Be Congur
ed on the Machine and Their Settings(P. 324)
Troubleshooting
320
Cannot Access Remote UI
94RC-0A4
If the message [Cannot access Remote UI.] or [Cannot continue the settings because the function to perform settings
for the de
vice is restricted.] appears and you cannot access Remote UI, troubleshoot by checking the items below.
Set the Remote UI Access PIN.
To access the Remote UI, you must set the Remote UI Access PIN.
Administr
ator privileges are required to congure the setting.
[Home] screen on the operation panel [Menu] [Management Settings] [Remote UI
Settings/Update Firmwar
e]
[Remote UI Settings] [Remote UI Access Security
Settings] [On] enter the PIN enter the PIN again
* You cannot set a PIN consisting of all zeros, such as "00" or "0000000."
Change the System Manager PIN.
When logging in with System Manager Mode, you must change the System Manager PIN from the default
settings.
Administr
ator privileges are required to change the settings.
[Home] screen on the operation panel [Menu] [Management Settings] [User
Management] [System Manager Information Settings] [System Manager ID and
PIN] enter the System Manager ID enter the PIN enter the PIN again
* You cannot set a System Manager ID or PIN consisting of all zeros, such as "00" or "0000000."
* Only allo
w certain administrators to have access to the System Manager ID and PIN after the settings are
changed.
Troubleshooting
321


Lost Department ID or PIN for the Administrator
94RC-0A7
Contact the administr
ator to check whether the System Manager ID and System Manager PIN were changed from the
default settings.
The System Manager ID and System Manager PIN are not set by default.
* If they have not been changed from the default settings, change them for enhanced security, and allow only certain
administrators to know this information.
Setting the Department ID and PIN for the Administrator(P. 144)
● If you still cannot r
ecover your System Manager ID and PIN even after conrming the above information,
contact your dealer or service representative.
If the Problem Persists(P. 339)
Troubleshooting
323

Checking the Items That Can Be Congur
ed on the
Machine and Their Settings
94RC-0A8
Y
ou can print the User Data List and System Manager Data List to check the items that can be congured on the
machine and their settings.
Printing and Viewing Reports and Lists(P. 186)
User Data List
Displays the settings that do not r
equire administrator privileges.
System Manager Data List
Displays the settings that require administrator privileges.
Troubleshooting
324

A Message Appears
94RC-0CA
If a message appears on the oper
ation panel, select the message from the list below, and check how to troubleshoot
the problem.
Cannot analyze the authentication server certicate.(P
. 326)
Cannot nd the access point.(P
. 326)
Cannot print. A non-Canon or counterfeit cartridge may be in use. Close: Press OK(P. 326)
Cannot print RX data.(P. 327)
Cart. Comm. Error Cannot print. A non-Canon or counterfeit cartridge may be in use. Close: Press
OK(P
. 327)
Cartridge Comm. Error Problems caused by non-Canon cart. not covered by warranty. Close: Press
OK(P
. 327)
Change the authentication password.(P. 327)
Check the authentication settings.(P. 328)
Could not connect.(P. 328)
Could not connect. Check the encryption key settings.(P. 328)
Could not connect. Device will restart.(P. 328)
Could not connect. Max connections to access point reached(P. 328)
Could not connect using the wireless LAN.(P. 329)
Could not connect using WPS.(P. 329)
Could not detect any connections from wireless devices.(P. 329)
Could not perform cleaning.(P. 330)
Could not perform Open System auth. Chk encryp. key set.(P. 330)
Could not perform Shared Key auth. Chk encryp. key set.(P. 330)
Direct Connection terminated.(P. 330)
Easy Conn. via PC ended due to timeout Device will restart.(P. 331)
Encryption key is not set correctly. Check the encryption key settings.(P. 331)
Encryption key not set correctly. Check encryption key set.(P. 331)
End of Cart. Lifetime(P. 331)
IEEE 802.1X error. Cannot analyze auth. server certicate.(P
. 331)
IEEE 802.1X error. Change the auth. password.(P. 332)
IEEE 802.1X error. Check the auth. settings.(P. 332)
IEEE 802.1X error. Congur
e correct authentication info.(P. 332)
IEEE 802.1X error. Congur
e the info. required for auth.(P. 332)
IEEE 802.1X error. No reply from the destination.(P. 332)
IEEE 802.1X error. The auth. server cert. has expired.(P. 332)
IEEE 802.1X error. The auth. server cert. is incorrect.(P. 332)
Incorrect number of characters/invalid characters entered.(P. 333)
Low Cartridge Level(P. 333)
Mem. Full (Skip Error)(P. 333)
Memory is full.(P. 333)
No Paper(P. 333)
No reply from the destination.(P. 333)
No response from host.(P. 334)
Paper jammed.(P. 334)
Prepare a cartridge.(P. 334)
Set the correct authentication information.(P. 334)
Set the information necessary for authentication.(P. 334)
Size/Settings Mismatch(P. 335)
The authentication server certicate has e
xpired.(P. 335)
The authentication server certicate is incorr
ect.(P. 335)
Use Remote UI to set info. necessary for authentication.(P. 335)
Troubleshooting
325
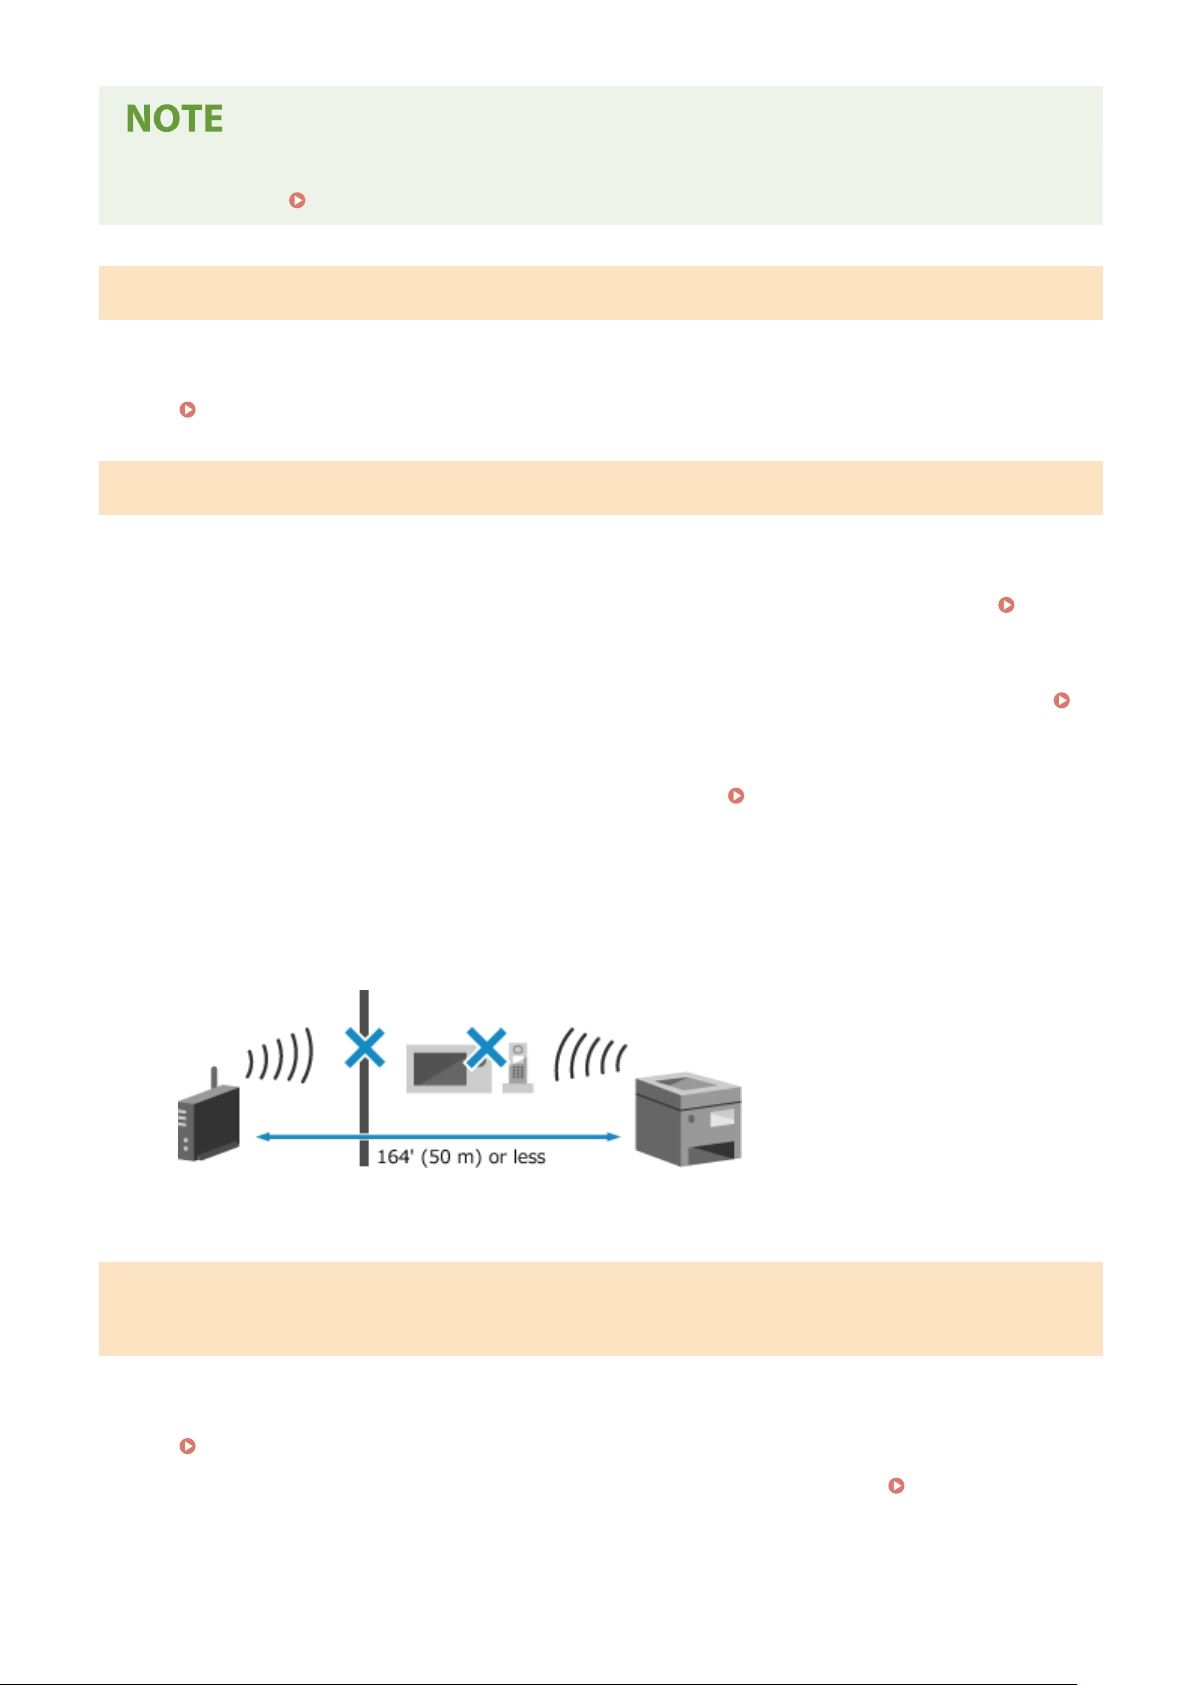
● If the pr
oblem persists even after trying the troubleshooting methods, contact your dealer or service
representative.
If the Problem Persists(P. 339)
Cannot analyze the authentication server certicate.
The certicate of the authentication server may not be corr
ect, or it may be a format unsupported by the machine.
Check the Certicate of the Authentication Server, and Change the Setting, as Needed.
Setting IEEE 802.1X(P. 155)
Cannot nd the access point.
An err
or occurred, preventing the machine from detecting the wireless LAN router (access point).
Is Connection Type Congured Correctly?
Select the connection type (WPS) according to the method supported by the wireless LAN router.
Connecting to a Wireless LAN by Using the Router Button (Push Button Mode)(P. 41)
Did Y
ou Connect Within the Fixed Time?
When connecting by pressing a button on the wireless LAN router, set the connection type on the operation
panel of the machine, and then press the button on the wireless LAN router within one or two minutes.
Connecting to a Wireless LAN by Using the Router Button (Push Button Mode)(P. 41)
Ar
e the SSID and Network Key Congured Correctly?
When entering the wireless LAN router information manually, check the SSID and network key of the wireless
LAN router, and congure the settings correctly on the machine.
Connecting to a Wireless LAN by
Setting the Details (Manual Setup Method)(P
. 47)
Are the Machine and Wireless LAN Router Located Appropriately?
● The machine and wireless LAN router should be installed in a location without walls or other obstructions
between the devices and within range of 164' (50 m).
● Do not install near a microwave oven, digital cordless telephone, or other device that generates radio
waves.
Check the Security Settings of the Wireless LAN Router.
For details, see the manual of the wir
eless LAN router or contact the manufacturer.
Cannot print. A non-Canon or counterfeit cartridge may be in use. Close:
Pr
ess OK
Printing cannot be performed due to the use of a toner cartridge whose print quality cannot be guaranteed.
Replace with a New Toner Cartridge.
Replacing the Toner Cartridge(P. 257)
For optimum print quality, using Canon genuine toner cartridges is recommended. List of
Consumables(P. 263)
Troubleshooting
326

Cannot print RX data.
Received data cannot be printed for some reason.
Do the Cause and Solution Appear on the Operation Panel?
If so, follow the instructions on the screen.
Is the Front Cover, Rear Cover, or Toner Cover Open on the Machine?
Close the covers if they are open.
Is Paper Loaded?
Load paper if not loaded. Loading Paper(P. 87)
Is Paper Jammed?
If so, r
emove any jammed paper.
Paper Jams(P. 271)
Have the T
oner Cartridge Reached the End of Their Lifetime?
Check the remaining amount of toner in the toner cartridge, and replace any toner cartridge, as needed.
Checking the Remaining Amount of Consumables(P. 262)
Replacing the Toner Cartridge(P. 257)
Cart. Comm. Error Cannot print. A non-Canon or counterfeit cartridge may
be in use. Close: Pr
ess OK
Printing cannot be performed due to incorrect installation of the toner cartridge, a damaged toner cartridge, or the
use of a toner cartridge whose print quality cannot be guaranteed.
Reinstall the Toner Cartridge or Replace with New Toner Cartridge.
Replacing the Toner Cartridge(P. 257)
● For
optimum print quality, using Canon genuine toner cartridges is recommended.
List of
Consumables
(P. 263)
● If the message still appears after repeatedly reinstalling the toner cartridge, contact your dealer or service
representative.
If the Problem Persists(P. 339)
Cartridge Comm. Error Problems caused by non-Canon cart. not covered by
warr
anty. Close: Press OK
Printing cannot be performed due to incorrect installation of the toner cartridge, a damaged toner cartridge, or the
use of a non-Canon toner cartridge, resulting in a communication error.
Reinstall the Toner Cartridge.
Replacing the Toner Cartridge(P. 257)
● For
optimum print quality, using Canon genuine toner cartridges is recommended.
List of
Consumables
(P. 263)
● If the message still appears after repeatedly reinstalling the toner cartridge, contact your dealer or service
representative.
If the Problem Persists(P. 339)
Change the authentication password.
The passwor
d has expired.
Set a new password.
Troubleshooting
327
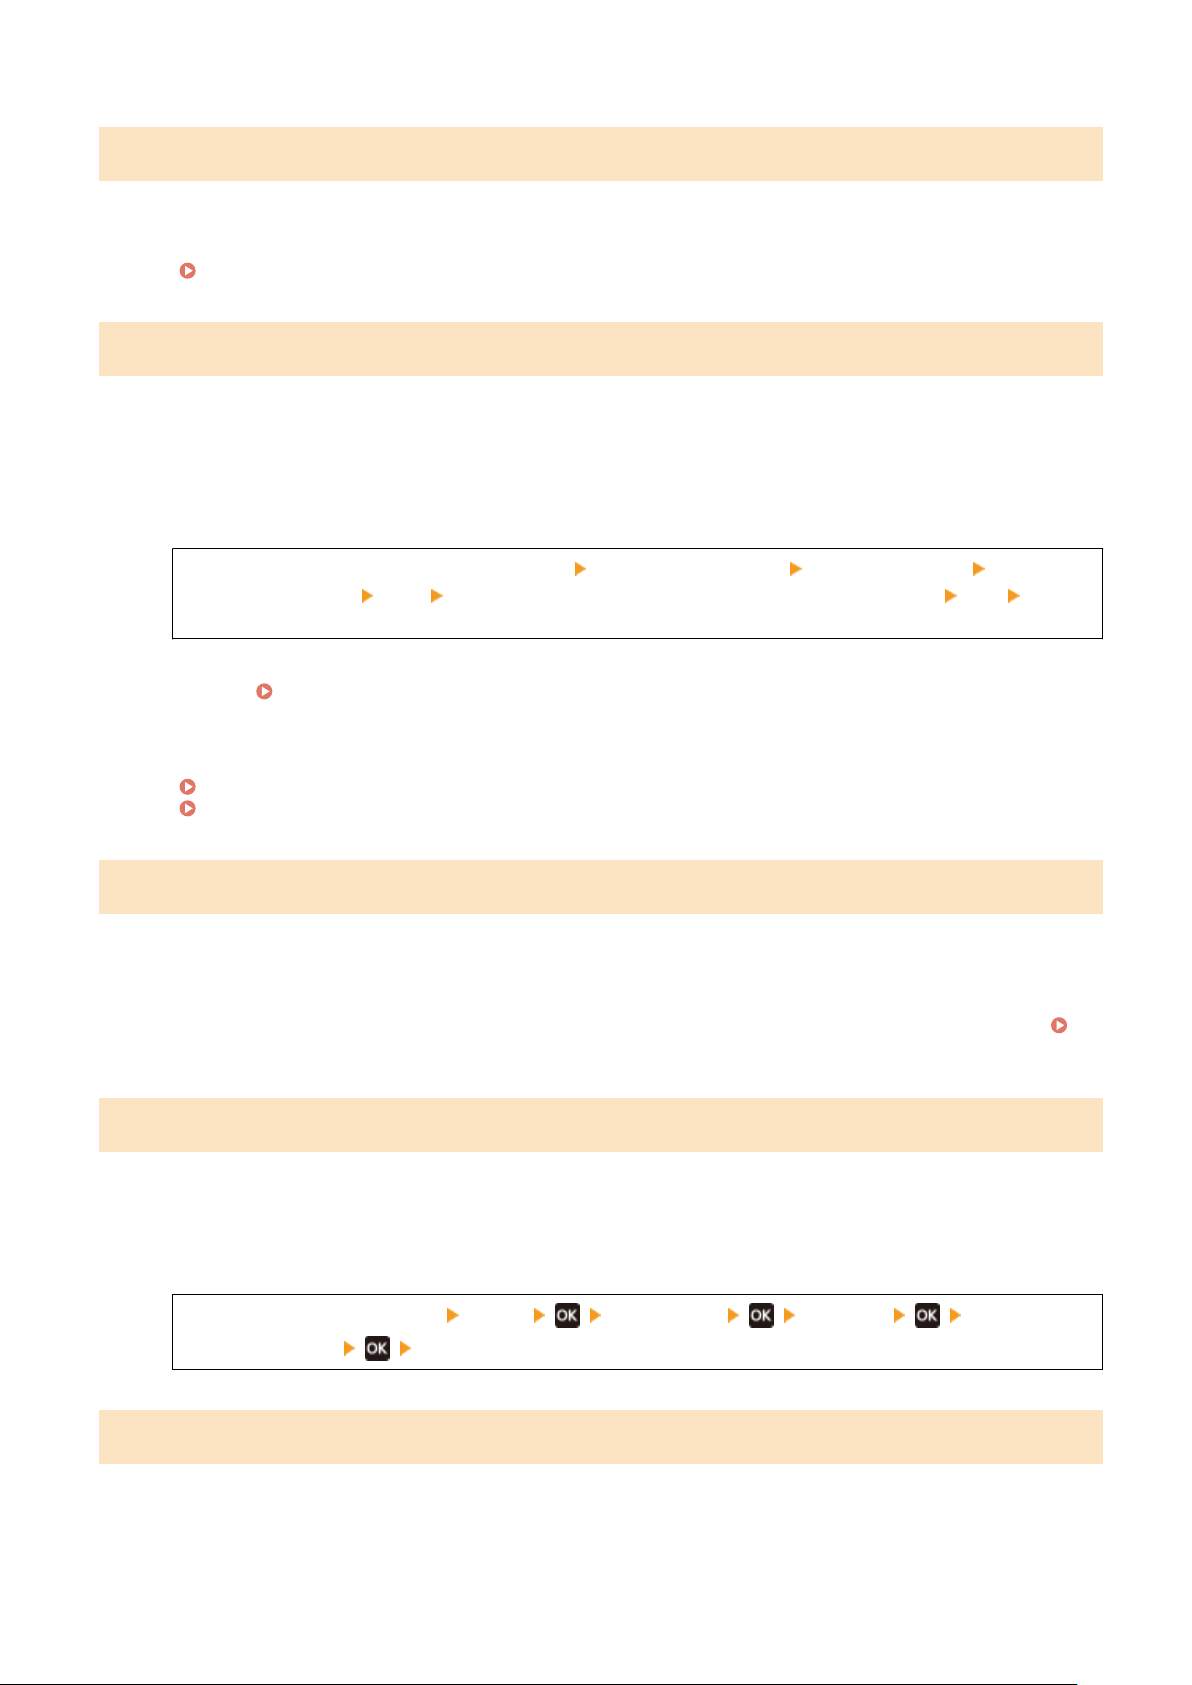
Check the authentication settings.
The authentication method set on the machine does not match that set on the RADIUS server.
Check the Authentication Method Set on the RADIUS Server, and Set This Correctly.
Setting IEEE 802.1X(P. 155)
Could not connect.
An error occurred, preventing the machine from establishing a direct connection.
Wait a Moment, and Try Connecting Again.
If you still cannot establish a connection, restart the machine.
Set the IP Address for Connection to Something Other Than "192.168.22.xx".
The machine must be restarted to apply the settings.
Log in to Remote UI in System Manager Mode [Settings/Registration] [Network Settings] [Direct
Connection Settings] [Edit] in [IP Address for Direct Connection], enter the IP address [OK] restart
the machine
On the operation panel, select [Menu] in the [Home] screen, and then select [Preferences] to congur
e the
settings.
[Direct Connection Settings](P. 203)
Is the Subnet Mask Congur
ed Correctly?
Check the IPv4 subnet mask settings. Change the settings if they have not been congured correctly. For
details, contact the network administrator.
Viewing the IP address set to the machine(P. 67)
Setting IPv4 Addresses(P. 50)
Could not connect. Check the encryption key settings.
The network k
ey (encryption key) of the wireless LAN router (access point) is not congured correctly, preventing
connection.
Reset the Network Key.
Check the network key of the wireless LAN router, and congure the settings correctly on the machine.
Connecting to a Wireless LAN(P. 38)
Could not connect. Device will restart.
An err
or occurred, preventing the machine from connecting in Access Point Mode. Alternatively, an error occurred
when starting cableless setup mode.
Restart the Machine, and Start Cableless Setup Mode Again.
Administrator privileges are required.
[Home] on the operation panel [Menu] [Preferences] [Network] [Easy
Connection via PC] start the settings on the computer
Could not connect. Max connections to access point reached
The maximum number of devices that can be connected to the wireless LAN router (access point) has been reached,
preventing connection.
Reduce the Number of Devices (Clients) Connected to the Wireless LAN Router.
Troubleshooting
328
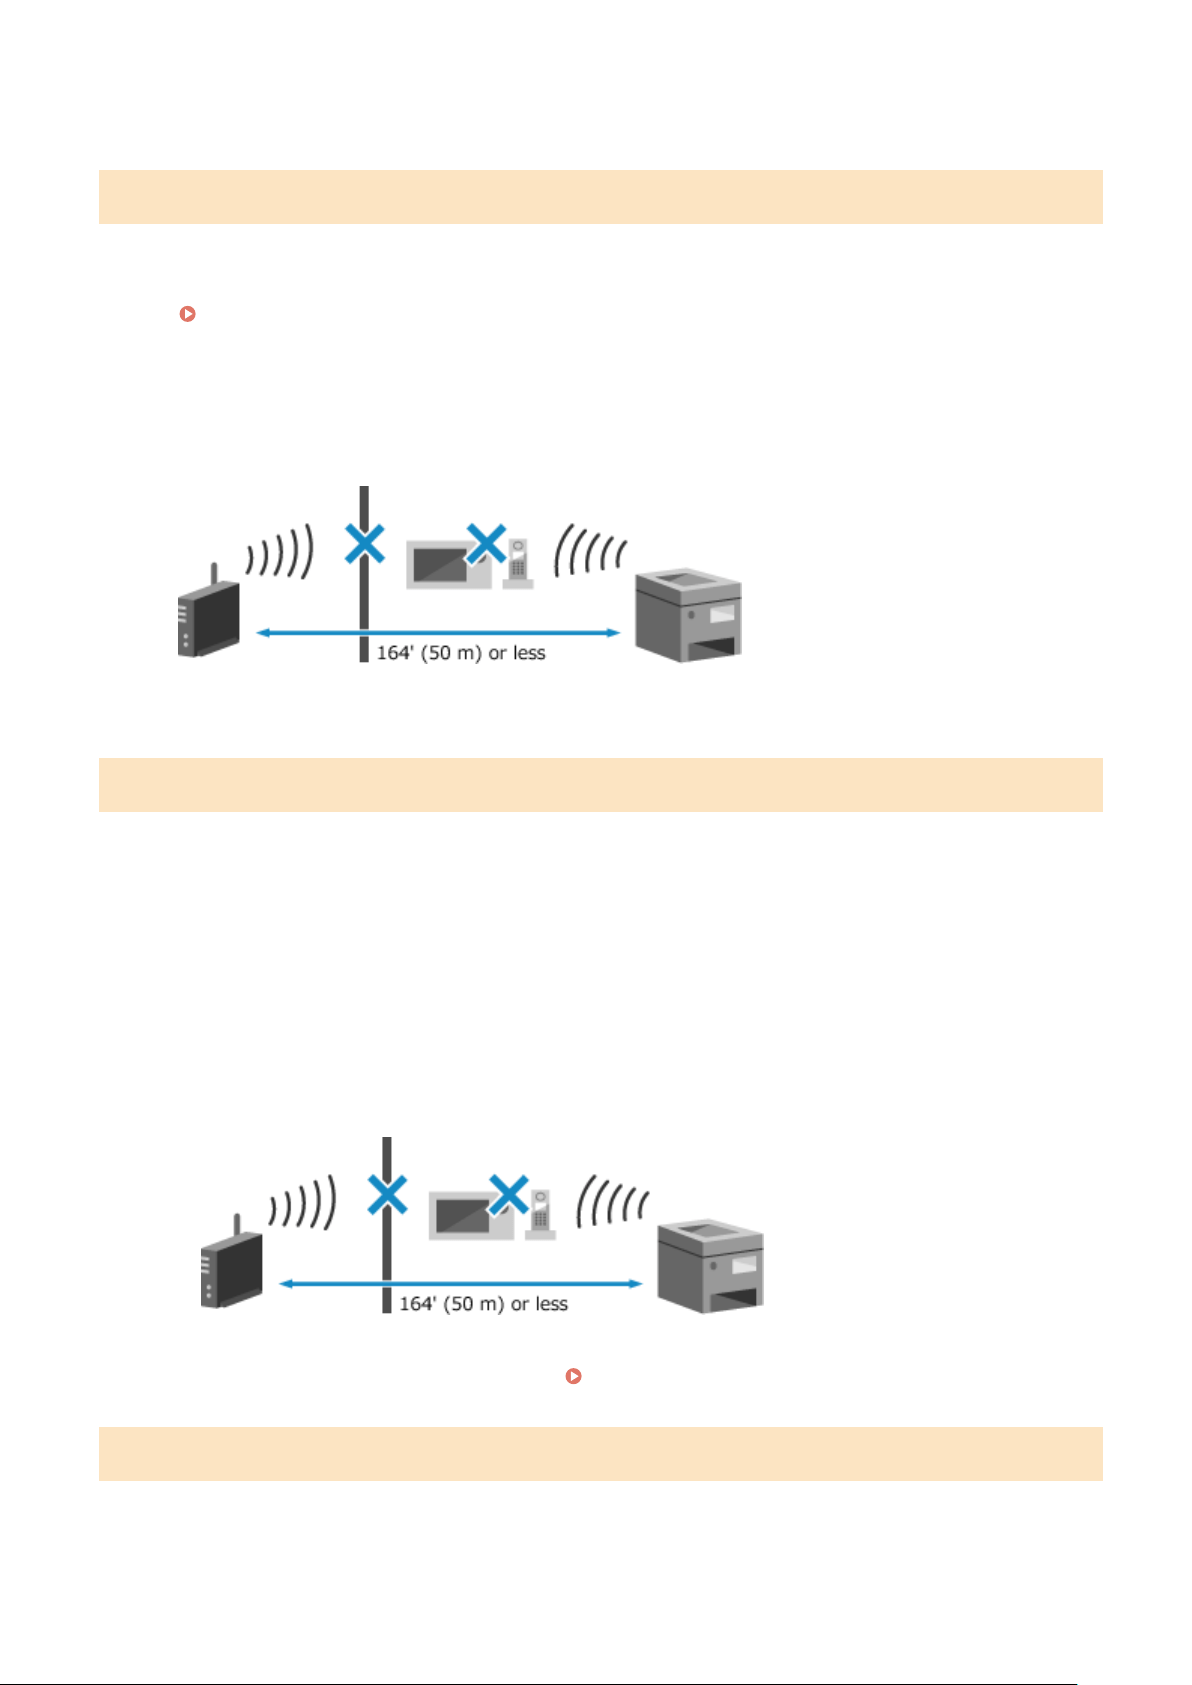
For the maximum number of connections, see the manual of the wireless LAN router or contact the
manufactur
er.
Could not connect using the wireless LAN.
An error occurred, preventing the machine from connecting to the wireless LAN.
Restart the Machine, and Congure the Wireless LAN Connection Again.
Connecting to a Wireless LAN(P. 38)
Ar
e the Machine and Wireless LAN Router (Access Point) Located Appropriately?
● The machine and wireless LAN router should be installed in a location without walls or other obstructions
between the devices and within range of 164' (50 m).
● Do not install near a microwave oven, digital cordless telephone, or other device that generates radio
waves.
Check the Security Settings of the Wireless LAN Router.
For details, see the manual of the wir
eless LAN router or contact the manufacturer.
Could not connect using WPS.
An error occurred, preventing the machine from establishing a WPS connection.
Wait a Moment, and Congure the Settings Again.
If you still cannot establish a WPS connection, check whether the wireless LAN router (access point) supports
WPS.
If It Supports WPS
Check that the machine and wireless LAN router are located appropriately.
● The machine and wireless LAN router should be installed in a location without walls or other
obstructions between the devices and within range of 164' (50 m).
● Do not install near a microwave oven, digital cordless telephone, or other device that generates radio
waves.
If It Does Not Support WPS
Connect using a differ
ent connection type.
Connecting to a Wireless LAN(P. 38)
Could not detect any connections from wireless devices.
An err
or occurred, preventing the machine from detecting mobile devices.
Did You Connect Within the Fixed Time?
Connect the mobile device to the machine within ve minutes of the SSID and network key being displayed.
Troubleshooting
329

Could not perform cleaning.
Cleaning could not be performed due to jammed paper or another problem.
Is Paper Loaded?
Load paper in the paper drawer if not loaded. Loading Paper in the Paper Drawer(P. 88)
Is Paper Jammed?
If so, r
emove any jammed paper.
Paper Jams(P. 271)
Could not perform Open System auth. Chk encryp. key set.
The WEP authentication methods of the machine and wir
eless LAN router (access point) do not match, or MAC address
ltering of the wireless LAN router is set to prevent a connection to the machine, thereby preventing Open System
Authentication.
Use the Manual Setup Method to Change the WEP Authentication Method to [Shared Key], and
Connect Again.
Connecting to a Wireless LAN by Setting the Details (Manual Setup Method)(P. 47)
In the MA
C address ltering setting of the wireless LAN router, allow the connection to the machine.
Check the MAC address of the machine, and congure the wireless LAN router to allow a connection from
that MAC address.
Viewing the MAC Address and Connection Information of the Wireless LAN(P. 68)
For the setup method, see the manual of the wir
eless LAN router or contact the manufacturer.
Could not perform Shared Key auth. Chk encryp. key set.
The network k
ey (encryption key) of the wireless LAN router (access point) is not congured correctly, or the WEP
authentication methods of the machine and wireless LAN router do not match, preventing Shared Key Authentication.
Reset the Network Key.
Check the network key of the wireless LAN router, and congure the settings correctly on the machine.
Connecting to a Wireless LAN(P. 38)
Match the WEP Authentication Method on the Machine and Wir
eless LAN Router.
The machine may be set to Shared Key Authentication, and the wireless LAN router may be set to Open
System Authentication. Change the WEP setting according to the authentication method you are using.
When Using Open System Authentication
Connect to the wireless LAN using either of the following methods:
● Connect with the access point setup method.
Connecting to a Wireless LAN by Searching for a
Router (Access Point Setup Method)(P
. 45)
● Using the Manual Setup Method, connect with the WEP authentication method set to [Open System].
Connecting to a Wireless LAN by Setting the Details (Manual Setup Method)(P. 47)
When Using Shared Key Authentication
On the wireless LAN router, change the WEP authentication method to "Shared Key", and connect again.
For the setup method, see the manual of the wireless LAN router or contact the manufacturer.
Direct Connection terminated.
The connection with a mobile de
vice was terminated.
Directly Connect Again.
Connecting a Mobile Device Directly to the Machine (Direct Connection)(P. 134)
Troubleshooting
330

Easy Conn. via PC ended due to timeout Device will restart.
30 minutes have elapsed since the start of the cableless setup mode without connecting to the computer.
Restart the Machine, and Start Cableless Setup Mode Again.
Administrator privileges are required.
[Home] on the operation panel [Menu] [Preferences] [Network] [Easy
Connection via PC] start the settings on the computer
Encryption key is not set correctly. Check the encryption key settings.
The network key (encryption key) of the wireless LAN router (access point) is not congured correctly on the machine.
Alternatively, the WEP authentication method of the machine does not match that of the wireless LAN router.
Reset the Network Key.
Check the network key of the wireless LAN router, and congure the settings correctly on the machine.
Connecting to a Wireless LAN(P. 38)
Match the WEP Authentication Method on the Machine and Wir
eless LAN Router.
The machine may be set to Shared Key Authentication, and the wireless LAN router may be set to Open
System Authentication. Change the WEP setting according to the authentication method you are using.
When Using Open System Authentication
Connect to the wireless LAN using either of the following methods:
● Connect with the access point setup method.
Connecting to a Wireless LAN by Searching for a
Router (Access Point Setup Method)(P
. 45)
● Using the Manual Setup Method, connect with the WEP authentication method set to [Open System].
Connecting to a Wireless LAN by Setting the Details (Manual Setup Method)(P. 47)
When Using Shar
ed Key Authentication
On the wireless LAN router, change the WEP authentication method to "Shared Key", and connect again.
For the setup method, see the manual of the wireless LAN router or contact the manufacturer.
Encryption key not set correctly. Check encryption key set.
The network k
ey (encryption key) of the wireless LAN router (access point) may not be congured correctly on the
machine.
Reset the Network Key.
Reset the network key.
Connecting to a Wireless LAN(P. 38)
End of Cart. Lifetime
The toner cartridge has reached the end of their lifetime.
It Is Recommended to Replace with New Toner Cartridge.
Replace the toner cartridge. Replacing the Toner Cartridge(P. 257)
IEEE 802.1X error. Cannot analyze auth. server certicate.
The certicate of the authentication server may not be corr
ect, or it may be a format unsupported by the
machine.Check the certicate of the authentication server, and change the setting, as needed.
Check the Certicate of the RADIUS Server, and Change the Setting, as Needed.
Troubleshooting
331

Setting IEEE 802.1X(P. 155)
IEEE 802.1X error. Change the auth. password.
The password has expired.
Set a New Password.
Setting IEEE 802.1X(P. 155)
IEEE 802.1X error. Check the auth. settings.
The authentication method set on the machine does not match that set on the RADIUS server.
Check the Authentication Method Set on the RADIUS Server, and Set This Correctly.
Setting IEEE 802.1X(P. 155)
IEEE 802.1X error. Congure correct authentication info.
The authentication method or authentication information of IEEE 802.1X is not set correctly.
Set the Authentication Method and Authentication Information (Keys and Certicates, Password, CA
Certicate) Correctly.
Setting IEEE 802.1X(P. 155)
Managing and Verifying a Key and Certicate(P
. 157)
IEEE 802.1X error. Congure the info. required for auth.
The authentication method or authentication information of IEEE 802.1X is not set correctly.
Set the Authentication Method and Authentication Information (Keys and Certicates, Password, CA
Certicate) Correctly.
Setting IEEE 802.1X(P. 155)
Managing and Verifying a Key and Certicate(P
. 157)
IEEE 802.1X error. No reply from the destination.
The network connection may have a pr
oblem.
Check the Network Status and Settings.
● Check the Ethernet cable and switch status.
● Check the network key of the wireless LAN router, and congure the settings correctly on the machine.
IEEE 802.1X error. The auth. server cert. has expired.
The server certicate sent fr
om the RADIUS server has expired.
Check the Expiry Date of the RADIUS Server.
Setting IEEE 802.1X(P. 155)
IEEE 802.1X error. The auth. server cert. is incorrect.
A CA certicate that supports the certicate of the authentication server is not registered to the machine.
Troubleshooting
332

Check the Certicate Information of the Authentication Server, and Register a Supported CA
Certicate.
Setting IEEE 802.1X(P. 155)
Registering a Key and Certicate or CA Certicate Obtained fr
om an Issuing Authority(P. 163)
Incorrect number of characters/invalid characters entered.
The network key of the wireless LAN router (access point) is not congured correctly on the machine.
Reset the Network Key.
Check the network key of the wireless LAN router, and congure the settings correctly on the machine.
Connecting to a Wireless LAN(P. 38)
Low Cartridge Level
It is nearing the time to replace the toner cartridge.
Prepare New Toner Cartridge, and Replace the Old Ones, as Needed.
When printing large printing jobs, it is recommended to replace the toner cartridge. Replacing the Toner
Cartridge
(P. 257)
To Continue Printing, Press [Continue Printing].
● Y
ou can manually specify when this message appears (when toner is low).
[Displ. Timing for Cartridge
Pr
ep. Notif.](P. 199)
Mem. Full (Skip Error)
The memory is full with data that has not been printed due to an err
or.
Cancel Printing of the Data with an Error, or Press [Skip Error] on the [Status Monitor] Screen.
Canceling Printing with the Operation Panel(P. 122)
Viewing the Print Job Status and Log(P. 123)
Memory is full. [Memory is full.] Is Displayed on the Operation Panel, and the Operation Cannot Be Performed.
Printing cannot be performed due to insucient available memory
. If there is data waiting to be printed, wait until the
processing is completed.
Reduce the File Size or Divide the File.
Optimize the le to make it smaller, or divide the le and then print it.
No Paper
Ther
e is no paper loaded, or the paper loaded cannot be used to print reports or lists.
Load the Paper.
Load the paper for printing reports, lists, and set the paper size and type.
Loading Paper(P. 87)
No reply from the destination.
The Ethernet cable may not be connected or ther
e may be a problem with the switch.
Troubleshooting
333

Check the Ethernet cable and switch status.
No response from host.
The machine is not connected correctly to the network.
Check the Settings of the Machine and Network, and Connect Again.
When Connected via Wireless LAN
Congure the settings correctly according to your usage environment. Connecting to a Wireless
LAN(P
. 38)
When Connected via Wired LAN
Check that the Ethernet cable is properly connected.
Connecting to a Wired LAN(P. 37)
Paper jammed.
Paper jammed in the machine during printing.
Remove the Jammed Paper, and If Printing Does Not Resume Automatically, Try Printing Again.
Paper Jams(P. 271)
Prepare a cartridge.
It is nearing the time to replace the toner cartridge.
Prepare New Toner Cartridge, and Replace the Old Ones, as Needed.
When printing large jobs, it is recommended to replace the toner cartridge. Replacing the Toner
Cartridge
(P. 257)
To Continue Printing, Press [Continue Printing].
● Y
ou can manually specify when this message appears (when toner is low).
[Displ. Timing for Cartridge
Pr
ep. Notif.](P. 199)
Set the correct authentication information.
The authentication method or authentication information of IEEE 802.1X is not set corr
ectly.
Set the Authentication Method and Authentication Information (Keys and Certicates, Password, CA
Certicate) Correctly.
Setting IEEE 802.1X(P. 155)
Managing and Verifying a Key and Certicate(P
. 157)
Set the information necessary for authentication.
The authentication method or authentication information of IEEE 802.1X is not set corr
ectly.
Set the Authentication Method and Authentication Information (Keys and Certicates, Password, CA
Certicate) Correctly.
Setting IEEE 802.1X(P. 155)
Managing and Verifying a Key and Certicate(P
. 157)
Troubleshooting
334
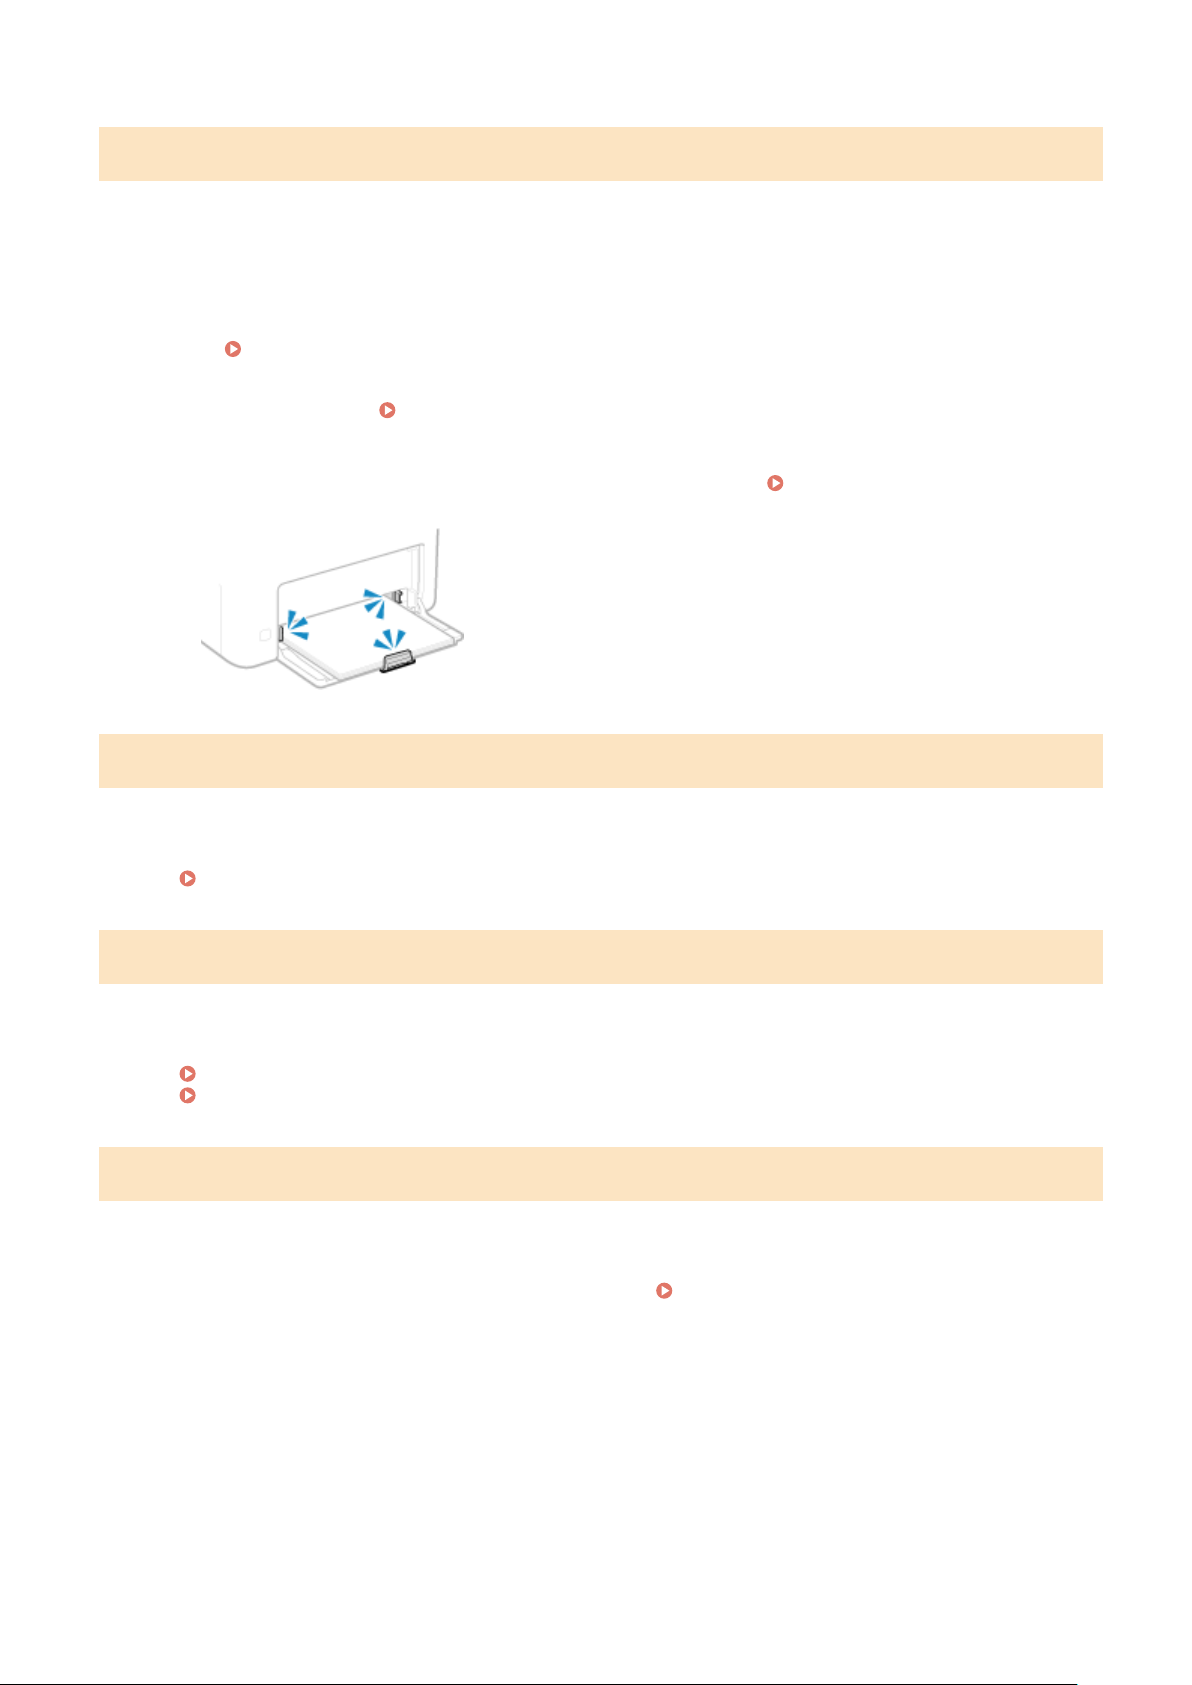
Size/Settings Mismatch
The size of the paper loaded in the machine does not match that set on the operation panel or printer driver.
Match the Size of the Loaded Paper with the Paper Size Setting.
When Using the Loaded Paper
● Change the paper size setting on the operation panel to match the size of the loaded paper.
Setting the Paper Size and Type for the Paper Drawer(P. 95)
● When
printing from a computer, change the paper size setting on the printer driver to match the size of
the loaded paper.
Printing from a Computer(P. 115)
When Reloading Paper
Load paper of the size set on the oper
ation panel or printer driver.
Loading Paper(P. 87)
Check That the Paper Guides Ar
e Not Too Loose or Too Tight.
The authentication server certicate has expired.
The server certicate sent from the RADIUS server has expired.
Check the Expiry Date of the RADIUS Server.
Setting IEEE 802.1X(P. 155)
The authentication server certicate is incorrect.
A CA certicate that supports the certicate of the authentication server is not registered to the machine.
Check the certicate information of the authentication server, and register a supported CA certicate.
Setting IEEE 802.1X(P. 155)
Registering a Key and Certicate or CA Certicate Obtained fr
om an Issuing Authority(P. 163)
Use Remote UI to set info. necessary for authentication.
The authentication method or authentication information of IEEE 802.1X is not set corr
ectly.
Check the IEEE 802.1X Setting, and Set This Correctly.
Check the following, and change the setting, as needed.
Setting IEEE 802.1X(P. 155)
● The login name is specied corr
ectly.
● At least one of the following checkboxes is selected: [Use TLS], [Use TTLS], and [Use PEAP].
● When using TLS, a key and certicate are registered.
● When using TTLS or PEAP, the user name and password are set correctly.
Troubleshooting
335
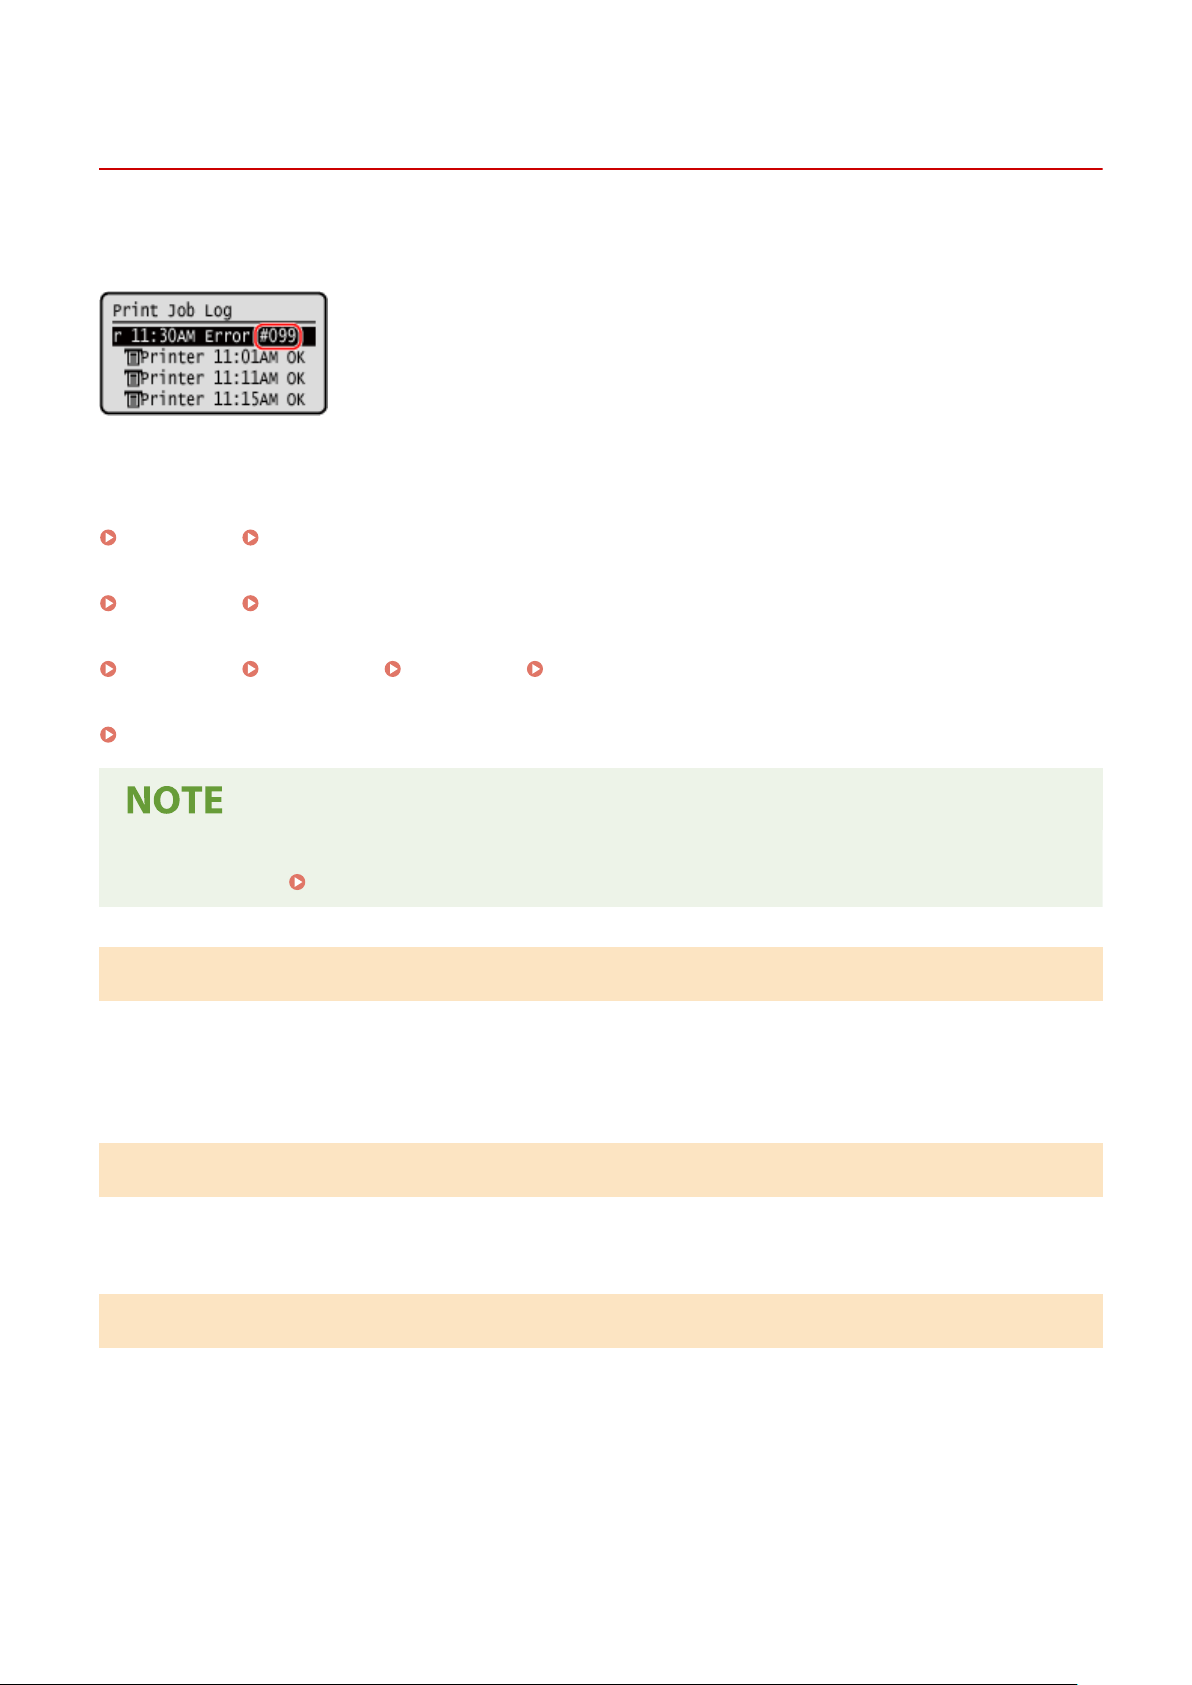
An Error Code Is Displayed
94RC-0AA
If printing cannot be performed, or another err
or occurs, an error code (three-digit number starting with "#") is
displayed in the job log.
Select the err
or code from the list below, and check how to troubleshoot the problem.
#001 to #099
#037(P. 336) #099(P. 336)
#701 to #799
#753(P. 336) #766(P. 337)
#801 to #899
#852(P. 337) #853(P. 337) #861(P. 337) #863(P. 337)
#901 to #999
#934(P. 338)
● If the pr
oblem persists even after trying the troubleshooting methods, contact your dealer or service
representative.
If the Problem Persists(P. 339)
#037
Printing could not be performed due to the le size.
Reduce the File Size or Divide the File.
Optimize the le to mak
e it smaller, or divide the le and then print it.
#099
The job was canceled.
This does not indicate a malfunction. Perform the oper
ation again, as needed.
#753
The machine was unable to connect to the network due to a disconnected Ethernet cable.
Check That the Ethernet Cable Is Pr
operly Connected.
Troubleshooting
336

#766
The certicate has e
xpired.
Renew the certicate, or use a certicate that is not expired.
Managing and Verifying a Key and Certicate(P
. 157)
Are the current date and time on the machine correct?
Check the date and time setitngs. If the settings are not correct, set the time zone, and then set the current
date and time.
Setting the Date and Time(P. 177)
#852
The power of the machine turned OFF for some reason.
Make sure the power plug is rmly inserted into an outlet.
#853
Printing failed for some reason.
If the operation was canceled when print data was being sent from a computer to the machine, try printing again.
Otherwise, check the following:
Are You Printing a Large Job?
The data volume may have exceeded the processing capacity of the machine. Reduce the number of pages to
print, or print when there is no print data being printed or waiting to be printed.
Is the Data to Be Printed Corrupted?
If the data is corrupted or otherwise damaged, x the data.
#861
Y
ou are using an unsupported printer driver, or the data you are trying to print is corrupted.
Use the printer driver of the machine, and try printing again.
Printing from a Computer(P. 115)
Is the Data to Be Printed Corrupted?
If the data is corrupted or otherwise damaged, x the data.
#863
An err
or occurred, preventing printing.
Restart the Machine, and Then Print the Data Again.
Restarting the Machine(P. 75)
Troubleshooting
337

#934
The job was deleted by the Auto Delete Suspended Jobs function.
Resolve the Error That Caused the Job to Be Suspended.
Resolve the error, and try printing again.
* Disable the Auto Delete Suspended Jobs function, or change the time until the data is automatically
deleted. [Auto Delete Suspended Jobs](P. 229)
Troubleshooting
338
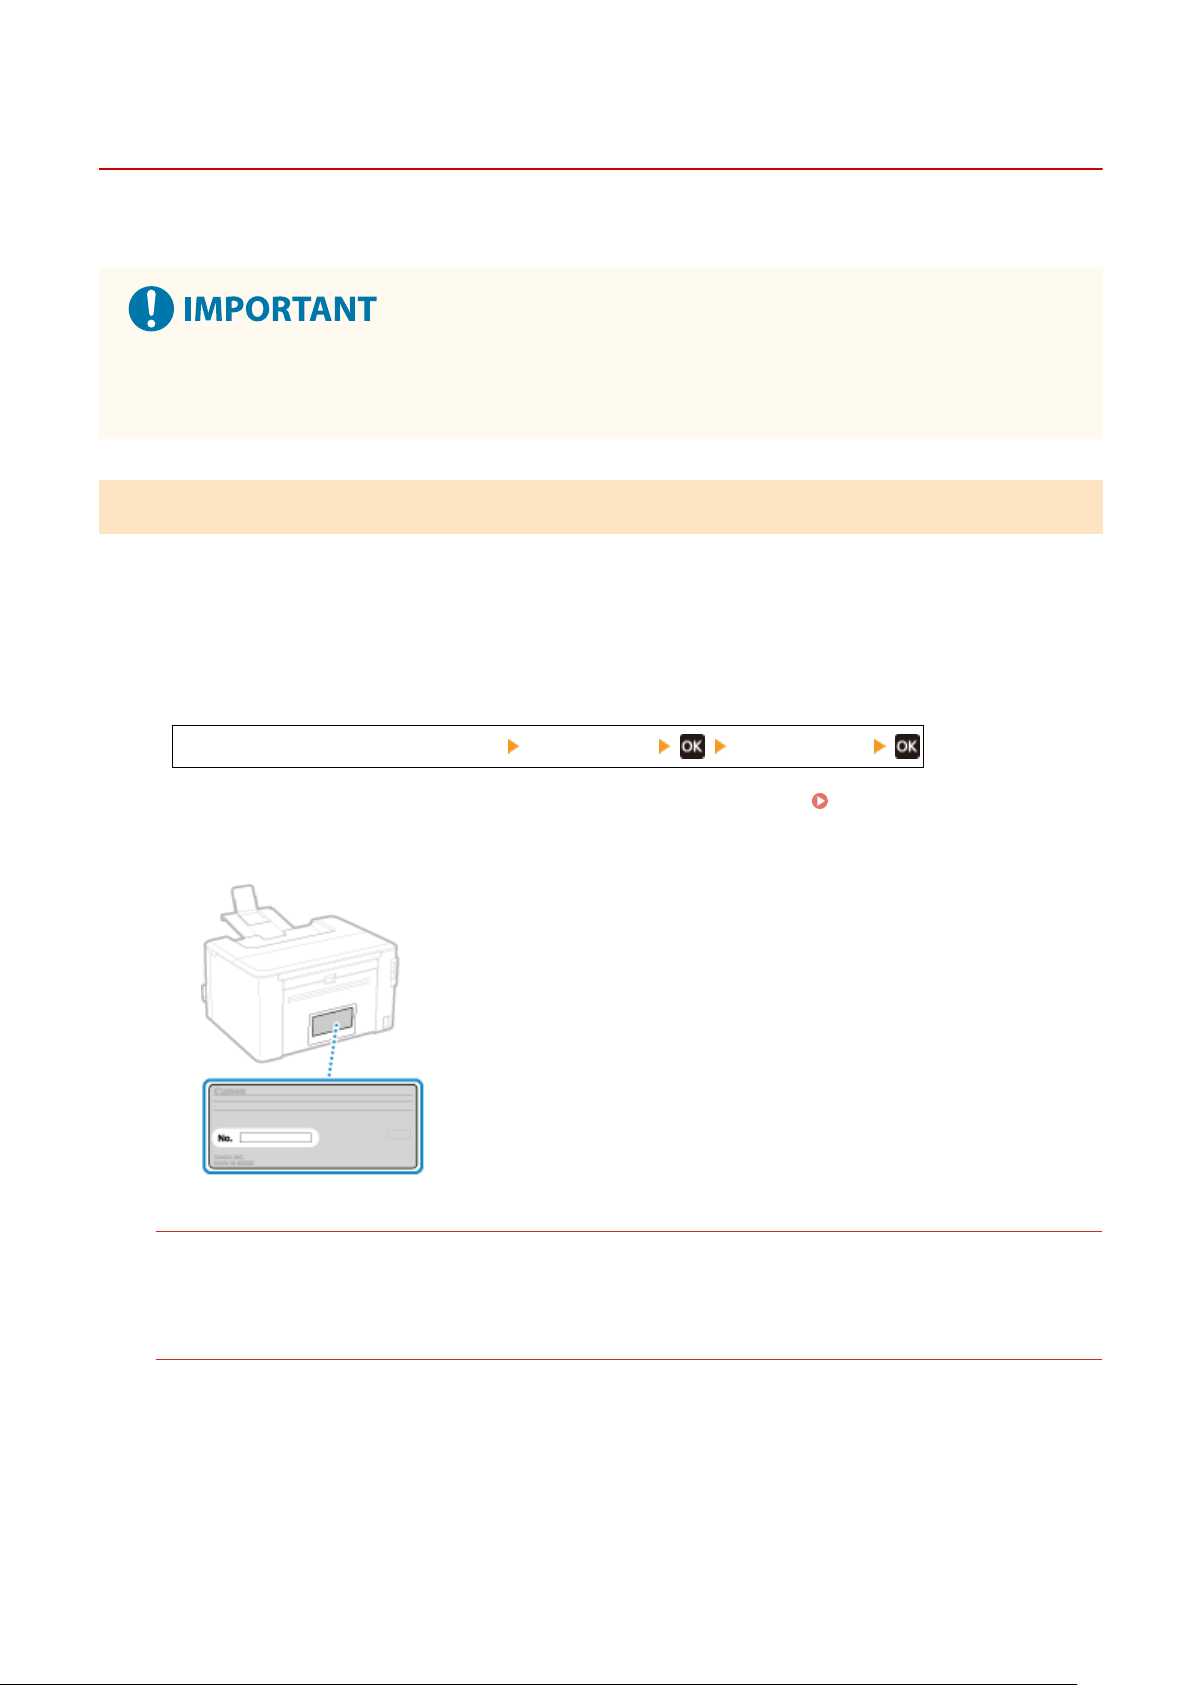
If the Problem Persists
94RC-0AC
If the pr
oblem persists even after trying the troubleshooting methods, contact your dealer or service representative.
Do not disassemble or repair the machine yourself.
● Disassembling or r
epairing the machine yourself may void the warranty.
Checks Before Contacting Us
● Pr
oduct name (LBP122dw)
● Dealer purchased from
● Details of the problem (such as operation details and their results)
● Serial number
How to Look Up the Serial Number
[Home] screen on the operation panel [Device Status] [Serial Number]
● Y
ou can also check this information using Remote UI from a computer.
Managing the Machine from a
Computer (Remote UI)(P
. 178)
● You can also check this information on the label on the back of the machine.
Customer Support (U.S.A.)
If you cannot solve a problem by referring to the information in this chapter, for the fastest resolution, please
r
efer to available support materials (including the Knowledgebase FAQs and How to Video material) for your
product at www.usa.canon.com.
Customer Support (Canada)
If you cannot solve a problem by referring to the information in this chapter, for the fastest resolution, please
r
efer to available support materials (including the Knowledgebase FAQs and How to Video material) for your
product at www.canon.ca/support.
Troubleshooting
339

Appendix
Appendix .............................................................................................................................................................
341
Manuals of the Machine ................................................................................................................................... 342
Using the User's Guide ...................................................................................................................................... 343
Manual Display Settings ................................................................................................................................... 346
Operation Examples When Using a Computer ................................................................................................ 347
Environmental Information, Regulations, and Standards .............................................................................. 357
Notice ................................................................................................................................................................. 358
Trademarks and Copyrights ............................................................................................................................. 359
Third-party Software ......................................................................................................................................... 361
Appendix
340

Appendix
94RC-0AE
In this chapter, you can vie
w the manuals of the machine and the basic operations required when using the machine
with a computer.
Manuals of the Machine
Manuals are provided according to your purpose.
Manuals of the Machine(P. 342)
The User
's Guide (this manual) contains information on all functions of the machine and specications as well
as how to maintain the machine. You can search for specic information and change the text size and layout.
Using the User's Guide(P. 343)
Manual Display Settings(P. 346)
Basic Oper
ations When Using with a Computer
You must set up a computer to use the machine from the computer and view information set on the machine
from the computer. The operations are introduced using Windows and macOS operation examples.
Operation Examples When Using a Computer(P. 347)
Other Information
Environmental Information, Regulations, and Standards(P. 357)
Notice(P. 358)
Trademarks and Copyrights(P. 359)
Third-party Software(P. 361)
Appendix
341
Manuals of the Machine
94RC-0AF
The manuals belo
w are provided with the machine. Use these according to your purpose.
Click on the icon to display the corresponding manual (PDF).
Important Safety Instructions
This contains required information to prevent injury and accidental damage to property.
Setup Guide
This e
xplains the process from unpacking the machine to setting it up so that it is ready to use.
User's Guide (this manual)
This describes all the functions of the machine in detail. It also contains the specications and describes ho
w
to maintain the machine. The User's Guide is displayed in a Web browser.
Using the User's Guide(P. 343)
● For information on drivers, and softwar
e manuals, see the online manual site.
https://oip.manual.canon/
Appendix
342
Using the User's Guide
94RC-0AH
The User
's Guide (this manual) contains information on all functions of the machine and specications as well as how
to maintain the machine.
You can use the User's Guide to nd useful information through the contents and search function.
* Click [
] or [ ] at the top of the screen to change between contents and search keyword display.
Screens and Illustrations(P. 343)
Symbols(P. 343)
Key and Button Indicators(P. 344)
Search Function(P. 344)
Operating Environment(P. 345)
● The User
's Guide describes the various functions of all model series including the machine. You can view a
table indicating which functions are supported for each model.
Supported Functions(P. 3)
Screens and Illustrations
In the User
's Guide, unless otherwise stated, the following are used in the screens and illustrations.
Model
LBP122dw
Toner Cartridges
Canon Cartridge 071
Computer Operating System
Windows 10
macOS 11
● The screens may vary depending on the model.
● The operations and screens may vary depending on the computer operating system.
● The screens are subject to change due to updates of the drivers and software.
Symbols
The warnings and cautions ar
e also listed in the Important Safety Instructions supplied with the machine. See this for
more information.
Manuals of the Machine(P. 342)
Indicates a warning concerning operations that may lead to death or serious
personal injury if not performed corr
ectly. To ensure that you use the machine
safely, always observe these warnings.
Indicates a precaution for preventing the risk of personal injury or property
damage other than a pr
oduct fault due to improper use of the machine. To
ensure that you use the machine safely, always observe these cautions.
Appendix
343

Indicates an operation that must not be performed. Read these items carefully,
and mak
e sure not to perform the described operations.
Indicates important requirements and restrictions for security and data
pr
otection as well as precautions that should be observed. Be sure to read these
items to avoid malfunction, fault, or property damage due to incorrect operation.
Indicates a clarication of an oper
ation, or contains additional explanations for a
procedure.
Key and Button Indicators
The oper
ation panel keys and buttons displayed on the screen are indicated as follows:
Operation Panel Keys
Indicated with an icon.
Example: Back key
Buttons Displayed on the Operation Panel and Computer Screen
Enclosed in squar
e brackets [ ].
Example:
[Menu]
[Cancel]
[Yes]
[Settings applied.]
Search Function
1
Click [
] at the top of the screen.
➠ The search keyword input eld is displayed at the top left of the screen.
2
Enter a keyword, and click [ ] or press the [Enter] key on the computer.
● Separ
ate multiple keywords with spaces to search for pages that include all keywords.
● Enclose keywords in double quotation marks (") to search for pages that only contain complete matches
including spaces.
3
Click the search result to view the page.
● Click [
] to show or hide the search results.
● Click [ ] to display the contents.
Appendix
344

Operating Environment
The User's Guide can be viewed in the following operating environments:
Windows
Internet Explorer 9 or later
Microsoft Edge
Firefox
Firefox ESR
Chrome
*1
macOS
Safari
Firefox
Chrome
*1
Linux
Firefox
iOS
Safari
*1
Android
Chrome
*1
*1
Only available when vie
wing at the online manual site.
Appendix
345

Manual Display Settings
94RC-0AJ
Appendix
346
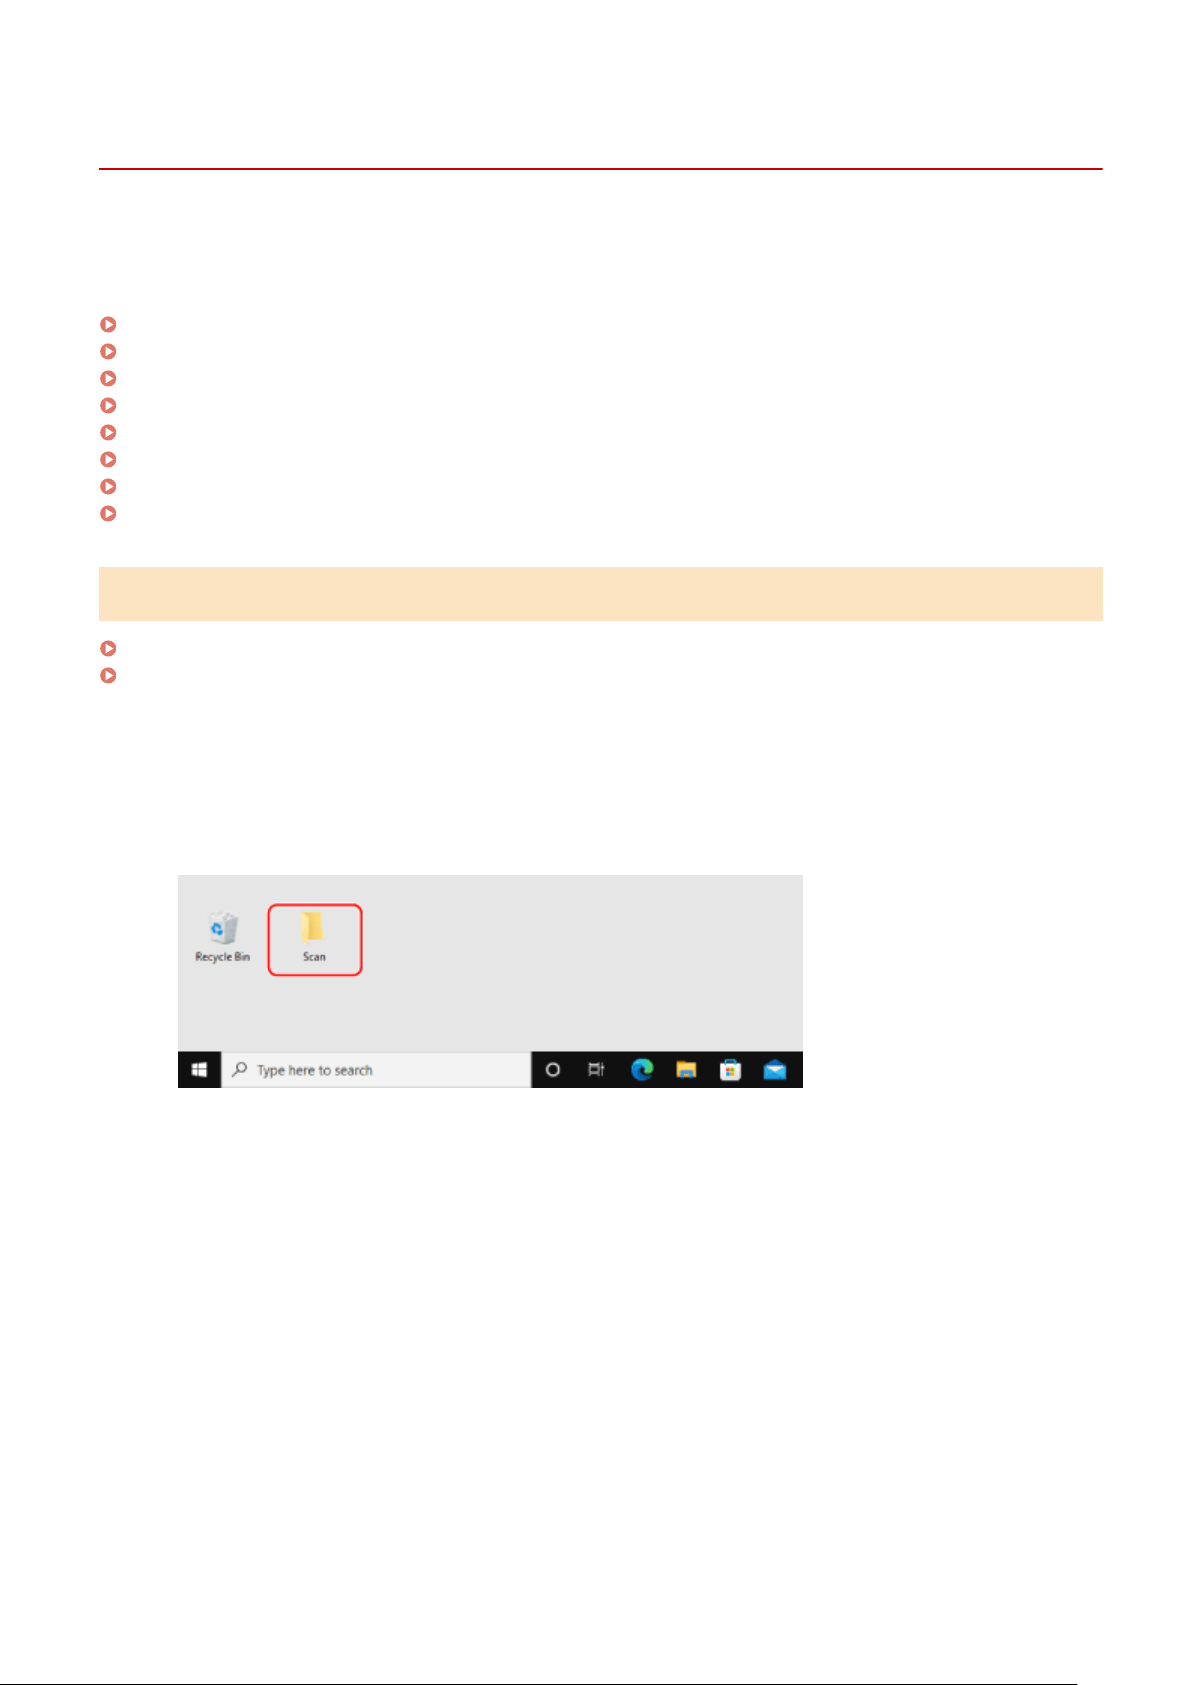
Operation Examples When Using a Computer
94RC-0AK
When using the machine fr
om a computer, you must congure the settings of the computer according to the function
you are using. In addition, you may need the computer information to view the information set on the machine.
In this case, use the operation examples below to check the required settings and information on the computer.
Creating a Shared Folder(P. 347)
Enabling Network Discovery(P. 349)
Displaying a Shared Printer in the Print Server(P. 349)
Viewing the System Information of the Computer(P. 350)
Viewing the Network Connection Information of the Computer(P. 352)
Viewing the Printer Port(P. 354)
Viewing Two-way Communication(P. 355)
Printing a Test Page(P. 355)
Creating a Shared Folder
When Using Windows(P. 347)
When Using macOS(P. 348)
◼ When Using Windo
ws
1
Create a folder in any location (such as Desktop).
2
Right-click the created folder, and click [Properties].
3
On the [Sharing] tab, click [Advanced Sharing].
➠ The [Advanced Sharing] scr
een is displayed.
4
Select the [Share this folder] checkbox, and click [Permissions].
5
Congure the access privilege.
Appendix
347
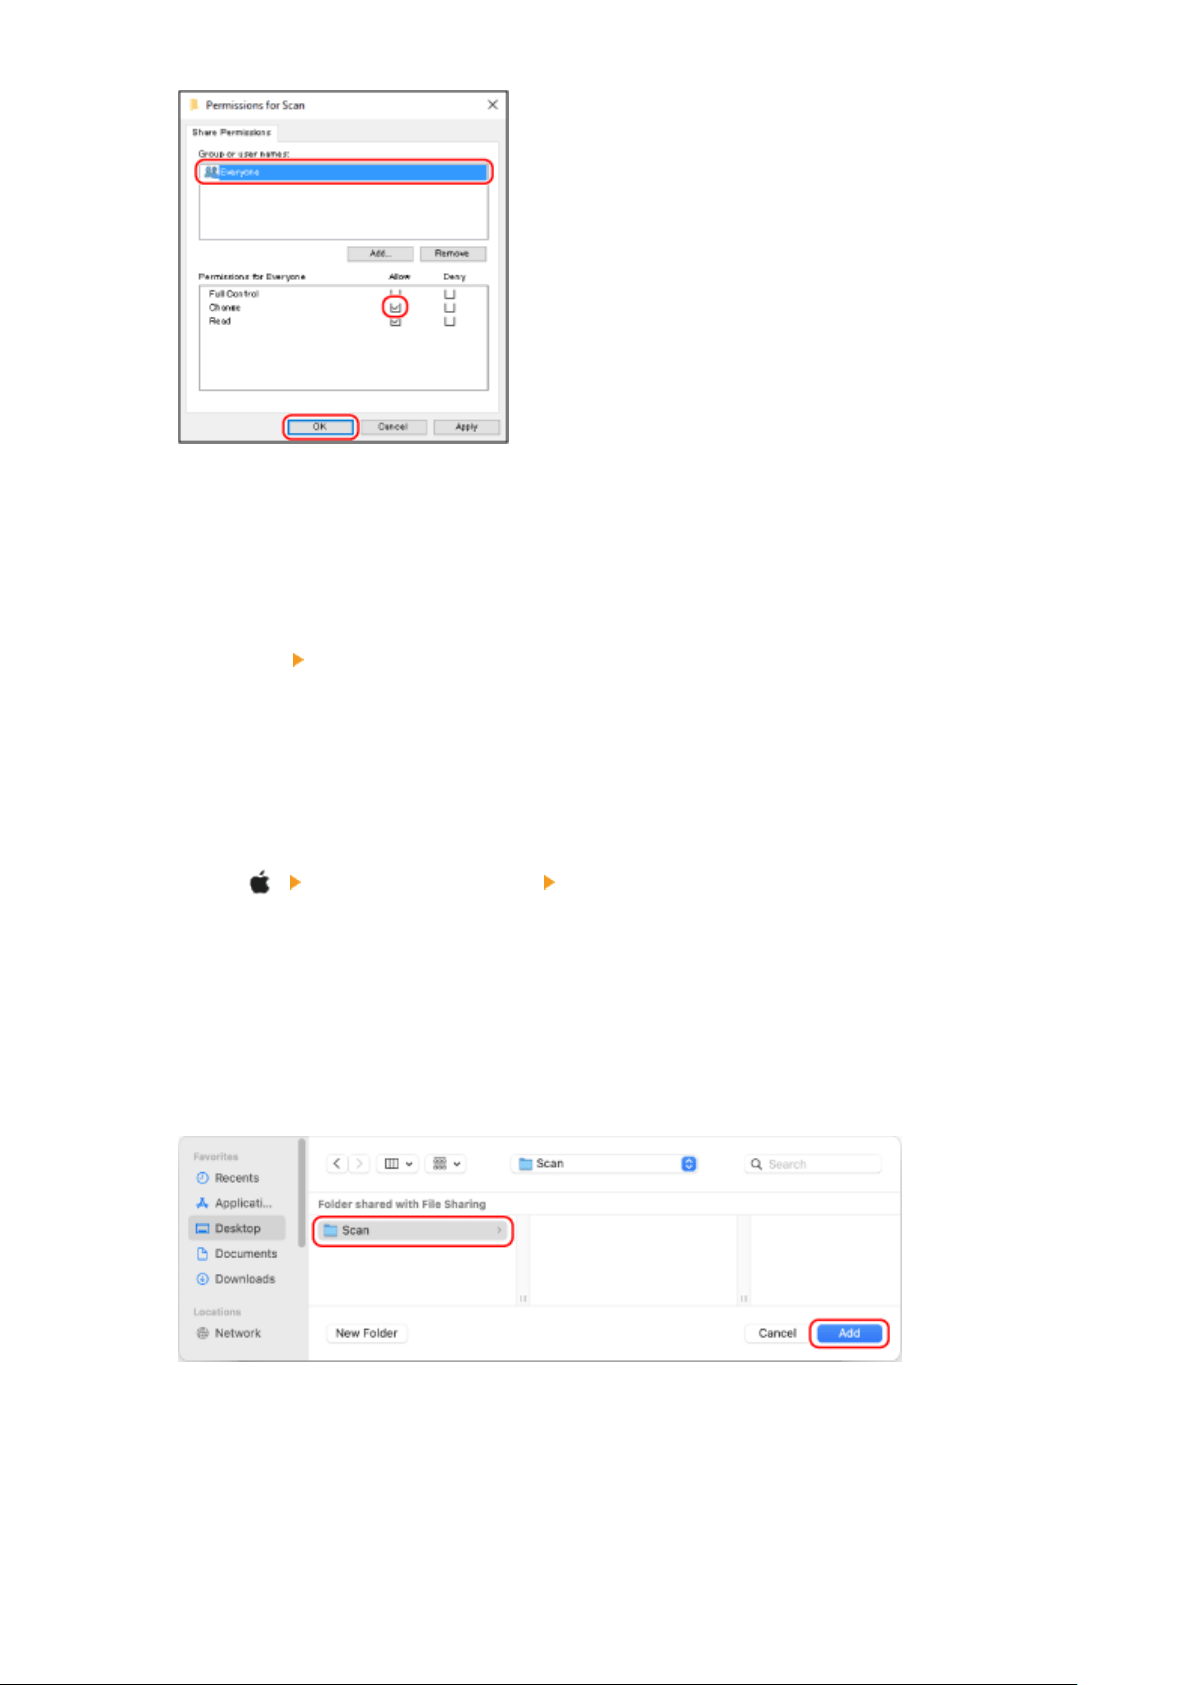
1
In [Group or user names], select [Everyone].
2
In [Permissions], select the [Allow] checkbox in [Change].
3
Click [OK].
6
Click [OK]
[Close].
➠ The cr
eated folder can be used as a shared folder.
◼ When Using macOS
1
Click [
] [System Preferences] [Sharing].
➠ The [Sharing] screen is displayed.
2
Select the [File Sharing] checkbox, and click [+] in [Shared Folders].
3
Create a folder in any location (such as Desktop), and click [Add].
4
Congure the access privilege.
Appendix
348
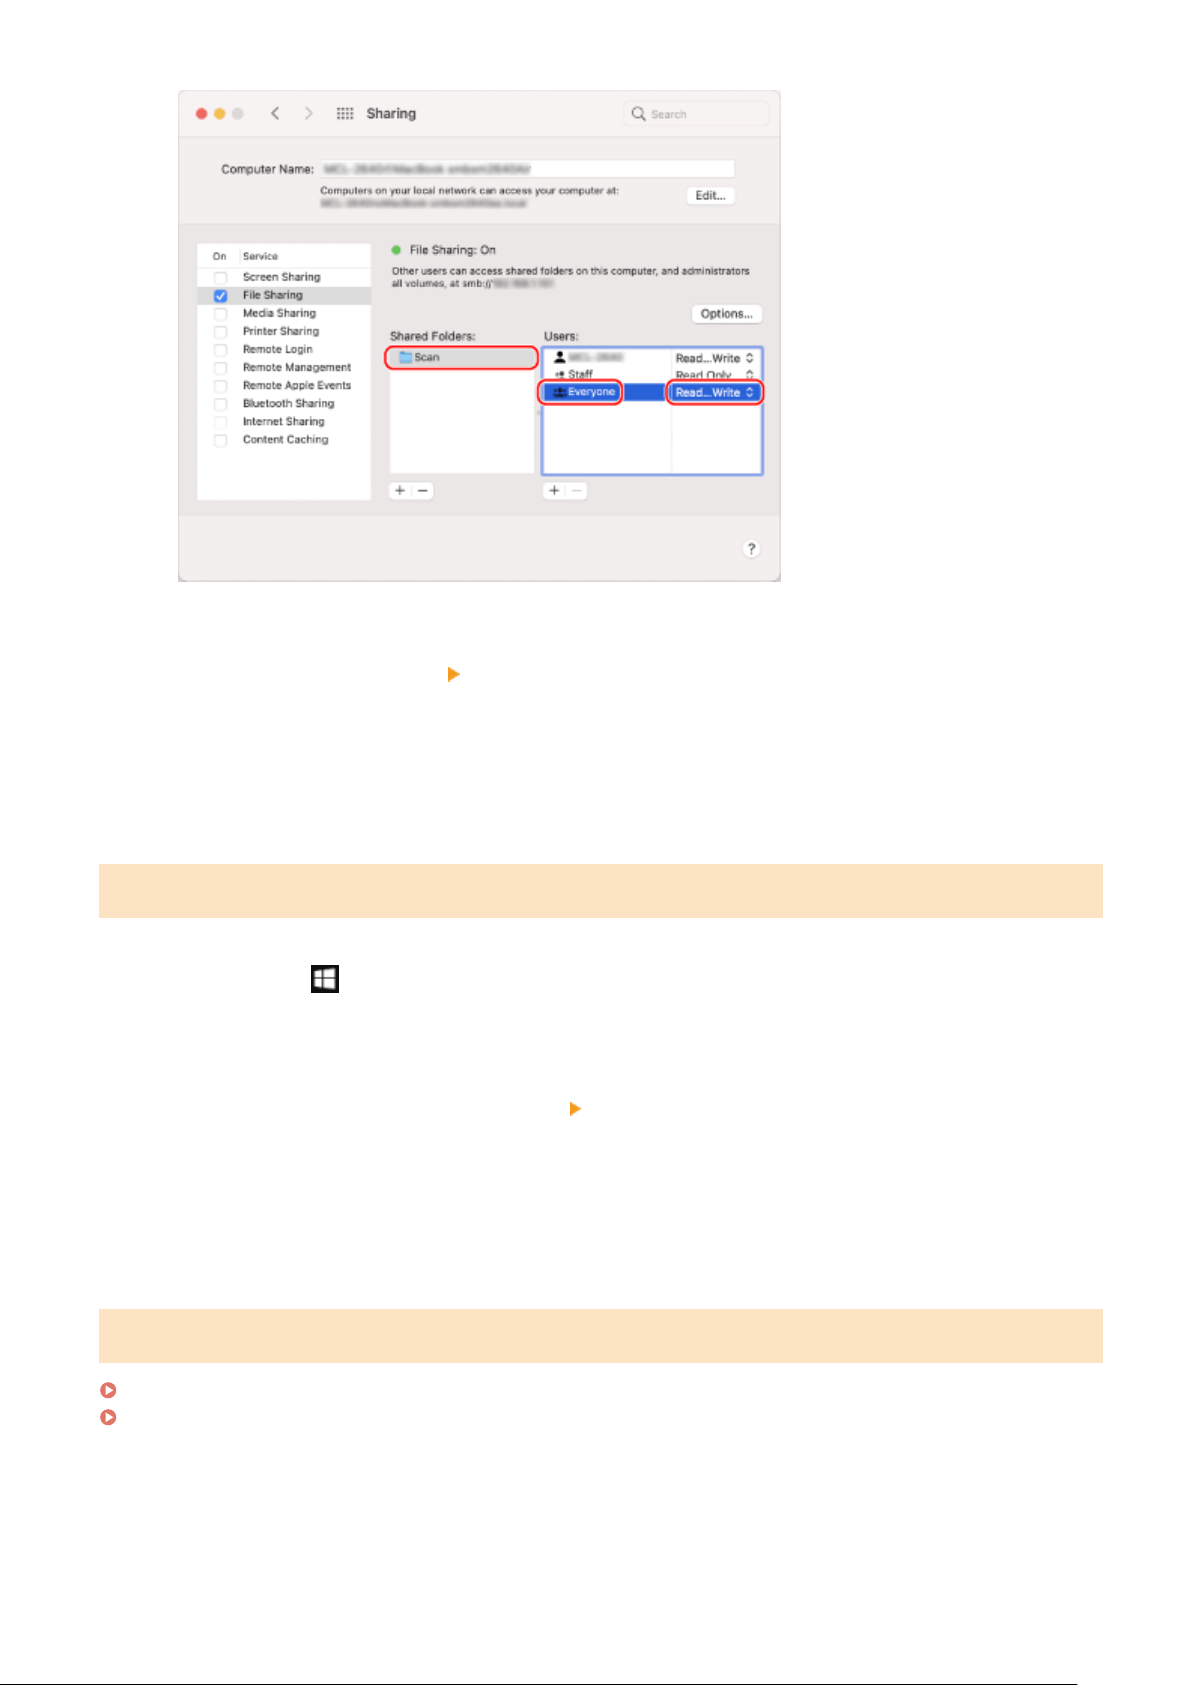
1
In [Shared Folders], select the created folder.
2
In [Users], select [Everyone] [Read & Write].
5
Close the screen.
➠ The cr
eated folder can be used as a shared folder.
Enabling Network Discovery
1
Right-click [
] (Start), and click [Network Connections].
➠ The [Status] scr
een is displayed.
2
Click [Network and Sharing Center]
[Change advanced sharing settings].
➠ The [Advanced sharing settings] scr
een is displayed.
3
In [Network discovery], select [Turn on network discovery], and click [Save changes].
Displaying a Shared Printer in the Print Server
When Using Windows(P. 350)
When Using macOS(P. 350)
Appendix
349
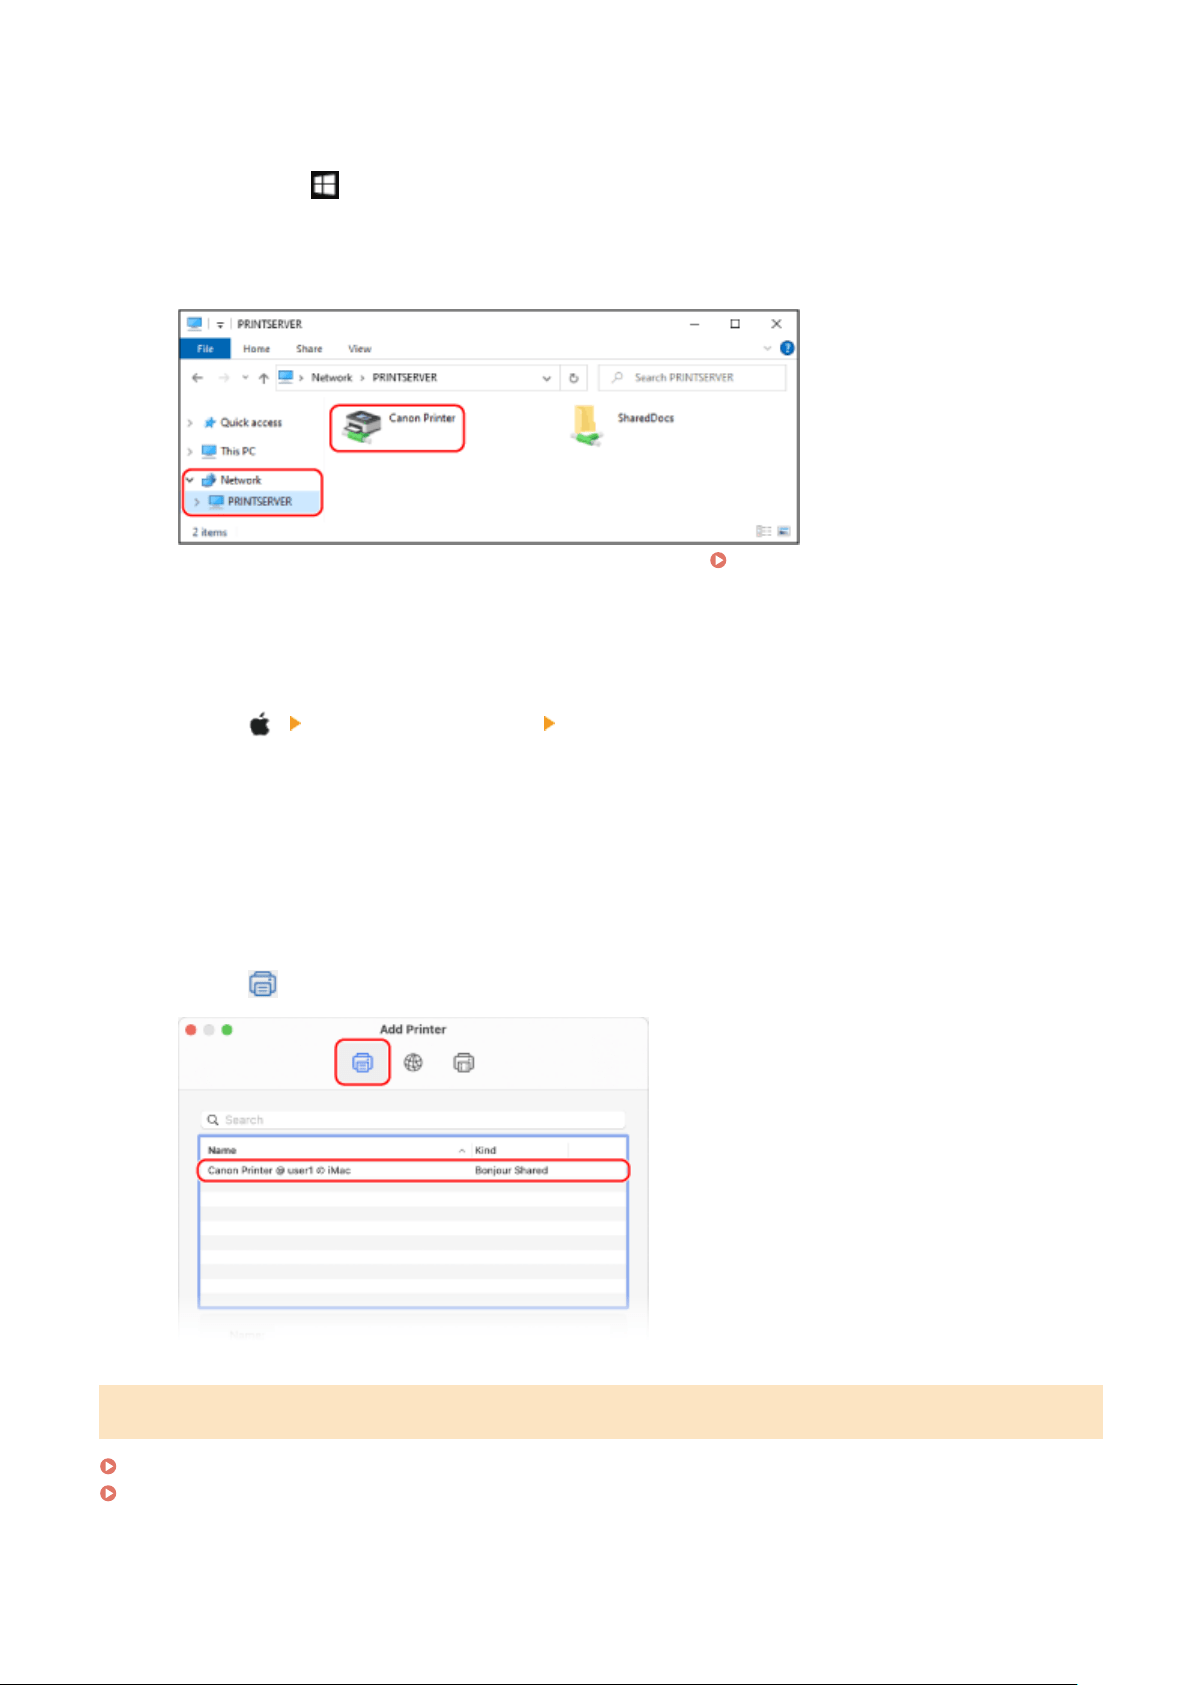
◼ When Using Windo
ws
1
Right-click [
] (Start), and click [File Explorer].
2
In [Network], select the print server to display the shared printer.
If nothing is displayed in [Network], enable network discovery. Enabling Network Discovery(P. 349)
◼ When Using macOS
1
Click [
] [System Preferences] [Printers & Scanners].
➠ The [Printers & Scanners] scr
een is displayed.
2
Click [+] at the bottom left.
➠ The [Add] scr
een is displayed.
3
Click [
], to display the shared printer.
Viewing the System Information of the Computer
When Using Windows(P. 351)
When Using macOS(P. 351)
Appendix
350

◼ When Using Windo
ws
1
Right-click [
] (Start), and click [System].
➠ The [About] scr
een is displayed.
2
In [Device specications], vie
w the computer name and operating system version.
● The computer name is displayed in [De
vice name].
● The operating system version is displayed in [System type].
If the computer has a 32-bit operating system, "32-bit Operating System" is displayed.
If the computer has a 64-bit operating system, "64-bit Operating System" is displayed.
◼ When Using macOS
1
Click [
] [System Preferences] [Sharing].
➠ The [Sharing] scr
een is displayed.
The name displayed in [Computer Name] on the [Sharing] screen may not be usable on the network. Use
the following procedure to view the computer name used on the network.
2
Click [Edit].
3
In [Local Hostname], view the computer name.
Parts displayed in gray are not included in the computer name.
Appendix
351
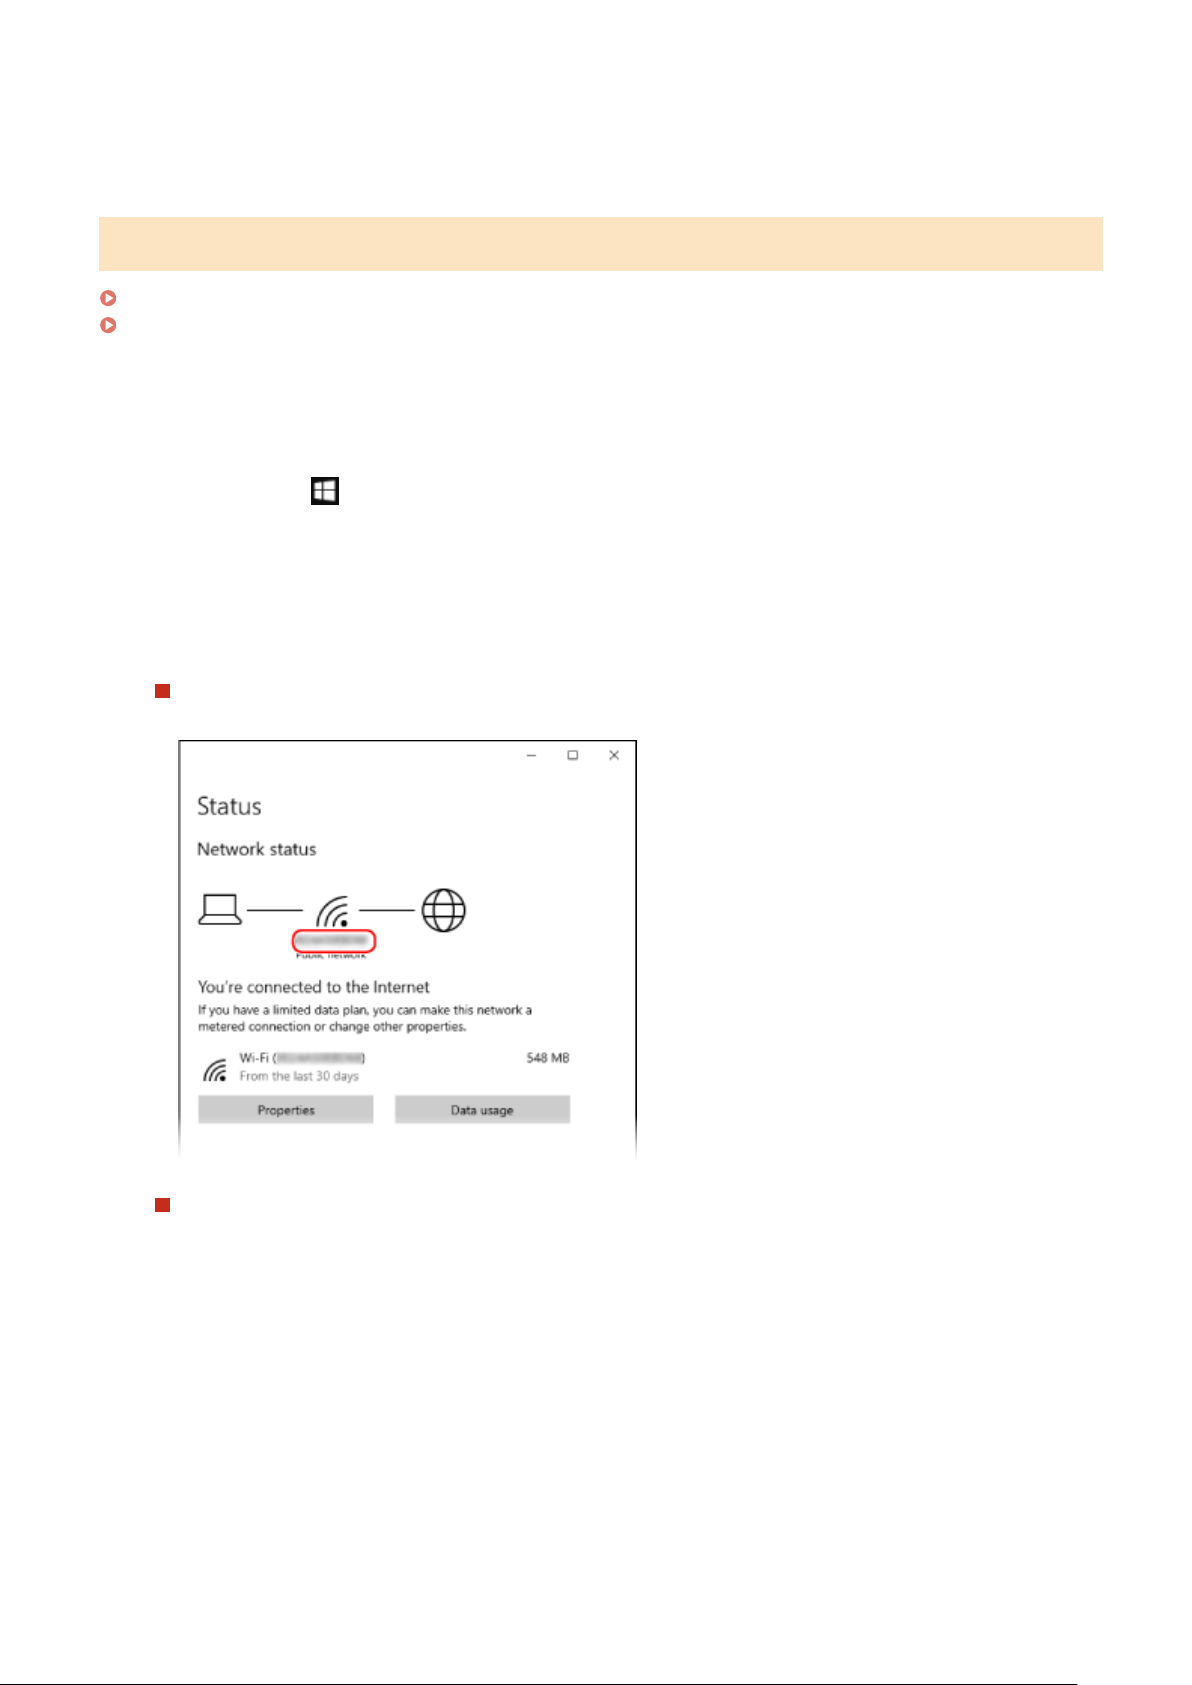
4
Click [Cancel].
Viewing the Network Connection Information of the Computer
When Using Windows(P. 352)
When Using macOS(P. 353)
◼ When Using Windo
ws
1
Right-click [
] (Start), and click [Network Connections].
➠ The [Status] scr
een is displayed.
2
View the network connection information.
Viewing the SSID of the Wired LAN
Vie
w the SSID in [Network status].
Viewing the IP Address and DNS Server
1
Click [Properties] for the connected network.
2
In [Properties], view the IP address and DNS server.
Appendix
352
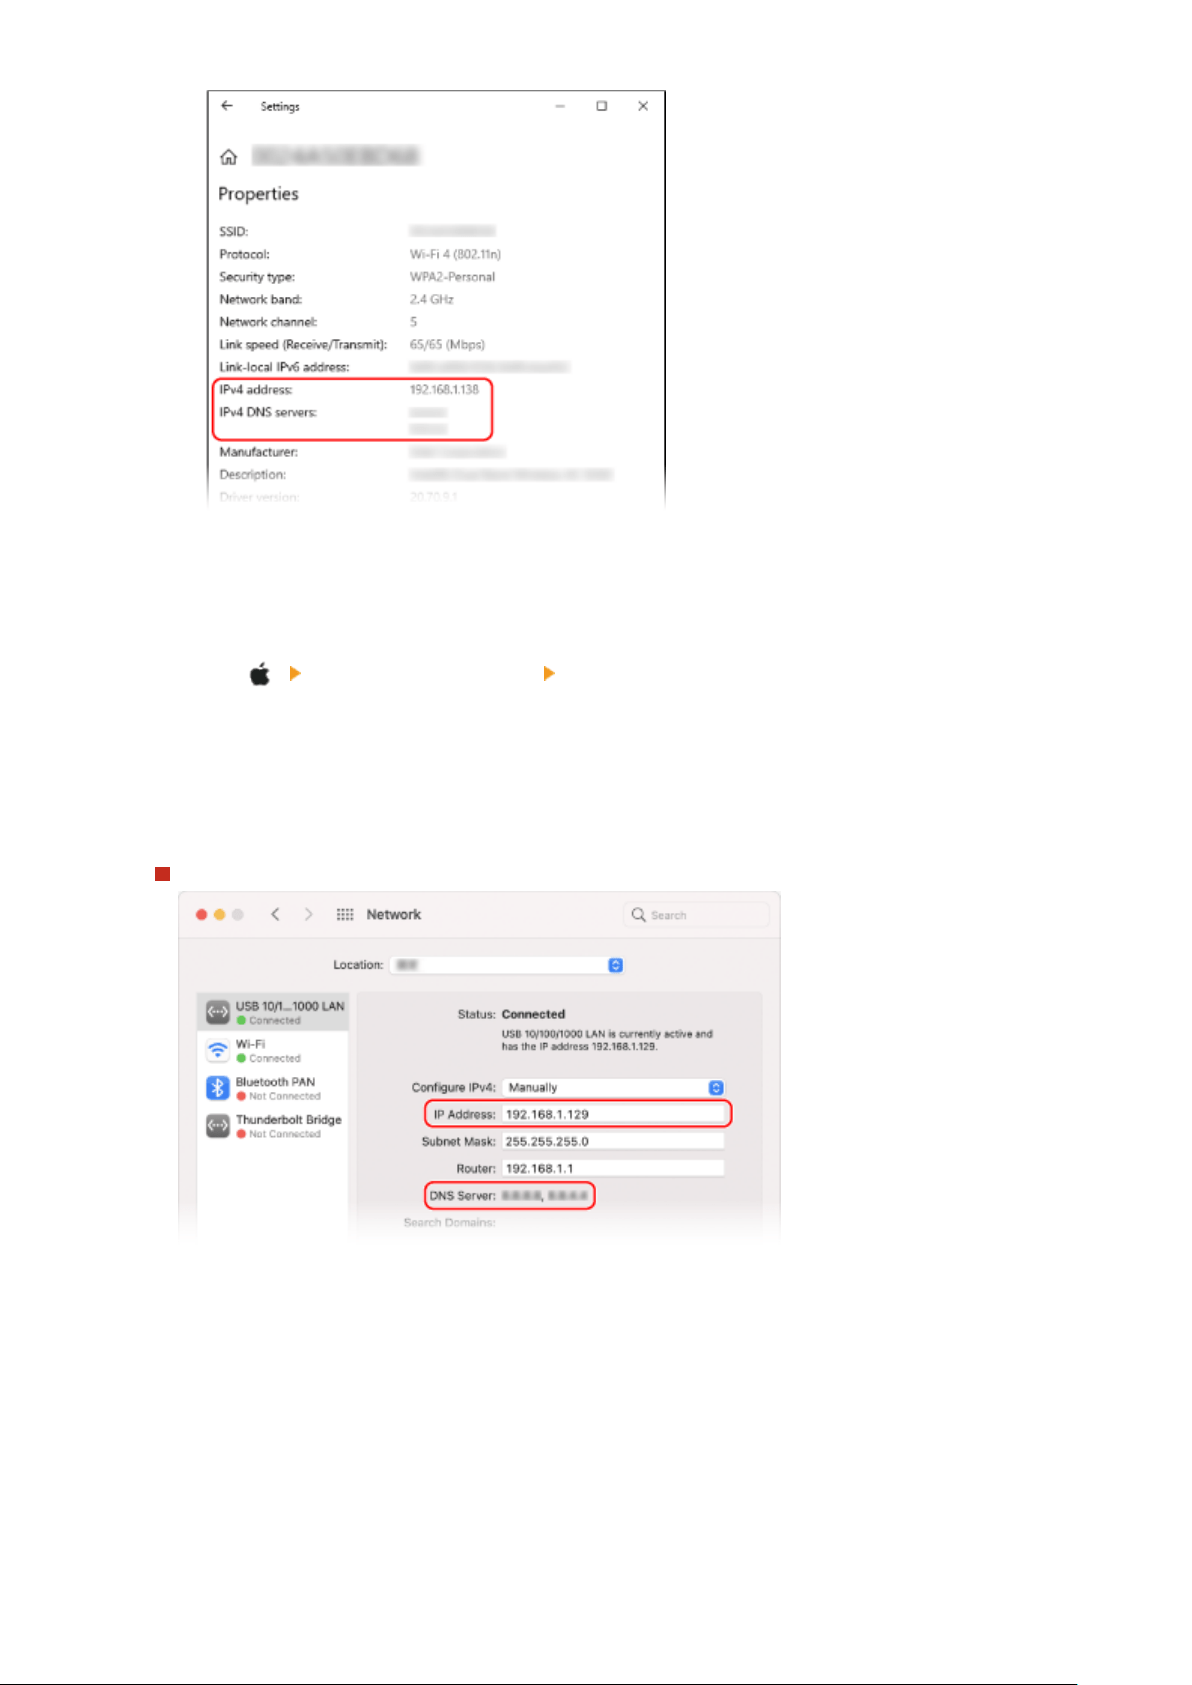
◼ When Using macOS
1
Click [
] [System Preferences] [Network].
➠ The [Network] scr
een is displayed.
2
View the IP address, DNS server, and other information.
For Wired LAN
Appendix
353
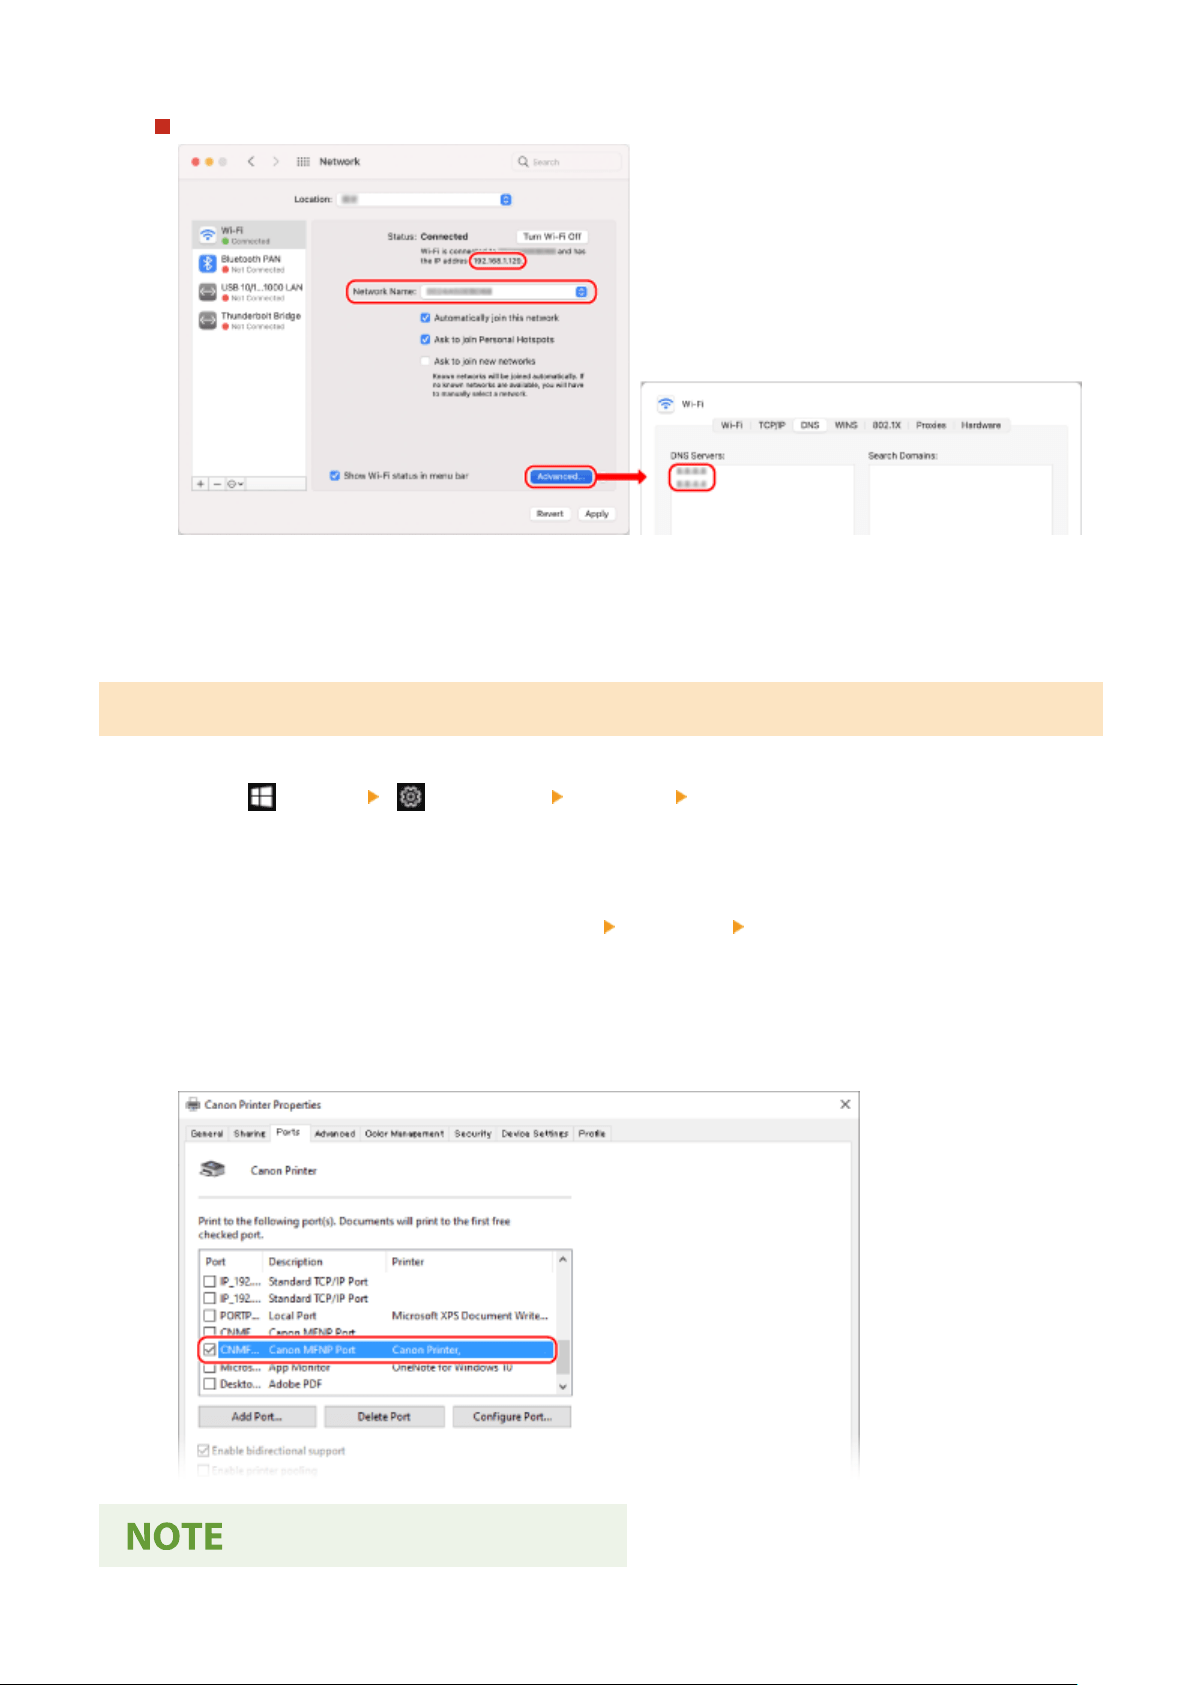
For Wireless LAN
● Vie
w the SSID in [Network Name].
● View the IP address in [Status].
● Click [Advanced], and view the DNS server on the [DNS] tab.
Viewing the Printer Port
1
Click [
] (Start) [ ] (Settings) [Devices] [Printers & scanners].
➠ The [Printers & scanners] scr
een is displayed.
2
Click the printer driver of the machine
[Manage] [Printer properties].
➠ The printer driver pr
operties screen is displayed.
3
On the [Ports] tab, view the port being used.
Appendix
354
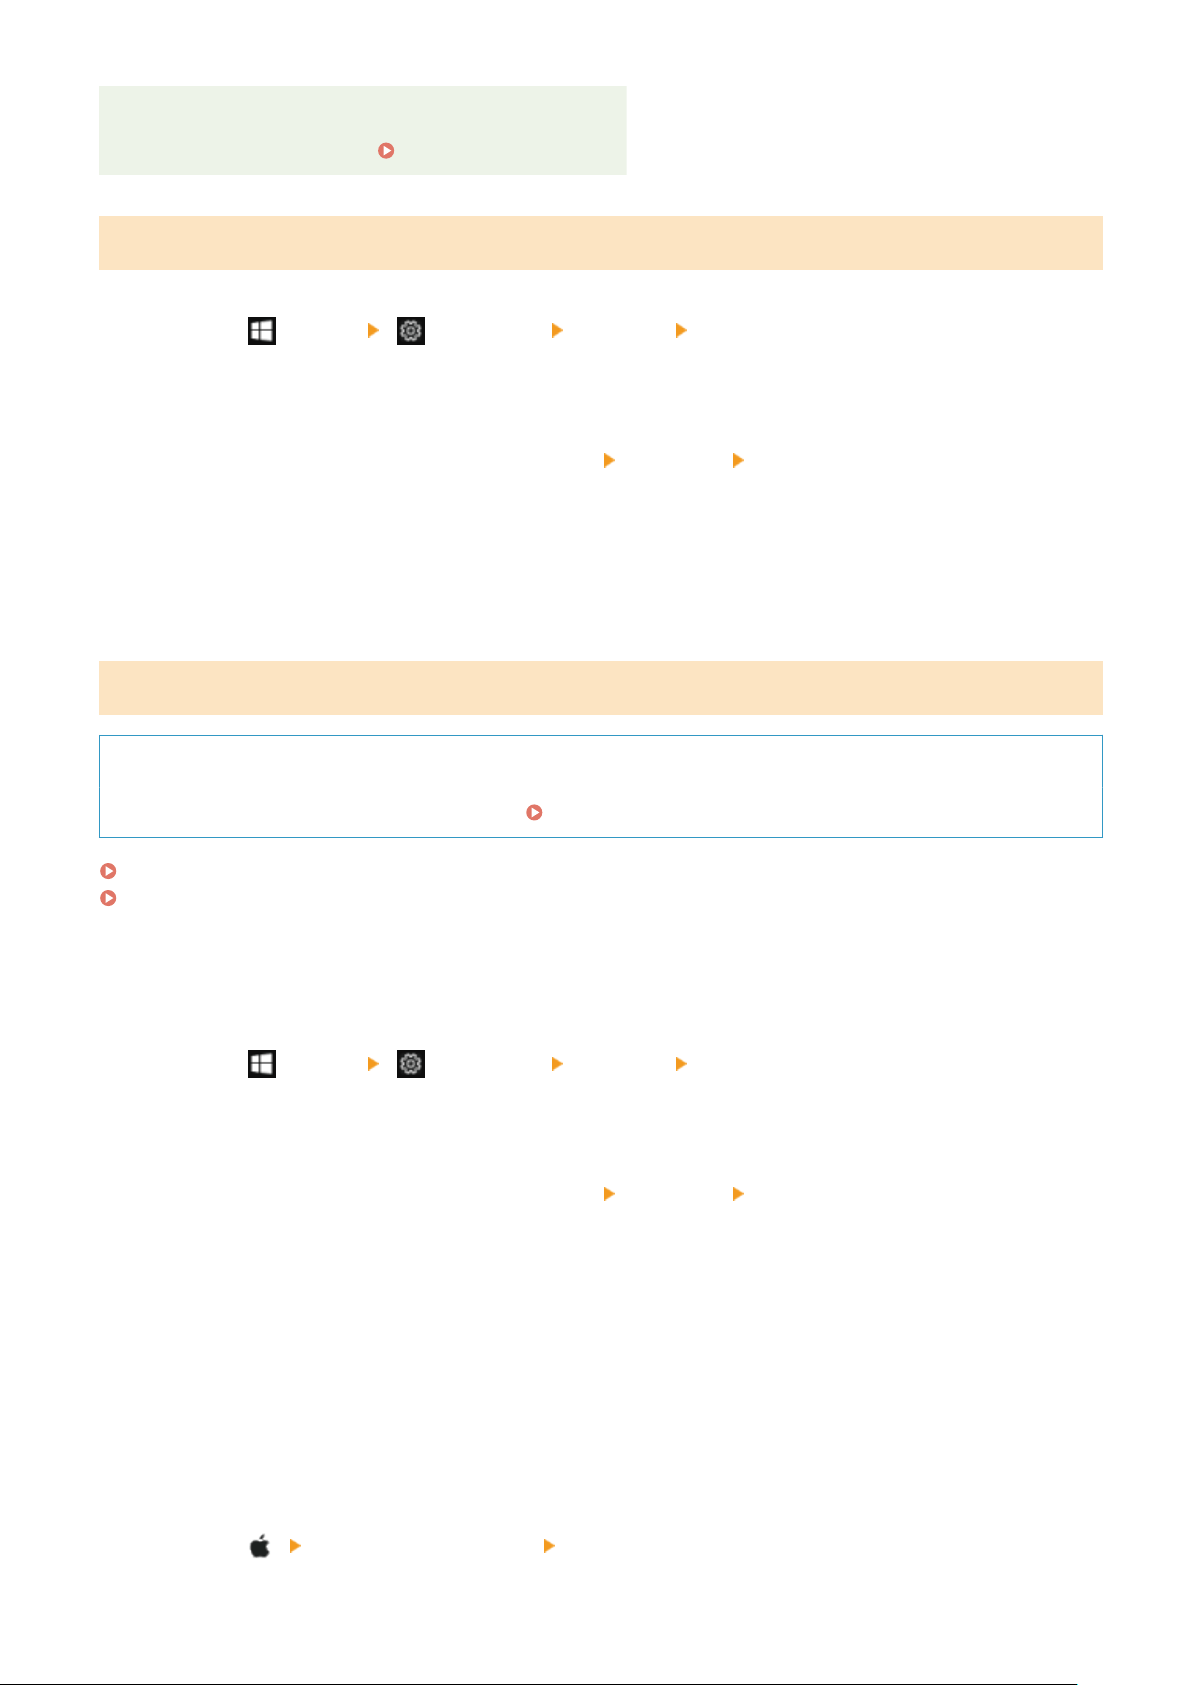
If the IP Address of the Machine Is Changed
● Y
ou must add a new port.
Adding a Port(P. 104)
Viewing Two-way Communication
1
Click [ ] (Start) [ ] (Settings) [Devices] [Printers & scanners].
➠ The [Printers & scanners] scr
een is displayed.
2
Click the printer driver of the machine
[Manage] [Printer properties].
➠ The printer driver pr
operties screen is displayed.
3
On the [Ports] tab, check that the [Enable bidirectional support] checkbox is selected.
Printing a Test Page
Required Preparations
● Load Letter size paper in the paper dr
awer.
Loading Paper in the Paper Drawer(P. 88)
When Using Windows(P. 355)
When Using macOS(P. 355)
◼ When Using Windo
ws
1
Click [
] (Start) [ ] (Settings) [Devices] [Printers & scanners].
➠ The [Printers & scanners] scr
een is displayed.
2
Click the printer driver of the machine
[Manage] [Printer properties].
➠ The printer driver pr
operties screen is displayed.
3
On the [General] tab, click [Print Test Page].
➠ When the print data is sent corr
ectly, a test page is printed from the machine.
◼ When Using macOS
1
Click [
] [System Preferences] [Printers & Scanners].
Appendix
355

➠ The [Printers & Scanners] scr
een is displayed.
2
Select the machine, and click [Open Print Queue].
3
From the [Printer] menu, click [Print Test Page].
➠ When the print data is sent corr
ectly, a test page is printed from the machine.
Appendix
356

Environmental Information, Regulations, and
Standar
ds
94RC-0AL
◼ International ENERGY ST
AR
®
program (for USA and Canada only)
The international ENERGY STAR Program is an international program that promotes energy
savings in computers and other oce equipment. The pr
ogram backs the development and
dissemination of products with functions that effectively reduce energy consumption. It is
an open system in which businesses can participate voluntarily.
◼ IPv6 Ready Logo
The protocol stack included in this product has obtained the IPv6 Ready Logo Phase-2
established b
y the IPv6 Forum.
◼ When disposing of used toner cartridges
● T
o protect the environment and make more effective use of resources, Canon promotes the recovery and recycling
of used toner cartridges. Please cooperate in the recovery of toner cartridges (resource reuse). For details on
resource reuse, see the Canon website:
global.canon/ctc
When disposing of toner cartridges, pack them in their original packaging to prevent toner dispersal and dispose of
the cartridges in accordance with your local government instructions.
Appendix
357

Notice
94RC-0AR
● The information in this document is subject to change without notice.
● CANON
INC. MAKES NO WARRANTY OF ANY KIND WITH REGARD TO THIS MANUAL, EITHER EXPRESS OR IMPLIED,
EXCEPT AS STIPULATED HEREIN, INCLUDING WITHOUT LIMITATION THEREOF WARRANTIES AS TO MARKETABILITY,
MERCHANTABILITY, FITNESS FOR A PARTICULAR PURPOSE OF USE, OR NON-INFRINGEMENT OF PATENT RIGHTS.
CANON INC. SHALL NOT BE LIABLE FOR ANY DIRECT, INCIDENTAL OR CONSEQUENTIAL DAMAGES OF ANY NATURE,
NOR FOR LOSSES OR EXPENSES RESULTING FROM THE USE OF THIS MANUAL.
● If you are unable to view the manual in PDF format, download Adobe Acrobat Reader from the Adobe Systems
website (https://get.adobe.com/reader/).
Appendix
358

Trademarks and Copyrights
94RC-0AS
◼ T
rademarks
Adobe, Acrobat and Reader are registered trademarks of Adobe Systems Incorporated in the United States and/or
other countries.
Apple, Bonjour, iPad, iPhone, iPod touch, Safari, Mac, macOS and OS X are trademarks of Apple Inc.
iOS is a trademark or registered trademark of Cisco in the U.S. and other countries and is used under license.
Mopria®, the Mopria® Logo and the Mopria® Alliance logo are registered trademarks and service marks of Mopria
Alliance, Inc. in the United States and other countries. Unauthorized use is strictly prohibited.
Google Chrome, Chrome OS, Chromebook, and Android are trademarks of Google LLC.
This product contains the Universal Font Scaling Technology or UFST® under license from Monotype Imaging, Inc.
UFST® is a trademark of Monotype Imaging, Inc. registered in the United States Patent and Trademark Oce and may
be registered in certain jurisdictions.
UFST: Copyright © 1989 - 1996, 1997, 2003, 2004, 2008, 2014 all rights reserved, by Monotype Imaging Inc.
Copyright © 2008 Adobe Systems Incorporated. All rights reserved.
Pr
otected by U.S. Patents 6,185,684; 6,205,549; 7,213,269; 7,272,628; 7,278,168; Patents pending in the U.S. and other
countries.
Systems Incorporated unless otherwise stated. The name PostScript also is used as a product trademark for Adobe
Systems’ implementation of the PostScript language interpreter.
Except as otherwise stated, any reference to a “PostScript printing device,” “PostScript display device,” or similar item
refers to a printing device, display device or item (respectively) that contains PostScript technology created or licensed
by Adobe Systems Incorporated and not to devices or items that purport to be merely compatible with the PostScript
language.
Adobe, the Adobe logo, PostScript, the PostScript Logo, and PostScript 3 are either registered trademarks or
trademarks of Adobe Systems Incorporated in the United States and/or other countries.
Linux is a registered trademark of Linus Torvalds. Microsoft and Windows are either registered trademarks or
trademarks of Microsoft Corporation in the United States and/or other countries.
All other trademarks are the property of their respective owners.
All brand names and product names appearing on this document are registered trademarks or trademarks of their
respective owners.
◼ Copyright
Unauthorized reproduction of the contents of this document in whole or in part is prohibited.
Appendix
359

◼ Legal Limitations on the Usage of Y
our Product and the Use of Images
Using your product to scan, print or otherwise reproduce certain documents, and the use of such images as scanned,
printed or otherwise reproduced by your product, may be prohibited by law and may result in criminal and/or civil
liability. A non-exhaustive list of these documents is set forth below. This list is intended to be a guide only. If you are
uncertain about the legality of using your product to scan, print or otherwise reproduce any particular document,
and/or of the use of the images scanned, printed or otherwise reproduced, you should consult in advance with your
legal advisor for guidance.
● Paper Money
● Travelers Checks
● Money Orders
● Food Stamps
● Certicates of Deposit
● Passports
● Postage Stamps (canceled or uncanceled)
● Immigration Papers
● Identifying Badges or Insignias
● Internal Revenue Stamps (canceled or uncanceled)
● Selective Service or Draft Papers
● Bonds or Other Certicates of Indebtedness
● Checks or Drafts Issued by Governmental Agencies
● Stock Certicates
● Motor Vehicle Licenses and Certicates of Title
● Copyrighted Works/Works of Art without Permission of Copyright Owner
V_220726
Appendix
360

Third-party Software
94RC-0AU
For details about thir
d-party software, click the following icon:
Third-Party Services
Third-Party Software Included in This Manual
Appendix
361

This Font Software is licensed under the SIL Open Font License,
V
ersion 1.1.
This license is copied below, and is also available with a FAQ at:
http://scripts.sil.org/OFL
-----------------------------------------------------------
SIL OPEN FONT LICENSE Version 1.1 - 26 February 2007
-----------------------------------------------------------
PREAMBLE
The goals of the Open Font License (OFL) are to stimulate worldwide
development of collaborative font projects, to support the font
creation efforts of academic and linguistic communities, and to
provide a free and open framework in which fonts may be shared and
improved in partnership with others.
The OFL allows the licensed fonts to be used, studied, modied and
redistributed freely as long as they are not sold by themselves. The
fonts, including any derivative works, can be bundled, embedded,
redistributed and/or sold with any software provided that any reserved
names are not used by derivative works. The fonts and derivatives,
however, cannot be released under any other type of license. The
requirement for fonts to remain under this license does not apply to
any document created using the fonts or their derivatives.
DEFINITIONS
"Font Software" refers to the set of les released by the Copyright
Holder(s) under this license and clearly marked as such. This may
include source les, build scripts and documentation.
"Reserved Font Name" refers to any names specied as such after the
copyright statement(s).
"Original Version" refers to the collection of Font Software
components as distributed by the Copyright Holder(s).
"Modied Version" refers to any derivative made by adding to,
deleting, or substituting -- in part or in whole -- any of the
components of the Original Version, by changing formats or by porting
the Font Software to a new environment.
"Author" refers to any designer, engineer, programmer, technical
writer or other person who contributed to the Font Software.
PERMISSION & CONDITIONS
Permission is hereby granted, free of charge, to any person obtaining
a copy of the Font Software, to use, study, copy, merge, embed,
modify, redistribute, and sell modied and unmodied copies of the
Font Software, subject to the following conditions:
SIL OPEN FONT LICENSE
362

1) Neither the Font Software nor any of its individual components, in
Original or Modied V
ersions, may be sold by itself.
2) Original or Modied Versions of the Font Software may be bundled,
redistributed and/or sold with any software, provided that each copy
contains the above copyright notice and this license. These can be
included either as stand-alone text les, human-readable headers or
in the appropriate machine-readable metadata elds within text or
binary les as long as those elds can be easily viewed by the user.
3) No Modied Version of the Font Software may use the Reserved Font
Name(s) unless explicit written permission is granted by the
corresponding Copyright Holder. This restriction only applies to the
primary font name as presented to the users.
4) The name(s) of the Copyright Holder(s) or the Author(s) of the Font
Software shall not be used to promote, endorse or advertise any
Modied Version, except to acknowledge the contribution(s) of the
Copyright Holder(s) and the Author(s) or with their explicit written
permission.
5) The Font Software, modied or unmodied, in part or in whole,
must be distributed entirely under this license, and must not be
distributed under any other license. The requirement for fonts to
remain under this license does not apply to any document created using
the Font Software.
TERMINATION
This license becomes null and void if any of the above conditions are
not met.
DISCLAIMER
THE FONT SOFTWARE IS PROVIDED "AS IS", WITHOUT WARRANTY OF ANY KIND,
EXPRESS OR IMPLIED, INCLUDING BUT NOT LIMITED TO ANY WARRANTIES OF
MERCHANTABILITY, FITNESS FOR A PARTICULAR PURPOSE AND NONINFRINGEMENT
OF COPYRIGHT, PATENT, TRADEMARK, OR OTHER RIGHT. IN NO EVENT SHALL THE
COPYRIGHT HOLDER BE LIABLE FOR ANY CLAIM, DAMAGES OR OTHER LIABILITY,
INCLUDING ANY GENERAL, SPECIAL, INDIRECT, INCIDENTAL, OR CONSEQUENTIAL
DAMAGES, WHETHER IN AN ACTION OF CONTRACT, TORT OR OTHERWISE, ARISING
FROM, OUT OF THE USE OR INABILITY TO USE THE FONT SOFTWARE OR FROM
OTHER DEALINGS IN THE FONT SOFTWARE.
SIL OPEN FONT LICENSE
363

1
The Software Subjected to Other License Conditions
Please refer to Contents of Software and respective License terms below, for more detail and
corresponding license conditions.
Contents of Software
Names of Software page
1.Adobe PDF Scan Library ............................................................................................................... 2
2.expat ........................................................................................................................................... 5
3.Net-SNMP .................................................................................................................................... 6
4. XKCP ......................................................................................................................................... 18

2
1.Adobe PDF Scan Library
Portions use software under the following terms:
______________________________________________________________________________________
This product contains either BSAFE and/or TIPEM software by RSA Security Inc.
______________________________________________________________________________________
This product includes software developed by the Apache Software Foundation
(http://www.apache.org/).
Copyright (c) 1998-2000 The Apache Software Foundation. All rights reserved.
Redistribution and use in source and binary forms, with or without modification, are permitted
provided that the following conditions are met:
1. Redistributions of source code must retain the above copyright notice, this list of conditions and
the following disclaimer.
2. Redistributions in binary form must reproduce the above copyright notice, this list of conditions
and the following disclaimer in the documentation and/or other materials provided with the
distribution.
3. The end-user documentation included with the redistribution, if any, must include the following
acknowledgment:
"This product includes software developed by the Apache Software Foundation
(http://www.apache.org/)."
Alternately, this acknowledgment may appear in the software itself, if and wherever such third-party
acknowledgments normally appear.
4. The names "Xerces" and "Apache Software Foundation" must not be used to endorse or promote
products derived from this software without prior written permission. For written permission, please
contact [email protected].
5. Products derived from this software may not be called "Apache", nor may "Apache" appear in their
name, without prior written permission of the Apache Software Foundation.
THIS SOFTWARE IS PROVIDED ``AS IS'' AND ANY EXPRESSED OR IMPLIED WARRANTIES, INCLUDING,
BUT NOT LIMITED TO, THE IMPLIED WARRANTIES OF MERCHANTABILITY AND FITNESS FOR A
PARTICULAR PURPOSE ARE DISCLAIMED. IN NO EVENT SHALL THE APACHE SOFTWARE FOUNDATION
OR ITS CONTRIBUTORS BE LIABLE FOR ANY DIRECT, INDIRECT, INCIDENTAL, SPECIAL, EXEMPLARY, OR
CONSEQUENTIAL DAMAGES (INCLUDING, BUT NOT LIMITED TO, PROCUREMENT OF SUBSTITUTE
GOODS OR SERVICES; LOSS OF USE, DATA, OR PROFITS; OR BUSINESS INTERRUPTION) HOWEVER
CAUSED AND ON ANY THEORY OF LIABILITY, WHETHER IN CONTRACT, STRICT LIABILITY, OR TORT

3
(INCLUDING NEGLIGENCE OR OTHERWISE) ARISING IN ANY WAY OUT OF THE USE OF THIS SOFTWARE,
EVEN IF ADVISED OF THE POSSIBILITY OF SUCH DAMAGE.
This software consists of voluntary contributions made by many individuals on behalf of the Apache
Software Foundation and was originally based on software copyright (c) 1999, International Business
Machines, Inc., http://www.ibm.com. For more information on the Apache Software Foundation,
please see <http://www.apache.org/>.
______________________________________________________________________________________
March 27, 2003
Portions of this product are based on Modifications created from the Original Code known as the
"Sablotron XSLT Processor". The Sablotron XSLT Processor is subject to the Mozilla Public License
Version 1.1 (the "License"). You may obtain a copy of
the License at http://www.mozilla.org/MPL/
Software distributed under the License is distributed on an "AS IS" basis, WITHOUT WARRANTY OF
ANY KIND, either express or implied. See the License for the specific language governing rights and
limitations under the License.
The Original Code is the Sablotron XSLT Processor.
The Initial Developer of the Original Code is Ginger Alliance Ltd. Portions created by Ginger Alliance
are Copyright (C) 2000 Ginger Alliance Ltd. All Rights Reserved.
Pursuant to sections 3.2 and 3.6 of the License, the Modifications created by Adobe Systems
Incorporated are available as Source Code. The Modifications may be downloaded via the Internet
from:
http://partners.adobe.com/asn/tech/xml/sablotron/index.jsp
The Original Code may be downloaded via the Internet from:
https://sourceforge.net/projects/sablotron/
______________________________________________________________________________________
Portions Copyright (c) 1997-1999 Silicon Graphics Computer Systems, Inc.
Permission to use, copy, modify, distribute and sell this software and its documentation for any
purpose is hereby granted without fee, provided that the above copyright notice appear in all copies

4
and that both that copyright notice and this permission notice appear in supporting documentation.
Silicon Graphics makes no representations about the suitability of this software for any purpose. It is
provided "as is" without express or implied warranty.
______________________________________________________________________________________
The Loki Library
Portions Copyright (c) 2001 by Andrei Alexandrescu . This code accompanies the book:
Alexandrescu, Andrei. "Modern C++ Design: Generic Programming and Design Patterns Applied".
Portions Copyright (c) 2001. Addison-Wesley. Permission to use, copy, modify, distribute and sell this
software for any purpose is hereby granted without fee, provided that the above copyright notice
appear in all copies and that both that copyright notice and this permission notice appear in
supporting documentation. The author or Addison-Wesley Longman make no representations
about the suitability of this software for any purpose. It is provided "as is" without express or implied
warranty.
______________________________________________________________________________________
Updated Information/Additional Third Party Code Information available at
http://www.adobe.com/go/thirdparty .
______________________________________________________________________________________

5
2.expat
Copyright (c) 1998, 1999, 2000 Thai Open Source Software Center Ltd
and Clark Cooper
Copyright (c) 2001, 2002, 2003, 2004, 2005, 2006 Expat maintainers.
Permission is hereby granted, free of charge, to any person obtaining a copy of this software and
associated documentation files (the "Software"), to deal in the Software without restriction, including
without limitation the rights to use, copy, modify, merge, publish, distribute, sublicense, and/or sell
copies of the Software, and to permit persons to whom the Software is furnished to do so, subject to
the following conditions:
The above copyright notice and this permission notice shall be included in all copies or substantial
portions of the Software.
THE SOFTWARE IS PROVIDED "AS IS", WITHOUT WARRANTY OF ANY KIND, EXPRESS OR IMPLIED,
INCLUDING BUT NOT LIMITED TO THE WARRANTIES OF MERCHANTABILITY, FITNESS FOR A
PARTICULAR PURPOSE AND NONINFRINGEMENT. IN NO EVENT SHALL THE AUTHORS OR COPYRIGHT
HOLDERS BE LIABLE FOR ANY CLAIM, DAMAGES OR OTHER LIABILITY, WHETHER IN AN ACTION OF
CONTRACT, TORT OR OTHERWISE, ARISING FROM, OUT OF OR IN CONNECTION WITH THE SOFTWARE
OR THE USE OR OTHER DEALINGS IN THE SOFTWARE.

6
3.Net-SNMP
Various copyrights apply to this package, listed in various separate
parts below. Please make sure that you read all the parts.
---- Part 1: CMU/UCD copyright notice: (BSD like) -----
Copyright 1989, 1991, 1992 by Carnegie Mellon University
Derivative Work - 1996, 1998-2000
Copyright 1996, 1998-2000 The Regents of the University of California
All Rights Reserved
Permission to use, copy, modify and distribute this software and its
documentation for any purpose and without fee is hereby granted,
provided that the above copyright notice appears in all copies and
that both that copyright notice and this permission notice appear in
supporting documentation, and that the name of CMU and The Regents of
the University of California not be used in advertising or publicity
pertaining to distribution of the software without specific written
permission.
CMU AND THE REGENTS OF THE UNIVERSITY OF CALIFORNIA DISCLAIM ALL
WARRANTIES WITH REGARD TO THIS SOFTWARE, INCLUDING ALL IMPLIED
WARRANTIES OF MERCHANTABILITY AND FITNESS. IN NO EVENT SHALL CMU OR
THE REGENTS OF THE UNIVERSITY OF CALIFORNIA BE LIABLE FOR ANY SPECIAL,
INDIRECT OR CONSEQUENTIAL DAMAGES OR ANY DAMAGES WHATSOEVER RESULTING
FROM THE LOSS OF USE, DATA OR PROFITS, WHETHER IN AN ACTION OF
CONTRACT, NEGLIGENCE OR OTHER TORTIOUS ACTION, ARISING OUT OF OR IN
CONNECTION WITH THE USE OR PERFORMANCE OF THIS SOFTWARE.
---- Part 2: Networks Associates Technology, Inc copyright notice (BSD) -----
Copyright (c) 2001-2003, Networks Associates Technology, Inc

7
All rights reserved.
Redistribution and use in source and binary forms, with or without
modification, are permitted provided that the following conditions are met:
* Redistributions of source code must retain the above copyright notice,
this list of conditions and the following disclaimer.
* Redistributions in binary form must reproduce the above copyright
notice, this list of conditions and the following disclaimer in the
documentation and/or other materials provided with the distribution.
* Neither the name of the Networks Associates Technology, Inc nor the
names of its contributors may be used to endorse or promote
products derived from this software without specific prior written
permission.
THIS SOFTWARE IS PROVIDED BY THE COPYRIGHT HOLDERS AND CONTRIBUTORS ``AS
IS'' AND ANY EXPRESS OR IMPLIED WARRANTIES, INCLUDING, BUT NOT LIMITED TO,
THE IMPLIED WARRANTIES OF MERCHANTABILITY AND FITNESS FOR A PARTICULAR
PURPOSE ARE DISCLAIMED. IN NO EVENT SHALL THE COPYRIGHT HOLDERS OR
CONTRIBUTORS BE LIABLE FOR ANY DIRECT, INDIRECT, INCIDENTAL, SPECIAL,
EXEMPLARY, OR CONSEQUENTIAL DAMAGES (INCLUDING, BUT NOT LIMITED TO,
PROCUREMENT OF SUBSTITUTE GOODS OR SERVICES; LOSS OF USE, DATA, OR PROFITS;
OR BUSINESS INTERRUPTION) HOWEVER CAUSED AND ON ANY THEORY OF LIABILITY,
WHETHER IN CONTRACT, STRICT LIABILITY, OR TORT (INCLUDING NEGLIGENCE OR
OTHERWISE) ARISING IN ANY WAY OUT OF THE USE OF THIS SOFTWARE, EVEN IF
ADVISED OF THE POSSIBILITY OF SUCH DAMAGE.
---- Part 3: Cambridge Broadband Ltd. copyright notice (BSD) -----
Portions of this code are copyright (c) 2001-2003, Cambridge Broadband Ltd.
All rights reserved.
Redistribution and use in source and binary forms, with or without
modification, are permitted provided that the following conditions are met:
* Redistributions of source code must retain the above copyright notice,

8
this list of conditions and the following disclaimer.
* Redistributions in binary form must reproduce the above copyright
notice, this list of conditions and the following disclaimer in the
documentation and/or other materials provided with the distribution.
* The name of Cambridge Broadband Ltd. may not be used to endorse or
promote products derived from this software without specific prior
written permission.
THIS SOFTWARE IS PROVIDED BY THE COPYRIGHT HOLDER ``AS IS'' AND ANY
EXPRESS OR IMPLIED WARRANTIES, INCLUDING, BUT NOT LIMITED TO, THE
IMPLIED WARRANTIES OF MERCHANTABILITY AND FITNESS FOR A PARTICULAR
PURPOSE ARE DISCLAIMED. IN NO EVENT SHALL THE COPYRIGHT HOLDER BE
LIABLE FOR ANY DIRECT, INDIRECT, INCIDENTAL, SPECIAL, EXEMPLARY, OR
CONSEQUENTIAL DAMAGES (INCLUDING, BUT NOT LIMITED TO, PROCUREMENT OF
SUBSTITUTE GOODS OR SERVICES; LOSS OF USE, DATA, OR PROFITS; OR
BUSINESS INTERRUPTION) HOWEVER CAUSED AND ON ANY THEORY OF LIABILITY,
WHETHER IN CONTRACT, STRICT LIABILITY, OR TORT (INCLUDING NEGLIGENCE
OR OTHERWISE) ARISING IN ANY WAY OUT OF THE USE OF THIS SOFTWARE, EVEN
IF ADVISED OF THE POSSIBILITY OF SUCH DAMAGE.
---- Part 4: Sun Microsystems, Inc. copyright notice (BSD) -----
Copyright (c) 2003 Sun Microsystems, Inc., 4150 Network Circle, Santa Clara,
California 95054, U.S.A. All rights reserved.
Use is subject to license terms below.
This distribution may include materials developed by third parties.
Sun, Sun Microsystems, the Sun logo and Solaris are trademarks or registered
trademarks of Sun Microsystems, Inc. in the U.S. and other countries.
Redistribution and use in source and binary forms, with or without
modification, are permitted provided that the following conditions are met:

9
* Redistributions of source code must retain the above copyright notice,
this list of conditions and the following disclaimer.
* Redistributions in binary form must reproduce the above copyright
notice, this list of conditions and the following disclaimer in the
documentation and/or other materials provided with the distribution.
* Neither the name of the Sun Microsystems, Inc. nor the
names of its contributors may be used to endorse or promote
products derived from this software without specific prior written
permission.
THIS SOFTWARE IS PROVIDED BY THE COPYRIGHT HOLDERS AND CONTRIBUTORS ``AS
IS'' AND ANY EXPRESS OR IMPLIED WARRANTIES, INCLUDING, BUT NOT LIMITED TO,
THE IMPLIED WARRANTIES OF MERCHANTABILITY AND FITNESS FOR A PARTICULAR
PURPOSE ARE DISCLAIMED. IN NO EVENT SHALL THE COPYRIGHT HOLDERS OR
CONTRIBUTORS BE LIABLE FOR ANY DIRECT, INDIRECT, INCIDENTAL, SPECIAL,
EXEMPLARY, OR CONSEQUENTIAL DAMAGES (INCLUDING, BUT NOT LIMITED TO,
PROCUREMENT OF SUBSTITUTE GOODS OR SERVICES; LOSS OF USE, DATA, OR PROFITS;
OR BUSINESS INTERRUPTION) HOWEVER CAUSED AND ON ANY THEORY OF LIABILITY,
WHETHER IN CONTRACT, STRICT LIABILITY, OR TORT (INCLUDING NEGLIGENCE OR
OTHERWISE) ARISING IN ANY WAY OUT OF THE USE OF THIS SOFTWARE, EVEN IF
ADVISED OF THE POSSIBILITY OF SUCH DAMAGE.
---- Part 5: Sparta, Inc copyright notice (BSD) -----
Copyright (c) 2003-2013, Sparta, Inc
All rights reserved.
Redistribution and use in source and binary forms, with or without
modification, are permitted provided that the following conditions are met:
* Redistributions of source code must retain the above copyright notice,
this list of conditions and the following disclaimer.
* Redistributions in binary form must reproduce the above copyright
notice, this list of conditions and the following disclaimer in the
documentation and/or other materials provided with the distribution.

10
* Neither the name of Sparta, Inc nor the names of its contributors may
be used to endorse or promote products derived from this software
without specific prior written permission.
THIS SOFTWARE IS PROVIDED BY THE COPYRIGHT HOLDERS AND CONTRIBUTORS ``AS
IS'' AND ANY EXPRESS OR IMPLIED WARRANTIES, INCLUDING, BUT NOT LIMITED TO,
THE IMPLIED WARRANTIES OF MERCHANTABILITY AND FITNESS FOR A PARTICULAR
PURPOSE ARE DISCLAIMED. IN NO EVENT SHALL THE COPYRIGHT HOLDERS OR
CONTRIBUTORS BE LIABLE FOR ANY DIRECT, INDIRECT, INCIDENTAL, SPECIAL,
EXEMPLARY, OR CONSEQUENTIAL DAMAGES (INCLUDING, BUT NOT LIMITED TO,
PROCUREMENT OF SUBSTITUTE GOODS OR SERVICES; LOSS OF USE, DATA, OR PROFITS;
OR BUSINESS INTERRUPTION) HOWEVER CAUSED AND ON ANY THEORY OF LIABILITY,
WHETHER IN CONTRACT, STRICT LIABILITY, OR TORT (INCLUDING NEGLIGENCE OR
OTHERWISE) ARISING IN ANY WAY OUT OF THE USE OF THIS SOFTWARE, EVEN IF
ADVISED OF THE POSSIBILITY OF SUCH DAMAGE.
---- Part 6: Cisco/BUPTNIC copyright notice (BSD) -----
Copyright (c) 2004, Cisco, Inc and Information Network
Center of Beijing University of Posts and Telecommunications.
All rights reserved.
Redistribution and use in source and binary forms, with or without
modification, are permitted provided that the following conditions are met:
* Redistributions of source code must retain the above copyright notice,
this list of conditions and the following disclaimer.
* Redistributions in binary form must reproduce the above copyright
notice, this list of conditions and the following disclaimer in the
documentation and/or other materials provided with the distribution.
* Neither the name of Cisco, Inc, Beijing University of Posts and
Telecommunications, nor the names of their contributors may
be used to endorse or promote products derived from this software
without specific prior written permission.

11
THIS SOFTWARE IS PROVIDED BY THE COPYRIGHT HOLDERS AND CONTRIBUTORS ``AS
IS'' AND ANY EXPRESS OR IMPLIED WARRANTIES, INCLUDING, BUT NOT LIMITED TO,
THE IMPLIED WARRANTIES OF MERCHANTABILITY AND FITNESS FOR A PARTICULAR
PURPOSE ARE DISCLAIMED. IN NO EVENT SHALL THE COPYRIGHT HOLDERS OR
CONTRIBUTORS BE LIABLE FOR ANY DIRECT, INDIRECT, INCIDENTAL, SPECIAL,
EXEMPLARY, OR CONSEQUENTIAL DAMAGES (INCLUDING, BUT NOT LIMITED TO,
PROCUREMENT OF SUBSTITUTE GOODS OR SERVICES; LOSS OF USE, DATA, OR PROFITS;
OR BUSINESS INTERRUPTION) HOWEVER CAUSED AND ON ANY THEORY OF LIABILITY,
WHETHER IN CONTRACT, STRICT LIABILITY, OR TORT (INCLUDING NEGLIGENCE OR
OTHERWISE) ARISING IN ANY WAY OUT OF THE USE OF THIS SOFTWARE, EVEN IF
ADVISED OF THE POSSIBILITY OF SUCH DAMAGE.
---- Part 7: Fabasoft R&D Software GmbH & Co KG copyright notice (BSD) -----
Copyright (c) Fabasoft R&D Software GmbH & Co KG, 2003
Author: Bernhard Penz <bernhard.pe[email protected]>
Redistribution and use in source and binary forms, with or without
modification, are permitted provided that the following conditions are met:
* Redistributions of source code must retain the above copyright notice,
this list of conditions and the following disclaimer.
* Redistributions in binary form must reproduce the above copyright
notice, this list of conditions and the following disclaimer in the
documentation and/or other materials provided with the distribution.
* The name of Fabasoft R&D Software GmbH & Co KG or any of its subsidiaries,
brand or product names may not be used to endorse or promote products
derived from this software without specific prior written permission.
THIS SOFTWARE IS PROVIDED BY THE COPYRIGHT HOLDER ``AS IS'' AND ANY
EXPRESS OR IMPLIED WARRANTIES, INCLUDING, BUT NOT LIMITED TO, THE
IMPLIED WARRANTIES OF MERCHANTABILITY AND FITNESS FOR A PARTICULAR
PURPOSE ARE DISCLAIMED. IN NO EVENT SHALL THE COPYRIGHT HOLDER BE
LIABLE FOR ANY DIRECT, INDIRECT, INCIDENTAL, SPECIAL, EXEMPLARY, OR
CONSEQUENTIAL DAMAGES (INCLUDING, BUT NOT LIMITED TO, PROCUREMENT OF

12
SUBSTITUTE GOODS OR SERVICES; LOSS OF USE, DATA, OR PROFITS; OR
BUSINESS INTERRUPTION) HOWEVER CAUSED AND ON ANY THEORY OF LIABILITY,
WHETHER IN CONTRACT, STRICT LIABILITY, OR TORT (INCLUDING NEGLIGENCE
OR OTHERWISE) ARISING IN ANY WAY OUT OF THE USE OF THIS SOFTWARE, EVEN
IF ADVISED OF THE POSSIBILITY OF SUCH DAMAGE.
---- Part 8: Apple Inc. copyright notice (BSD) -----
Copyright (c) 2007 Apple Inc. All rights reserved.
Redistribution and use in source and binary forms, with or without
modification, are permitted provided that the following conditions
are met:
1. Redistributions of source code must retain the above copyright
notice, this list of conditions and the following disclaimer.
2. Redistributions in binary form must reproduce the above
copyright notice, this list of conditions and the following
disclaimer in the documentation and/or other materials provided
with the distribution.
3. Neither the name of Apple Inc. ("Apple") nor the names of its
contributors may be used to endorse or promote products derived
from this software without specific prior written permission.
THIS SOFTWARE IS PROVIDED BY APPLE AND ITS CONTRIBUTORS "AS IS" AND
ANY EXPRESS OR IMPLIED WARRANTIES, INCLUDING, BUT NOT LIMITED TO,
THE IMPLIED WARRANTIES OF MERCHANTABILITY AND FITNESS FOR A
PARTICULAR PURPOSE ARE DISCLAIMED. IN NO EVENT SHALL APPLE OR ITS
CONTRIBUTORS BE LIABLE FOR ANY DIRECT, INDIRECT, INCIDENTAL,
SPECIAL, EXEMPLARY, OR CONSEQUENTIAL DAMAGES (INCLUDING, BUT NOT
LIMITED TO, PROCUREMENT OF SUBSTITUTE GOODS OR SERVICES; LOSS OF
USE, DATA, OR PROFITS; OR BUSINESS INTERRUPTION) HOWEVER CAUSED AND
ON ANY THEORY OF LIABILITY, WHETHER IN CONTRACT, STRICT LIABILITY,
OR TORT (INCLUDING NEGLIGENCE OR OTHERWISE) ARISING IN ANY WAY OUT
OF THE USE OF THIS SOFTWARE, EVEN IF ADVISED OF THE POSSIBILITY OF
SUCH DAMAGE.
---- Part 9: ScienceLogic, LLC copyright notice (BSD) -----

13
Copyright (c) 2009, ScienceLogic, LLC
All rights reserved.
Redistribution and use in source and binary forms, with or without
modification, are permitted provided that the following conditions are
met:
* Redistributions of source code must retain the above copyright notice,
this list of conditions and the following disclaimer.
* Redistributions in binary form must reproduce the above copyright
notice, this list of conditions and the following disclaimer in the
documentation and/or other materials provided with the distribution.
* Neither the name of ScienceLogic, LLC nor the names of its
contributors may be used to endorse or promote products derived
from this software without specific prior written permission.
THIS SOFTWARE IS PROVIDED BY THE COPYRIGHT HOLDERS AND CONTRIBUTORS
``AS IS'' AND ANY EXPRESS OR IMPLIED WARRANTIES, INCLUDING, BUT NOT
LIMITED TO, THE IMPLIED WARRANTIES OF MERCHANTABILITY AND FITNESS FOR
A PARTICULAR PURPOSE ARE DISCLAIMED. IN NO EVENT SHALL THE COPYRIGHT
HOLDERS OR CONTRIBUTORS BE LIABLE FOR ANY DIRECT, INDIRECT,
INCIDENTAL, SPECIAL, EXEMPLARY, OR CONSEQUENTIAL DAMAGES (INCLUDING,
BUT NOT LIMITED TO, PROCUREMENT OF SUBSTITUTE GOODS OR SERVICES; LOSS
OF USE, DATA, OR PROFITS; OR BUSINESS INTERRUPTION) HOWEVER CAUSED AND
ON ANY THEORY OF LIABILITY, WHETHER IN CONTRACT, STRICT LIABILITY, OR
TORT (INCLUDING NEGLIGENCE OR OTHERWISE) ARISING IN ANY WAY OUT OF THE
USE OF THIS SOFTWARE, EVEN IF ADVISED OF THE POSSIBILITY OF SUCH
DAMAGE.
---- Part 10: Lennart Poettering copyright notice (BSD-like) -----
Copyright 2010 Lennart Poettering
Permission is hereby granted, free of charge, to any person
obtaining a copy of this software and associated documentation files

14
(the "Software"), to deal in the Software without restriction,
including without limitation the rights to use, copy, modify, merge,
publish, distribute, sublicense, and/or sell copies of the Software,
and to permit persons to whom the Software is furnished to do so,
subject to the following conditions:
The above copyright notice and this permission notice shall be
included in all copies or substantial portions of the Software.
THE SOFTWARE IS PROVIDED "AS IS", WITHOUT WARRANTY OF ANY KIND,
EXPRESS OR IMPLIED, INCLUDING BUT NOT LIMITED TO THE WARRANTIES OF
MERCHANTABILITY, FITNESS FOR A PARTICULAR PURPOSE AND
NONINFRINGEMENT. IN NO EVENT SHALL THE AUTHORS OR COPYRIGHT HOLDERS
BE LIABLE FOR ANY CLAIM, DAMAGES OR OTHER LIABILITY, WHETHER IN AN
ACTION OF CONTRACT, TORT OR OTHERWISE, ARISING FROM, OUT OF OR IN
CONNECTION WITH THE SOFTWARE OR THE USE OR OTHER DEALINGS IN THE
SOFTWARE.
---- Part 11: IETF copyright notice (BSD) -----
Copyright (c) 2013 IETF Trust and the persons identified as authors of
the code. All rights reserved.
Redistribution and use in source and binary forms, with or without
modification, are permitted provided that the following conditions are
met:
* Redistributions of source code must retain the above copyright notice,
this list of conditions and the following disclaimer.
* Redistributions in binary form must reproduce the above copyright
notice, this list of conditions and the following disclaimer in the
documentation and/or other materials provided with the distribution.
* Neither the name of Internet Society, IETF or IETF Trust, nor the
names of specific contributors, may be used to endorse or promote
products derived from this software without specific prior written
permission.

15
THIS SOFTWARE IS PROVIDED BY THE COPYRIGHT HOLDERS AND CONTRIBUTORS ``AS
IS'' AND ANY EXPRESS OR IMPLIED WARRANTIES, INCLUDING, BUT NOT LIMITED
TO, THE IMPLIED WARRANTIES OF MERCHANTABILITY AND FITNESS FOR A
PARTICULAR PURPOSE ARE DISCLAIMED. IN NO EVENT SHALL THE COPYRIGHT OWNER
OR CONTRIBUTORS BE LIABLE FOR ANY DIRECT, INDIRECT, INCIDENTAL, SPECIAL,
EXEMPLARY, OR CONSEQUENTIAL DAMAGES (INCLUDING, BUT NOT LIMITED TO,
PROCUREMENT OF SUBSTITUTE GOODS OR SERVICES; LOSS OF USE, DATA, OR
PROFITS; OR BUSINESS INTERRUPTION) HOWEVER CAUSED AND ON ANY THEORY OF
LIABILITY, WHETHER IN CONTRACT, STRICT LIABILITY, OR TORT (INCLUDING
NEGLIGENCE OR OTHERWISE) ARISING IN ANY WAY OUT OF THE USE OF THIS
SOFTWARE, EVEN IF ADVISED OF THE POSSIBILITY OF SUCH DAMAGE.
---- Part 12: Arista Networks copyright notice (BSD) ----
Copyright (c) 2013, Arista Networks, Inc.
All rights reserved.
Redistribution and use in source and binary forms, with or without
modification, are permitted provided that the following conditions are
met:
* Redistributions of source code must retain the above copyright notice,
this list of conditions and the following disclaimer.
* Redistributions in binary form must reproduce the above copyright
notice, this list of conditions and the following disclaimer in the
documentation and/or other materials provided with the distribution.
* Neither the name of Arista Networks, Inc. nor the names of its
contributors may be used to endorse or promote products derived
from this software without specific prior written permission.
THIS SOFTWARE IS PROVIDED BY THE COPYRIGHT HOLDERS AND CONTRIBUTORS
``AS IS'' AND ANY EXPRESS OR IMPLIED WARRANTIES, INCLUDING, BUT NOT
LIMITED TO, THE IMPLIED WARRANTIES OF MERCHANTABILITY AND FITNESS FOR
A PARTICULAR PURPOSE ARE DISCLAIMED. IN NO EVENT SHALL THE COPYRIGHT
HOLDERS OR CONTRIBUTORS BE LIABLE FOR ANY DIRECT, INDIRECT,

16
INCIDENTAL, SPECIAL, EXEMPLARY, OR CONSEQUENTIAL DAMAGES (INCLUDING,
BUT NOT LIMITED TO, PROCUREMENT OF SUBSTITUTE GOODS OR SERVICES; LOSS
OF USE, DATA, OR PROFITS; OR BUSINESS INTERRUPTION) HOWEVER CAUSED AND
ON ANY THEORY OF LIABILITY, WHETHER IN CONTRACT, STRICT LIABILITY, OR
TORT (INCLUDING NEGLIGENCE OR OTHERWISE) ARISING IN ANY WAY OUT OF THE
USE OF THIS SOFTWARE, EVEN IF ADVISED OF THE POSSIBILITY OF SUCH
DAMAGE.
---- Part 13: VMware, Inc. copyright notice (BSD) -----
Copyright (c) 2016, VMware, Inc.
All rights reserved.
Redistribution and use in source and binary forms, with or without
modification, are permitted provided that the following conditions are met:
* Redistributions of source code must retain the above copyright notice,
this list of conditions and the following disclaimer.
* Redistributions in binary form must reproduce the above copyright
notice, this list of conditions and the following disclaimer in the
documentation and/or other materials provided with the distribution.
* Neither the name of VMware, Inc. nor the names of its contributors
may be used to endorse or promote products derived from this software
without specific prior written permission.
THIS SOFTWARE IS PROVIDED BY THE COPYRIGHT HOLDERS AND CONTRIBUTORS ``AS
IS'' AND ANY EXPRESS OR IMPLIED WARRANTIES, INCLUDING, BUT NOT LIMITED TO,
THE IMPLIED WARRANTIES OF MERCHANTABILITY AND FITNESS FOR A PARTICULAR
PURPOSE ARE DISCLAIMED. IN NO EVENT SHALL THE COPYRIGHT HOLDERS OR
CONTRIBUTORS BE LIABLE FOR ANY DIRECT, INDIRECT, INCIDENTAL, SPECIAL,
EXEMPLARY, OR CONSEQUENTIAL DAMAGES (INCLUDING, BUT NOT LIMITED TO,
PROCUREMENT OF SUBSTITUTE GOODS OR SERVICES; LOSS OF USE, DATA, OR PROFITS;
OR BUSINESS INTERRUPTION) HOWEVER CAUSED AND ON ANY THEORY OF LIABILITY,
WHETHER IN CONTRACT, STRICT LIABILITY, OR TORT (INCLUDING NEGLIGENCE OR
OTHERWISE) ARISING IN ANY WAY OUT OF THE USE OF THIS SOFTWARE, EVEN IF
ADVISED OF THE POSSIBILITY OF SUCH DAMAGE.

17
---- Part 14: USC/Information Sciences Institute copyright notice (BSD) -----
Copyright (c) 2017-2018, Information Sciences Institute
All rights reserved.
Redistribution and use in source and binary forms, with or without
modification, are permitted provided that the following conditions are met:
* Redistributions of source code must retain the above copyright notice,
this list of conditions and the following disclaimer.
* Redistributions in binary form must reproduce the above copyright
notice, this list of conditions and the following disclaimer in the
documentation and/or other materials provided with the distribution.
* Neither the name of Information Sciences Institue nor the names of its
contributors may be used to endorse or promote products derived from
this software without specific prior written permission.
THIS SOFTWARE IS PROVIDED BY THE COPYRIGHT HOLDERS AND CONTRIBUTORS ``AS
IS'' AND ANY EXPRESS OR IMPLIED WARRANTIES, INCLUDING, BUT NOT LIMITED TO,
THE IMPLIED WARRANTIES OF MERCHANTABILITY AND FITNESS FOR A PARTICULAR
PURPOSE ARE DISCLAIMED. IN NO EVENT SHALL THE COPYRIGHT HOLDERS OR
CONTRIBUTORS BE LIABLE FOR ANY DIRECT, INDIRECT, INCIDENTAL, SPECIAL,
EXEMPLARY, OR CONSEQUENTIAL DAMAGES (INCLUDING, BUT NOT LIMITED TO,
PROCUREMENT OF SUBSTITUTE GOODS OR SERVICES; LOSS OF USE, DATA, OR PROFITS;
OR BUSINESS INTERRUPTION) HOWEVER CAUSED AND ON ANY THEORY OF LIABILITY,
WHETHER IN CONTRACT, STRICT LIABILITY, OR TORT (INCLUDING NEGLIGENCE OR
OTHERWISE) ARISING IN ANY WAY OUT OF THE USE OF THIS SOFTWARE, EVEN IF
ADVISED OF THE POSSIBILITY OF SUCH DAMAGE.

18
4. XKCP
# Implementation by the Keccak Team, namely, Guido Bertoni, Joan Daemen,
#Michael Peeters, Gilles Van Assche and Ronny Van Keer,
#hereby denoted as "the implementer".
# To the extent possible under law, the implementer has waived all copyright
# and related or neighboring rights to the source code in this file.
# http://creativecommons.org/publicdomain/zero/1.0/
