Loading ...
Loading ...
Loading ...
16
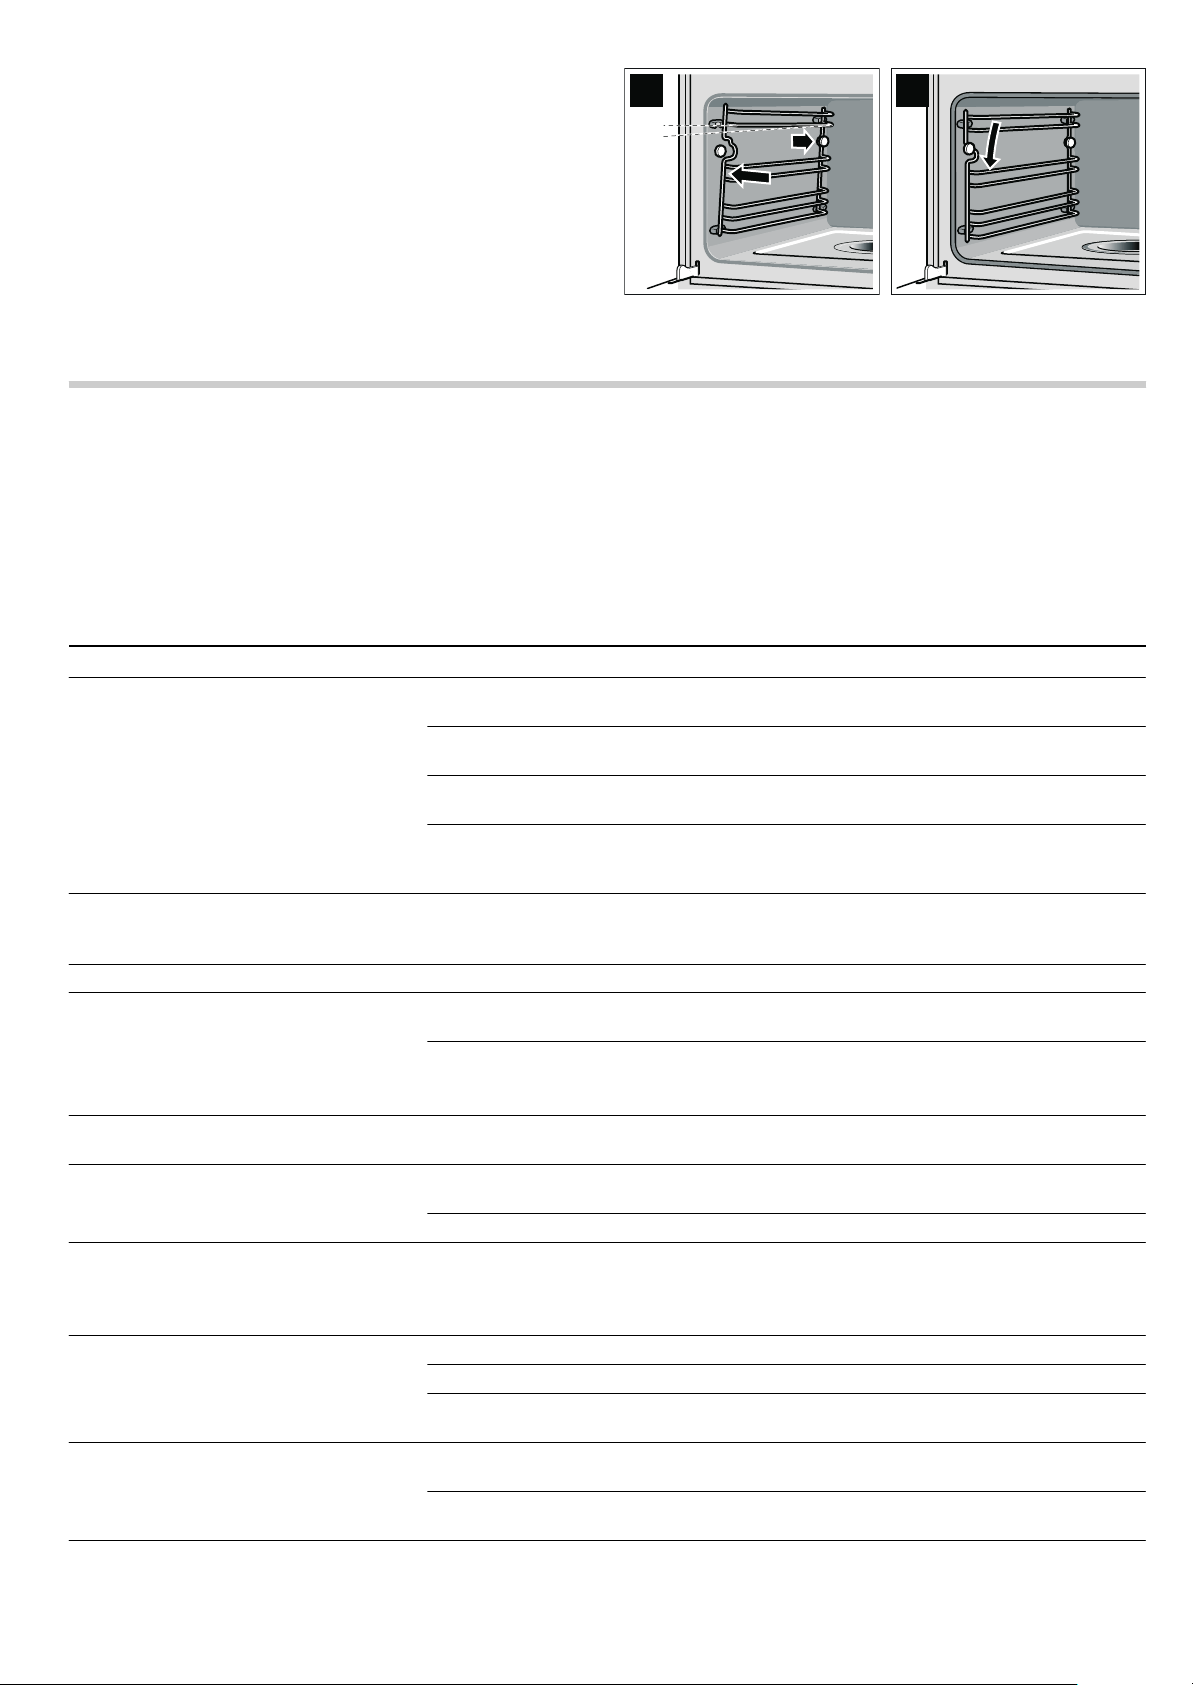
Attaching the rail
1. Position the rail so that the indentations are facing upwards.
2. Hook the rail in at the back and push it towards the rear until
it engages (fig. C).
3. Hook the front of the rail onto the holder and press down until
it engages and is fixed level in place in the appliance once
more (fig. D).
Each set of rails only fits on one side.
Troubleshooting
Malfunctions often have simple explanations. Please read the
following instructions before calling the after-sales service.
Repairs may only be carried out by fully trained after-sales
service technicians. Incorrect repairs to your appliance may
present considerable risks for the user.
: Risk of electric shock!
■ Work on the appliance electronics may only be performed by
a specialist.
■ Always disconnect the appliance from the power supply
when work is carried out on the electronics. Switch off the
circuit breaker or remove the fuse from your household fuse
box.
'
&
Problem Possible cause Notes/remedy
The appliance does not work The plug is not plugged into the mains. Connect the appliance to the electricity
supply
Power cut Check whether other kitchen appliances
are working
Fuse defective Check in the fuse box to make sure that
the fuse for the appliance is OK
Faulty operation Switch the appliance off using the fuse in
the fuse box. Wait approximately
10 seconds and then switch it back on
Appliance does not start. [
r] ‹‹:…‹ min
appears in the display.
Descaling has been cancelled
Turn the operating mode selector to r
and rinse the appliance twice
(see section: Cancelling descaling)
The appliance cannot be started The appliance door is not fully closed Close the appliance door.
The appliance is not in operation. A dura-
tion is shown in the display
A control knob was unintentionally
pressed
Press and hold the
n button
The
n button was not pressed after mak-
ing the setting
Press the n button briefly to start the
cooking operation, or press and hold the
n button to cancel the setting
0 and ‹‹:‹‹ light up in the display
Power cut Reset the clock time (see section: "Time-
setting options")
The
Ë indicator appears even though the
water tank is full
The water tank has not been pushed in
properly
Slide in the water tank until it engages
The detection system is not working Call the after-sales service
The
Ë indicator appears even though the
water tank is not yet empty, or the water
tank is empty but the
Ë indicator does not
appear
The water tank is dirty. The mobile water
level indicators are jammed
Shake and clean the water tank. If the
parts cannot be released, obtain a new
water tank from the after-sales service.
The water tank empties for no discernible
reason. The evaporator dish is overflowing
The water tank was not closed properly Close the lid until you feel it engage.
The tank cover seal is dirty Clean the seal
The seal in the tank cover is defective Obtain a new water tank from the after-
sales service
The evaporator dish has boiled dry even
though the water tank is full
The water tank has not been pushed in
properly
Slide in the water tank until it engages
The feed line is blocked Descale the appliance. Check whether the
water hardness is set correctly
The
Ë indicator appears
The appliance has not been used for at
least 2 days and the water tank is full
Empty and clean the water tank. Always
empty the water tank after cooking
Loading ...
Loading ...
Loading ...