Loading ...
Loading ...
Loading ...

9
English
Attaching Quick Connect Filter (Fig.C)
This power cleaner must be used with the quick connect
adapters. The garden or suction hose can only be attached
when the quick connect filter
7
isinstalled.
1. To connect the quick connect filter
7
to the power
cleaner
2
, place the end of the quick connect filter onto
the water intake
3
. Tighten the quick connect filter
byhand.
nOTE: Avoid cross threading when installing the hose.
Cross threading will causeleaks.
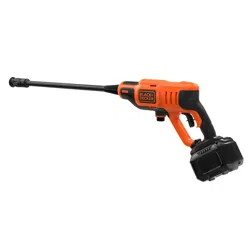
How To Use Spray Wand (Fig. A)
A variable spray nozzle
9
is supplied with this powercleaner.
1. To adjust the pressure of the variable spray nozzle
9
,
twist the tip clockwise or counterclockwise for the
desiredflow.
‑ A narrow spray is good for cleaning grills, driveways,
sidewalks and brickwork.
‑ A wide spray is good for cleaning decking, vinyl,
painted surfaces, auto/rv and stucco.
*NOTICE: The high pressure spray from your power
cleaner is capable of causing damage to surfaces such
as wood, glass, automobile paint, auto striping and
trim, and delicate objects such as flowers and shrubs.
Before spraying, check the item to be cleaned to assure
yourself that it is strong enough to resist damage from
the force of thespray.
2. To connect the quick connect hose adapter
13
to the
quick connect filter
7
on the power cleaner
2
, push
the quick connect hose adapter firmly onto the quick
connectfilter.
nOTE: Before use, gently tug on the garden hose to
ensure the connection issecured. Make sure the quick
connect hose adapter is flush with the quick connect
filter as shown in Figure F.
3. Always disconnect the garden hose afterusage. To
disconnect, pull back the collar on the quick connect
hose adapter and remove from the quick connectfilter.
To Attach the Suction Hose (Fig.F, G)
Use the suction hose to pull water from a bucket or other
fresh watersource.
NOTICE: Do not use to suction soap, chemicals, dirty or
corrosive liquids, such as window cleaner, plant food,
fertilizers or bleach. Do not use saltwater.
1. To connect the quick connect hose adapter
11
on the
end of the suction hose to the quick connect filter
7
on the power cleaner
2
, push the quick connect hose
adapter firmly onto the quick connectfilter.
nOTE: Before use, gently tug on the garden hose to
ensure the connection issecured. Make sure the quick
connect hose adapter on the end of the suction hose
is flush with the quick connect filter as shown in the
FigureFinset.
2. Place other end of suction hose with filter on it into
container of fresh water or a fresh water source. Adjust
the float ball
12
on the suction hose so the filter
18
stays covered in theliquid.
3. Select the correct nozzle to be used. See How to Use the
Multi‑Spray Nozzle paragraph.
4. After the job being performed is complete, place the
suction hose into container of clean water and draw the
clean water through the system torinse.
To Attach the Garden or Suction Hose
(Fig.E–G)
Connecting the garden hose or suction hose will depend on
the job to beperformed.
To Attach Garden Hose (Fig.E, F)
This power cleaner must be used with the quick
connectadapters.
1. To connect the quick connect hose adapter
13
to a
garden hose, thread the quick connect hose adapter
onto the end of the garden hose. Tighten the garden
hose byhand.
nOTE: Avoid cross threading when installing the hose.
Cross threading will causeleaks.
nOTE: Before connecting the garden hose to the
power cleaner, run water through the garden hose for
thirty seconds to clear any debris from the mouth of
thegarden pressurehose.
SPECIFICATIONS
Maximum Pounds per Square Inch 350
Rated Gallons per Minute 0.5
Battery 20V DC
Inlet Hose 20 ft (6 m)
Pressure of Inlet Water 0-80 PSI
Inlet Water Cold Tap
ASSEMBLY AND ADJUSTMENTS
WARNING: To reduce the risk of serious personal
injury, turn unit off and remove the battery pack
before making any adjustments or removing/
installing attachments or accessories. An
accidental start‑up can causeinjury.
Attachments (Fig.D)
• Insert the end of the attachment into the opening on
the power cleaner
2
. Push in and turn the attachment
clockwise until its secured into workingposition.
• To remove the attachment, push in and turn the
attachment counterclockwise and pull from the power
cleaner
2
.
nOTE: Other accessories are available for use with this power
cleaner, refer to the Accessoriessection.
Loading ...
Loading ...
Loading ...