Loading ...
Loading ...
Loading ...
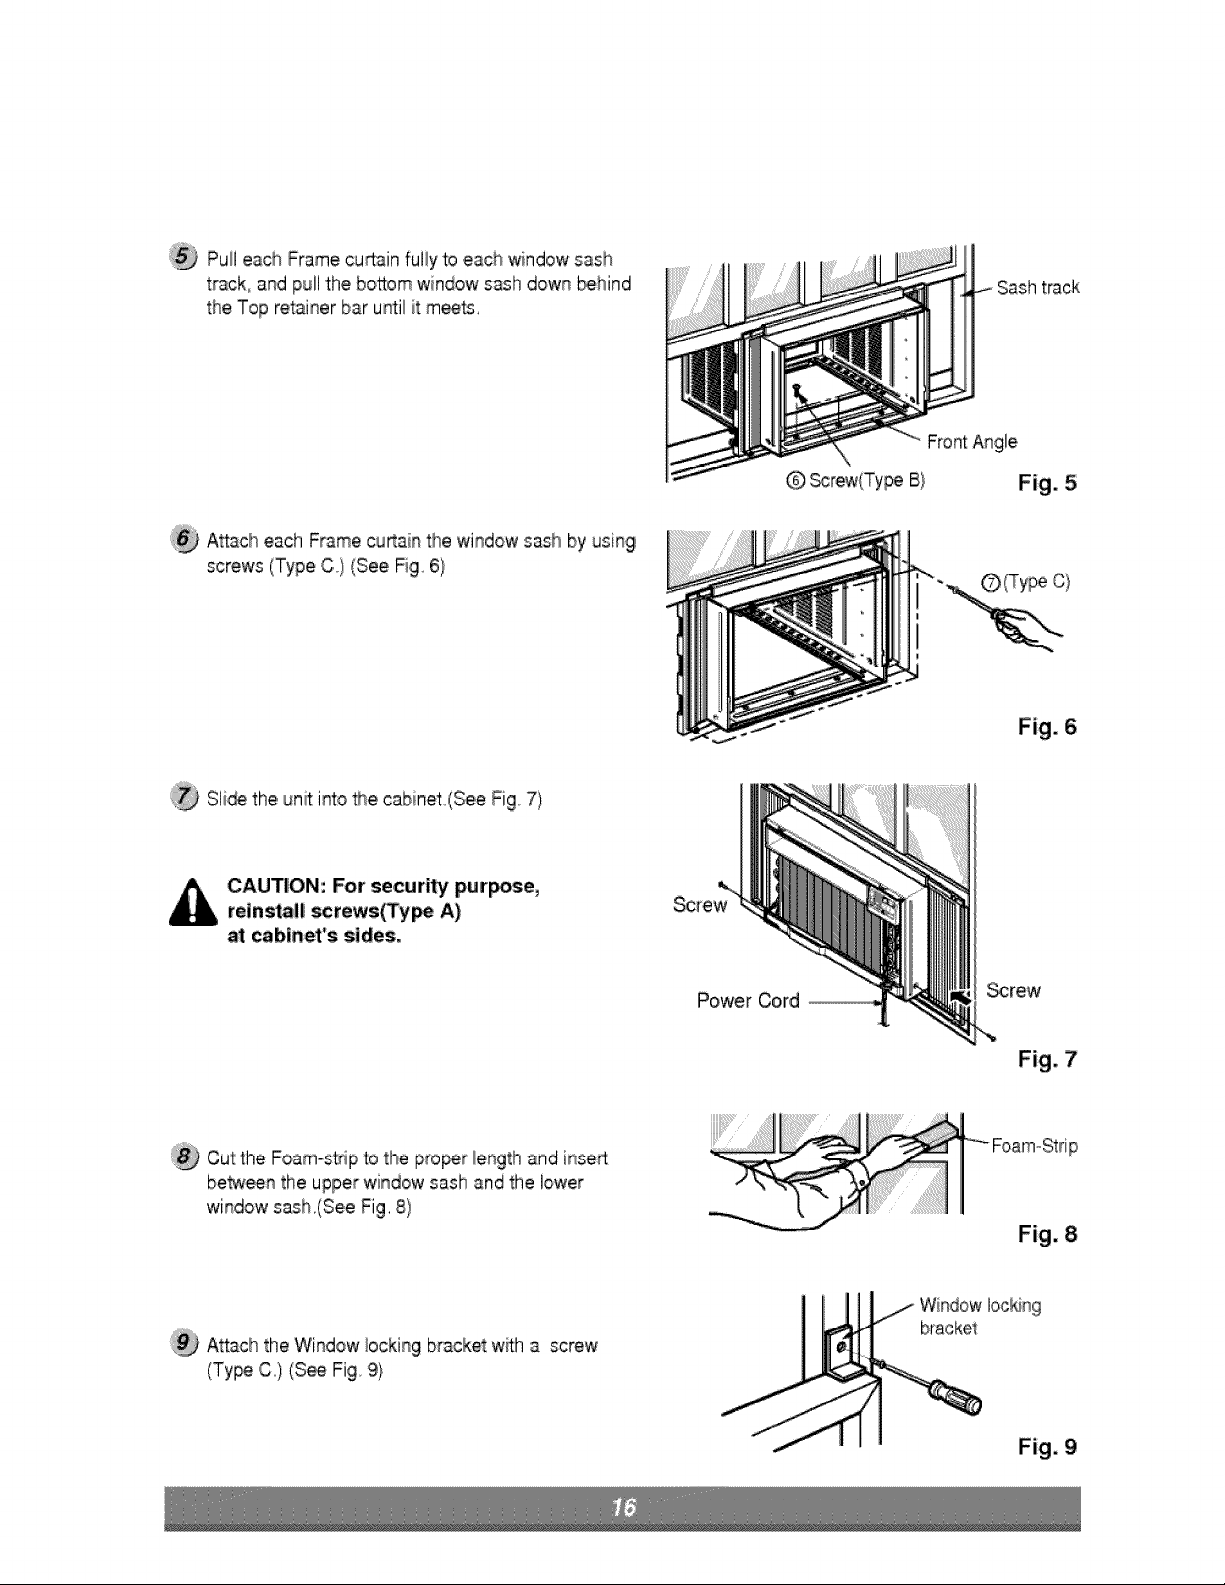
Pull each Frame cudain fully to ,eachwindow sash
track° and pull the bosom window sash dowl_ _hind
the Top retainer bar until it meets,
track
Attaclheach Frame cu_ain the window sash by using
screws (Type C) {See Fig 6}
FrontAngle
Q _rew(Type B} Fig. 5
(Type C)
Fig. 6
'_ Sli_ the,unff i_,o _e cabinet(See Fig°7)
CAUTION: For security pur_e,
reinstal! screws(Ty_ A)
at cabinet's sides.
Power Cord _rew
Fig. 7
Cut:the Foam-strip to the proof _engthand insed
betw_n the upper window sash and the lower
window sash,(See Fig, 8)
Fig,, 8
Attach the Window bcking bracket with a screw
(Ty_, C) (S_ Fig 9}
I
/t* WikqdowIo0_%
bracket
Fig,. 9
Loading ...
Loading ...
Loading ...