Loading ...
Loading ...
Loading ...
5
TWEETER INSTALLATION
C1 tweeters have been designed for surface
or flush-mounting. Before choosing a method,
carefully inspect the desired mounting location
to determine which method will work best.
Surface-Mount: uses the supplied surface-
mount fixture and requires the drilling of
three holes (one for the wires and two for the
mounting screws). This application is useful
when mounting the tweeters to a panel that has
insufficient clearance behind it for the tweeter’s
magnet structure.
Flush-Mount: yields a custom-installed
appearance and requires a 1-3/4-inch (44 mm)
diameter hole to be cut in the vehicle panel, with
at least 0.40-inch (10 mm) of clearance behind
the mounting surface for the tweeter and up
to 1.45-inch (37 mm) for the stud bolts used to
mount each tweeter.
WARNING
!!
Double check the clearance for both speakers
before proceeding. Many cars are different
from one side to the other!
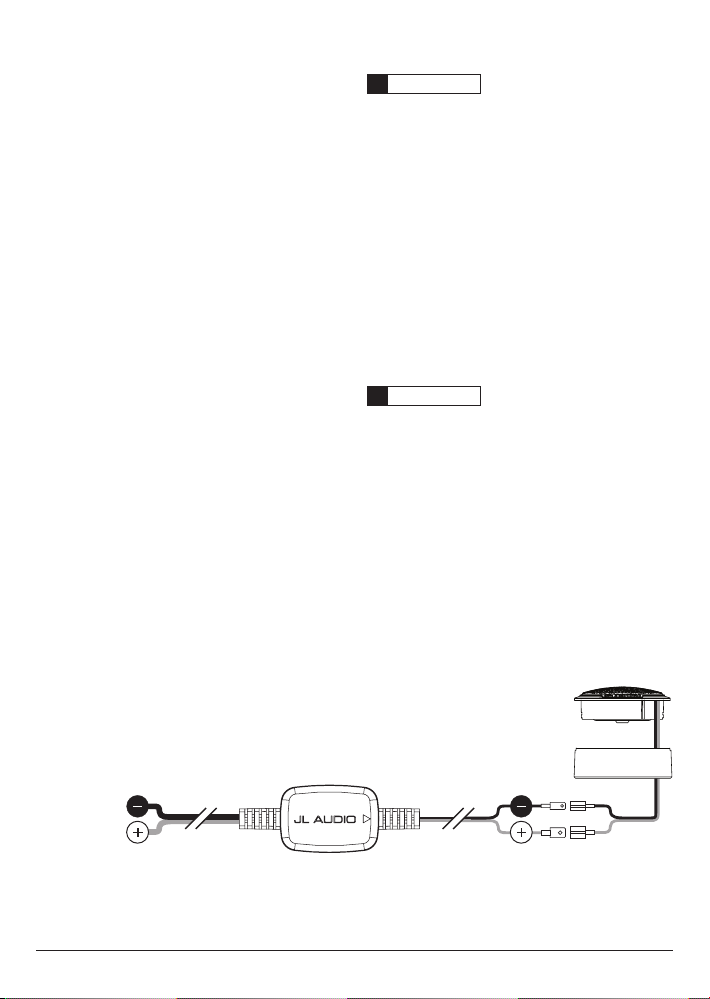
TWEETER CONNECTIONS
Run the wire leads from the crossovers to the
tweeter mounting locations and to the speaker/
amplifier outputs. Then, connect the harness
wire leads to the speaker/amplifier outputs
and tweeters, observing correct polarity. See
Diagram C below for details.
WARNING
!!
It is absolutely vital that your component
tweeter is connected, as shown in Diagram C.
Failure to connect the tweeter as shown will
result in damage which is NOT covered under
warranty. Only use in-line filters clearly
marked “C1-100cthp”.
Fr
om Woofer
or Amplier
Tweeter Crossover
Tweeter
DIAGRAM C:
Tweeter / Crossover Wiring
Loading ...
Loading ...
Loading ...