Loading ...
Loading ...
Loading ...

E-79
Temperature Sensor Calibration
The temperature sensor built into the watch is calibrated at the factory and normally requires no further
adjustment. If you notice serious errors in the temperature values produced by the watch, you can
calibrate the sensor to correct the errors.
Important!
• Incorrectly calibrating the temperature sensor can result in incorrect readings.
Carefully read the information below before doing anything.
–
Compare the readings produced by the watch with those of another reliable and accurate thermometer.
– If adjustment is required, remove the watch from your wrist and wait for 20 or 30 minutes to give the
temperature of the watch time to stabilize.
To calibrate the temperature sensor
1. Take a reading with another measurement device to determine the
exact current temperature.
2. While in the Timekeeping Mode or a sensor mode, use
A
to cycle
through the sensor modes until
TEMP
appears on the display.
3. Pull out the crown. This will cause the current temperature reading
value to fl ash on the digital display.
4. Rotate the crown to adjust the temperature value.
• The calibration unit is 0.1°C (0.2°F).
• To return the currently fl ashing value to its initial factory default
setting, press
A
and
C
at the same time. OFF will appear at
the fl ashing location for about one second, followed by the initial
default value.
5. After you complete calibration, push the crown back in.
l
l
l
l
l
l
l
l
l
l
l
l
l
l
E-78
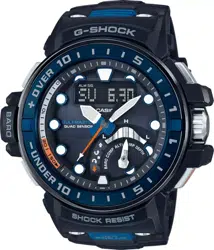
Taking Temperature Readings
This watch uses a temperature sensor to measure temperature.
To take temperature readings
While in the Timekeeping Mode or a sensor mode, use
A
to cycle
through the sensor modes until
TEMP
appears on the display. See
“Selecting a Mode” (page E-30).
• This enters the Temperature Mode and displays a temperature reading
after about one second.
• After a temperature reading operation is started, the watch will take
readings every fi
ve seconds for the fi rst three minutes, and then every
two minutes after that.
• The watch will return to the Timekeeping Mode automatically if you do
not perform any operation for about 1 hour after entering the
Thermometer Mode.
Temperature
• Temperature is displayed in units of 0.1°C (or 0.2°F).
• The displayed temperature value changes to
- -.-
°C (or °F) if a measured temperature falls outside the
range of –10.0°C to 60.0°C (14.0°F to 140.0°F). The temperature value will reappear as soon as the
measured temperature is within the allowable range.
Display Units
You can select Celsius (°C) or Fahrenheit (°F) as the display unit for the measured temperature value.
See “To specify altitude, depth, barometric pressure, and temperature units” (page E-43).
Temperature
E-77
Precautions Concerning Simultaneous Altitude and Temperature Readings
For the more accurate altitude readings, leaving the watch on your wrist is recommended in order to
maintain the watch at a constant temperature.
• When taking readings, keep the watch at as stable a temperature as possible. Changes in temperature
can affect readings.
E-76
Altimeter Precautions
• This watch estimates altitude based on air pressure. This means that altitude readings for the same
location may vary if air pressure changes.
• Do not use this watch for altitude reading or perform button operations while sky diving, hang gliding,
or paragliding, while riding a gyrocopter, glider, or any other aircraft, or while engaging in any other
activity where there is the chance of sudden altitude changes.
• Do not use this watch for measuring altitude in applications that demand professional or industrial level
precision.
• Remember that the air inside of a commercial aircraft is pressurized. Because of this, the readings
produced by this watch will not match the altitude readings announced or indicated by the fl
ight crew.
E-75
How does the altimeter work?
Generally, air pressure decreases as altitude increases. This watch bases its altitude readings on
International Standard Atmosphere (ISA) values stipulated by the International Civil Aviation Organization
(ICAO). These values defi ne relationships between altitude and air pressure.
• Note that the conditions below will prevent you from obtaining accurate readings:
When air pressure changes because of changes in the weather
Extreme temperature changes
When the watch itself is subjected to strong impact
There are two standard methods of expressing altitude: absolute altitude, which expresses an absolute
height above sea level, and relative altitude, which expresses the difference between the altitudes of two
different places. This watch expresses altitudes as relative altitude.
Sea Level
Rooftop at an altitude of
230 m above sea level
(absolute altitude)
Height of building 130 m
(relative altitude)
Regular calibration of the watch in accordance with values provided by local altitude (elevation) indications
is recommended before taking readings in order to maximize reading accuracy (page E-69).
E-74
The altitude differential with the reference location is indicated by the second hand (altitude differential
indicator) as shown in the illustration below.
Unit: Meters
Unit: 100m
1000m
500
100m
50
−100m
−50
−1000m
−500
00
Unit: 10m
Example: Altitude differential
of −30 (300) meters
Indication range:
±100 (1000) meters
E-73
To use the altitude differential value
1. Using the contour lines on a map, determine the altitude difference between your current location and
your destination.
2. Take a reading of the altitude at your current location.
3. In the Altimeter Mode, hold down
C
for at least two seconds to specify your current location as the
altitude differential start point. Release
C
after
DIFF RESET
and then
RESET
appear on the display.
• The watch will take an altitude reading, and the second hand will indicate the altitude differential.
±
0 (
±0 meters) will be indicated as the altitude differential at the reference point.
4. While comparing the altitude differential you calculated using your map
with the altitude differential indicated by the watch’s second hand,
advance towards your destination.
• If the map indicates a differential of +80 meters, you can conclude
th
at you are near your destination when the second hand indicates
an altitude differential of +80 meters.
l
l
l
l
l
l
l
l
l
l
Altitude differential (Reference
location, so ±0 m is indicated.)
Current altitude
E-72
Specifying the Altitude Differential Measurement Range
You can use the procedure below to select either ±100 meters or ±1,000
meters as the altitude differential measurement range.
Relative Altitude Measurement Range Display Unit
±100 meters (±328 feet) 5 meters (16 feet)
±1000 meters (±3280 feet) 50 meters (164 feet)
To specify the altitude differential measurement range
1. In the Altimeter Mode, pull out the crown.
• This will cause the current altitude reading value to appear.
2. Press
B
twice.
• This will cause DIF
F to appear on the digital display, along with the
fl ashing current altitude differential measurement range setting.
3. Rotate the crown to select either 100 meters (
100m
) or 1,000 meters
(
1000m
) as the altitude differential measurement range.
4. After the setting is the way you want, push the crown back in to exit the
setting screen.
Using the Altitude Differential Value While Mountain Climbing or Hiking
After you specify the altitude differential start point while mountain climbing or hiking, you can easily
measure the change in the altitude between that point and other points along the way.
l
l
l
l
l
l
l
l
l
l
l
l
Altitude differential
Operation Guide 5477
Loading ...
Loading ...
Loading ...