Loading ...
Loading ...
Loading ...
29
bromic.com/heat
OPERATING INSTRUCTIONS
REMOTE CONTROL BATTERY
• CAUTION: Do not ingest battery—Chemical burn hazard.
• The remote control supplied with this product contains a coin/button cell battery. If the coin/button cell
battery is swallowed, it can cause severe internal burns in just 2 hours and can lead to death.
• Keep new and used batteries away from children.
• If the battery compartment does not close securely, stop using the product and keep it away from children.
• If you think batteries might have been swallowed or placed inside any part of the body, seek immediate
medical attention and call a doctor.
• Explosion hazard if the battery is substituted incorrectly.
• Replace the battery with a CR2430 type battery only.
• Battery is not rechargable and must not be recharged.
• Always wrap the battery up, both when it is being stored and when it is being disposed of. The battery
should not come into contact with other metal objects as it could cause the battery to run down, catch fire
or be damaged.
• Dispose of damaged or finished batteries immediately in compliance with the law. To this end, contact the
authorities for safeguarding the environment or the centre for disposing of waste materials in your area.
• Do not throw the battery away with household rubbish.
• The supply terminals are not to be short-circuited.
• Battery must be inserted with correct polarity (+/-)!
To replace the battery:
1. Remove screw and open the back cover of the remote.
2. Take the old battery out and put the new one in the same way.
PAIRING REMOTE CONTROL TO HEATER PCB (TOP 4 BUTTONS OF REMOTE).
WARNING: MUST ONLY BE SERVICED BY LICENSED &
AUTHORIZED TECHNICIAN.
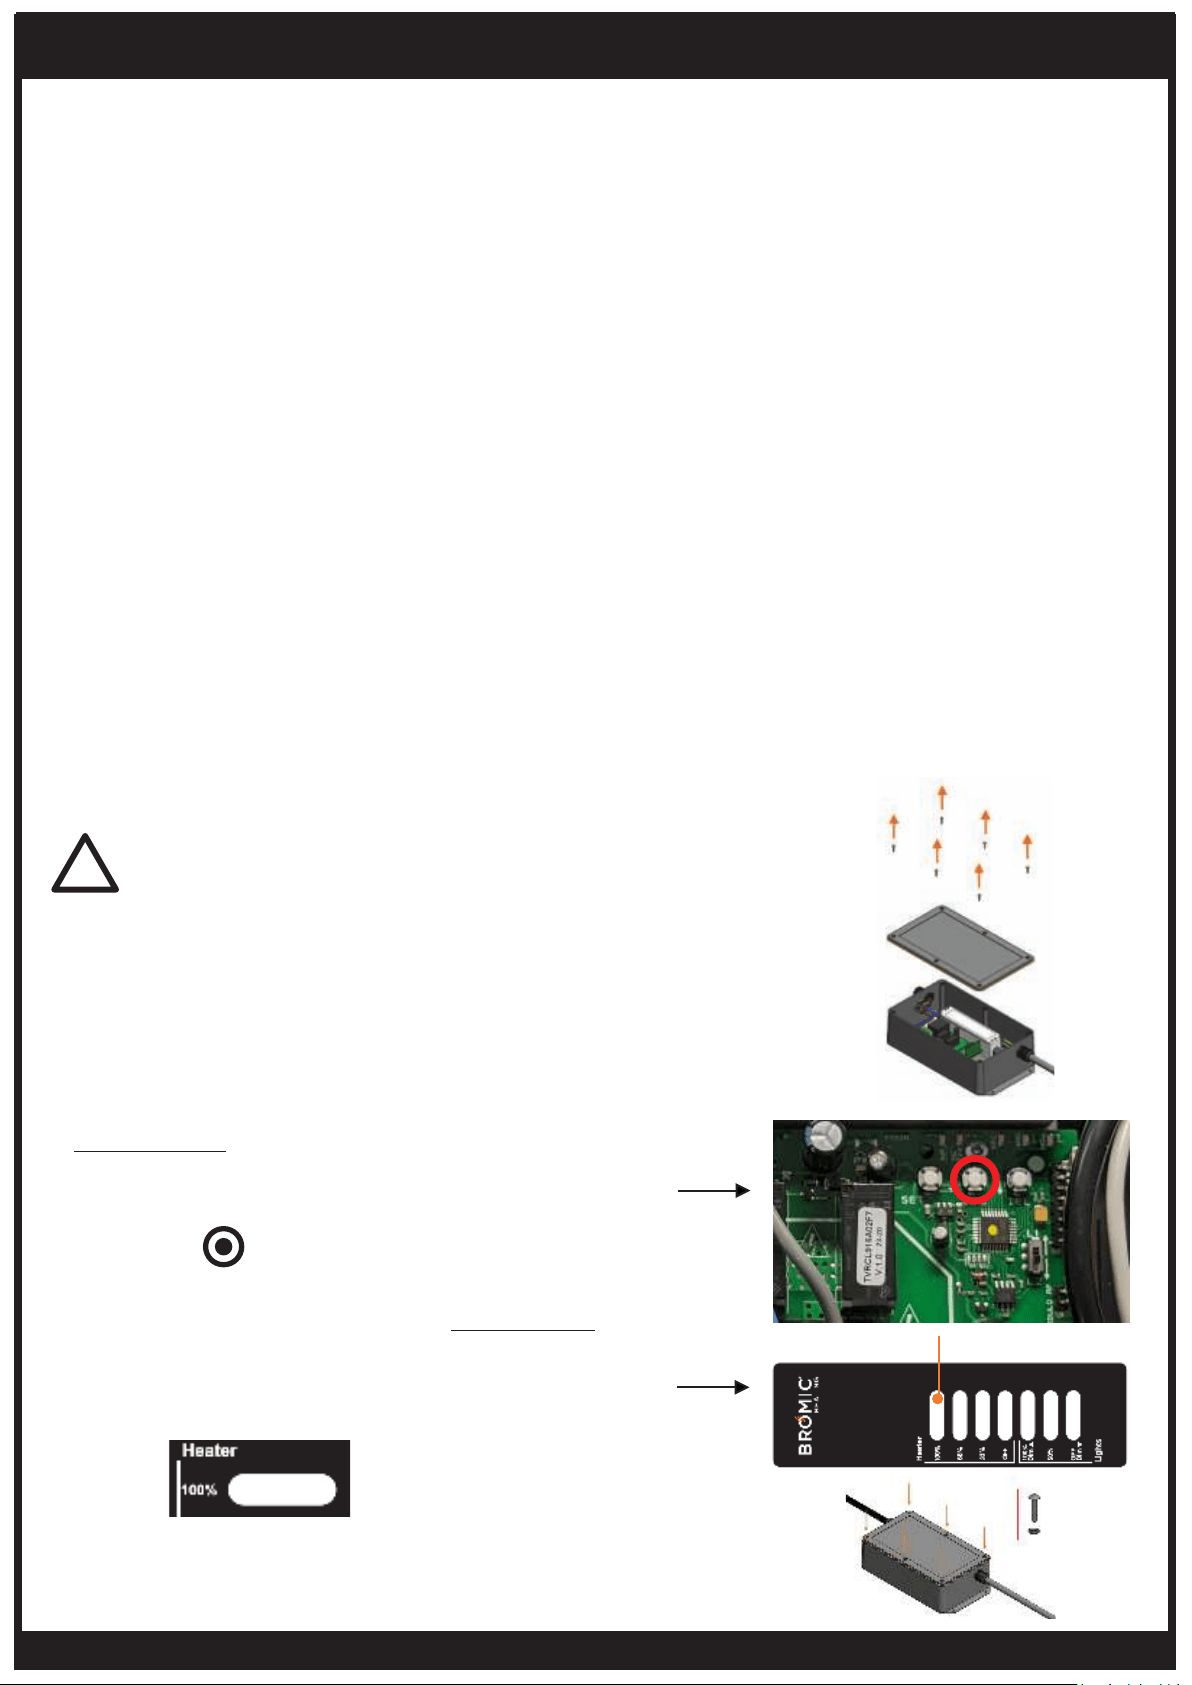
1. Open cover to the Pendant Control Box, by removing 6x
Oval head screws (#4-40 - Length: 1/2”) from the cover.
2. Switch the power supply to the Eclipse Pendant Control
ON.
3. With the Eclipse Pendant Control powered ON,
PRESS & HOLD the middle ‘MEM’ button on the large
heater control PCB. (A long “Beep” sound should be heard
whilst the button is held down).
Whilst the ‘MEM’ button is held down, SHORT PRESS the
Heater 100% button on the remote control. (Three short
“Beep” sounds should be heard to indicate the remote has
been paired successfully.
4. Refit cover to the box, ensuring the 6 X M3 O-Rings are
present on the 6x Oval head screws (#4-40 - Length: 1/2”).
Lights 100% (DIM˄)
Lights OFF (DIM˅)
DANGER
ELECTRICAL SHOCK HAZARD! Serious injury or death
may occur. Do not touch any components other than
specified below. Protective equiment including insulated
gloves must be worn.
!
1s (short)
(hold)
‘MEM’ button
Loading ...
Loading ...
Loading ...