Loading ...
Duetohighercenterofgravityofapplianceonped-
estals,someside-to-siderockingisnormalduringoperation.
Vibrationcanbeminimizedbyassuringapplianceisinstalled
properly,includingbeinglevelandsolidonallfour(4)legsby
followingthesedirections.
1. Ifwasherordryerisnewandhasnotbeeninstalledyet,skipto
step4.
2. Ifdryerisalreadyinstalled,disconnectdryerfromelectricaland
gasconnectionsandexhaustventing.
3. Ifwasherisalreadyinstalled,disconnectwasherfromelectrical
connection.Turnoffhotandcoldwatersupplyanddisconnect
hotandcoldwatersupplyhosesfromwatersupplyoutlets.
Disconnectdrainhosefromdrainpipe.Removeholeplugsfrom
backsheetandreinstallshippingbracesandbolts.
4. Protectfloorandunitwithcardboardorrugandcarefullylaythe
applianceonitssideandscreweachlegcompletelyintothebase.
-EXCESSIVE WEIGHT HAZARD - To avoid back
or other injury, have more than one person move or lift the
appliance.
DO NOT use open dispenser drawer of washer
or dispenser cavity as hand-hold location when tipping washer
on its side. Serious damage could occur to your washer.
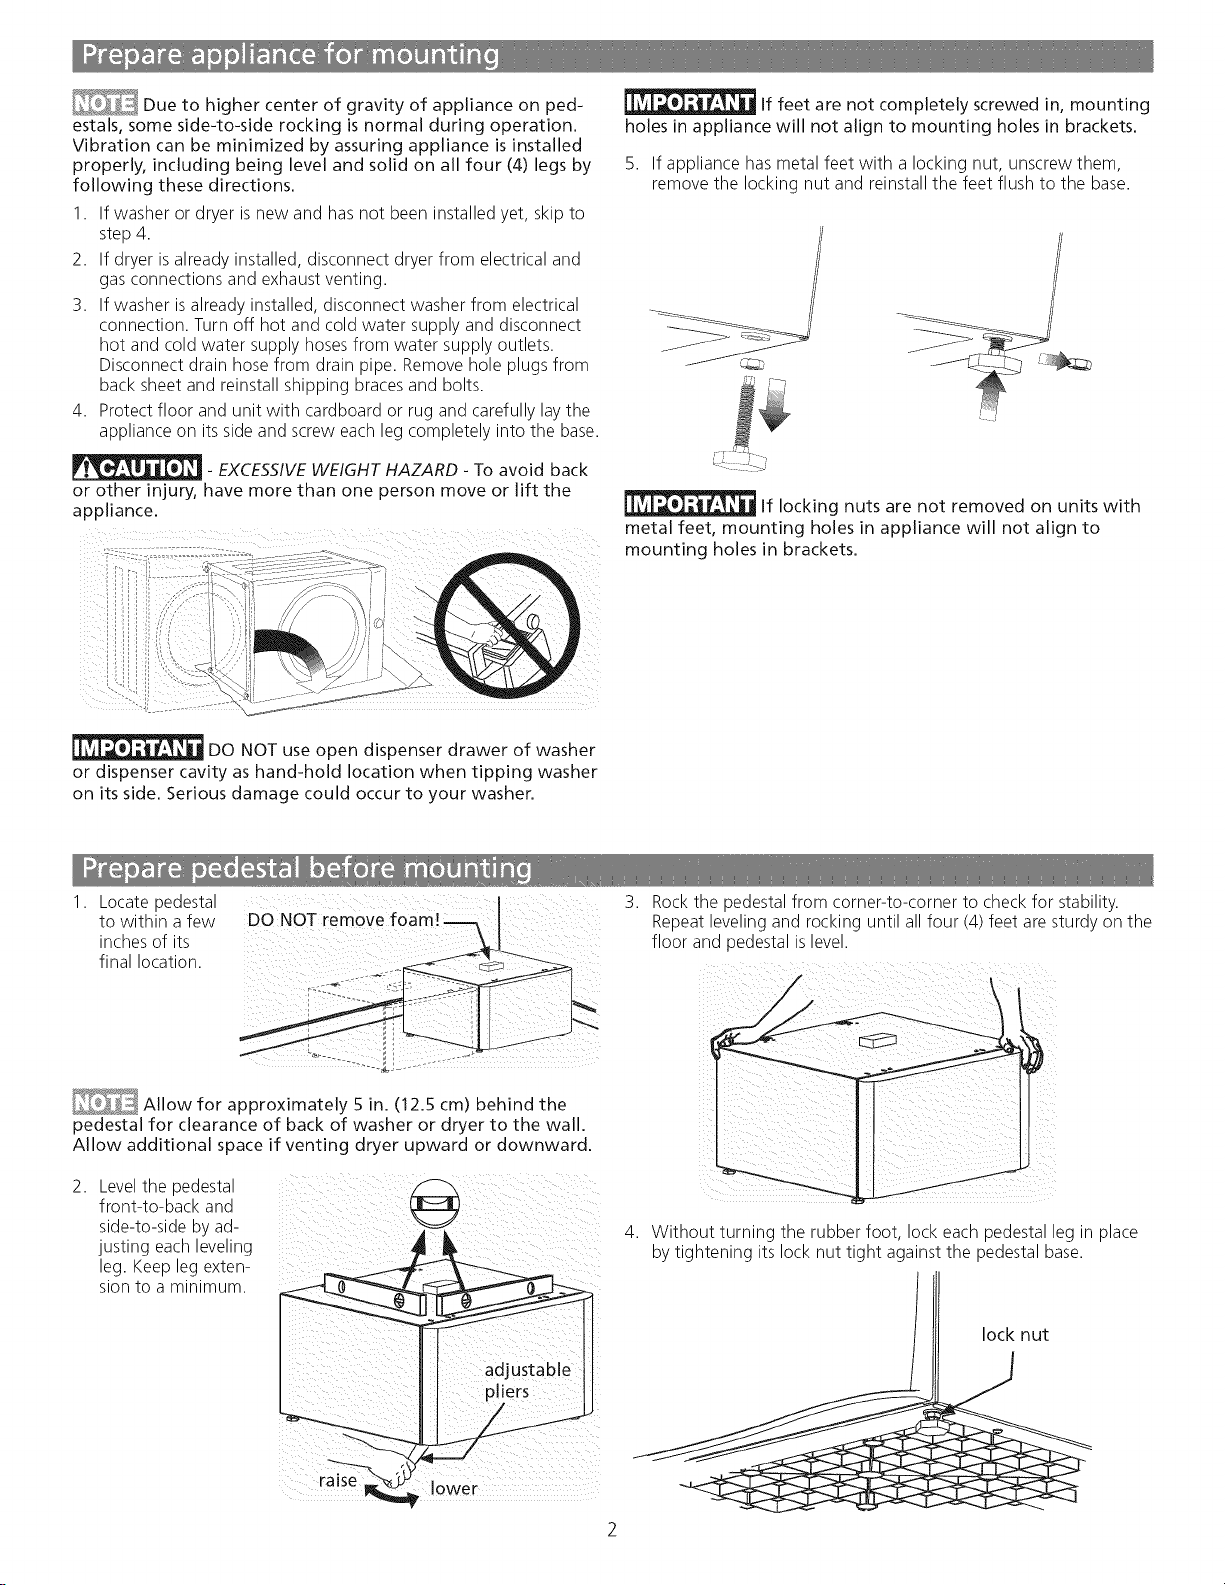
If feet are not completely screwed in, mounting
holes in appliance will not align to mounting holes in brackets.
5. If appliance has metal feet with a locking nut, unscrew them,
remove the locking nut and reinstall the feet flush to the base.
If locking nuts are not removed on units with
metal feet, mounting holes in appliance will not align to
mounting holes in brackets.
1.
Locate pedestal
to within a few
inches of its
final location.
3. Rock the pedestal from corner-to-corner to check for stability.
Repeat leveling and rocking until all four (4) feet are sturdy on the
floor and pedestal is level.
Allow for approximately 5 in. (12.5 cm) behind the
pedestal for clearance of back of washer or dryer to the wall.
Allow additional space if venting dryer upward or downward.
2.
Level the pedesta
front-to-back and
side-to-side by ad-
justing each evettn9
leg. Keep leg exten-
sion to a minimum.
4.
Without turning the rubber foot, lock each pedestal leg in place
by tightening its lock nut tight against the pedestal base.
lock nut
Loading ...
Loading ...
Loading ...