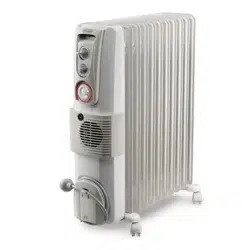
Loading ...
Loading ...

IMPORTANT WARNINGS
- This appliance is not intended for use by
persons (including children) with reduced
physical, sensory or mental capabilities, or
lack of experience and knowledge, unless
they have been given supervision or
instruction concerning use of the appli-
ance by a person responsible for their
safety.
Children should be supervised to ensure
that they do not play with the appliance.
CAUTION — Some parts of this prod-
uct can become very hot and cause
burns. Particular attention has to be
given where children and vulnerable
people are present.
- Do not use the appliance near showers,
bathtubs, sinks, swimming pools, etc.
- If the power cable has been damaged, it
must be replaced by the manufacturer or
the technical service centre or by a quali-
fied person so as to avoid all risks.
- ATTENTION: in order to avoid any danger
caused by an accidental resetting of the
safety system, this appliance must not be
powered through an external timer.
- The appliance must not be located imme-
diately below a fixed socket-outlet.
- The use of an extension lead is not recommended, as over-
heating of the extension lead may occur during the opera-
tion of the heater.
- WARNING: In order to avoid over-
heating, never under any circum-
stances cover the appliances during oper-
ation, as this would lead to dangerous
overheating.
- The appliance must not be placed immediately under a fixed
power socket.
- The power cord should be fully removed from the cord stor-
age unit when in use.
- The appliance is fitted with a tilt-switch which turns the
appliance off if it should fall over.
To restart the appliance, simply place it upright again.
- Always use the radiator in the vertical position.
- Do not use the appliance in rooms with a base areaof less
than 4 m
2
.
- It is normal for the appliance to make "creaking" noises
when first turned on.
- In order to eliminate the radiator’s “new” smell, set it to
maximum power for at least a few hours when used for the
first time. During this operation, the room in which the radia-
tor is located must be ventilated.
- This appliance is filled with a precise quantity of oil and
repairs requiring it to be opened must be carried out by the
manufacturer or an authorised technical assistance centre
only. In the event of oil leaks, please contact Customer Expe-
rience, see enclosed guarantee.
- As with any electrical appliance, whilst the instructions aim
to cover as many eventualities as possible, caution and com-
mon sense should be applied when operating your appli-
ance, particularly in the vicinity of young children.
- A safety device will turn the radiator off. To reset, contact the
technical assistance service.
GENERAL FEATURES
Remove the appliance from the packaging, turn upside down
and rest on the polystyrene. Check that neither the appliance nor
the power cable has been damaged in any way during trans-
portation. Do not operate the appliance if damaged.
FITTING THE FEET
Remove the feet and the castors (if provided) from the poly-
styrene packing.
Fit the castors to the spindles on the feet and push firmly until
they click into position (fig. 1).
Pull each castor to check that it is fitted correctly. In certain mod-
els, the castors are already mounted on the feet. Using the
threaded u-bolt and wing nuts, fit the feet to the bottom of the
radiator between the last two elements as shown in figures 2, 3
and 4. Depending on the type of feet supplied, type A or B,
mount the feet as shown in figure 5 or 6. Mount the foot without
castors by inserting the two guides (C fig. 7) into the holes on
the bottom of the control box (fig. 7). Fit the tooth into the slot
provided and lock the foot with the eye screw (fig. 8). After fit-
ting, turn the radiator back into the vertical operating position.
ELECTRICAL CONNECTION
- Before plugging the radiator into the mains, check that the
voltage of your mains electricity supply corresponds to the
value V indicated on the appliance and that the socket and
power line are appropriately dimensioned.
- CONNECT THE RADIATOR TO EFFICIENTLY EARTHED SOCKETS
ONLY
INSTRUCTIONS FOR USE
Switching on
Plug into the mains socket. Turn the thermostat as far as it will
go to maximum position. Turn the radiator on using the switch
following the procedure described below (see fig. 10):
- Place the switch in the "MIN" position to select minimum
power.
3
Loading ...
