ge.com
m
U
m
(J1
I
O
Safety Instructions ...... 2-7
Operating Instructions
Aluminum Foil ................ 15
Burners ...................... 8, 9
Clock ......................... 19
Griddle .................... !0, !!
Oven ..................... 12-17
Baking and Roasting ......... 15
Broiling .................. 16, 17
Broiling Guide ............... 17
Clock and Timer ............. 19
Light ........................ 14
Oven Control ................ 12
Power Outage ............... 14
Preheating .................. 15
Thermostat Adjustment ...... 18
Vent ......................... 14
Careand Cleaning
Broiler Compartment ......... 27
Broiler Drawer ................ 27
Burner Assemblies ........ 23, 24
Burner Grates ................ 25
Control Panel and Knobs ...... 28
Cooktop Surface .............. 25
Griddle ....................... 22
Li_off Oven Door ............. 26
Oven Bottom ................. 26
Oven Interior ................. 28
Oven Light Replacement ...... 27
Oven Vents ................... 28
Shelves ....................... 27
Stainless Steel Surfaces ....... 25
Write the model and serial
numbers here:
Model #
Serial #
You can find them on a label on the
front of the range behind the kick
panel or broiler compartment,
Installation
Instructions ............ 2%41
Air Adjustment ................ 40
Anti-Tip Device ............ 33, 41
Assembling
Surface Burners .............. 38
Checking Burner Ignition ...... 39
Connecting the Range
to Gas .................... 34-36
Dimensions and
Clearances ................... 32
Electrical Connections ..... 37, 38
Leveling the Range ........... 40
Location ...................... 33
LP ............................ 41
Model and Serial Number
Location ...................... 33
Troubleshooting Tips..42, 43
Accessories ................ 44
Consumer Support
Consumer
Support .............. Back Cover
Product Registration ....... 45, 46
Warrantg ..................... 47
JGBS80
183D5580P217 49-85155 05-07JR
IMPORTANT SAFETY INFORMATION.
READ ALL INSTRUCTIONS BEFORE USING.
WARNING!
For your safety, the information in this manual must be followed to minimize the risk of fire or
explosion, electric shock, or to prevent property damage, personal injury, or loss of life.
® ®
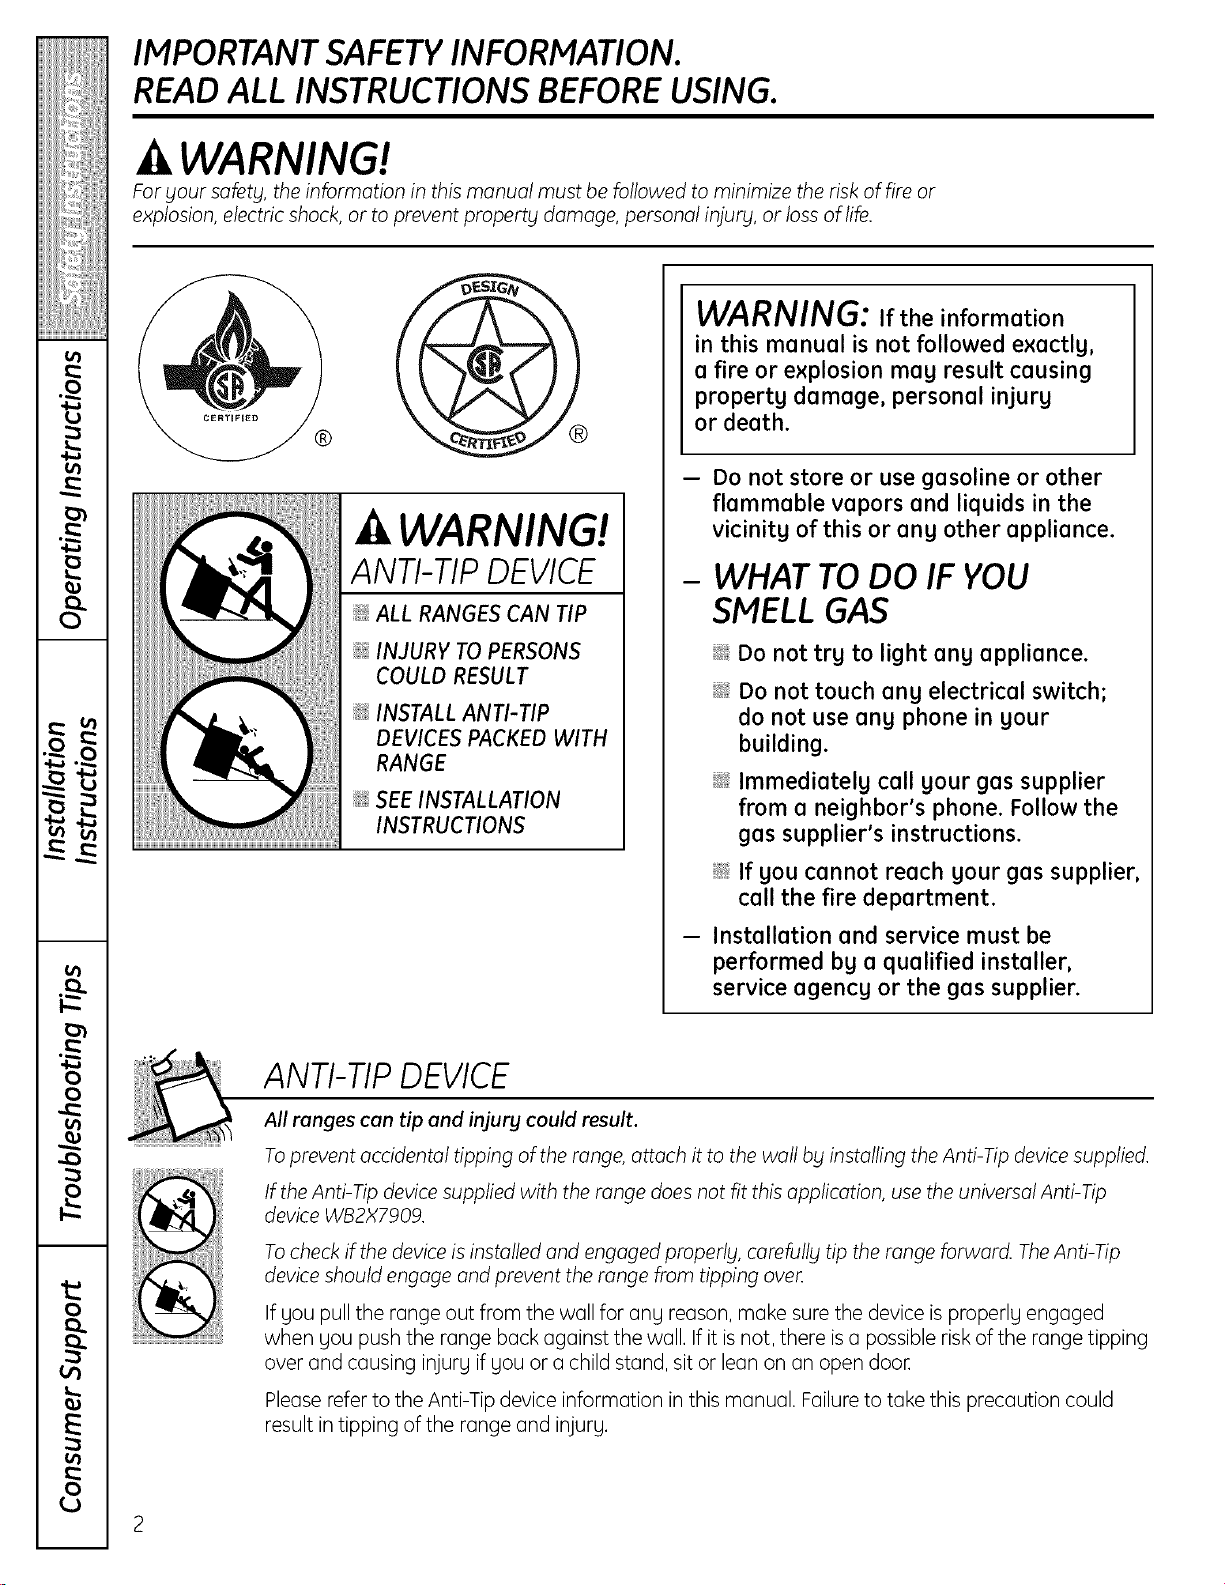
WARNING!
ANTI-TIPDEVICE
_! ALL RANGES CAN TIP
@ INJURY TO PERSONS
COULD RESULT
_: INSTALL ANTI-TIP
DEVICES PACKED WITH
RANGE
_il;SEE INSTALLATION
INSTRUCTIONS
WARNING: If the information
in this manual is not followed exactlg,
a fire or explosion meg result causing
propertg damage, personal injurg
or death.
- Do not store or use gasoline or other
flammable vapors and liquids in the
vicinitg of this or ang other appliance.
- WHAT TO DO IF YOU
SMELL GAS
i_;:;i;Do not trg to light ang appliance.
i_;:iDo not touch ang electrical switch;
do not use ang phone in gour
building.
i_i_iImmediatelg call gour gas supplier
from a neighbor's phone. Follow the
gas supplier's instructions.
i_i_iIf gou cannot reach gour gas supplier,
call the fire department.
- Installation and service must be
performed bg a qualified installer,
service agencg or the gas supplier.
ANTI-TIP DEVICE
All ranges can tip and injury could result.
Toprevent accidental tipping of the range, attach it to the wall bg installing the Anti-Tip device supplied.
If the Anti-Tip device supplied with the range does not fit this application, use the universal Anti-Tip
device WB2X7909.
Tocheck if the device is installed and engaged properly, carefully tip the range forward. TheAnti-Tip
device should engage and prevent the range from tipping oveL
If you pull the range out from the wall for any reason, make sure the device is properlg engaged
when gou push the range back against the wall. If it is not, there is a possible risk of the range tipping
over and causing injurg if gou or a child stand, sit or lean on an open door,
Please refer to the Anti-Tip device information in this manual. Failure to take this precaution could
result in tipping of the range and injurg.
ge.com
WARNING!
IMPORTANTSAFETYNOTICE
The California Safe Drinking Water and Toxic Enforcement Act requires the Governor of California to
publish a list of substances known to the state to cause birth defects or other reproductive harm, and
requires businesses to warn customers of potential exposure to such substances.
Gas appliances can cause minor exposure to four of these substances, namelg benzene, carbon
monoxide, formaldehyde and soot, caused primarily by the incomplete combustion of natural gas or
LP fuels. Properly adjusted burners, indicated by o bluish rather than a yellow flame, will minimize
incomplete combustion. Exposure to these substances con be minimized by venting with an open
window or using a ventilation fan or hood.
SAFETYPRECAUTIONS
Have the installer show you the location of the range gas shut-off valve and how to shut it off
if necessarg.
_::Have your range installed and properly
grounded by a qualified installer, in
accordance with the Installation Instructions.
Any adjustment and service should be
performed only by qualified gas range
installers or service technicians.
_t_:_Do not attempt to repair or replace any
part of your range unless it is specifically
recommended in this manual. All other service
should be referred to a qualified technician.
_t_:_Plug your range into a 120-volt grounded
outlet onlg. Do not remove the round
grounding prong from the plug. If in doubt
about the grounding of the home electrical
system, it is your personal responsibility and
obligation to have an ungrounded outlet
replaced with a properly grounded,
three-prong outlet in accordance with
the National Electrical Code. Do not use
an extension cord with this appliance.
ii//i/i!ii_i_iiii/
o
t_
o
_°
}
oo
rb
o
IMPORTANT SAFETY INFORMATION.
READ ALL INSTRUCTIONS BEFORE USING.
4
SAFETYPRECAUTIONS
_t_:_Locate the range out of kitchen traffic path
and out of drafty locations to prevent poor air
circulation.
;_i:,:Be sure all packaging materials are removed
from the range before operating it to prevent
fire or smoke damage should the packaging
material ignite.
;_::,:Be sure your range is correctlg adjusted by
a qualified service technician or installer for
the tgpe of gas (natural or LP)that is to be
used. Your range can be converted for use
with either type of gas. See the Installation
of the range section.
WARNING:These adjustments must
be made by a qualified service technician
in accordance with the manufacturer's
instructions and all codes and requirements of
the authoritg having jurisdiction. Failure
to follow these instructions could result in
serious injury or propertg damage. The
qualified agency performing this work
assumes responsibilitg for the conversion.
_::After prolonged use of a range, high floor
temperatures may result and many floor
coverings will not withstand this kind of use.
Never install the range over vinyl tile or
linoleum that cannot withstand such type
of use. Never install it directlg over interior
kitchen carpeting.
;;):,:Do not leave children alone or unattended
where a range is hot or in operation. They
could be seriouslg burned.
Do not allow anyone to climb, stand or hang
on the oven door, broiler compartment or
cooktop. They could damage the range and
even tip it over, causing severe personal injury.
CAUTION: Itemsof interestto children
should not bestored in cabinets above a
range or onthe backsplashof a range-
childrenclimbing onthe range to reachitems
couldbe seriouslginjured.
WARNING: NEVERusethis
appliance as a space heater to heat or
warm the room. Doing so may result
in carbon monoxide poisoning and
overheating of the oven.
_i_Clean onlg parts listed in this Owner's Manual.
_::Never wear loose fitting or hanging garments
while using the appliance. Be careful when
reaching for items stored in cabinets over the
range. Flammable material could be ignited if
brought in contact with flame or hot oven
surfaces and may cause severe burns.
Do not store flammable materials in an oven,
a range broiler, behind the kick panel or near
a cooktop.
Do not store or use combustible materials,
gasoline or other flammable vapors and
liquids in the vicinity of this or any other
appliance.
Do not let cooking grease or other flammable
materials accumulate in or near the range.
Do not use water on grease fires. Never pick
up a flaming pan. Turn the controls off.
Smother a flaming pan on a surface burner
by covering the pan completely with a well-
fitting lid, cookie sheet or flat tray. Use a
multi-purpose dry chemical or foam-type
fire extinguishe[
Flaming grease outside a pan can be put
out by covering it with baking soda or,
if available, by using a multi-purpose dry
chemical or foam-type fire extinguisher
Flame in the oven can be smothered
completelg by closing the oven door and
turning the control to off or by using a multi-
purpose dry chemical or foam-tgpe
fire extinguishe[
;_i:,:Let the burner grates and other surfaces cool
before touching them or leaving them where
children can reach them.
_::Never block the vents (air openings)of the
range. They provide the air inlet and outlet
that are necessary for the range to operate
properlg with correct combustion. Air openings
are located at the rear of the cooktop, at the
top and bottom of the oven door, and at the
bottom of the range under the broiler
compartment or kick panel.
_?_::Large scratches or impacts to glass doors can
lead to broken or shattered glass.
ge.com
COOKMEATAND POULTRYTHOROUGHLY...
Cook meat and poultry thoroughly-meat to at least an INTERNALtemperature of 160°F and poultry to
at least an INTERNALtemperature of l80°E Cooking to these temperatures usually protects against
foodbome illness.
OVEN
Stand away from the range when opening the door of a hot oven. The hot air and steam that escape
can cause burns to hands, face and eyes.
;_):,:Do not use the oven for a storage area.
Items stored in the oven can ignite.
;_i:,:Keep the oven free from grease buildup.
;_i:,:Place the oven shelves in the desired aosition
while the oven is cool.
;_i:,:Pulling out the shelf to the stop-lock is a
convenience in lifting heavy foods. It is also
a precaution against burns from touching hot
surfaces of the door or oven walls. The lowest
position is not designed to slide.
_t::_Do not heat unopened food containers.
Pressure could build up and the container
could burst, causing an injury.
WARNING: NEVERcover
any slots, holes or passages in the oven
bottom or cover an entire shelf with
materials such as aluminum foil. Doing
so blocks air flow through the oven and
may cause carbon monoxide poisoning.
Aluminum foil linings may also trap
heat, causing a fire hazard.
;_i:,:Do not use aluminum foil anywhere in the
oven except as described in this manual.
Misuse could result in a fire hazard or damage
to the range.
;_i:,:When using cooking or roasting bags in the
oven, follow the manufacturer's directions.
;_):,:Do not use your oven to dry newspapers.
If overheated, they can catch fire.
_t_::Use only glass cookware that is recommended
for use in gas ovens.
_t_::Always remove any broiler pan from the range
as soon as you finish broiling. Grease left in the
pan can catch fire if oven is used without
removing the grease from the broiler pan.
_t_:_When broiling, if meat istoo close to the flame,
the fat may ignite. Trim excess fat to prevent
excessive flare-ups.
;_i:,:Makesurea broiler pan isin place correctlg to
reducethe possibilitg ofgrease fires,
_:::If you should have a grease fire in the broiler
pan, turn offthe oven control, and keep
the broiler compartment and oven door closed
to contain fire until it burns out.
;;i:,:For safetg and proper cooking performance,
always bake and broil with the oven door
closed.
ii//i/i!ii_i_iiii/
o
_°
}
oo
¢b
o
IMPORTANT SAFETY INFORMATION.
READ ALL INSTRUCTIONS BEFORE USING.
WARNING!
SURFACEBURNERS
Use proper pan size-avoid pans that are unstable or easily tipped. Select coo!<wore having flat
bottoms large enough to cover burner grates. Toavoid spillovers, mal<esure coo!<wore is large enough
to contain the food properly. This will both save cleaning time and prevent hazardous accumulations of
food, since heavy spattering or spillovers left on range can ignite. Use pans with handles that can be
easily grasped and remain cool.
_;):,:Always use the Life position when igniting the
top burners and make sure the burners have
ignited.
_t_::Never leave the surface burners unattended at
high flame settings. Boilovers cause smoking
and greasy spillovers that may catch on fire.
_;i:,:Adjust the top burner flame size so it
does not extend beyond the edge of the
cookware. Excessive flame is hazardous.
_t_:_Use only dry pot holders-moist or damp pot
holders on hot surfaces may result in burns
from steam. Do not let pot holders come near
open flames when lifting cookware. Do not
use a towel or other bulky cloth in place of
a pot holder.
;_i:,:When using glass cookware, make sure it
is designed for top-of-range cooking.
_:::To minimize the possibilitg of burns, ignition
of flammable materials and spillage, turn
cookware handles toward the side or back of
the range without extending over adjacent
burners.
_t_:_Carefully watch foods being fried at a high
flame setting.
_t_:_Always heat fat slowlg, and watch as it heats.
Do not leave any items on the cooktop. The
hot air from the vent may ignite flammable
items and will increase pressure in closed
containers, which may cause them to burst.
_t_::If a combination of oils or fats will be used in
frying, stir together before heating or as fats
melt slowlg,
;_::,:Use a deep fat thermometer whenever
possible to prevent overheating fat beyond the
smoking point.
_t_::Use the least possible amount of fat for
effective shallow or deep-fat frying. Filling the
pan too full of fat can cause spillovers when
food is added.
;_):,:Do not flame foods on the cooktop, If you do
flame foods under the hood, turn the fan on.
;_i:,:Do not use a wok on the cooking surface
if the wok has a round metal ring that is
placed over the burner grate to support
the wok. This ring acts as a heat trap, which
may damage the burner grate and burner
head. Also, it may cause the burner to work
improperlg. This may cause a carbon
monoxide level above that allowed by current
standards, resulting in a health hazard.
6
ge.com
_t_::Do not use aluminum foil to line the griddle.
Misuse could result in a fire hazard.
_' Never leave the kitchen while using the griddle.
_t::_Foods for frging should be as drg as possible.
Frost on frozen foods or moisture on fresh
foods can cause hot fat to bubble up and over
the sides of the pan.
_ Never trg to move a pan of hot fat, especiallg
a deep fat frger. Wait until the fat is cool.
_t::_Do not leave plastic items on the cooktop-
theg mag melt if left too close to the vent.
;_i:,:Keep all plastics away from the surface
burners.
;_i:,:To avoid the possibilitg of a burn, always be
certain that the controls for all burners are at
the Off position and all grates and the griddle
are cool before attempting to remove them.
_::_If range is located near a window, do not hang
long curtains that could blow over the surface
burners and create a fire hazard.
_t::_If you smell gas, turn off the gas to the range
and call a qualified service technician. Never
use an open flame to locate a leak.
;_i:,:Always turn the surface burner controls off
before removing cookware or the griddle.
_t_:_Do not lift the cooktop. Lifting the cooktop can
lead to damage and improper operation of the
range.
_:_Do not place or store items that can melt or
catch fire on the grates, even when the
cooktop is not being used.
;_::,:Keep range clean and free of accumulations of
grease or spillovers, which may ignite.
READAND FOLLOW THISSAFETYINFORMATION CAREFULLY.
SAVE THESE INSTRUCTIONS
iiIIiIi!ii_i_iiiil
o
t_
o
_°
}
oo
rb
o
Using the gas surface burners.
Throughout this manual, features and appearance may vary from your model.
Before Lighting a Gas Burner
iJi::Make sureall burners are in place.
iJi::Make sureall grates (andthe center
griddle,if it isgoing to be used)onthe
range are properly placed before using any
burner:
After Lighting a Gas Burner
ij_::Do not operate the burner for an extended
period of time without cookware on the
grate. The finish on the grate mag chip
without cookware to absorb the heat.
;;Ji::Besurethe burners, griddle and grates are
cool before you place your hand, a pot
holder,cleaning cloths or other materials
on them.
i i i i i i i i
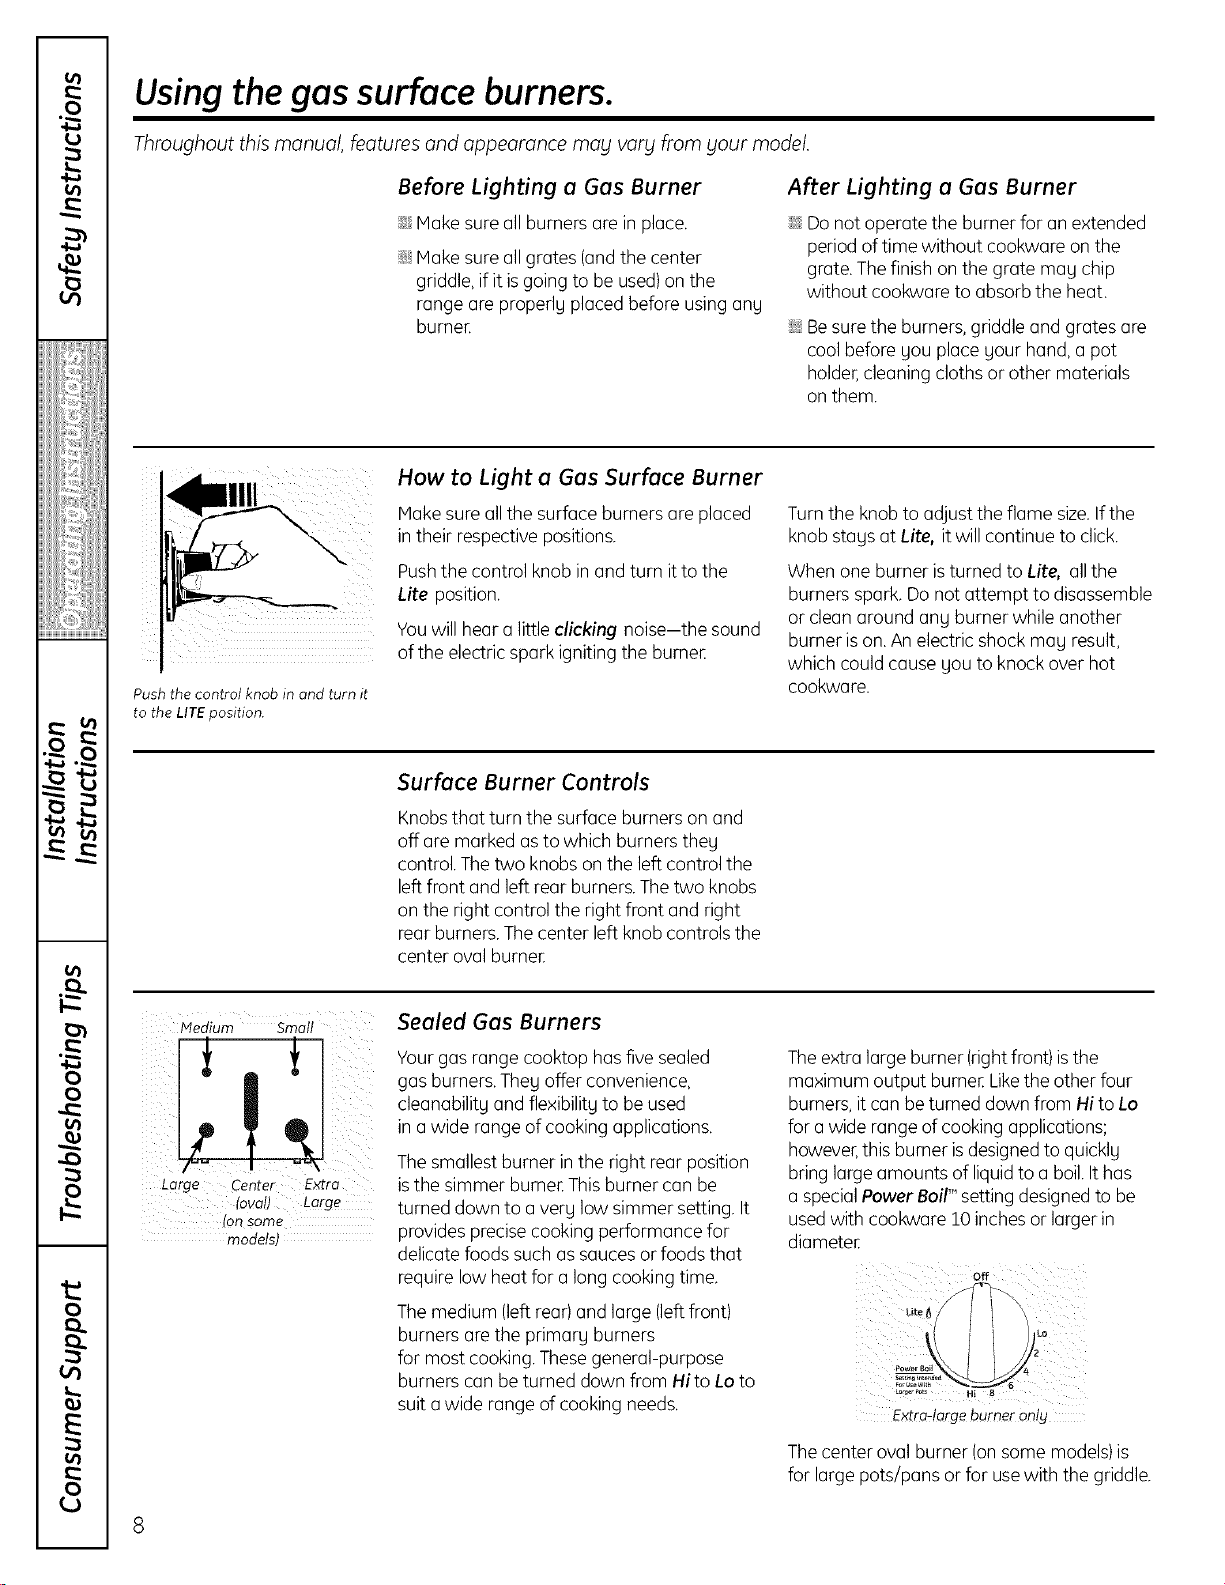
Push the control knob in and turn it
to the LITEposition.
How to Light a Gas Surface Burner
Makesure all the surface bumers are placed
intheir respective positions.
Pushthe control knob inand turn it to the
Lite position.
Youwill hear a little clicking noise-the sound
ofthe electricspark igniting the bumeE
Turnthe knob to adjust the flame size.If the
knob stagsat Lite, it will continue to click.
When one burner isturned to Lite, all the
burners spark.Do not attempt to disassemble
or clean around ang burner while another
burner is on.An electric shockmag result,
which could cause you to knock over hot
cookware.
Surface Burner Controls
Knobsthat turn the surface burners on and
off are marked asto which burnerstheg
control.Thetwo knobs on the left control the
left front and left rear burners.Thetwo knobs
on the right control the right front and right
rear burners.Thecenter left knob controls the
center oval burneE
Hedium Small
Large Center Extra
{oval) Large
{on some
models)
Sealed Gas Burners
Your gasrange cooktop hasfive sealed
gasburners.Theg offer convenience,
cleanability and flexibilitgto be used
in a wide range of cooking applications.
Thesmallest burner in the right rear position
isthe simmer burneEThisburner can be
turned down to averg low simmer setting. It
provides precisecooking performance for
delicate foods such assaucesor foods that
require low heat for a long cooking time.
Themedium (leftrear) and large (leftfront)
burners are the primarg burners
for most cooking.Thesegeneral-purpose
burners can be turned down from Hito Lo to
suit a wide range of cooking needs.
The extra large burner (right front) isthe
maximum oumut burneE Like the other four
burners, it can be turned down from Hi to Lo
for a wide range of cooking applications:
howeve/this burner is designed to quickly
bring large amounts of : uid to a boil. t has
a special Power Boil _"setting designea to be
used with COOKware10 inches or larger in
diameteE
off
L// J;
-'LJ-.S
Lo,_.,po_ Hi 8
Extra-large burner or
Thecenter oval burner (onsome models)is
for large pots/pans or for usewith the griddle.
8
ge.com
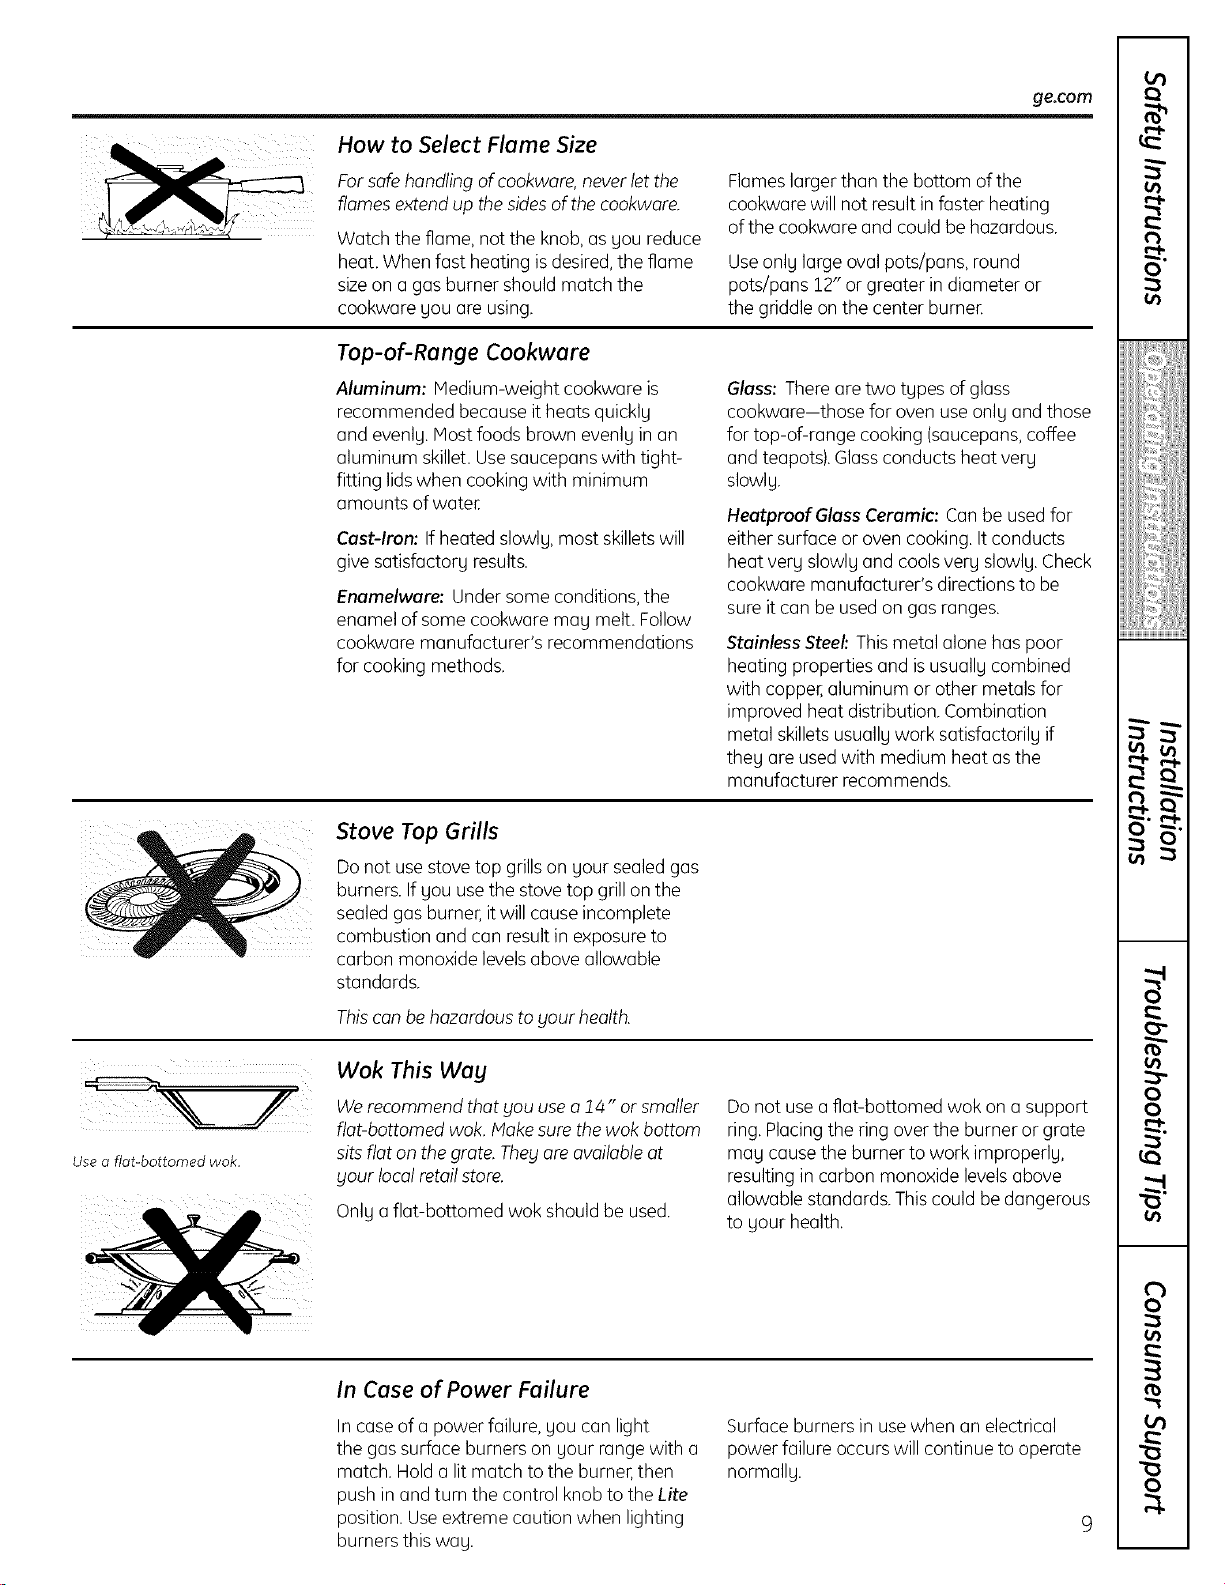
How to Select flame Size
Forsafehandling ofcookwore, neverletthe
flamesextend up thesidesof the cookwore.
Watch the flame, not the knob, asgou reduce
heat. When fast heating isdesired,the flame
sizeon a gasburner should match the
cookware gou are using.
Flameslarger than the bottom of the
cookwarewill not result in faster heating
ofthe cookware and could be hazardous.
Useonlg large oval pots/pans, round
pots/pans 12" or greater in diameter or
the griddle on the center burner
Top-of-Range Cookware
Aluminum: Medium-weight cookware is
recommended because it heats quicklg
and evenlg.Most foods brown evenlg in an
aluminum skillet. Usesaucepanswith tight-
fitting lidswhen cooking with minimum
amounts of water
Cast-Iron: If heated slowlg, most skillets will
give satisfactorg results.
Enamelware: Under some conditions, the
enamel of some cookware mug melt. Follow
cookware manufacturer's recommendations
for cooking methods.
Glass: Thereare two tgpes of glass
cookware-those for oven use onlg and those
for top-of-range cooking (saucepans,coffee
and teapots).Glassconducts heat verg
slowlg.
HeatproofGlass Ceramic: Can be usedfor
either surface or oven cooking.It conducts
heat very slowlg and cools very slowlg.Check
cookware manufacturer's directions to be
sure itcan be usedon gas ranges.
Stainless Steel: This metal alone has poor
heating properties and isusuallg combined
with copper,aluminum or other metalsfor
improved heat distribution. Combination
metal skillets usuallgwork satisfactorilg if
theg are usedwith medium heat as the
manufacturer recommends.
Stove Top Grills
Do not usestove top grillson gout sealedgas
burners. If gou usethe stove top grill on the
sealedgas burner,itwill cause incomplete
combustion and can result in exposure to
carbon monoxide levelsabove allowable
standards.
Thiscan behazardous to your health.
Use a fiat-bottomed wok.
Wok This Way
We recommend that youuse a 14 " or smaller
flat-bottomed wok. Hake sure the wok bottom
sits flat on the grate. They are available at
your local retailstore.
Onlg a flat-bottomed wok should be used.
Donot usea flat-bottomed wok on a support
ring. Placingthe ring over the burner or grate
mag cause the burner to work improperlg,
resulting in carbon monoxide levels above
allowable standards. Thiscould be dangerous
to gour health.
In Case of Power Failure
In case of a power failure, gou can light
the gas surface burners on gour range with a
match. Hold a lit match to the burner,then
push in and turn the control knob to the Lite
position. Useextreme caution when lighting
burners this wag.
Surface burners in usewhen an electrical
power failure occurswill continue to operate
normallg.
t_
0
iijiiiiii]iiiijjil
i_iii_ii,i,:>iiiii
L_
tb
:b-
8
{,t}
('b
o
R
Usingthe griddle.
Your non-stick coated griddle provides
an extra-large cooking surface for meats,
pancakes or other food usually prepared
in a frying pan or skillet.
NOTE:Yourgriddle will discolor overtime asit
becomesseasonedwith use.
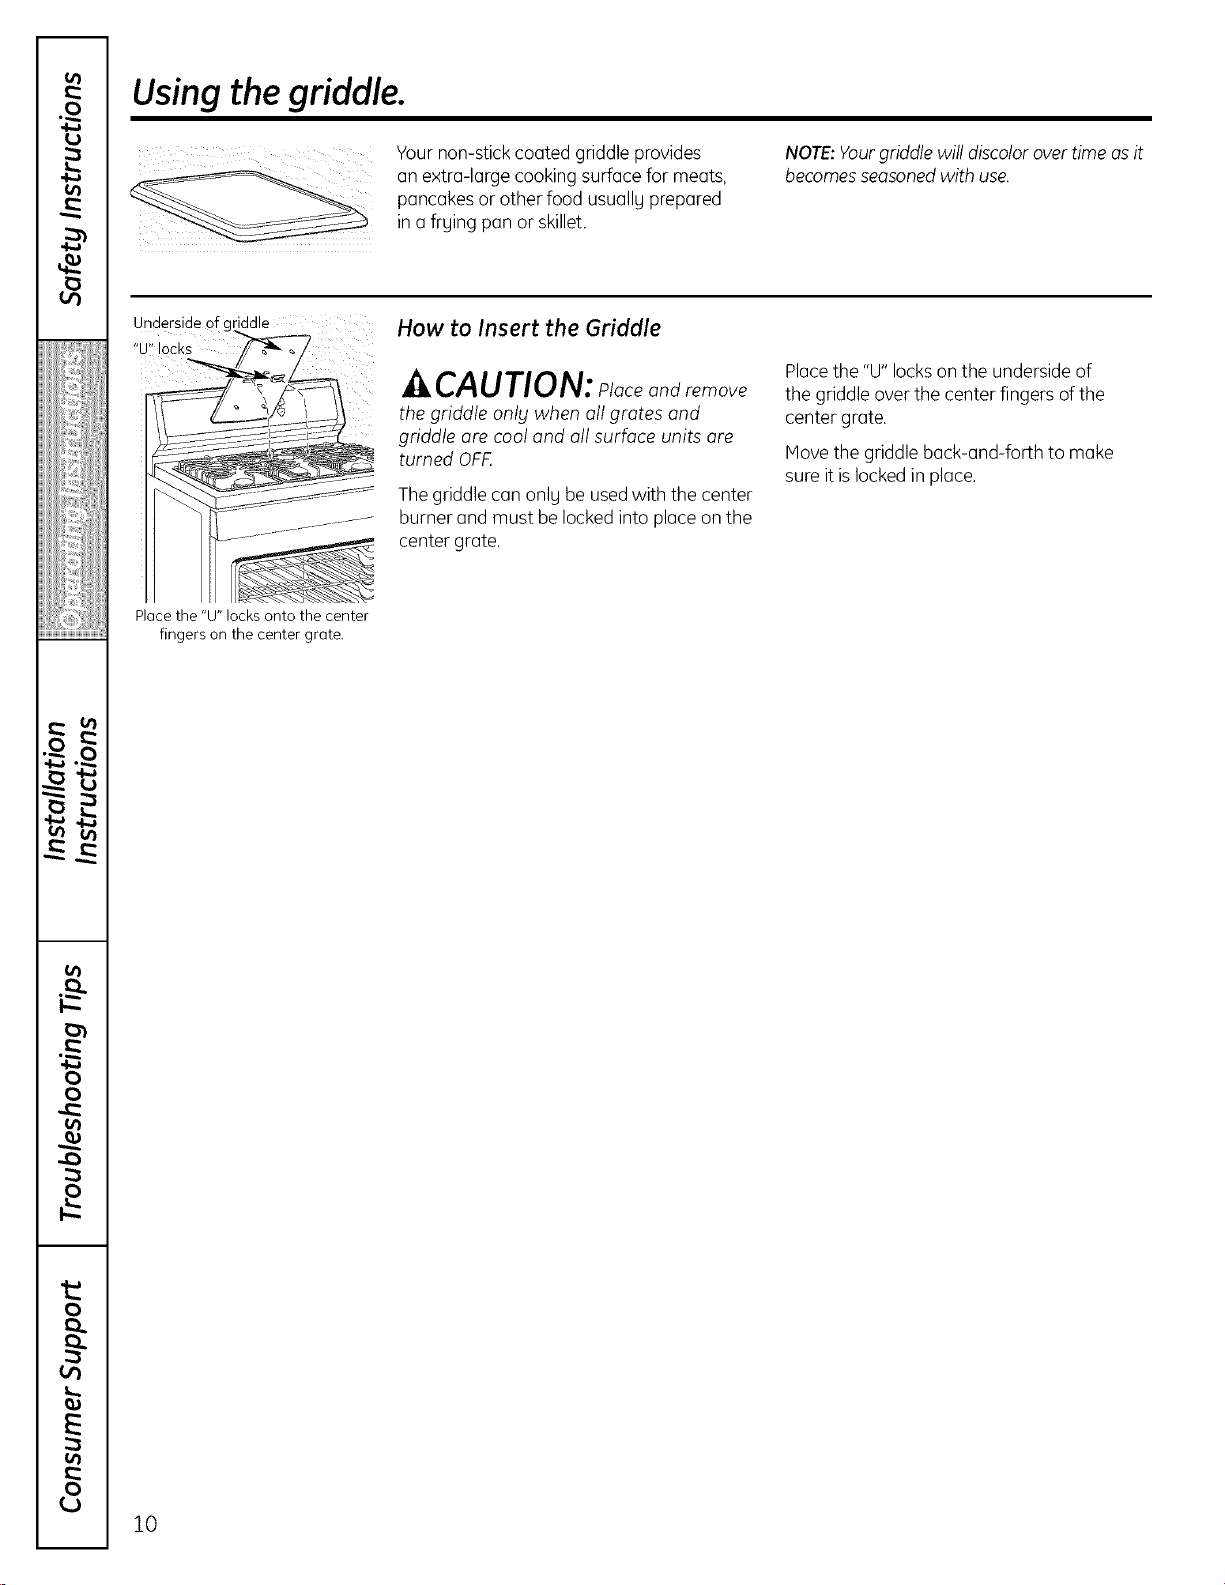
Underside oft riddle
locks
How to Insert the Griddle
CAUTlON: puceandremo e
the griddle onlg when all grates and
griddle are cool and all surface units are
turned OFF,
The griddle can only be used with the center
burner and must be locked into place on the
center grate.
Placethe "U" lockson the underside of
the griddle overthe center fingers of the
center grate.
Move the griddle back-and-forth to make
sure it islocked in place.
Place the "U" locks onto the center
fingers on the center grate.
10
ge.com
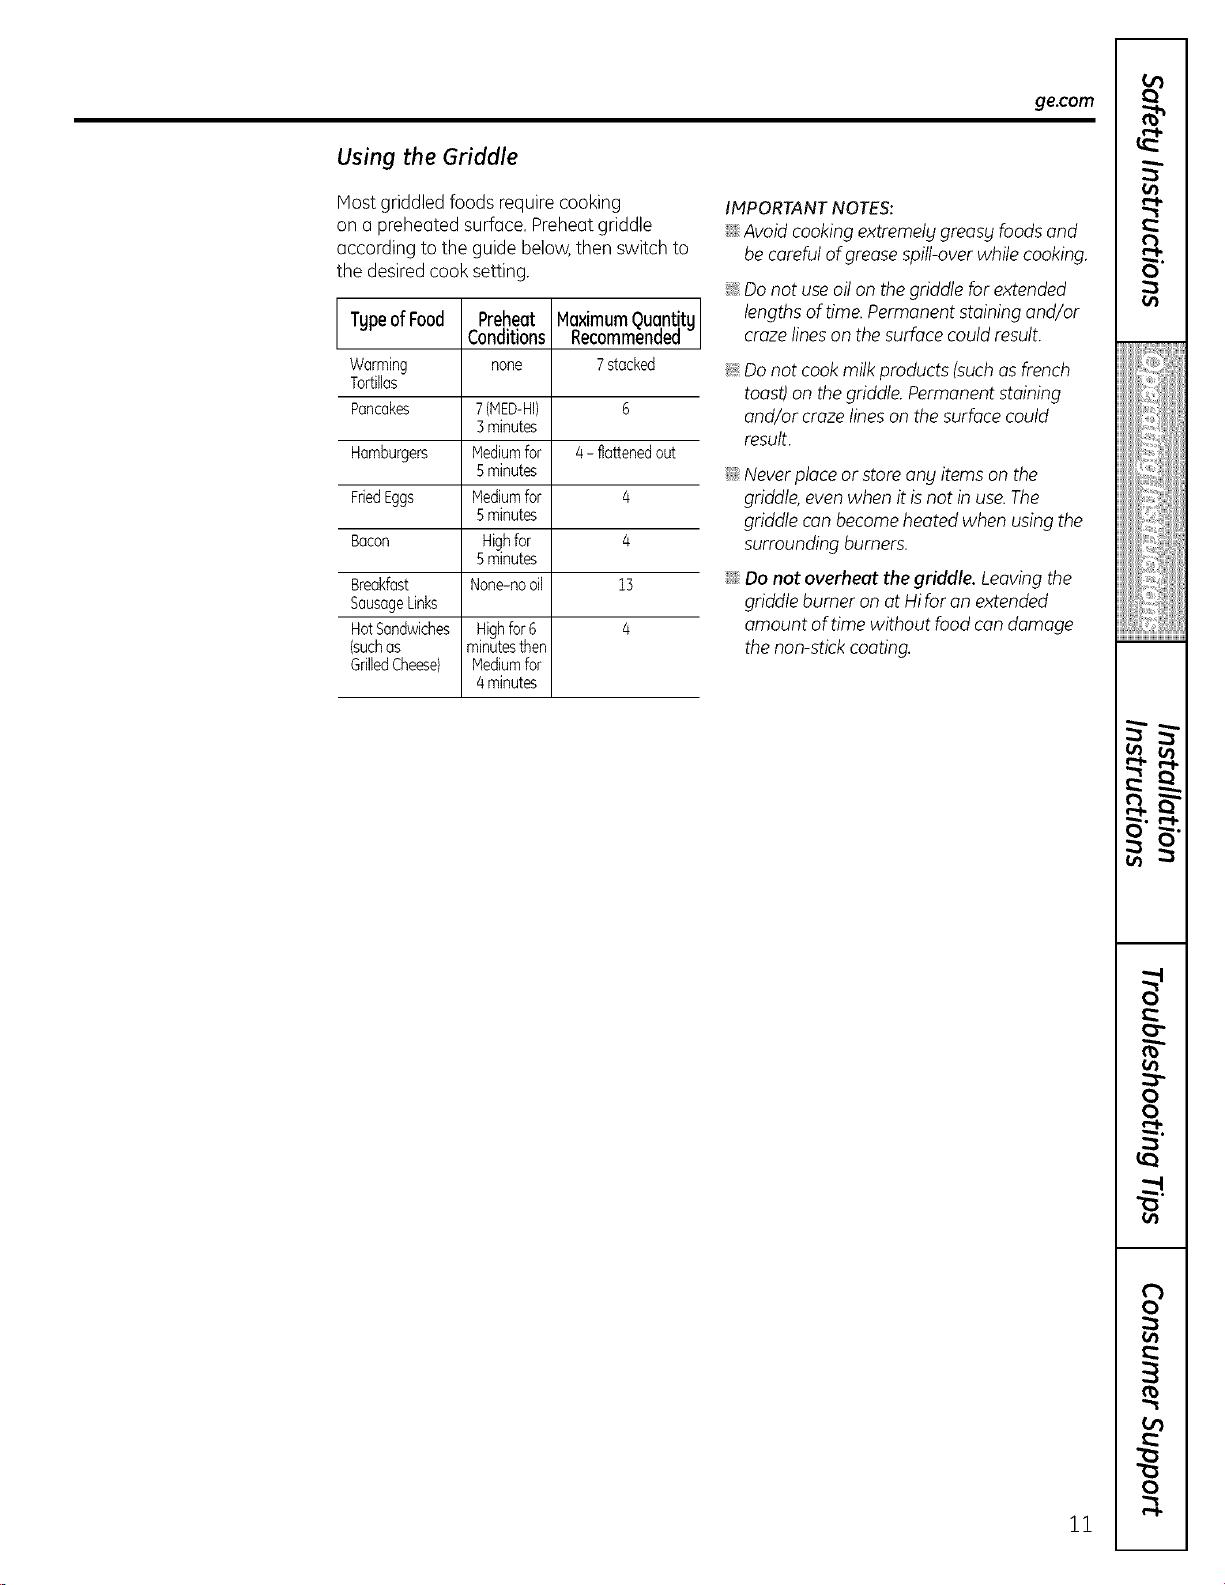
Using the Griddle
Host griddled foods require cooking
on a preheated surface. Preheatgriddle
according to the guide below,then switch to
the desiredcook setting.
k TgpeofFood Preheat MaximumguqntitgI
Conditions _ecommenaea j
Warming none 7stacked
Tortillas
Pancakes 7 (NED-HI) 6
] minutes
Hamburgers Mediumfor 4- flattenedout
5minutes
FriedEggs Nediumfor 4
5minutes
Bacon Highfor 4
5minutes
Breakfast None-nooil 13
SausageLinks
HotSandwichesHighfor6 4
(suchas minutesthen
GrilledCheese) Nediumfor
4minutes
IMPORTANTNOTES:
;;J_::Avoidcooking extremely greasy foods and
becareful of greasespill-overwhile cooking.
_: Donot useoil on thegriddle for extended
lengthsof time.Permanent staining and/or
crazelineson the surfacecould result.
_ Donot cook milk products (suchasfrench
toast)on thegriddle.Permanent staining
and/or craze lineson the surfacecould
result.
;;J_:,Neverplaceor store any itemson the
griddle,evenwhen it isnot in use.The
griddle canbecome heatedwhen usingthe
surroundingburners.
::Ji::Do not overheat the griddle. Leavingthe
griddle burner on at Hifor an extended
amount of time without food candamage
the non-stickcoating.
11
Using the oven controls.
Throughout this manual, features and appearance mag vary from gout model.
®
o k-iJ
OvenControl,Clockand TimerFeaturesand Settings(onsomemodets)
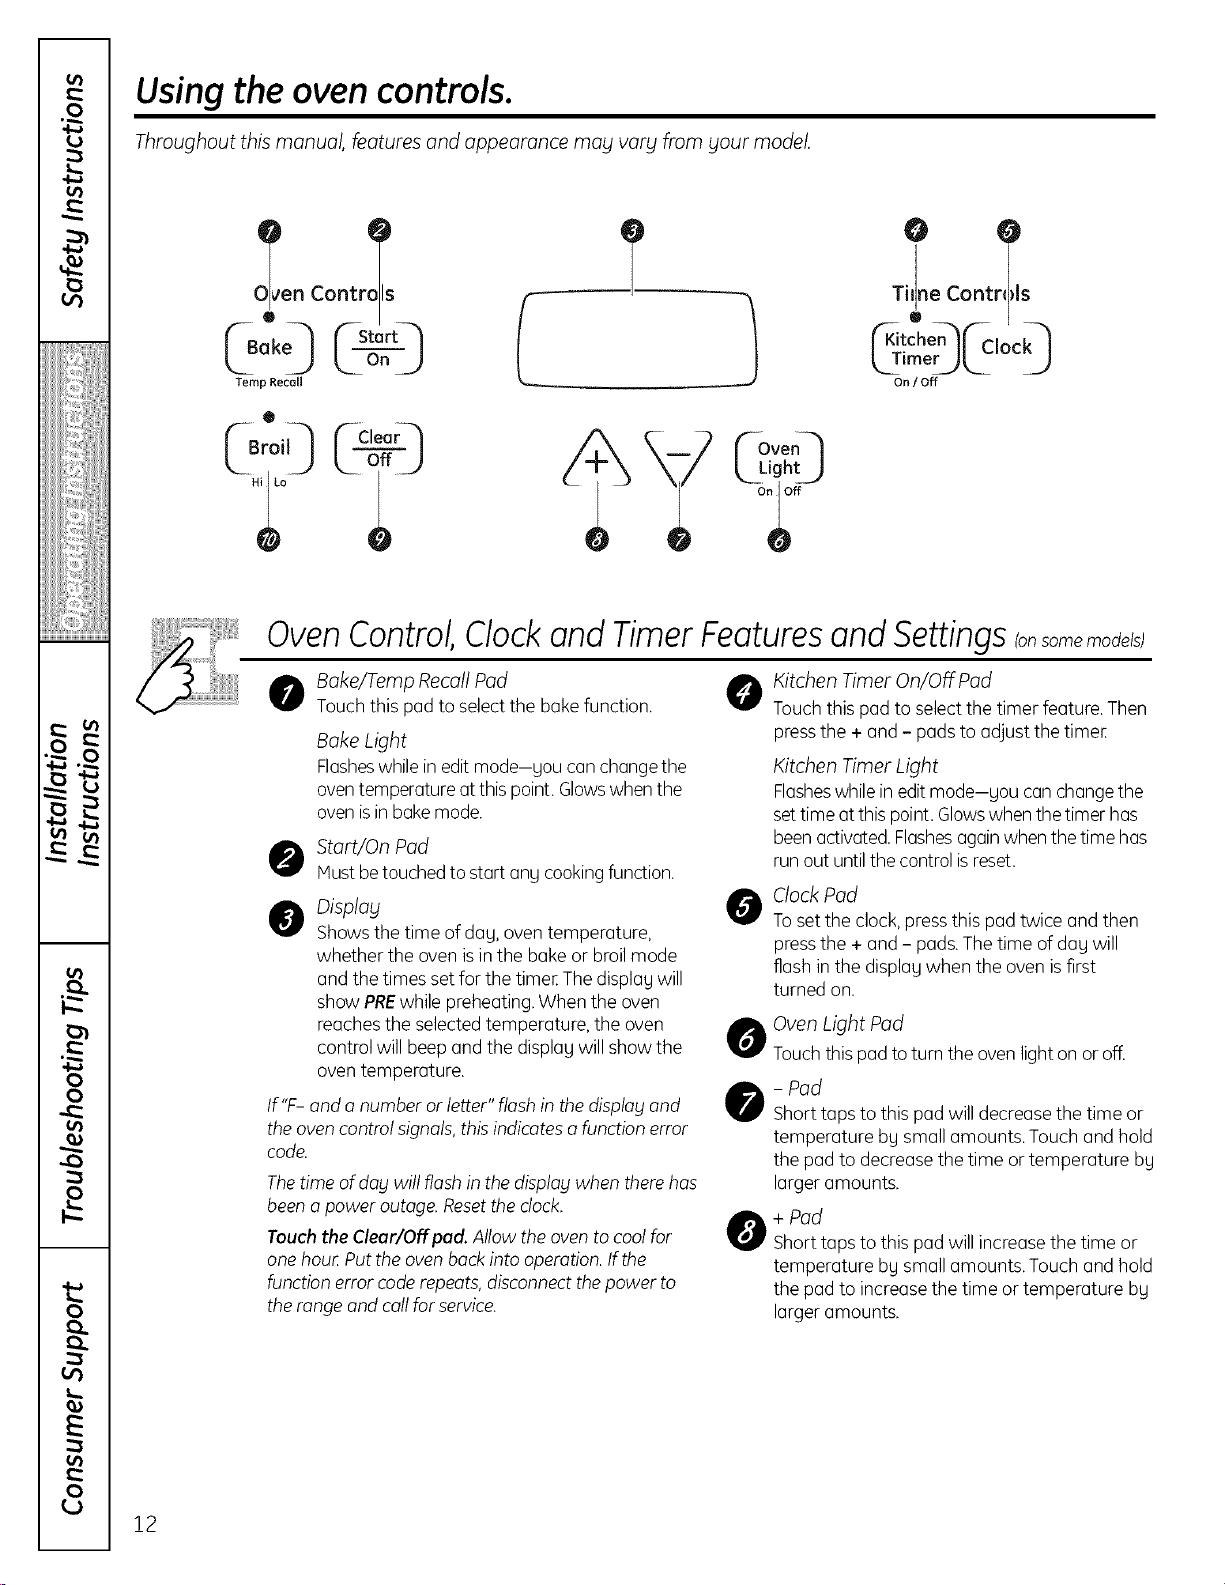
O ake/Temp Recall Pad O
Touchthis pad to selectthe bakefunction.
Bake Light
Flasheswhilein edit mode-uou canchangethe
oventemperatureat this point. Glowswhen the
ovenisin bakemode.
O Start/On Pad
lust betouched to start ang cookingfunction.
O Display
Showsthe time of day, oven temperature,
whether the oven isin the bake or broil mode
and the times set for the timer.Thedisplay will
show PREwhile preheating.When the oven
reaches the selectedtemperature, the oven
control will beep and the display will show the
oven temperature.
tf "F- and a number or letter" flash in the displayand
the ovencontrol signals,this indicatesa function error
code.
Thetime of dablwill flash in the disploblwhen therehas
been o power outage. Resetthe dock.
Touch the Clear/Off pad. Allow the ovento cool for
one hou: Putthe oven backinto operation.If the
function error coderepeats,disconnect thepower to
the range and callfor service.
Kitchen Timer On/OFFPad
Touchthis pad to selectthe timer feature. Then
pressthe + and - padsto adjust the timer.
Kitchen Timer Light
Flasheswhilein editmode-uou canchangethe
settime atthis point. Glowswhenthetimer has
been activated.Flashesagainwhen thetime has
run out untilthe control isreset.
0
Clock Pad
Toset the clock, pressthis pad twice and then
pressthe + and - pads.The time of day will
flash in the display when the oven isfirst
turned on.
O Oven Light Pad
Touchthis pad to tum the oven lighton or off.
- Pad
Short taps to this pad will decreasethe time or
temperature by small amounts. Touch and hold
the pad to decrease the time or temperature by
larger amounts.
+ Pad
taps to this pad will increasethe time or
temperature by small amounts. Touch and hold
the pad to increase the time or temperature by
larger amounts.
12
ge.com
Oven Control, Clock and Timer Features and Settings _onsomemode_s_
O lear/OffPad
Touchthis pad to cancel ALL oven operations
except the clock and timer
O Broil Hi/Lo Pod
Touchthis pad to selectthe broil function.
Broil Light
Flasheswhilein editmode-you canswitch from
Hito Lo Broil at this point. Glowswhenthe oven
isin broilmode.
Indicator Lights (on some pads)
Editmode lastsseveralsecondsafter the last
pad press.
15
e,,l,
9"
8
rb
o
to
0
0
0
e"l.
Using the oven.
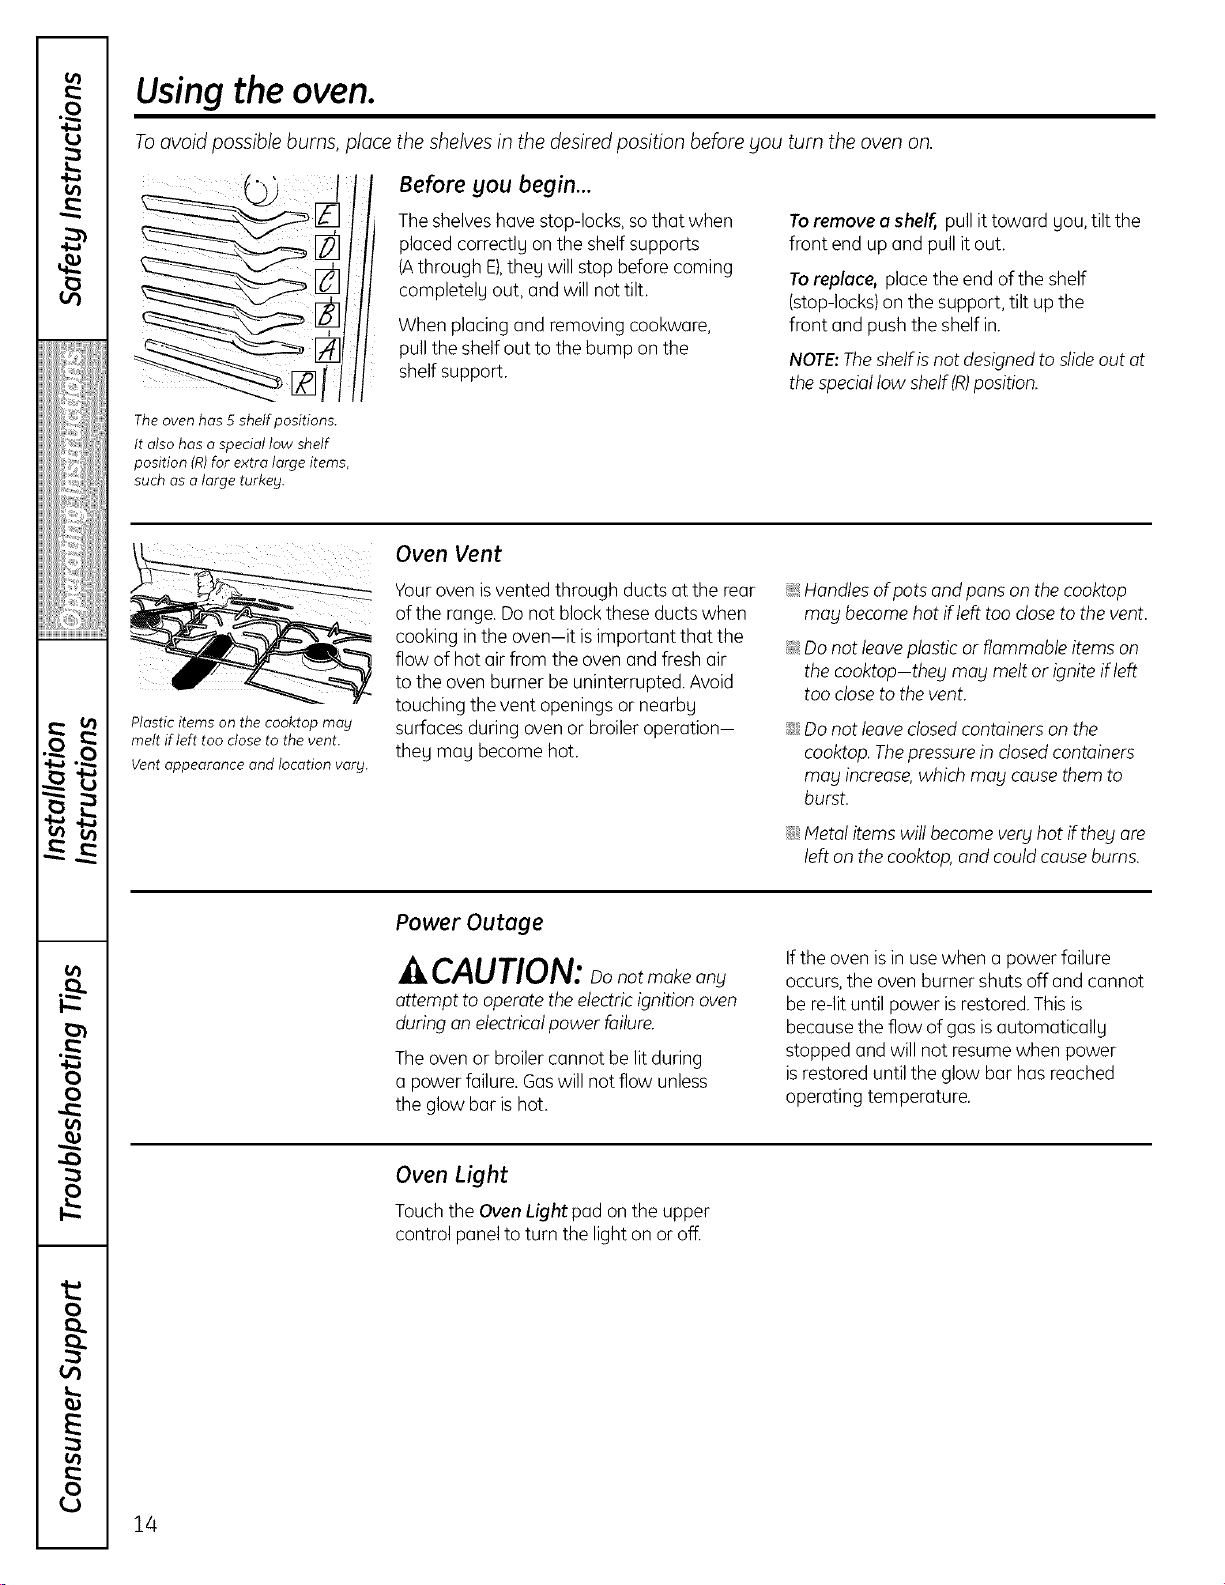
To avoid possible burns, place the shelves in the desired position before you turn the oven on.
Before you begin...
Theshelveshave stop-locks, sothat when
placed correctlu on the shelf supports
(Athrough E),they will stop before coming
completelu out, and will nottilt.
When placing and removing cookware,
pull the shelf out to the bump on the
shelf support.
Toremove o shelf, pull it toward Uou,tilt the
front end up and pull it out.
Toreplace, placethe end of the shelf
(stop-locks)on the support, tilt up the
front and push the shelf in.
NOTE:Theshelfisnot designedto slideout at
the speciallow shelf(R)position.
The oven has 5 shelf positions.
It also has a special low shelf
position (R)for extra large items,
such as a large turkey.
Plastic items on the cooktop mag
melt if left too close to the vent.
Vent appearance and location vary.
Oven Vent
Your ovenisvented through ducts at the rear
of the range.Do not block these ductswhen
cooking in the oven-it isimportant that the
flow of hot air from the oven and fresh air
to the oven burner be uninterrupted. Avoid
touching thevent openings or nearby
surfaces during ovenor broiler operation-
they may become hot.
_ Handlesof pots and pans on the cooktop
mog become hot if left too closeto the vent.
_ Donot leaveplasticor flammable items on
the cooktop-theg may melt or igniteif left
too closeto the vent.
;;Ji::Donot leaveclosedcontainerson the
cooktop.Thepressurein dosedcontainers
may increase,which may causethem to
burst.
iJi::Metal itemswill becomeverg hot if thegore
left on the cooktop,and could causeburns.
Power Outage
^ CAUTION: notmakeany
attempt to operate theelectricignition oven
during an electricalpower failure.
Theoven or broiler cannot be lit during
a power failure. Gaswill not flow unless
the glow bar ishot.
Ifthe oven is in use when a power failure
occurs, the oven burner shuts off and cannot
be re-lit until power is restored. This is
because the flow of gas is automaticall9
stopped and will not resume when power
is restored until the glow bar has reached
operating temperature.
Oven Light
Touch the OvenLightpad on the upper
control panelto turn the light on or off.
14
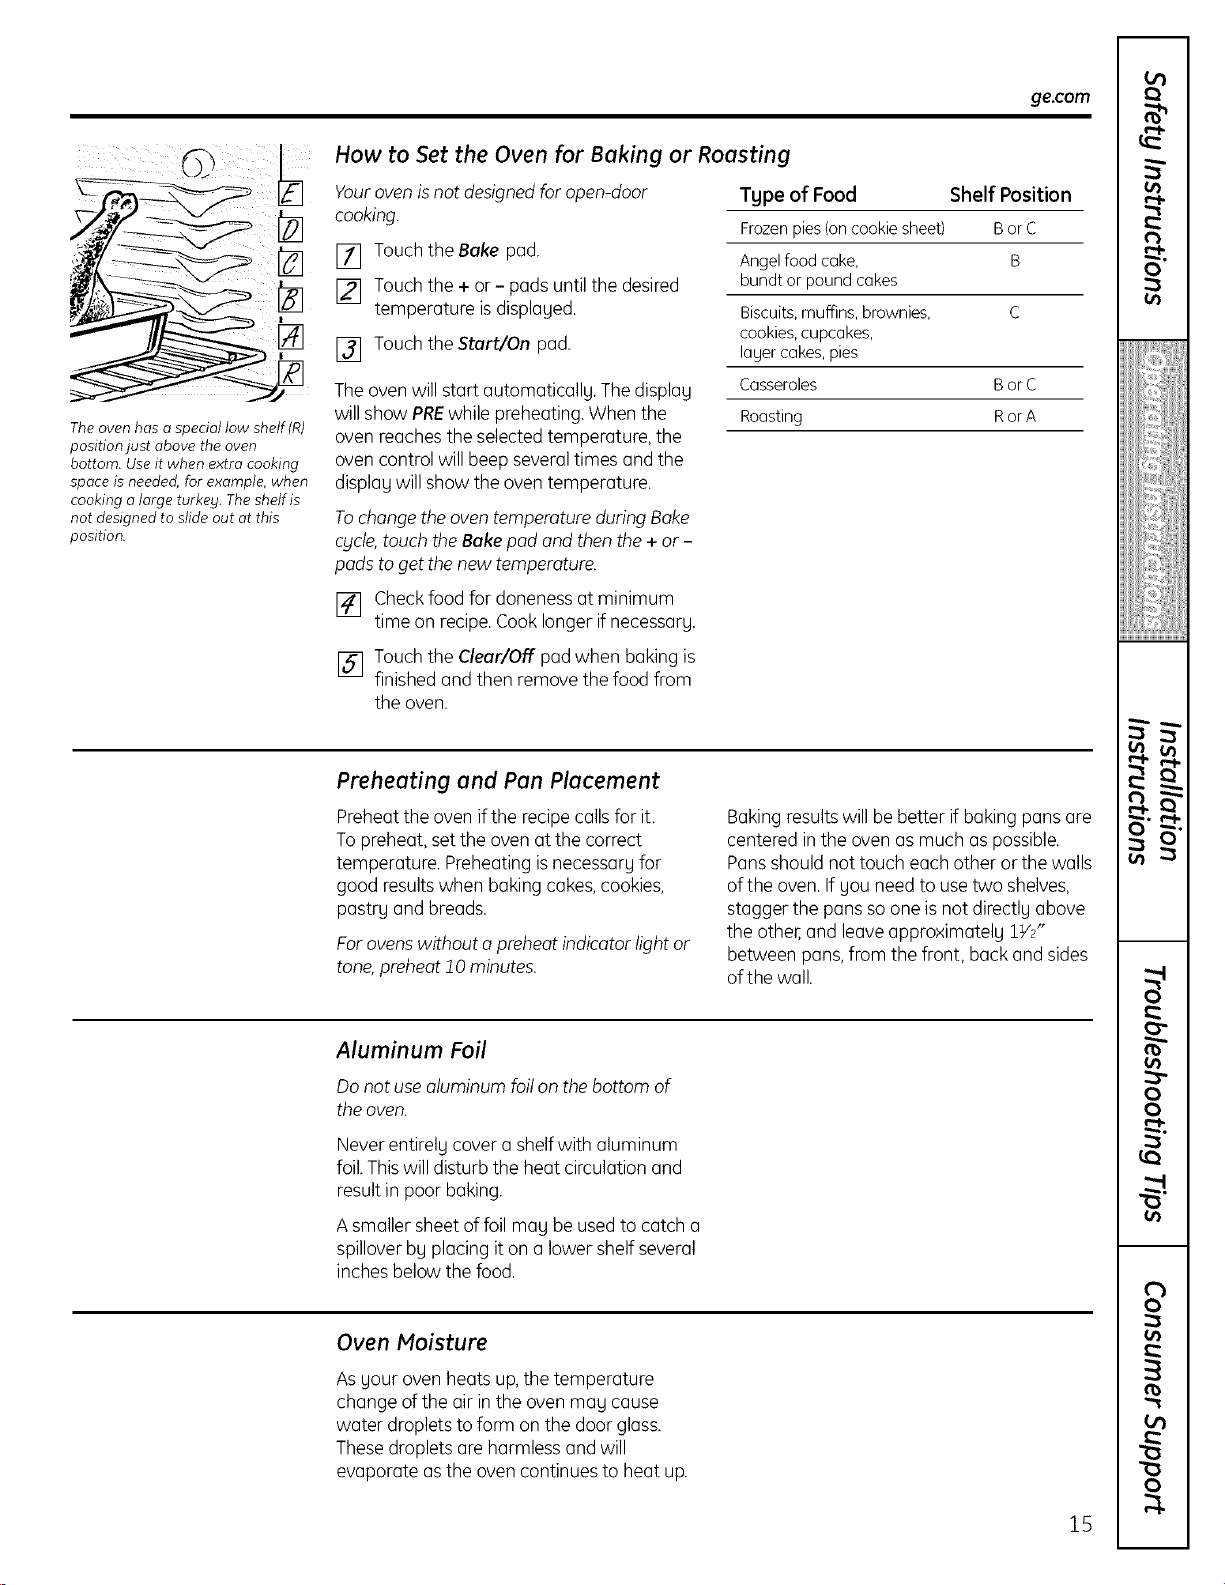
The oven has a special low shelf(R)
position just above the oven
bottom. Use it when extra cooking
space is needed, for example, when
cooking a large turkey. The shelf is
not designed to slide out at this
position.
ge,com
How to Set the Oven for Baking or Roasting
Yourovenisnot designedfor open-door
cooking.
[] Touch the Bake pad.
[] Touch the + or- pads until the desired
temperature is displayed.
[] Touch the Start/On pad.
Theovenwill start automatically. Thedisplay
will show PREwhile preheating. When the
oven reaches the selectedtemperature, the
oven control will beep severaltimes and the
display will show the oven temperature.
Tochangethe oventemperature during Bake
cycle,touch theBake pod and then the +or -
pods to getthe new temperature.
[] Checkfood for doneness at minimum
time on recipe.Cook longer if necessary.
[] Touchthe Clear/Off pad when baking is
finished and then remove the food from
the oven.
Tgpe of Food Shelf Position
Frozen pies (on cookie sheet) B or C
Angel food cake, B
bundtorpoundcakes
Biscuits, muffins, brownies, C
cookies, cupcakes,
layer cakes, pies
Casseroles BorC
Roasting RorA
Preheating and Pan Placement
Preheatthe oven if the recipe calls for it.
To preheat, set the oven at the correct
temperature. Preheating isnecessary for
good resultswhen baking cakes,cookies,
pastry and breads.
Forovenswithout a preheat indicator light or
tone,preheat 10 minutes.
Baking resultswill be better if baking pans are
centered in the oven as much as possible,
Pansshould not touch each other or the walls
of the oven. If you need to usetwo shelves,
stagger the pans soone isnot directly above
the other,and leave approximately 1V2"
between pans,from the front, back and sides
of the wall.
Aluminum Foil
Do notuse aluminum foilon the bottom of
the oven.
Never entirely cover a shelfwith aluminum
foil.Thiswill disturb the heat circulation and
result in poor baking.
A smaller sheet of foil may be usedto catch a
spillover by placing it on a lower shelf several
inches below the food.
Oven Moisture
Asyour oven heats up,the temperature
change ofthe air in the ovenmay cause
water droplets to form on the door glass.
These droplets are harmless and will
evaporate asthe oven continuesto heat up.
15
¢t)
t_
0
iiiiiii_iiiiiii'iiiiiiiii
@i_i_,,iliJii_i,
_° r _
g
¢b
o
R
Using the oven.
Broiling
Broilingiscooking food bg direct heat from
above the food. Host fish and tender cuts of
meat can be broiled.Followthese directions
to keepspattering and smoking to a
minimum.
Your range has a compartment below the
oven for broiling.
Both the oven and broiler compartment
doors must be CLOSED during broiling.
Turn most foods once during cooking (the
exception is thin fillets of fish; oil one side,
place that side down on broiler grid and cook
without turning until done). Time foods for
about one-half the total cooking time, turn
food, then continue to cook to preferred
doneness.
[] You can change the distance of the food
from the heat source bUpositioning a
broiler pan and grid on one of three shelf
positions in the broiler compartment-A
(bottom of broiler compartment), B
(middle) and C (top).
[] Preheating the broiler or oven is not
necessar Uand can produce poor results.
[] If meat has fat or gristle around the edge,
cut vertical slashes through both about
2" apart. If desired, the fat ma U be
trimmed, leaving a lager about 1/8" thick.
[]
[]
[]
[]
Arrange the food on the grid and position
the broiler pan on the appropriate shelf in
the oven or broiling compartment.
Placingfood closer to the flame
increasesexterior browning of the food,
but also increasesspattering and the
possibilitgof fats and meat juices
igniting.
Closethe oven and broiler compartment
dooE
Touch the Broil Hi/Lo pad oncefor
Hi Broil.
To change to Lo Broil, touch the
Broil Hi/Lo pad again.
UseLo Broil to cook foods such as
poultrg or thick cuts of meat thoroughlg
without over-browning them
Touch the Start/On pad.
When broiling isfinished,touch the
Clear/Off pad.
Removethe broiler pan from the broiler
compartment and serve the food
immediatelg. Leavethe pan outside the
range to cool.
16
ge.com
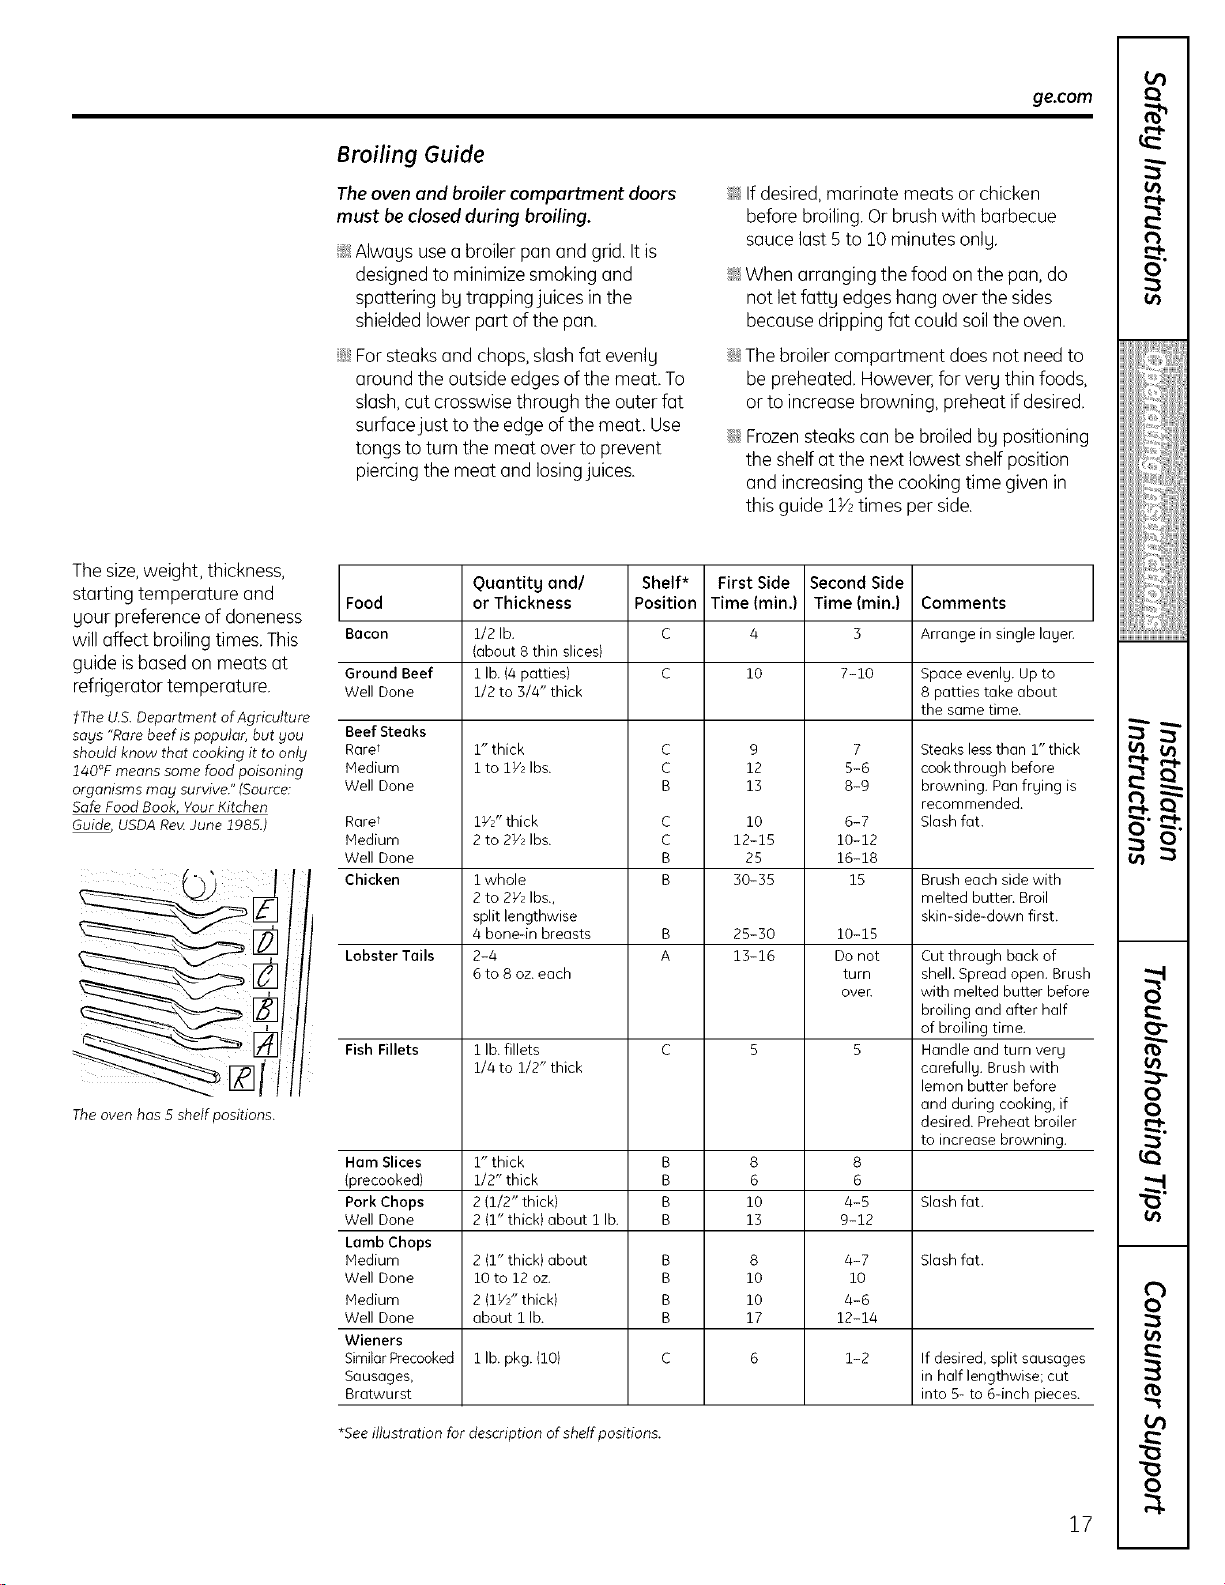
Broiling Guide
The oven and broiler compartment doors
must be closed during broiling.
_:Alwags usea broiler pan and grid. It is
designed to minimize smoking and
spattering bg trapping juices inthe
shielded lower part of the pan.
ij_:,Forsteaksand chops,slash fat evenlg
around the outside edgesof the meat. To
slash,cut crosswisethrough the outer fat
surfacejust to the edge ofthe meat. Use
tongs to turn the meat overto prevent
piercingthe meat and Iosingjuices.
?_:If desired,marinate meats or chicken
beforebroiling. Or brushwith barbecue
sauce last 5 to 10 minutes onlg.
?_:When arranging the food on the pan, do
not let fattg edgeshang over the sides
becausedripping fat could soilthe oven.
ij_::Thebroiler compartment does not need to
be preheated. However,for vergthin foods,
or to increase browning, preheat if desired.
ij_::Frozensteakscan be broiled bg positioning
the shelfat the next lowest shelf position
and increasing the cooking time given in
this guide 1V_times per side.
Thesize,weight, thickness,
starting temperature and Food
gour preference of doneness
will affect broiling times. This Bacon
guide is based on meats at
refrigerator temperature.
tThe U.S. Department of Agriculture
says "Rare beef is popular, but you Beef Steaks
should know that cooking it to only Rarer
240°F means some food poisoning Medium
organisms may survive." (Source: Well Done
Safe Food Book Your Kitchen
Guide, USDA Rev.June 1985.)
The oven has 5 shelf positions.
Ground Beef
Well Done
Rarer
Hedium
Well Done
Chicken
Lobster Tails
Fish Fillets
Ham Slices
grecooked)
Pork Chops
Well Done
Lamb Chops
Hedium
Well Done
Medium
Well Done
Wieners
Similar Precooked
Sausages,
Bratwurst
Quantitg and/ Shelf* First Side
or Thickness Position Time (min.)
1/2 lb. C
(about 8 thin slices)
1lb.(4 patties} C
1/2 to 3/4" thick
1" thick
i to 1VzIbs.
1:/2" thick
2 to 2]/z Ibs.
i whole
2 to 2Y, Ibs.,
split lengthwise
4 bone-in breasts
2-4
6 to 8 oz. each
1 lb. fillets
1/4 to 1/2" thick
1" thick
1/2" thick
2 (1/2" thick}
2 (1" thick)about 1 lb.
2 (1" thick) about
10to 12 oz.
2 (lY2" thick)
about 1 lb.
1lb. pkg. (lO)
c
c
B
C
C
B
B
B
B
B
B
B
B
B
B
10
9
12
13
i0
12-15
25
30-35
25-30
13-16
8
6
10
13
8
10
10
17
Second Side
Time (min.)
7-10
7
5-6
8-9
6-7
10-12
16-18
15
10-15
Do not
turn
over
8
6
4-5
9-12
4-7
10
4-6
12-14
1-2
Comments
Arrange in single lager.
Spaceevenlg. Up to
8 patties take about
the same time.
Steaks less than 1" thick
cookthrough before
browning. Pan frging is
recommended.
Slash fat.
Brush each side with
melted butter. Broil
skin-side-down first.
Cut through back of
shell. Spread open. Brush
with melted butter before
broiling and after half
of broiling time.
Handle and turn very
carefull 9. Brush with
lemon butter before
and during cooking, if
desired. Preheat broiler
to increase browning.
Slash fat.
Slash fat.
If desired, split sausages
in half lengthwise; cut
into B- to 6-inch pieces.
*See illustration for description of shelf positions.
17
e,,l,
O_
t_
0
iiiiiii_iiiiiii'iiiiiiiii
iJi!iii_i_,,iliJii_i,
t;iiiiitiiiiiii/
_° r _
oo
rb
o
R
Adjust the oven thermostat--Do it yourself!
You may find that your new oven cooks differently than the one it replaced. Use your new oven for a few weeks to
become more familiar with it. If Fou still think your new oven is too hot or too cold, you can adjust the thermostat
yourself
Do not use thermometers, such as those found in grocery stores, to check the temperature setting of Four oven.
These thermometers may vary 20-40 degrees.
NOTE: This adjustment will not affect the broiling temperature.
0
OokO
Temp Recoil
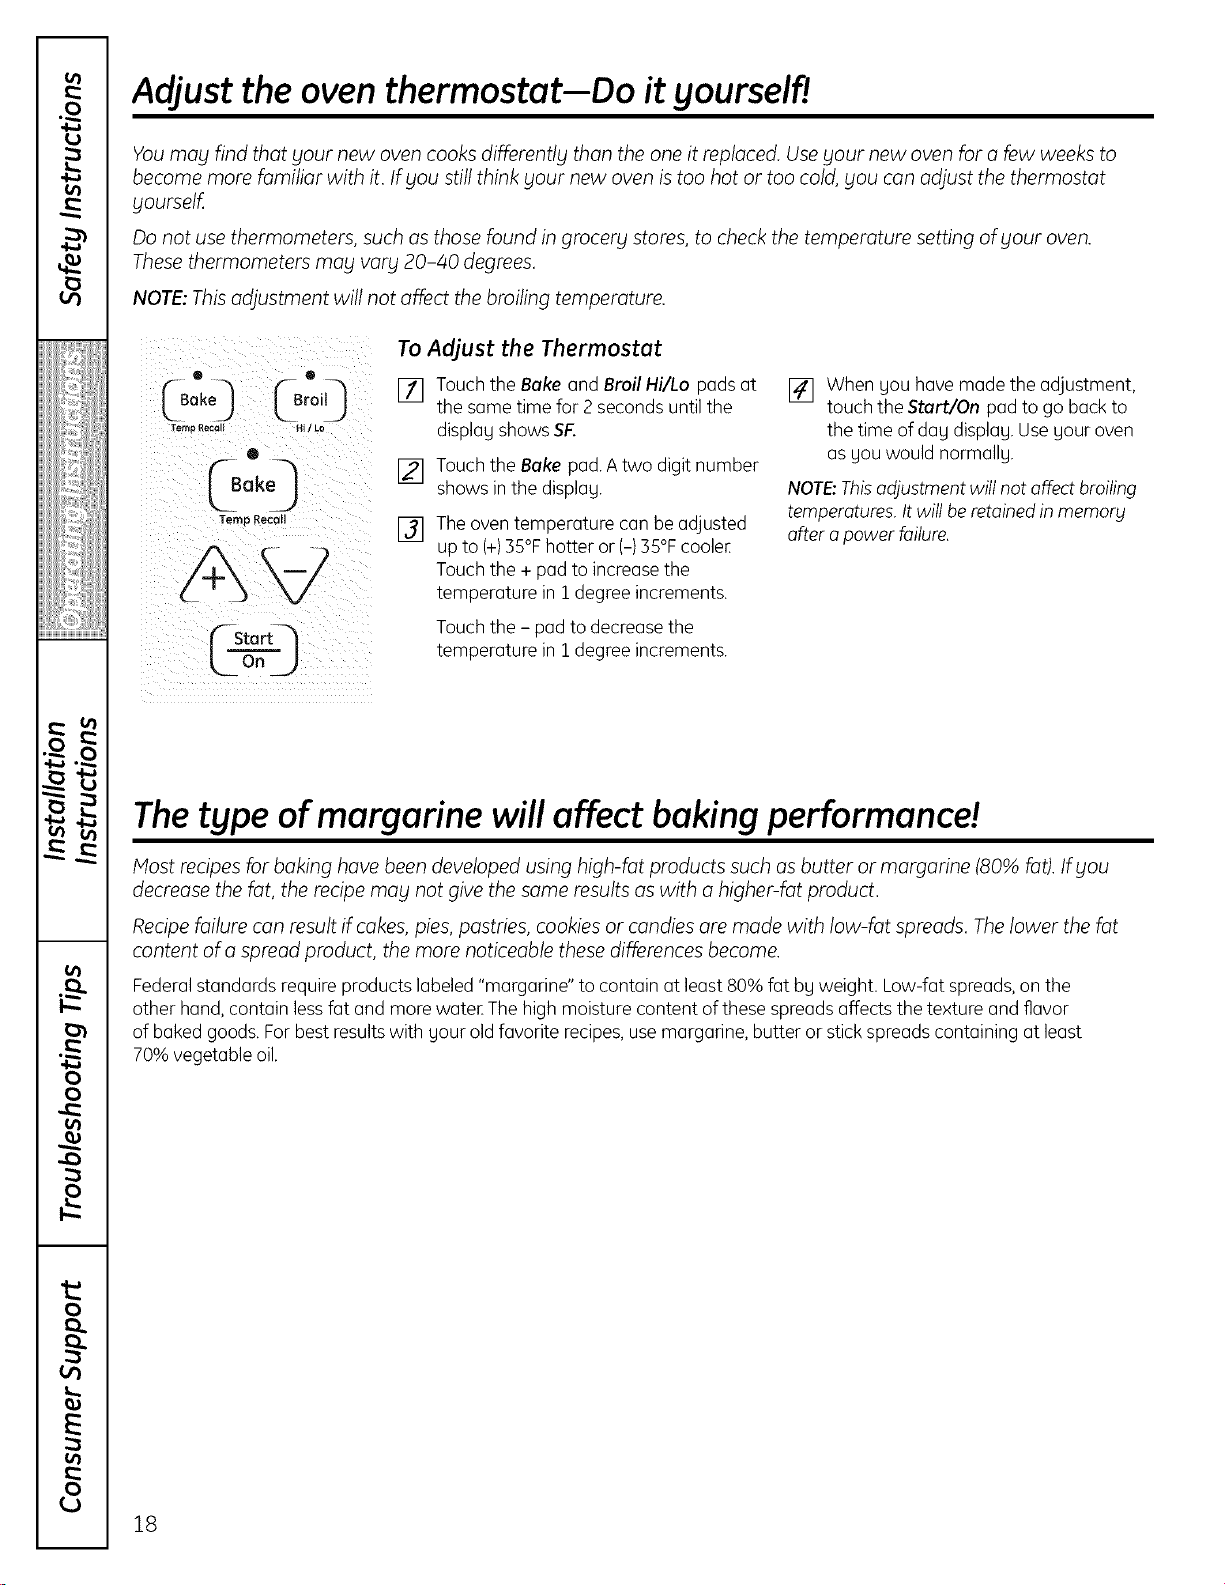
To Adjustthe Thermostat
[] Touchthe Bake and Broil Hi/Lo pads at
the same time for 2 seconds until the
displag showsSF.
[] Touchthe Bake pad.A two digit number
shows in the displag.
[] Theoventemperature can be adjusted
up to (+)35°Fhotter or (-) 35°Fcooler
Touchthe + pad to increasethe
temperature in i degree increments.
Touchthe - pad to decreasethe
temperature in i degree increments.
[] When gou have made the adjustment,
touch the Start/On pad to go back to
the time of day displag. Useyour oven
as gou would normallg.
NOTE:Thisadjustment will not affect broiling
temperatures. It will be retainedin memory
after a power failure.
Thetype of margarine will affect baking performance!
Most recipes for baking have been developed using high-fat products such as butter or margarine (80% fat). If Fou
decrease the fat, the recipe may not give the same results as with a higher-fat product.
Recipe failure can result if cakes, pies, pastries, cookies or candies are made with low-fat spreads. The lower the fat
content of a spread product, the more noticeable these differences become.
Federalstandards require products labeled "margarine" to contain at least 80% fat by weight. Low-fat spreads,on the
other hand,contain lessfat and more water The high moisture content ofthese spreads affects the texture and flavor
of baked goods. Forbest resultswith your old favorite recipes,usemargarine, butter or stick spreads containing at least
70% vegetable oil.
18
Using the clock and timer.
ge.com
Not oil features ore on oil models.
lock_}
¢sta q
LO" J
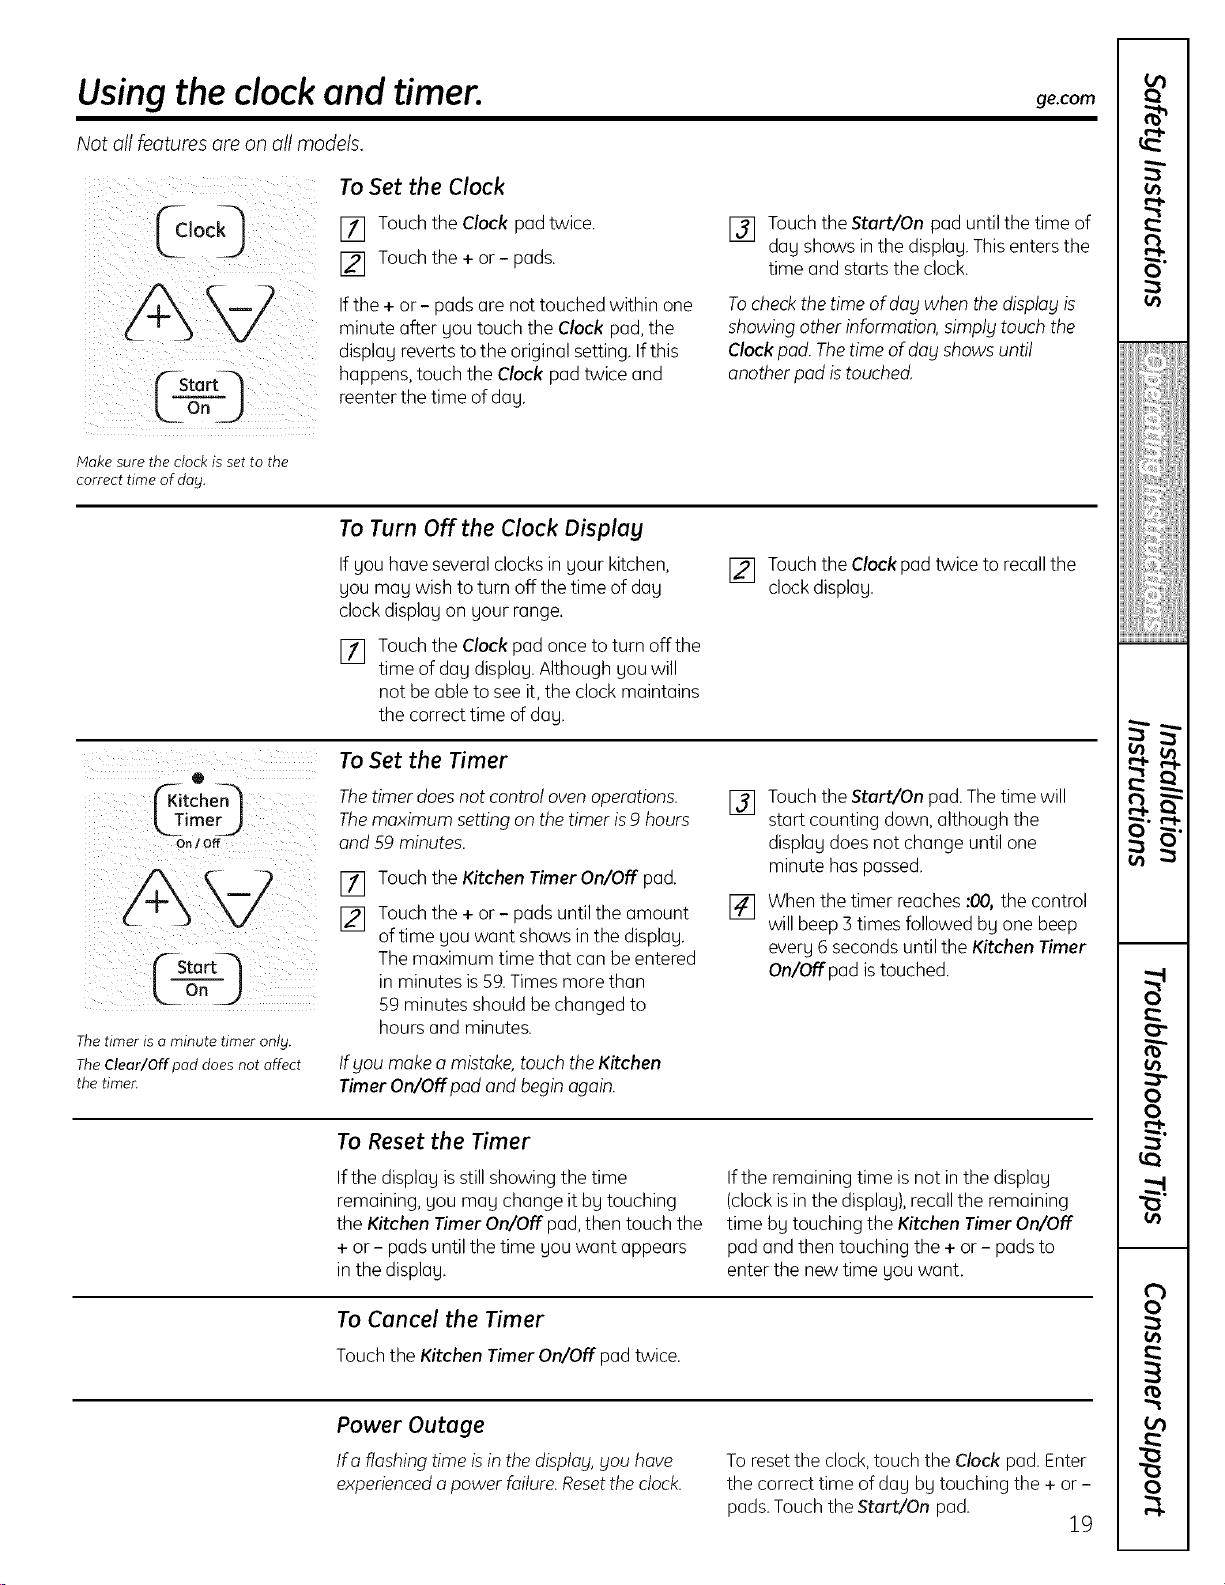
To Set the Clock
[] Touch the Clock pod twice.
[] Touch the + or- pods.
If the + or- pods ore not touched within one
minute offer gou touch the Clock pod, the
displag revertsto the original setting. Ifthis
happens, touch the Clock pod twice and
reenter the time of dog.
[] Touch the Start/On pod until the time of
dog shows in the displag.Thisenters the
time and starts the clock.
Tocheckthe time of day when the display is
showing other information, simply touch the
Clockpod. Thetime of dog shows until
anotherpod istouched.
Hake sure the clock is set to the
correct time of dog.
To Turn Off the Clock Display
If gou have several clocksin gour kitchen,
gou mag wish to turn off the time of dog
clock displagon gour range.
[] Touch the Clock pad once to turn off the
time of dog displag.Although gou will
not be able to seeit, the clock maintains
the correct time of dag.
[] Touch the Clock pad twice to recallthe
clockdisplag.
• ] zzzzzz
r _
[ Kitchen /
LTmer_
FStartq
LOnJ
The timer is a minute timer only.
The Clear/Off pad does not affect
the timer.
To Set the Timer
Thetimer doesnot control ovenoperations.
Themaximum setting on the timer is9 hours
and 59 minutes.
[]
[]
Touch the Kitchen Timer On/Off pad.
Touch the + or - pads until the amount
of time gou want shows in the displag.
The maximum time that can be entered
in minutes is59.Times more than
59 minutes should be changed to
hours and minutes.
tf you make a mistake,touch the Kitchen
Timer On/Off pod and begin again.
[] Touch the Start/On pod.Thetime will
start counting down, although the
displagdoes not change until one
minute has passed.
[] When the timer reaches :00, the control
will beep 3 times followed bg one beep
everg6 secondsuntil the Kitchen Timer
On/Off pad istouched.
To Reset the Timer
If the displag isstill showing the time
remaining, gou mug change it bg touching
the Kitchen Timer On/Off pod,then touch the
+ or- podsuntil the time gouwont appears
in the displag.
If the remaining time is not in the displag
(clockisin the displag),recallthe remaining
time bg touching the Kitchen Timer On/Off
pod and then touching the + or - podsto
enter the new time gou wont.
To Cancel the Timer
Touch the Kitchen Timer On/Off pad twice.
Power Outage
Ira flashing time is in the display, you hove
experienced o power failure. Reset the clock.
To resetthe clock,touch the Clock pod. Enter
the correct time of dog bg touching the + or-
pods.Touch the Start/On pod.
19
e,,l,
9"
i!i_iiiiiiiiiiiiii
iii_iiii!!ijiiill
i
L_
oo
rb
o
to
0
0
0
Special features of your oven control.
Yournew touch pad control hasadditional featuresthat you may chooseto use.Thefollowing arethefeaturesand
how you may activate them.
The special feature modes can onlg be activated while the display isshowing the time of day. Theg remain in the
control's memory until the steps ore repeated.
Whenthe display showsyour choice,touch theStart/On pad.Thespecialfeatureswill remain inmemory after
a power failure.
NOTE: TheSabbath feature and the Thermostat Adjustment feature ore also Special Features, but the_jore addressed
separately in their own sections.
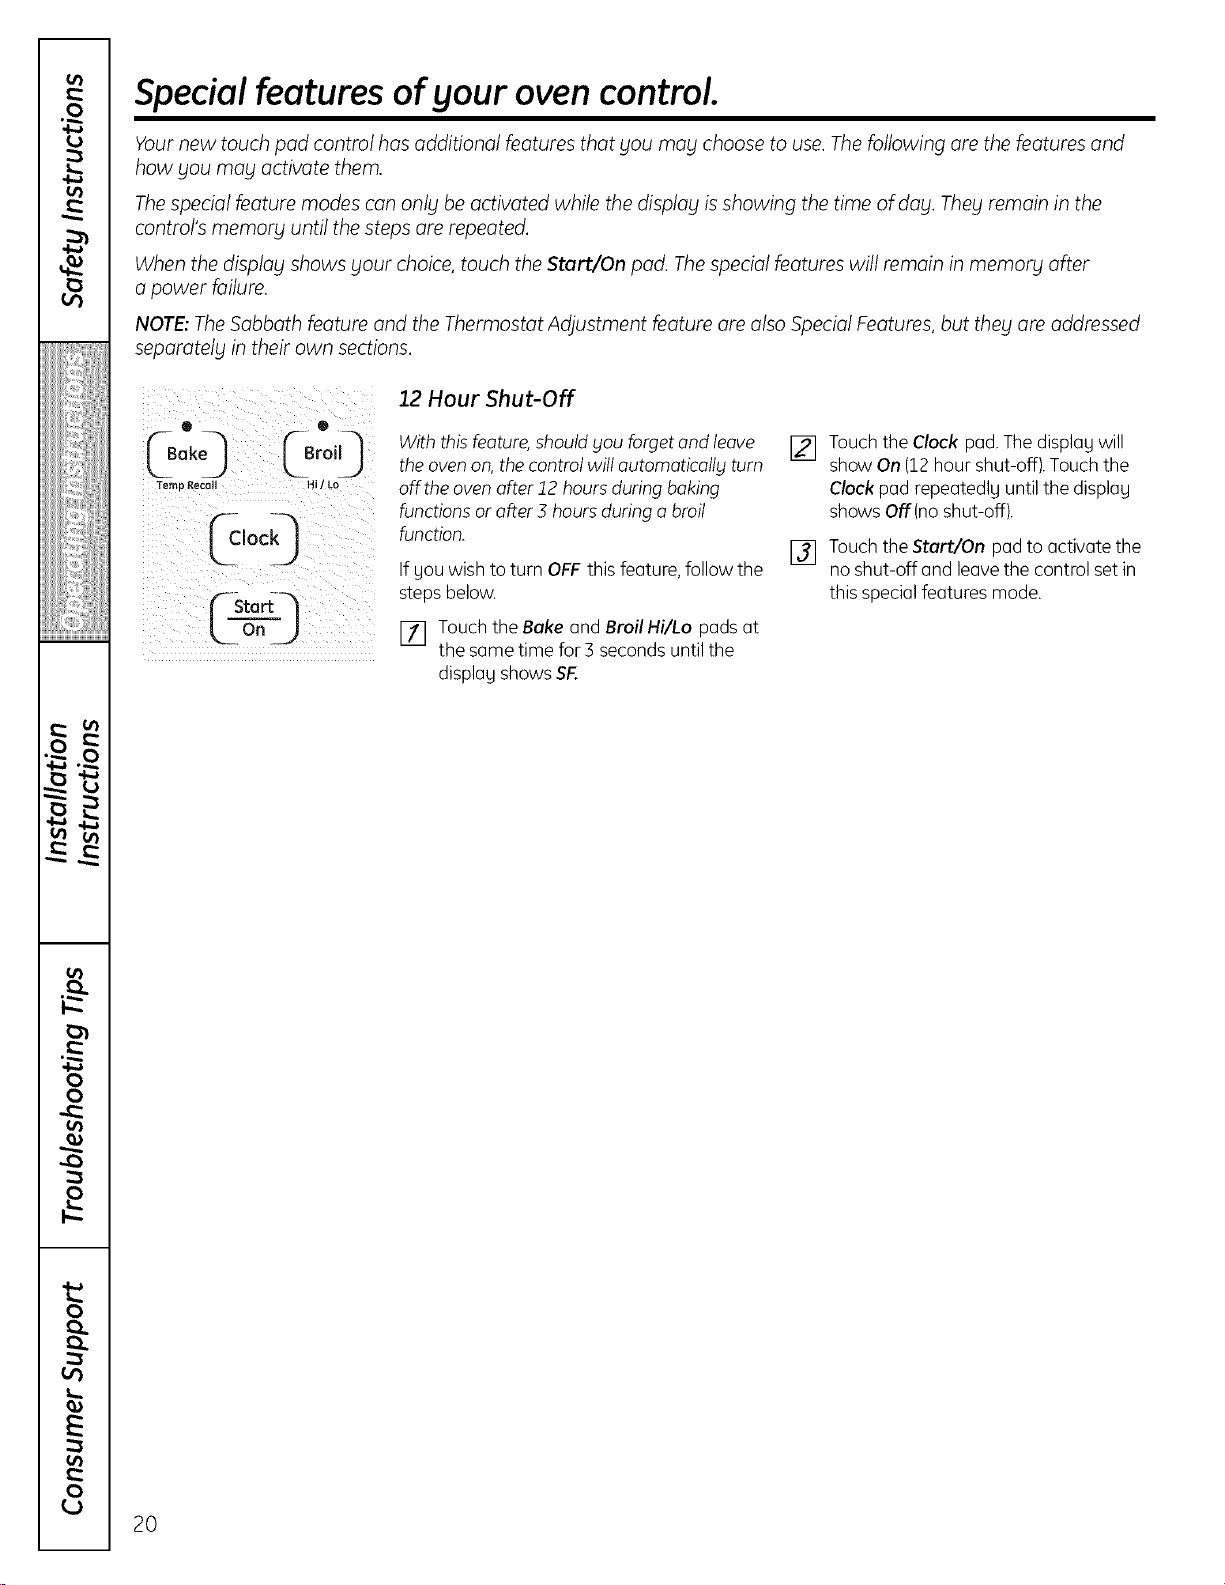
12 Hour Shut-Off
With this feature,should you forget and leave
the ovenon,the control will automaticallblturn
off the ovenafter 12 hoursduring baking
functions or after 3 hoursduring a broil
function.
If Uouwish to turn OFF this feature, follow the
stepsbelow.
[] Touch the Bake and Broil Hi/Lo pads at
the same time for 3 seconds untilthe
displau showsSF.
[] Touchthe Clock pad.Thedisplay will
show On (12hour shut-off).Touch the
Clock pad repeatedlu until the display
shows Off(no shut-off).
[] Touchthe Start/On pad to activate the
no shut-off and leavethe control set in
this special features mode.
20
-'-usingthe Sabbath Feature. (onsomemode/s
(Designed for use on the Jewish Sabbath and Holidays)
ge.com
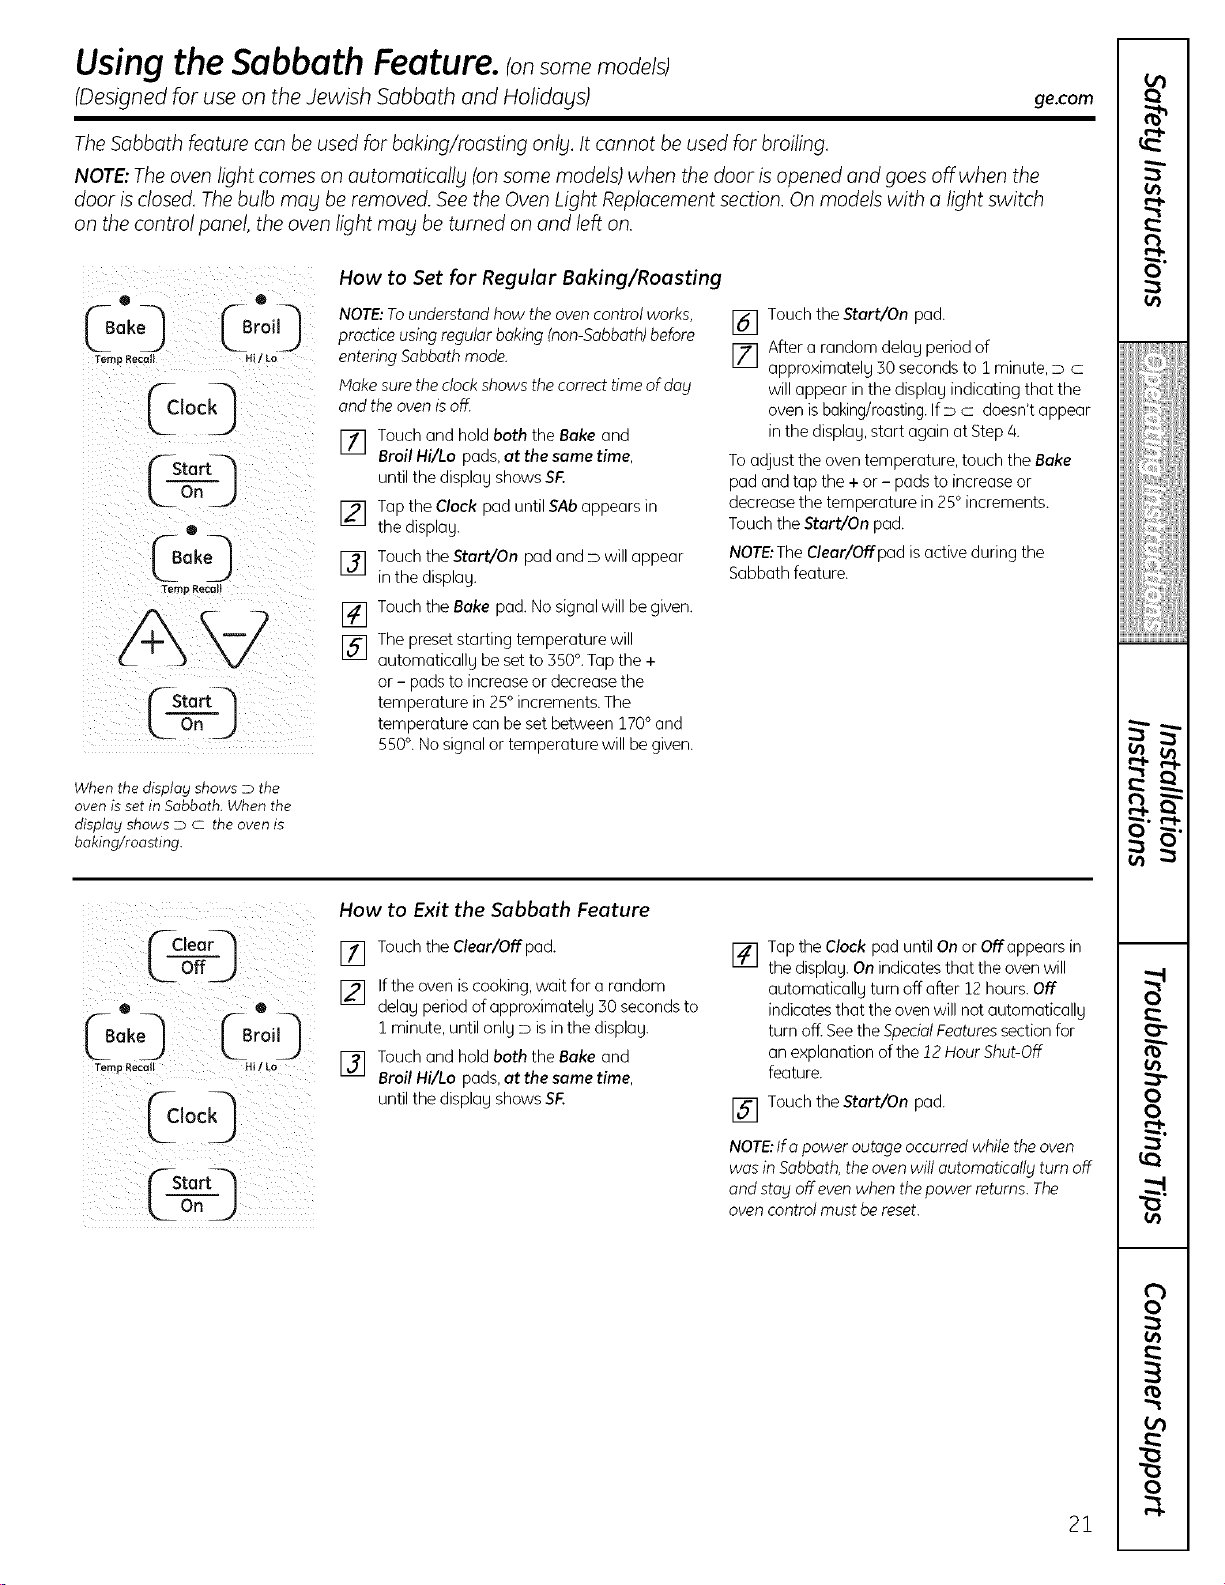
The Sabbath feature can be used for baking/roosting only. It cannot be used for broiling.
NOTE: The oven light comes on automatically (on some models) when the door is opened and goes off when the
door is closed. Thebulb may be removed. See the Oven Light Replacement section. On models with o light switch
on the control panel, the oven light mag be turned on and left on.
C°r°O
Temp RecaI H / LO
b,oo
Os r,:
oJ
Temp Recall
on J
How to Set for Regular Baking/Roasting
NOTE:To understand haw the avencantral works,
practice usingregular baking (nan-Sabbath)before
entering Sabbath mode.
Makesurethe clockshows the correct time af day
and the oven isoff
F_q Touch and hold both the Bake and
it i
Broil Hi/Lo pads,at the same time,
until the displag shows SF.
[] Tap the Clock pad until SAb appears in
the display.
[] Touch the Start/On pad and D will appear
in the displag.
[] Touch the Bake pad. No signal will be given.
[] The preset starting temperature will
automaticallg be set to 350 °.Tap the +
or - pads to increase or decrease the
temperature in 25° increments. The
temperature can be set between 170 ° and
550°. No signal or temperature will be given.
16] Touch the Start/On pad.
[] After a random delag period of
approximatelg 30 secondsto :1minute,D C
will appear inthe displag indicating that the
oven is baking/roasting.IfD c doesn'tappear
in the displag,start again at Step 4.
Toadjust the oventemperature, touch the Bake
pad and tap the + or - pads to increase or
decrease the temperature in 25°increments.
Touch the Start/On pad.
NOTE:TheClear/Off pad isactive during the
Sabbath feature.
When the display shows D the
oven is set in Sabbath. When the
display shows D C the oven is
baking/roasting.
Temp Recall Hi/Lo
How to Exit the Sabbath Feature
[] Touch the Cleor/Offpad.
[] Ifthe oven is cooking,wait for a random
delag period of approximatelg 30 secondsto
1minute, until onlg D is in the displag.
[] Touch and hold both the Bake and
Broil I-li/La pads,at the same time,
until the displagshows SF.
I_q Tap the Clock pad until Onor 0ffappears in
the displag.Onindicates that the oven will
automaticallg turn off after 12hours. Off
indicatesthat the ovenwill not automaticallg
turn off. Seethe SpecialFeaturessectionfor
an explanation of the 12 HourShut-Off
feature.
[] Touch the Start/On pad.
NOTE: If a power outage occurred while the oven
was in Sabbath, the oven will autamatically rum aff
and stay aff even when the power retums. The
oven control must be reset.
21
e",l,
9"
i!i_iiiiiiiiiiiiii
;ii_iiii!!ijiiill
m
8
rb
0
L_
0
Care and cleaning of the range.
Be sure electrical power is off and off surfaces are cool before cleaning ang part of the range.
If blour ronge is removed for cleaning, servicing or anbl reason, be sure the anti-tip
device is re-engaged properly when the range is replaced. Failure to take this
precaution could result in tipping of the range and cause injury.
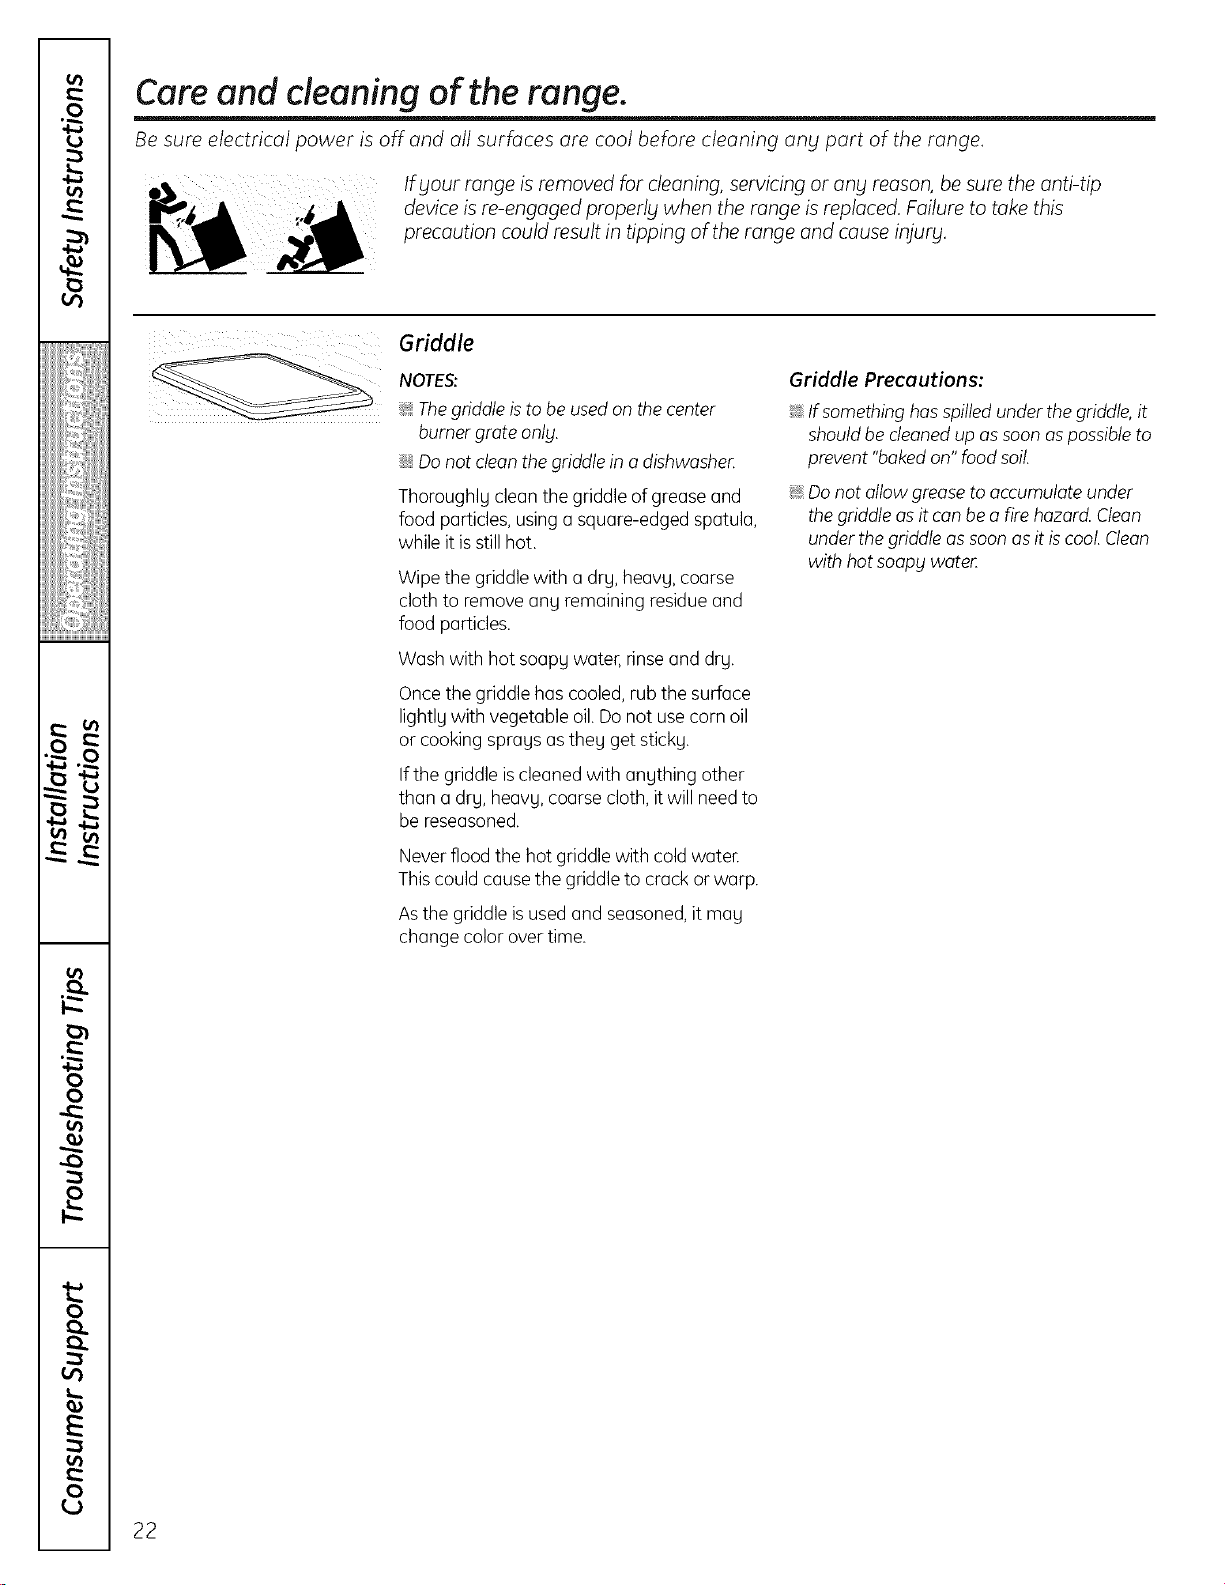
Griddle
NOTES:
i:_i:Thegriddle isto be usedon the center
burner grote onlbl.
::Ji:,Donot cleonthe griddle in a dishwashen
Thoroughly clean the griddle of grease and
food particles, usinga square-edged spatula,
while it isstill hot.
Wipe the griddle with a dry, heavy, coarse
cloth to remove any remaining residueand
food particles.
Wash with hot soapy water, rinseand dry.
Oncethe griddle has cooled, rub the surface
lightly with vegetable oil.Do not usecorn oil
or cooking sprays asthey get sticky.
If the griddle iscleaned with anything other
than a dry, heavy, coarse cloth,it will needto
be reseasoned.
Never flood the hot griddle with cold wate_
Thiscould cause the griddle to crack or warp.
Asthe griddle isusedand seasoned,it may
change color overtime.
Griddle Precautions:
_ Ifsomething has spilledunder thegriddle,it
shouldbe cleanedup assoon aspossibleto
prevent "boRedon"food soil.
_ Donot allow greaseto accumulate under
thegriddle as itcan be a fire hazard. Cleon
under thegriddle as soonasit iscool.Cleon
with hot soapy waten
22
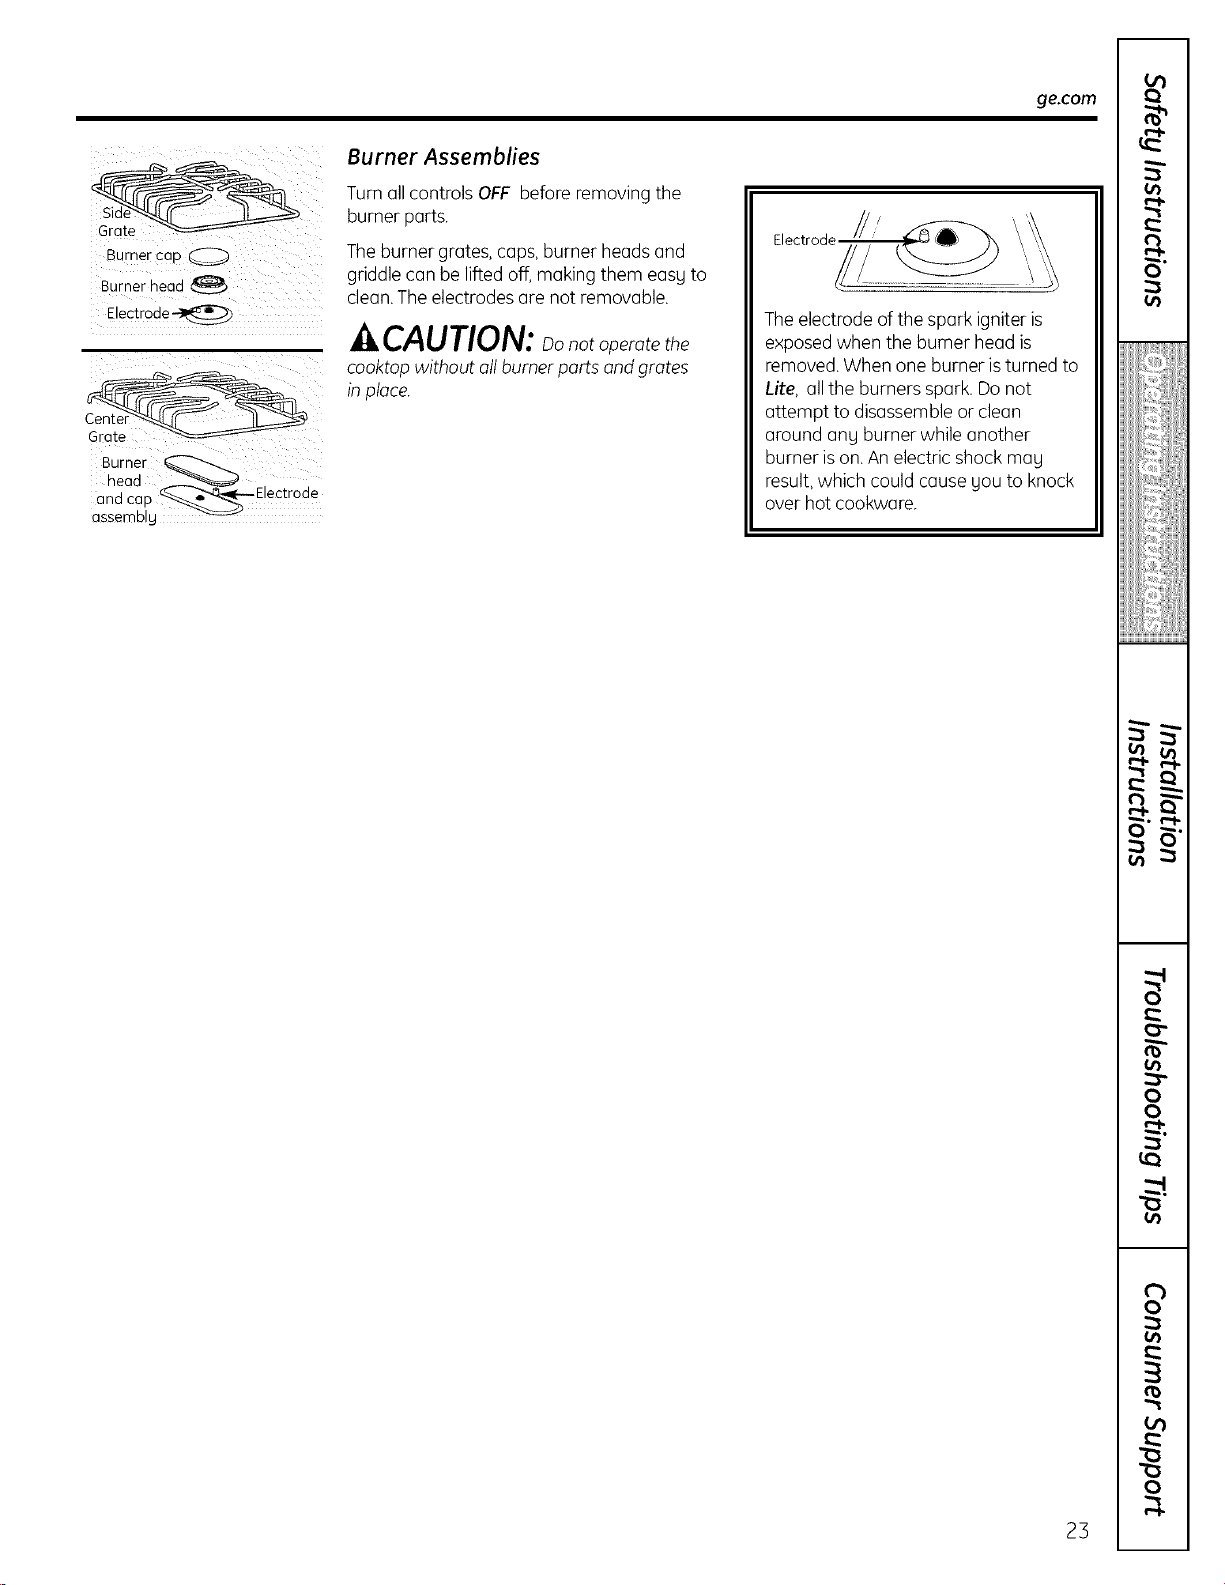
Burner cop O
Burner head
Electrode _
Burner
head
and cap _Electrode
assembly
Burner Assemblies
Turnall controls OFF before removing the
burner parts.
Theburner grates,caps,burner heads and
griddle can be lifted off,making them easy to
clean.Theelectrodes are not removable.
CAUTION: notope ot the
cooktop without all burner parts and grates
in place.
ge.com
The electrode of the spark igniter is
exposed when the bumer head is
removed.When one burner isturned to
Lite, allthe burners spark. Donot
attempt to disassembleor clean
around any burner while another
burner ison.An electric shock may
result,which could cause you to knock
over hot cookware.
23
9"
i!i_iiiiiiiiiiiiii
iii_iiii!!ijiiill
i
oo
rb
o
t_
t_
0
e_e
Careand cleaning of the range.
iii! _
Use e sewing needle or twist-tie
to unclog the smell hole in the
burner heed.
Burner Caps and Heads
Burner caps
Liftoff when cool. Wash burner caps in hot,
soapy water and rinse with clean water You
mag scour with a plastic scouring pad to
remove burned-on food particles.
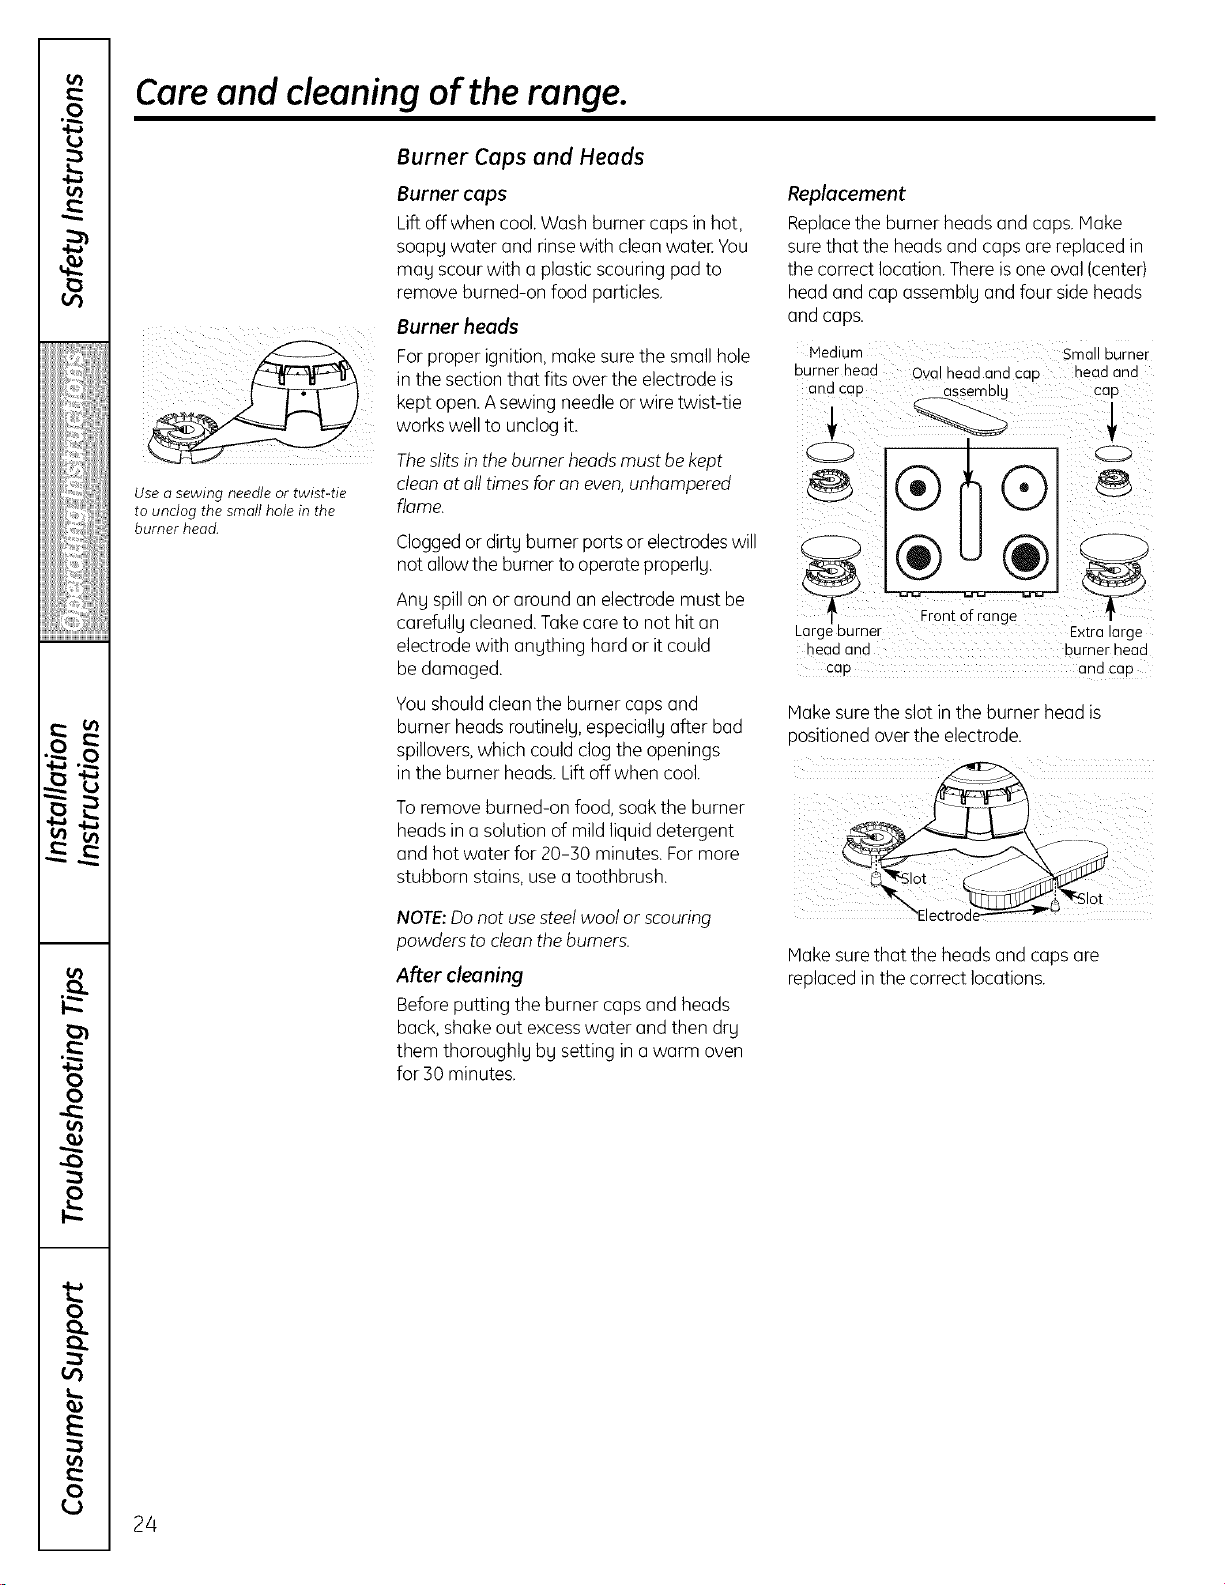
Burner heads
For proper ignition, make sure the small hole
in the section that fits over the electrode is
kept open. Asewing needle or wire twist-tie
works well to unclog it.
The slits in the burner heads must be kept
clean at all times for an even, unhampered
flame.
Cloggedor dirty burner ports or electrodeswill
not allowthe burner to operateproperly.
Any spillon or around an electrode must be
carefully cleaned.Takecare to not hit an
electrode with anything hard or it could
be damaged.
Youshould cleanthe burner caps and
burner heads routinely, especiallyafter bad
spillovers,which could clogthe openings
in the burner heads.Lift off when cool.
To remove burned-on food, soak the burner
heads in a solution of mild liquid detergent
and hot water for 20-30 minutes. For more
stubborn stains, usea toothbrush.
NOTE:Do not use steel wool or scouring
powders to clean the burners.
After cleaning
Before putting the burner caps and heads
back, shake out excess water and then drg
them thoroughly bg setting in a warm oven
for 30 minutes.
Replacement
Replacethe burner heads and caps.Make
surethat the heads and caps are replaced in
the correct location.Thereisone oval(center)
head and cap assembly and four sideheads
and cc ps.
Medium
Durner neaa Ovc neaa ana coo
ana CaD assernDig
÷®
®
er --rant of range
neaa ana
caE
Small burne-
nec 3 ona
CaE
C2_
Extra large
Durner neaa
ana CaD
Hake surethe slot in the burner head is
positioned over the electrode.
Hake surethat the heads and caps are
replaced in the correct locations.
24
ge.com
i
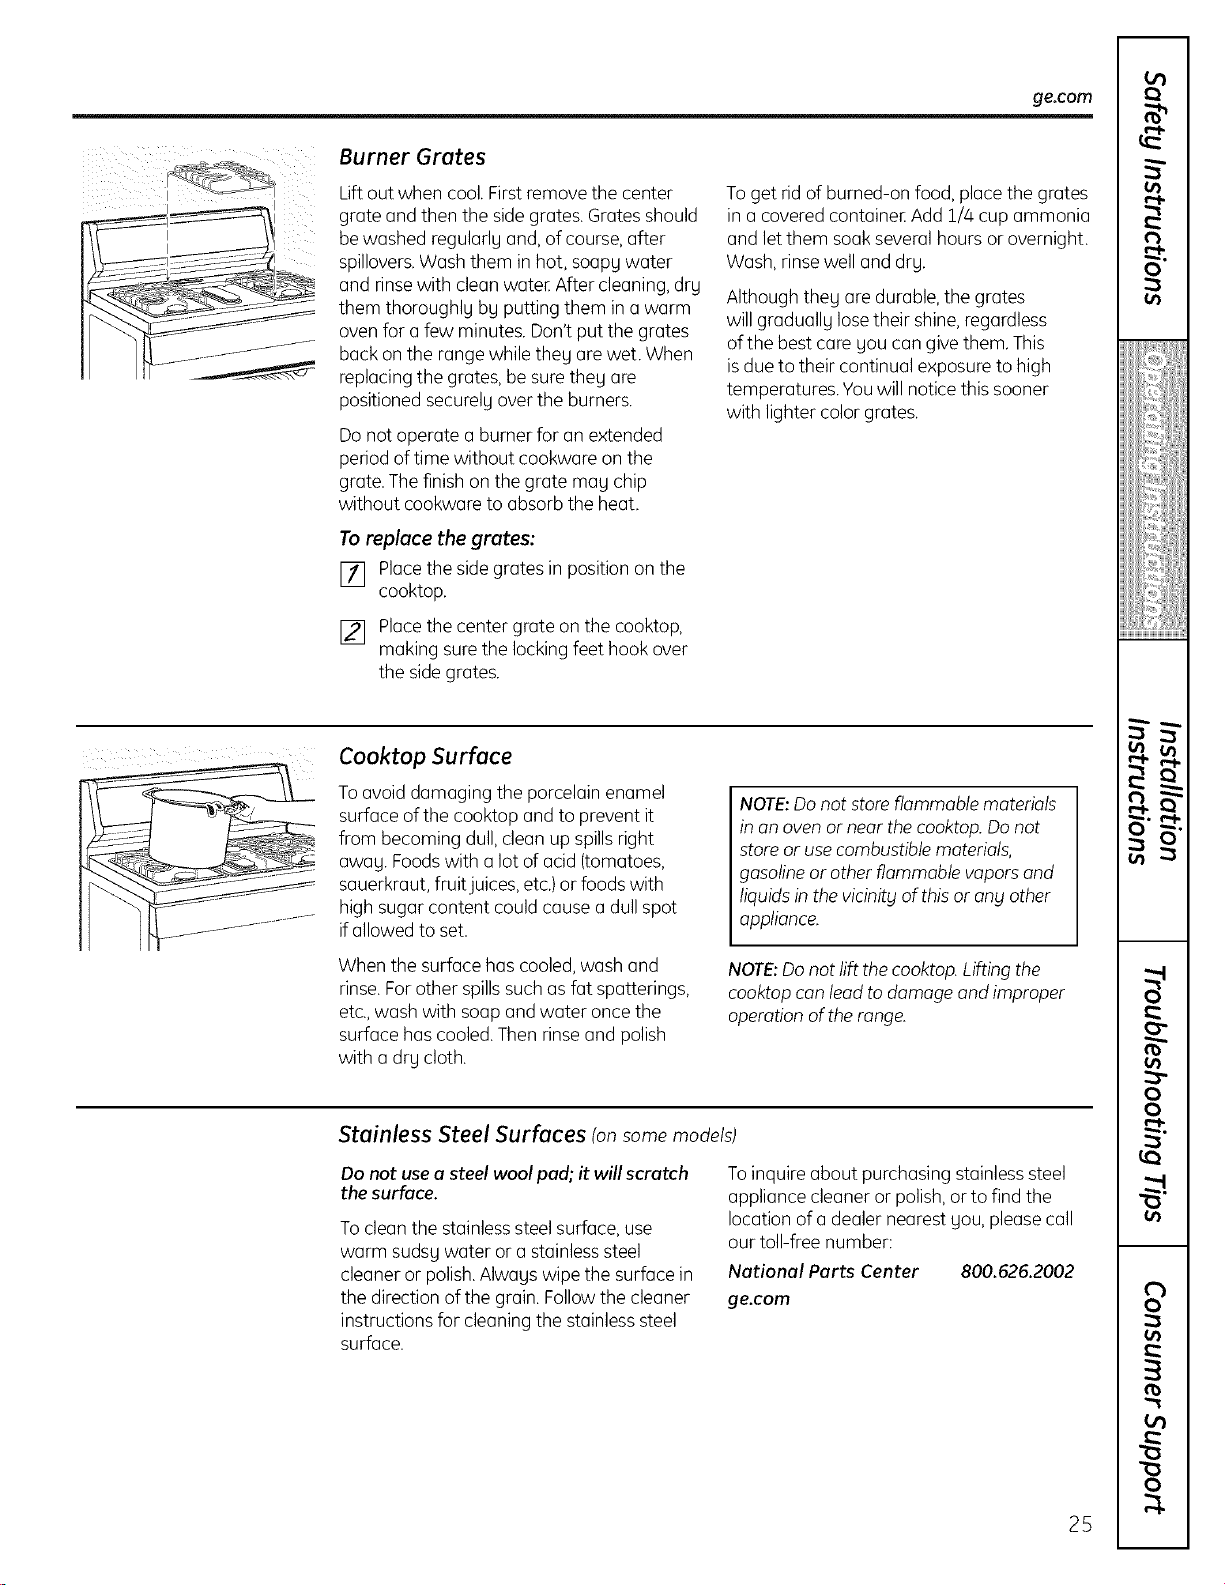
Burner Grates
Lift out when cool. Firstremove the center
grate and then the sidegrates. Gratesshould
be washed regularly and,of course,after
spillovers.Wash them in hot, soapy water
and rinsewith cleanwater After cleaning,dry
them thoroughly by putting them in u warm
oven for a few minutes. Don't put the grates
buck on the range while they are wet. When
replacing the grates, be surethey are
positioned securelyover the burners.
Do not operate a burner for an extended
period of time without cookware on the
grate. Thefinish on the grate may chip
without cookware to absorb the heat.
To replace the grates:
[] Placethe sidegrates in position on the
cooktop.
[] Placethe center grate on the cooktop,
making surethe locking feet hook over
the sidegrates.
To get rid of burned-on food, place the grates
in a covered container Add i/4cup ammonia
and letthem soak several hours or overnight.
Wash,rinsewell and dry.
Although they are durable,the grates
will gradually losetheir shine,regardless
of the best care you can give them. This
isdue to their continual exposure to high
temperatures. Youwill notice this sooner
with lighter colorgrates.
Cooktop Surface
To ovoid damaging the porcelain enamel
surface of the cooktop and to prevent it
from becoming dull, clean up spills right
away. Foods with a lot of acid (tomatoes,
sauerkraut, fruitjuices, etc.) or foods with
high sugar content could cause a dull spot
ifallowed to set.
When the surface has cooled, wash and
rinse.Forother spillssuch as fat spatterings,
etc.,wash with soap and water once the
surface has cooled.Then rinseand polish
with a dry cloth.
NOTE: Do not store flammable materials
in an oven or near the cooktop. Do not
store or use combustible materials,
gasoline or other flammable vapors and
liquids in the vicinity of this or ang other
appliance.
NOTE: Do not lift the cooktop. Lifting the
cooktop can lead to damage and improper
operation of the range,
Stainless Steel Surfaces (on some models)
Do not use a steel wool pad; it will scratch
the surface.
To cleanthe stainlesssteel surface, use
warm sudsy water or a stainlesssteel
cleaner or polish.Always wipe the surface in
the direction of the grain. Followthe cleaner
instructions for cleaningthe stainlesssteel
surface.
Toinquire about purchasing stainlesssteel
appliance cleaner or polish,orto find the
location of a dealer nearest you, pleasecall
our toll-free number:
National Parts Center 800.626.2002
ge.com
25
Ul
¢1
0
Ul
iiiiiiii_iiiiiiiil
i_iii_ii,:,::,iiiii
to
oo
rb
o
R
Careand cleaning of the range.
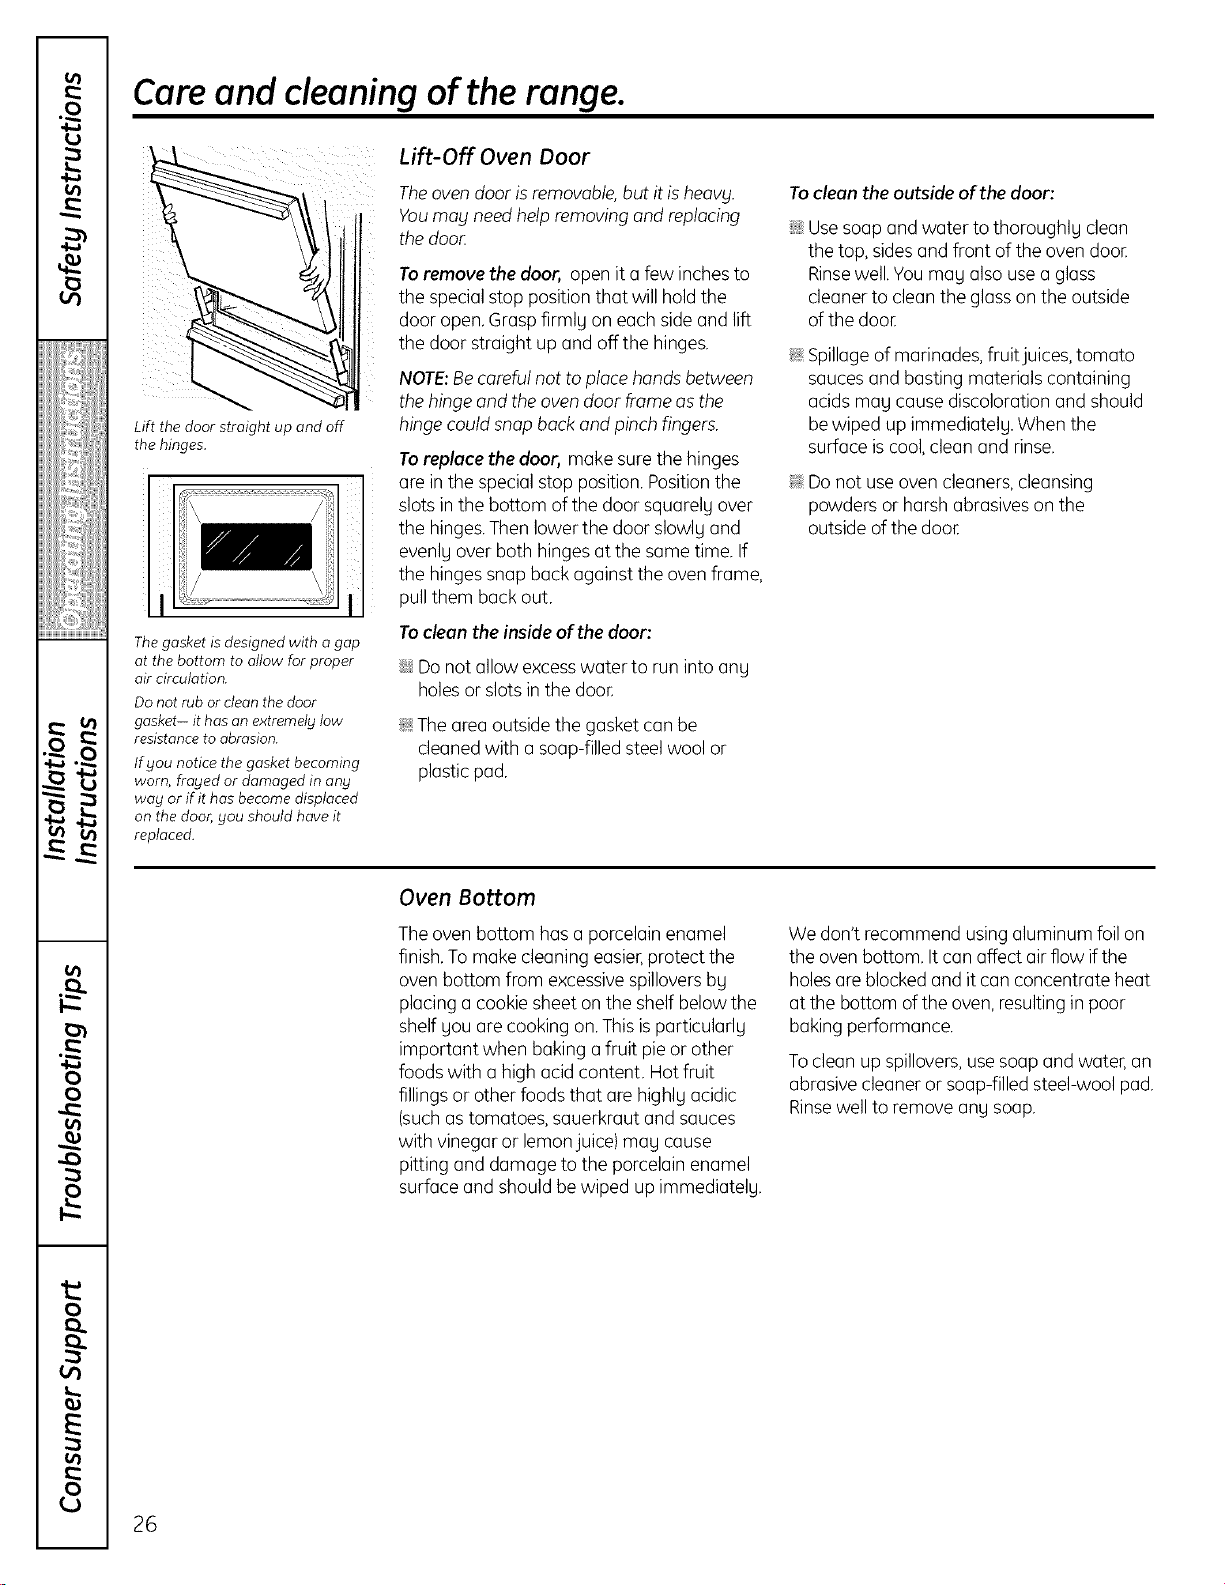
Lift the door straight up and off
the hinges.
Thegasket is designed with a gap
at the bottom to allow for proper
air circulation.
Do not rub or clean the door
gasket- it has an extremely low
resistance to abrasion.
If you notice the gasket becoming
worn, frayed or damaged in any
way or if it has become displaced
on the door, you should have it
replaced.
Lift-Off Oven Door
Theoven door isremovable,but it isheavy.
Youmay need help removing and replacing
the doo_
Toremove the door, open it a few inches to
the special stop position that will hold the
door open.Graspfirmlg on each sideand lift
the door straight up and offthe hinges.
NOTE:Becareful not to place handsbetween
the hinge and the ovendoor frame as the
hinge could snapback and pinchfingers.
Toreplace the door, make sure the hinges
are in the special stop position.Positionthe
slots inthe bottom of the door squarelg over
the hinges.Thenlower the door slowlg and
evenlg over both hinges at the same time. If
the hinges snap back against the oven frame,
pull them back out.
Tocleon the inside of the door:
::Ji::Donot allow excesswater to run into ang
holesor slots in the door.
?_:Thearea outside the gasket can be
cleanedwith a soap-filled steel wool or
plasticpad.
Tocleon the outside of the door:
::J_::Usesoap and water to thoroughlg clean
the top, sidesand front of the oven door.
Rinsewell.Youmag also usea glass
cleanerto cleanthe glass on the outside
ofthe dooE
?_:Spillageof marinades,fruitjuices, tomato
saucesand basting materials containing
acids mag cause discoloration and should
bewiped up immediatelg. When the
surface iscool,clean and rinse.
?_:Donot use oven cleaners,cleansing
powders or harsh abrasiveson the
outside of the dooE
Oven Bottom
Theoven bottom has a porcelainenamel
finish,To make cleaning easier,protect the
oven bottom from excessivespilloversbg
placing a cookie sheet on the shelf below the
shelf gou are cooking on.This isparticularlg
important when baking a fruit pieor other
foods with a high acid content. Hot fruit
fillings or other foods that are highlg acidic
(suchas tomatoes, sauerkraut and sauces
with vinegar or lemonjuice) mag cause
pitting and damage to the porcelain enamel
surface and should be wiped up immediatelg.
We don'trecommend using aluminum foilon
the oven bottom. It can affect air flow ifthe
holesare blocked and it can concentrate heat
at the bottom ofthe oven, resultingin poor
baking performance.
To cleanup spillovers,usesoap and water, an
abrasive cleaner or soap-filled steel-wool pad.
Rinsewell to remove ang soap.
26
ge.com
Broiler Compartment
When the broiler compartment iscool,
remove ang grid and pan.Cleanthe broiler
compartment with hot soapg water. Rinse
thoroughlg with a damp cloth and drg.
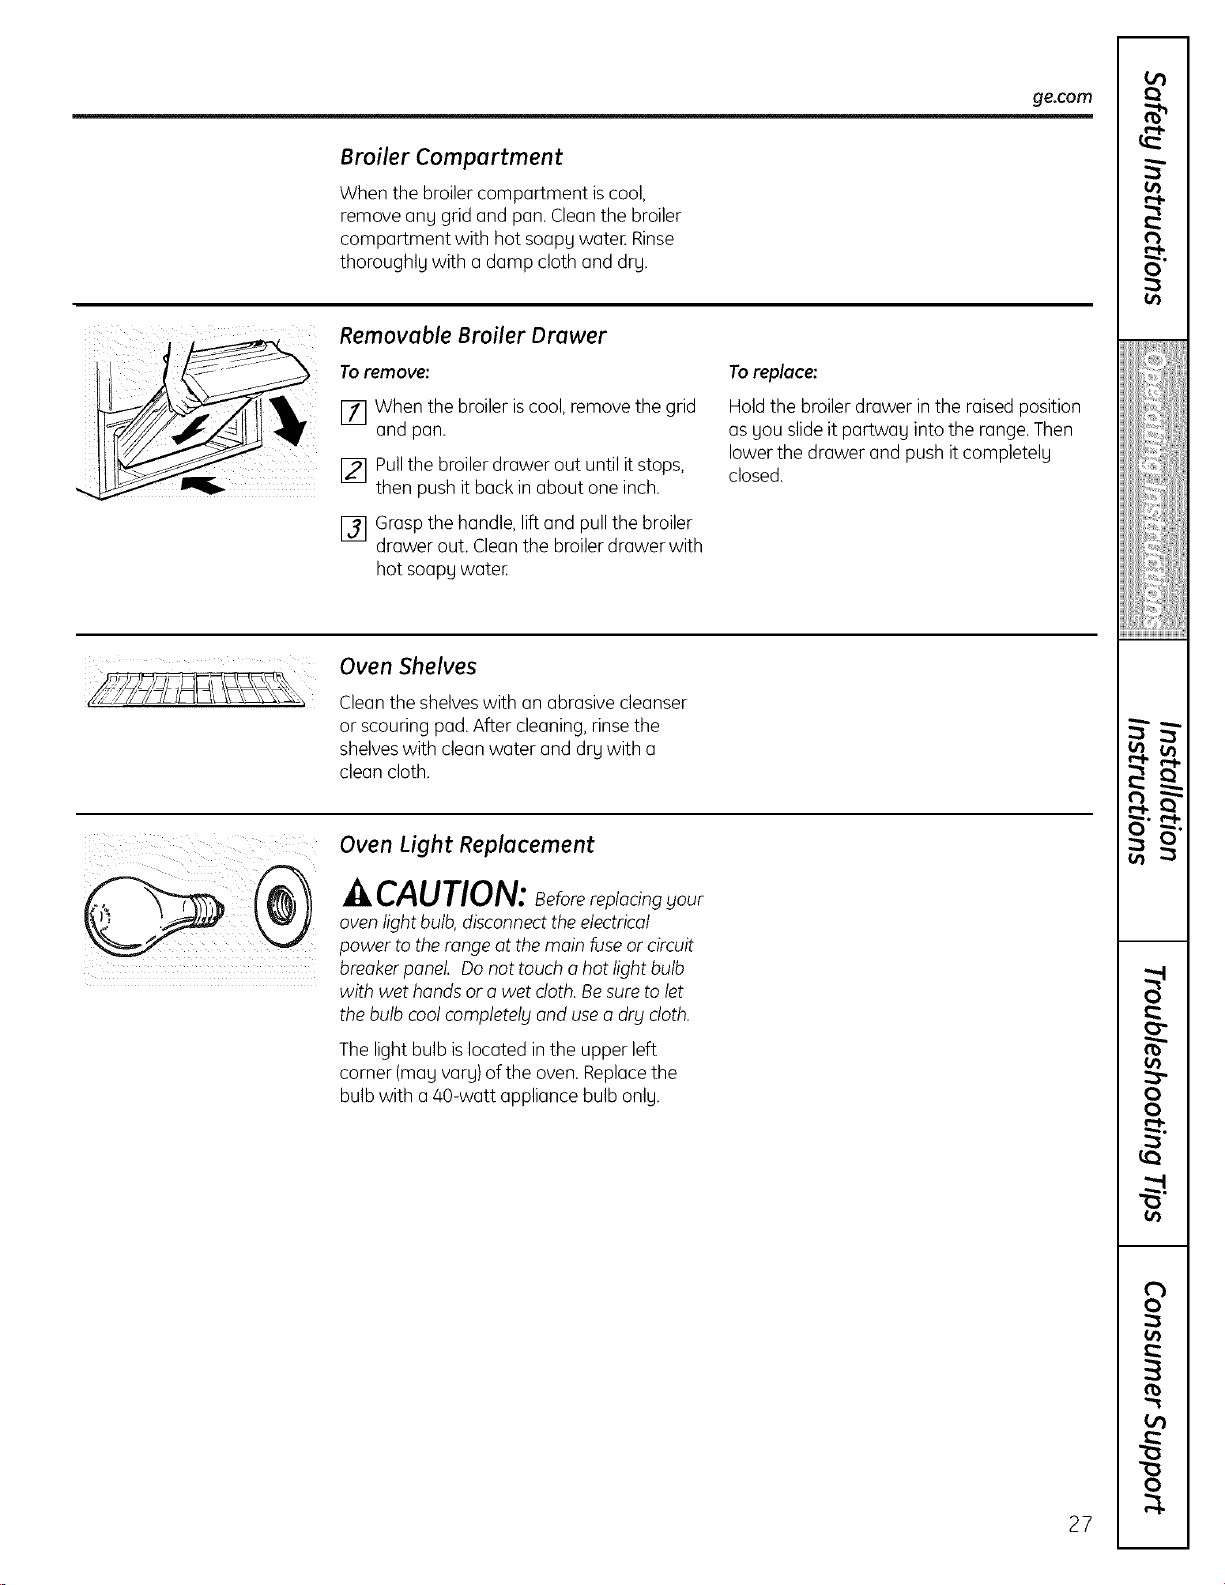
Removable Broiler Drawer
To remove:
[] When the broiler iscool, remove the grid
and pan.
[] Pullthe broilerdrawer out until it stops,
then push it back in about one inch.
[] Graspthe handle, lift and pullthe broiler
drawer out. Cleanthe broilerdrawer with
hot soapy water.
Toreplace:
Holdthe broiler drawer in the raised position
as gou slideit partway into the range.Then
lower the drawer and push it completelg
closed.
Oven Shelves
Cleanthe shelveswith an abrasive cleanser
or scouring pad.After cleaning,rinsethe
shelveswith clean water and drg with a
clean cloth.
Oven Light Replacement
^ CAUTION:Beforereplacingyour
oven light bulb, disconnect the electrical
power to the range at the main fuse or circuit
breaker panel. Do not touch o hot light bulb
with wet hands or o wet doth. Be sure to let
the bulb cool completely and use a dry cloth.
The light bulb is located in the upper left
corner (mag varg)of the oven. Replace the
bulb with a 40-watt appliance bulb onlg.
27
01
-,,,,,,,
Ul
0
Ul
iijiiiii_]iiiijjil
i'}
i_iii_iibiiiii
L_
tO
8
U_
o
Careand cleaning of the range.
Oven Air Vents
Never block the vents (air openings)of the
range.They providethe air inlet and outlet
that are necessary for the range to operate
properly with correct combustion.
Air openings are located at the rear of the
cooktop, at the top and bottom of the oven
door,and at the bottom ofthe range, under
kick panel or broiler compartment (depending
on the model).
Vent appearance and location vary.
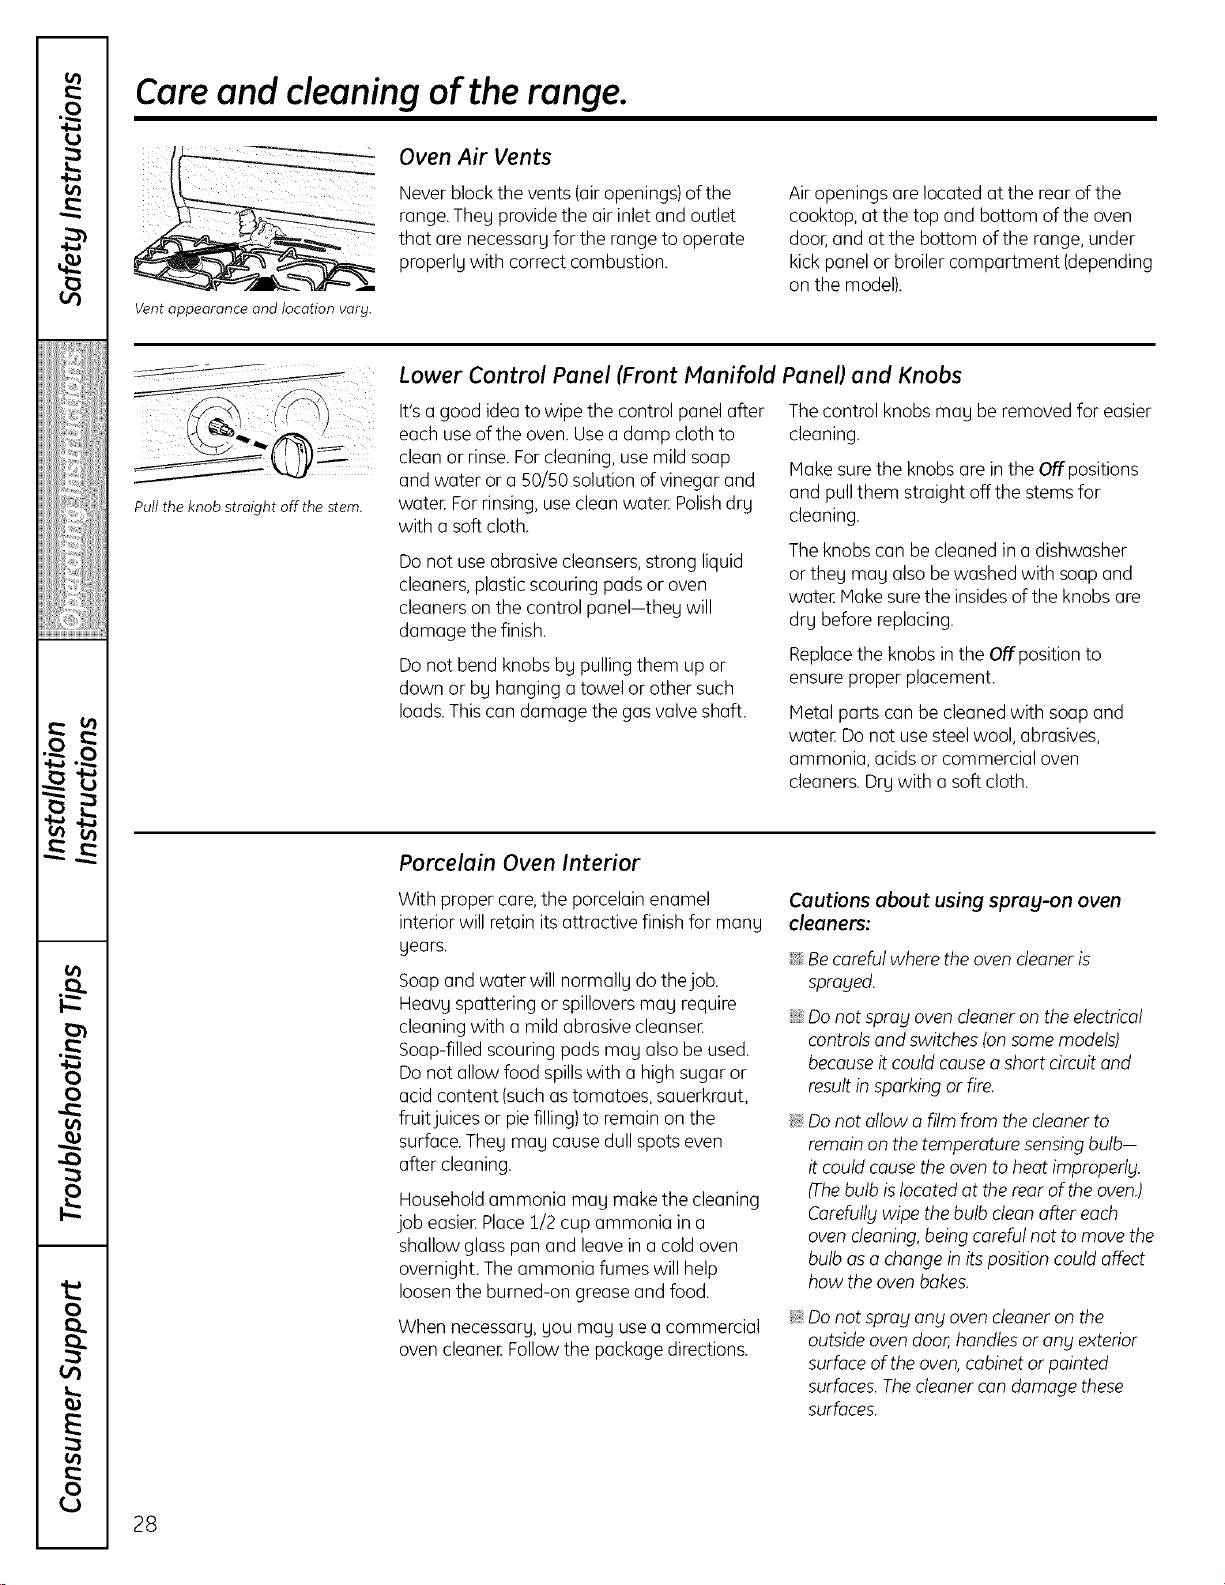
Pull the knob straight off the stem.
Lower Control Panel {Front Manifold Panel] and Knobs
It'sa good idea to wipe the control panel after
each useof the oven. Usea damp cloth to
clean or rinse. Forcleaning,use mild soap
and water or a 50/50 solution of vinegar and
water Forrinsing,useclean water Polishdry
with a soft cloth.
Do not use abrasive cleansers,strong liquid
cleaners,plasticscouring pads or oven
cleaners on the control panel-they will
damage the finish.
Do not bend knobs by pulling them up or
down or by hanging a towel or other such
loads.Thiscan damage the gasvalve shaft.
The control knobs may be removed for easier
cleaning.
Make surethe knobs are in the Offpositions
and pull them straight off the stems for
cleaning.
The knobs can be cleanedin a dishwasher
or they may also bewashed with soapand
water Makesurethe insidesof the knobs are
dry before replacing.
Replacethe knobs inthe Offposition to
ensure proper placement.
Metal parts can be cleanedwith soap and
water Donot usesteel wool, abrasives,
ammonia, acids or commercial oven
cleaners.Dry with a soft cloth.
Porcelain Oven Interior
With proper care,the porcelain enamel
interior will retainits attractive finish for many
years.
Soap and water will normally do thejob.
Heavy spattering or spilloversmay require
cleaning with a mild abrasive cleanser
Soap-filledscouring pads may also be used.
Do not allow food spillswith a high sugar or
acid content (suchastomatoes, sauerkraut,
fruitjuices or piefilling)to remain on the
surface.They may cause dull spots even
after cleaning.
Household ammonia may make the cleaning
job easier Place1/2 cup ammonia in a
shallow glass pan and leavein a cold oven
overnight. Theammonia fumes will help
loosenthe burned-on grease and food.
When necessary, you may usea commercial
oven cleaner Followthe package directions.
Cautions about using sprag-on oven
cleaners:
::J_::Becarefulwhere the oven cleaneris
sprabled.
::J_::Donot spray ovendeaner on the electrical
controlsand switches (onsome models)
becauseit could causeo short circuit and
resultin sparking or fire.
_: Donot allow o film from thedeoner to
remainon thetemperature sensing bulb-
itcould causethe ovento heatimproperly.
(Thebulb islocated at therear of the oven.)
Carefullbtwipe the bulb clean after each
ovendeoning, being carefulnot to move the
bulb aso change in its position could affect
how the ovenbakes.
_: Donot spray anblovencleaner on the
outsideovendoor,handlesor anblexterior
surfaceofthe oven,cabinet or painted
surfaces.Thecleanercon damage these
surfaces.
28
Installation
Instructions
Range
I If you have questions, call 800.GE.CARES or visit our Website at: ge.com I
In the Commonwealth of
Massachusetts:
• This product must be installed bg a licensed plumber
or gas fitten
• When using ball-tgpe gas shut-off valves, theg shall
be the T-handle tgpe,
• A flexible gas connector, when used, must not
exceed ] feet.
BEFORE YOU BEGIN
Read these instructions completely and carefully.
Installation of this range must conform with
local codes, or in the absence of local codes,
with the National Fuel Gas Code, ANSI
Z223.1/NFPA.54, latest edition. This range has
been design-certified by CSA International
according to ANSI Z21.1, latest edition and
Canadian Gas Association according to
CAN/CGA-I.1 latest edition.
As with ang appliance using gas and generating
hecut, there curecertcuin scufetg precautions gou
should follow. You will find these precautions in the
Important Safety Information section in the front
of this manual. Read them ccurefullg,
•IMPORTANT-scuvetheseinstructionsfor
local electrical inspector's use.
•IMPORTANT- Observecullgoverning codes
and ordinances.
• Note to Installer- Be sure to leave these
instructions with the ConsumeE
• Note to Consumer - Keep these instructions for
future reference
• Note - This appliance must be properly grounded
• Servicer- The electrical diagram is in an envelope
attached to the back of the range
• Skill level- Installation of this appliance requires
basic mechanical skills.
• Proper installation is the responsibilitg of the
instcullen
• Product failure due to improper installation is not
covered under the Warrantg.
29
Installation Instructions
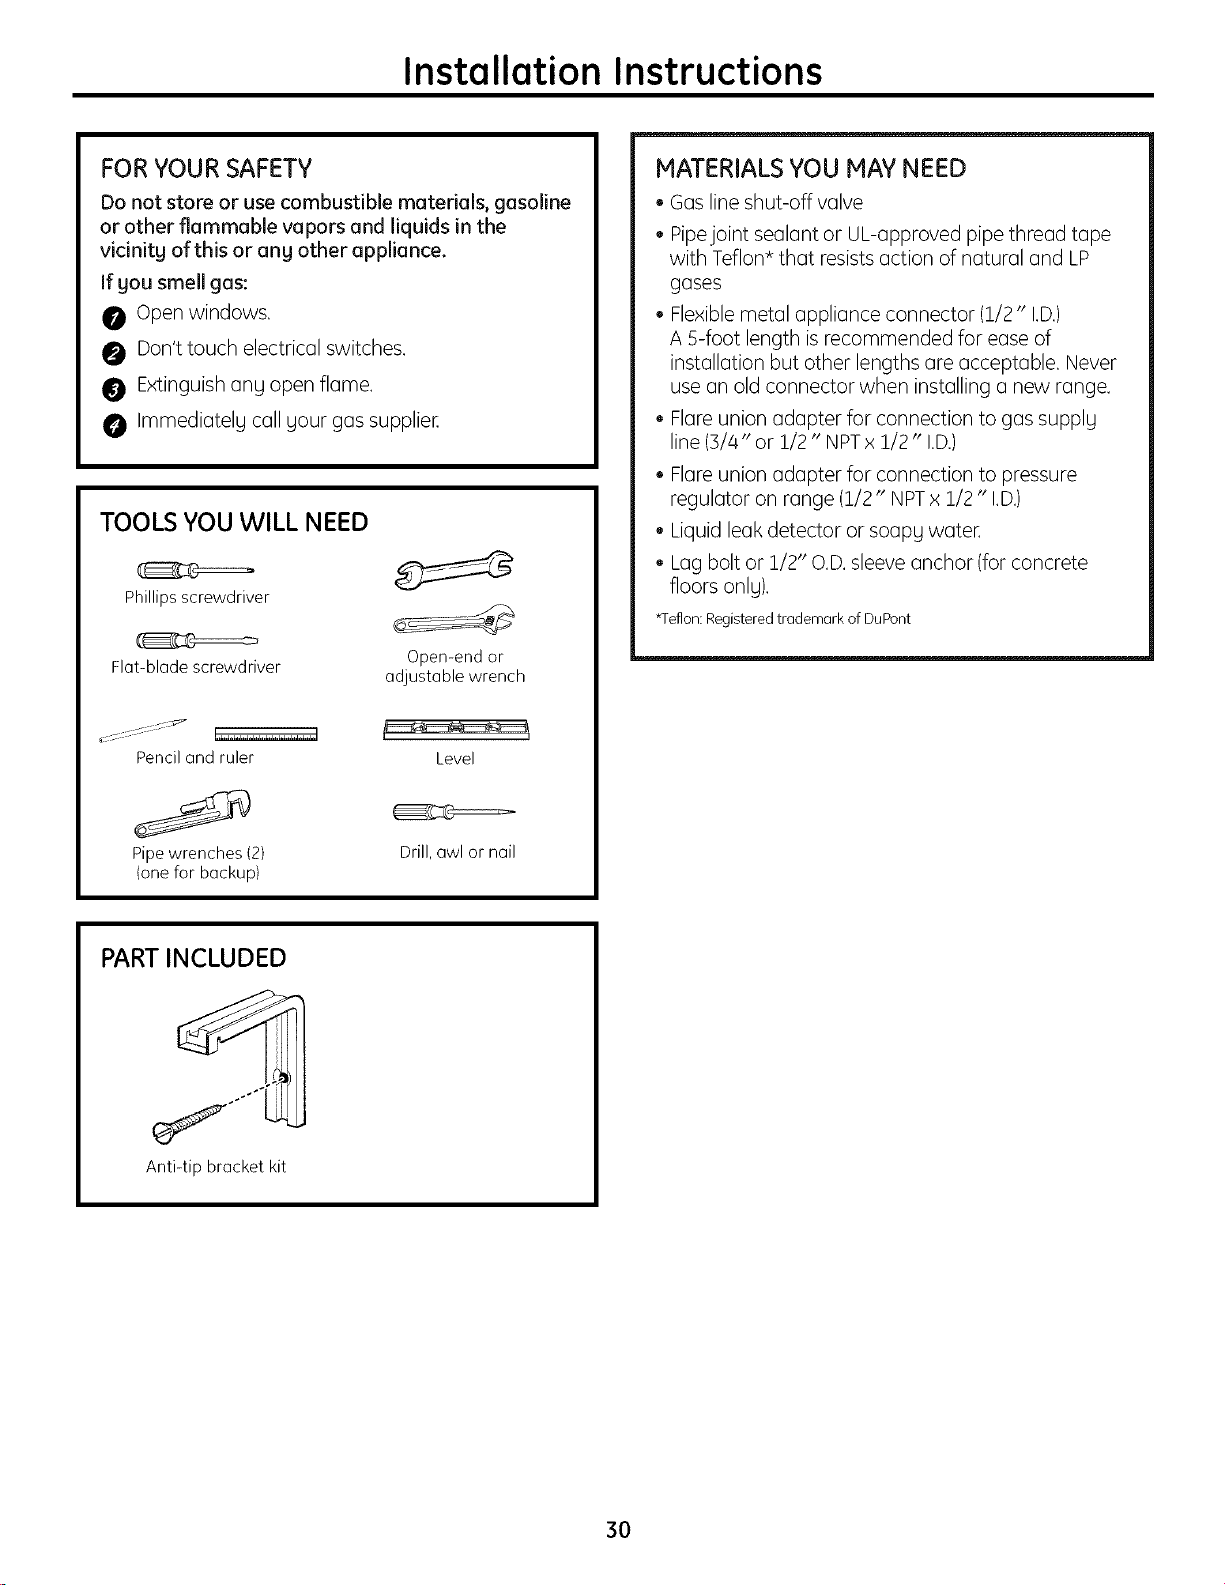
FOR YOUR SAFETY
Do not store or use combustible materials, gasoline
or other flammable vapors and liquids in the
vicinity of this or any other appliance.
If you smell gas:
0 Open windows.
0 Don't touch electrical switches,
Extinguish ang open flame,
Immediatelg call gour gas supplier,
TOOLS YOU WILL NEED
Phillips screwdriver
Flat-blade screwdriver
Pencil and ruler
Pipe wrenches (2)
(one for backup)
Open-end or
adjustable wrench
Level
Drill, awl or nail
MATERIALS YOU MAY NEED
• Gas line shut-off valve
• Pipejoint sealant or UL-approved pipe thread tape
with Teflon* that resists action of natural and LP
gases
Flexible metal appliance connector (!/2" I,D,)
A 5-foot length is recommended for ease of
installation but other lengths are acceptable, Never
use an old connector when installing a new range,
• Flare union adapter for connection to gas supplg
line (3/4" or 1/2" NPTx 1/2" I.D,)
• Flare union adapter for connection to pressure
regulator on range (1/2" NPTx 1/2" I,D,)
• Liquid leak detector or soapg water.
• Lag bolt or 1/2" O,D,sleeve anchor (for concrete
floors onlg),
*Teflon: Registered trademark of DuPont
PART INCLUDED
Anti-tip bracket kit
3O

Installation Instructions
-&WARNING!
INSTALLATION SAFETY
INSTRUCTIONS
Read these instructions completelg and carefullg.
Improper installation, adjustment, alteration,
service or maintenance can cause injurg or
propertg damage. Refer to this manual. For
assistance or additional information, consult a
qualified installer, service agency, manufacturer
(dealer) or the gas supplier.
Never reuse old flexible connectors. The use of old
flexible connectors can cause gas leaks and personal
injurg. Alwags use NEW flexible connectors when
installing a gas appliance.
IM PORTANT - Remove allpackingmaterial
and literaturefrom oven beforeconnectinggas and
electrical supplg to range.
CAUTION - Do not attempt to operate the
oven of this range during a power failure (Electric
Ignition models onlg).
• Have gour range installed bg a qualified installer.
• Your range must be electricallg grounded in
accordance with local codes or,in the absence of
local codes, in accordance with the National
Electrical Code (ANSI/NFPA70, latest edition). See
Efectricof Connections in this section.
• Before installing gour range on linoleum or ang
other sgnthetic floor covering, make sure the floor
covering can withstand 180°F without shrinking,
warping or discoloring. Do not install the range over
carpeting unless a sheet of 3_/4"thick plgwood or
similar insulator is placed between the range and
carpeting.
• Make sure the wall coverings around the range can
withstand heat generated bg the range up to 200°F.
• Avoid placing cabinets above the range. To reduce
the hazard caused bu reaching over the open
flames of operating burners, install a ventilation
hood over the range that projects forward at least
5" beuond the front of the cabinets.
• The ventilating hood must be constructed of sheet
metal not less than 0.0122"thick. Install above the
cooktop with a clearance of not less than 1//4"
between the hood and the underside of the
combustible material or metal cabinet. The hood
must be at least as wide us the appliance and
centered over the appliance. Clearance between the
cooking surface and the ventilation hood surface
MUST NEVER BE LESSTHAN 24 INCHES.
EXCEPTION: Installation of o listed microwave oven
or cooking appliance over the cooktop shall conform
to the installation instructions packed with that
appliance.
If cabinets are placed above the range, allow a
minimum clearance of 30" between the cooking
surface and the bottom of unprotected cabinets.
If o 30" clearance between cooking surface and
overhead combustible material or metal cabinets
cannot be maintained, protect the underside of the
cabinets above the cooktop with not less than 1/4"
insulating millboard covered with sheet metal not
less than 0.0122" thick. Clearance between the
cooking surface and protected cabinets MUST
NEVER BE LESSTHAN 24 INCHES.
• The vertical distance from the plane of the cooking
surface to the bottom of adjacent overhead cabinets
extending closer than 1" to the plane of the range
sides must not be less than 18". (Seethe Dimensions
and Clearances illustration in this section.)
• CAUTION - Items of interest to children
should not be stored in cabinets above a range or
on the backsplash of a range-children climbing on
the range to reach items could be seriouslg injured.
31

instatlation instructions
DIMENSIONS AND CLEARANCES
Provide adequate clearances between the range and adjacent combustible surfaces. These dimensions must be met for
safe use of gout range. The location of the electrical outlet and pipe opening {see Gas Pipe and Electric Outlet Locations) mag
be adjusted to meet specific requirements.
The range mag be placed with 0" clearance {flush) at the back wall.
Minimum
to cabinets
on either
side of the
range
_-18"
I I I
30"
30"
Hinimum -_
Haximum
depth for
cabinets above
countertops
__ 2 al To wall on either side
Front edge
of the range
sidepanel
forward from
cabinet
_- 0 _
To cabinets
below cooktop
and at the
range back
Depthwith door closed(includesdoor handle)
J 27VJ' to 28%"
30"
Depth varies depending on model.
See specifications sheet for your model.
3611J ' _+1/4"
32
Installation Instructions
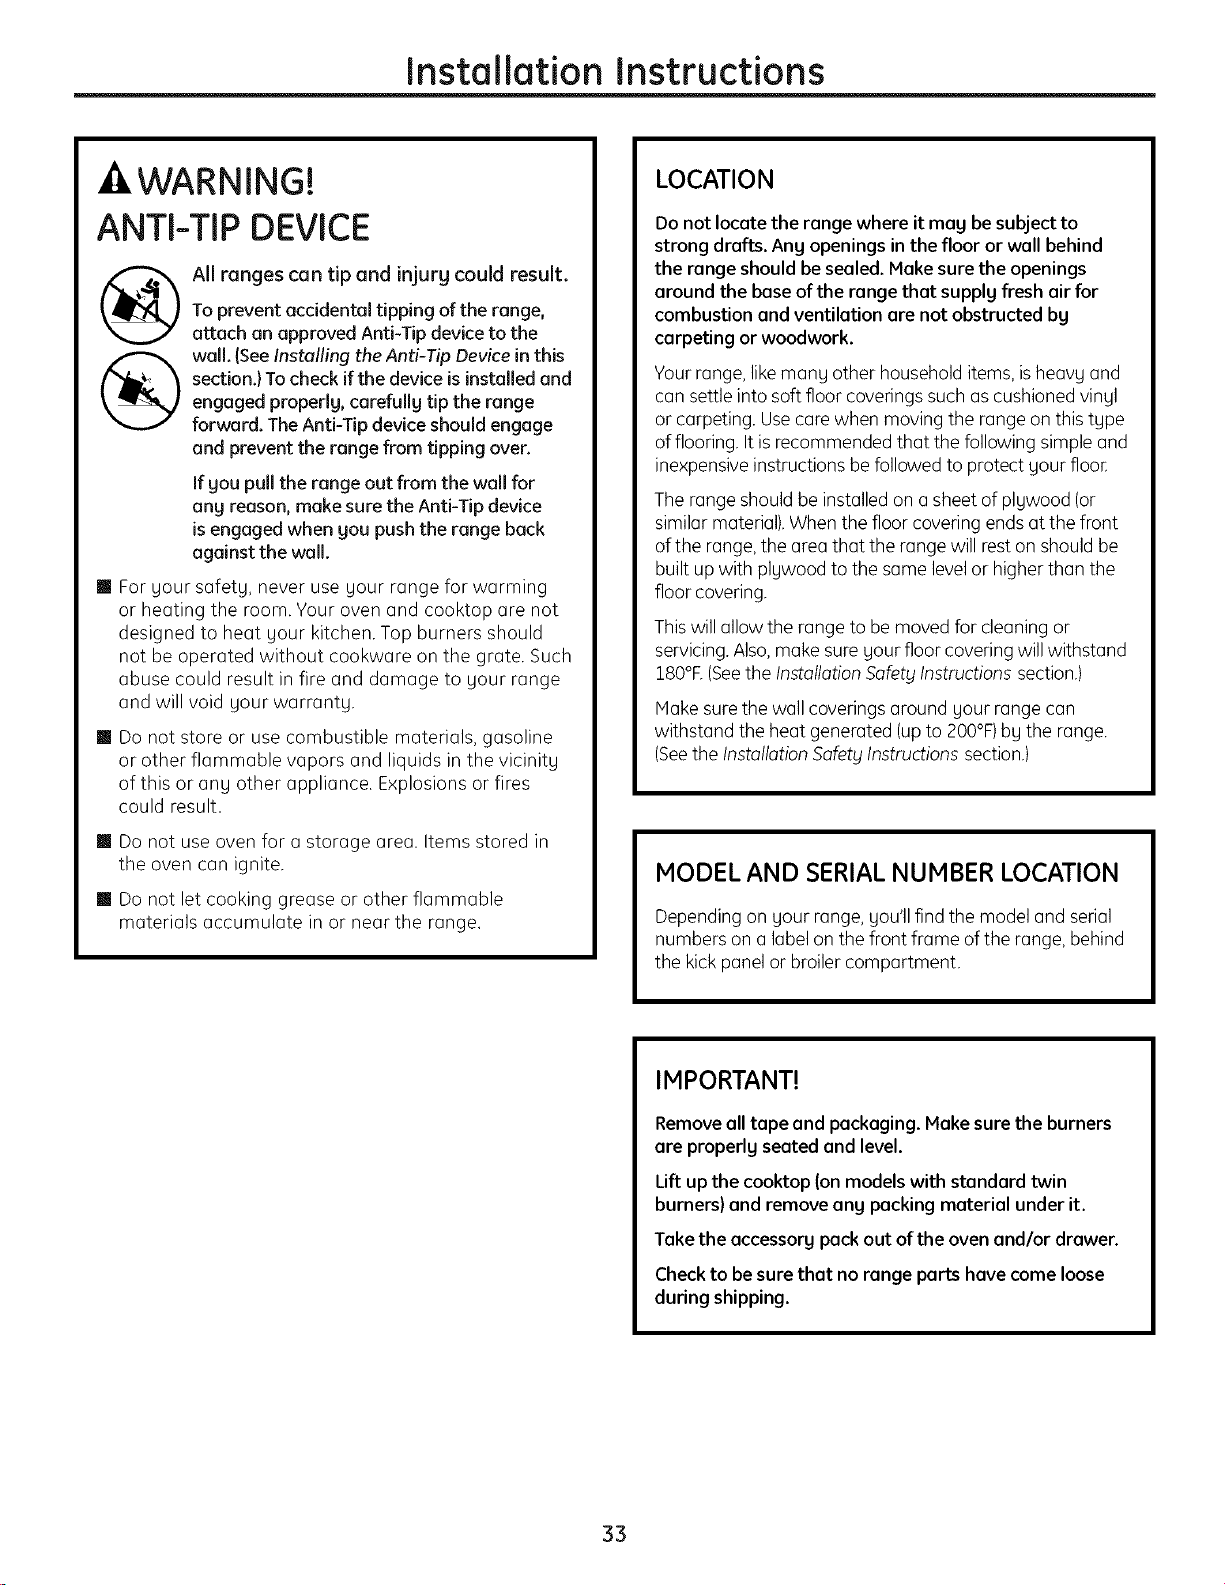
WARNING!
ANTI-TIP DEVICE
@
®
All ranges can tip and injurg could result.
To prevent accidental tipping of the range,
attach an approved Anti-Tip device to the
wall. {See Installing the Anti-Tip Device in this
section.) To check if the device is installed and
engaged properlg, carefullg tip the range
forward. The Anti-Tip device should engage
and prevent the range from tipping over.
If gou pull the range out from the wall for
ang reason, make sure the Anti-Tip device
is engaged when gou push the range back
against the wall.
[] For your safety, never use your range for warming
or heating the room. Your oven and cooktop are not
designed to heat your kitchen. Top burners should
not be operated without cookware on the grate. Such
abuse could result in fire and damage to your range
and will void your warranty.
[] Do not store or use combustible materials, gasoline
or other flammable vapors and liquids in the vicinity
of this or any other appliance. Explosions or fires
could result.
[] Do not use oven for a storage area. Items stored in
the oven can ignite.
[] Do not let cooking grease or other flammable
materials accumulate in or near the range.
LOCATION
Do not locate the range where it mag be subject to
strong drafts. Ang openings in the floor or wall behind
the range should be sealed. Make sure the openings
around the base of the range that supplg fresh air for
combustion and ventilation are not obstructed bg
carpeting or woodwork.
Yourrange, likemany other householditems, isheavy and
can settle into soft floor coveringssuch as cushioned vinyl
or carpeting. Usecare when moving the range on this type
of flooring. It isrecommended that the following simple and
inexpensiveinstructions be followed to protect your floor,
The range shouldbe installed on a sheet of plywood (or
similar material).When the floor covering ends at the front
of the range,the area that the range will rest on shouldbe
built up with plywood to the same levelor higher than the
floor covering.
This will allow the range to be moved for cleaning or
servicing.Also,make sureyour floor covering will withstand
180°E(Seethe Installation SafetyInstructions section.)
Make surethe wall coveringsaround your range can
withstand the heat generated (upto 200°F)by the range.
(Seethe Installation 5ofet_lInstructions section.)
MODEL AND SERIAL NUMBER LOCATION
Depending on your range, you'll find the model and serial
numbers on a label on the front frame of the range,behind
the kick panel or broiler compartment.
IMPORTANT!
Removeall tape and packaging. Make sure the burners
are properlg seated and level.
Lift up the cooktop (on models with standard twin
burners) and remove ang packing material under it,
Take the accessorg pack out of the oven andlor drawer.
Checkto be sure that no range parts have come loose
during shipping.
33
Installation Instructions
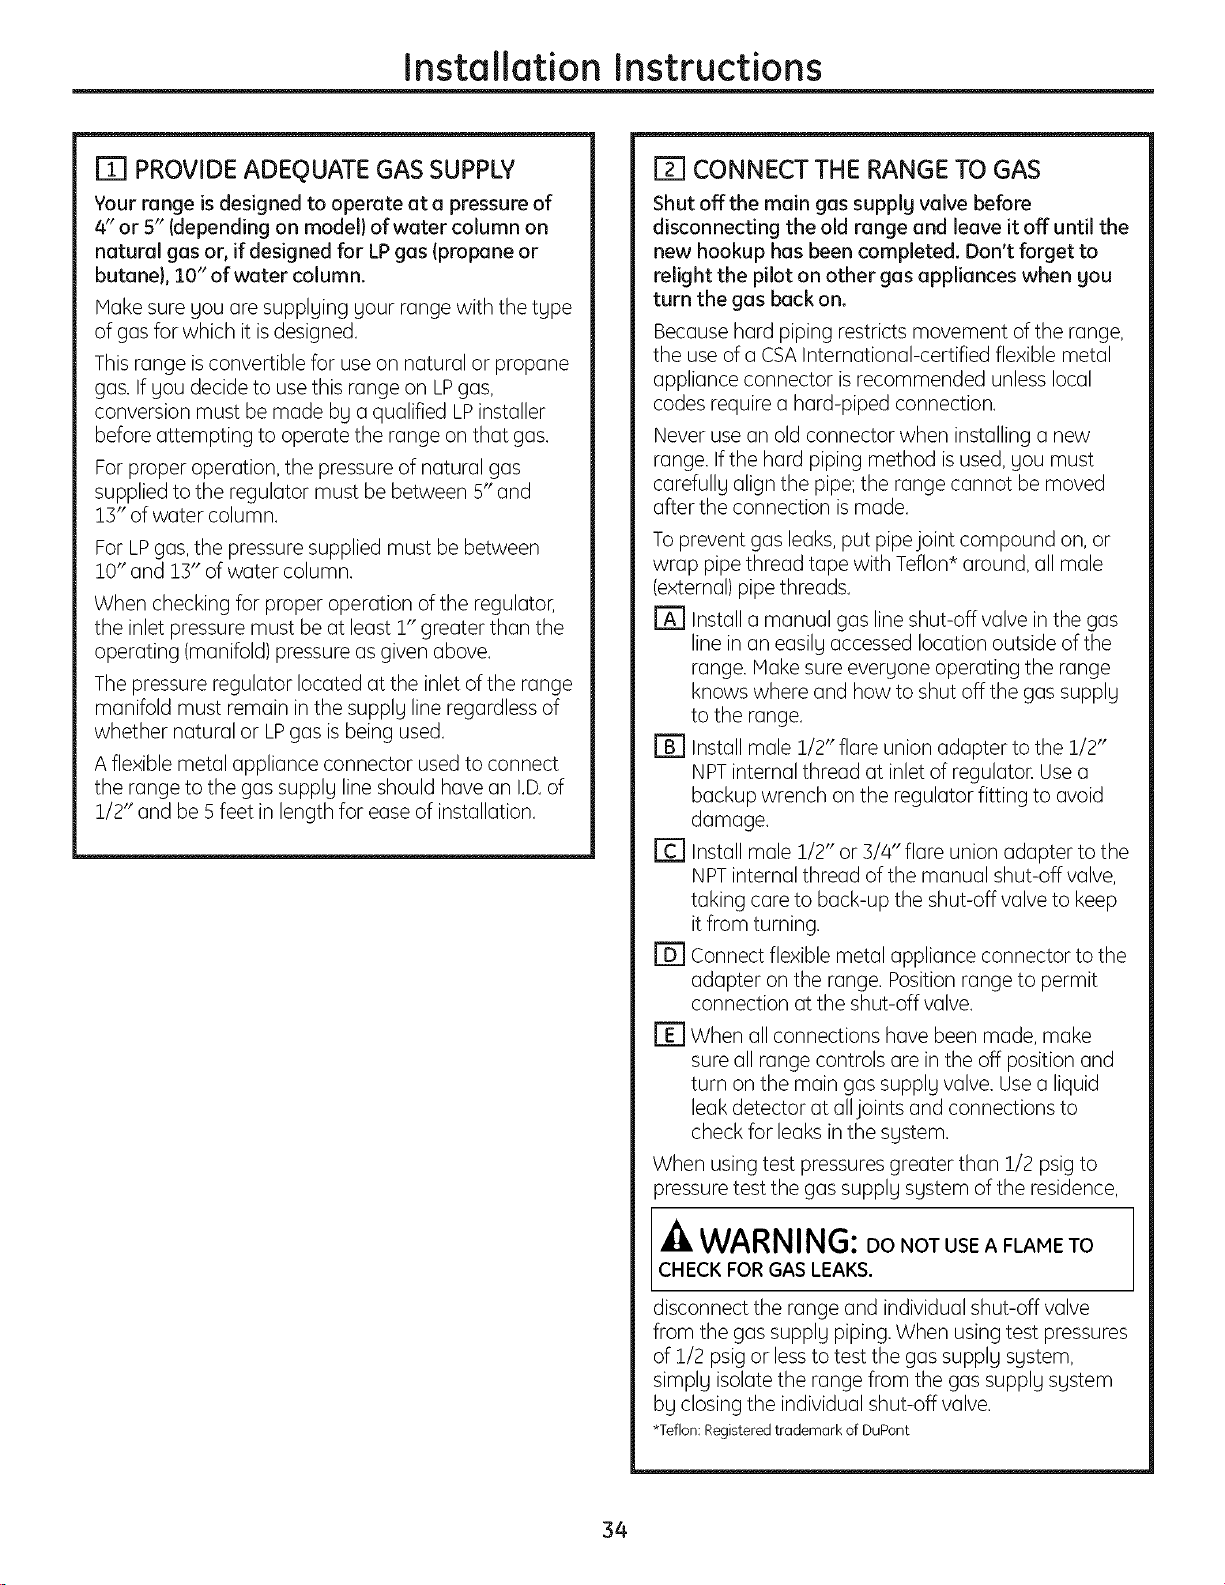
[] PROVIDE ADEQUATE GAS SUPPLY
Your range is designed to operate at a pressure of
4" or 5" (depending on model) of water column on
natural gas or, if designed for LP gas (propane or
butane), 10" of water column.
Make sure gou are supplging gour range with the tgpe
of gas for which it is designed.
This range is convertible for use on natural or propane
gas. If gou decide to use this range on LPgas,
conversion must be made bg a qualified LP installer
before attempting to operate the range on that gas.
For proper operation, the pressure of natural gas
supplied to the regulator must be between 5" and
:!3" of water column.
For LP gas, the pressure supplied must be between
!0" and 13" of water column.
When checking for proper operation of the regulator,
the inlet pressure must be at least !" greater than the
operating (manifold) pressure as given above.
The pressure regulator located at the inlet of the range
manifold must remain in the supplg line regardless of
whether natural or LPgas is being used.
A flexible metal appliance connector used to connect
the range to the gas supplg line should have an I.D.of
1/2" and be 5 feet in length for ease of installation.
[] CONNECT THE RANGE TO GAS
Shut offthe main gas supplg valve before
disconnecting the old range and leave it off until the
new hookup has been completed. Don't forget to
relight the pilot on other gas appliances when you
turn the gas back on.
Because hard piping restricts movement of the range,
the use of a CSA International-certified flexible metal
appliance connector is recommended unless local
codes require a hard-piped connection.
Never use an old connector when installing a new
range. If the hard piping method is used, gou must
carefullg align the pipe; the range cannot be moved
after the connection is made.
To prevent gas leaks, put pipe joint compound on, or
wrap pipe thread tape with Teflon* around, all male
(external) pipe threads.
[] Install a manual gas line shut-off valve in the gas
line in an easilg accessed location outside of the
range. Make sure evergone operating the range
knows where and how to shut offthe gas supplg
to the range.
[] Install male 1/2" flare union adapter to the 1/2"
NPT internal thread at inlet of regulato[ Use a
backup wrench on the regulator fitting to avoid
damage.
[] Install male !/2" or 3/4" flare union adapter to the
NPTinternal thread of the manual shut-off valve,
taking care to back-up the shut-off valve to keep
it from turning.
[] Connect flexible metal appliance connector to the
adapter on the range. Position range to permit
connection at the shut-off valve.
[] When all connections have been made, make
sure all range controls are in the off position and
turn on the main gas supplg valve. Use a liquid
leak detector at all joints and connections to
check for leaks in the sgstem.
When using test pressures greater than 1/2 psig to
)ressure test the gas supplg sgstem of the residence,
A
R WARNING: Do NOT USE A FLAME TO
CHECK FOR GAS LEAKS,
disconnect the range and individual shut-off valve
from the gas supplg piping. When using test pressures
of 1/2 psig or less to test the gas supplg sgstem,
simplg isolate the range from the gas supplg sgstem
bg closing the individual shut-off valve.
*Teflon: Registered trademark of DuPont
34
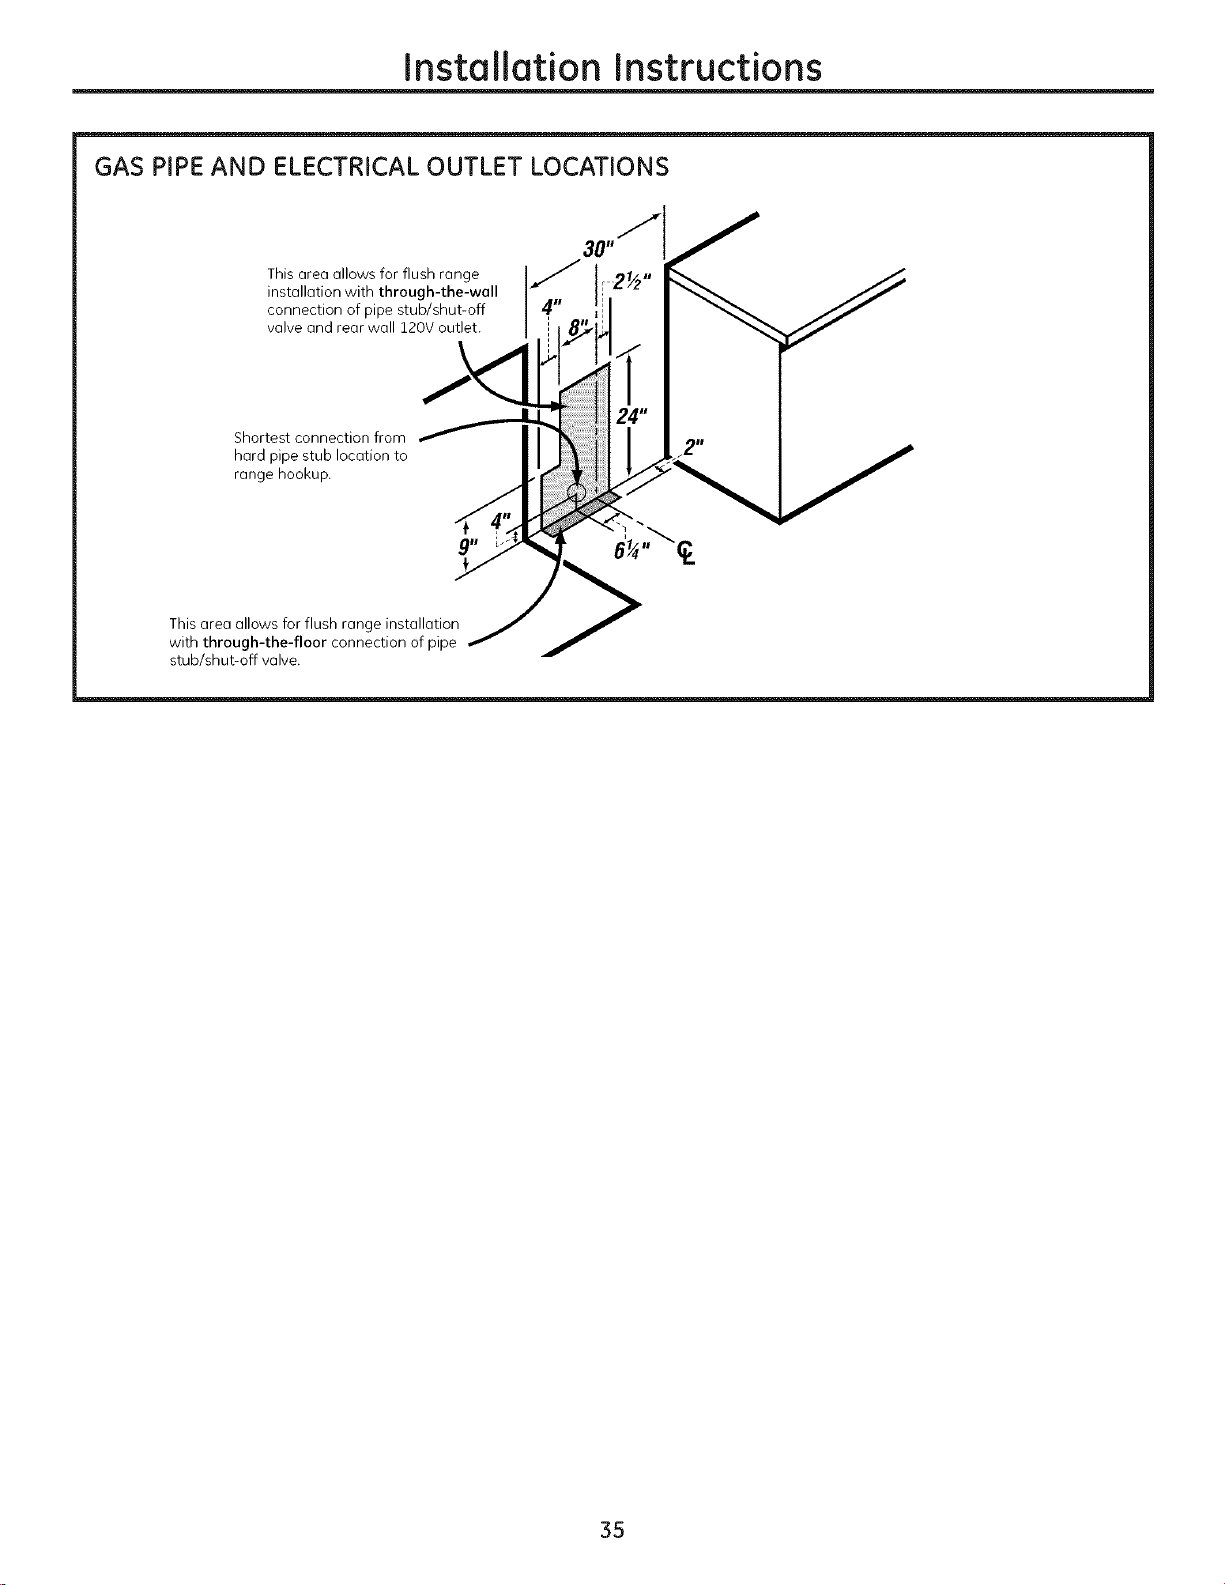
Installation Instructions
GAS PIPE AND ELECTRICAL OUTLET LOCATIONS
This area allows for flush range
installation with through-the-wall
connection of pipe stub/shut-off
valve and rear wall 120V outlet.
Shortest connection from
hard pipe stub location to
range hookup.
This area allows for flush range installation
with through-the-floor connection of pipe
stub/shut-off valve.
35
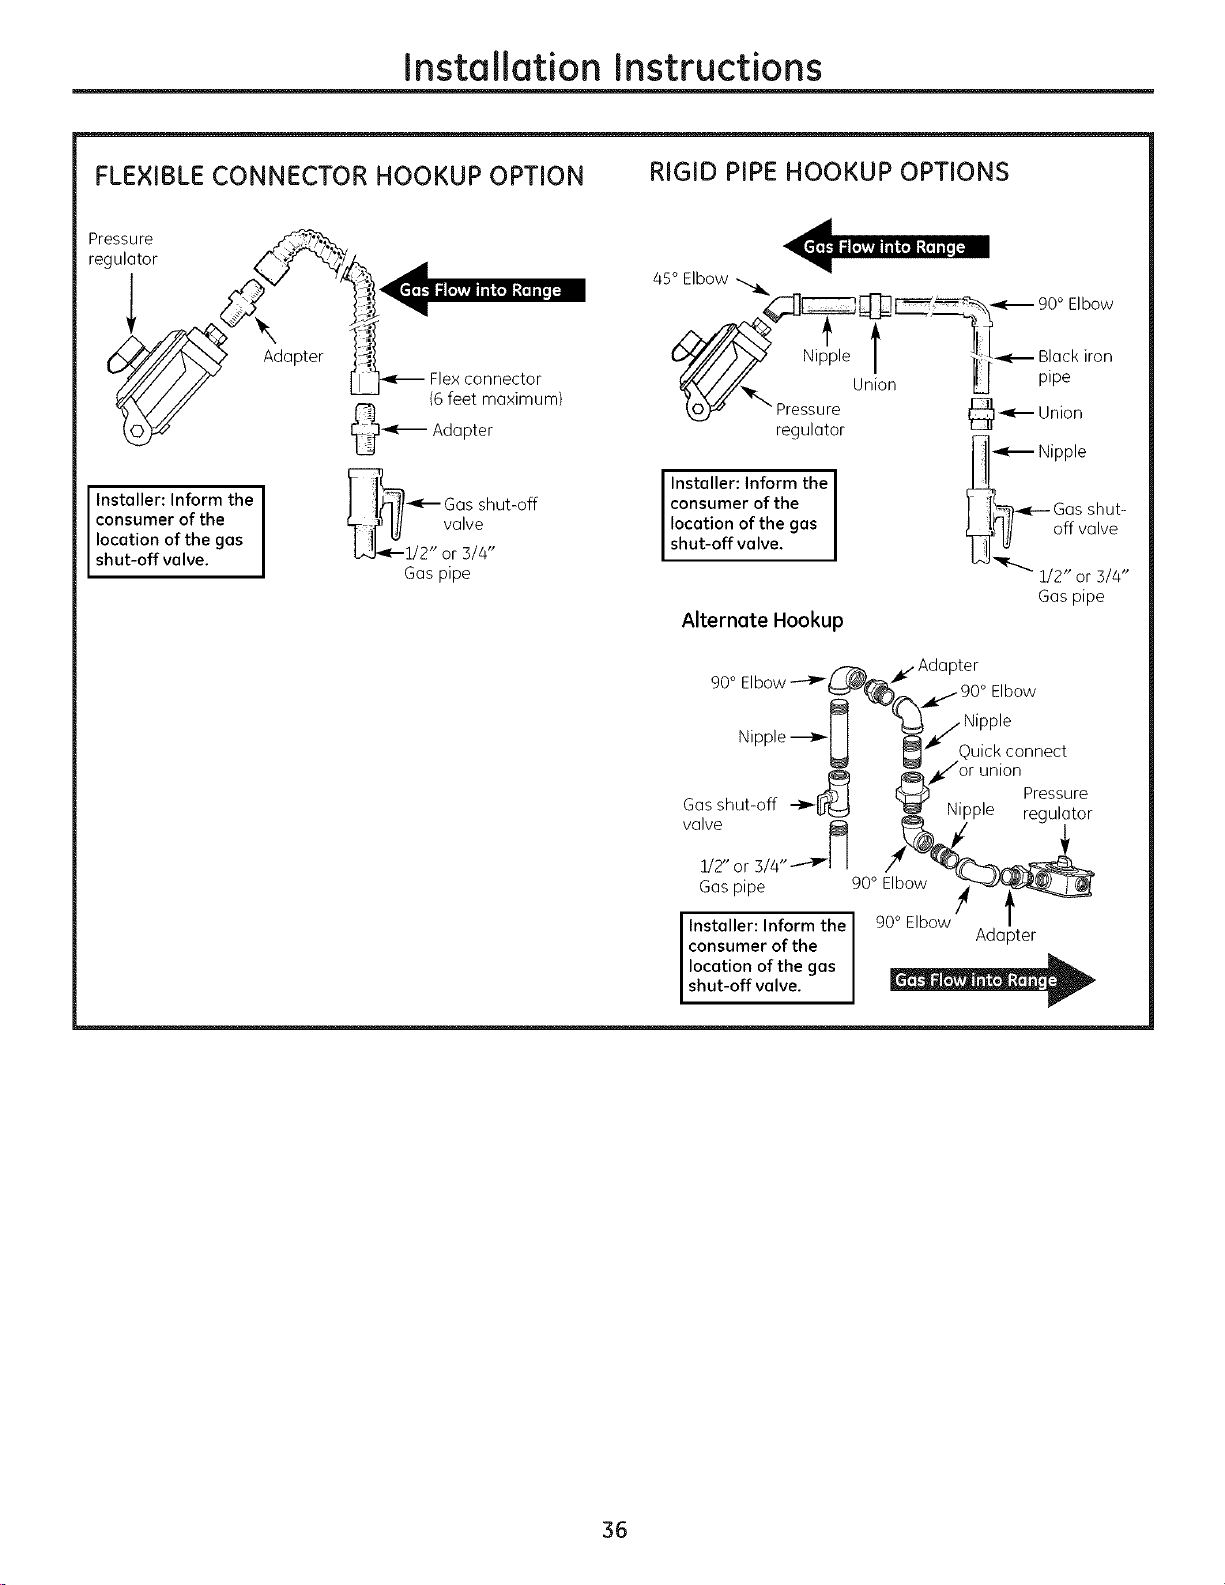
Installation Instructions
FLEXIBLE CONNECTOR HOOKUP OPTION RIGID PIPE HOOKUP OPTIONS
Pressure _,
regulotor _/_<_' '_'Z/_ _1
_y///_x,,_ Adapter J_",L
-_'//'////" J _ Flex connector
_X<//J _ (6 feet maximum)
_--- Adopter
Installer: Inform the ] _Gos shut-off
consumer of the CX-i[_ [_ valve
locution of the gas
shut-offva ve. b-Ll-._i/2" or 3//4"
Gos pipe
45° Elbow
_11_ _ __I-- 90 ° Elbow
_'_M"_ Nip'pie T "--'_'_ l__ BliOeCkiron
_/-_//_ Union _ P'P
"Per; Sk_Ul-er @_1-- Union
Installer: Inform the I
consumer of the
location of the gas
shut-off va ve.
Alternate Hookup
Nipple
[l_J]_"_Gos shut-
_[_,_ off volve
112" or 314"
Gos pipe
o _ ,/- Adopter
90 Elbow _%Pi_ _ 90° Elbow
Nipple _1_ _ _//Nipple
_" Quick connect
Pressure
Gas shut-off _ Nipple regulutor
volve
IIZ' or 314"-''_'_
Gas pipe 90 ° Elbow
Installer: Inform the I
consumer of the
location of the gas
shut-off va ve.
90 ° Elbow
Adopter
36
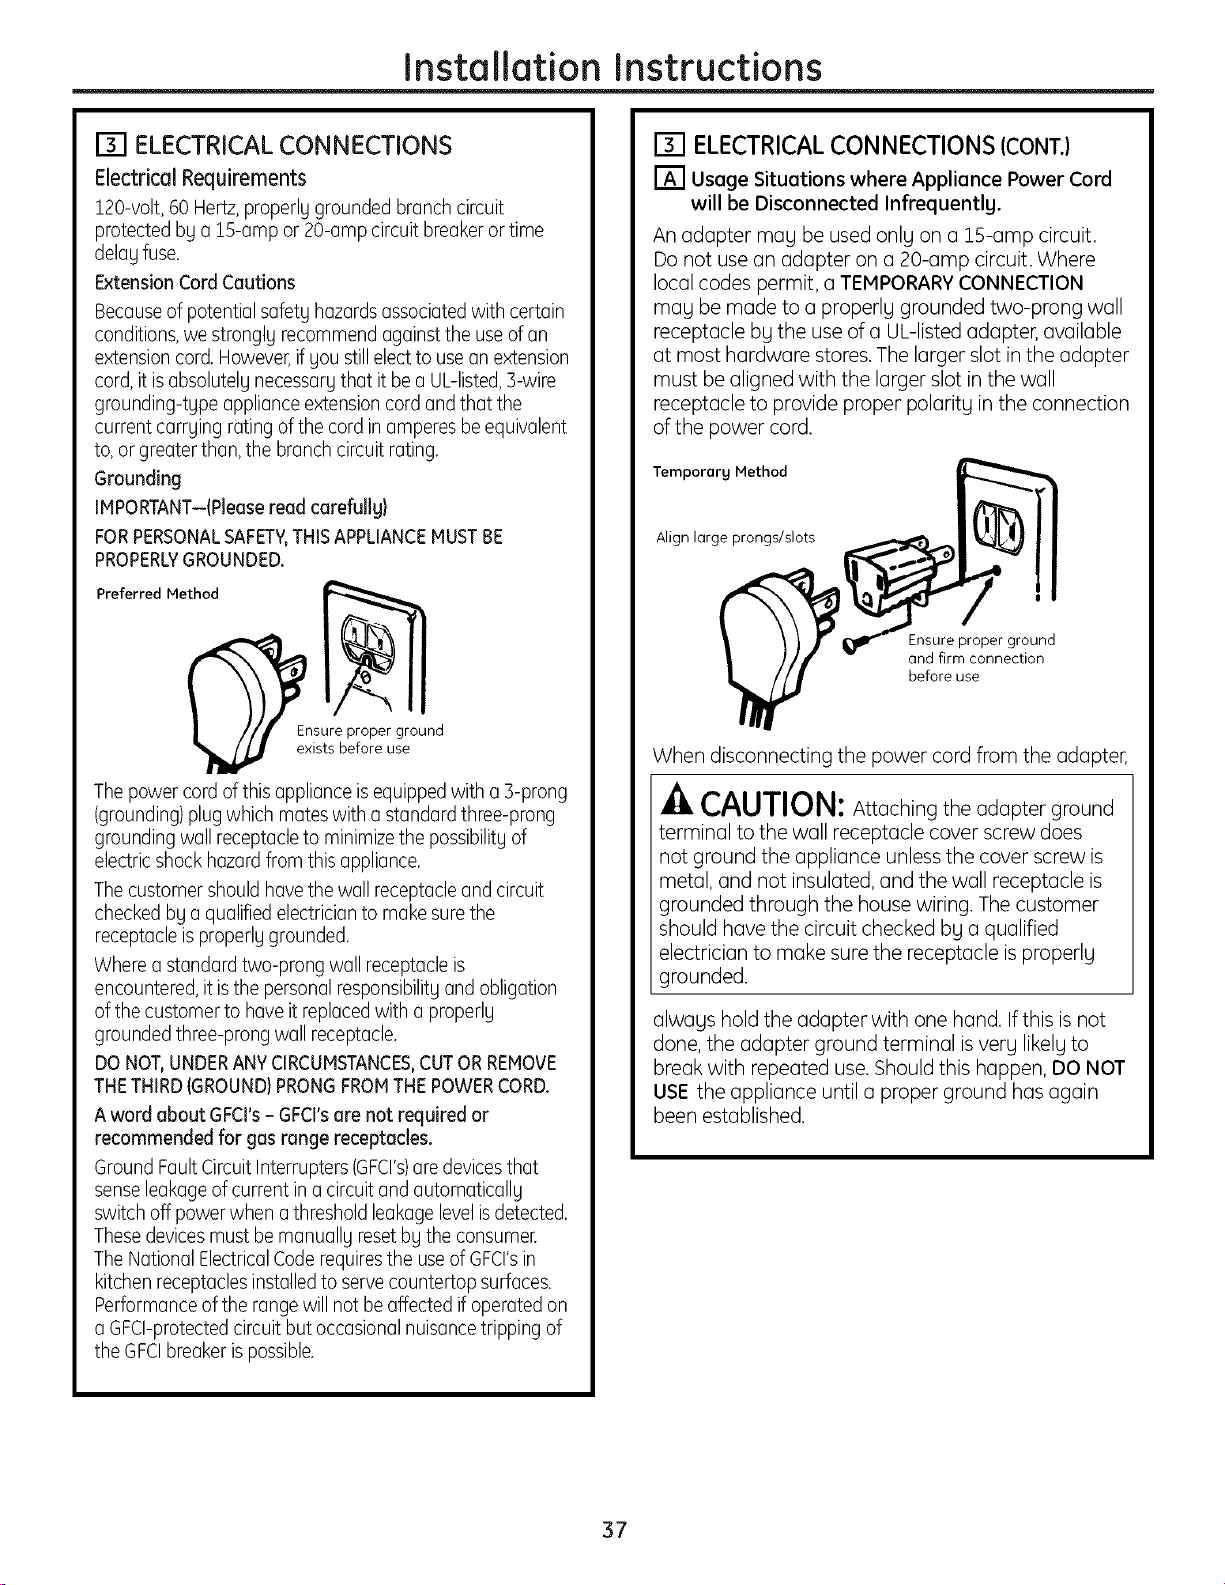
Installation Instructions
[] ELECTRICAL CONNECTIONS
Electrical Requirements
120-volt, 60 Hertz,properly grounded branch circuit
protected by a !5-amp or 20-amp circuit breaker or time
delay fuse.
Extension Cord Cautions
Becauseof potential safety hazardsassociated with certain
conditions,we strongly recommend against the use ofan
extensioncord. However,ifyou stillelect to usean extension
cord, it isabsolutely necessary that it be a UL-listed,3-wire
grounding-type appliance extensioncord and that the
current carrying rating ofthe cord in amperes be equivalent
to, or greater than, the branch circuit rating.
Grounding
IMPORTANT-IPIeaseread carefullg}
FORPERSONALSAFETY,THISAPPLIANCEMUSTBE
PROPERLYGROUNDED.
Preferred Method
E__sure proper ground
exists before use
The power cord of this appliance isequipped with a 3-prong
(grounding)plug which mates with a standard three-prong
grounding wall receptacleto minimizethe possibility of
electric shockhazardfrom this appliance.
The customer should havethe wall receptacleand circuit
checked by a qualified electricianto make surethe
receptacle isproperly grounded.
Where a standard two-prong wall receptacleis
encountered,it isthe personalresponsibility and obligation
of the customer to have it replacedwith a properly
grounded three-prong wall receptacle.
DO NOT,UNDERANYCIRCUMSTANCES,CUTORREMOVE
THETHIRD(GROUND)PRONGFROMTHEPOWERCORD.
A word about GFCI's- GFCI'sare not required or
recommended for gas range receptacles.
Ground Fault CircuitInterrupters (GFCI's)are devicesthat
senseleakageof current in a circuit and automatically
switch off powerwhen a threshold leakagelevelisdetected.
These devicesmust be manually resetby the consumer.
The National ElectricalCoderequiresthe useof GFCrsin
kitchen receptaclesinstalled to servecountertop surfaces.
Performance ofthe range will not beaffected if operated on
a GFCI-protectedcircuit but occasional nuisancetripping of
the GFCIbreakeris possible.
[] ELECTRICALCONNECTIONS (CONT.)
[] Usage Situations where Appliance Power Cord
will be Disconnected Infrequently.
An adapter may be used only on a 1S-ampcircuit.
Donot usean adapter on a 20-amp circuit.Where
local codes permit, a TEMPORARYCONNECTION
may be made to a properly grounded two-prong wall
receptacle by the useof a UL-listedadapter,available
at most hardware stores.Thelargerslot inthe adapter
must bealigned with the larger slot in the wall
receptacleto provideproper polarity inthe connection
of the power cord.
Temporary Method
Align large prongs/slots
_nfofrirr_CeOnnection
When disconnecting the power cord from the adapter,
CAUTION: Attaching the adapter ground
terminal to the wall receptaclecover screwdoes
not ground the appliance unlessthe cover screw is
metal, and not insulated,and the wall receptacleis
grounded through the housewiring. Thecustomer
should havethe circuitchecked by a qualified
electricianto make surethe receptacleisproperly
grounded.
always hold the adapter with one hand. If this is not
done, the adapter ground terminal is very likely to
break with repeated use. Should this happen, DO NOT
USE the appliance until a proper ground has again
been established.
37
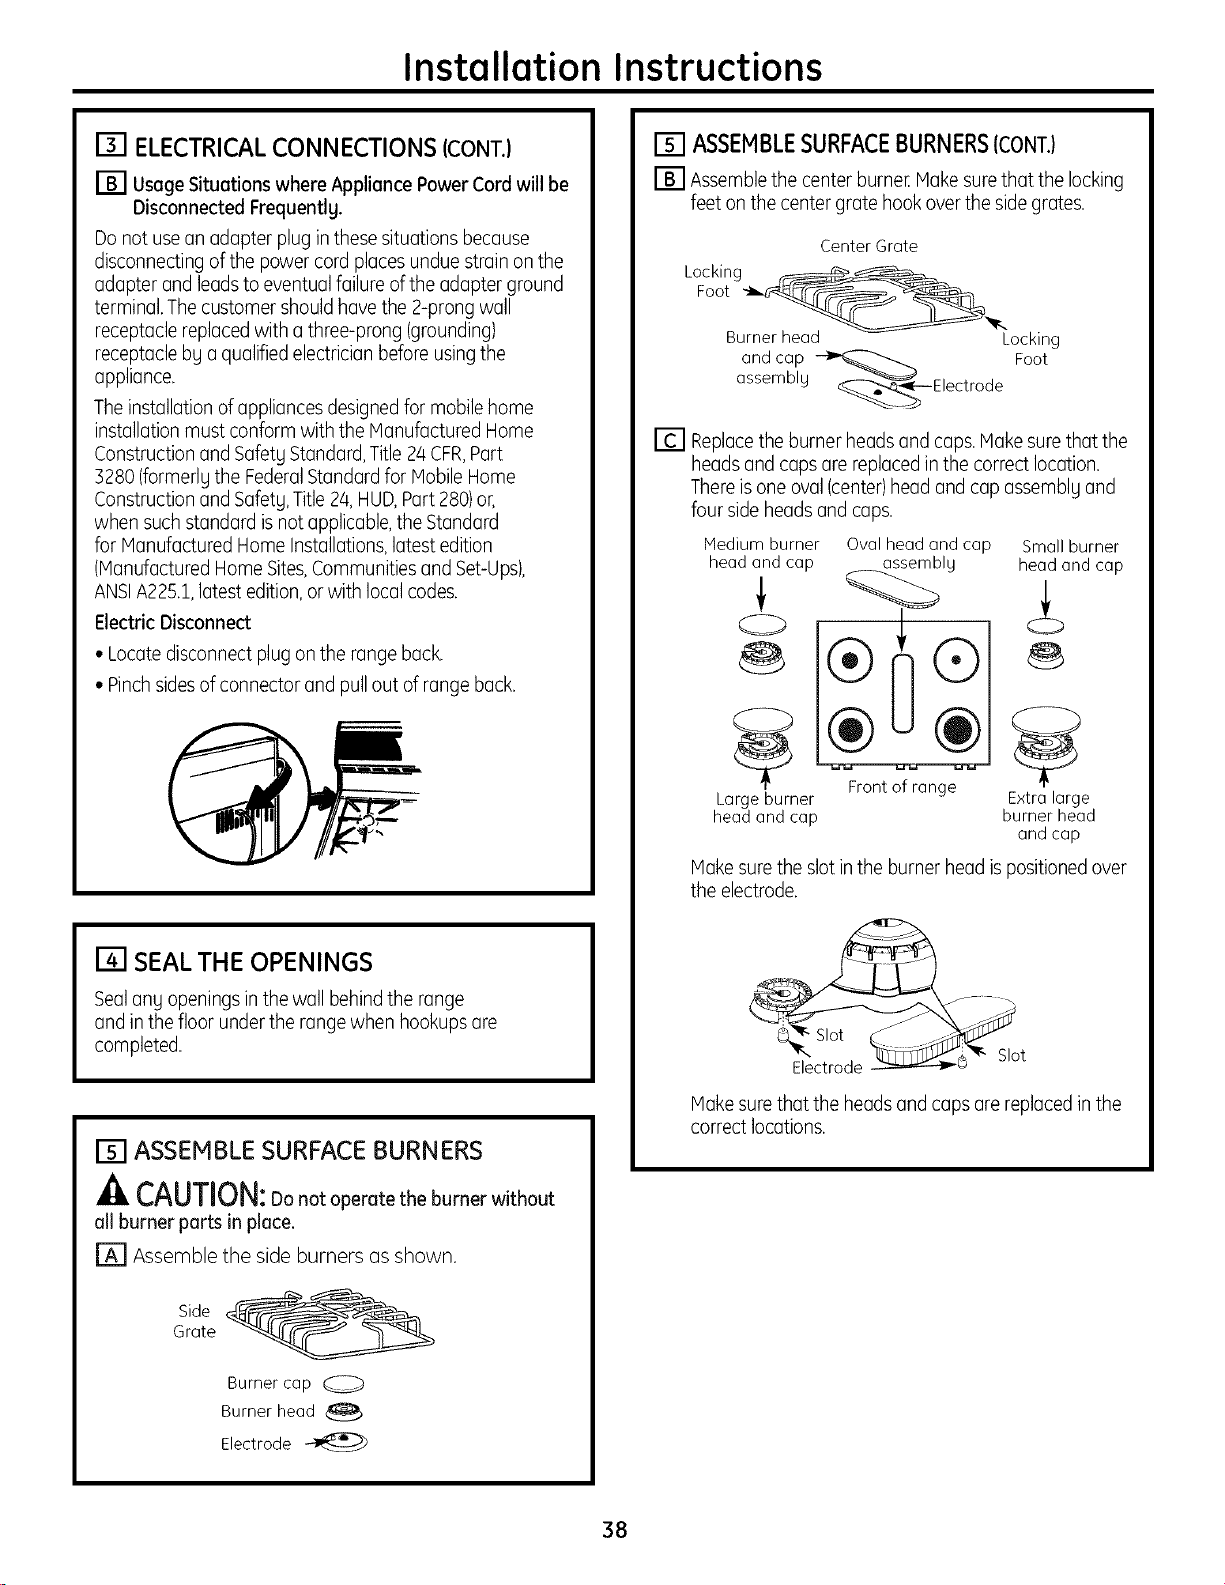
Installation Instructions
[] ELECTRICAL CONNECTIONS (CONT.)
[] Usage Situations where Appliance Power Cord will be
Disconnected Frequentlg.
Do not usean adapter plug inthese situations because
disconnecting of the power cord places undue strain on the
adapter and leadsto eventual failure of the adapter ground
terminal.Thecustomer should havethe 2-prong wall
receptacle replacedwith a three-prong (grounding)
receptacle bg a qualified electrician before usingthe
appliance.
The installation ofappliances designedfor mobilehome
installation must conform with the Manufactured Home
Constructionand SafetgStandard,Title 2/4CFR,Part
3280 (formerlg the FederalStandardfor Mobile Home
Constructionand Safetg,Title 2/4,HUD,Part280)or,
when such standard is not applicable,the Standard
for Manufactured Home Installations,latest edition
(Manufactured Home Sites,Communitiesand Set-Ups),
ANSIA225.1,latest edition,or with localcodes.
Electric Disconnect
• Locatedisconnect plug on the range back.
• Pinchsidesof connector and pull out of range back.
[] SEAL THE OPENINGS
SealanUopeningsin the wall behindthe range
and in thefloor under the range when hookups are
completed.
[] ASSEMBLE SURFACE BURNERS
-& CAUTION:Donotoperatetheburnerwithout
all burner parts in place.
[] Assemble the side burners as shown.
Side
Grate
Burner cap O
Burner head
Electrode
[] ASSEMBLESURFACEBURNERS(CONT.)
[] Assemblethe center burner.Make surethat the locking
feet on the center grate hook over the sidegrates.
Center Grate
Locking_
Foot _,_..
Burner head Locking
and cap _ Foot
assembly _%___Electrode
[] Replacethe burner headsand caps.Make surethat the
heads and caps are replacedin the correct location.
Thereis one oval(center)head and cap assemblUand
four side headsand caps.
Mediumburner Smallburner
headand cap headand cap
0
Large burner Extra large
headand cap burnerhead
and cap
Ovalhead and cap
assembly
®1®
Frontof range
Make surethe slot in the burner head is positionedover
the electrode.
Makesurethattheheadsandcapsarereplacedinthe
correctlocations,
38
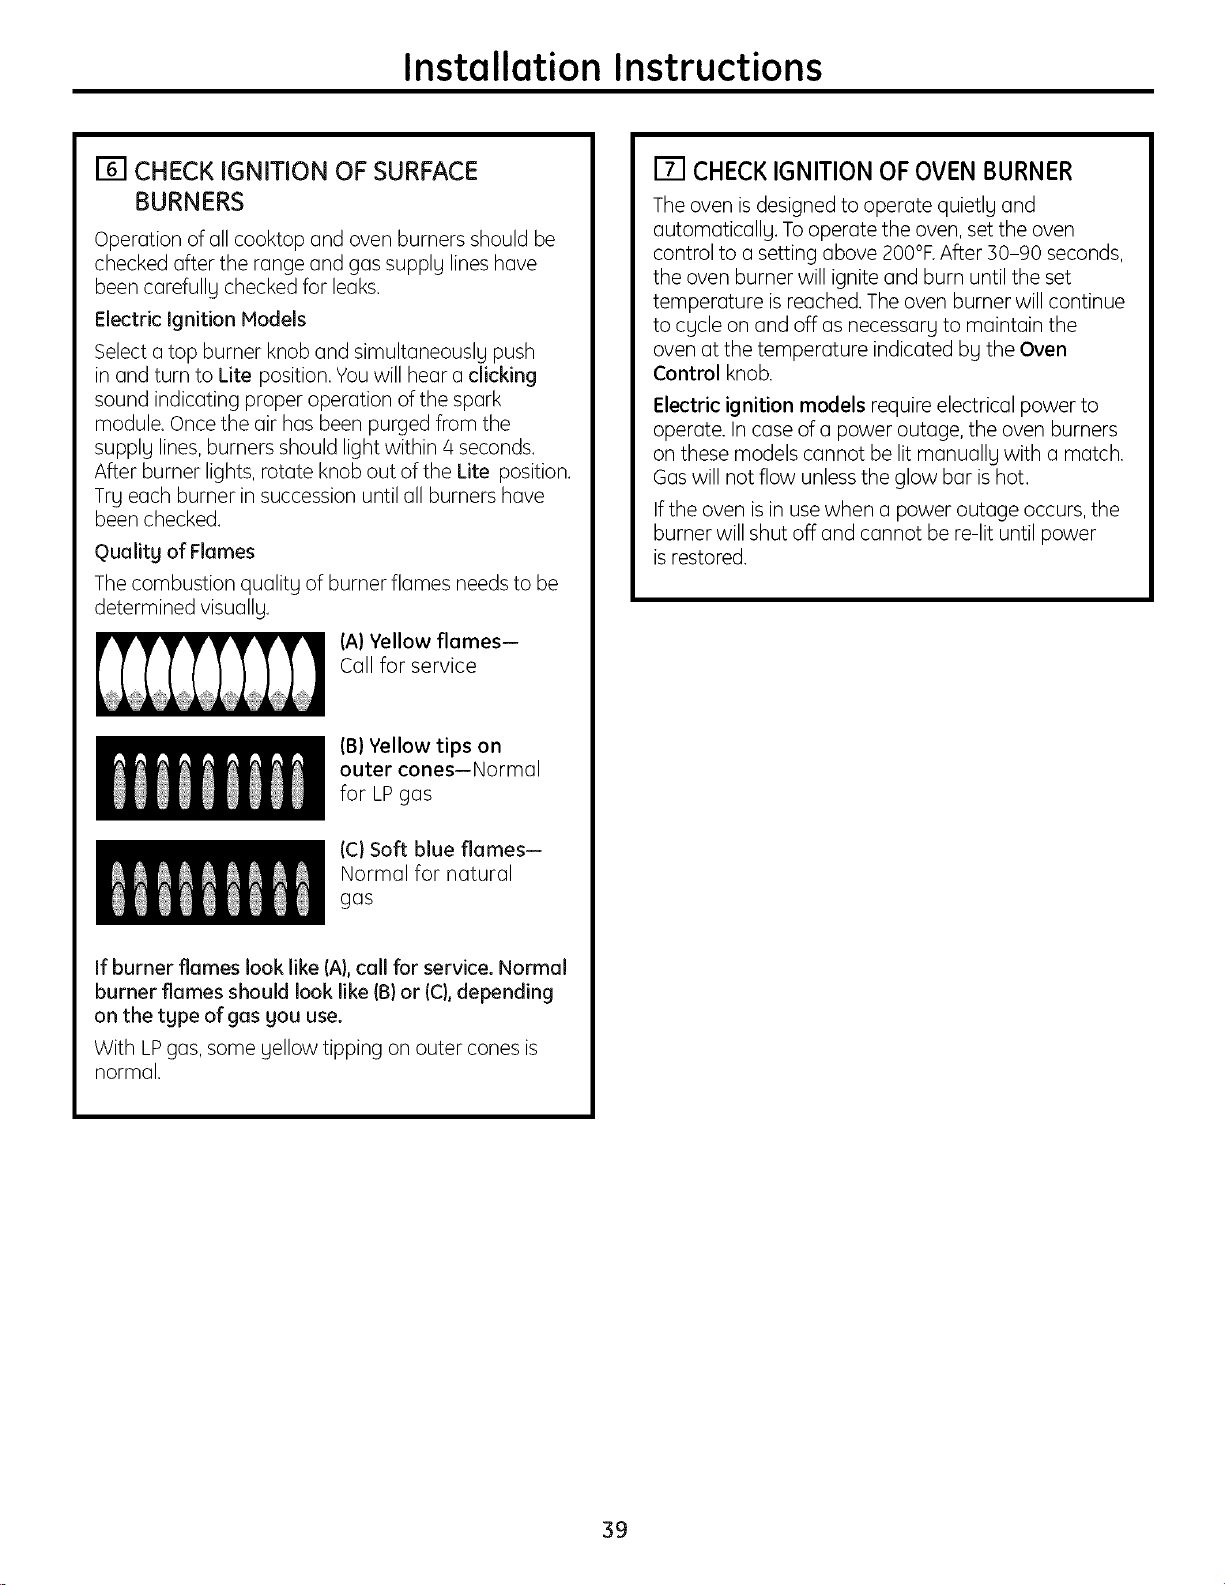
Installation Instructions
[] CHECK IGNITION OF SURFACE
BURNERS
Operation of oil cooktop and oven burners should be
checked offer the range and gas supply lines hove
been carefully checked for leaks.
Electric Ignition Models
Select o top burner knob and simultaneously push
in and turn to Lite position. You will hear o clicking
sound indicating proper operation of the spark
module. Once the air has been purged from the
supply lines, burners should light within/4 seconds.
After burner lights, rotate knob out of the Lite position.
Try each burner in succession until oil burners hove
been checked.
Quality of Flames
The combustion quality of burner flames needs to be
determined visually.
(A) Yellow flames--
Call for service
(B) Yellow tips on
outer cones--Normal
for LP gas
(C)Soft blue flames--
Normal for natural
gas
If burner flames look like (A},call for service. Normal
burner flames should look like (B} or (C},depending
on the type of gas you use.
With LPgas, some yellow tipping on outer cones is
normal.
[] CHECKIGNITION OF OVEN BURNER
The oven is designed to operate quietly and
automatically. To operate the oven, set the oven
control to a setting above 200°F.After 30-90 seconds,
the oven burner will ignite and burn until the set
temperature is reached. The oven burner will continue
to cycle on and off as necessary to maintain the
oven at the temperature indicated by the Oven
Control knob.
Electric ignition models require electrical power to
operate. In case of u power outage, the oven burners
on these models cannot be lit manually with u match.
Gas will not flow unless the glow bur is hot.
If the oven is in use when a power outage occurs, the
burner will shut off and cannot be re-lit until power
is restored.
39
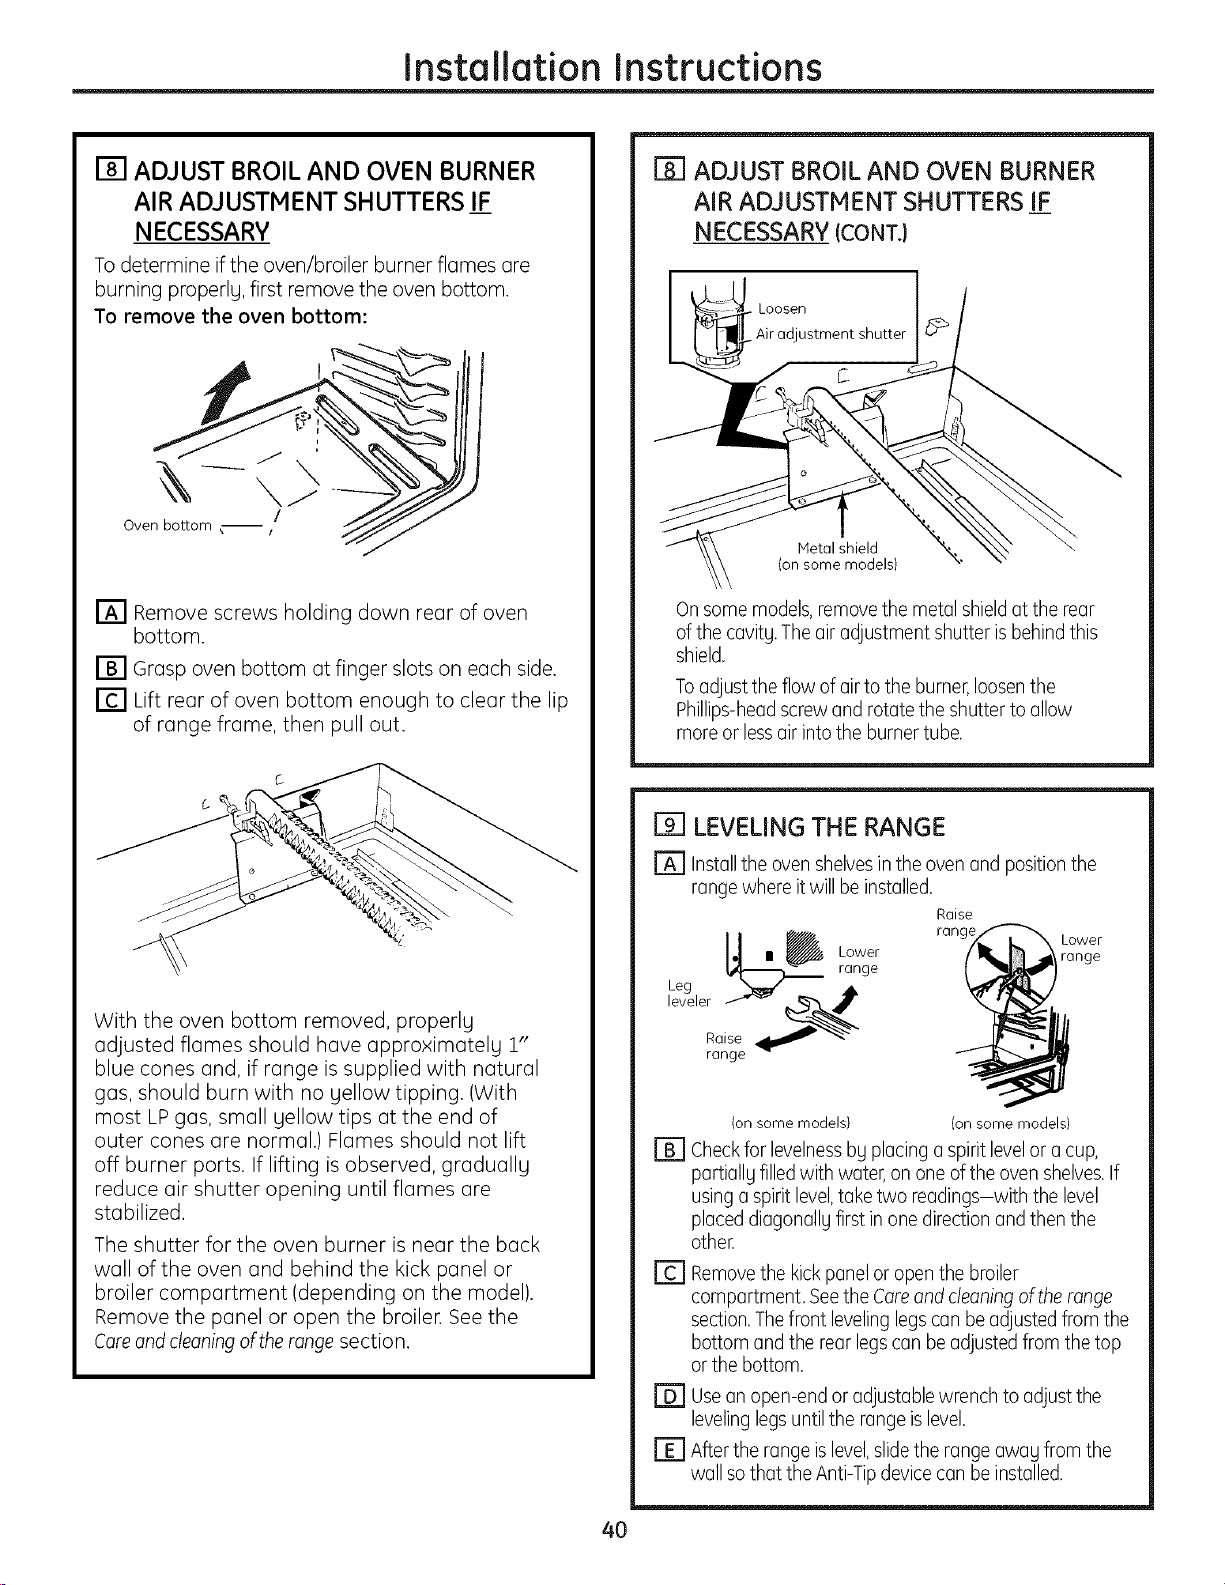
Installation Instructions
[] ADJUST BROIL AND OVEN BURNER
AIR ADJUSTMENT SHUTTERS IF
NECESSARY
To determine if the oven/broiler burner flames are
burning properly, first remove the oven bottom.
To remove the oven bottom:
/
Oven bottom
[] Remove screws holding down rear of oven
bottom.
[] Grasp oven bottom at finger slots on each side.
[] Lift rear of oven bottom enough to clear the lip
of range frame, then pull out.
With the oven bottom removed, properly
adjusted flames should have appro×imately 1"
blue cones and, if range is supplied with natural
gas, should burn with no yellow tipping. (With
most LP gas, small yellow tips at the end of
outer cones are normal.) Flames should not lift
off burner ports. If lifting is observed, gradually
reduce air shutter opening until flames are
stabilized.
The shutter for the oven burner is near the back
wall of the oven and behind the kick panel or
broiler compartment (depending on the model).
Remove the panel or open the broiler. See the
Careand cleaning ofthe range section.
4O
[] ADJUST BROIL AND OVEN BURNER
AIR ADJUSTMENT SHUTTERS IF
NECESSARY(CONT.)
Loosen
Air adjustment shutter
C
Metal shield
(on some models)
Onsome models,remove the metal shieldat the rear
ofthe cavitU.Theair adjustment shutter isbehind this
shield.
Toadjust the flow of air to the burner,loosenthe
Phillips-headscrewand rotate the shutter to allow
more or lessair into the burner tube.
[] LEVELING THE RANGE
[] Installthe oven shelvesin the oven and positionthe
range where itwill be installed.
Raise
rang_ Lower
IJ ' Lower range
range
Leg _ ,A
range
[]
[]
(on some models) (on some models)
Checkfor levelnessby placing a spirit levelor a cup,
partially filledwith water,on one of the oven shelves,If
using a spirit level,take two readings-with the level
placed diagonally first in one direction and then the
other,
Removethe kickpanel or open the broiler
compartment. Seethe Careand cleaningofthe range
section.Thefront levelinglegscan be adjusted from the
bottom and the rear legscan beadjusted from the top
or the bottom.
[] Usean open-end or adjustable wrench to adjust the
levelinglegsuntil the range islevel.
[] After the range islevel,slidethe range away from the
wall sothat the Anti-Tip devicecan be installed.
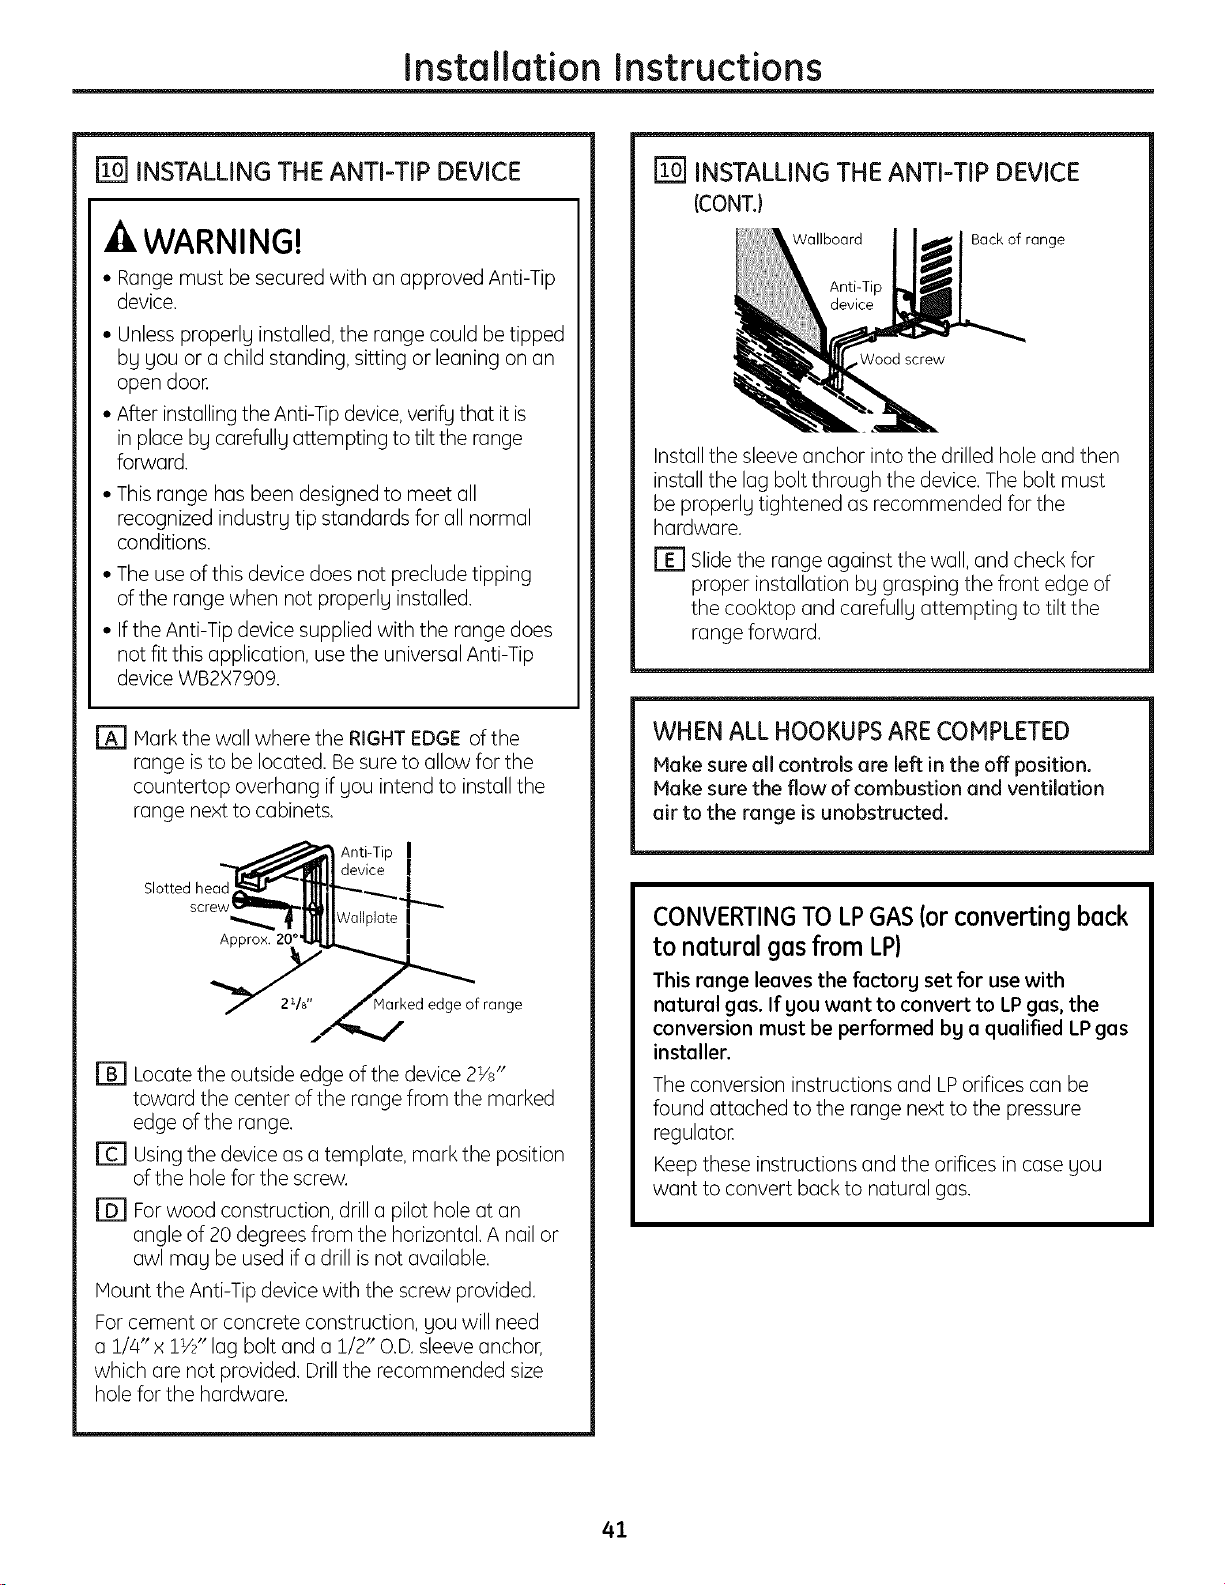
Installation Instructions
[] INSTALLING THE ANTI-TIP DEVICE
-4,WARNING!
• Range must be secured with an approved Anti-Tip
device.
• Unless properlg installed, the range could be tipped
bg gou or a child standing, sitting or leaning on an
open door.
• After installing the Anti-Tip device, verify that it is
in place bg carefullg attempting to tilt the range
forward.
• This range has been designed to meet all
recognized industrg tip standards for all normal
conditions.
• The use of this device does not preclude tipping
of the range when not properlg installed.
• If the Anti-Tip device supplied with the range does
not fit this application, use the universal Anti-Tip
device WB2X7909.
[] Hark the wall where the RIGHT EDGE of the
range isto be located. Be sure to allow for the
countertop overhang if gou intend to install the
range next to cabinets.
of range
[] Locate the outside edge of the device 2Y8"
toward the center of the range from the marked
edge of the range.
[] Using the device as a template, mark the position
of the hole for the screw.
[] For wood construction, drill a pilot hole at an
angle of 20 degrees from the horizontal. A nail or
awl mag be used if a drill is not available.
Mount the Anti-Tip device with the screw provided.
For cement or concrete construction, gou will need
a 1/4"x 1W' lag bolt and a 1/2" O.D.sleeve anchor,
which are not provided. Drill the recommended size
hole for the hardware.
[] INSTALLING THE ANTI-TIP DEVICE
(CONT.}
Wallboard
Anti-Tip
Wood screw
Back of range
Install the sleeve anchor into the drilled hole and then
install the lag bolt through the device. The bolt must
be properlg tightened as recommended for the
hardware.
[] Slide the range against the wall, and check for
proper installation bg grasping the front edge of
the cooktop and carefullg attempting to tilt the
range forward.
WHEN ALL HOOKUPSARE COMPLETED
Hake sure all controls are left in the off position.
Hake sure the flow of combustion and ventilation
air to the range is unobstructed.
CONVERTINGTO LPGAS(or converting back
to natural gas from LP)
This range leaves the factorg set for use with
natural gas. If gou want to convert to LPgas, the
conversion must be performed bg a qualified LP gas
installer.
The conversion instructions and LPorifices can be
found attached to the range next to the pressure
regulator.
Keep these instructions and the orifices in case gou
want to convert back to natural gas.
41
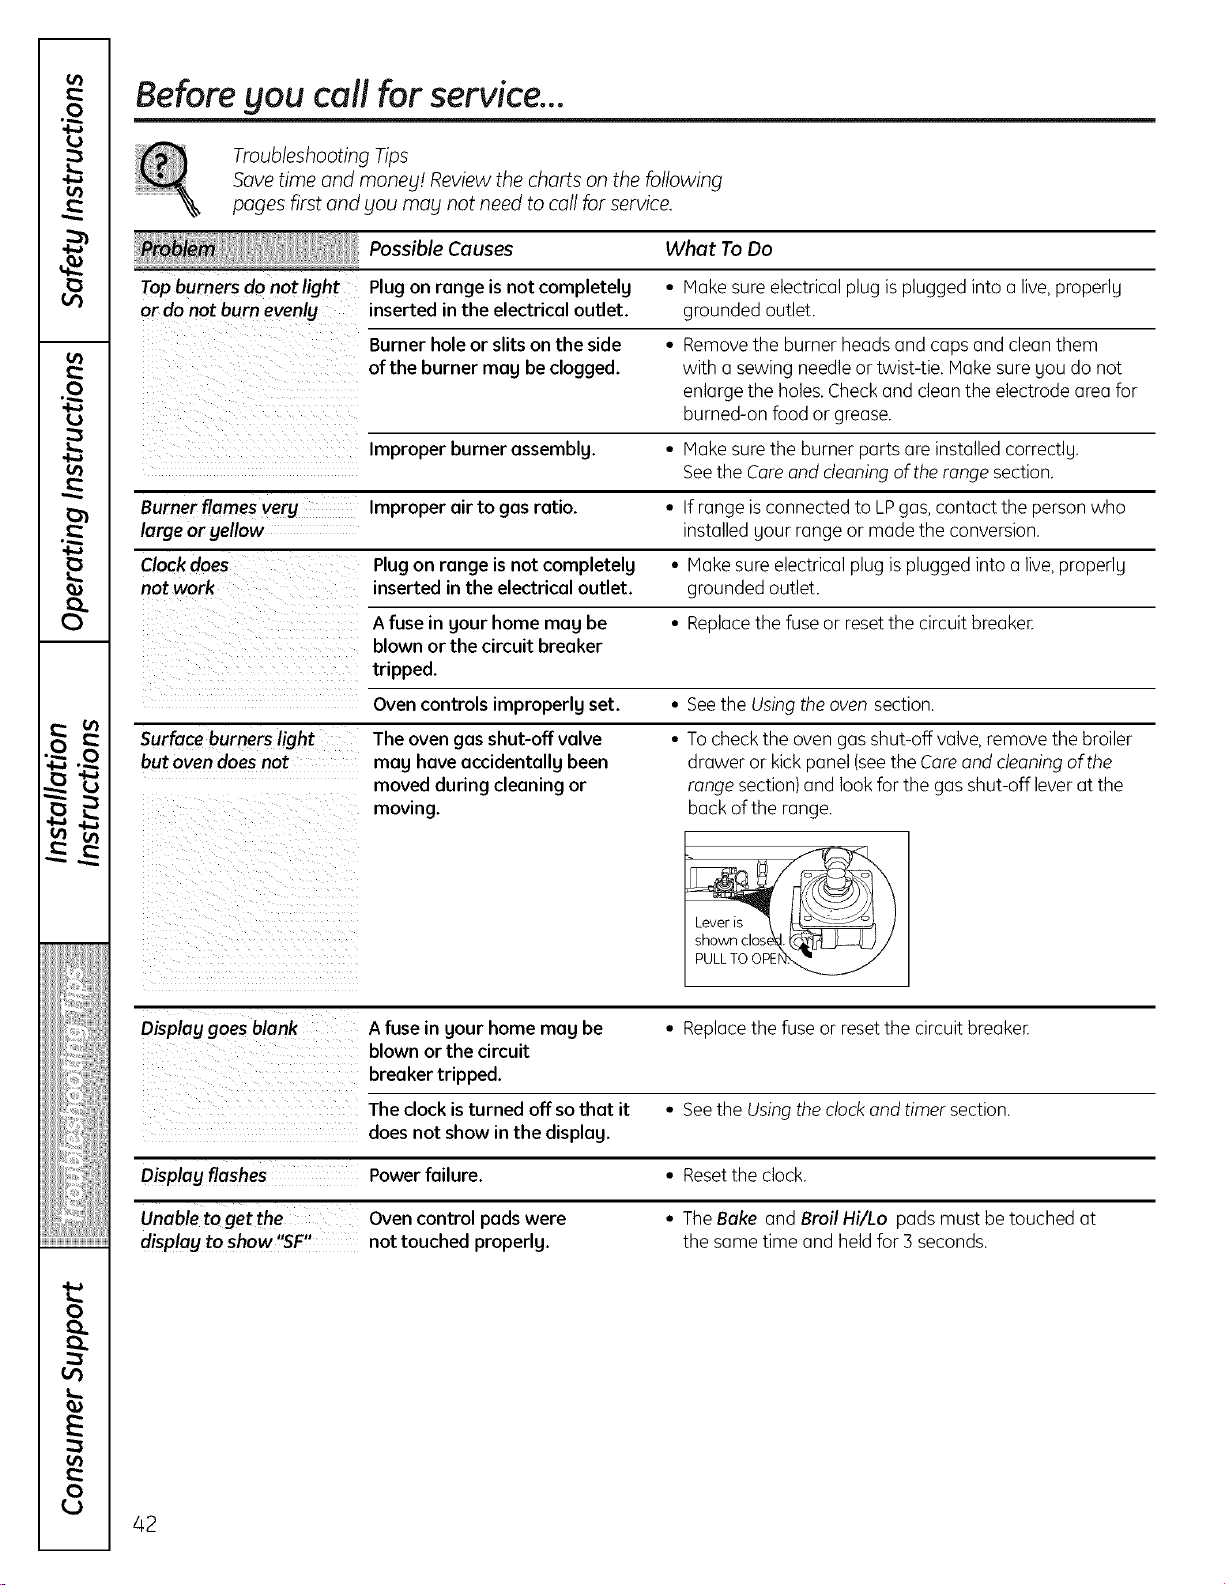
0
m
0
0
w
• u
i_J_iiliYiii_iiiiiiiiii
i_i_=_4_,,,¸,
!!iiiii_iilIili
4_
0
0
Beforeyou call for service...
Troubleshooting Tips
Save time and money! Review the charts on the following
pages first and Sou mag not need to call for service.
if:: Possible Causes What To Do
Topburners do not light Plug on range is not completelg
or do not burn evenly inserted in the electrical outlet.
Burner hole or slits on the side
of the burner mag be clogged.
Improper burner assemble.
Burner flames very Improper air to gas ratio.
large or yellow
Clock does Plug on range is not completelg
not work inserted in the electrical outlet.
A fuse in gour home mag be
blown or the circuit breaker
tripped.
Oven controls improperlg set.
Surface burners light The oven gas shut-off valve
but oven does not mag have accidentallg been
moved during cleaning or
moving.
• Make sure electrical plug isplugged into a live,properly
grounded outlet.
• Removethe burner heads and caps and cleanthem
with a sewing needle or twist-tie. Makesure you do not
enlarge the holes.Checkand clean the electrode area for
burned-on food or grease.
• Make surethe burner parts are installed correctly,
Seethe Careand cleaningof the range section,
• If range isconnected to LPgas,contact the person who
installed your range or made the conversion.
• Make sure electrical plug isplugged into a live,properly
grounded outlet.
• Replacethe fuse or resetthe circuit breaken
• Seethe Using theoven section.
• Tocheck the oven gas shut-off valve,remove the broiler
drawer or kickpanel (seethe Careand cleaningof the
range section)and look for the gas shut-off leverat the
back of the range.
PULL TO OPE
Display goes blank A fuse in gour home mag be • Replacethe fuse or resetthe circuit breaken
blown or the circuit
breaker tripped.
Theclock isturned off so that it • Seethe Using theclockand timer section.
does not show in the displag.
Display flashes Powerfailure.
Unable to get the Oven control pads were
display to show !'sF!! not touched properlg.
• Resetthe clock.
• The Bake and Broil Hi/Lo pads must be touched at
the same time and held for 3 seconds,
42
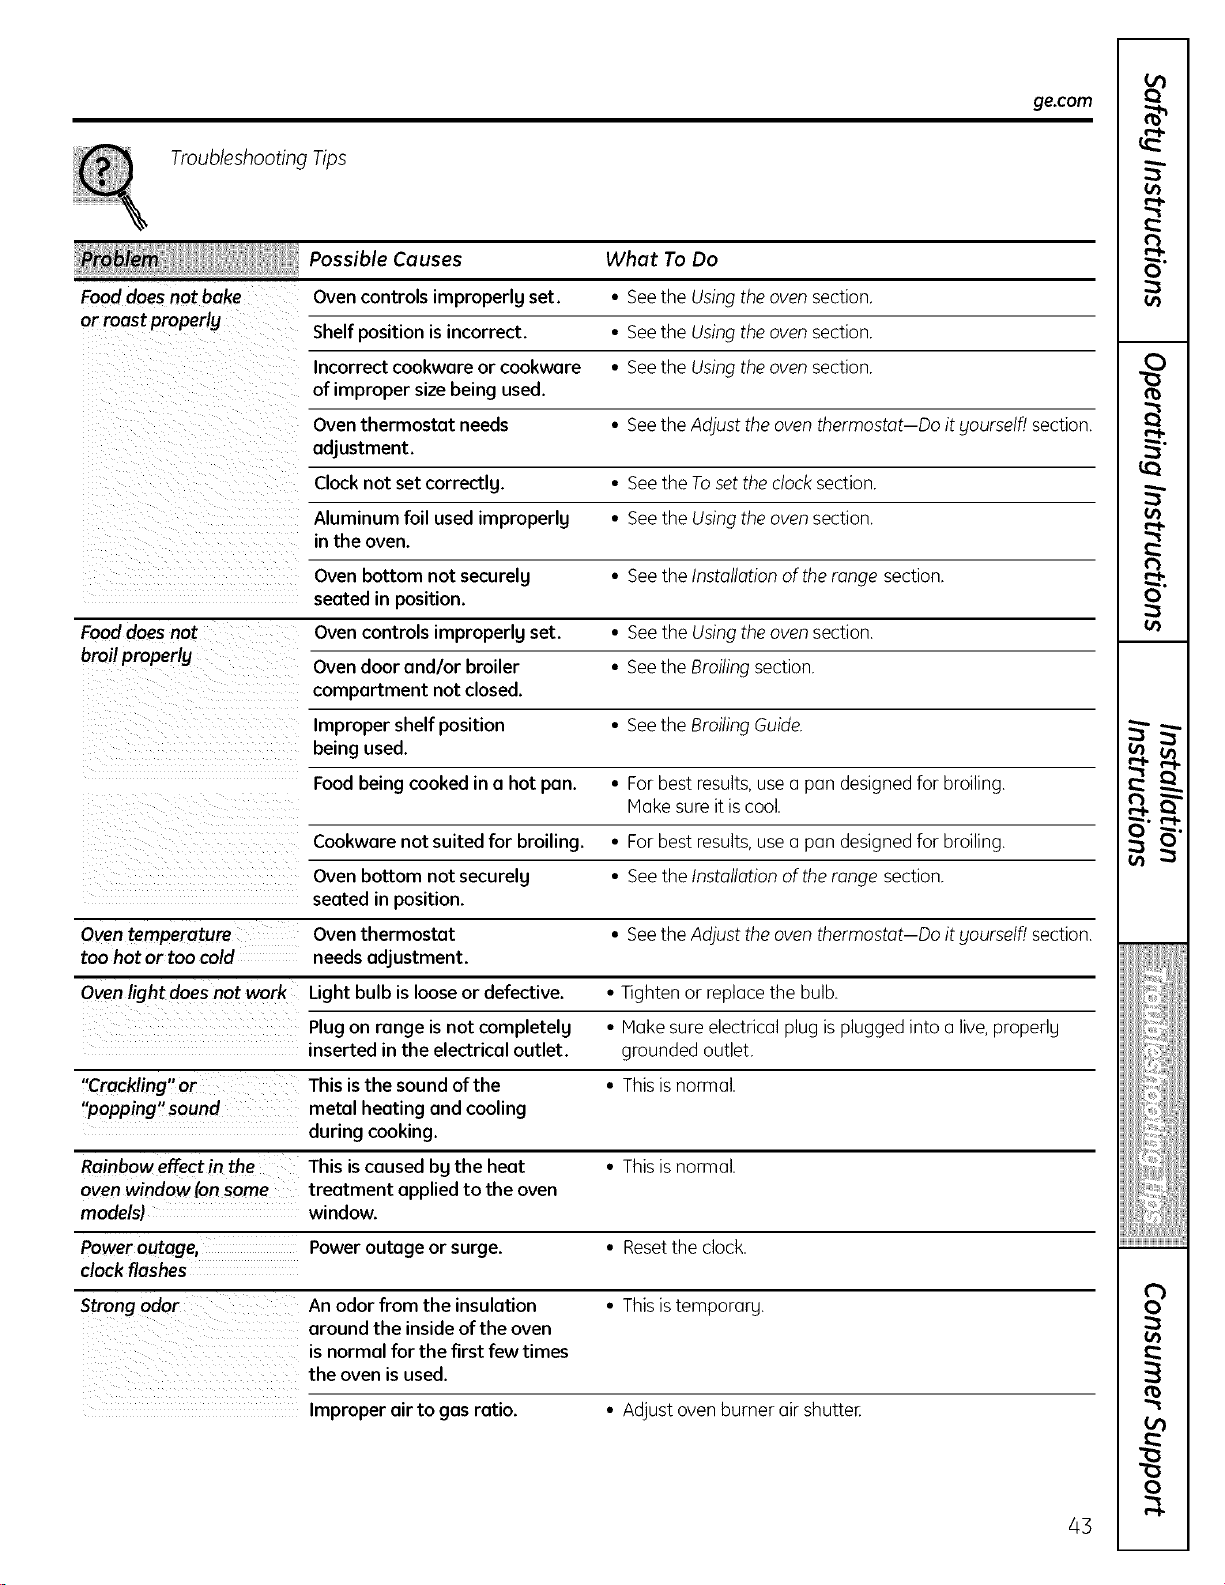
ge.com
Troubleshooting Tips
Possible Causes What To Do
Food does not bake Oven controls improperlg set. * See the Using the oven section.
or roast properly Shelf position is incorrect. * See the Using the oven section.
Incorrect cookware or cookware * See the Using the oven section
of improper size being used.
Oven thermostat needs ° See the AdJust the oven thermostat Do it #ourselfi section
adjustment.
Clock not set correctlg. • See the To set the clock section.
Aluminum foil used improperlg * See the Using the oven section.
in the oven.
Oven bottom not securelg * See the Installation of the range section.
seated in position.
Food does not Oven controls improperlg set. • See the Using the oven section
broil properly Oven door end/or broiler * See the Broiling section
compartment not closed.
Improper shelf position * See the Broiling Guide
being used.
Food being cooked in a hot pan. * For best results, use a pan designed for broiling
Hake sure it is cool.
Cookware not suited for broiling. • For best results, use a pan designed for broiling.
Oven bottom not securelg * See the Installation of the range section.
seated in position.
Oven temperature Oven thermostat * See the AdJust the oven thermostat Do it yourselfi section.
too hot or too cold needs adjustment.
Oven light does not work Light bulb is loose or defective. * Tighten or replace the bulb.
Plug on range is not completelg * Hake sure electrical plug is plugged into a live, properly
inserted in the electrical outlet, grounded outlet.
"Crackling" or This is the sound of the * This is normal.
" o i "so "
p pp ng una metal heating and cooling
during cooking.
Rainbow effect in the This is caused bg the heat * This is normal.
oven window (on some treatment applied to the oven
models) window.
Power outage, Power outage or surge. * Reset the clock.
clock flashes
Strong odor An odor from the insulation ° This is temporarg.
around the inside of the oven
is normal for the first few times
the oven is used.
Improper air to gas ratio. • Adjust oven burner air shutteE
43
¢t}
9"
¢t}
f_
€#1
13
0
° i._
_,,_tt,__N__
/iiiiiiiiiii_iiii
rb
0
€#1
0
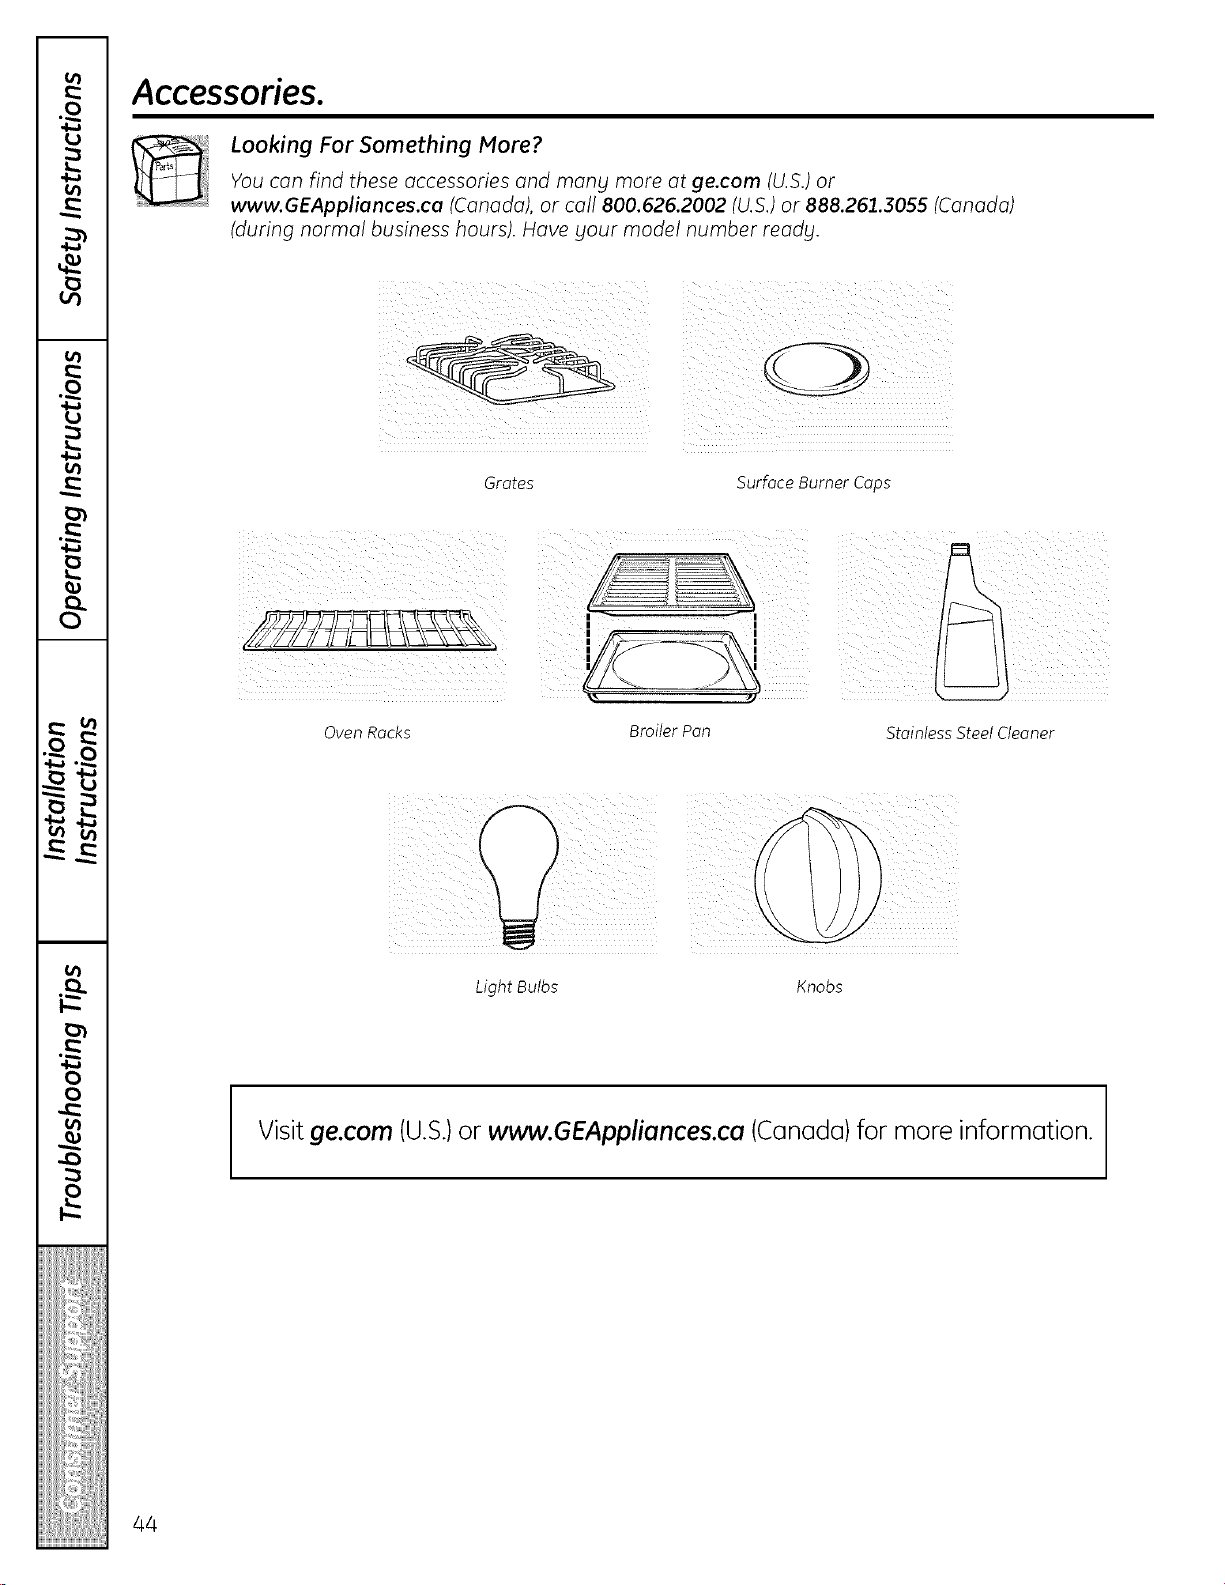
Accessories.
Looking For Something More?You can find these accessories and many more at ge.com (U.S.) or
www.GEAppliances.ca (Canada),or call 800.626.2002 (U.S.)or 888.261.3055 (Canada)
(during normal business hours). Have your model number ready.
: i i_i
Grates
i i
Surface Burner Caps
Oven Racks
Broiler Pan
Stainless Steel Cleaner
Light Bulbs Knobs
I
Visitge.com (U.S.)or www.GEAppliances.ca (Canada)for more information.
44
GE Service Protection Plus'"
GE, a name recognized worldwide for quality and dependability, offers you
Service Protection Plus_'-comprehensive protection on all your appliances-
No Matter What Brand!
Benefits Include:
• Backed bg GE
• All brands covered
• Unlimited service calls
• All parts and labor costs included
• No out-of-pocket expenses
• No hidden deductibles
• One 800 number to call
We'll Cover Ang Appliance.
Angwhere. Angtime.*
You will be completely satisfied with our service protection or you may request your money back
on the remaining value of your contract. No questions asked. It's that simple.
Protect your refrigerator, dishwasher, washer and dryer, range, TV,VCRand much more-any brand!
Plusthere's no extra charge for emergency service and low monthly financing is available. Evenicemaker
coverage and food spoilage protection is offered. You con rest easy, knowing that oil your valuable household
products ore protected against expensive repairs.
Place your confidence in GEand call us in the U.S.toll-free at 800.626.2224
for more information.
*All brands covered, up to 20 years old, in the continental US
QQ_.,_ Cut here
Please place in envelope and mail to:
General Electric Compang
Warranty Registration Department
RO. Box 32150
Louisville, KY 40232-2150
45
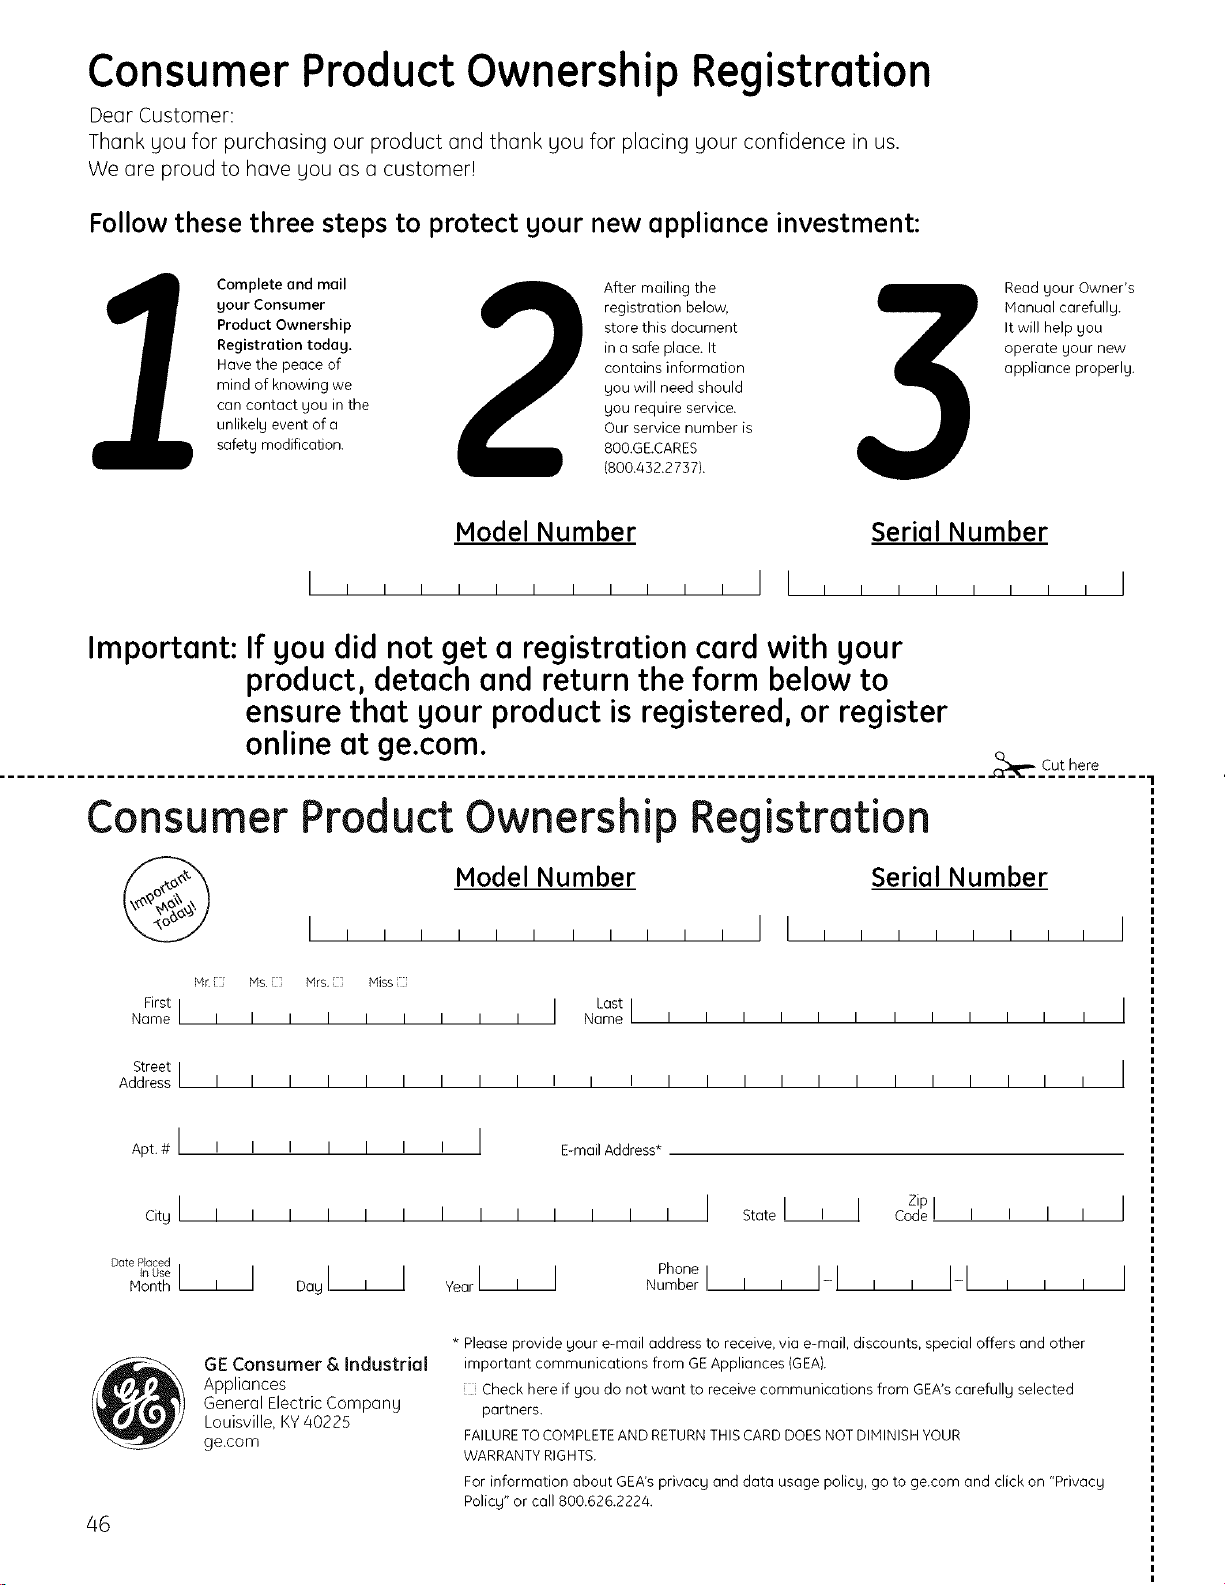
Consumer Product Ownership Registration
Dear Customer:
Thank gou for purchasing our product and thank gou for placing gour confidence in us.
We are proud to have gou as a customer!
Follow these three steps to protect your new appliance investment:
Complete and mail
your Consumer
Product Ownership
Registration today.
Have the peace of
mind of knowing we
can contact gou inthe
unlikely event of a
safety modification.
After mailing the
registration below,
store this document
in a safe place. It
contains information
you will need should
you require service.
Our service number is
800.GECARES
(800.432.2737).
Read gour Owner's
Manual carefullg.
It will help gou
operate your new
appliance properly.
Model Number Serial Number
,,, , , , , , II , , , , , , , , I
Important:
Consum
@
M_
First
Name I I
If you did not get a registration cardwith your
product, detach and return the form below to
ensure that your product is registered, or register
online at ge.com.
er Product Ownership Registration
=%_':__Cut_hete......
Model Number Serial Number
I I I I I I
Ms Mrs, Miss
I Lastl I
I I I I I I I I Name I I I I I I I I I I I I
StreetI
Address I I I I I I I I I I I I I I I I I I I I I I I I
Apt. # I I I I I I I I I E-mail Address*
citg I I I
Date PEaced
In Use III
Month
Zip
, , , ,,, , , , , , I Statel , I Codel
oagl , I Yearl' 1 Phone
Numberl, , FI , ,
i I I
I-I i i I
I
I
@
46
GE Consumer & Industrial
Appliances
General Electric Compan U
Louisville, KY40225
ge.com
* Please provide gour e-mail address to receive, via e-mail, discounts, special offers and other
irnportant communications from GEAppliances (GEA/.
i Check here if you do not want to receive communications from GEA's carefullg selected
partners.
FAILURETOCOMPLETEAND RETURNTHISCARDDOESNOTDIMINISH YOUR
WARRANTYRIGHTS.
For information about GEA'sprivacy and data usage policy, go to ge.com and click on "Privacg
Policg" or call 800.626.2224.
GEGas Range Warranty. ge.com
All warranty service provided by our Factory Service Centers,
or on authorized Customer Core®technician. To schedule
service, on-line, 24 hours o dog, visit us at ge.com, or call
800.GE.CARES (800.432.2737). Please have serial and model
numbers available when coiling for service.
Staple your receipt here.
Proof of the original purchase
date is needed to obtain service
under the warranty.
From the dote of the
original purchase
GE Will Replace:
Any part ofthe range which fails due to a defect in materials or workmanship. During this
limited one-year warranty, GEwill also provide,free of charge, all labor and in-home serviceto
replacethe defective part.
_ Service trips to gour home to teach gou how to use
the product.
::Ji::Improper installation, deliverg or maintenance.
::Ji::Failure of the product if it is abused, misused,
or used for other than the intended purpose or
used commerciallg.
_ Replacement of house fuses or resetting of circuit
breakers.
!i::Damage to the product caused bg accident, fire, floods
or acts of God.
::Ji:_Incidental or consequential damage caused bg possible
defects with this appliance.
::J_:_Damage caused after deliverg.
_ Product not accessible to provide required service.
EXCLUSION OF CMPLIED WARRANTIES--Vour sole and exclusive remedy is product repair as
provided in this Limited Warranty. Any implied warranties, including the implied warranties of
merchantability or fitness for a particular purpose, are limited to one year or the shortest period
allowed by law.
This warranty is extended to the original purchaser and any succeeding owner for products purchased for
home use within the USA. If the product is located in on area where service by o GE Authorized Servicer is
not available, you may be responsible for a trip charge or you may be required to bring the product to on
Authorized GE Service Location for service. In Alaska, the warranty excludes the cost of shipping or service
calls to your home.
Some states do not allow the exclusion or limitation of incidental or consequential damages. This warranty
gives you specific legal rights, and you may also have other rights which vary from state to state. To know
what your legal rights ore, consult your local or state consumer affairs office or your state's Attorney General.
Warrantor: General Electric Company. Louisville, KV40225
47
0,1
th
0
c
to
t_
0
4
q
: !
i'!
(
0
0
0
iiiii,,iii::ii
_;i_!i!il;'!i
_iiiiiiiiii_!i

Consumer Support.
q I GEAppliances Website
Have a question or need assistancewith your appliance?Try the GEAppliances Website 24 hours a day,
' any day of the year! Forgreater convenience and faster service,you can now download Owner's Manuals,
order parts or even schedule serviceon-line.
ge.com
ScheduleService go.cam
Expert GErepair serviceisonly one step away from your dooEGeton-line and schedule your serviceat your
convenience 24 hours any day of the year! Or call800.GE.CARES(800.432.2737)during normal businesshours.
RealLife Design Studio Be.cam
GEsupports the UniversalDesignconcept-products, services and environments that can be usedbg people of
all ages, sizesand capabilities, We recognizethe needto designfor a wide range of physical and mental abilities
and impairments, Fordetails of GE'sUniversalDesignapplications, including kitchen design ideasfor people with
disabilities,checkout our Website today. Forthe hearing impaired, pleasecall 800.TDD.GEAC(800.833,4522).
Extended Warranties
Purchasea GEextended warranty and learn about special discountsthat are available while your warranty
isstill in effect. You can purchase it on-line anytime, or call800.626.2224during normal businesshours.
GEConsumer Home Serviceswill still be there after your warranty expires.
ge.com
Ports and Accessories ge.com
Individualsqualified to servicetheir own appliances can have parts or accessoriessent directly to their homes
(VISA,MasterCardand Discovercards are accepted).Orderon-line today, 24 hours every day or by phone at
800.626,2002during normal businesshours.
Instructions contained in this munuol cover procedures to be performed by uny user. Other servicing
generally should be referred to qualified service personnel Caution must be exercised, since improper
servicing meg cause unsafe operation.
Contact Us go.cam
If you are not satisfiedwith the serviceyou receivefrom GE,contact uson our Websitewith all the details
including your phone number, or write to: General Hanager, Customer Relations,GEAppliances,Appliance Park,
Louisville,KY40225.
Register YourAppliance
Register your new appliance on-line--at your convenience! Timely product registration will allow for
, enhanced communication and prompt service under the terms of your warranty, should the need arise.
Youmay also mailin the pre-printed registration card included in the packing material.
ge.com
Printed inMexico
This book is printed on recycled paper.

