
Loading ...
Loading ...
Loading ...
ENGLISH
4
WARNING: Use of this tool can generate and/
or disperse dust, which may cause serious and
permanent respiratory or other injury. Always use
NIOSH/OSHA approved respiratory protection
appropriate for the dust exposure. Direct particles
away from face andbody.
WARNING: Always wear proper personal hearing
protection that conforms to ANSI S12.6 (S3.19)
during use. Under some conditions and duration
of use, noise from this product may contribute to
hearingloss.
• Air vents often cover moving parts and should be
avoided. Loose clothes, jewelry or long hair can be
caught in movingparts.
The label on your tool may include the following symbols. The
symbols and their definitions are asfollows:
V ......................... volts
Hz .......................hertz
min ..................... minutes
or DC ......direct current
...................... Class I Construction
(grounded)
…/min ..............per minute
BPM .................... beats per minute
IPM ..................... impacts per minute
RPM .................... revolutions per
minute
sfpm ................... surface feet per
minute
SPM .................... strokes per minute
A ......................... amperes
W ........................watts
or AC ...........alternating current
or AC/DC .... alternating or
direct current
...................... Class II
Construction
(double insulated)
n
o
........................no load speed
n .........................rated speed
......................earthing terminal
.....................safety alert symbol
.....................visible radiation
..................... wear respiratory
protection
..................... wear eye
protection
..................... wear hearing
protection
SAVE THESE INSTRUCTIONS FOR
FUTURE USE
Motor
Be sure your power supply agrees with the nameplate
marking. Voltage decrease of more than 10% will cause loss
of power and overheating.
DeWALT
tools are factory tested;
if this tool does not operate, check power supply.
WARNING: This product is Class 1
Construction and must be connected to an
Earthconnection.
WARNING: Do not operate this tool using D.C. power.
It may damage the tool electronics, which could
create an unsafecondition.
COMPONENTS (FIG. A)
WARNING: Never modify the power tool or any part
of it. Damage or personal injury couldresult.
Refer to Figure A at the beginning of this manual for a
complete list ofcomponents.
INTENDED USE
This heavy-duty drill press is designed for professional
drilling applications.
DO NOT use under wet conditions or in presence of
flammable liquids orgases.
This drill press is a professional power tool. DO NOT let
children come into contact with the tool. Supervision is
required when inexperienced operators use thistool.
ASSEMBLY AND ADJUSTMENTS
WARNING: To reduce the risk of serious personal
injury, turn unit off and disconnect it from
power source before making any adjustments or
removing/installing attachments or accessories.
An accidental start-up can causeinjury.
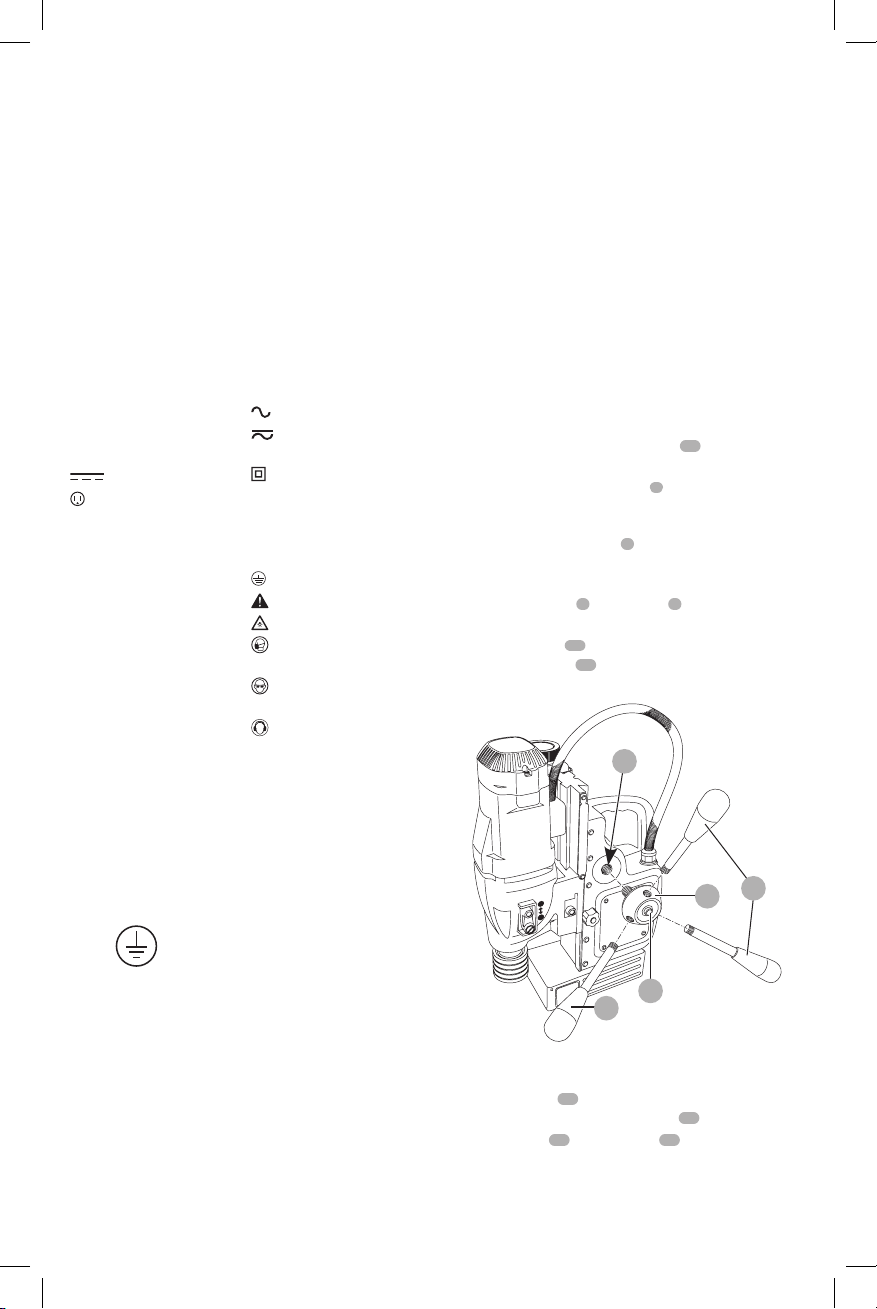
Installing the Machine (Fig. A, E)
1. Assemble the feedhandle.
2. Fit the lubrication system asnecessary.
3. Place the machine on a clean, level and solid
surface. Remove any particles that will obstruct full
contact between the magnetic base
15
and the
mountingsurface.
4. Fit and tighten the safety chain
9
.
Assembling the Feed Handle (Fig. A, B)
The quick-release feed handle
6
can be mounted in
one simple operation both to the left and the right of
themachine.
1. Screw the handles
6
into the hub
7
. Ensure handles
aresecure.
2. Keep the button
17
depressed while inserting the hub
shaft into the hole
18
.
3. Release thebutton.
2
1
Fig. B
6
18
7
17
6
Assemble the Drill Guard (Fig. C)
1. Hold the guard
16
in front of the tool holder, aligning
the slots in the guard with the holes
20
in the machine.
2. Fit the screws
19
into the holes
20
located in the front
of the frame.
WARNING: Always use the drill guard.
Loading ...
Loading ...
Loading ...