Loading ...
Loading ...
Loading ...
60 - INSTALLATION 91477A859/A
data, serial number and brand name is visibly
positioned on the appliance.
Do not remove this plate for any reason.
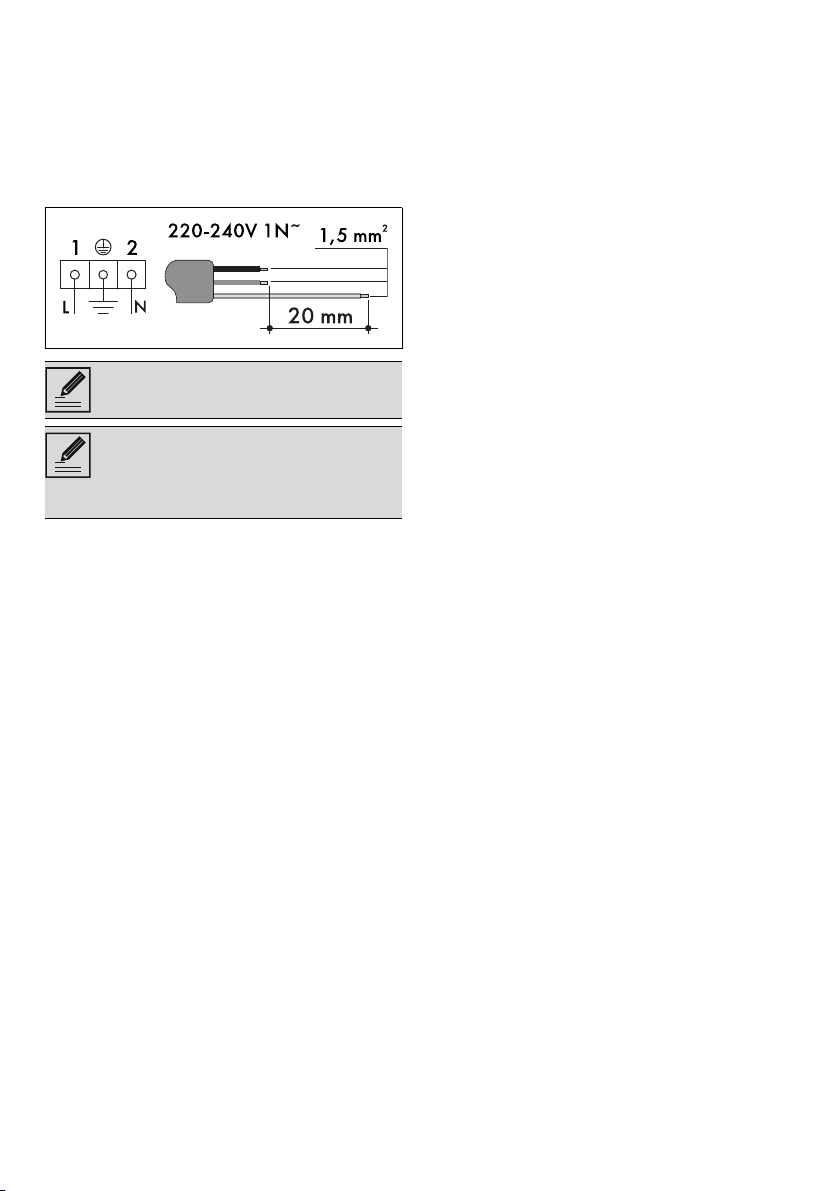
The appliance must be connected to ground
using a wire that is at least 20 mm longer than
the other wires.
The appliance can work in the following modes:
• 220-240 V 1N~
Fixed connection
Fit the power line with an all-pole circuit breaker
with a contact separation distance sufficient to
provide complete disconnection in category III
overvoltage conditions, pursuant to installation
regulations.
For the Australian/New Zealand market:
The circuit breaker incorporated in the fixed
connection must comply with AS/NZS 3000.
Instructions for the installer
• If you use a plug to connect to the power
supply, the plug must be accessible after
installation.
• Do not bend or trap the power cable.
• The appliance must be installed according
to the installation diagrams.
• Do not try to unscrew or force the threaded
elbow of the fitting. You may damage this
part of the appliance, which may void the
manufacturer’s warranty.
• Use soap and water to check for gas leaks
on all connections. DO NOT use naked
flames to search for leaks.
• Turn on all the burners separately and at
then all together to make sure that the gas
valve, burner and ignition are working
properly.
• Turn the burner knobs to the minimum
position and check that the flame is stable
for each individual burner and all the
burners together.
• If the appliance does not work correctly
after having carried out all the checks,
contact your local Authorised Service
Centre.
• Once the appliance has been installed,
please explain to the user how to use it
correctly.
The values indicated refer to the cross-
section of the internal conductor.
The aforementioned power cables are
sized taking into account the
coincidence factor (in compliance with
standard EN 60335-2-6).