Loading ...
Loading ...
Loading ...
AUTOMATIC ICEMAKER & D SPENSER
Lconunueo)
_'P_'r+::, _le'_o Vnn_r "d-P,a+mm_'or' +mr+d "_imn_nq_r'
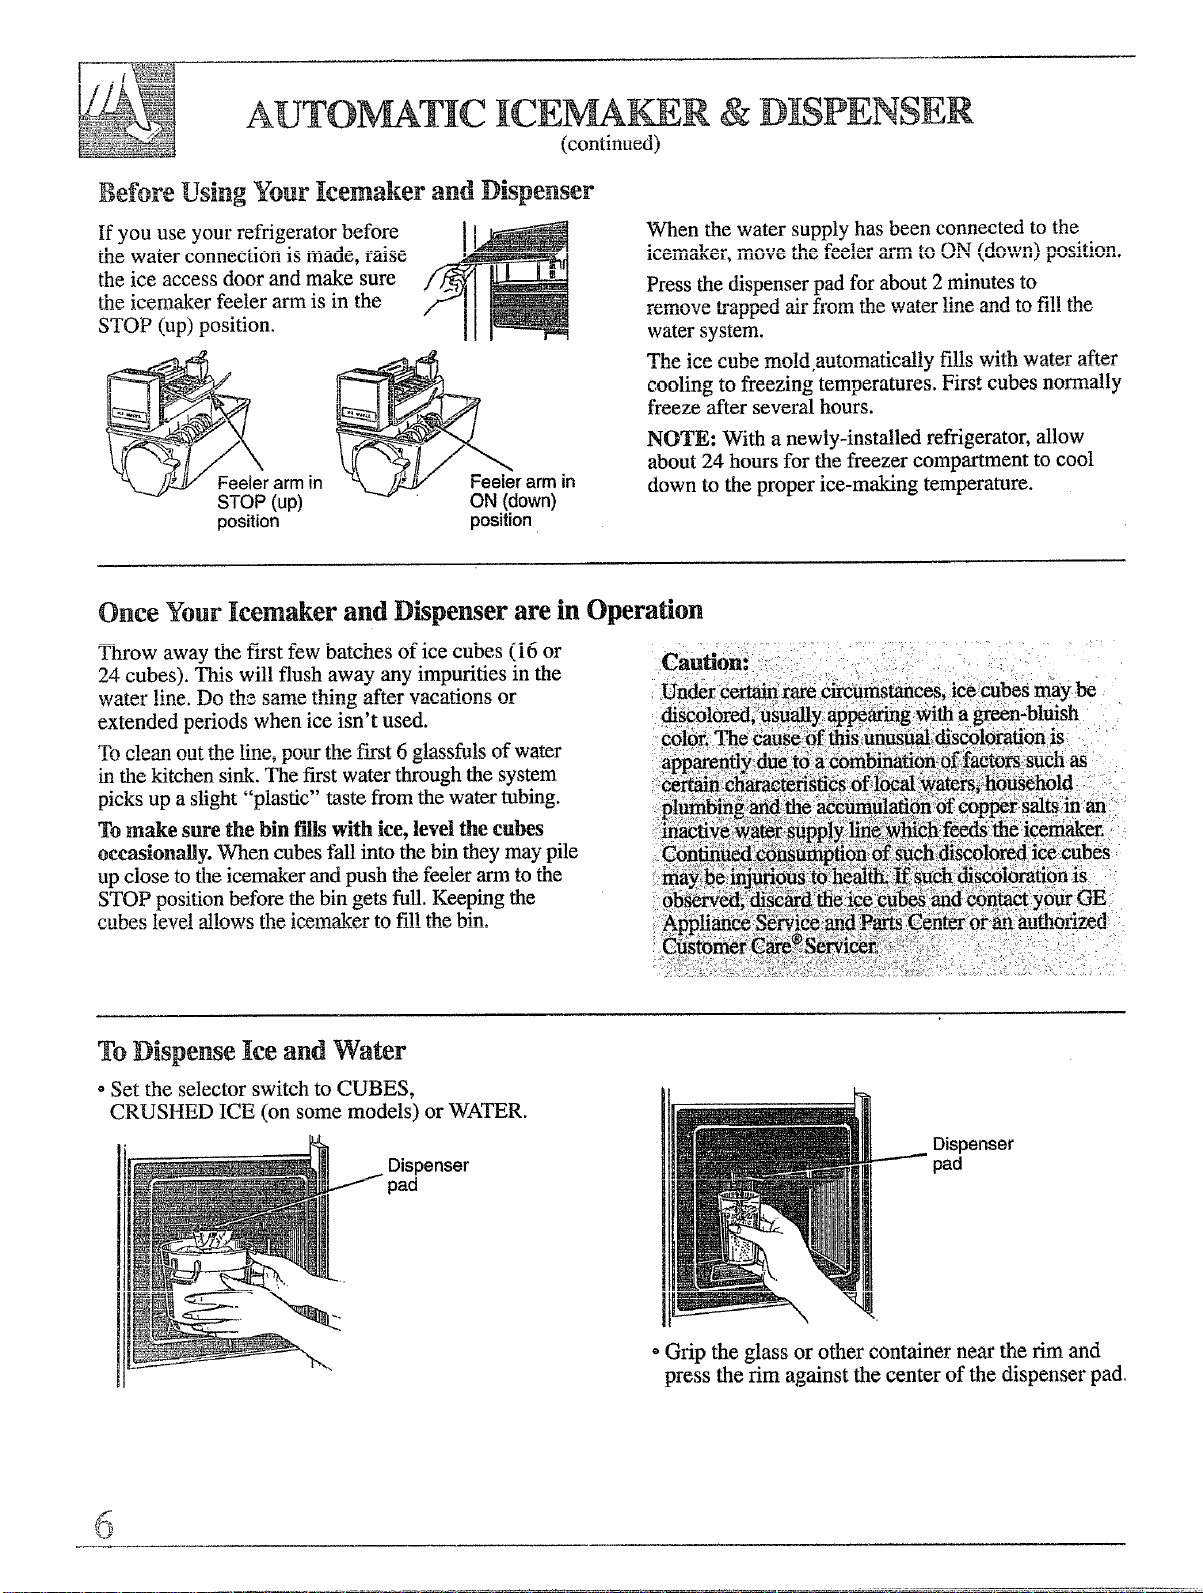
If you use your refrigerator before
the water connecuon is maue, raise
the ice access door and make sure
the icemaker feeler arm is in the
STOP (up) position.
_ I-eeterarm in
STOP (up)
position
" Ill
t-eeler arm in
ON (down)
position
When the water supply has been connected to the
Press the dispenser pad for about 2 minutes to
....... +,-_,,..,._,A ++_v+Pv.+',,mth,_ txmt,_r lin_ and tn fill th_
water system.
Th_ it,_ r,nha mold m_tnrnati_allv fill.qwith water after
cooling to freezing temperatures. First cubes normally
freeze after several hours.
NOTE: With a newly-installed refrigerator, allow
about 24 hours for the freezer compartment to cool
down to the proper ice-making temperature.
Once Your Icemaker and Dispenser are in Operation
Throw away the first few batches of ice cubes (i6 or
24 cubes). This will flush away any impurities in the
_xtnt_r lin¢, fin tb_ mamo thiner after vaeation_ or
extended periods when ice isn't used.
To c!ean out the !i_ne+pour the first 6 glassfuls of water
in the kitchen sink. The first water through the system
picks up a slight "plastic" taste from the water tubing.
To make sure the bin flus with ice, level the cubes
occasionally. When cubes fall into the bin they may pile
up close to the icemaker and push the feeler arm to the
STOP position before the bin gets full. Keeping the
cubes leve! al!ows the icemo_ker to il!! the bin.
To D_spense Ice and Water
o Set the selector switch to CUBES,
CRUSHED ICE (on some models) or WATER.
j Dispenser
pad
Dispenser
pad
<,Grip the glass or other container near the rim and
press the rim against the center of the dispenser pad,
f
Loading ...
Loading ...
Loading ...