PowerCrisp
Microwave
QUICK START GUIDE
• Features
• Before First Use
• Installation
• Setting the Clock
• Lock Mode
• Operating Instructions
• Cleaning and Maintenance
RJ55-MF
©CHEFMAN 2022
®
®
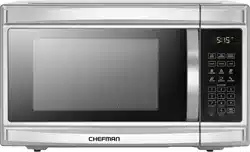
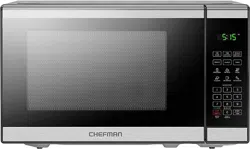
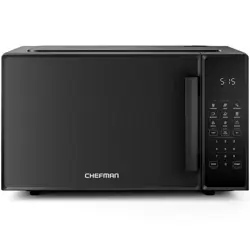
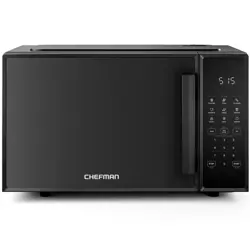
FEATURES FEATURES
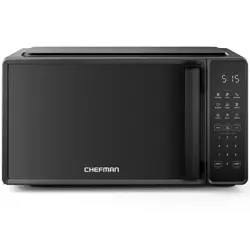
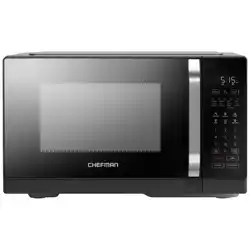
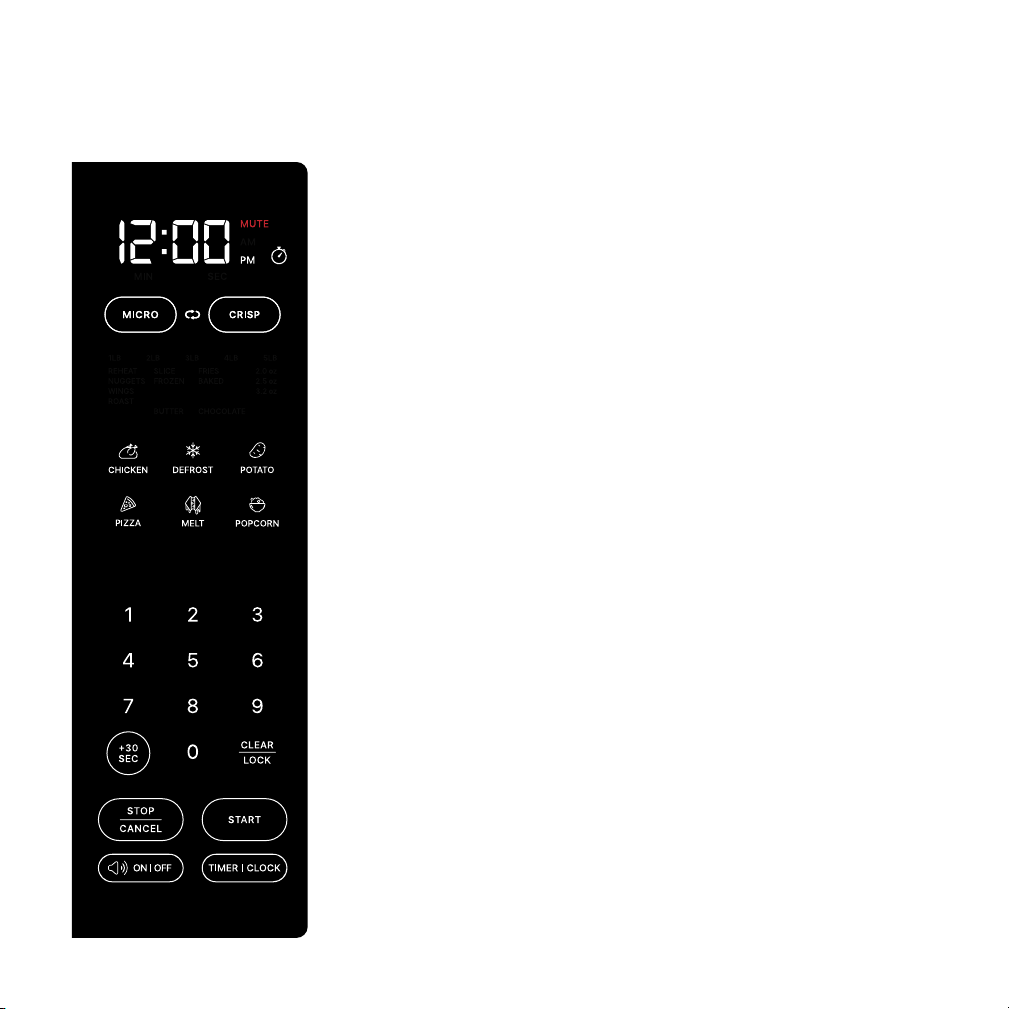
STANDBY MODE DISPLAY (shown left)
Clock/timer Counts down to the end of an active cooking
cycle. Displays time of day in Standby Mode.
Mute light Illuminates in red when sound is muted.
MICRO and CRISP Press to select mode.
Preset icons Use to select a preset cooking function for six
popular items (submenu choices illuminate in blue above
these icons when one is selected).
Number pad Use to manually enter cooking time or set clock
or kitchen timer.
+30 SEC Use to add 30 seconds while cooking or to start the
microwave with one touch in whatever mode was last used.
CLEAR|LOCK Press to "lock" door to childproof oven.
STOP|CANCEL Use to stop active cooking or return to
Standby Mode.
START Starts cooking once a preset or manual time has
been entered.
Sound ON|OFF Use to turn the oven’s sound on and off.
Timer|Clock button Use to set the clock and kitchen timer.
SLEEP MODE DISPLAY (not shown) When the microwave has
not been in use for 20 minutes, it will go into Sleep Mode. The
only thing that will display is the time of day (if the clock is set)
and the Start button. Press the Start button or open the oven
door to wake it up and return it to Standby Mode.
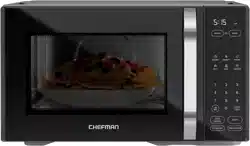
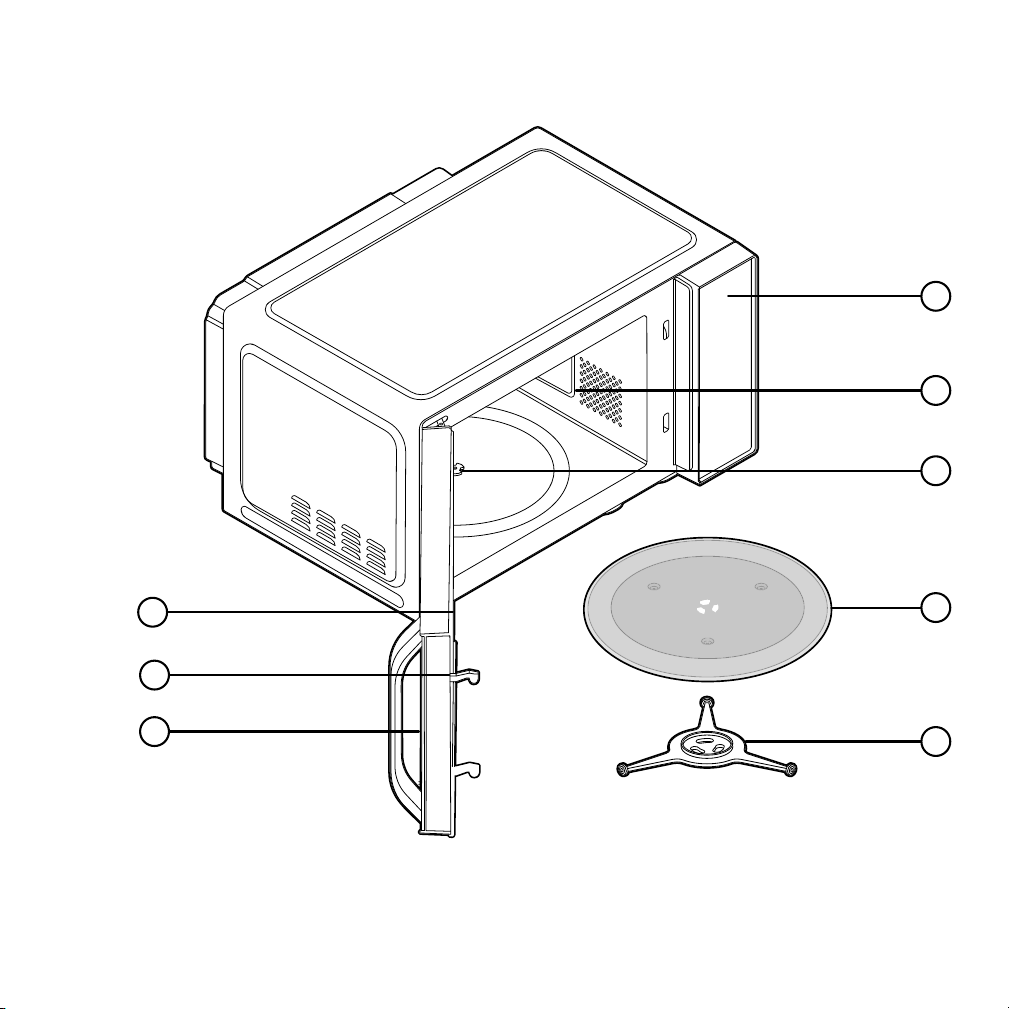
1. Door assembly
2. Safety interlock system
3. Window
4. Display
5. Interior light
6. Shaft
7. Glass turntable
8. Turntable support
1
2
3
6
7
8
5
4
FEATURES FEATURES
STANDBY MODE DISPLAY (shown left)
Clock/timer Counts down to the end of an active cooking
cycle. Displays time of day in Standby Mode.
Mute light Illuminates in red when sound is muted.
MICRO and CRISP Press to select mode.
Preset icons Use to select a preset cooking function for six
popular items (submenu choices illuminate in blue above
these icons when one is selected).
Number pad Use to manually enter cooking time or set clock
or kitchen timer.
+30 SEC Use to add 30 seconds while cooking or to start the
microwave with one touch in whatever mode was last used.
CLEAR|LOCK Press to "lock" door to childproof oven.
STOP|CANCEL Use to stop active cooking or return to
Standby Mode.
START Starts cooking once a preset or manual time has
been entered.
Sound ON|OFF Use to turn the oven’s sound on and off.
Timer|Clock button Use to set the clock and kitchen timer.
SLEEP MODE DISPLAY (not shown) When the microwave has
not been in use for 20 minutes, it will go into Sleep Mode. The
only thing that will display is the time of day (if the clock is set)
and the Start button. Press the Start button or open the oven
door to wake it up and return it to Standby Mode.
1. Door assembly
2. Safety interlock system
3. Window
4. Display
5. Interior light
6. Shaft
7. Glass turntable
8. Turntable support
1
2
3
6
7
8
5
4
TURNTABLE INSTALLATION
1. Fit the turntable support to the shaft on the bottom of the oven interior,
aligning the half-moon notch on the support with the peg on the shaft.
2. Place the glass turntable smooth side up on the support. Never place the
turntable upside down.
BEFORE FIRST USE
1. Remove all packaging materials, and read and remove all removable
stickers. (Leave the rating label on the unit.) Be sure that all parts and
accessories are accounted for before throwing away any packaging.
2. Gently wipe the exterior and interior of the oven with a clean, damp cloth
and dry thoroughly. NOTE: Do not use abrasive cleansers, which may
damage the nish. Never immerse the unit in water or other liquids.
3. Hand wash the glass turntable and dry thoroughly.
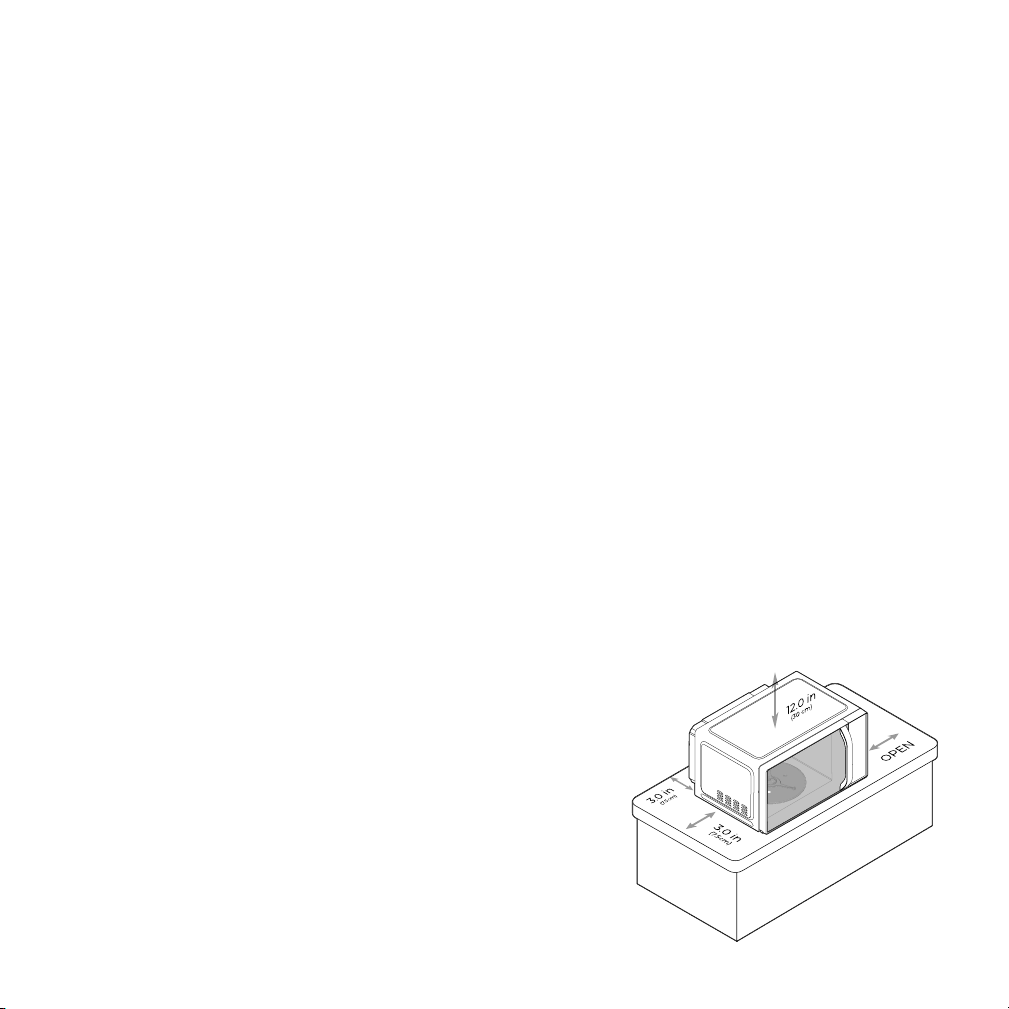
COUNTERTOP INSTALLATION
1. Place the microwave on a rm, level surface with the following clearance
for intake and outtake openings:
• right side of microwave must be open
• a minimum clearance of 3 inches on the sides and behind
• a minimum clearance of 12 inches between the top and any upper cabinets
• the minimum installation height is 3 feet
NOTE: Blocking openings can damage the oven.
2. Place the oven far away from radios and TV.
Operation of the microwave oven may cause
interference with your radio or TV.
3. Plug your oven into a standard household
outlet. Be sure the voltage and the frequency
match that on the rating label. WARNING: Do
not install the oven over a range cooktop or
other heat-producing appliance. This could
damage the oven and void the warranty.
SETTING THE CLOCK
1. Press and hold the Timer|Clock button for 3 seconds.
2. Use the keypad to enter the time of day.
3. To toggle between AM and PM, press the Timer|Clock button at any point
while setting.
LOCK MODE
To put the unit in LOCK mode, press and hold the Clear|Lock button for
3 seconds while in Standby Mode. This will turn all LEDs off, except for the
clock and the Clear|Lock button. To unlock, press and hold the Clear|Lock
button for 3 seconds, which will return the unit to Standby mode.

TURNTABLE INSTALLATION
1. Fit the turntable support to the shaft on the bottom of the oven interior,
aligning the half-moon notch on the support with the peg on the shaft.
2. Place the glass turntable smooth side up on the support. Never place the
turntable upside down.
BEFORE FIRST USE
1. Remove all packaging materials, and read and remove all removable
stickers. (Leave the rating label on the unit.) Be sure that all parts and
accessories are accounted for before throwing away any packaging.
2. Gently wipe the exterior and interior of the oven with a clean, damp cloth
and dry thoroughly. NOTE: Do not use abrasive cleansers, which may
damage the nish. Never immerse the unit in water or other liquids.
3. Hand wash the glass turntable and dry thoroughly.
COUNTERTOP INSTALLATION
1. Place the microwave on a rm, level surface with the following clearance
for intake and outtake openings:
• right side of microwave must be open
• a minimum clearance of 3 inches on the sides and behind
• a minimum clearance of 12 inches between the top and any upper cabinets
• the minimum installation height is 3 feet
NOTE: Blocking openings can damage the oven.
2. Place the oven far away from radios and TV.
Operation of the microwave oven may cause
interference with your radio or TV.
3. Plug your oven into a standard household
outlet. Be sure the voltage and the frequency
match that on the rating label. WARNING: Do
not install the oven over a range cooktop or
other heat-producing appliance. This could
damage the oven and void the warranty.
SETTING THE CLOCK
1. Press and hold the Timer|Clock button for 3 seconds.
2. Use the keypad to enter the time of day.
3. To toggle between AM and PM, press the Timer|Clock button at any point
while setting.
LOCK MODE
To put the unit in LOCK mode, press and hold the Clear|Lock button for
3 seconds while in Standby Mode. This will turn all LEDs off, except for the
clock and the Clear|Lock button. To unlock, press and hold the Clear|Lock
button for 3 seconds, which will return the unit to Standby mode.
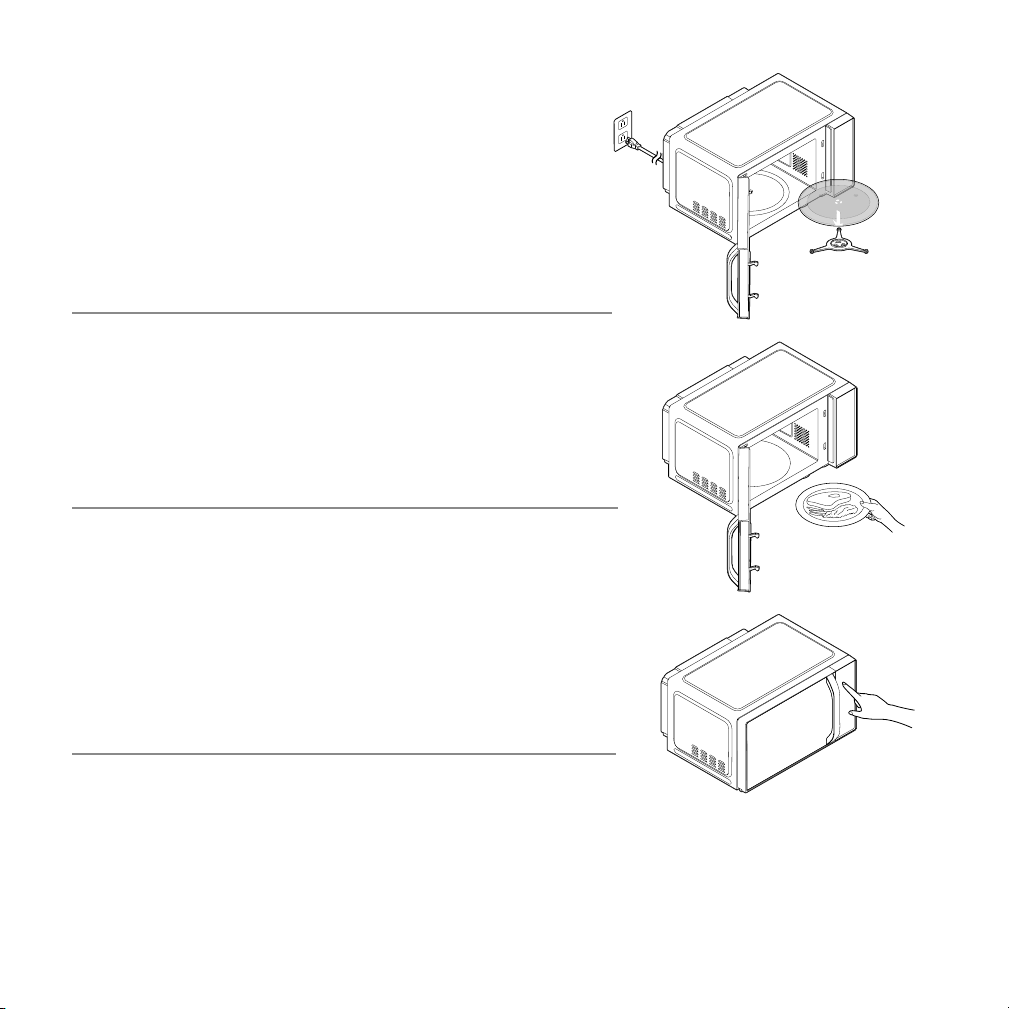
OPERATING INSTRUCTIONS
1. Periodically wipe down the interior of the microwave with a damp cloth.
2. If food splatters on the interior or on the glass turntable, clean both
with mild soap and a damp cloth. The turntable is also top-rack
dishwasher-safe.
3. Do not immerse the unit in water. The unit and turntable support are not
dishwasher-safe.
CLEANING AND MAINTENANCE
STEP 5 STEP 6
Press Start. Cooking will
begin, and the timer will
start counting down.
STEP 4
Enter your cooking time on the keypad (if using a preset, the unit will
automatically set the time). To use Combination mode, press Micro and
enter your microwaving time, then Crisp followed by your crisping time.
Opening the door pauses cooking while
the unit is operating. Close the door
and press Start to resume.
STEP 7 STEP 8
After the timer nishes
counting down, the unit will
beep and display End. If you
wish to add more time in the
same mode, simply press the
+30 button.
The +30 button can also be used
for simple one-touch 30-second
microwaving when the unit is in
standby mode.
STEP 1
Ensure the microwave is plugged in and the
turntable is properly installed.
STEP 3
Press the Micro or Crisp buttons to choose your
mode. Alternatively, press one of the preset icons
and continue to press the icon to toggle through
the submenus and make your selection.
STEP 2
Open the door, add your food, and close the door.
ALWAYS place food on the glass turntable.

PowerCrisp
Microwave
QUICK START GUIDE
• Features
• Before First Use
• Installation
• Setting the Clock
• Lock Mode
• Operating Instructions
• Cleaning and Maintenance
RJ55-MF
©CHEFMAN 2022
®
®