智能电烙铁使用说明书
HS-01
Intelligent Electric Soldering Iron user Manual

CATALOG
User Notice
10
1.Products Overview
10
2.Instrument Description
11
3.Parameter
11
4.Power selection
12
5.Product Usage
13
6.Operating Instructions
15
7.Firmware upgrade
17
8.Maintenance
18
9.Safety Instructions
18
10.Warranty terms
19
11.Contact US
19

●Please read this user manual and operating instructions carefully, and be sure to abide by the stipulations in the text.
●Please keep this manual properly.
●Discarded instruments cannot be disposed of together with household waste,please dispose according to relevant
national or local laws and regulations.
●When there are any quality problems or questions about the use of the instrument,you can contact the online
customer service of "Fnirsi-FNIRSI" or the manufacturer,and we will solve them as soon as possible.
●Thank you for purchasing this product. In order to make it more convenient for you to use this product, please operate
follow this instructions.
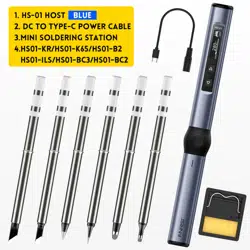
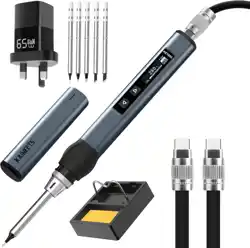
HS-01 is a portable screen display intelligent electric soldering iron launched by our company.The electric soldering iron
has the following characteristics:
User Notice
1.Products Overview
● Precise temperature control
● Small and convenient,
easy to carry.
● Fast temperature recovery
and rapid temperature rise
● 9-20V operating voltage
● Built-in OLED screen display ● Ergonomic design,
comfortable grip.
● Type-c interface power supply
10

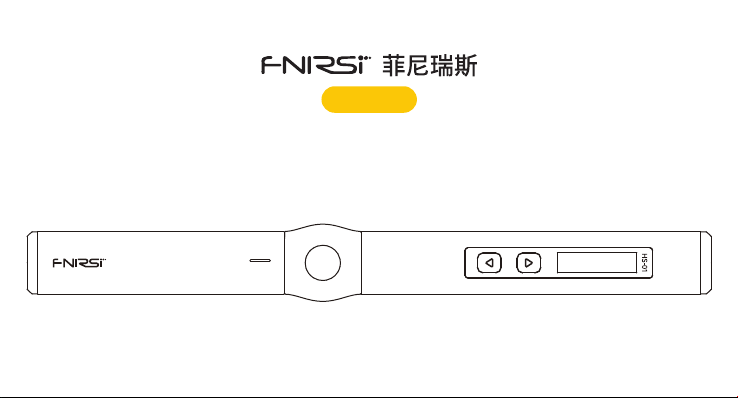
2.Instrument Description
soldering
iron tip
locking
nut
silica
gel
Pen cover pen body
Left
Right
OLED
screen
Type-c interface
power supply
3.Parameter
Power
Power
supply
Temperature
range
Fast charging
protocol
USB Typr-c port 80-420℃(180-780℉) PD trigger
65W Screen 0.87 inch OLED screen operating voltage DC9-20V
11

4.Power selection
Using the power adapter of the PD fast charging protocol, the intelligent electric soldering iron can be set to obtain any
operating voltage of 9V\12V\15\20V from the adapter.(The defualt seting is 20V).Under different operating voltages, the
working current, power and tinning time are as follows:
Notice:
●The default operating voltage of the Intelligent soldering iron is 20V. If the maximum output voltage of your adapter is
less than 20V, the maximum output voltage will NOT be obtained. If your adapter outputs up to 12v, get 12V.
●When the power adapter without PD fast charging protocol is used, the operating voltage of the intelligent soldering
iron is the input voltage.It is noted that when the adapter is connected and the heating will restart after entering the
home page.This indicates that the output power of the adapter is not sufficient for adapter, please replace another
adapter.
Operating voltage
Operating current
Power
Tin melting time
20V
≥3.25A
65W
8s
15V
≥2.5A
37.5w
12s
12V
≥2A
24w
17s
9V
1.5A
13.5w
30s
※If the voltage is lower than 9V, the screen will display low voltage.
12

● If output voltage of your adapter is 20V, but the ouput current is less than 3.25A(That is to say, the output power is less
than the power required by the soldering iron),after entering the main interface and heating,the adapter may be powered
off and restarted, which will cause the screen to restart!(Other operating voltages are the same)
● If it restarts after heating, it means that the output power of the current voltage of your adapter is not enough to work
normally,Please select a lower working voltage according to the output power of the adapter.If your adapter output is
12V/2.5A, 15V/2A or 20/1.5A, the total output power is 30W,set the operating voltage to 12V.
5.Product Usage
①Remove the nut ②Insert the soldering iron tip ③Lock nut
※If it is found that the soldering iron is stuck when inserting, you can try to rotate it and insert it again.
Installation Instructions
13

The working process of HS-01 intelligent soldering iron is shown in the figure above.After power-on, the logo is displayed.
Short press the corresponding flashing physical button once to heat up.When the child lock mode is turned on, short
press the corresponding physical button three times to heat. Entering the main interface, you can choose between 3
main working states of the soldering iron:
●Working state:The soldering iron is in a heated or ready-to-use state, please do not touch the high temperature parts.
●Sleep state: The soldering iron is already in the state of heating and use, and it will enter into sleep state if it is not used
for more than the sleep time, and it will be released after use.
●Shutdown state: It will shut down when the power is disconnected.
Workflow Description
Boot Logo Turn on heating Home page Hibernate Shutdown
Shutdown
280
℃
10%
280
SET
20V
200
℃
The home page is shown on the right, the lower right corner shows
the target temperature set by the user,and the middle is the
real-time temperature of the soldering iron. The bottom shows the
heating power, and the upper right shows the operating voltage.
Home page description
Soldering iron tip
temperature
operating voltage
Heating power bar
set temperature
280
℃
10%
280
SET
20V
14

6.Operating Instructions
●Power on:Power on when connected to the power supply, the screen displays the boot icon, and then
displays a prompt to insert the soldering iron tip , The interface will be displayed after the soldering iron
tip is inserted .
●Heating: The icon button will flash, then short press the corresponding physical button to enter the
heating page , and the soldering iron will heat up.
280
℃
10%
280
SET
20V
●Temperature setting: In the heating page state, press the left and right keys to enter the temperature
setting page to set the temperature, short press the right button to add a step value, short press the left
button to decrease a step value. Long press to increase or decrease quickly, the step is 10°C or 20°F.
℃
280
10%
280
SET
80 420
280
℃
●Setting mode:In the non-temperature setting page, press and hold the left and right keys at the same time to enter
the setting mode .
Vol Select
Calibrate
Birghtness
Vol Select
Calibrate
Birghtness
●Screen brightness:In the setting mode, short press the left and right keys to switch to brightness ,
long press the right key to enter , and the left and right keys adjust, and long press any key to exit.
●One-key standby: Long press the right button on the heating page to turn off the heating and return to the
standby page .
280
℃
10%
280
SET
20V
15

●Sleep temperature:In the setting mode, short press the left and right keys to switch to the sleep temperature ,
long press the right key to enter, and adjust the left and right keys. After the adjustment is completed, long
press any key to exit. When the working temperature is lower than the sleep temperature, the working temperature is
maintained in the sleep state, and when the working temperature is higher than the sleep temperature, the temperature will
drop to the sleep temperature in the sleep state.
80 200
℃
150
Child Lock
Sleep Time
Sleep Temp
●Temperature unit: In the setting mode, short press the left and right keys to switch to the temperature unit ,
long press the right key to enter, and the left and right keys switch, and long press any key to exit.
F
℃
Calibrate
Sleep Time
Temp Unit
●Child lock mode: In the setting mode, short press the left and right keys to switch to the child lock mode ,
long press the right key to enter , switch left and right , and long press any key to exit after the switch is
completed. After the child lock mode is turned on, when the power is turned on again, the button with a lock icon will be
displayed .At this time, it is necessary to press the left button 3 times continuously to heat up.
Close
Open
Language
Sleep Temp
Child Lock
●Sleep time: In the setting mode, short press the left and right keys to switch to the sleep time , and
long press the right key to enter ,Left and right keys to adjust,after the adjustment is completed, long
press any key to exit. The default sleep time is 20 minutes, and the setting range is 1-20 minutes. When it is set to the
maximum, short press to turn off the sleep.
Sleep Temp
Temp Unit
Sleep Time
1 20
OFF
● Temperature calibration: When entering the setting mode, short press the left and right keys to switch to the temperature
calibration , long press the right keys to enter , the left and right keys to adjust, long press
any key to exit. Under the home page, set the target temperature as 350 ℃. After the temperature is stable, use the soldering
iron thermometer to measure the actual temperature, record the difference between the target temperature and the actual
temperature (positive or negative), and fill the difference into this item in the menu.
-50 50
℃
30
Birghtness
Temp Unit
Calibrate
16

●The product will automatically shut down after 30 minutes of inactivity in the dormant state
7.Firmware upgrade
●The device is powered off, press the left button, use the USB Type-c data cable to connect the computer to power on the
device, and enter the Bootloader interface to upgrade the firmware.
●Choose the corresponding serial port number, open the selected file when ready is displayed on the left, and click to burn.
●Handheld mode:In the setting mode, short press the left and right buttons to switch to the handheld mode ,
long press the right button to enter ,switch left and right, long press any key to exit after switching is
complete.The product is right-handed by default and can be set according to your own usage habits. The logic of switching
to the left hand is reversed.
Hand Held
Vol Select
Language
Left
Right
●Voltage gear: In the setting mode, short press the left and right buttons to switch to the voltage gear type
, long press the right button to enter ,after entering, switch left and right to the four
voltage gears of 9V/12V/15V/20V, after the switch is completed, the long press any button to exit, the default is 20V, and
the customer can set it according to the power parameters of the charger to avoid the phenomenon that the charger starts
over-current protection due to insufficient power, and the device is forced to shut down with a black screen. When this
phenomenon occurs, just wait for the charger to recover, and enter the setting page to re-select the appropriate gear when
there is no heating or no soldering iron tip.
9
12
15 20
Vol Select
Birghtness
Hand Held
●Language selection:In the setting mode, short press the left and right keys to switch to language selection ,
long press the right key to enter, switch left and right, and long press any key to exit when the switch is complete.
English
中文
Language
Hand Held
Child Lock
17

9.Safety Instructions
●The temperature of the soldering iron tip can reach 80-420°C, please do not touch the soldering iron tip.
●Please keep out of reach of children.
●Please do not get this product wet, or use it in a humid environment.
●When not in use for a long time, please disconnect the power.
●When working normally, there will be a certain temperature at the handle, which is a normal phenomenon, please use it with
confidence!
●When a new soldering iron tip is used for the first time, it needs to be heated to 250°C and tinned to prevent dry burning oxidation.
●The new soldering iron has the problem of the temperature jumping for the first time, and it will be stable after several times of use.
●After using the soldering iron, please apply an appropriate amount of solder to the tip of the soldering iron to prevent oxidation.
●The normal working temperature of the soldering iron tip is about 300-380°C, please don't use it for a long time if the temperature
is too high to affect its life.
●Avoid hitting the soldering iron head violently during welding.
●Do not use wet sponge with clear water, semi-dry state is best.
●Do not use scaling powder with high chlorine or acid to avoid corroding the surface.
●If the surface of the soldering iron tip is oxidized and does not stick to tin, use gauze or other tools to carefully wipe the surface layer,
then heat it up to 250 ℃, immediately apply tin to stick the surface to prevent re-oxidation.
8.Maintenance
18