
Quick Start
Manual
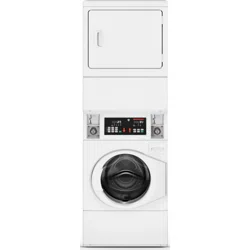
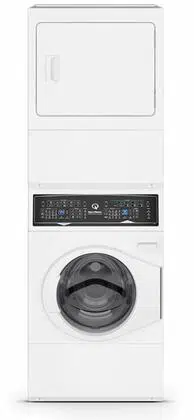
Welcome to the Speed Queen
®
family. Thank you for your support of our truly commercial quality products. Our washers and dryers are
expertly engineered to deliver commercial performance, tested to ensure ultimate durability and built with American Pride. For more than 110
years, Speed Queen consumer laundry products have been manufactured in Ripon, Wisconsin, a place where pride of workmanship is not just
alive, but thriving and embodied by each individual who designs, tests, assembles or in some way touches a Speed Queen product. A special
thing happens when that pride is combined with the highest quality commercial materials and components…it leads to the ultimate reliability…
reliability measured in decades, not years. That’s legendary Speed Queen Quality.
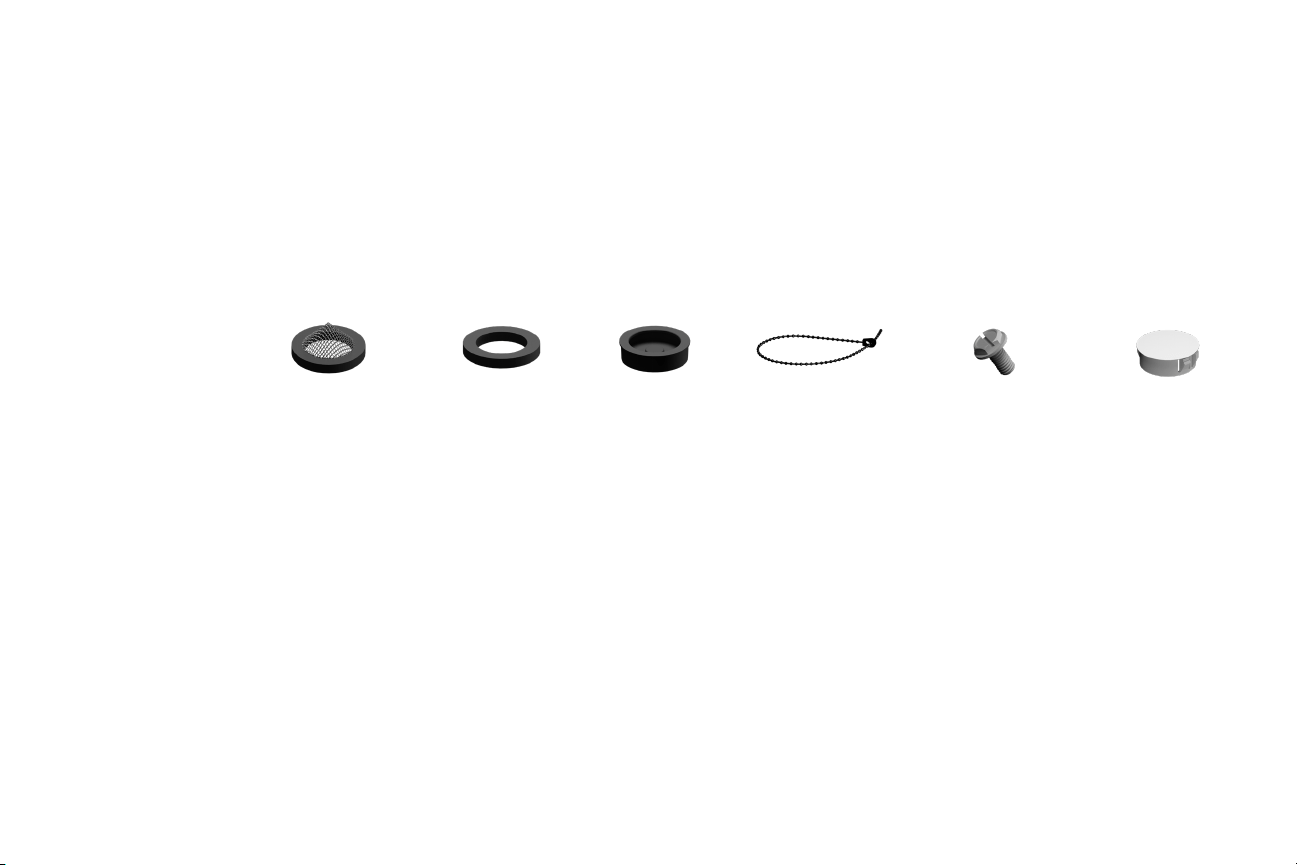
Two (2) lter
screen washers
Two (2) plain
rubber washers
Four (4) rubber
feet
Beaded strap
Installation
Parts included:
Three (3) screws
(electric models)
Two (2) plugs
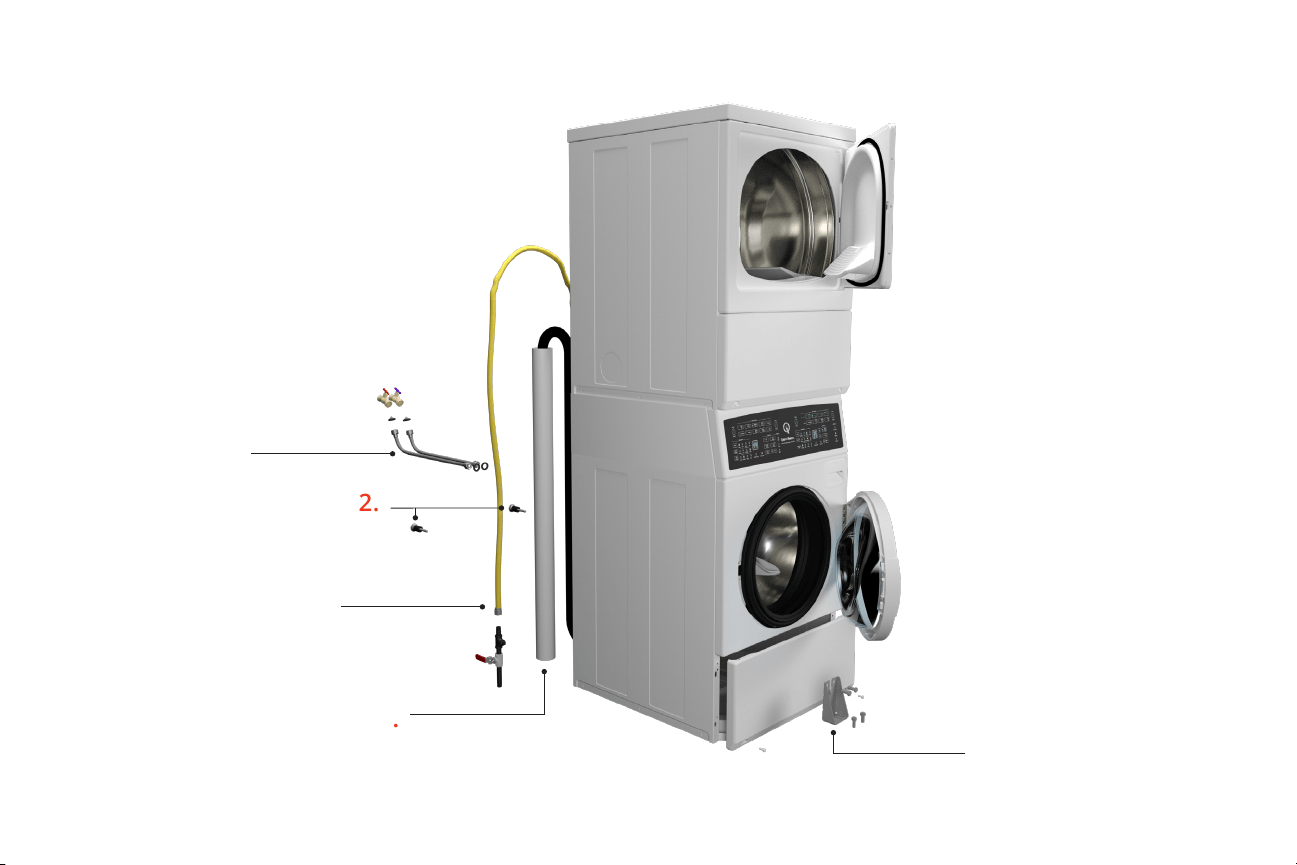
2.
Remove shipping materials.
• Remove lower panel (2 screws)
• Remove four (4) bolts securing shipping brace.
Remove brace and blue label
• Remove two (2) bolts from rear of washer
• Insert two (2) plugs into rear bolt holes
• Reinstall panel
3.
Connect ll hoses – water pressure = 20-120 psi
[138-827 kPa].
• Two required, sold separately
• Flush water supply lines
• Use two lter screen washers with screen
facing faucet
• Use two rubber washers in end of hose
connecting to the machine
4.
Connect drain hose to drain receptacle – 36 in. [91 cm]
recommended height.
• Use beaded strap to secure drain hose to drain receptacle
1.
Move unit to area within 4 ft (1.2 m) of nal installation.
5.
Gas models – connect gas supply pipe.
Gas service to a gas dryer must conform
with the local codes and ordinances.
Refer to installation instructions, which can be found at speedqueendoc.net
• Tighten all connections securely but do not
overtighten to avoid breaking or bending the
gas valve bracket.
Turn on gas and check all pipe connections
(internal and external) for gas leaks by applying a
non-corrosive leak detection uid to the ttings. If
bubbles are present then a leak is likely.
Retighten connections and recheck for leaks.
Welcome
4.
5.
2.
3.
2.
(gas connection)
(water connection)
(drain connection)

6.
Electric models – connect electrical cord with
three-wire or four-wire plug.
Refer to installation instructions, which can be found at speedqueendoc.net
7.
Connect exhaust system.
• Dryer must be exhausted to the outdoors
• Use 4 in (102 mm) rigid duct
• Maximum straight duct length = 65 ft (19.8 m).
Each elbow deduct 10 ft (3 m)
• Sucient make-up air must be supplied. The
free area of any opening for outside air must
be at least 40 in
2
(25806 mm
2
) per unit
8.
Position and level the unit.
• Recommended rear clearance minimum is 2 in
(51 mm) for utility connections and 6 in (152 mm)
when venting through rear of unit
• Place four (4) rubber feet on leveling legs
• Unit must not rock
Installation (continued)
9.
Wipe out inside of washtub and dryer drum.
10.
Connect washer and dryer to electrical power – on individual
branch circuit. Refer to serial plate for electrical ratings.
11.
Run washer through one complete cycle to make sure it is
operating properly and properly leveled.
12.
Check for leaks.
13.
Start dryer and check that dryer is heating.
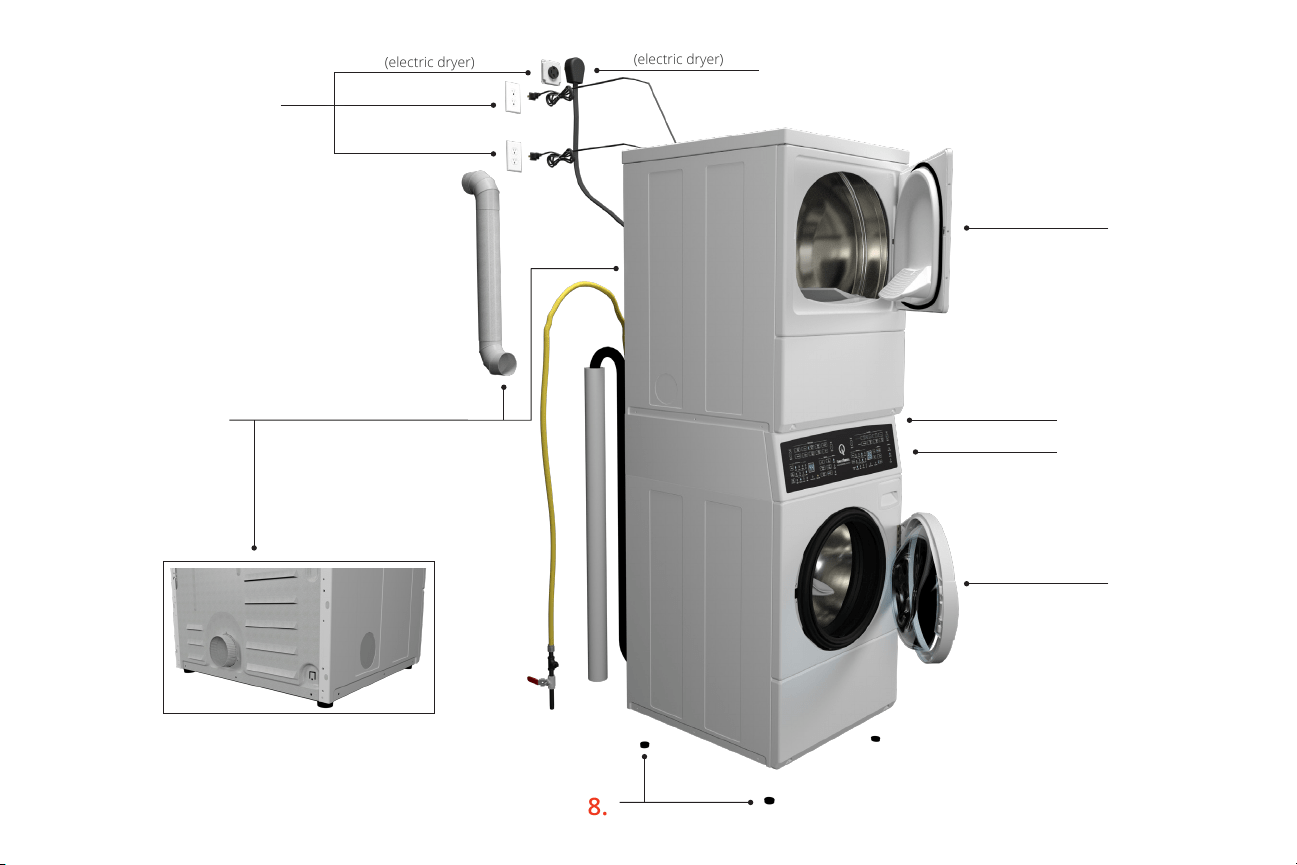
8.
(electric dryer)
(electric dryer)
6.
10.
9.
9.
11.
13.
7.
(gas dryer)
(washer)
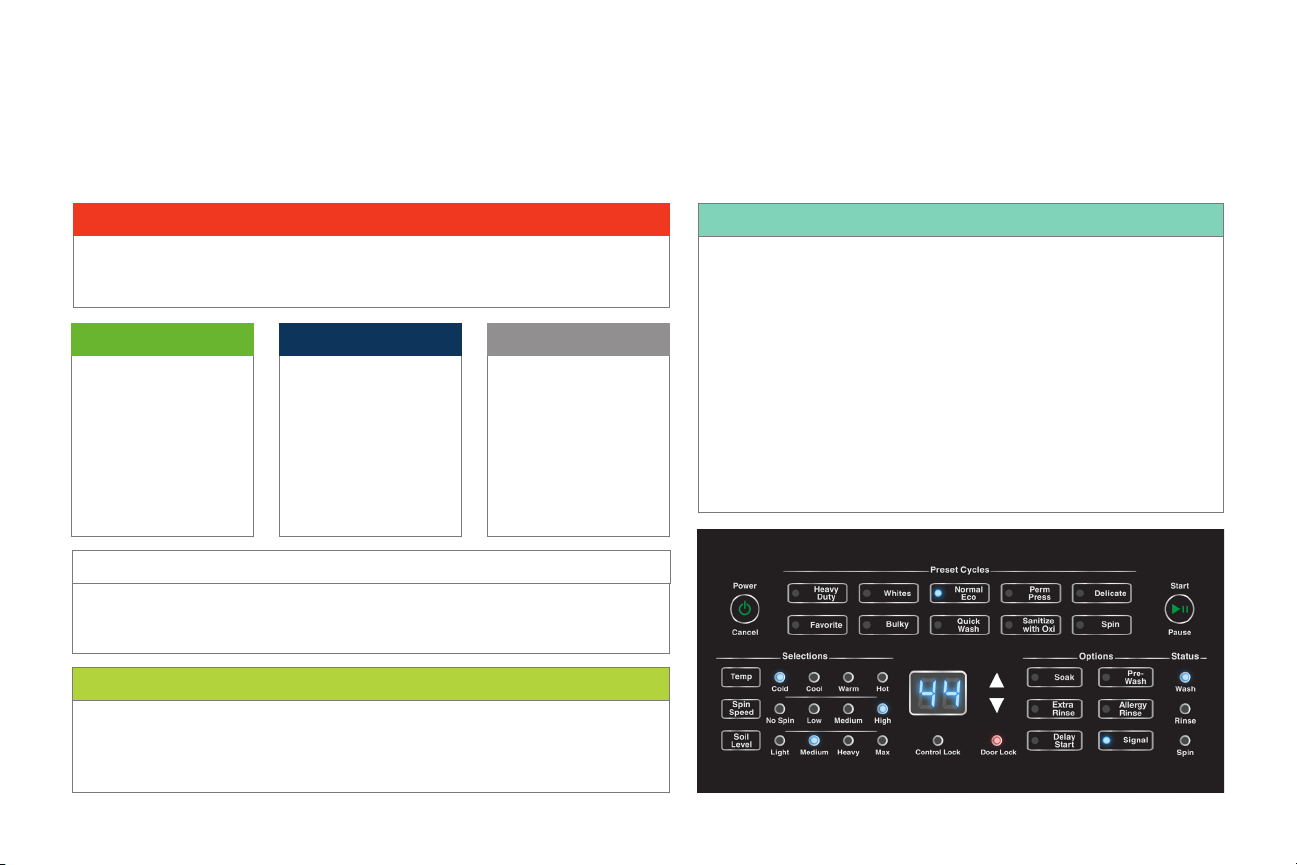
The following cycle descriptions will help determine which cycle to choose depending on the type of laundry being washed.
The cycle settings may be modied using the Selections and Options.
Cycle Information
Washer
Cycle Information
Perm Press
Use for permanent press
items and synthetics. This
cycle includes a wash
tumble and two rinses. The
nal spin extracts moisture
at a low spin speed.
Delicate
Wash delicate items usual-
ly washed by hand on this
cycle. The cycle includes a
wash tumble and two rins-
es. The nal spin extracts
moisture at a low spin.
Whites
This cycle is designed to keep white laundry white. It utilizes a longer, hot water wash
tumble and two rinses. The nal spin extracts moisture at a high spin speed.
Normal Eco
This cycle includes a wash
tumble and two rinses, but
uses less water than the
other cycles. It also uses
less hot water. Only the
high spin speed is available
in this cycle. This cycle is
recommended for washing
everyday cottons and linens.
Heavy Duty
Use for sturdy items, like play or work clothes, towels, T-shirts, etc. The cycle includes a
longer wash tumble and two rinses. The nal spin extracts moisture at a high spin speed.
Sanitize with Oxi
This cycle has been veried to reduce 99.9% of bacteria found in the typical household
laundry load when used with an Oxi additive in addition to detergent. In addition there is no
signicant contamination transferred to later washer loads.
Favorite
The Favorite keypad allows the user to save nine different cycles,
selections and options for later use.
1. Press the Favorite keypad. The control will display the settings for the
first Favorite cycle. The display will switch between F1 and the cycle
time for the selected cycle. If a Special Cycle is selected, the display
will switch between F1, P1 and the cycle time.
2. Press the keypads for the desired settings.
3. Press the Favorite, Start/Pause or Delay Start keypad to save the
current settings.
4. Press the Power/Cancel keypad to discard the current settings.
5. The next Favorite cycle, F2, will be displayed.
After the cycles have been saved, they can be accessed using the up and
down arrow keypads after pressing the Favorite keypad.

The following cycle descriptions will help determine which cycle to choose depending on the type of
laundry being dried. The cycle settings may be modied using the Selections and Options.
Dryer
Auto-Sensing
The Auto-Sensing drying cycle operation is determined by the type of cycle selected as well as the moisture sensing system, which can be set
by changing the Dryness setting. Auto-Sensing cycles are Energy Saver cycles that help prevent over-drying. When a wet load is put into the
dryer it takes a certain amount of time to reach the desired dryness level. The time will vary with load size, type of fabric, amount of moisture in
the load, air ow and the laundry room environment. The estimated time will be shown in the digital display.
Note:
The time shown before starting the cycle is
estimated by averaging the last 5 cycles run
on the selected cycle/dryness combination.
Heavy Duty
Dry heavy items such as
blankets on this cycle.
Perm Press
Use for permanent press
items and synthetics.
Regular
Use for sturdy items like play
or work clothes.
Delicate
Dry delicate items on
this cycle.
Manual
There are three manual cycles: Time Dry, Quick Dry and Flu Up. These cycles will run for the set
number of minutes shown on the digital display. The cycle time can be increased or decreased using
the up and down arrow keypads. The time and temperature selection may be adjusted manually at
any time before or during the cycle.
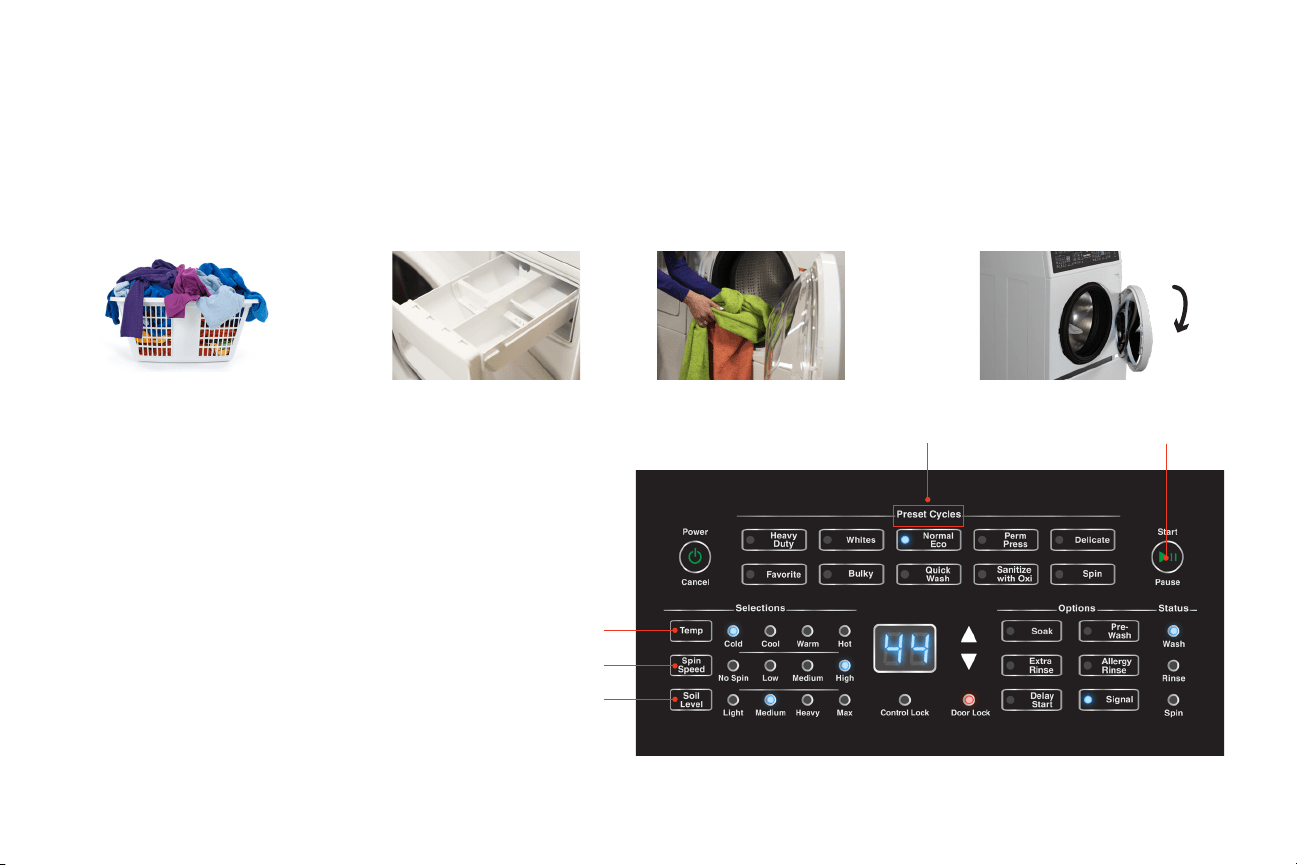
Washer
5.
Set cycle
Operating
1.
Prepare laundry
2.
Add high eciency
(he) laundry supplies*
6.
Set temperature
3.
Load laundry
7.
Set spin speed
8.
Set soil level
9.
Press start/pause
4.
Close door
5.
6.
7.
8.
9.
*Note: Pods must be placed in washtub with laundry.
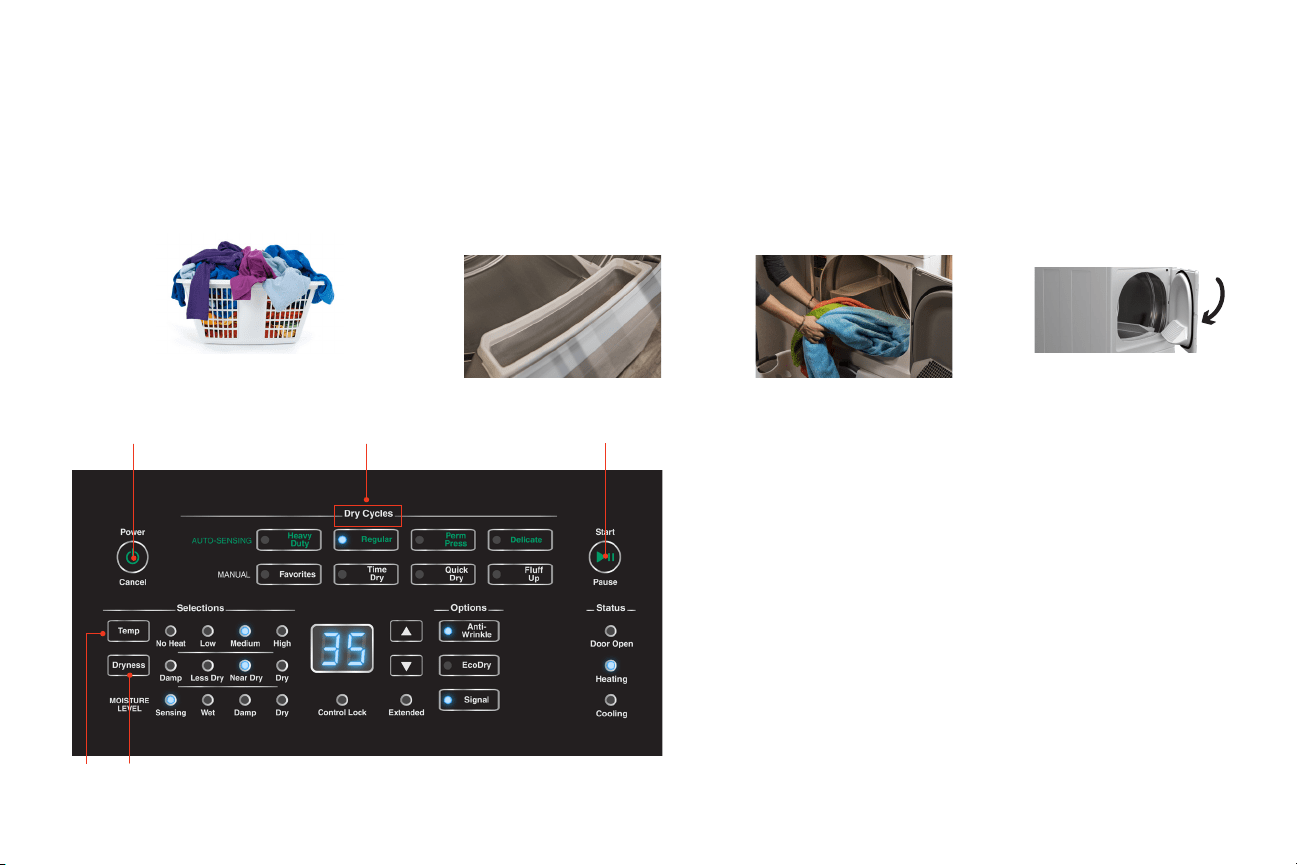
Dryer
2.
Clean lint lter by wiping
lint out of screen area
5.
Turn on dryer by
pressing power/cancel
Operating
1.
Prepare laundry
3.
Load dryer half
full with laundry
6.
Set cycle
7.
Set temperature or
fabric selector
8.
Set dryness level
9.
Press start/pause
10.
Remove laundry
from dryer once
cycle has ended
4.
Close door
5. 6.
9.
7.
8.

Register
1.
Register your product at www.speedqueen.com
to take full advantage of the limited warranty.
2.
Download full documentation and view installation and operating
videos for an immersive experience at Speedqueendoc.net or scan
the QR code below.
Warranty
5 Year Warranty.
Covers all parts and in-home labor.
Note:
This unit includes a limited warranty. Refer to
Speedqueendoc.net to download the full warranty bond.
3.
If you wish to receive printed documents at no cost, please complete
the order form online at speedqueen.com/request-printed-documents/
or email your request to [email protected].
If you don’t have internet access, complete the attached order form and
return by mail to the address on the form.
Order Form for Printed Documentation
Processing of manuals begins upon receipt of order. Allow 1-2 weeks for delivery.
Model No.
Serial No.
Name
Address
City State
Zip Code
Phone No.
Email Address
This unit includes a limited warranty. Refer to
Speedqueendoc.net to download the full warranty bond.
As an alternative to mailing this card, and for faster delivery of your manuals, place your order online
at speedqueen.com/request-printed-documents/.
☐ Please send me a printed Installation Manual, User’s Guide, and Warranty Bond.
☐ I understand this card does not register my product. I must go to
www.speedqueen.com to register.

BUSINESS REPLY MAIL
FIRST CLASS MAIL PERMIT NO. 489 RIPON,WI
POSTAGE WILL BE PAID BY ADDRESSEE
NO POSTAGE
NECESSARY IF
MAILED IN THE
UNITED STATES
SPEED QUEEN
TECHNICAL DOCUMENTATION
SHEPARD STREET
P O BOX 990
RIPON WI 54971-9967
Part No. 807498R2
December 2020
© Published by permission of the copyright owner – DO NOT COPY or TRANSMIT
Speed Queen by Alliance Laundry Systems