Loading ...
Loading ...
Loading ...
WARNING: If you strike aforeign object, stop
the engine. Remove wire from the spark plug,
thoroughly inspect the mower for any
damage, and repair the damage before
restarting and operating the mower.
Extensive vibration of the mower during
operation is an indication of damage. The unit
should be promptly inspected and repaired.
Mulching
For effective mulching, do not cut wet grass because it
tends to stick to the underside of the deck, preventing
proper mulching of grass clippings. New or thick grass
may require a narrower cut. The ground speed should
be adjusted to the condition of the lawn. If mowing has
been delayed and the grass has been allowed to grow
in excess of 4", mulching is not recommended. Mow
using the side discharge to reduce the grass height to 3
1/4" maximum before mulching.
SECTION6: MAKINGADJUSTMENTS
,_ WARNING: Do not at anytime make any
adjustments without first stopping engine and
disconnecting spark plug wire.
CuttingHeightAdjustment
Each wheel has a height adjustment lever which
provides cutting height adjustment. When the
adjustment lever is moved from one location to another
the height of cut will be changed. Simply depress the
lever towards wheel and move lever assembly to
desired position. See Figure 9.
IMPORTANT: All wheels must be placed in the same
relative position. For rough or uneven lawns, move the
height adjustment lever to a higher position. This will
help stop scalping of the grass.
Height _
Adjustment Levers'
Figure 9
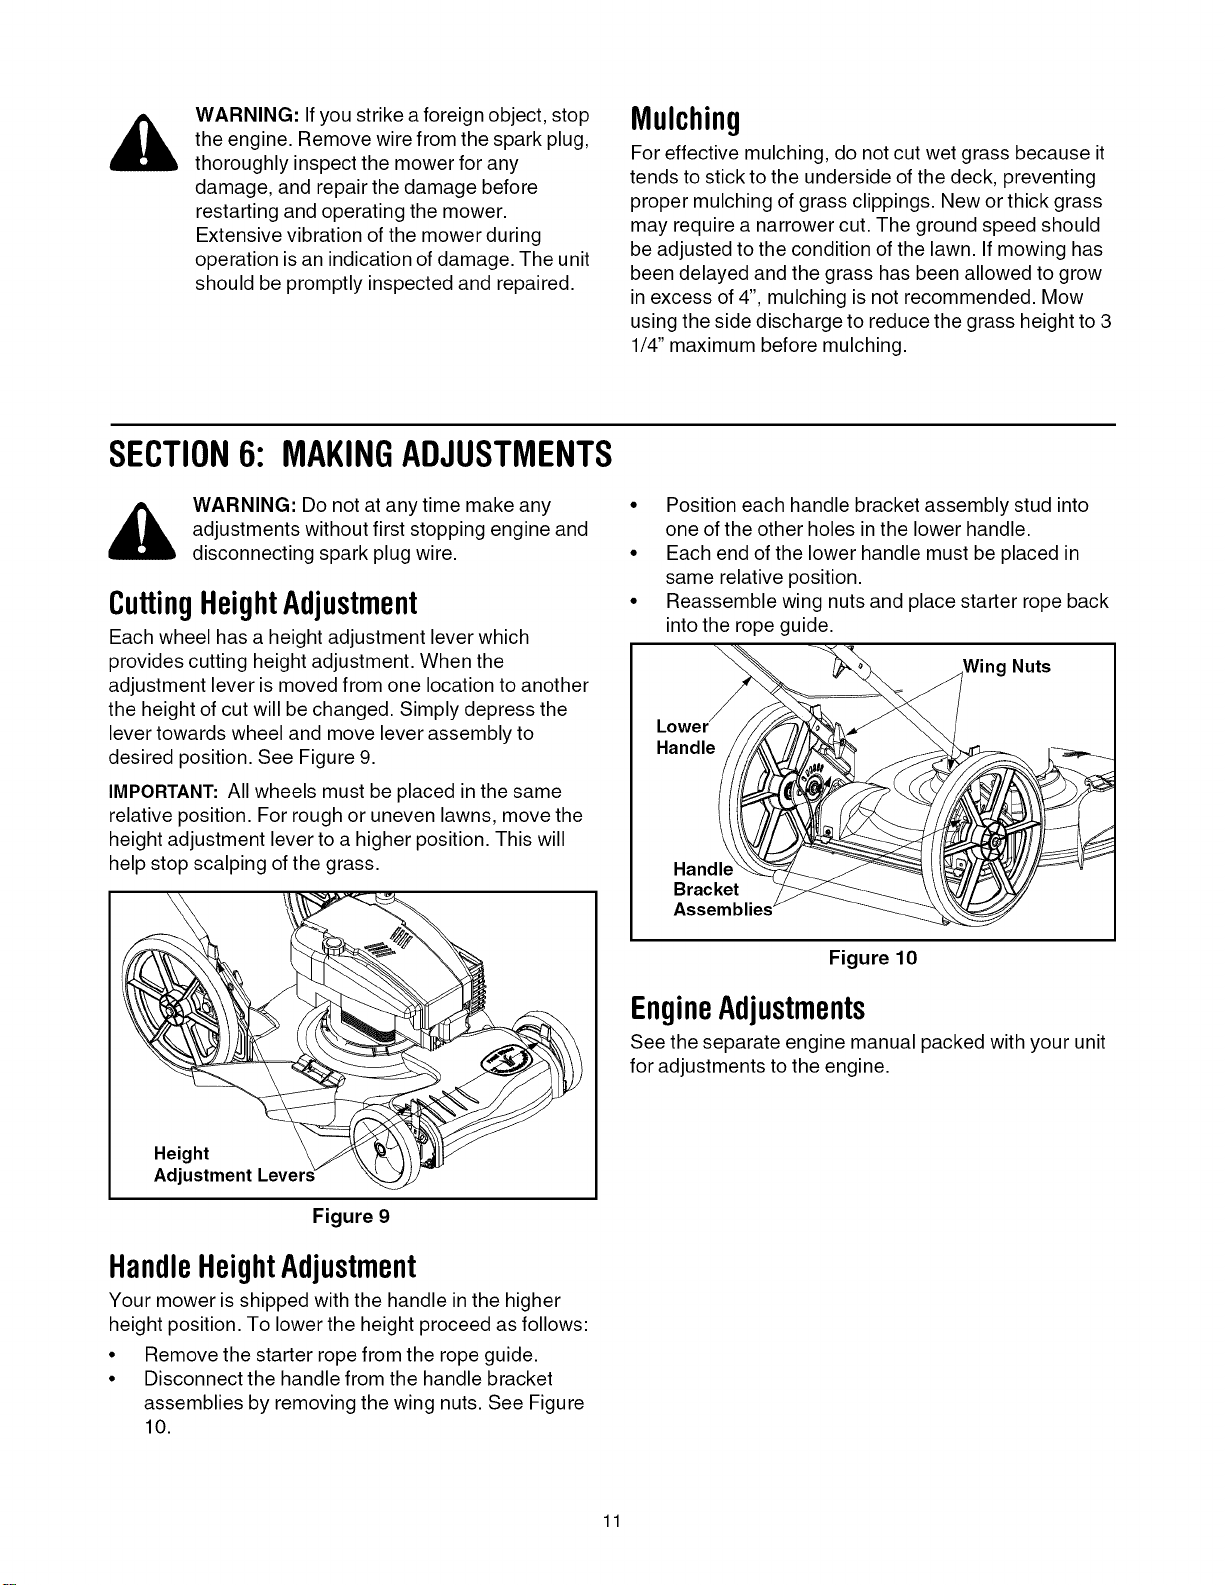
HandleHeightAdjustment
Your mower is shipped with the handle in the higher
height position. To lower the height proceed as follows:
• Remove the starter rope from the rope guide.
• Disconnect the handle from the handle bracket
assemblies by removing the wing nuts. See Figure
10.
• Position each handle bracket assembly stud into
one of the other holes in the lower handle.
• Each end of the lower handle must be placed in
same relative position.
• Reassemble wing nuts and place starter rope back
into the rope guide.
Nuts
Lower"
Handle
Handlq
Bracket
Assemblies
Figure 10
EngineAdjustments
See the separate engine manual packed with your unit
for adjustments to the engine.
11
Loading ...
Loading ...
Loading ...