Loading ...
Loading ...
Loading ...

11
ENGLISH
OPERATION
WARNING: To reduce the risk of serious personal
injury, turn unit off and keep away from the
power button before making any adjustments or
removing/installing attachments or accessories.
An accidental start‑up can causeinjury.
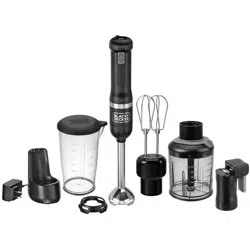
IMMERSION BLENDER
BCKM101MB
Intended Use
This immersion blender is intended for residential use only.
It blends liquids such as sauce, soup, and smoothies, mixes
batters, and purees fruits andvegetables.
DO NOT let children come into contact with theappliance.
Proper Hand Position (Fig.I)
WARNING: To reduce the risk of serious personal injury,
ALWAYS use proper hand position as shown.
WARNING: To reduce the risk of serious personal
injury, ALWAYS hold securely in anticipation of a
suddenreaction.
Hold the appliance
1
so your palm presses down the unlock
button
2
and use your thumb or a finger to push down the
powerbutton
3
.
Speed Control (Fig.H)
The appliance has a variable‑speed dial
4
. Turn the dial to
the appropriate speed for the attachment being used (1 is
the lowest speed, 5is the highestspeed).
ATTACHMENT SPEED
Immersion Blender Start at 1, increase as needed
Food Chopper Start at 1, increase as needed
Hand Mixer Start at 1, increase as needed
Whisk Start at 1, increase as needed
NOTE: With a 5‑second delay before the unit turns off, you
can release the buttons and use your thumb to adjust speed
without turning the unitoff.
NOTE: If LEDs go off during use, or don't light when starting
unit, release buttons and go back to step1.
3. Once the unit is on, the buttons may be released for up to
5seconds. The motor will stop running after the buttons
are released but the appliance remains active for 5seconds.
As long as the power button is pressed at least once within
5seconds after releasing, the appliance will turn backon.
4. To turn off, release both buttons. The appliance will
remain active for 5seconds before turningoff.
WARNING: The LEDs will stay on after buttons are
released. Ensure the LEDs are off and the unit has fully
stopped before removingattachments.
On / Off (Fig.G)
IMPORTANT: Never turn the motor on unless attachments
are securelyattached.
NOTE: Optimal temperature for use is between 50–104°F
(10–40°C).
1. To turn unit on, either:
‑ Press unlock button
2
, then press power button
3
.
‑ Press power button, then press unlockbutton.
‑ Press unlock and power buttonssimultaneously.
NOTE: There is a slight delay between pressing both buttons
and the appliancestarting.
2. When the appliance is ready to use, the LEDs
5
will
illuminate and remain solid. If they do not, refer to the
Troubleshootingsection.
OPERATION
WARNING: To reduce the risk of serious personal
injury, turn unit off and keep hands away from
the switch before making any adjustments or
removing/installing attachments or accessories.
An accidental start‑up can causeinjury.
Installing and Removing Attachments
WARNING: Ensure LEDs are off and the system is noton.
Blender (Fig. C)
1. To install, slide the immersion blender attachment
14
onto
the motor
6
and turn clockwise (as viewed from the end of
the attachment) until it securely locksin.
2. To remove, turn counterclockwise and pull attachmentoff.
Food Chopper (Fig. D)
• To attach, slide the motor
6
into the food chopper lid
21
.
It does not lock into the unit, but ensure the unit is fully
seated into the attachment. Do not operate if unit is
slightly raised out of attachment.
• To remove, turn off the unit and allow the blade to stop,
then lift the unit off of the food chopper.
Hand Mixer (Fig. E)
1. To install, slide the straight beater
31
into the small
adaptor hole
33
of the hand mixer adaptor
30
until it
clicks into place and issecure.
2. Slide the ring beater
32
into the large adaptor hole
34
until
it clicks into place and issecure.
3. Slide the hand mixer adaptor
30
onto the motor
6
and turn clockwise (as viewed from the end of the
attachment) until it locks insecurely.
4. To remove, turn adaptor counterclockwise and pull it off,
then pull the beaters from theadaptor.
Whisk (Fig. F)
1. To install, slide the whisk pole
36
into the whisk adaptor
hole
38
until it clicks into place and issecure.
2. Slide the whisk adaptor
37
onto the motor
6
and turn
clockwise (as viewed from the end of the attachment)
until it locks insecurely.
3. To remove, turn adaptor counterclockwise and pull it off,
then pull the whisk from theadaptor.
Loading ...
Loading ...
Loading ...
