Loading ...
Loading ...
Loading ...

NEEDLETIMINGTOSHUTTLE
On not attempt adJuStmentsother than those spocd,ed m
tills manual Jl.by follpw,ngthe prescribedprocedures,d is
determinedthat a mach.nPis out of radial trine, handle per
Bulletin $.820
Radial Timing Gauge
Instructions
I Removeneedle and replaced with test pmwh,ch hase
blunt lip
2 Remove bobbin case and shuttle hook Insert correct \
tad,el timing gauge into shuttle driver
For th,s ntodel(sl use gauge marked
$n _rcJ 158 FROPdT5 8 FRONT4 0
Use FRO?_r 58 mathng
3 Set stitch control at "0""or '5" tdependmg on model
involved)
4 Set needle posJhon controlat center tot n,odelswhich
have Ibis _ootrol
5 Rol,,te handwheelslo_'dybyhand /See Figure G.3a t The
test pm should come between the correct |wo v_r_ical
hoes at the end of the counterclockwiserotation of the
gauge Forthis modells)useverticallinesidentifiedcnth
one dot
DIM[ NSION A
6 Tocheckneedlebarhe_ght. contmuetorotatehsndwheel
slowlybyhand /See FigureG 3b JAt the Iowes;positron
ot the needle bar, the end of the test pin shouldcome
between t_o hoftcontalhnes on the gau,_e
if necessary, adlust needle,bar hllght Loosenscrewon
needle bar holder pod adlusl he,ght on the test pm
Zig_:ql Synchronization
Set stjiteh width COntrol at maximum. Turning ,,he
handwheeI, check and see if the needle side .-::.orlon
on the standard piano _0o394:nch above the uplP._r
surface ol the needle plate, at both needle p_slt_uPs
come wtthin the engineering ]lmR of 0.0138inch. £f
nL," _ooset, set screw s2_ on the wor/n gear eztl_er
direc,;_n. Tighten the screw ,2) securely j,qer
adjustment.
.... ., L..-" \\
DIMENSIONB
FIGUREG-3
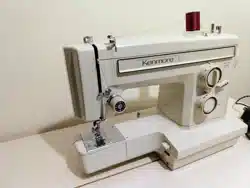
F,gure G.3 gives a general idea of tho use of the radrul
hmmg gauge Follow the snstructronSat the loft wh_h
pinata to th_smodells_
Loading ...
Loading ...
Loading ...