Loading ...
Loading ...
19. OUTDOOR USE EXTENSION CORDS. When tool is used out-
doors, use only extension cords intended for use outdoors and so
marked.
20. STAY ALERT. Watch what you are doing. Use common sense. Do
not operate tool when you are tired.
21. CHECK DAMAGED PARTS. Before further use of the tool, a
guard or other part that is damaged should be carefully checked to
determine that it will operate properly and perform its intended
function. Check for alignment of moving parts, binding of moving
parts, breakage of parts, mounting, and any other conditions that
may affect its operation. A guard or other part that is damaged
should be properly repaired or replaced by an authorized service
center unless otherwise indicated elsewhere in this instruction
manual. Have defective switches replaced by authorized service
center. Do not use tool if switch does not turn it on and off.
ADDITIONAL SAFETY INSTRUCTIONS FOR GRINDERS
1.
2.
3.
ALWAYS WEAR EYE PROTECTION.
KEEP GUARDS IN PLACE.
Use only grinding wheels having a maximum operating speed at
least highas "No Load RPM" marked on the tool'snameplate.
4. Before using, inspect recommended accessoryfor cracksor
flaws. If such a crack or flaw isevident, discard the accessory.
The accessory should also be inspectedwhenever you think the
tool may have been dropped.
5. When starting the tool (with a new or replacement wheel installed)
hold the tool in a well protected area and let it run for one minute.
If the wheel has an undetected crack or flaw, it should burst in less
than one minute. Never start the tool with a person in line with the
wheel. This includes the operator.
6. In operation, avoid bouncing the wheel or giving it rough treat-
ment. If this occurs, stop the tool and inspect the wheel.
7. ALWAYS USE GUARDS with depressed center wheels or flaring
cup grinding wheels.
8. Clean your tool out periodically.
9. CAUTION: Some wood contains preservatives such as copper
chromium arsenate (CCA) which can be toxic. When sanding
these materials extra care should be taken to avoid inhalation and
minimize skin contact.
SAVE THESE INSTRUCTIONS
SWITCH OPERATION (FIG. 1)
To start the grinder push the Switch Lock-Off Button forward and squeeze
the trigger switch. To turn the tool off, release the switch.
To lock the switch on for continuous operation, depress the trigger switch
and hold while you push in the Lock-On button at the end of the handle
shown in Figure 1. Hold the Lock-On button in as you release the trigger
switch. To turn the tool off from a locked on position, squeeze and release
the trigger switch once.
DO NOT STORE THE TOOL WITH THE SWITCH LOCKED ON... To do
so will cause the tool to start immediately the next time it is plugged in.
Damage or personal injury may result.
LOCK-ON BUTTON
©
©
FIG. 1
\
SWITCH
TRIGGER LOCK-OFF
SWITCH BU]-I'ON
AUXILIARY HANDLE (FIG. 2)
An auxiliary handle is furnished with your grinder and can be screwed
into either side or the top of the front housing, as shown in Figure 3.
This handle SHOULD BE USED AT ALL TIMES to maintain complete
control of the tool.
FIG. 2
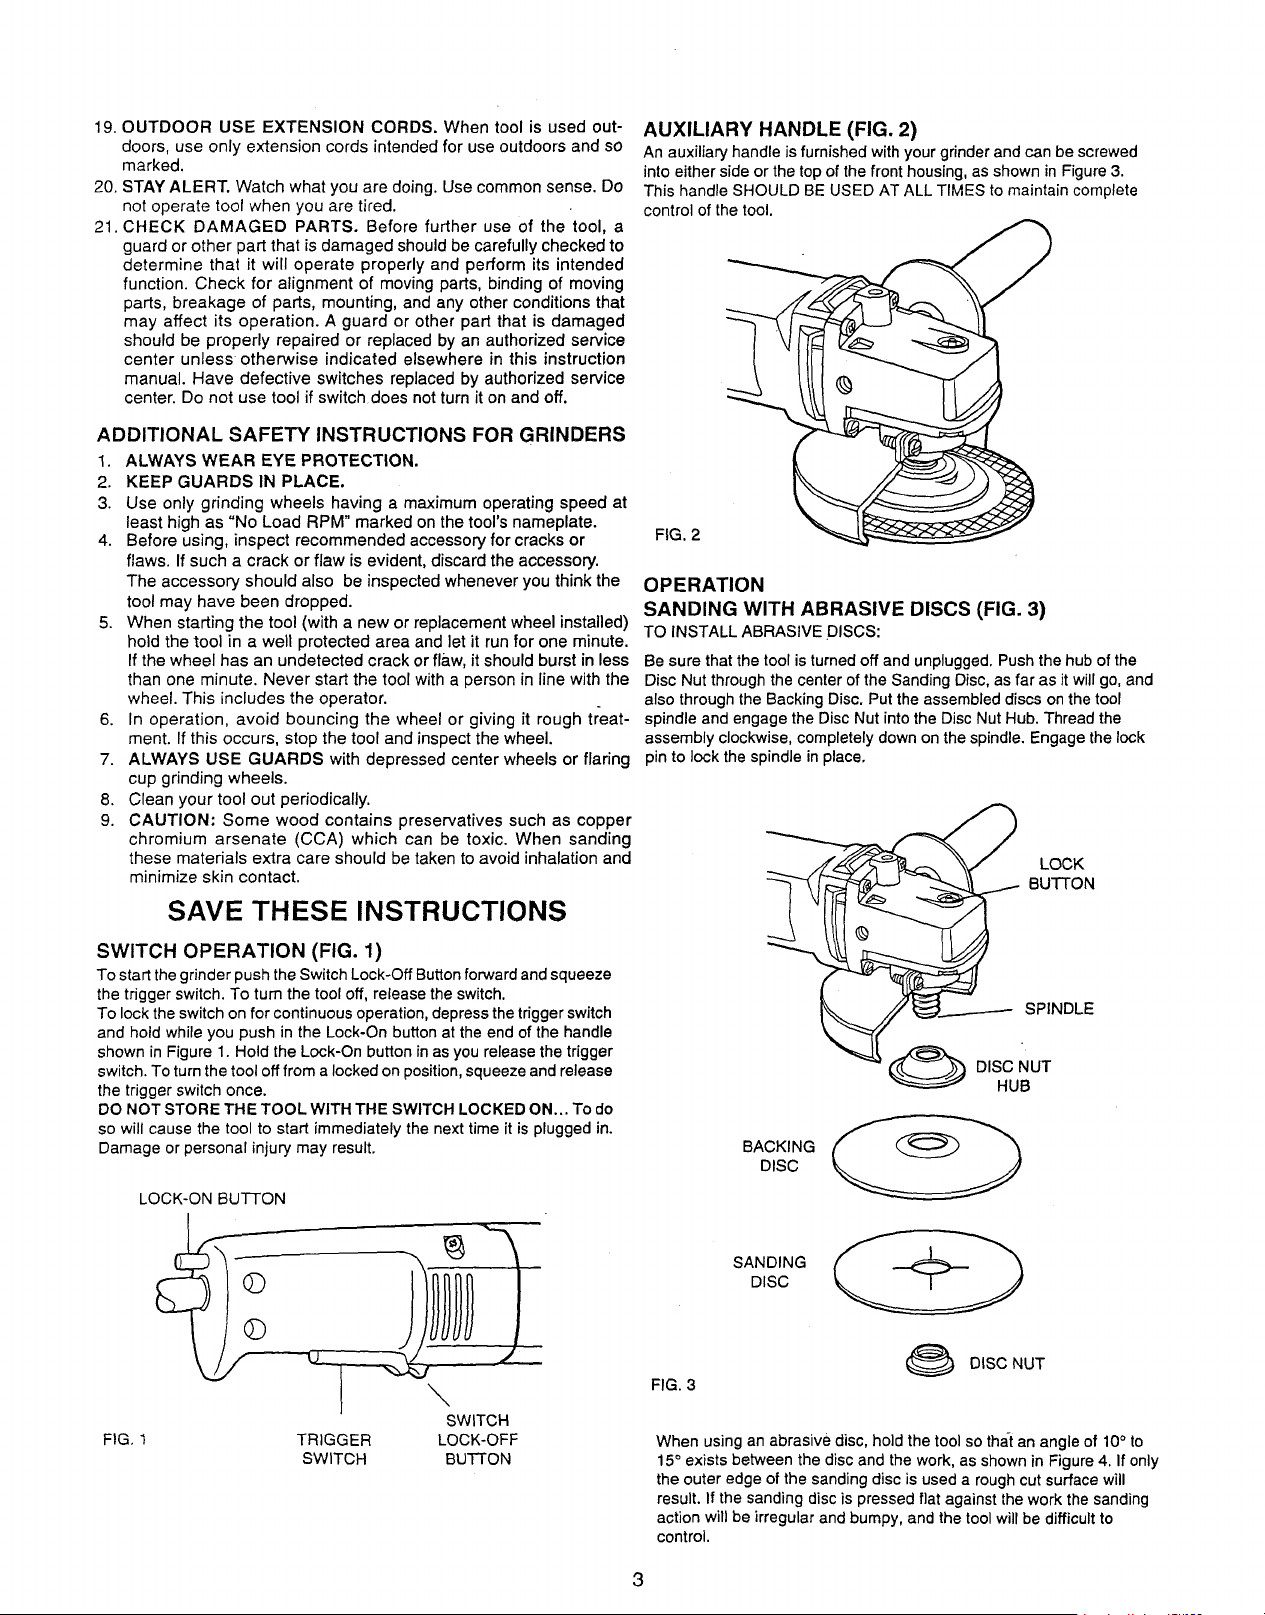
OPERATION
SANDING WITH ABRASIVE DISCS (FIG. 3)
TO INSTALL ABRASIVE DISCS:
Be sure that the tool is turned off and unplugged. Push the hub of the
Disc Nut through the center of the Sanding Disc, as far as it will go, and
also through the Backing Disc. Put the assembled discs on the tool
spindle and engage the Disc Nut into the Disc Nut Hub. Thread the
assembly clockwise, completely down on the spindle. Engage the lock
pin to lock the spindle in place.
FIG. 3
BACKING
DISC
SANDING
DISC
(_ DISC NUT
When using an abrasive disc, hold the tool so that an angle of 10° to
15° exists between the disc and the work, as shown in Figure 4. If only
the outer edge of the sanding disc is used a rough cut surface will
result. If the sanding disc is pressed flat against the work the sanding
action will be irregular and bumpy, and the tool will be difficult to
control.
3
Loading ...
Loading ...
Loading ...