Loading ...
Loading ...
www.SereneLifeHome.com2
www.SereneLifeHome.com4 www.SereneLifeHome.com 5
38. Surface temperatures become very hot when operating heater. Children and
adults should stay away to avoid burns or clothing ignition.
39. Young children should be carefully supervised when they are in the area of
the heater.
40. SAVE THESE INSTRUCTIONS.
PREPARATION
1. Prepare a cross head screw driver.
2. Read this instruction manual carefully before installation and use. Keep this
instruction manual in a proper and safe place for future use in case needed.
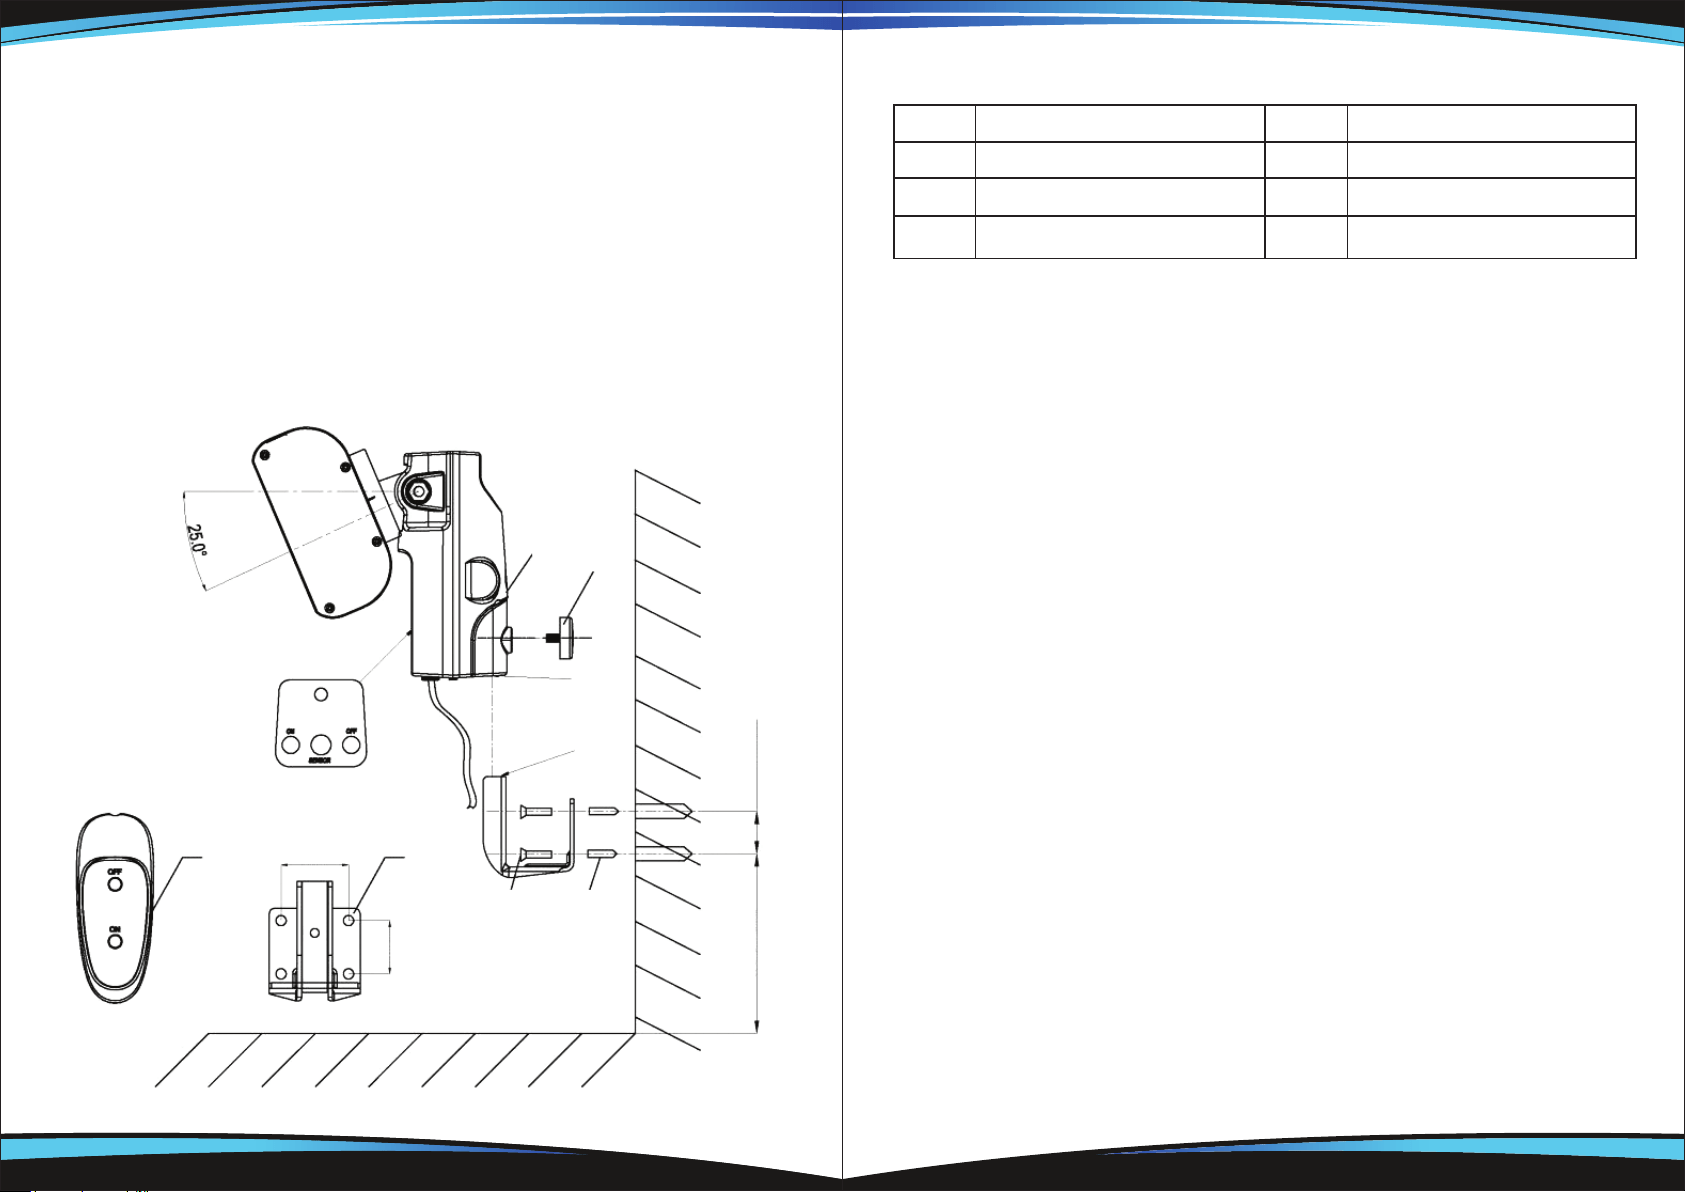
PARTS DESCRIPTIONS:
PARTS DESCRIPTIONS:
INSTALLATION
1. Drill 4 wholes positioned as shown above. Insert Plastic Plug (#4), (4 PCs totally)
to the holes respectively. Align Wall Bracket (#2) to the holes, and then x it
with Tapping Screw (#3).
2. Insert the wall bracket into the hole (Section C) of Control Box.
Fix them with the Screw Knob M6*12 (#5).
OPERATIONS:
1. Plug in the unit to a socket. Make sure the power supply is same as rated.
The blue indicator light will start ashing, which means it's in standby status.
2. Press button "On" on the control panel or the remote controller to switch on
the heater. Then the blue indicator will light up.
3. When the heater is no longer required, switch o, using the o button on the
unit or the o button on the remote controller and unplug the unit.
MAINTENANCE AND CLEANING
1. Before cleaning, make sure the power has been turned o at the circuit breaker
panel and that the heating element of the heater is cool.
2. To maintain the external appearance of the radiator, it only needs to be wiped
over occasionally with a dry duster. During the summer months, or at other
times when the appliance is not in use and is completely cold, it should be the
best opportunity to wipe over with a damp cloth.
3. Do not use abrasive cleaning powders or furniture polish to clean the appliance.
Do not use chemical or abrasive products, metallic scourers and so on, they
may deteriorate the surface.
4. All other servicing should be performed by qualied service personnel.
5. No disassembly when cleaning.
A
36
2
6
1
5
31
1800mm
B
C
3 4
31mm
No.
Part Name
No.
Part Name
1
Control Box
4
Plastic Plug
2 Wall Bracket
5
Screw Knob M6*12
3
Tapping Screw ST4*30 6 Remote Controller
Loading ...